
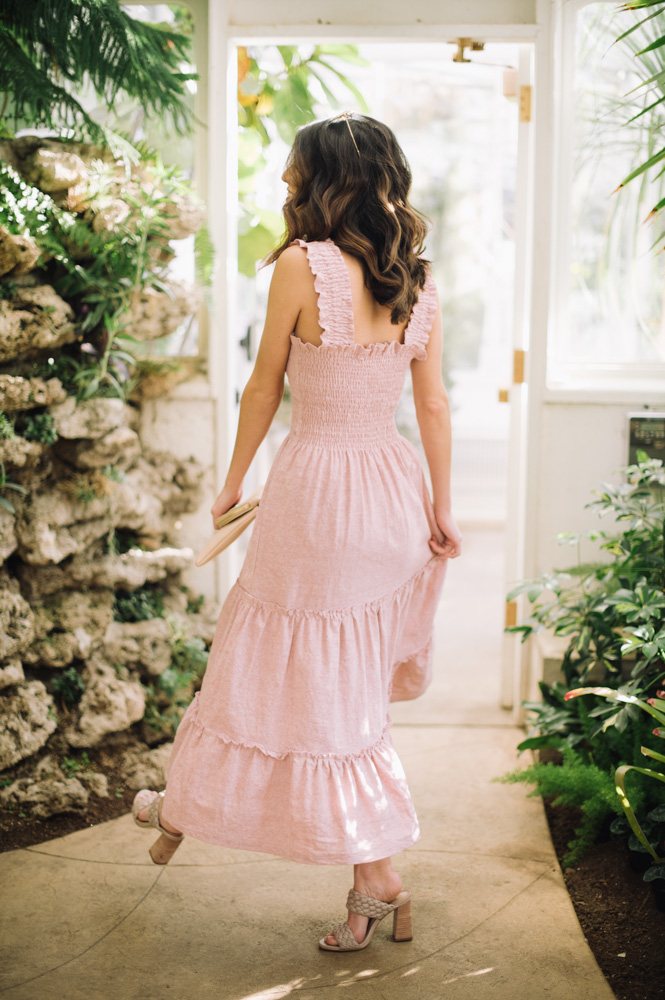
Inject some romantic charm into your spring wardrobe with this stunning shirred dress pattern. Inspired by the trendy nap dress, this spring dress design is perfect for light to medium weight fabrics, making it a great spring to summer garment for your wardrobe. This dress pattern features thick straps, a shirred bodice, and tiered maxi skirt, so it’s a comfortable and breezy dress for warm spring weather. Pair this dress with your favorite pair of sandals and a stylish clutch for a comfy and chic seasonal look!
Materials:
- Light to medium weight woven fabric
- Elastic thread
- PDF pattern – This is located at the bottom of this page.
- Basic sewing notions
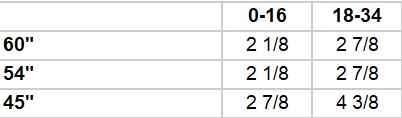
Fabric Requirements:
Note: Pieces cut crosswise on the grain.
Designer Notes:
- Seam allowance is 5/8” unless otherwise stated.
- The seams are all finished with either a zig zag stitch or serger.
Instructions:
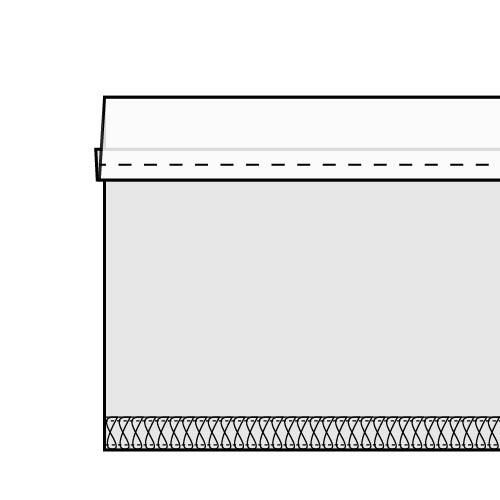
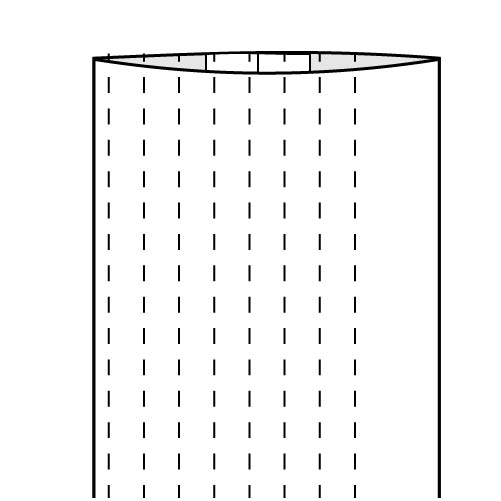
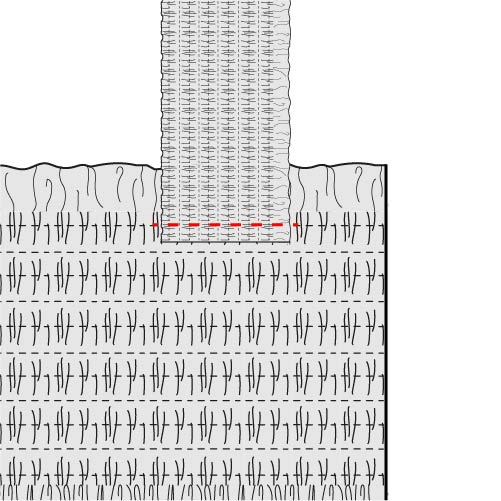
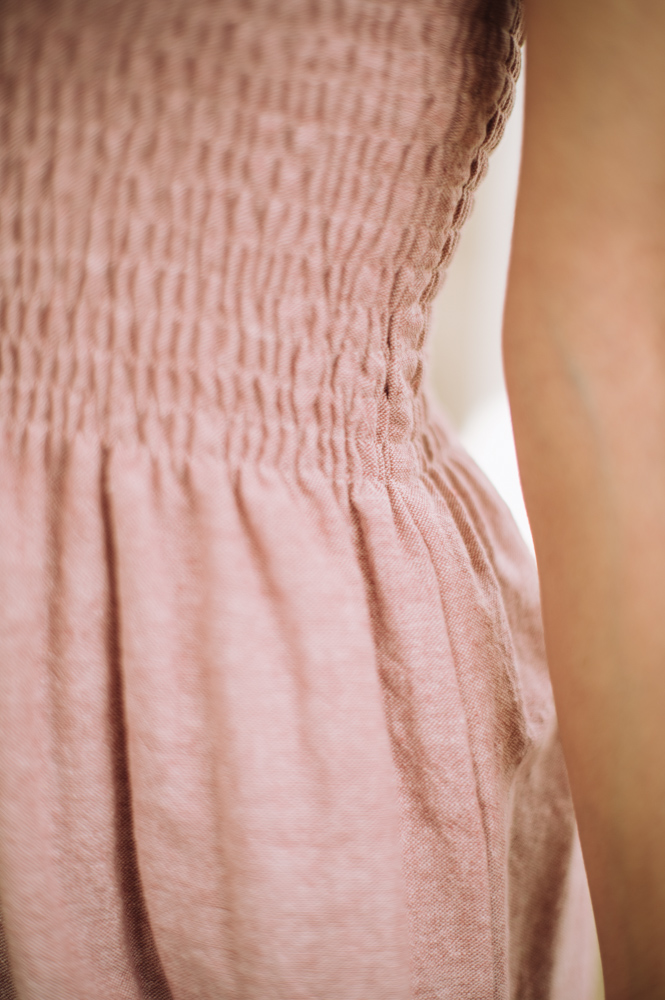
- Through the bust and waist, the bodice is shirred, which is the process of sewing rows of stitches 1/2” apart using elastic thread in the bobbin and regular thread in the needle. Wind the bobbin by hand with elastic thread (try not to pull the elastic too tight while winding it). After inserting the bobbin in the machine, change the stitch length of the machine to 4. Fold the top edge of the bodice piece 1/4” towards the wrong side and press. Fold another 1” and press well.
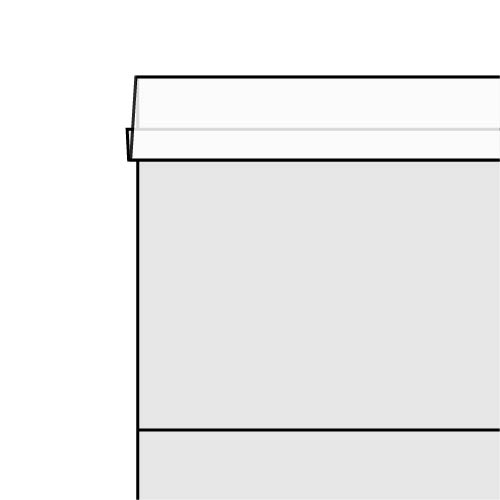
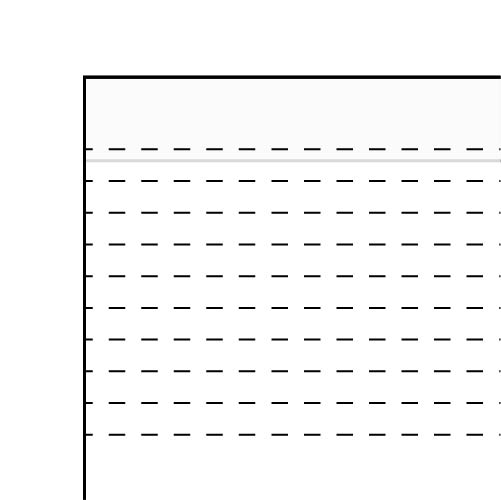
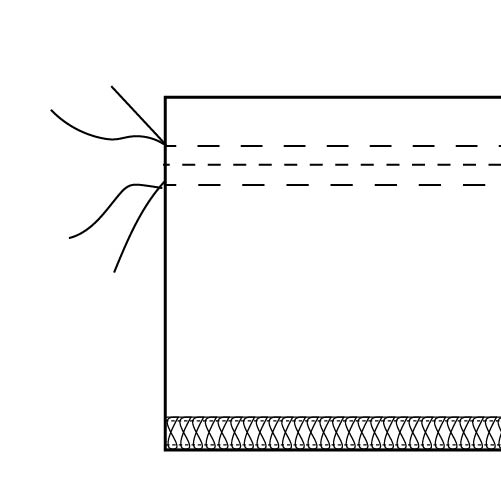
- Sew the first row of stitches along the inside folded edge of the bodice; this will secure the top folded edge. Backstitch at the beginning and ending of each row; this will hold the elastic in place. Continue sewing straight lines across the bodice every 1/2” until reaching the line marked on the pattern.
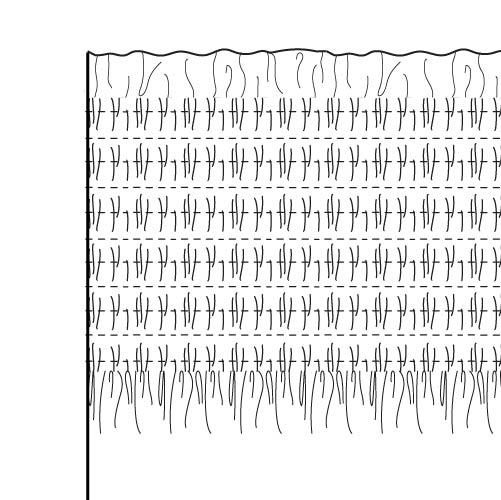
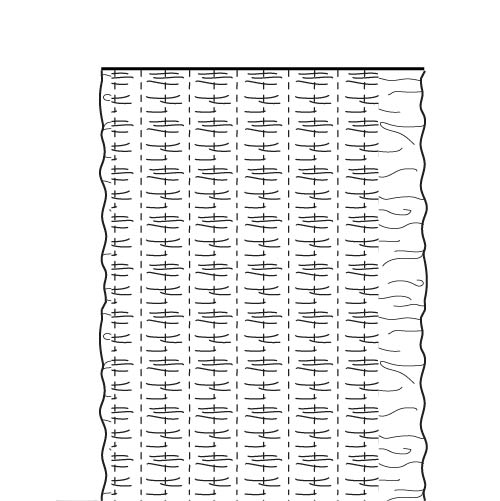
- Hover a steam iron over the shirring 1” and steam the fabric. This will bring all the elastic thread back to shape and make the gathering tighter.
- Repeat steps 1-3 with the other bodice piece. Finish the bottom edge of the bodice pieces with either a zig zag stitch or serger.
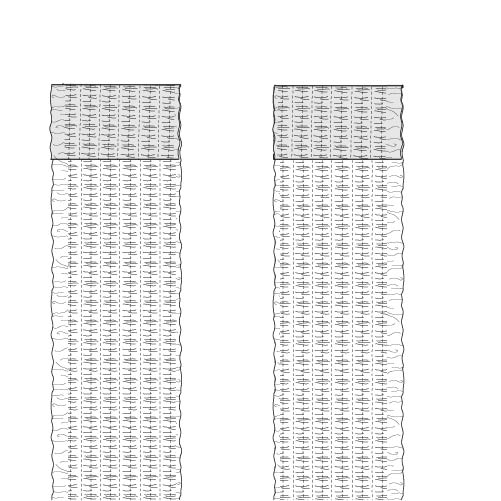
- Fold the top edge of the first tier 1/4” towards the wrong side and press. Fold another 3/4” and press well. Finish the bottom edge of the first tier with either a zig zag stitch or serger. Change the bobbin thread back to regular thread and the stitch length to 3 and sew along the inside folded edge.
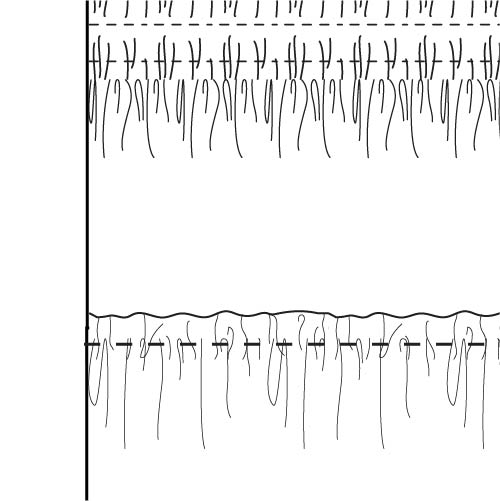
- Change the stitch length to 4 or 4.5 and sew a gathering stitch 1/4” above and below the line of stitching from Figure 4.
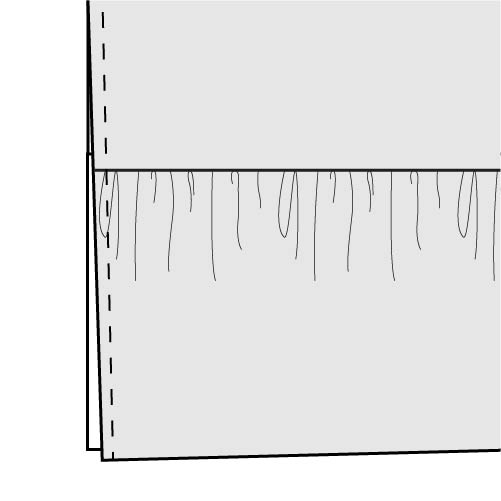
- Pull the bobbin threads from both lines of stitching at the same time to gather the tier to match the bottom edge of the bodice piece. With the bodice right sides up, place the first tier right sides up on top, lining up the stitch line from Figure 4 with the notch at the bottom of the bodice. Change the stitch length back to 3 and sew the tier to the bodice along the stitch line from Figure 4.
- Remove the basting stitches (gathering stitches) and repeat Figures 4-6 with the remaining tiers both front and back.
- With right sides together, sew the front and back together along the side seams and finish with either a zig zag stitch or serger.
- To hem the bottom of the dress, fold the bottom edge 1/4” towards the wrong side and press. Fold another 1” and press well. Sew the hem in place 1/8” from the inside folded edge.

- Fold one strap piece right sides together along the length of the strap. Sew the two long raw edges together with 1/4” seam allowance. Trim the seam allowance to 1/8”. Turn the strap right sides out and press with the seam down the center of the strap.
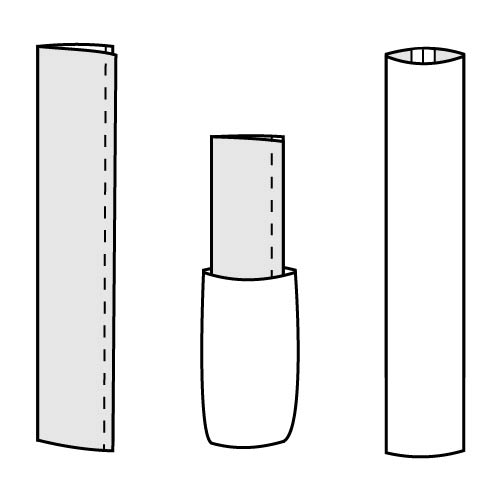
- Insert the elastic bobbin and change the stitch length to 4. Starting 3/4” from the right edge, sew a line of stitches the length of the strap. Continue sewing straight lines across the strap every 1/2” until reaching the other side.
- Hover a steam iron over the shirring 1” and steam the fabric.
- Repeat Figures 10 and 11 with the second strap.
- Change the bobbin back to regular thread and stitch length to 3.
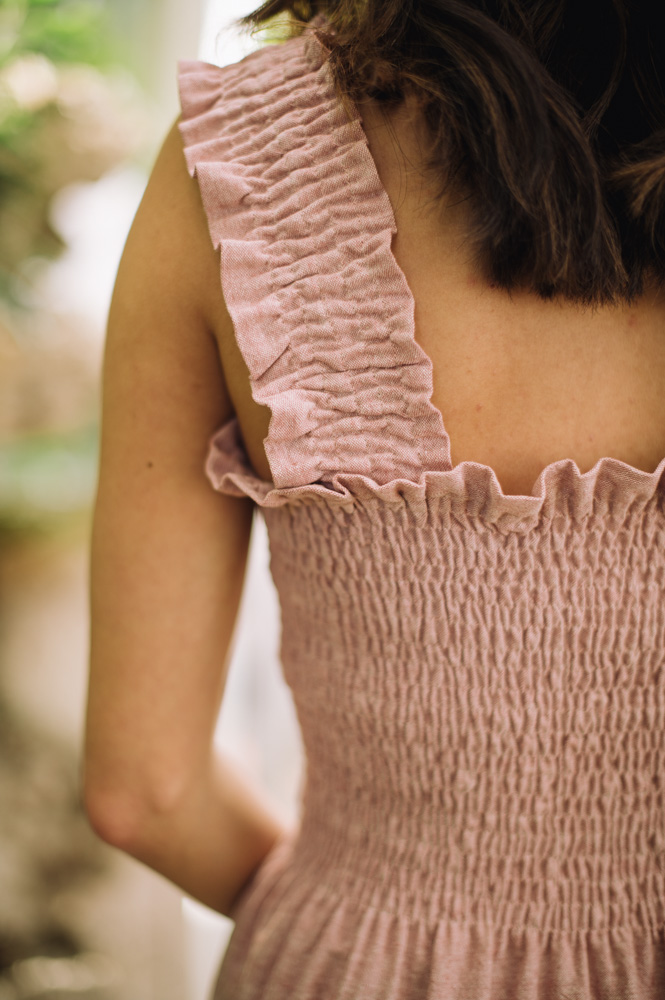
- Each strap has a larger ruffle on one side; that is the outside edge of the ruffle. Lay the ruffles right sides up (mirror images of each other) and fold the end of the strap 1/4” towards the wrong side and press.
- With the dress wrong sides out, place the strap at the notch, right sides down, lining up the folded edge just below the first line of stitches. Sew the strap in place along the top row of stitches. Make sure to backstitch at the beginning and end of the stitch to secure the strap.
- Repeat with other front strap. Before sewing the other end of the strap to the back, pin the strap in place and try the dress on. Adjust the strap length as needed and then sew to the back bodice piece as you did in Figure 13.
View this post on Instagram
Primrose Shirred Dress
Primrose Shirred Dress
Where is the pattern??
Hi there! The pattern is located at the bottom of the page and is available to Gold Club members only. Please let us know if we may further assist you. Have a great day! – Ashley, We Like Sewing
I don’t know how to interpret this pattern. It’s not like any other pattern I’ve ever purchased. There is no size on it and is not for actual size. Looks like you have to use the 1” square and I’ve never had to create a full size pattern from pieces like is shown. How do you use the 1” square. The pattern pieces are not labeled as in top, back, skirt, etc.
Hi there! The 1-inch test square is for readers to make sure everything is printing to scale. Pages are numbered and contain triangles to match up the pages. Once you download the PDF, you can de-select the sizes you don’t need using the Layers tool, which is symbolized on the right side of the page by layered squares. Tiers, straps, etc. are noted on the pattern pages. Please let us know if we may further assist you. Thanks! – Ashley, We Like Sewing
I am a Gold Member and there is no “orange box” or anything labeled “Primrose Shirred Dress Pattern”. Help?
This is what I have;
Home• Previews• Freebies• Videos• Magazine• Collections• Manage Account• Give a Gift• Contact Us• FAQs – Frequently Asked Questions• Glossary• Meet the Designers• Submit Your Designs• Do Not Sell My Personal Information• Sponsor Program• About Ampry Publishing
Hi Sasha! If you are logged into your account and scroll down below the additional project images (above the comments), you should see “Gold Members, Download Here” with a button to download the “Primrose Shirred Dress Pattern”. If you are still unable to access the pattern, please let us know and we can email it to you, since you are a Gold Club member. Thank you! – Ashley, We Like Sewing
I could not make sense of the pattern whatsoever.
I downloaded the pattern, but there’s a problem. There are 34 pages and none of them have actual sizing and directions on them. Each page looks like it’s been enlarged and shows just a snippet. Suggestions? Thanks.
Hello there! I’m so sorry you’re having issues downloading this pattern. Are you able to open your download in Adobe Acrobat, which should display the directions and sizes (you can select or de-select sizes using the Layers feature on the left side of the screen)? We will look into this issue and will leave an updated comment when we have more info. Thank you so much! – Ashley, WeLikeSewing
I couldn’t find this pattern. It said it was at the bottom of the page
Hi Kathleen! The pattern for this project is at the bottom of the page, where it says “Gold Members, Download Here”. If you click on the orange box underneath that’s labeled “Primrose Shirred Dress Pattern”, the pattern should download automatically. You may need to adjust your browser permissions to allow pop-ups for our site. Let us know if you have any questions! – Ashley, WeLikeSewing
This dress turned out even better than I could have imagined. The perfect dress for spring!
The dress photographed so beautifully!! – Ashley, WeLikeSewing