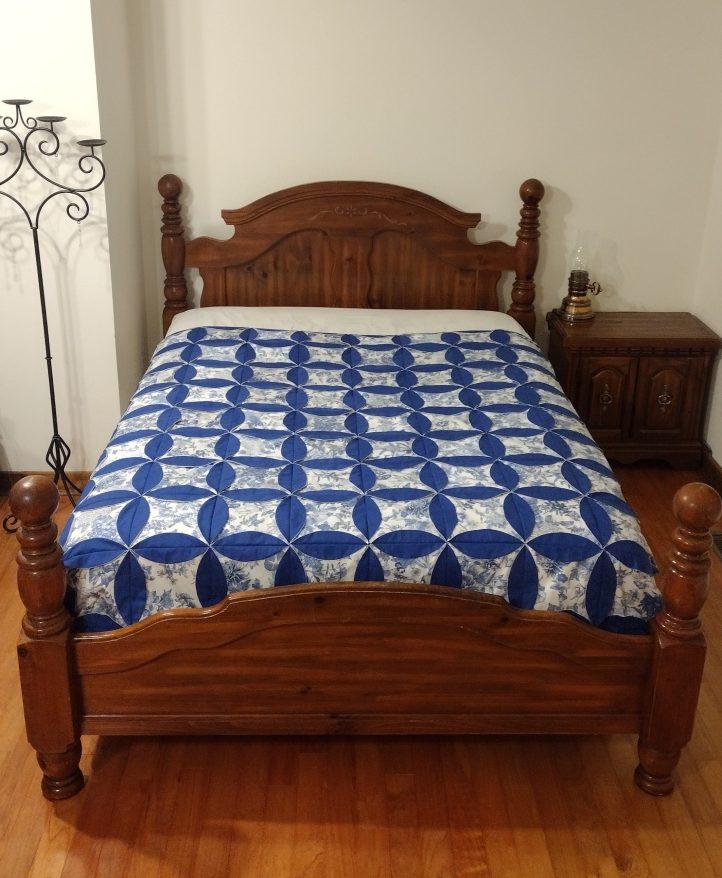
We love the retro vibe of traditional cathedral windows quilts, which is why we can’t wait for you to see this tutorial! Designer Jessie Agnew is sharing her tutorial on how to make cathedral windows quilt blocks using a little bit of sewing magic. The size of the blocks (or finished quilt) are adjustable, making it simple to create a custom work of art that’s just right for a crib or a king-sized bed. This quilt block may look complicated but rest assured, these blocks are fast and easy to join together.
Skill Level: Intermediate
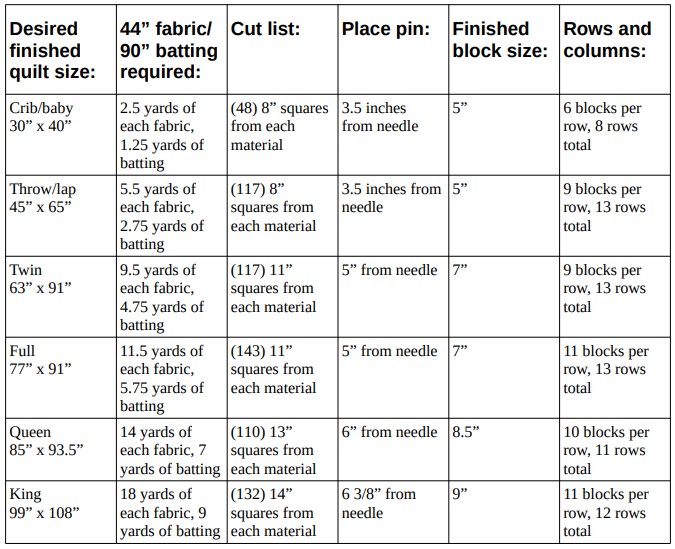
Finished Size: Use chart to select desired size. Note: This chart is located below, as well as at the bottom of the page as a PDF.
Materials:
- Two contrasting colors of cotton quilting fabric (use chart to determine yardage required)
- PDF chart – This is located at the bottom of this page. See printing instructions below. You can also find this chart in the Choosing Materials section of this page.
- Quilt batting (optional, the example uses 1/8” cotton batting)
- Thumbtack or lapel pin with flat back
- Painter’s tape
- Pinking shears or rotary cutter with pinking blade installed
PRINTING INSTRUCTIONS:
To download the PDF chart, click on the pattern download button at the bottom of the page. We recommend opening your pattern download using Adobe Acrobat.
CHOOSING MATERIALS:
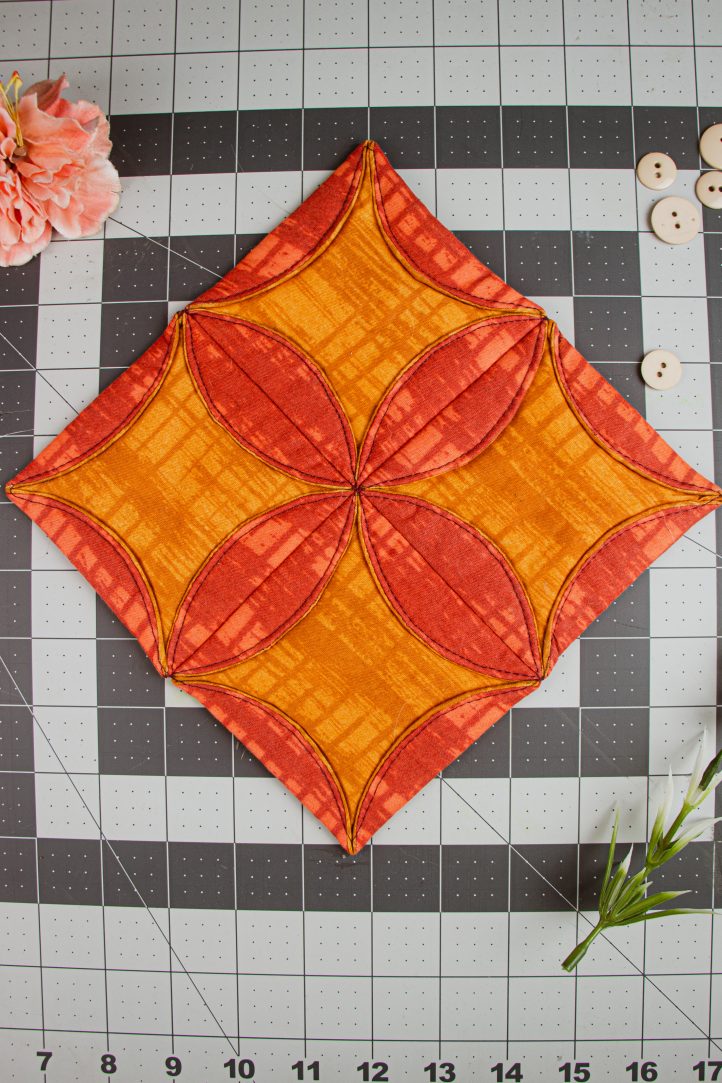
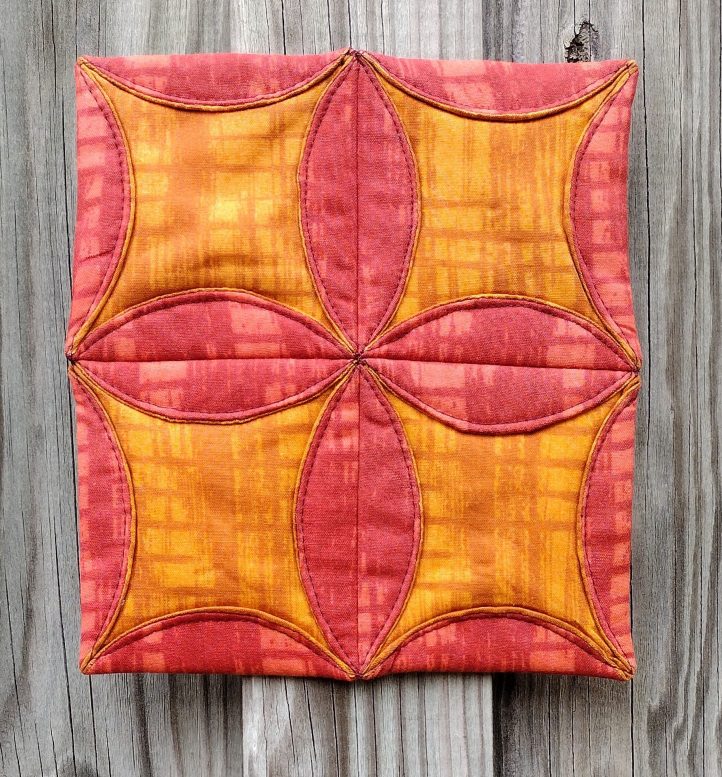
This quilt requires two different fabrics, a “frame” fabric and a “window” fabric. For the demonstration, the pink fabric was used as the frame fabric, and the mustard was used as the window fabric. The frame fabric creates petal shapes that surround the window fabric on the front of the quilt, and on the back side of the quilt, the frame fabric creates solid square blocks with quilted flower shapes.
The example used 1/8” cotton batting, but batting is entirely optional. It adds warmth and a little bit of puffy dimension to the petals and windows, but the cathedral window style of quilt is traditionally made without batting. Adding batting is extremely simple, and may be a wise choice in cooler climates. However, since the petal areas of the quilt end up with four layers of fabric, it tends to be one of the warmer quilt designs, even without any batting.
When sewing the two fabrics together into the circular shape, choose a thread that matches whichever fabric is darker. When topstitching/quilting the petal shapes, a thread that matches or contrasts with the frame fabric may be used. The designer chose to use a contrasting darker red thread, both for demonstration purposes and because the contrasting thread adds a bit of detail to the finished petal shapes that are formed by the frame fabric.
Instructions:
- Cut batting (if desired), and cut or tear squares of fabric according to measurements on the chart. For example, to make a crib-sized quilt, purchase 2.5 yards of 44” wide frame fabric, 2.5 yards of 44” wide window fabric, and 1.25 yards of 90” wide batting. For the crib-sized quilt, we see that 48 8” squares of each material are needed (48 squares of frame fabric, 48 squares of window fabric, and 48 squares of batting).
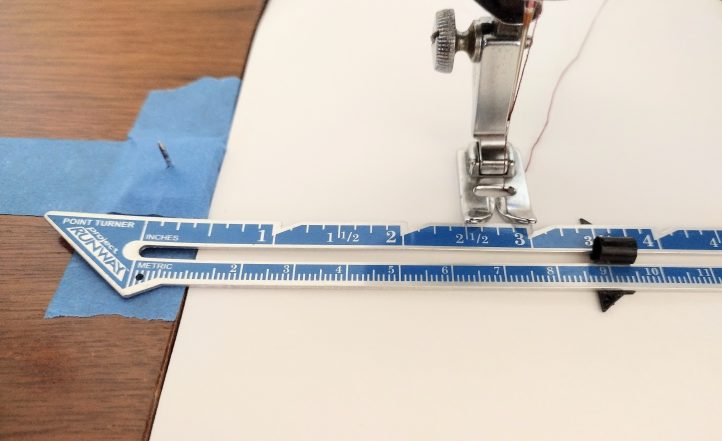
- Using painter’s tape, tape thumbtack to table directly to the left of the sewing machine needle. Again, use chart to determine the correct distance from the needle. If sewing machine bed is not level with the table, use a stack of books to create a level surface. Secure books to table with painter’s tape, and tape thumbtack to books.
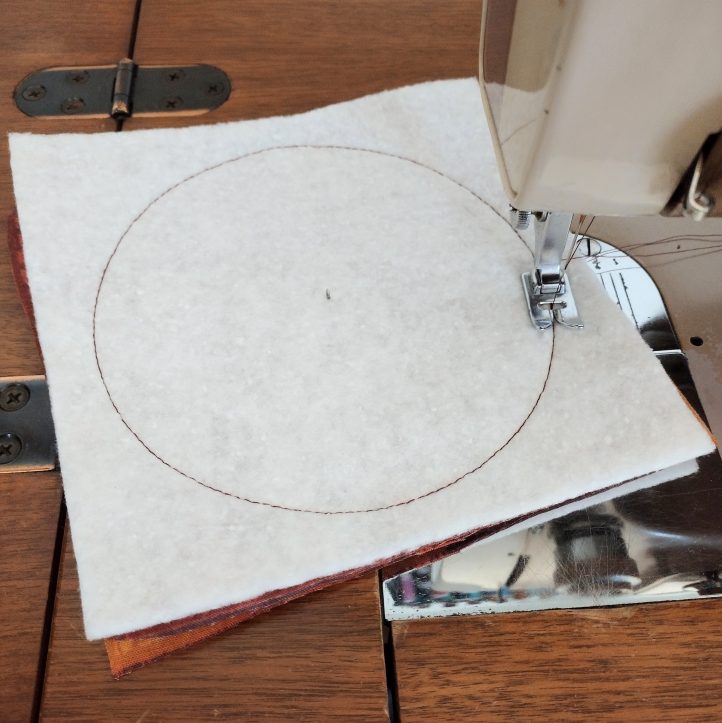
- Stack one square of batting, then the frame fabric right-side up, and then the window fabric right-side down. If no batting is desired, simply place frame and window fabric right-sides together.

- Fold stack in quarters to determine the center, and pierce center carefully onto thumbtack.
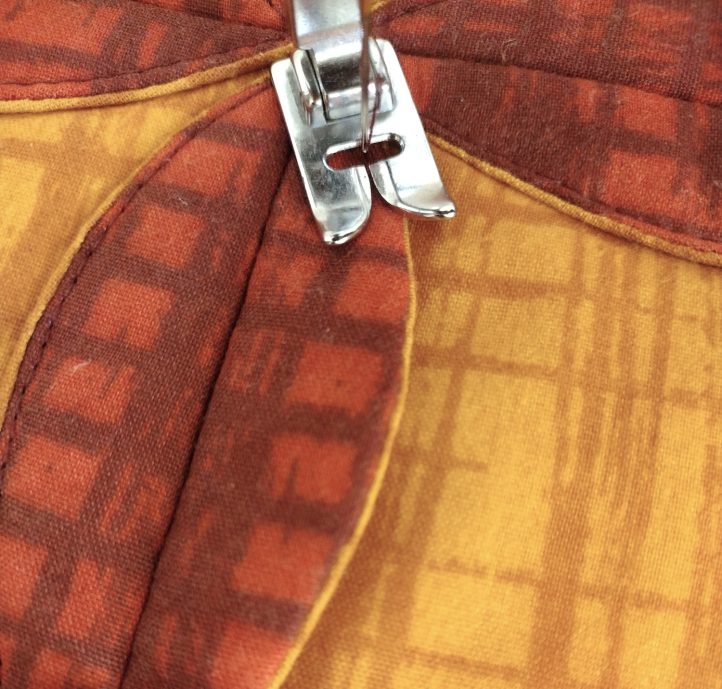
- Sew with a straight stitch all the way around in a circle, guiding fabric and allowing the material to pivot on the thumbtack. Ensure that fabric does not lift off thumbtack while sewing. Lock stitches by backtacking.
- Trim close to stitching using pinking shears or a rotary cutter with a pinking blade.
- Create an opening in the window fabric only by snipping with a pair of scissors, near one edge as indicated in the photo. Make the cut on the straight grain of the fabric, and leave at least 1/2” between slash and stitching.
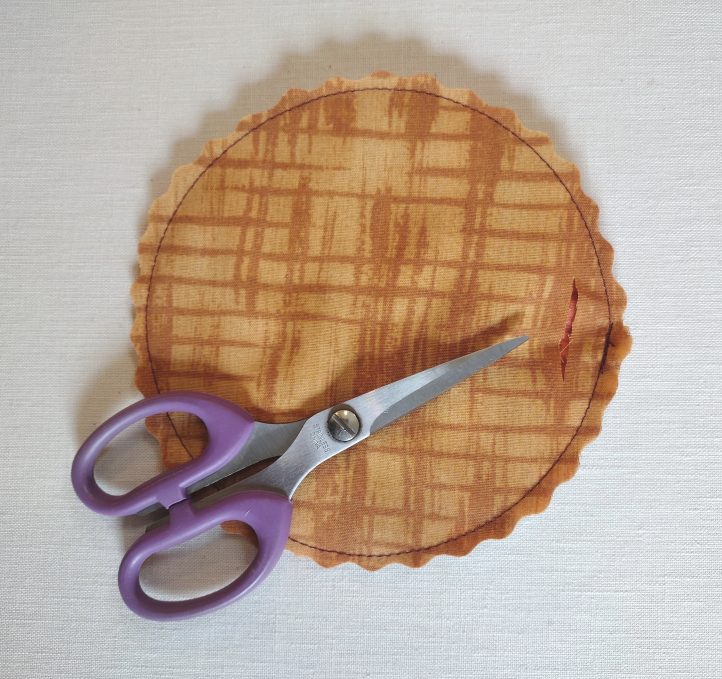
- Use the opening to turn block right side-out, being careful not to stretch or tear the slashed opening. Smooth out seam allowances from the inside (a spoon inserted into the opening may be helpful) and press block flat, ensuring that the seam is on the very edge of the block all the way around.
- Repeat Steps 3 to 8 to create desired number of blocks (as indicated on the chart).
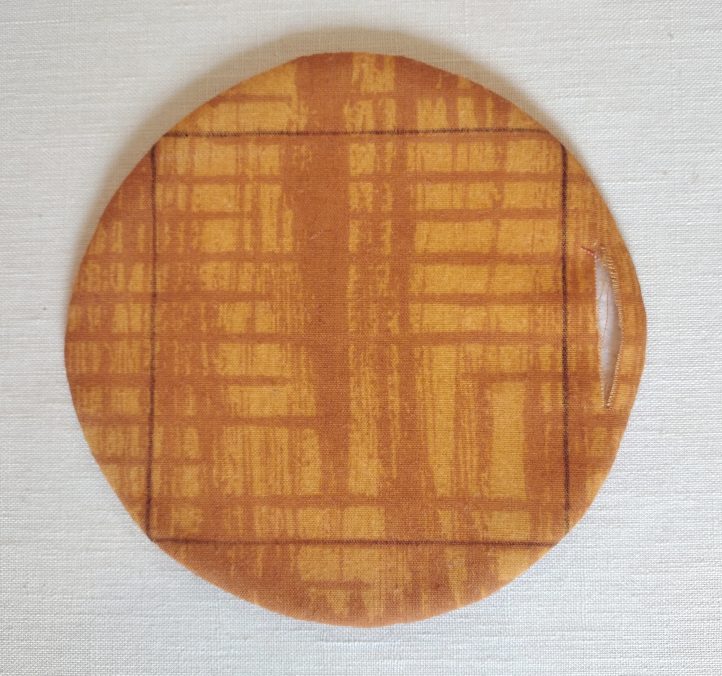
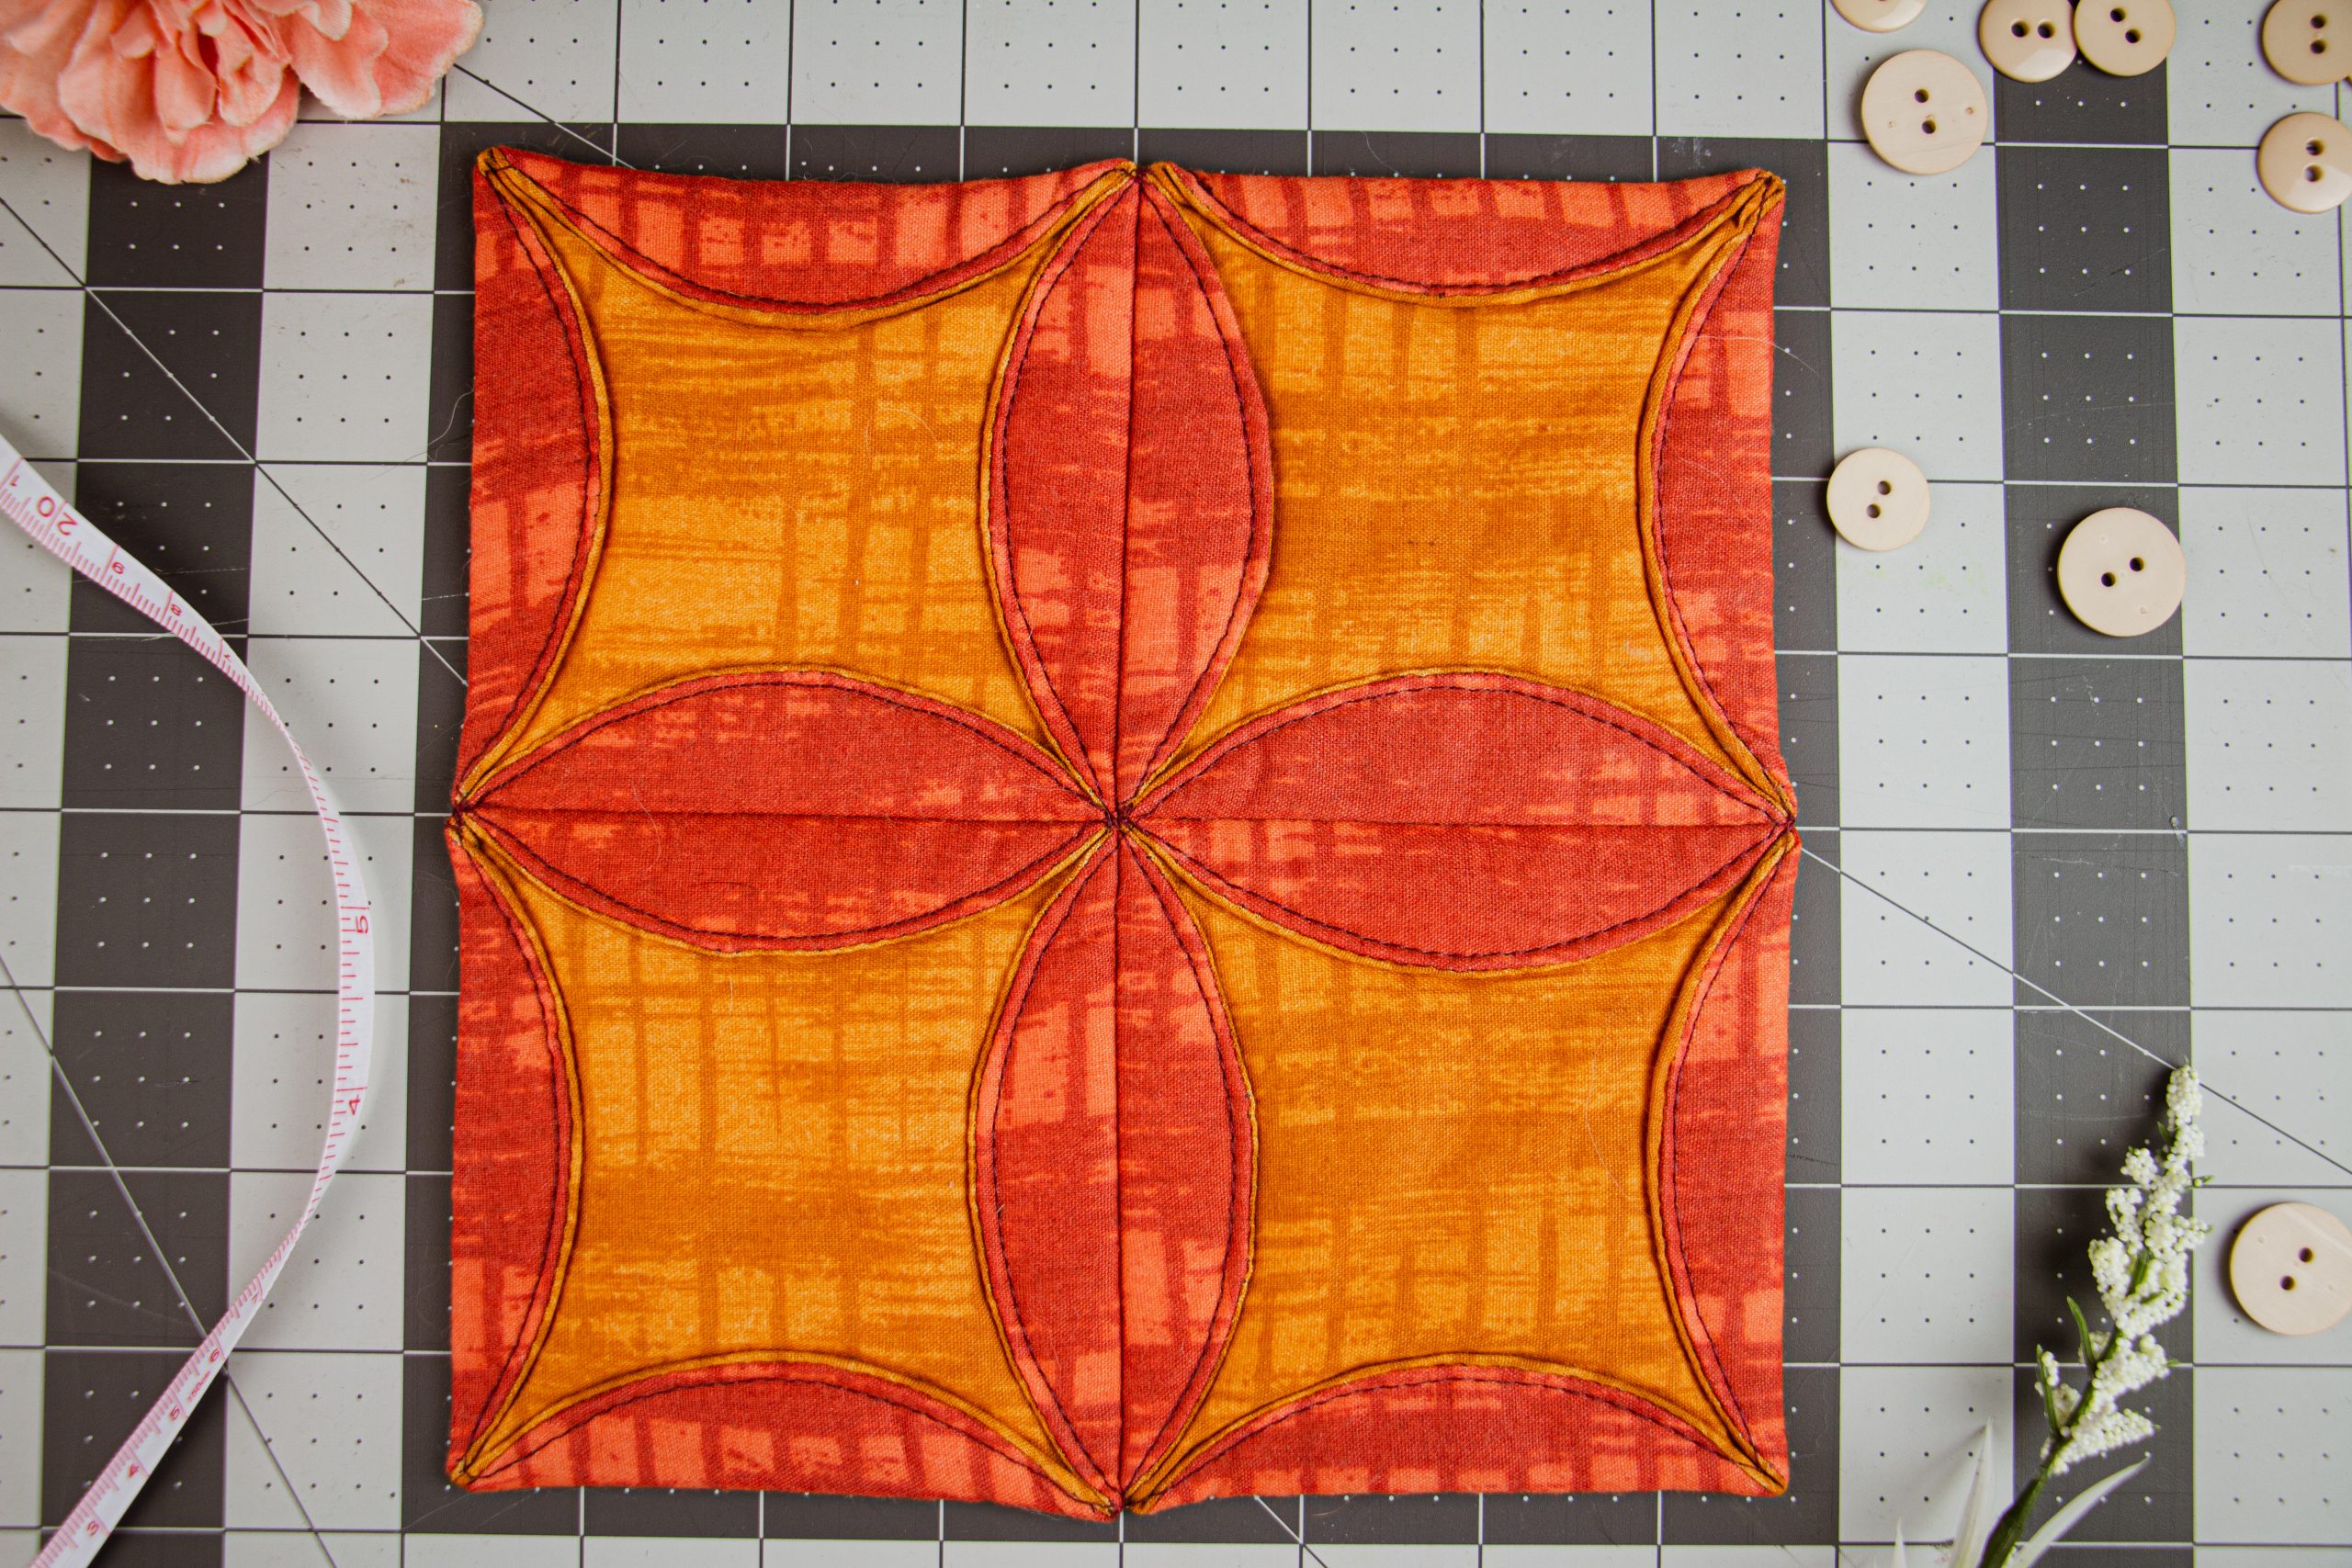
- Using an air- or water-erasable fabric pen, mark a square on the window side of each block according to the “finished block size” measurement on the chart. Ensure that the opening that was cut in the block is parallel with one edge of the square, and that the square is in the middle of the circle as shown in the picture.
- Align two blocks with the frame fabrics facing each other. Pin along one of the marked lines, ensuring that the pins are placed directly on a marked line on the top and bottom block. Sew on marked line to join blocks. Join additional blocks in order to create a quilt row with the desired number of blocks (according to the chart). Note: If a scalloped edge on the finished quilt is desired, ensure that all of the slashed openings on the blocks are oriented towards the middle of the quilt. The slashed openings will be sealed when the petal shapes are topstitched down; however, the petals on the border of a scalloped quilt will not be topstitched down. Therefore, all slashed openings must be oriented away from the border if a quilt with a scalloped edge is desired.
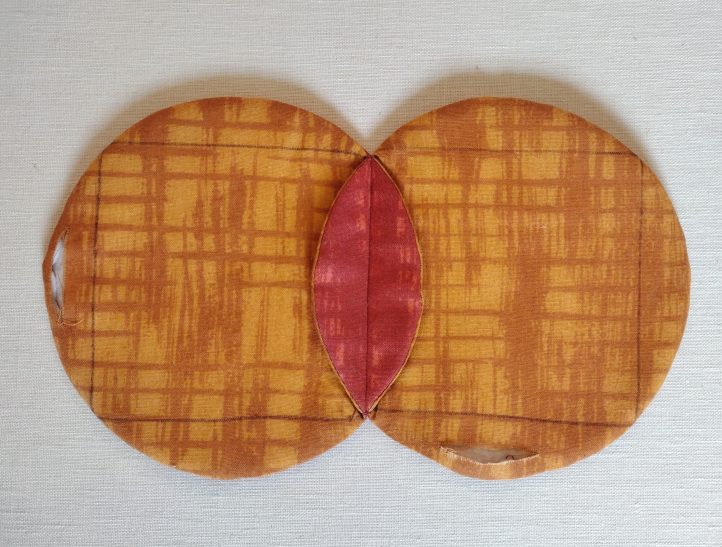
- Press petals open on each row.
- Pin together 2 rows along marked lines and sew to form columns. Repeat to create desired number of columns.
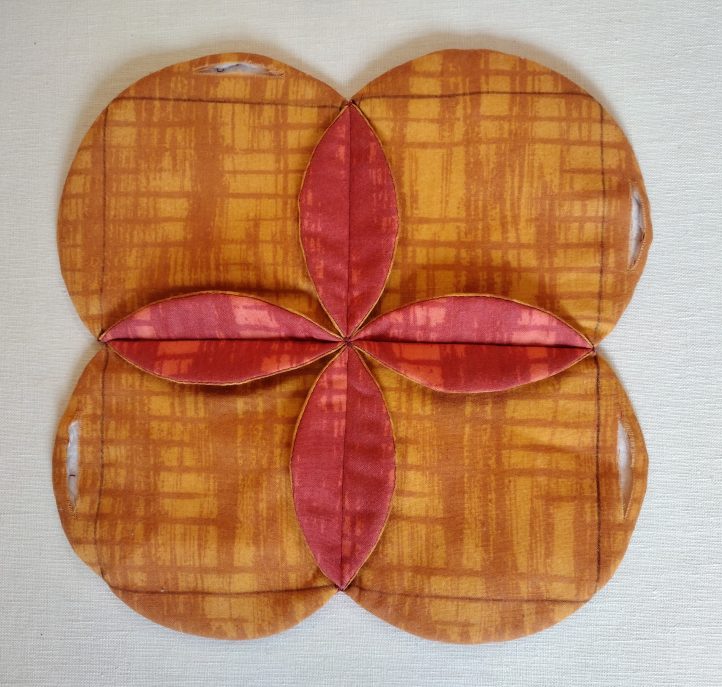
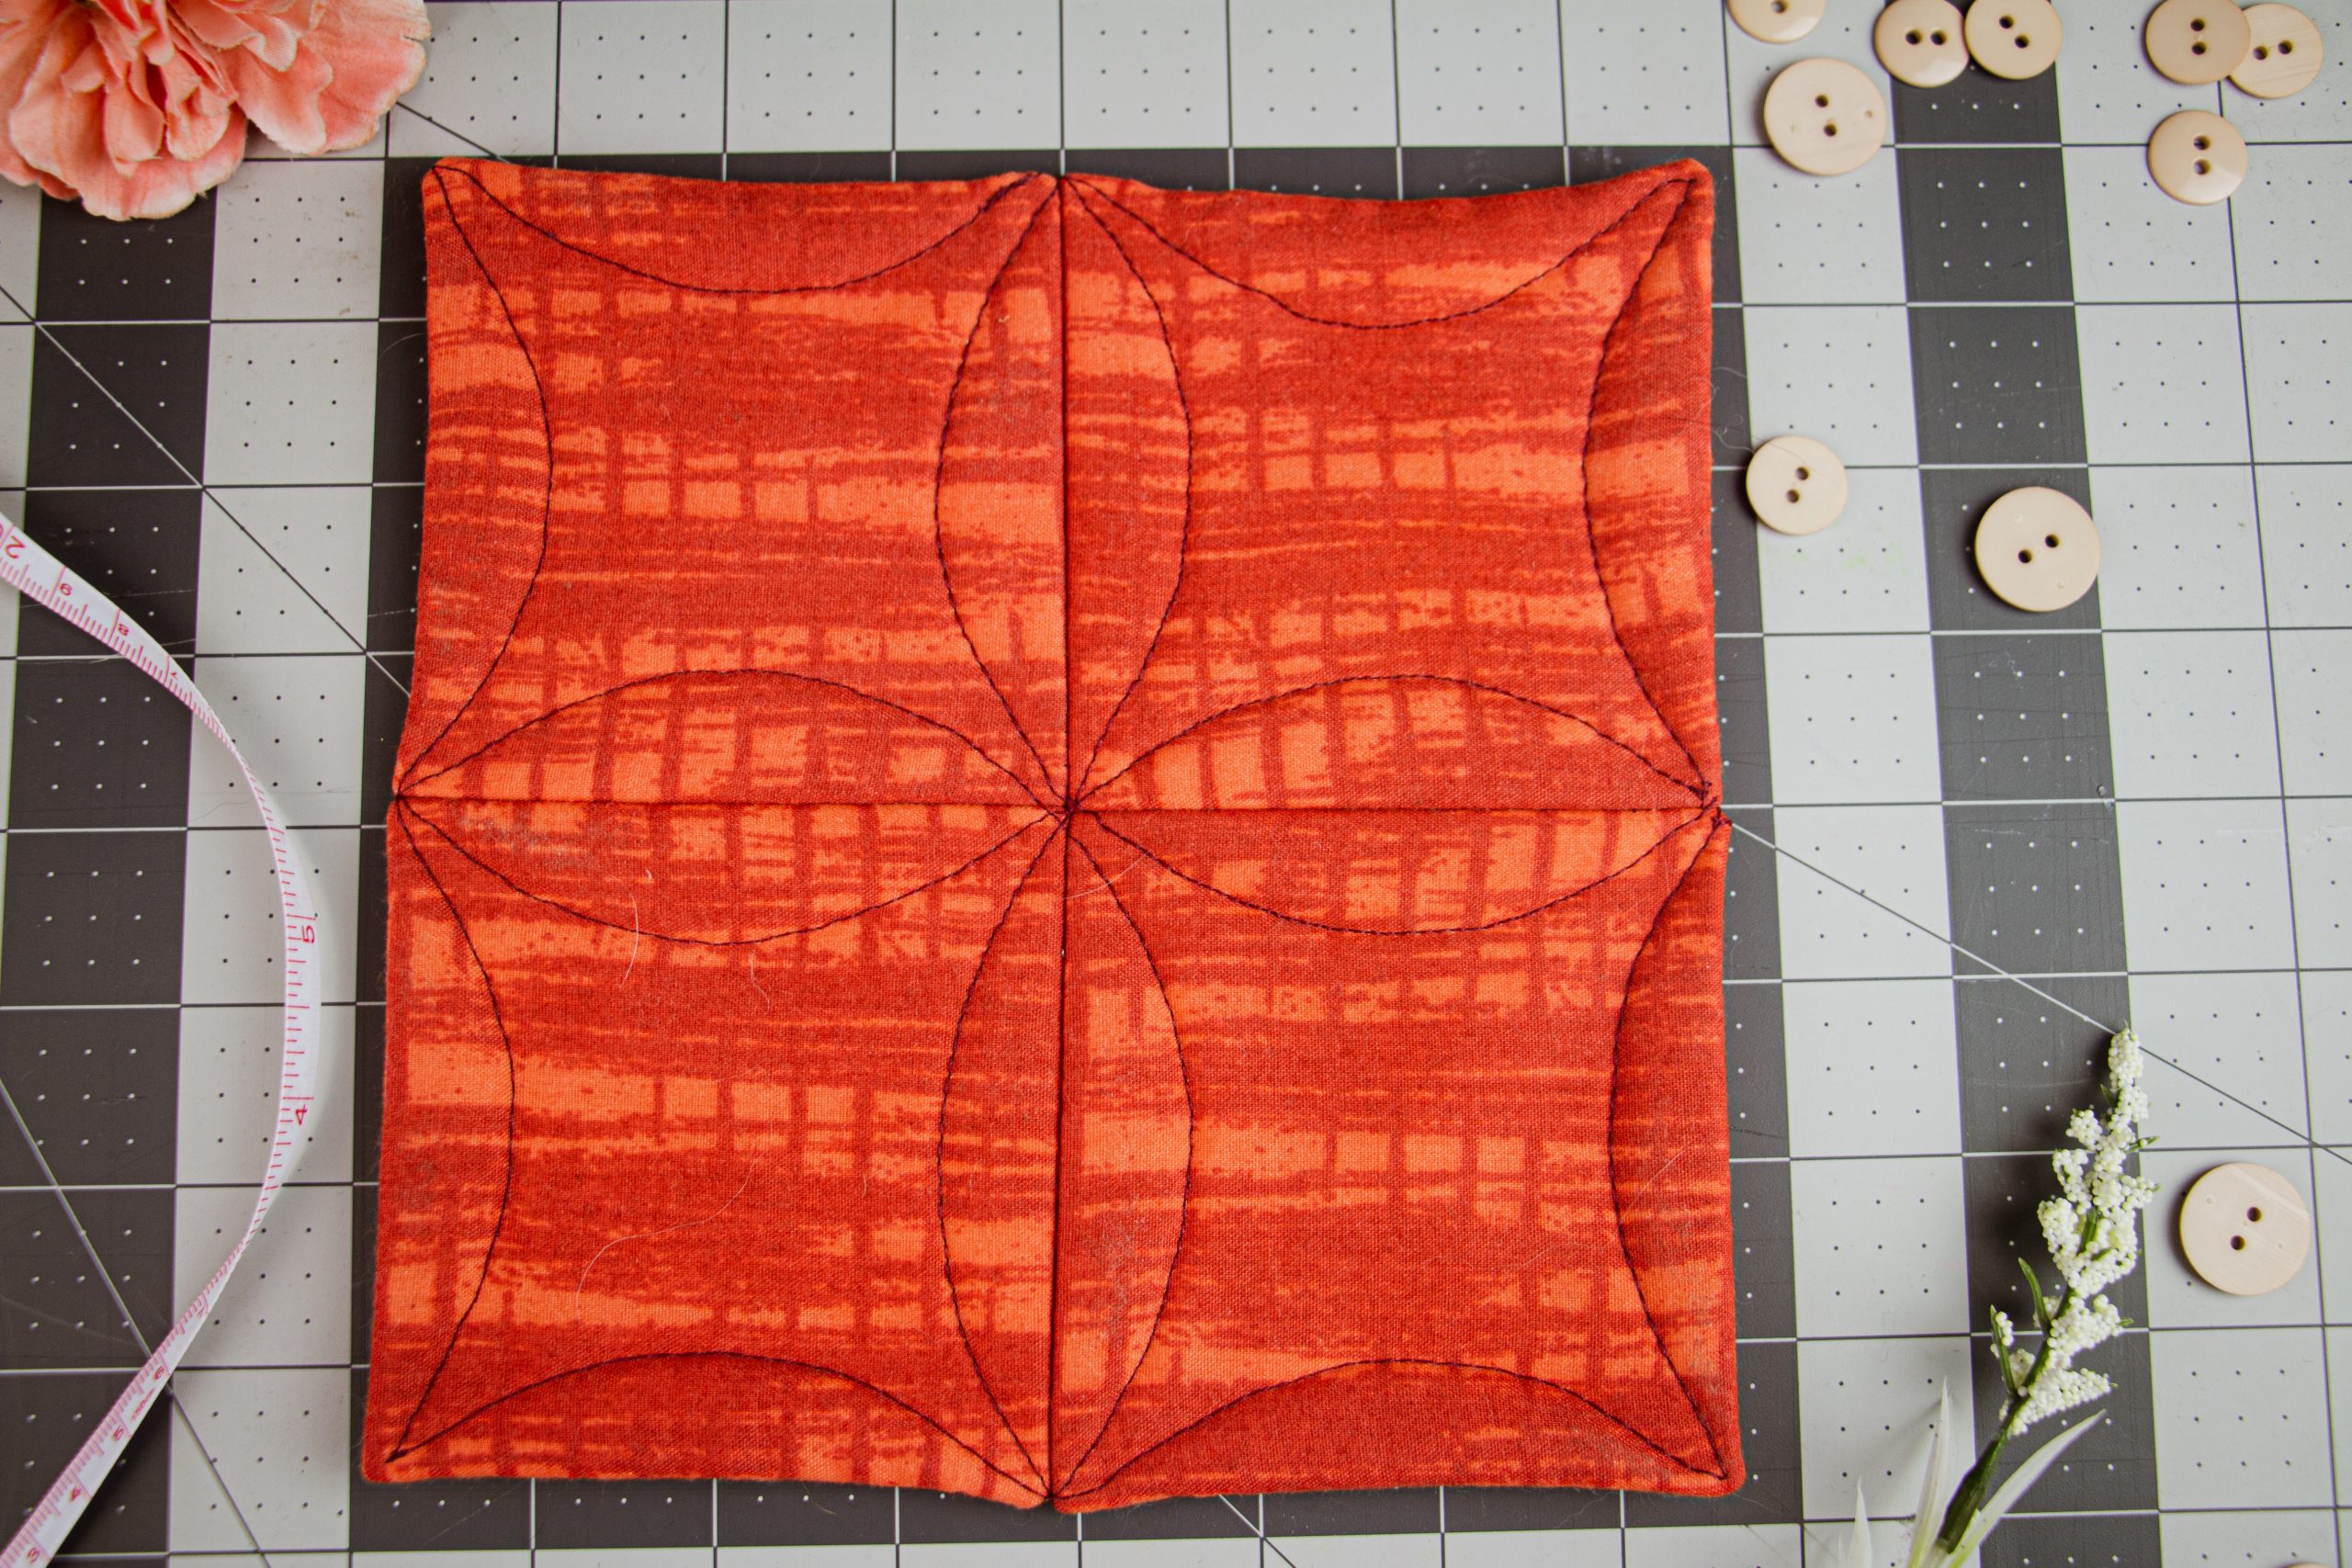
- Press all petals open, and topstitch petals down by sewing 1/8” from the edge of each petal. Topstitching the petals down will seal all of the slashed openings that were used to turn the blocks right side-out.
- The edges of the quilt may be left scalloped, or the petals along the edge may be pressed over a piece of cardboard to create a straight edge and then topstitched in place.


Thank you very much the beautiful Cathedral Pattern!
Have a nice week!
Marianne