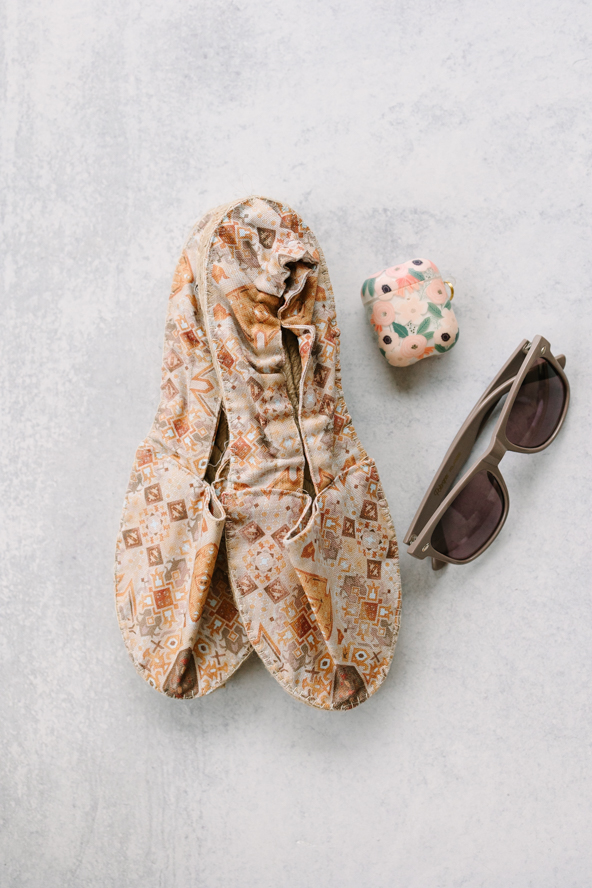
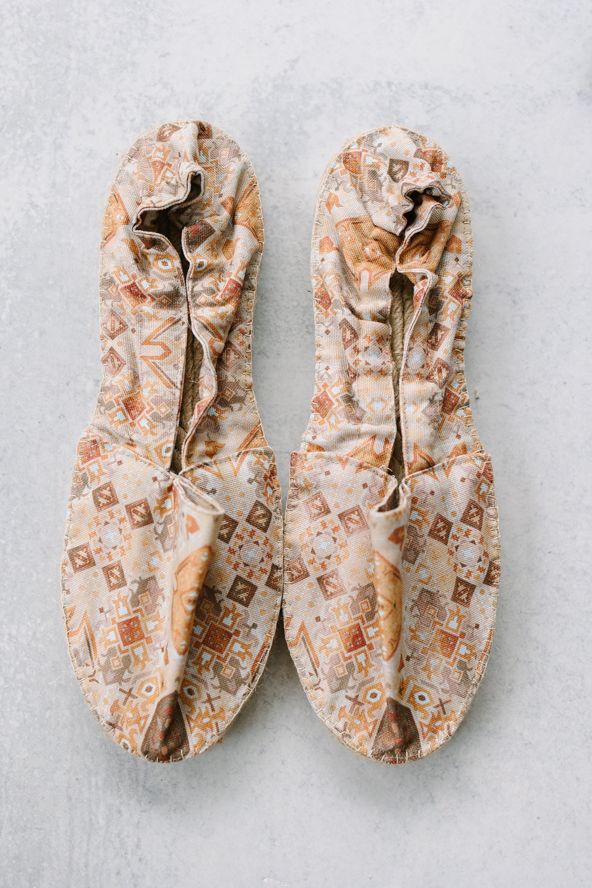
Comfort meets personal style with these DIY espadrilles. Learn how to sew a classic summer shoe that perfectly fits your wardrobe with this espadrille sewing pattern. Featuring a gorgeous sepia printed canvas from our friends at Verhees Textiles, this summer sewing pattern is made using a pre-made sole and combines machine and hand sewing techniques. Step into summer style by designing your own beautiful pair of espadrilles today.
Designer Notes:
- Available in whole US sizes.
- 1/2” seam allowance included in pattern.
- Because the finished size of the espadrille sole can vary quite a bit, and in the designer’s experience they run a bit large, she recommends cutting a muslin first to make sure you are using the correct size.
Materials:
- 1/4 yd fabric and you will have some leftover – If you have something vintage or extra special and a small amount, cut the linings in a plain fabric and use the fancy stuff on the outside!
- Fabric provided for this project by Verhees Textiles. You can check out Verhees on Instagram here!
- 3/4 yd 1/4” elastic
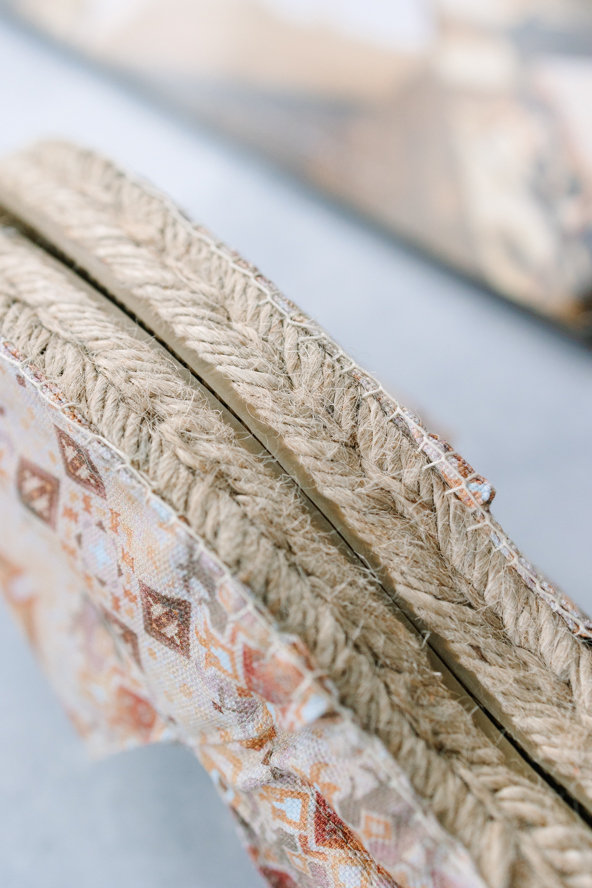
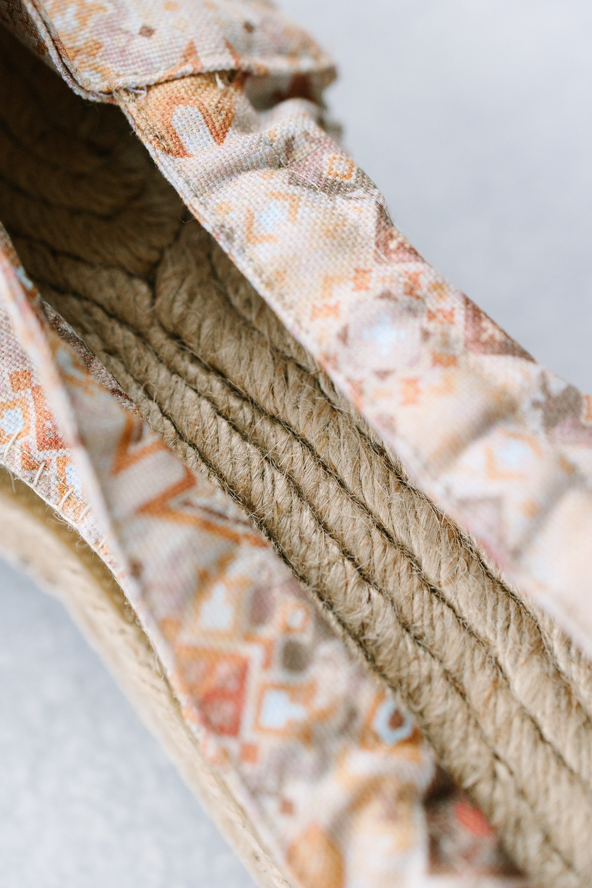
- Espadrille soles in your size
- Coordinating sewing thread for your sewing machine
- Button and Craft thread in a coordinating color for the hand sewing
- Hand sewing needle – The designer highly recommends you use a short curved needle
- PDF Pattern – This is located at the bottom of this page. Please see printing instructions below.
PRINTING INSTRUCTIONS:
Note: To download this pattern, click on the pattern download button at the bottom of the page. We recommend opening your pattern download using Adobe Acrobat.
Cutting Instructions:
- Cut 4 of the Toe piece, (or two fashion fabric and two plain lining) and 4 of the Back piece (or two and two as for the Toe), noting the Back piece is cut on a fold. If your pattern is directional, or has distinct design elements, make sure the Toes have the same design placement – you may need to fussy cut.
Sewing Instructions:
TOE:
- With right sides facing, sew two Toe pieces together, leaving openings where marked.
- Clip Curves, turn right side out and press, pressing under the seam allowance in the marked openings.
HEEL:
- With right sides facing, sew two Back pieces together along the top (slanted) and bottom (straight) edge, leaving the short sides open.
- Clip slanted seams turn right side out and press.
- Top stitch 3/8” from top edge to form a casing for the elastic.
- Thread elastic through the casing, and pull to desired tightness. If you do not have the person nearby you are making the espadrilles for, cut the elastic so it is 2” shorter than the top edge of the Back, unstretched.
- Machine or hand tack the elastic into place on the short sides of the Back so it cannot pull out, inside the seam allowance.
- Topstitch along the edge of the bottom edge.
ASSEMBLY:
- Insert each short edge of the Back into the opening at either side of the toe and pin into place.
- This is an excellent time to double check that the bottom edge of your assembled piece will fit snugly along the outer edge of the espadrille sole – again there can be some variation!
- Adjust the insertion if necessary, then top stitch around the entire toe, closing up the openings as you come to them.
FINISHING:
- Using button and craft thread and your curved hand sewing needle, hand stitch the fabric to the sole, using a buttonhole stitch.

Sorry. The diegos web address has forward slashes: https://www.diegos.com.
Thank you so much for sharing, Lynn! Have a great day 🙂 – Ashley, We Like Sewing
I found an espadrille sole maker at https:\\www.diegos.com. Soles are made for children, women, and men. I’m going to call them tomorrow to ask if I can get two-inch heeled soles for a woman’s size 11M.
I love all the patterns, thank you. I’d like to make the espadrilles, but where do you get the soles?
I found this on Amazon US and looks like there may be UK sizing if not in the US
https://www.amazon.com/PRYM-Espadrille-Rubber-Natural-11x3x30/dp/B014T7NMMC/ref=sr_1_2?crid=OAR2CR8K5RPM&keywords=espadrille+soles+for+shoe+making&qid=1683129030&sprefix=espidrille+soles%2Caps%2C154&sr=8-2