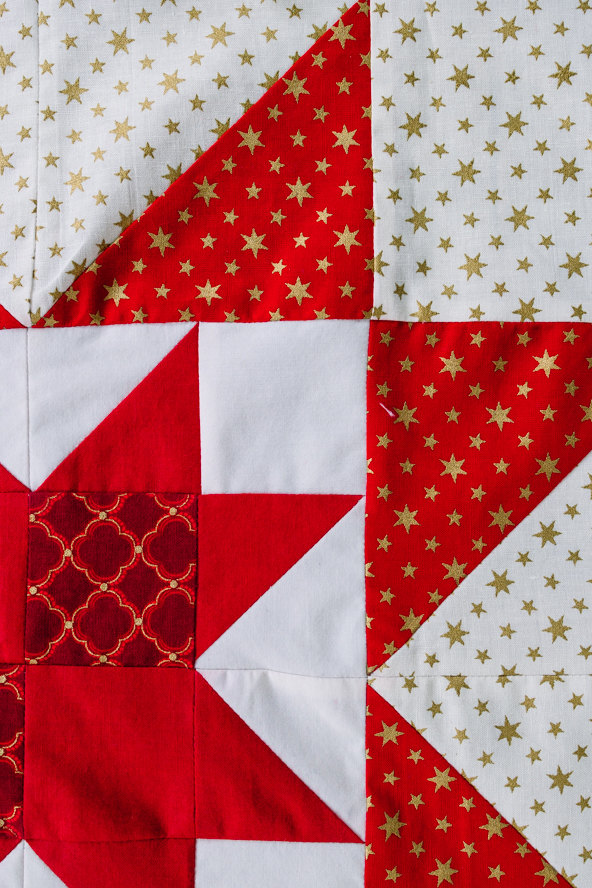
Is it ever too early to start quilting for Christmas? If you love getting a head start on your holiday quilting, then you don’t want to miss these festive 8-point stars. You’ll not only learn how to make a classic 8-point star block in this pattern, but you’ll also find tutorials for creating an on-point star block and Evening Star-Morning Star block. Get a jump on the Christmas spirit with a traditional star block that can easily be made into your own star quilt, pillow, or wall hanging.
There is more than one way of making the points for the stars in the three blocks below. The first two blocks use the ‘Flying Geese’ method (explained in detail in the February 2023 issue of We Like Sewing). This method allows you to make two points at the same time. The third block uses a quick method of making two individual half-square triangle units, which are then joined before being added to the block. You can use either method for any of the blocks below but note that the cutting measurements are different according to which method you use!
Designer Notes:
- A 1/4” seam is used throughout.
- On pressing: After completing each seam, press the seam with a hot iron (not steam) and then open up the fabric pieces and press as directed in the instructions below.
Materials:
To make all three star blocks below, you will need, in total:
- A fat quarter (18 x 21”) Fabric A, red printed with gold stars
- A fat quarter (18 x 21”) Fabric B, cream solid
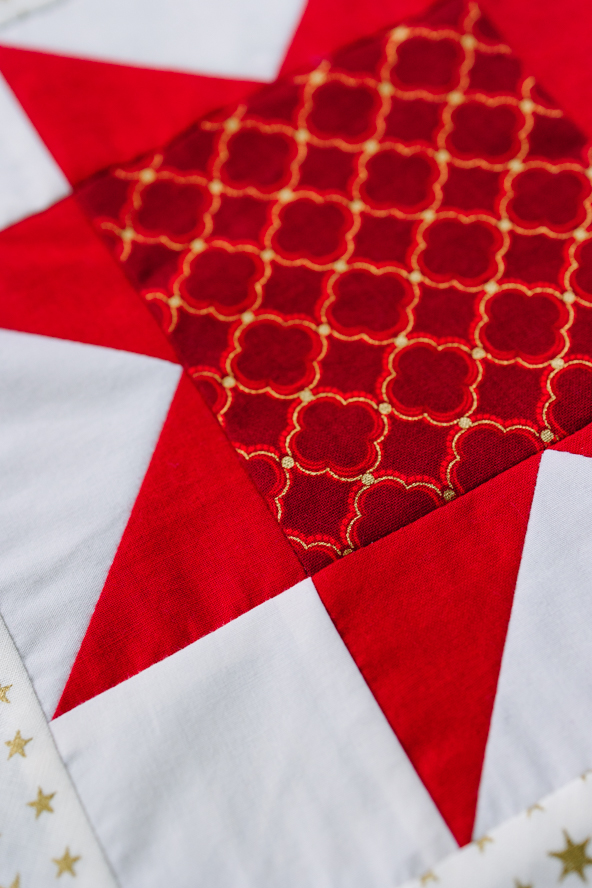
- Oddment (6 x 11”) Fabric C, dark red with gold and bright red print
- 1/2 yard Fabric D, cream printed with gold stars
- Oddment (7 x 14”) Fabric E, red solid
Instructions:
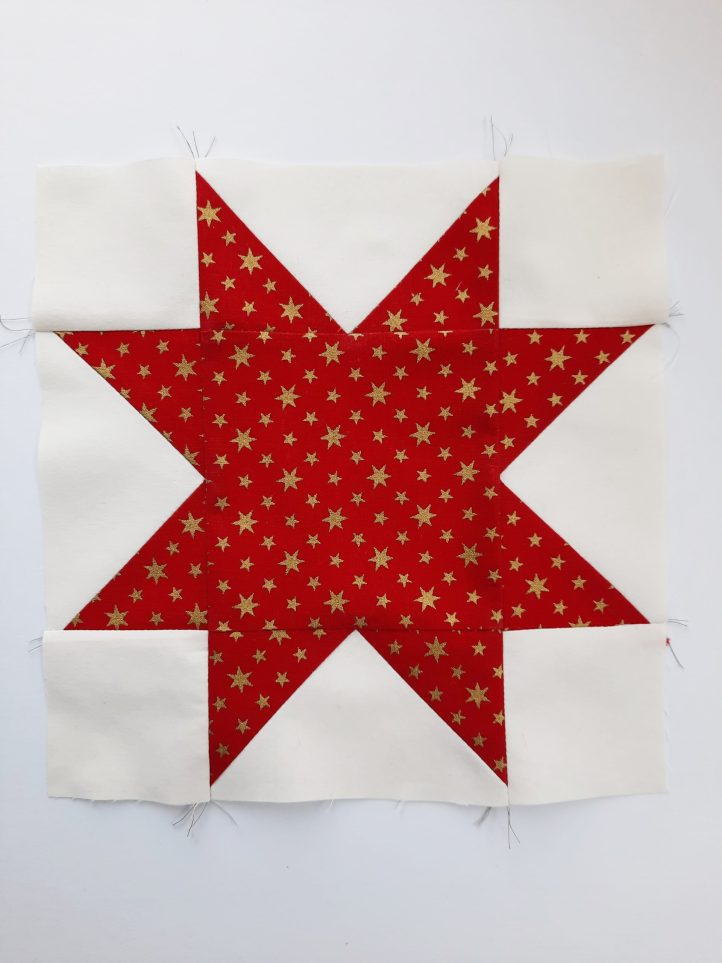
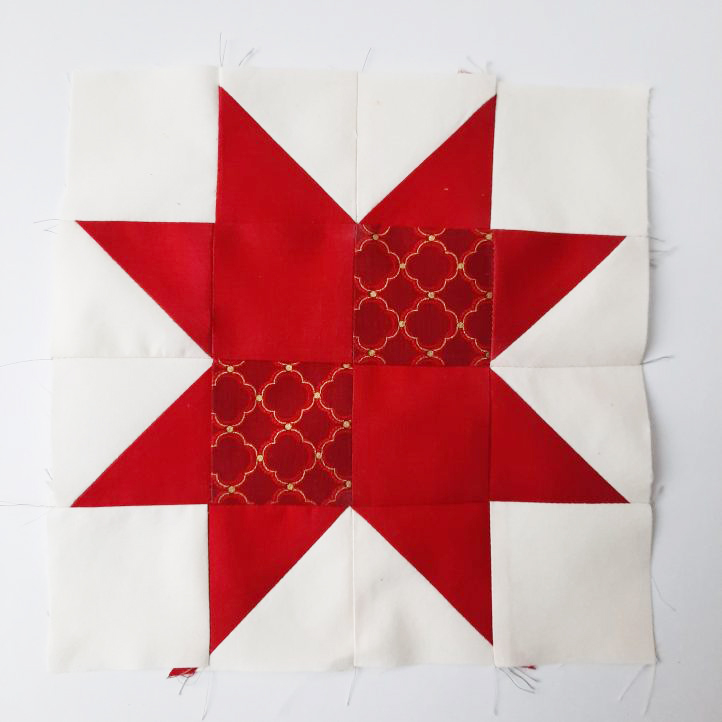
SIMPLE 8-POINT STAR BLOCK:
This makes an 8 x 8″ block (8 1/2″ x 8 1/2″ unfinished).
Cutting:
- From Fabric A, cut one square 4 1/2″ x 4 1/2” and eight squares 2 1/2″ x 2 1/2”.
- From Fabric B, cut four oblongs 4 1/2″ x 2 1/2” and four squares 2 1/2″ x 2 1/2”.
Making the 8-Point Star:
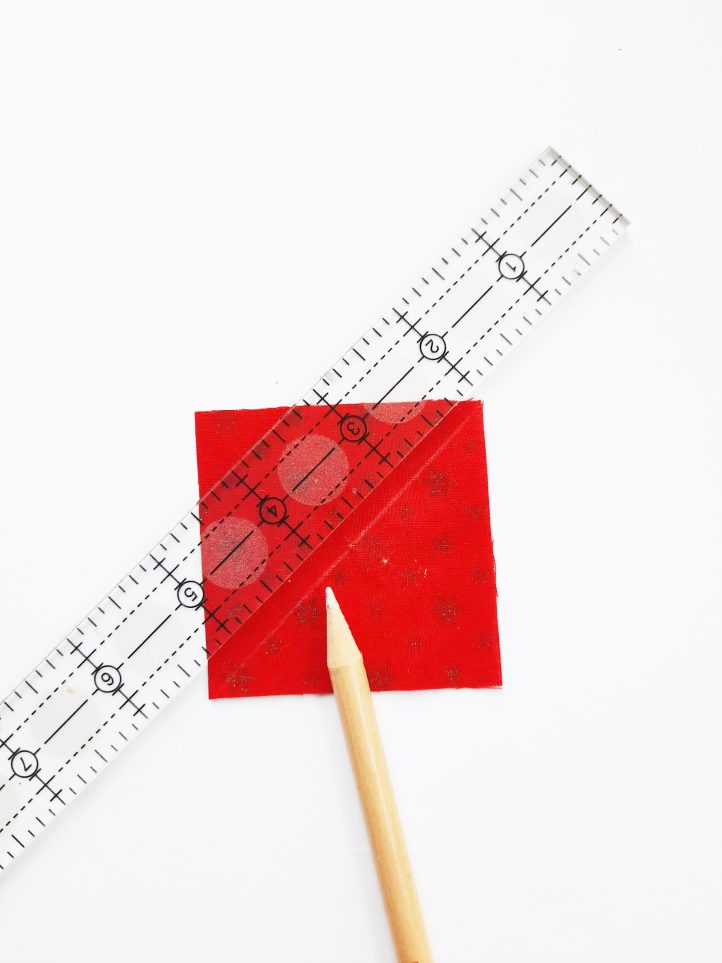
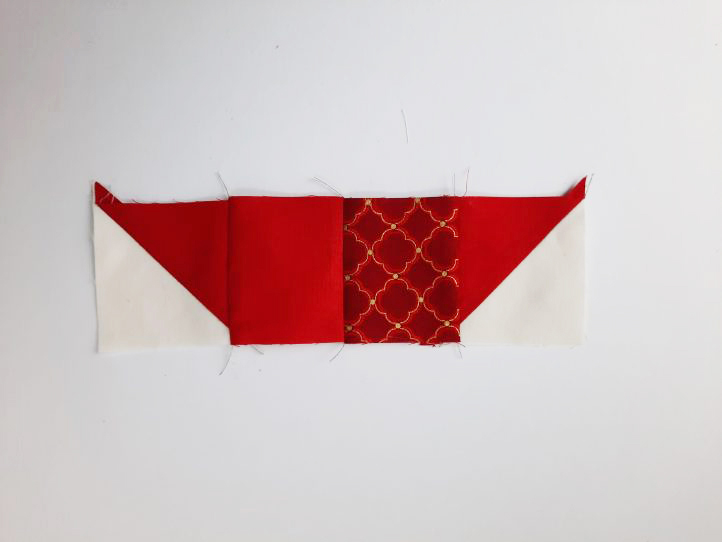
- Mark a diagonal line from corner to corner across the back of a Fabric A 2 1/2″ x 2 1/2″” square.
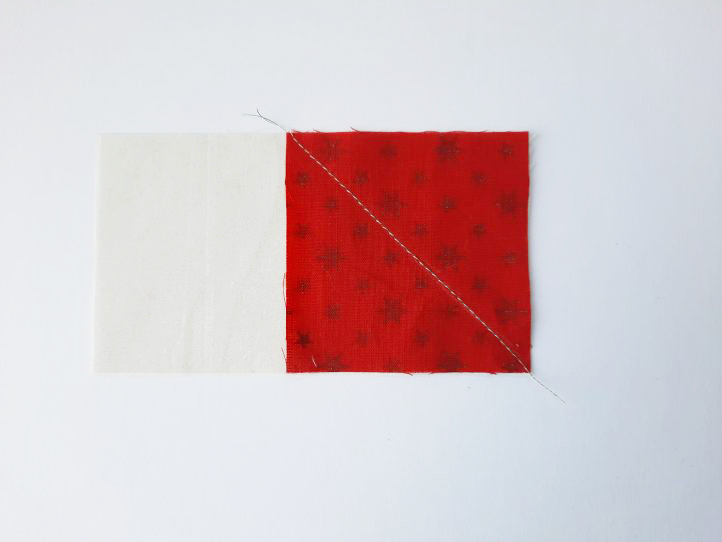
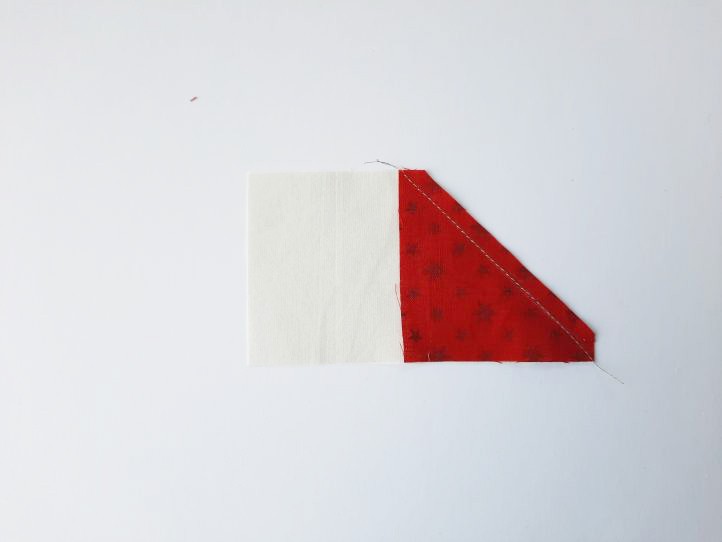
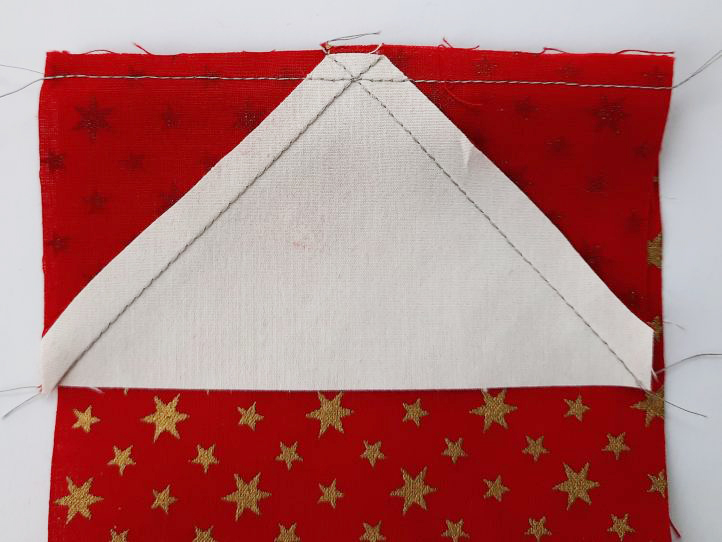
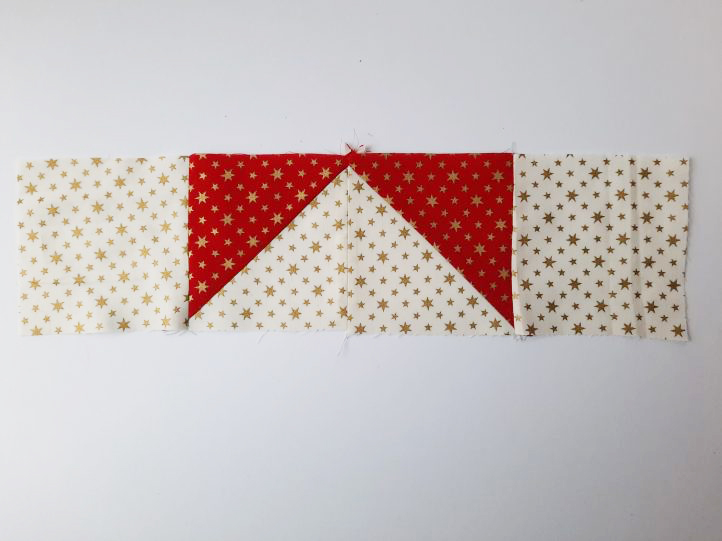
- Pin the square to the right of a Fabric B 4 1/2″ x 2 1/2″” oblong and stitch on the marked line.
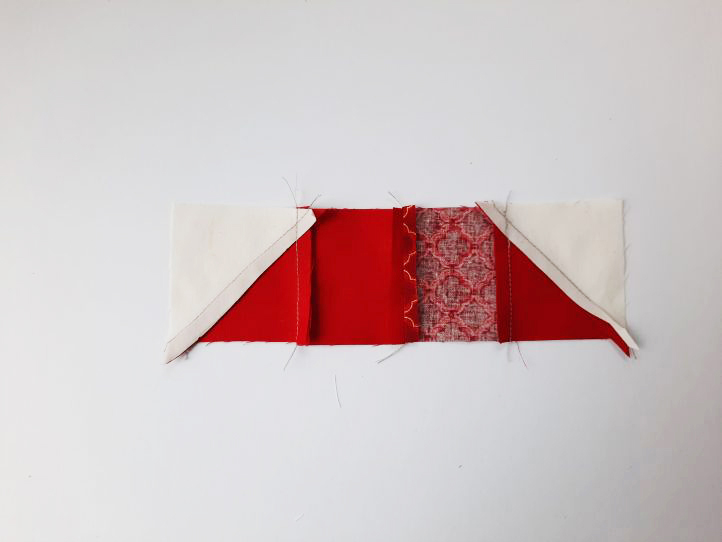
- Fold up the right side of the Fabric A piece to the corner and press.
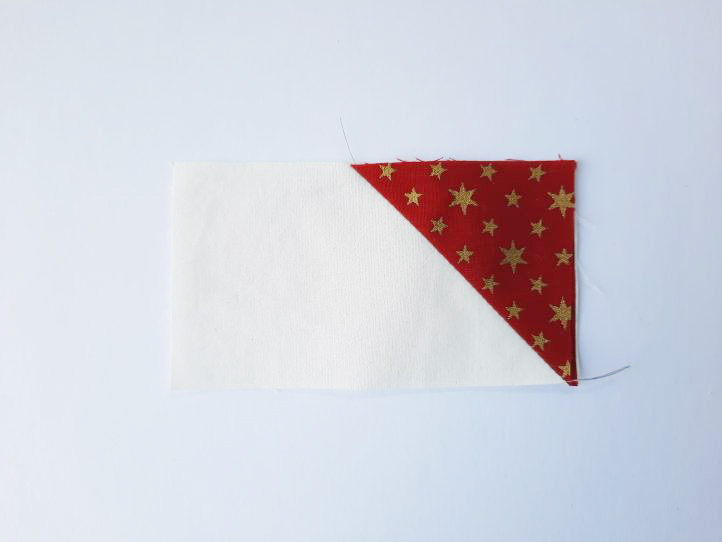
- Lift up the top Fabric A layer and trim the remaining two layers of fabric to a 1/4” seam allowance.
- Replace the top Fabric A layer.
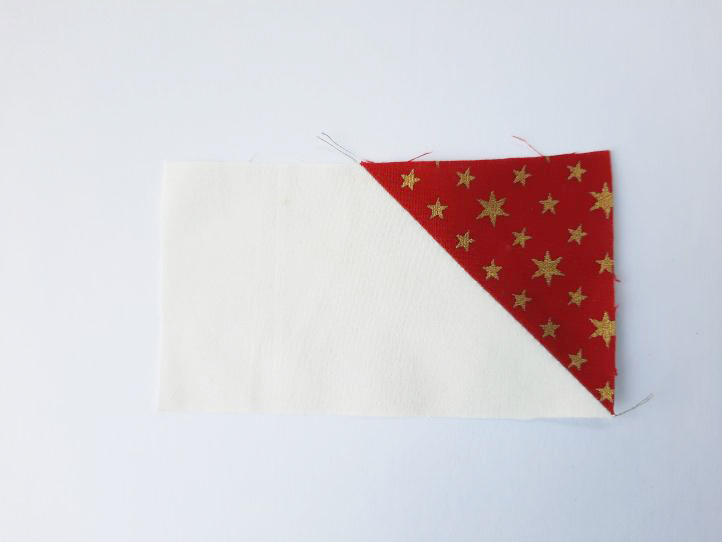
- Mark, pin and stitch a second Fabric A 2 1/2″ x 2 1/2” square to the left of the Fabric B oblong.
- Fold up, press and trim seams as before.
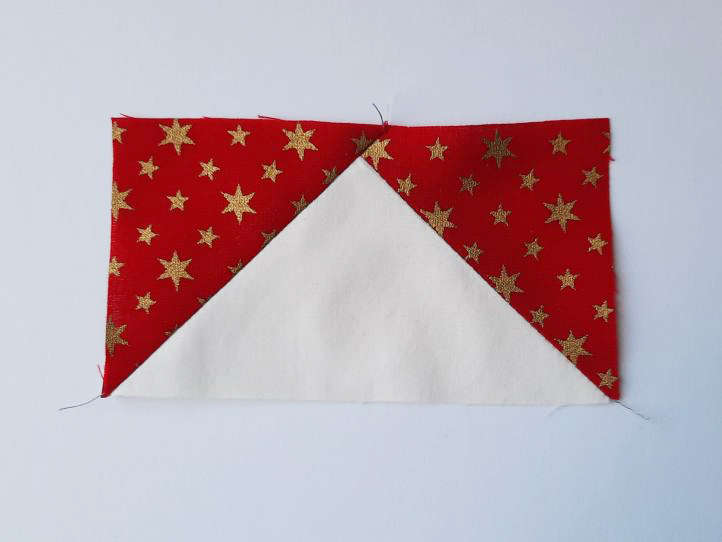
- Repeat Steps 1-7 three more times.
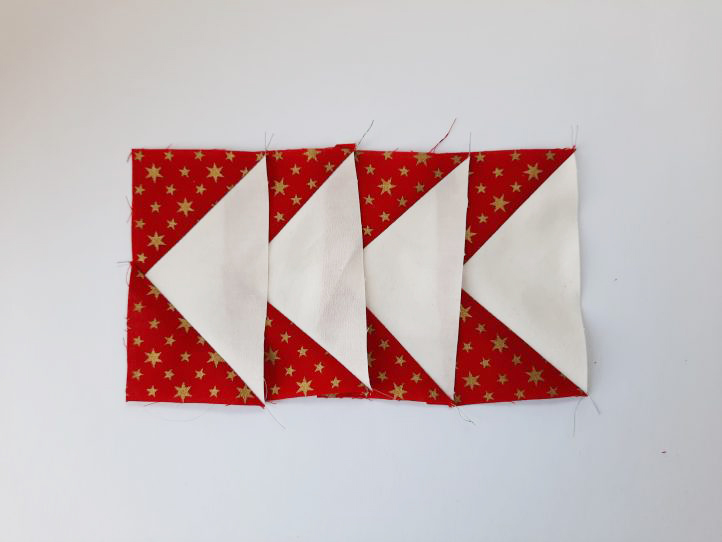
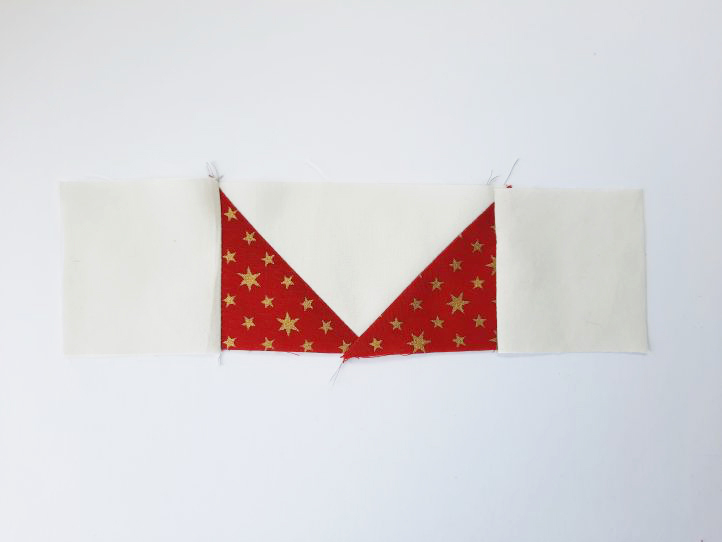
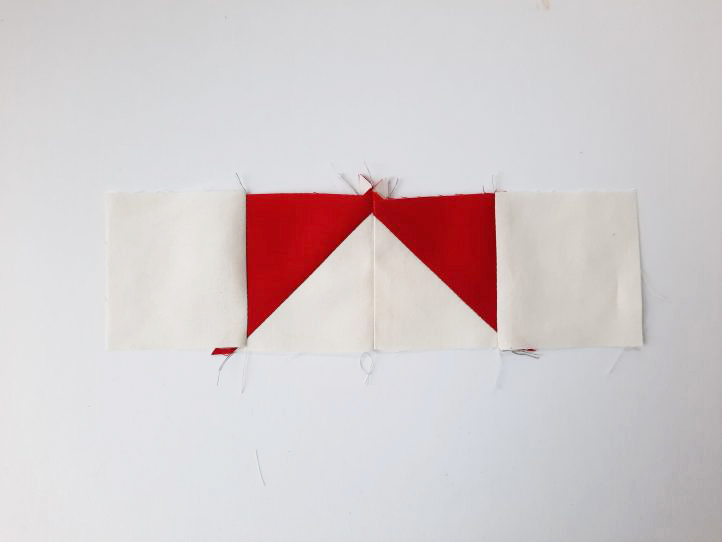
- Make Row 1. Stitch a Fabric B 2 1/2″ x 2 1/2” square to the left of the unit completed in Steps 1-7 and another Fabric B 2 1/2″ x 2 1/2” square to the right of it. Press the seam allowances out towards the Fabric B squares.
- Make Row 2. Stitch one of the three units completed in Step 8 to the left of the 4 1/2″ x 4 1/2” Fabric A square and another Step 8 unit to the right of the square. Press the seam allowances inwards towards the central square. Make sure that the seam goes exactly through the point at the top of the Fabric B triangle.
- Make Row 3. Repeat Step 9 with another of the Step 8 pieces. Turn through 180 degrees. Press the seam allowances out towards the Fabric B squares.
- Join the three rows. Press the seam allowances in towards the central square.
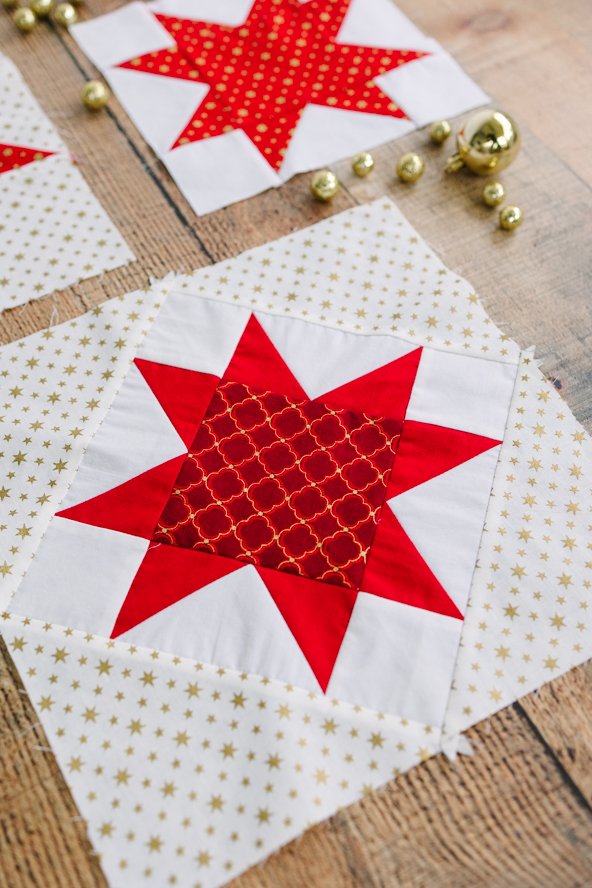
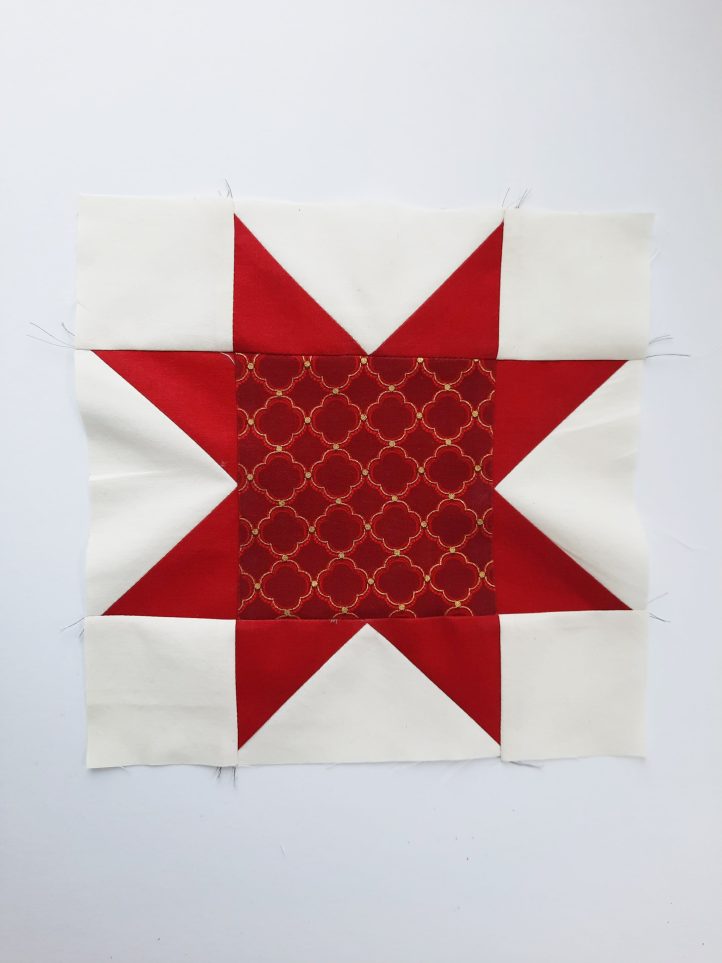
ON-POINT 8-POINT STAR BLOCK:
The measurement for this block is 11 x 11″ finished (11 1/2″ x 11 1/2″ unfinished).
Here the star is varied by using a different fabric for the center to the fabric used for the point and also by setting the star on point in a frame.
Cutting:
- From Fabric B, cut four oblongs 4 1/2″ x 2 1/2” and four squares 2 1/2″ x 2 1/2″.
- From Fabric C, cut one square 4 1/2″ x 4 1/2”.
- From Fabric D, cut two squares 6 1/2″ x 6 1/2”, cut each square once on the diagonal to make four large triangles.
- From Fabric E, cut eight squares 2 1/2″ x 2 1/2”.
Making the On-Point Star Block:
- Follow the instructions for the 8-point star above, but this time, use Fabric C in the center and Fabric E for the points.
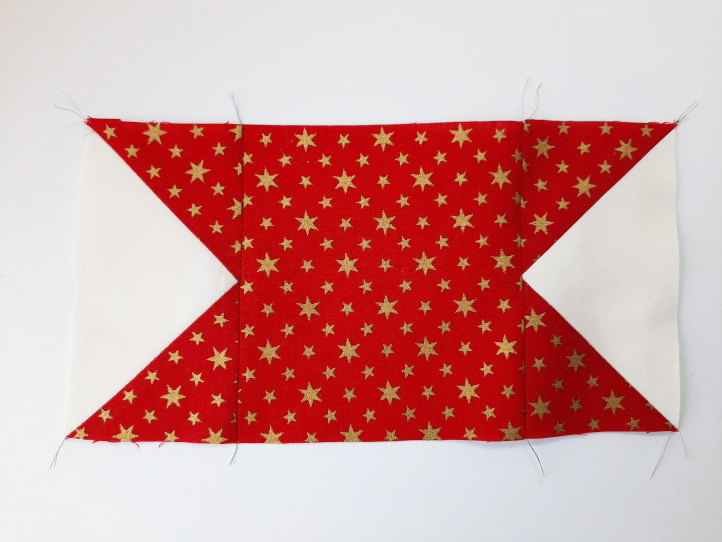
- Pin a Fabric D triangle, with the raw edges together, to one side of the piece completed in Step 1. Pin a second Fabric D triangle to the opposite side of the 8-point star. Stitch.
- Press the triangles open, pressing the seam allowances outwards. Pin and stitch the remaining two Fabric D triangles to the remaining sides of the 8-point star.
- Press the triangles open, pressing the seam allowances outwards. The block is complete.
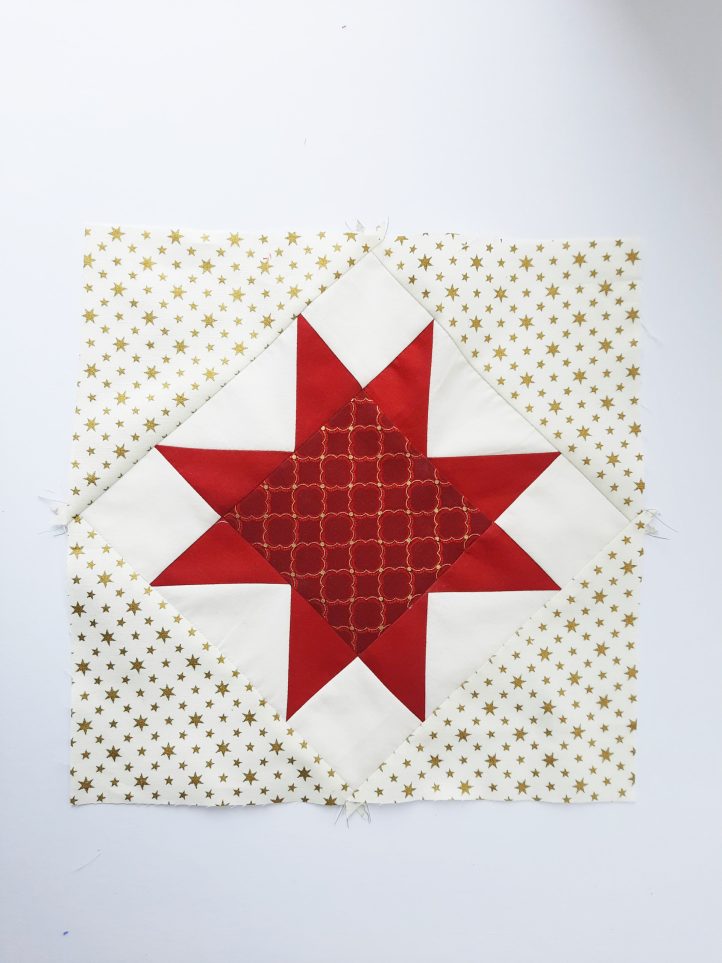
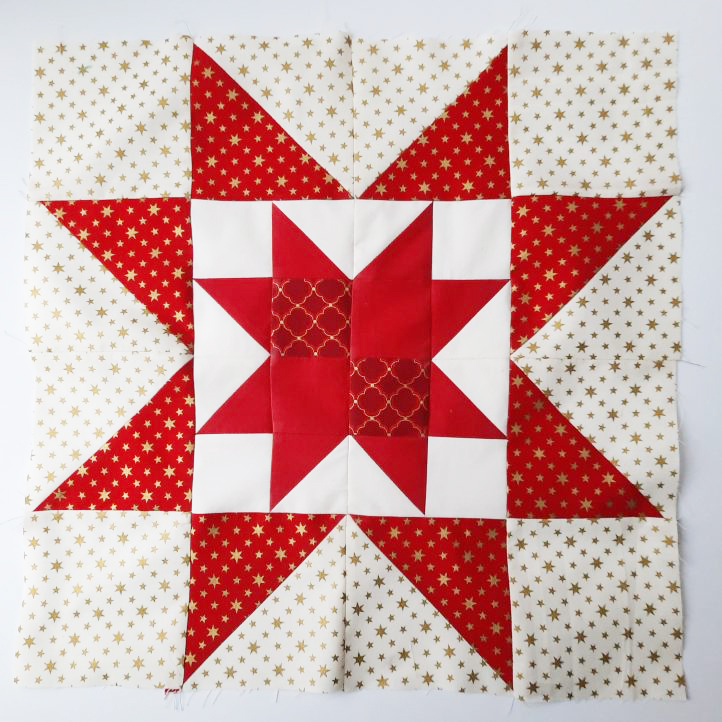
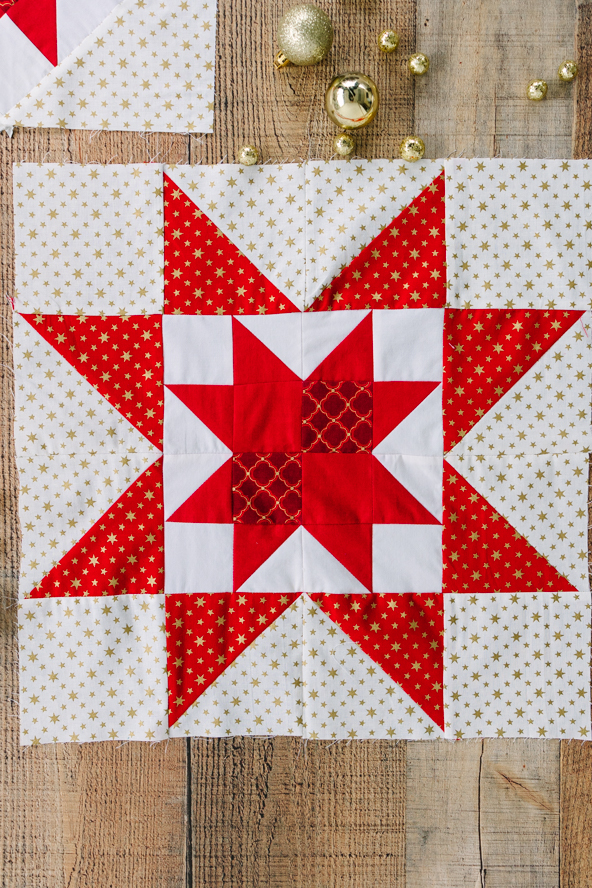
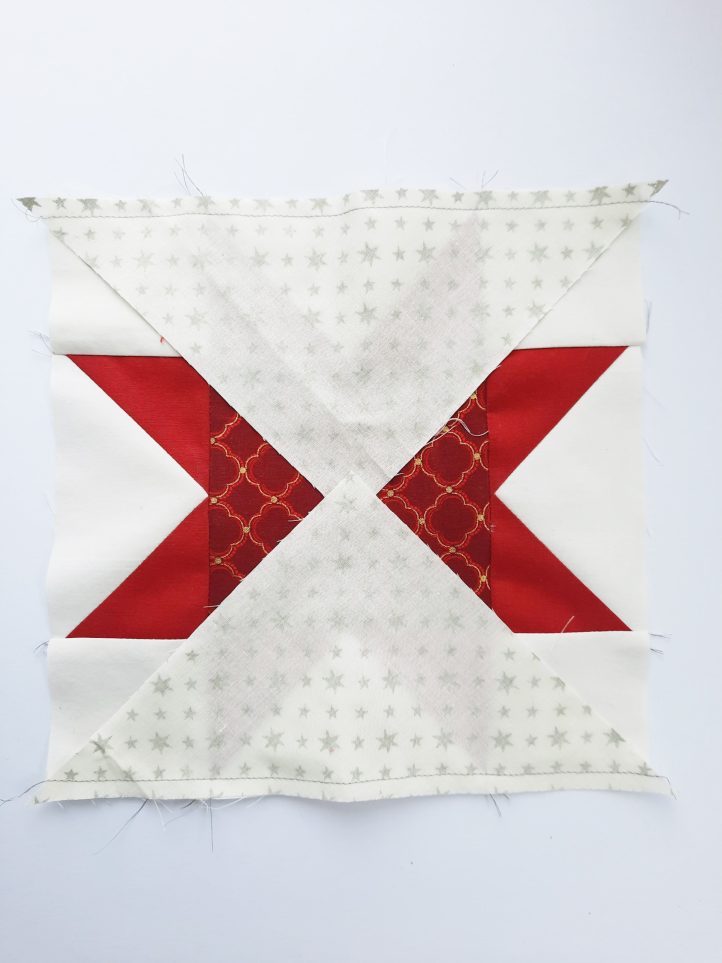
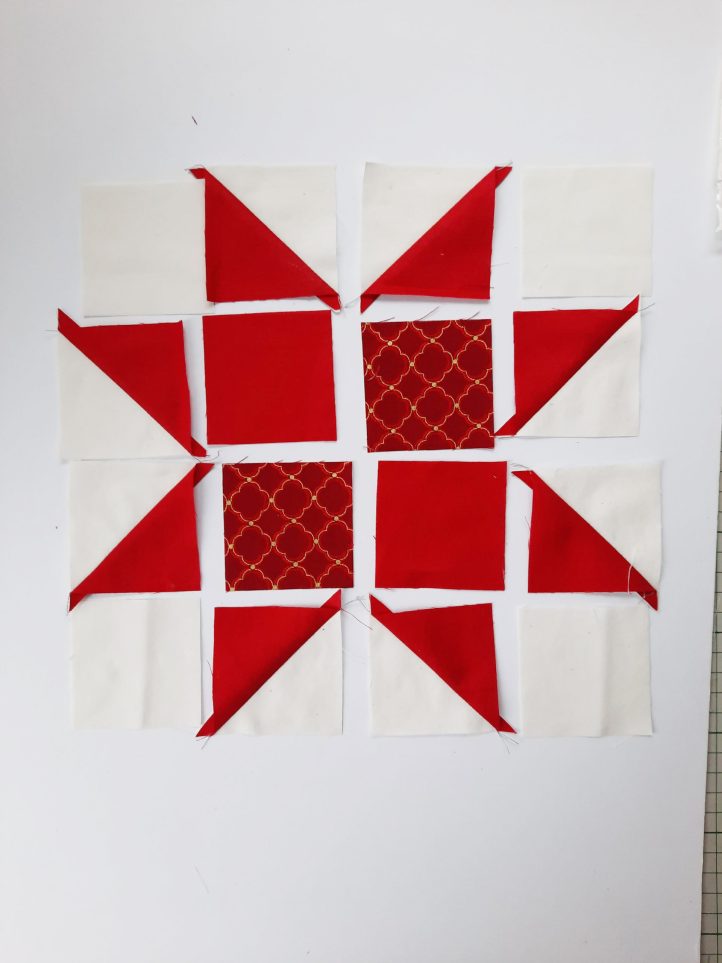
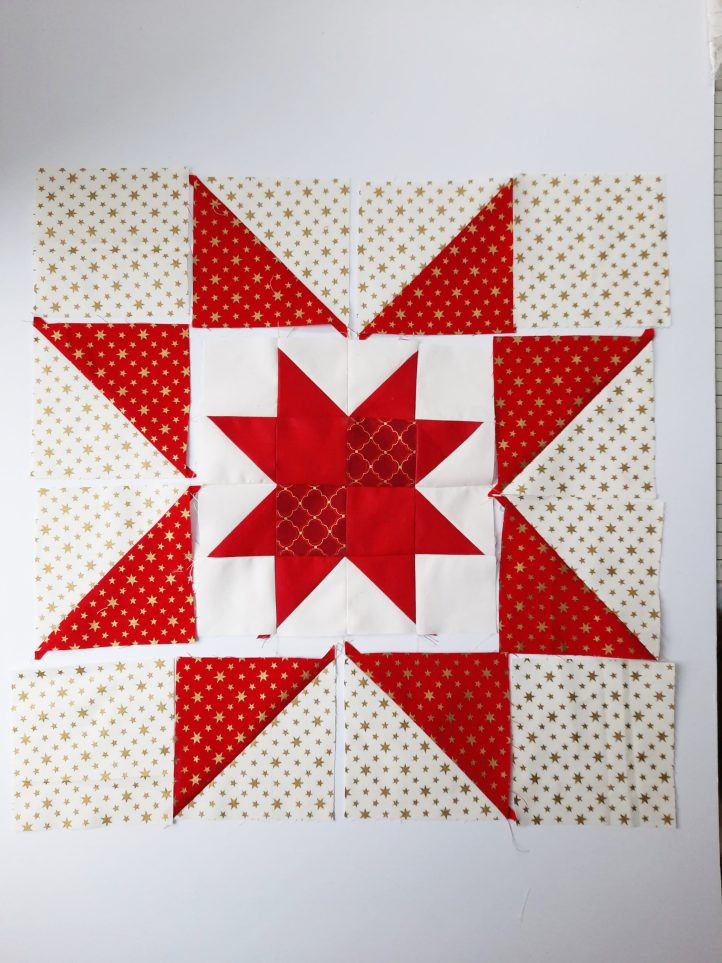
EVENING STAR-MORNING STAR BLOCK:
This block is 16 x 16″ finished (16 1/2″ x 16 1/2″ unfinished).
Here the star is varied by using two different fabrics for the center of the 8-point star and by setting that star inside a frame formed by a second star. This time the points of both stars are made with individual half-square triangles.
Cutting:
- From Fabric A, cut eight squares 4 7/8″ x 4 7/8”.
- From Fabric B, cut four squares 2 7/8″ x 2 7/8” and four squares 2 1/2″ x 2 1/2”.
- From Fabric C, cut two squares 2 1/2″ x 2 1/2”.
- From Fabric D, cut four squares 4 7/8″ x 4 7/8” and four squares 4 1/2″ x 4 1/2”.
- From Fabric E, cut four squares 2 7/8″ x 2 7/8″ and two squares 2 1/2″ x 2 1/2″.
Making the Evening Star-Morning Star Block:
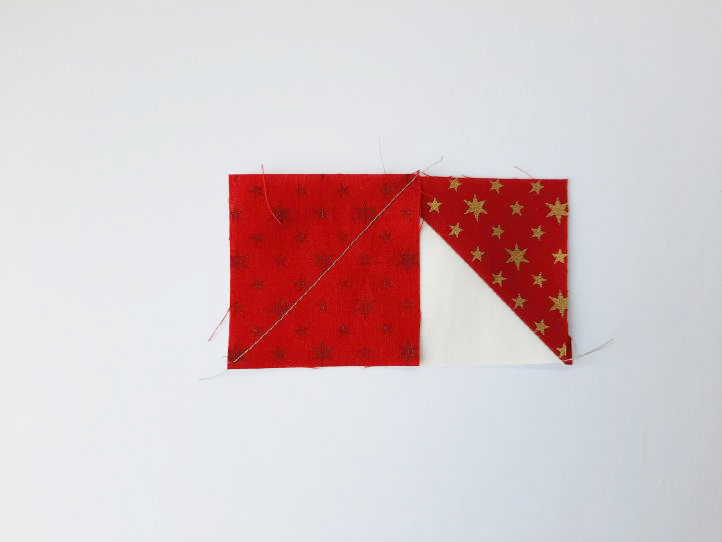
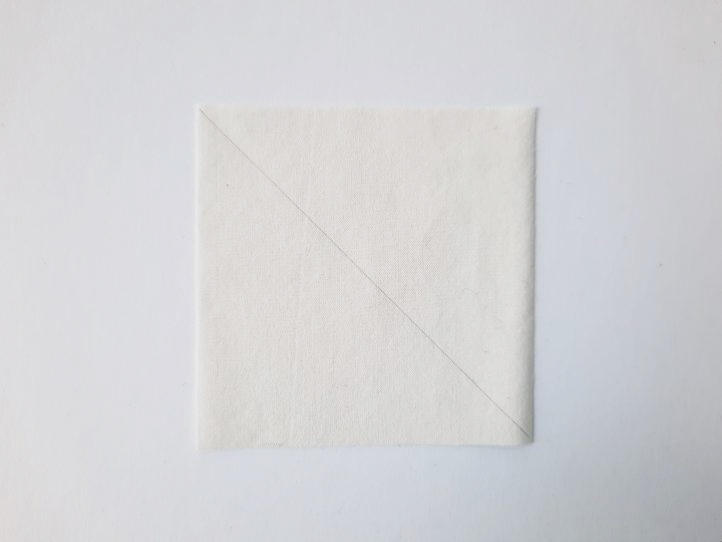
- Draw a line diagonally across the wrong side of a Fabric B 2 7/8″ x 2 7/8” square.
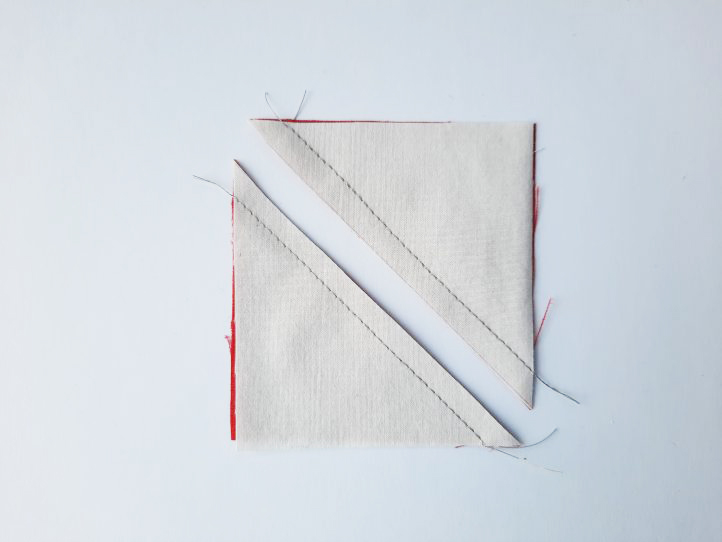
- Place this square, right sides together to a Fabric E 2 7/8″ x 2 7/8” square and pin. Stitch a seam 1/4” away from the marked line to the left of the line. Take the piece out of the machine and stitch (in the same direction) another seam, a 1/4” away from the marked line to the right of the line. Cut down the line with scissors.
- This will give you two Fabric B/E half-square triangle units.
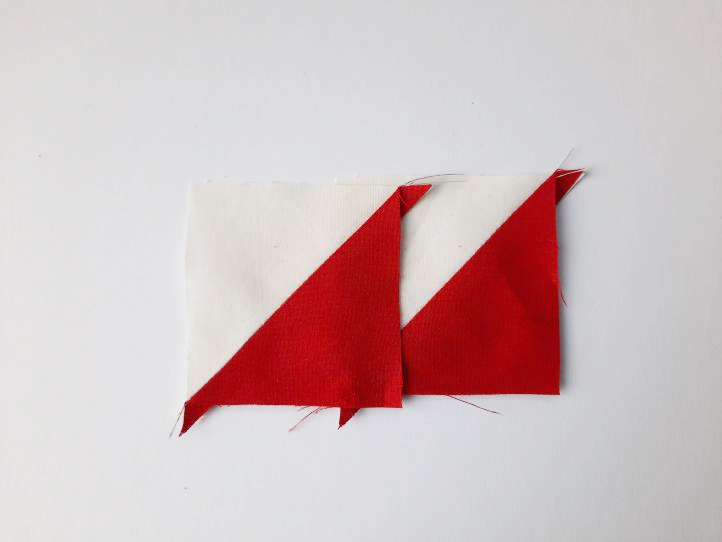
- Repeat Steps 1-3 three more times.
- Lay out the pieces for the center 8-point star as shown in the photo. Place two Fabric C and two fabric E 2 1/2″ x 2 1/2” squares at the center, then two Fabric B/E half-square triangle units on each side and one Fabric B 2 1/2″ x 2 1/2” square in each corner.
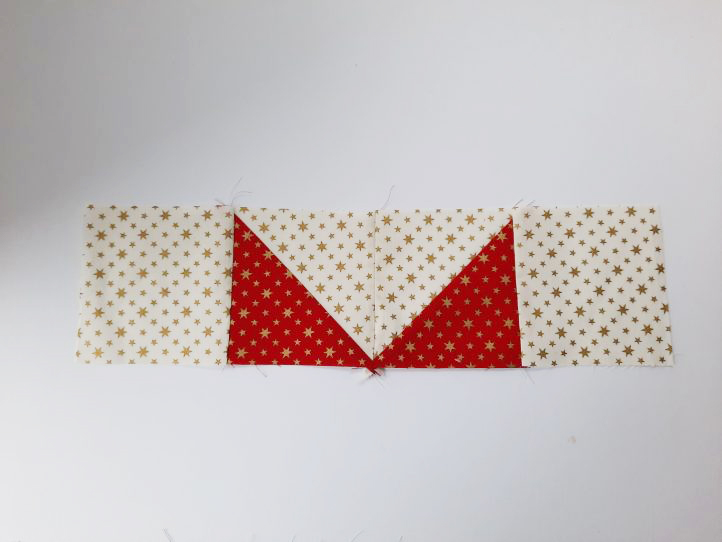
- Make Row 1. Join the Fabric B square to the two B/E half-square triangle units and finally add another Fabric B square.
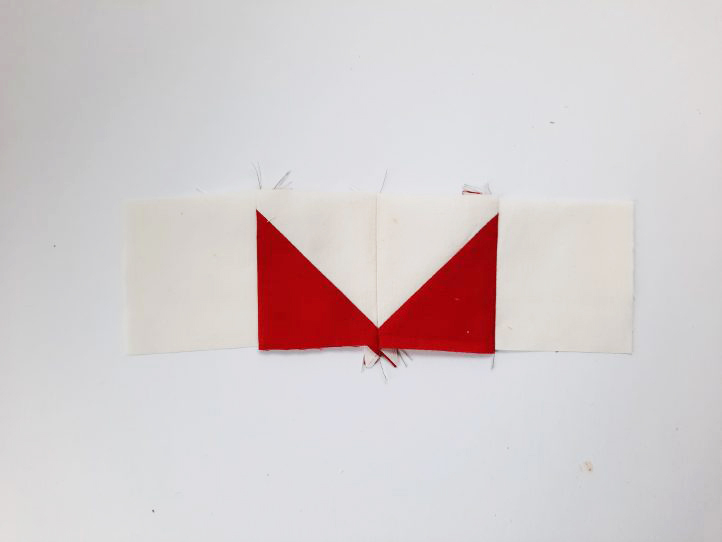
- Press the center seam open as shown, press the outer seam allowance inwards.

- Make Row 2. Join the B/E half-square triangle unit to the Fabric C square, then the Fabric E square and then another B/E unit.
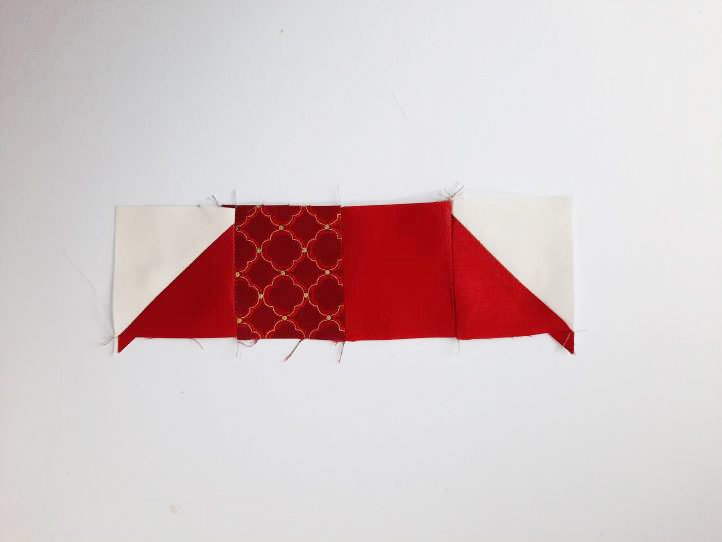
- Press the center seam open, press the outer seam allowance outwards.
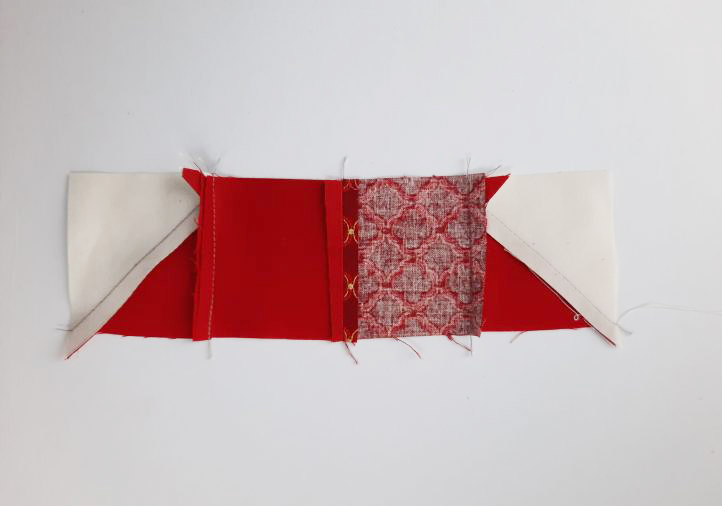
- Make Row 3. Join the B/E half-square triangle unit to the Fabric E square, then the Fabric C square and then another B/E unit.
- Press the center seam open, press the outer seam allowance inwards.
- Make Row 4. Join the Fabric B square to the two B/E half-square triangle units and finally add another Fabric B square.
- Press the center seam open as shown, press the outer seam allowance outwards.

- Join Row 1 to Row 2, pressing the seam allowances downwards. Join Row 3 to Row 4, pressing the seam allowances upwards. Then join the Row 1/2 piece to the Row 3/4 piece and press the seams downwards. Make sure all the vertical seams are aligned.
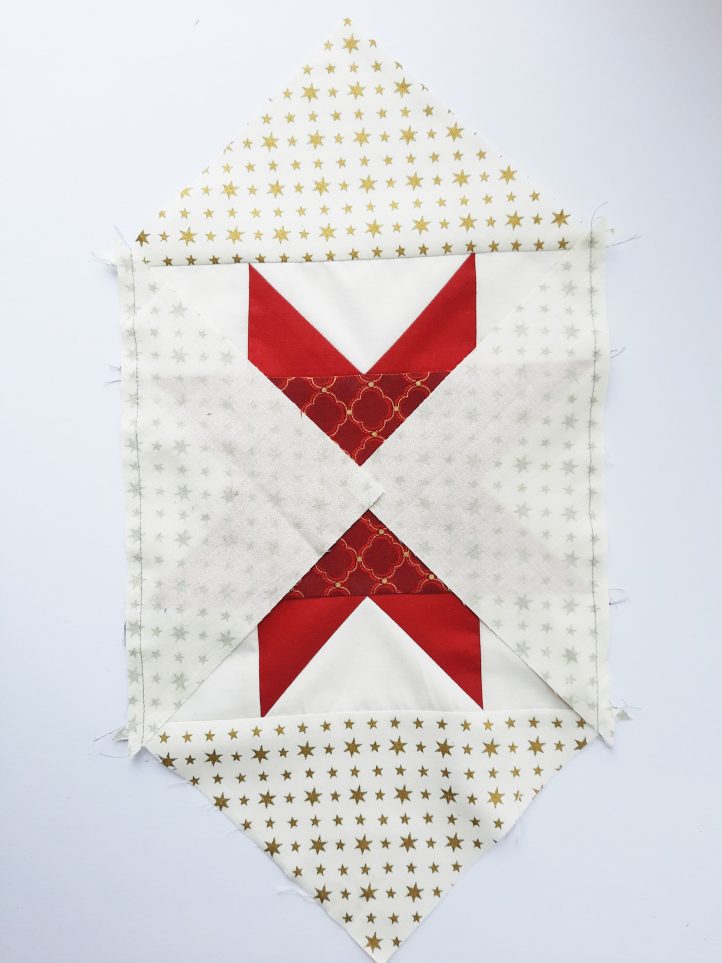
- Repeat Steps 1-4, this time with Fabric A and Fabric D 4 7/8″ x 4 7/8” squares to make eight units. Press the seam allowances to the Fabric A side.
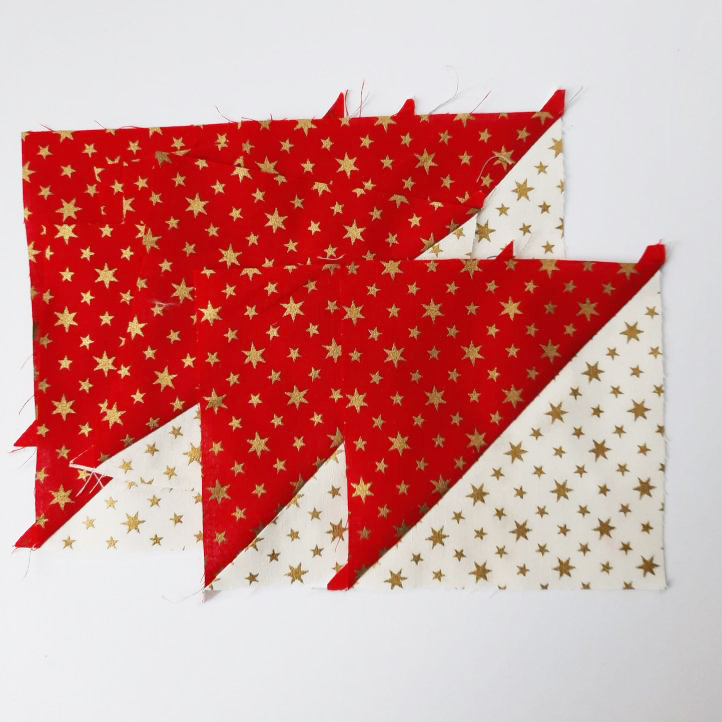
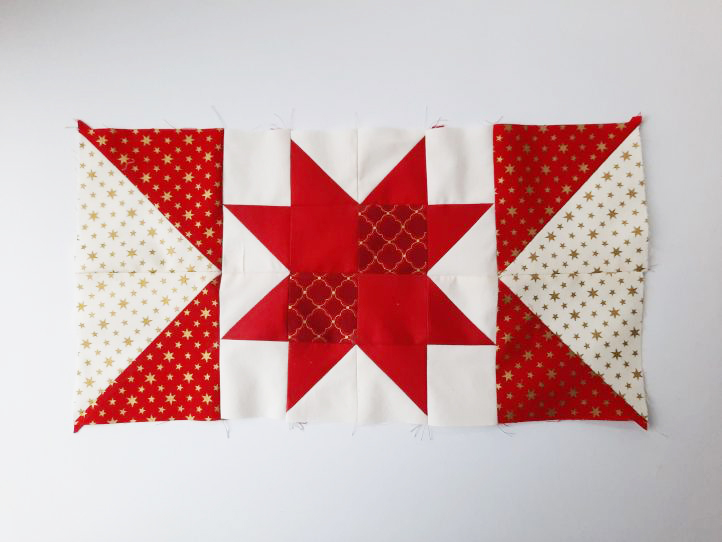
- Lay out the pieces for the outer star around the 8-point star completed in Step 14. Place a Fabric D 4 1/2″ x 4 1/2” square in each corner and two Fabric A/D half-square triangle units on each side of the center square.
- Make Row 1. Join a Fabric D 4 1/2″ x 4 1/2” square to two Fabric A/D units and then add a second Fabric D square.
- Make Row 2. Join two Fabric A/D units together and stitch them to the left of the center star block. Join two more Fabric A/D units together and stitch them to the right of the block.
- Make Row 3. Repeat the instructions in Step 17, then turn the piece through 180 degrees.
- Join Row 1 to Row 2. Then add Row 3.