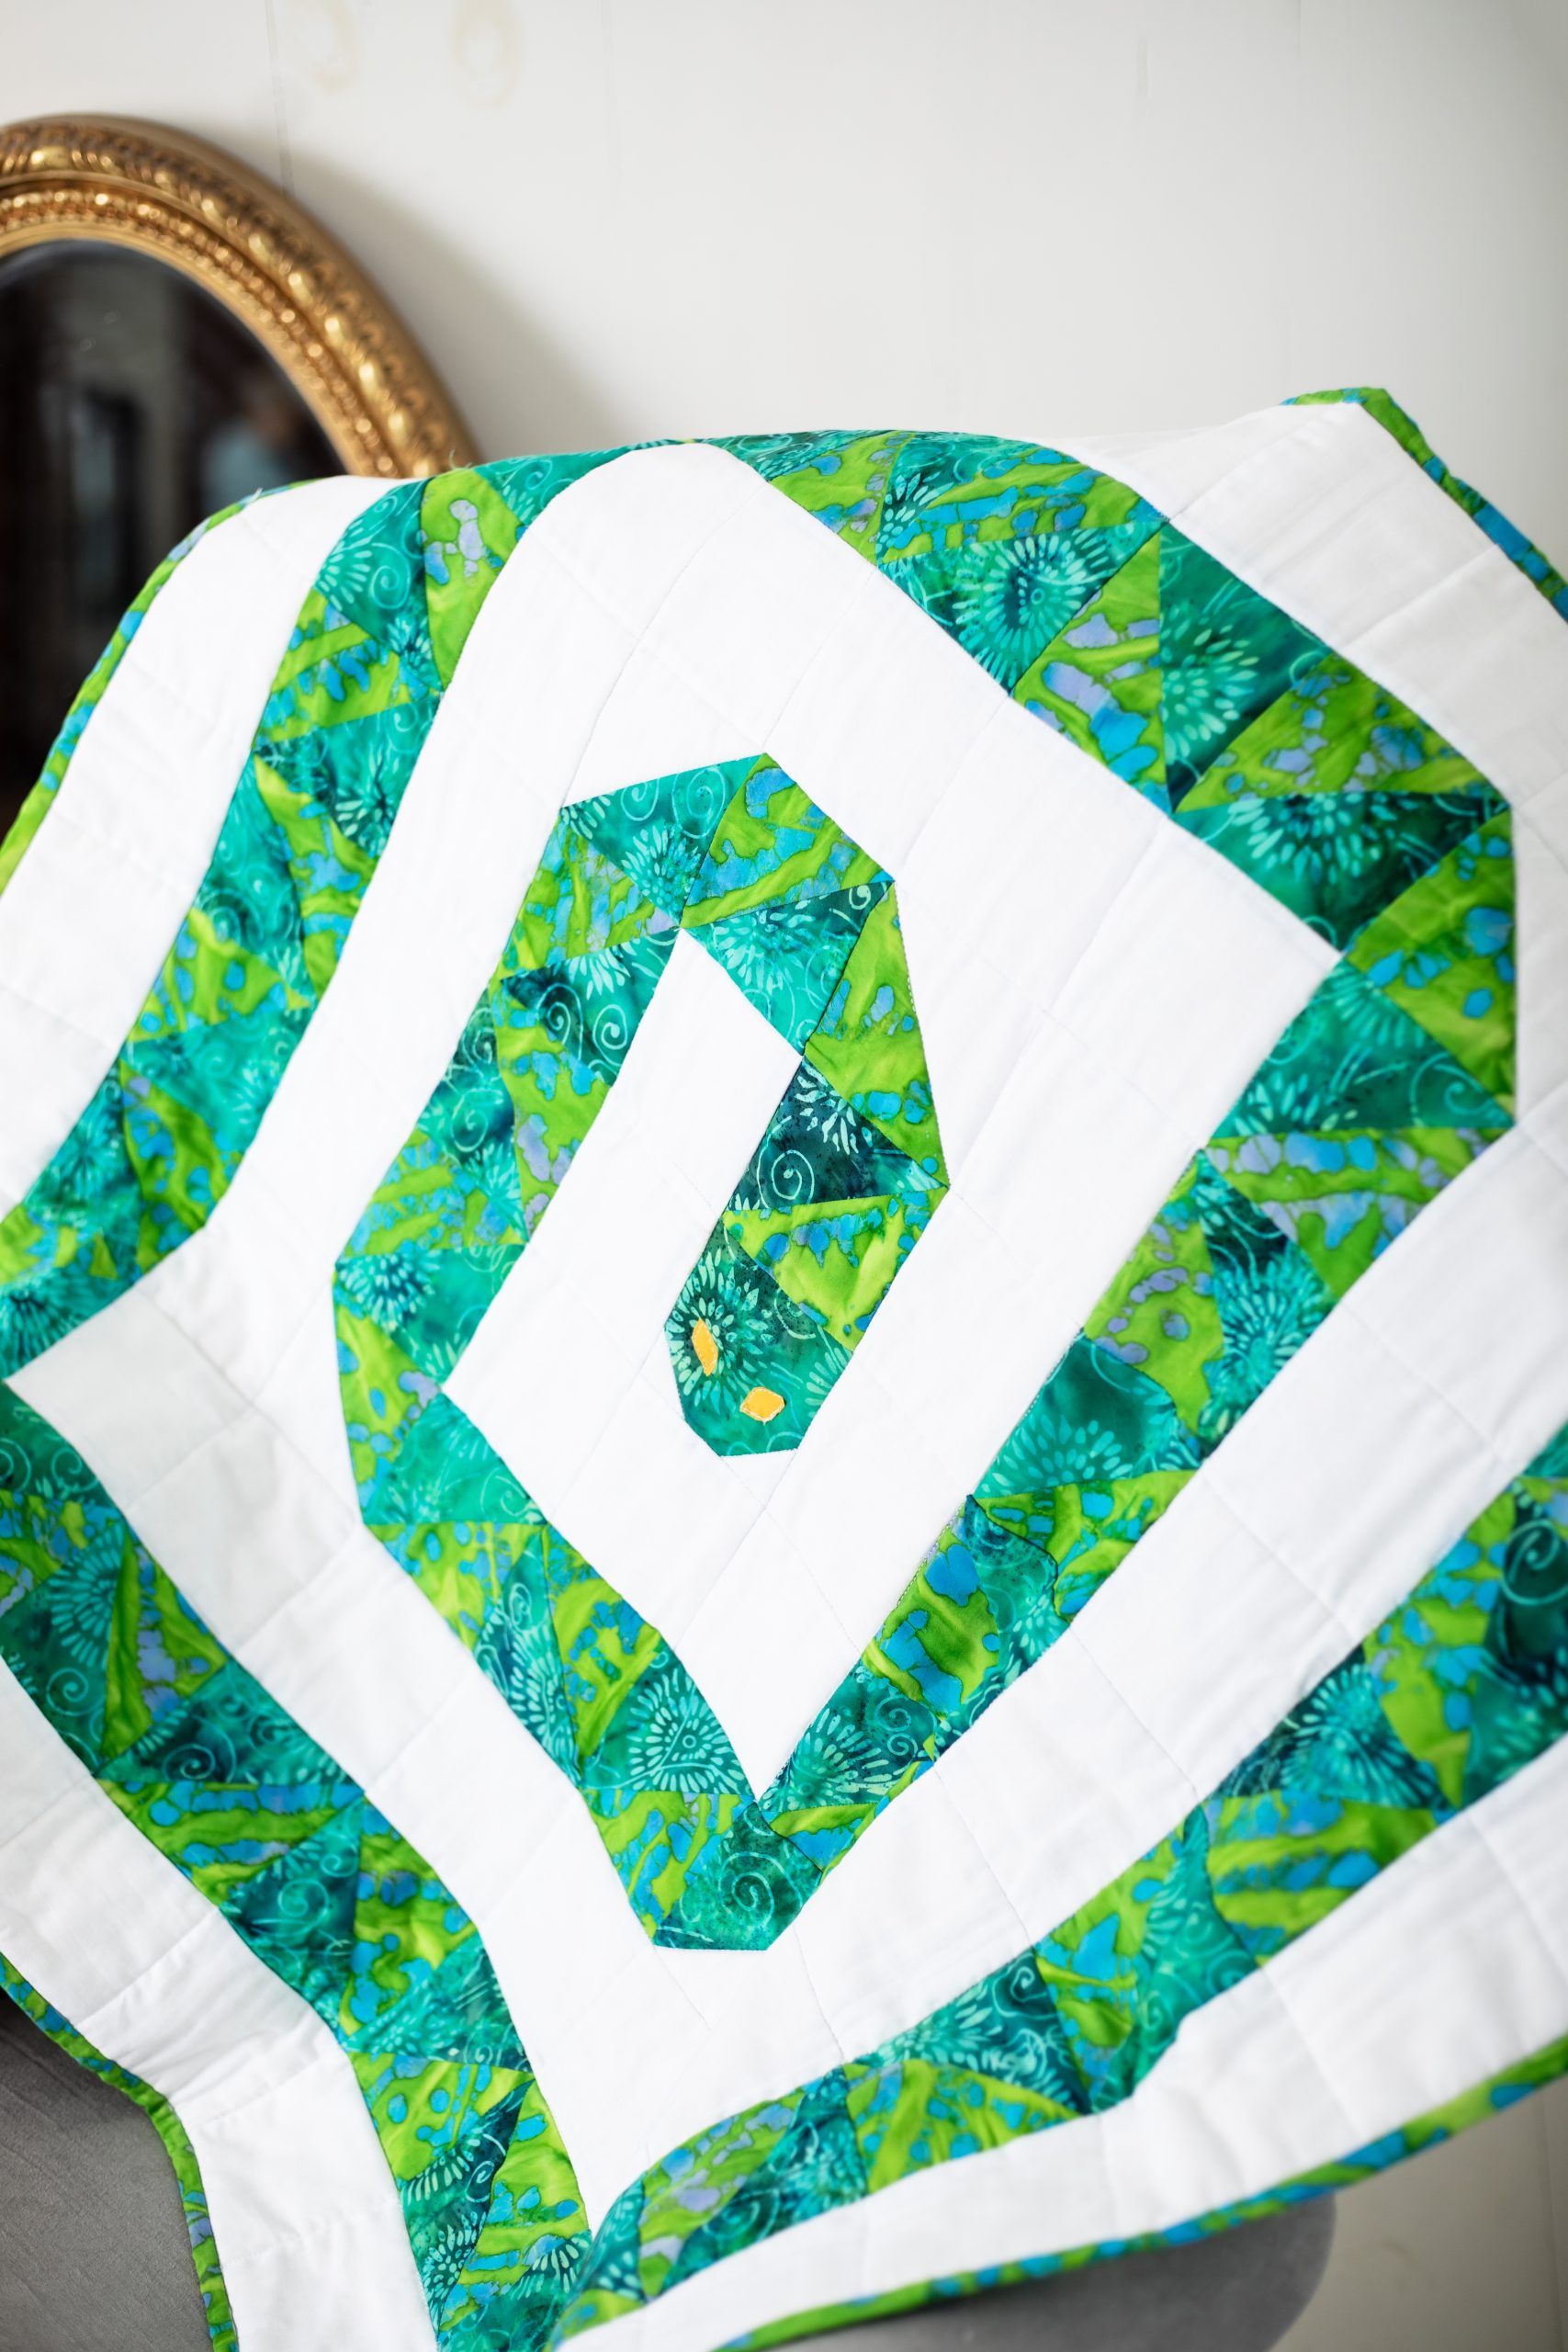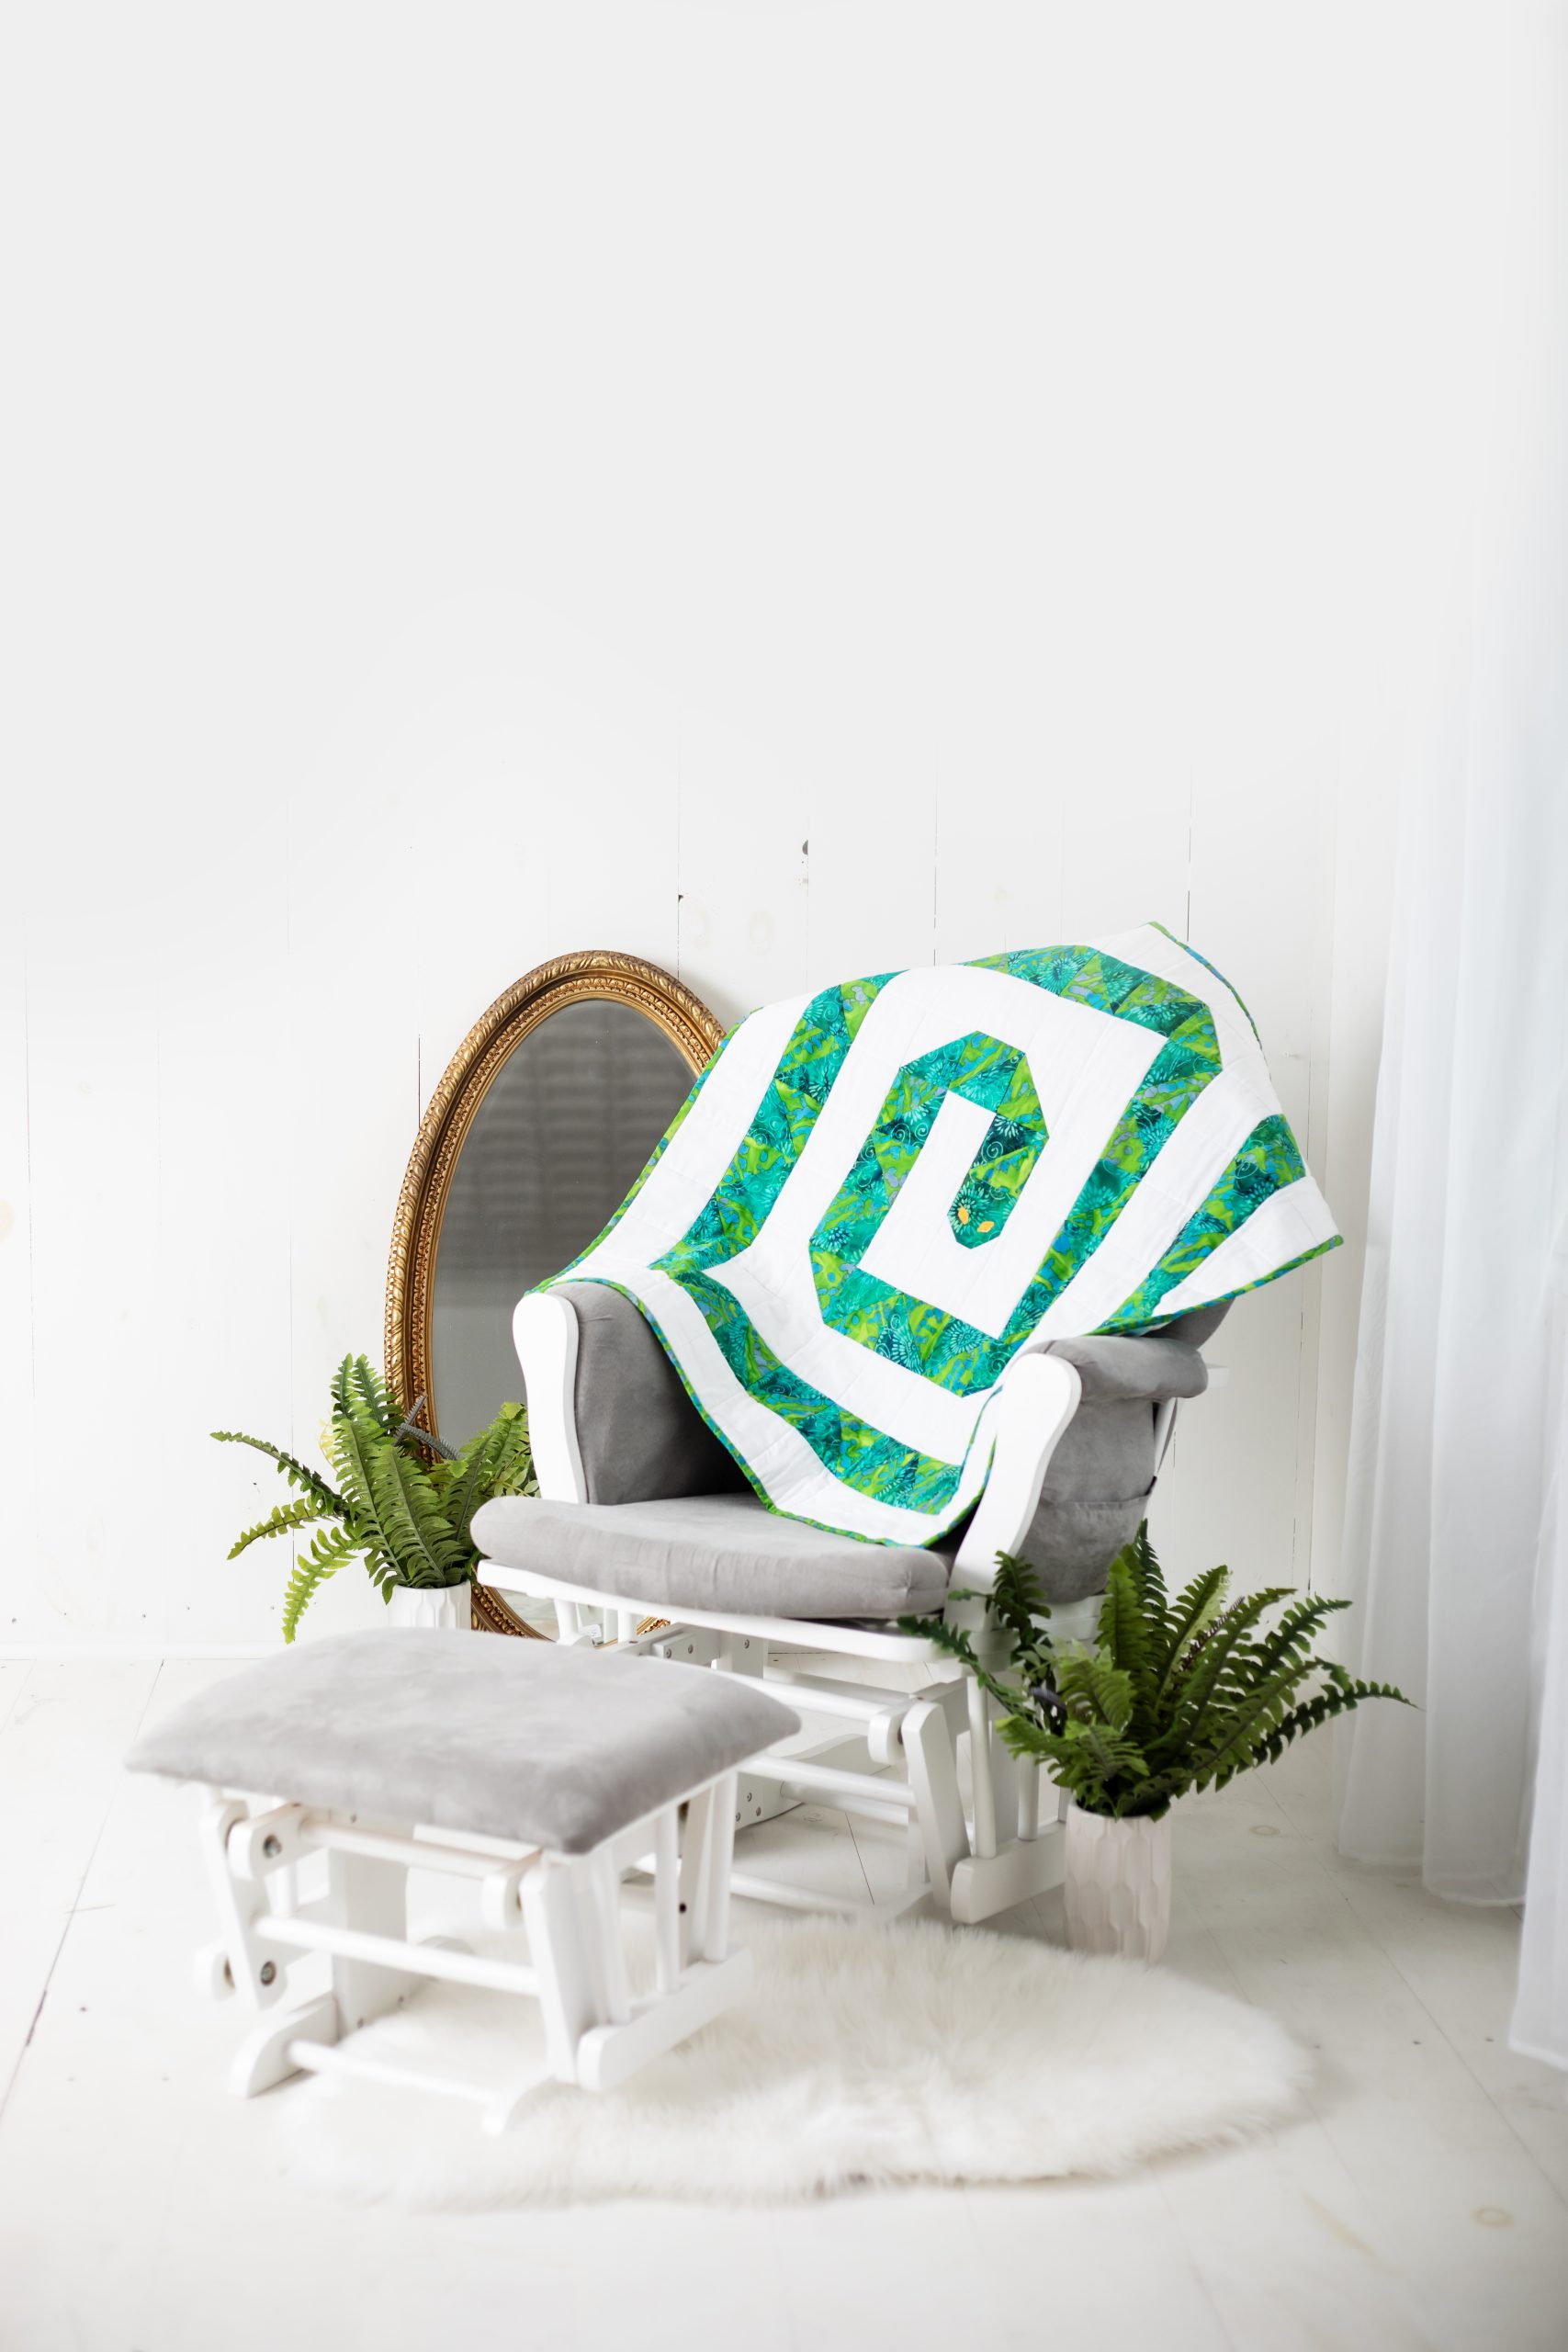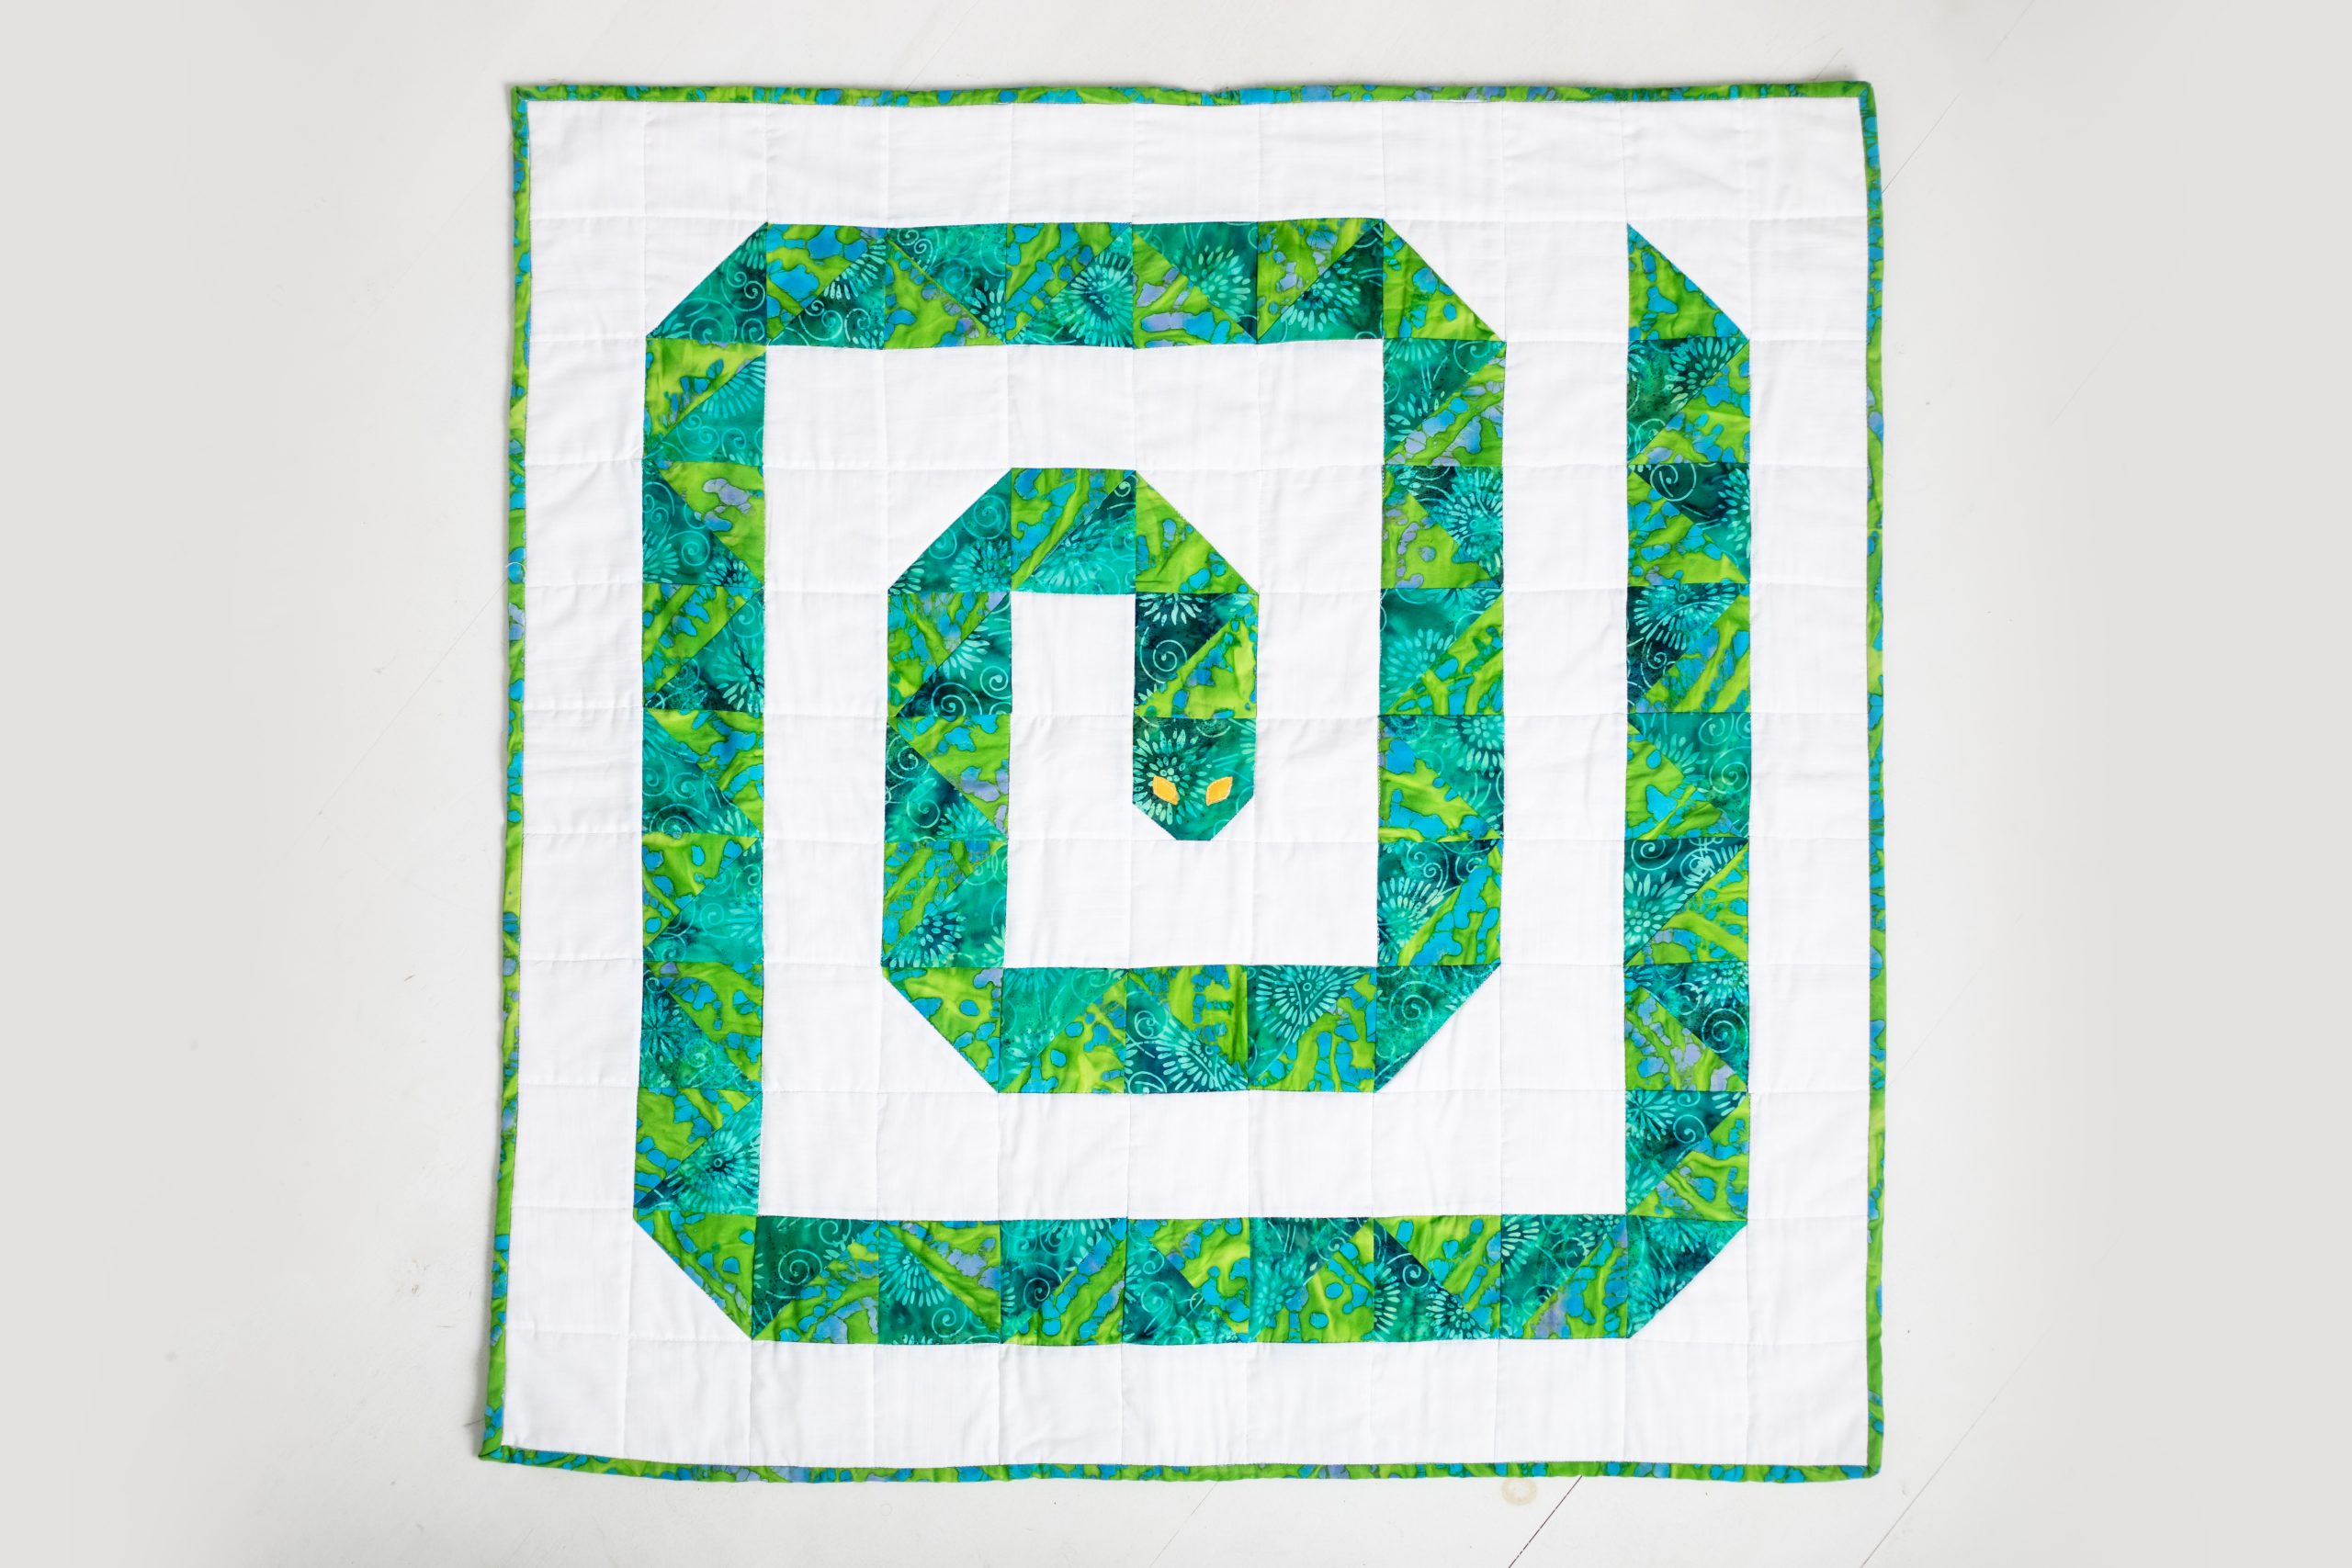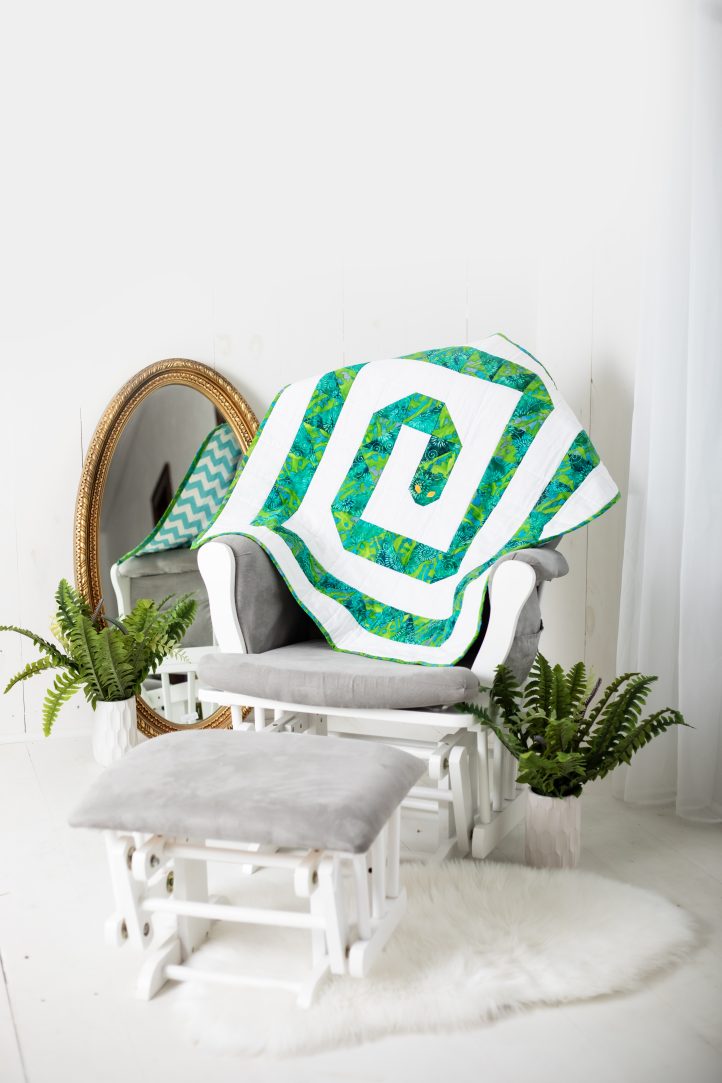
If you’re a beginner quilter who’s ready to take on new quilting techniques, then you’ll love this bold and colorful baby quilt pattern. Featuring a trendy coiled snake design, this summer baby quilt pattern uses simple shapes and a design grid to create its unique look. Using a bright blue-green batik fabric, this snake baby quilt is perfect for woodland, animal, or forest-themed nursery décor.
Skill Level: Easy
Seam Allowances: 1/4”
Finished Size: 33” x 33”
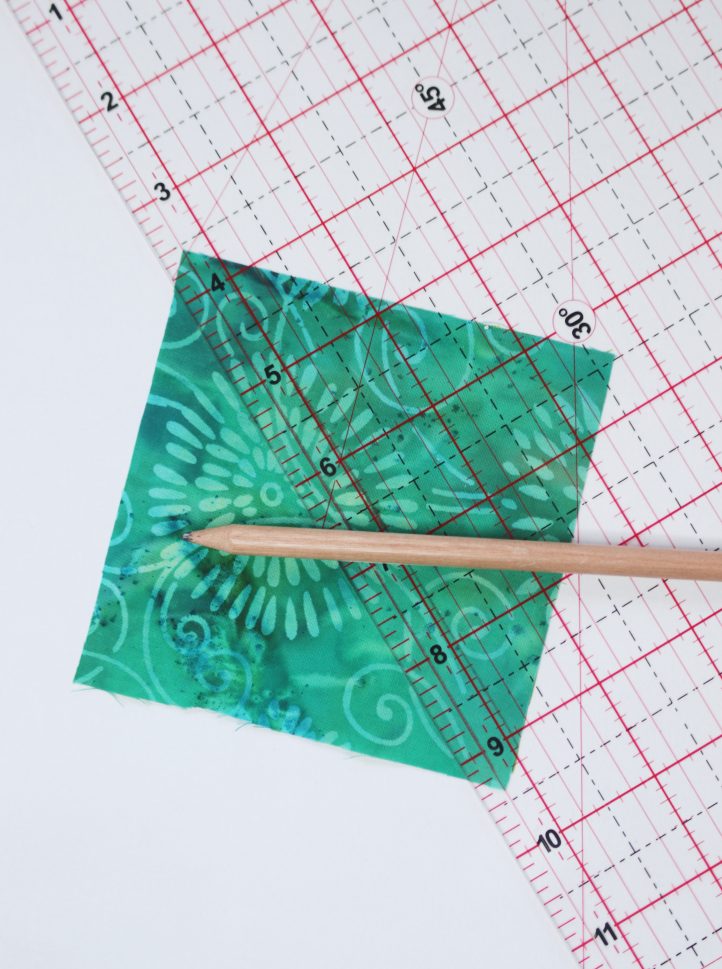
Designer Note: Half square triangles need to be cut slightly larger than regular quilt squares, to accommodate for the diagonal seam that runs down the middle of each pair. You can technically get away with cutting your HST squares 3/8” larger than the intended finished HST size, but we’re erring on the side of caution and cutting ours slightly bigger to begin with, at 4” square. We then trim them down to 3 1/2” square when finished to ensure an accurate fit.
Materials:
- Fabric: Two shades of green batik-dyed cotton, white cotton, and blue and white chevron cotton, 1 yard of each; plus, a small scrap of yellow cotton for the eyes
- Sewing thread: White, forest green, yellow
- Fusible webbing: Scraps
- Quilt batting: 1 yard
- PDF Template – This is located at the bottom of this page. Please see printing instructions below.
Tools:
- Rotary cutter and mat
- Pencil
- Iron
- Ruler
- Pins or clips
- Sewing machine
- Sewing needle
PRINTING INSTRUCTIONS:
Note: To download the template, click on the pattern download button at the bottom of the page. We recommend opening your pattern download using Adobe Acrobat.
Instructions:
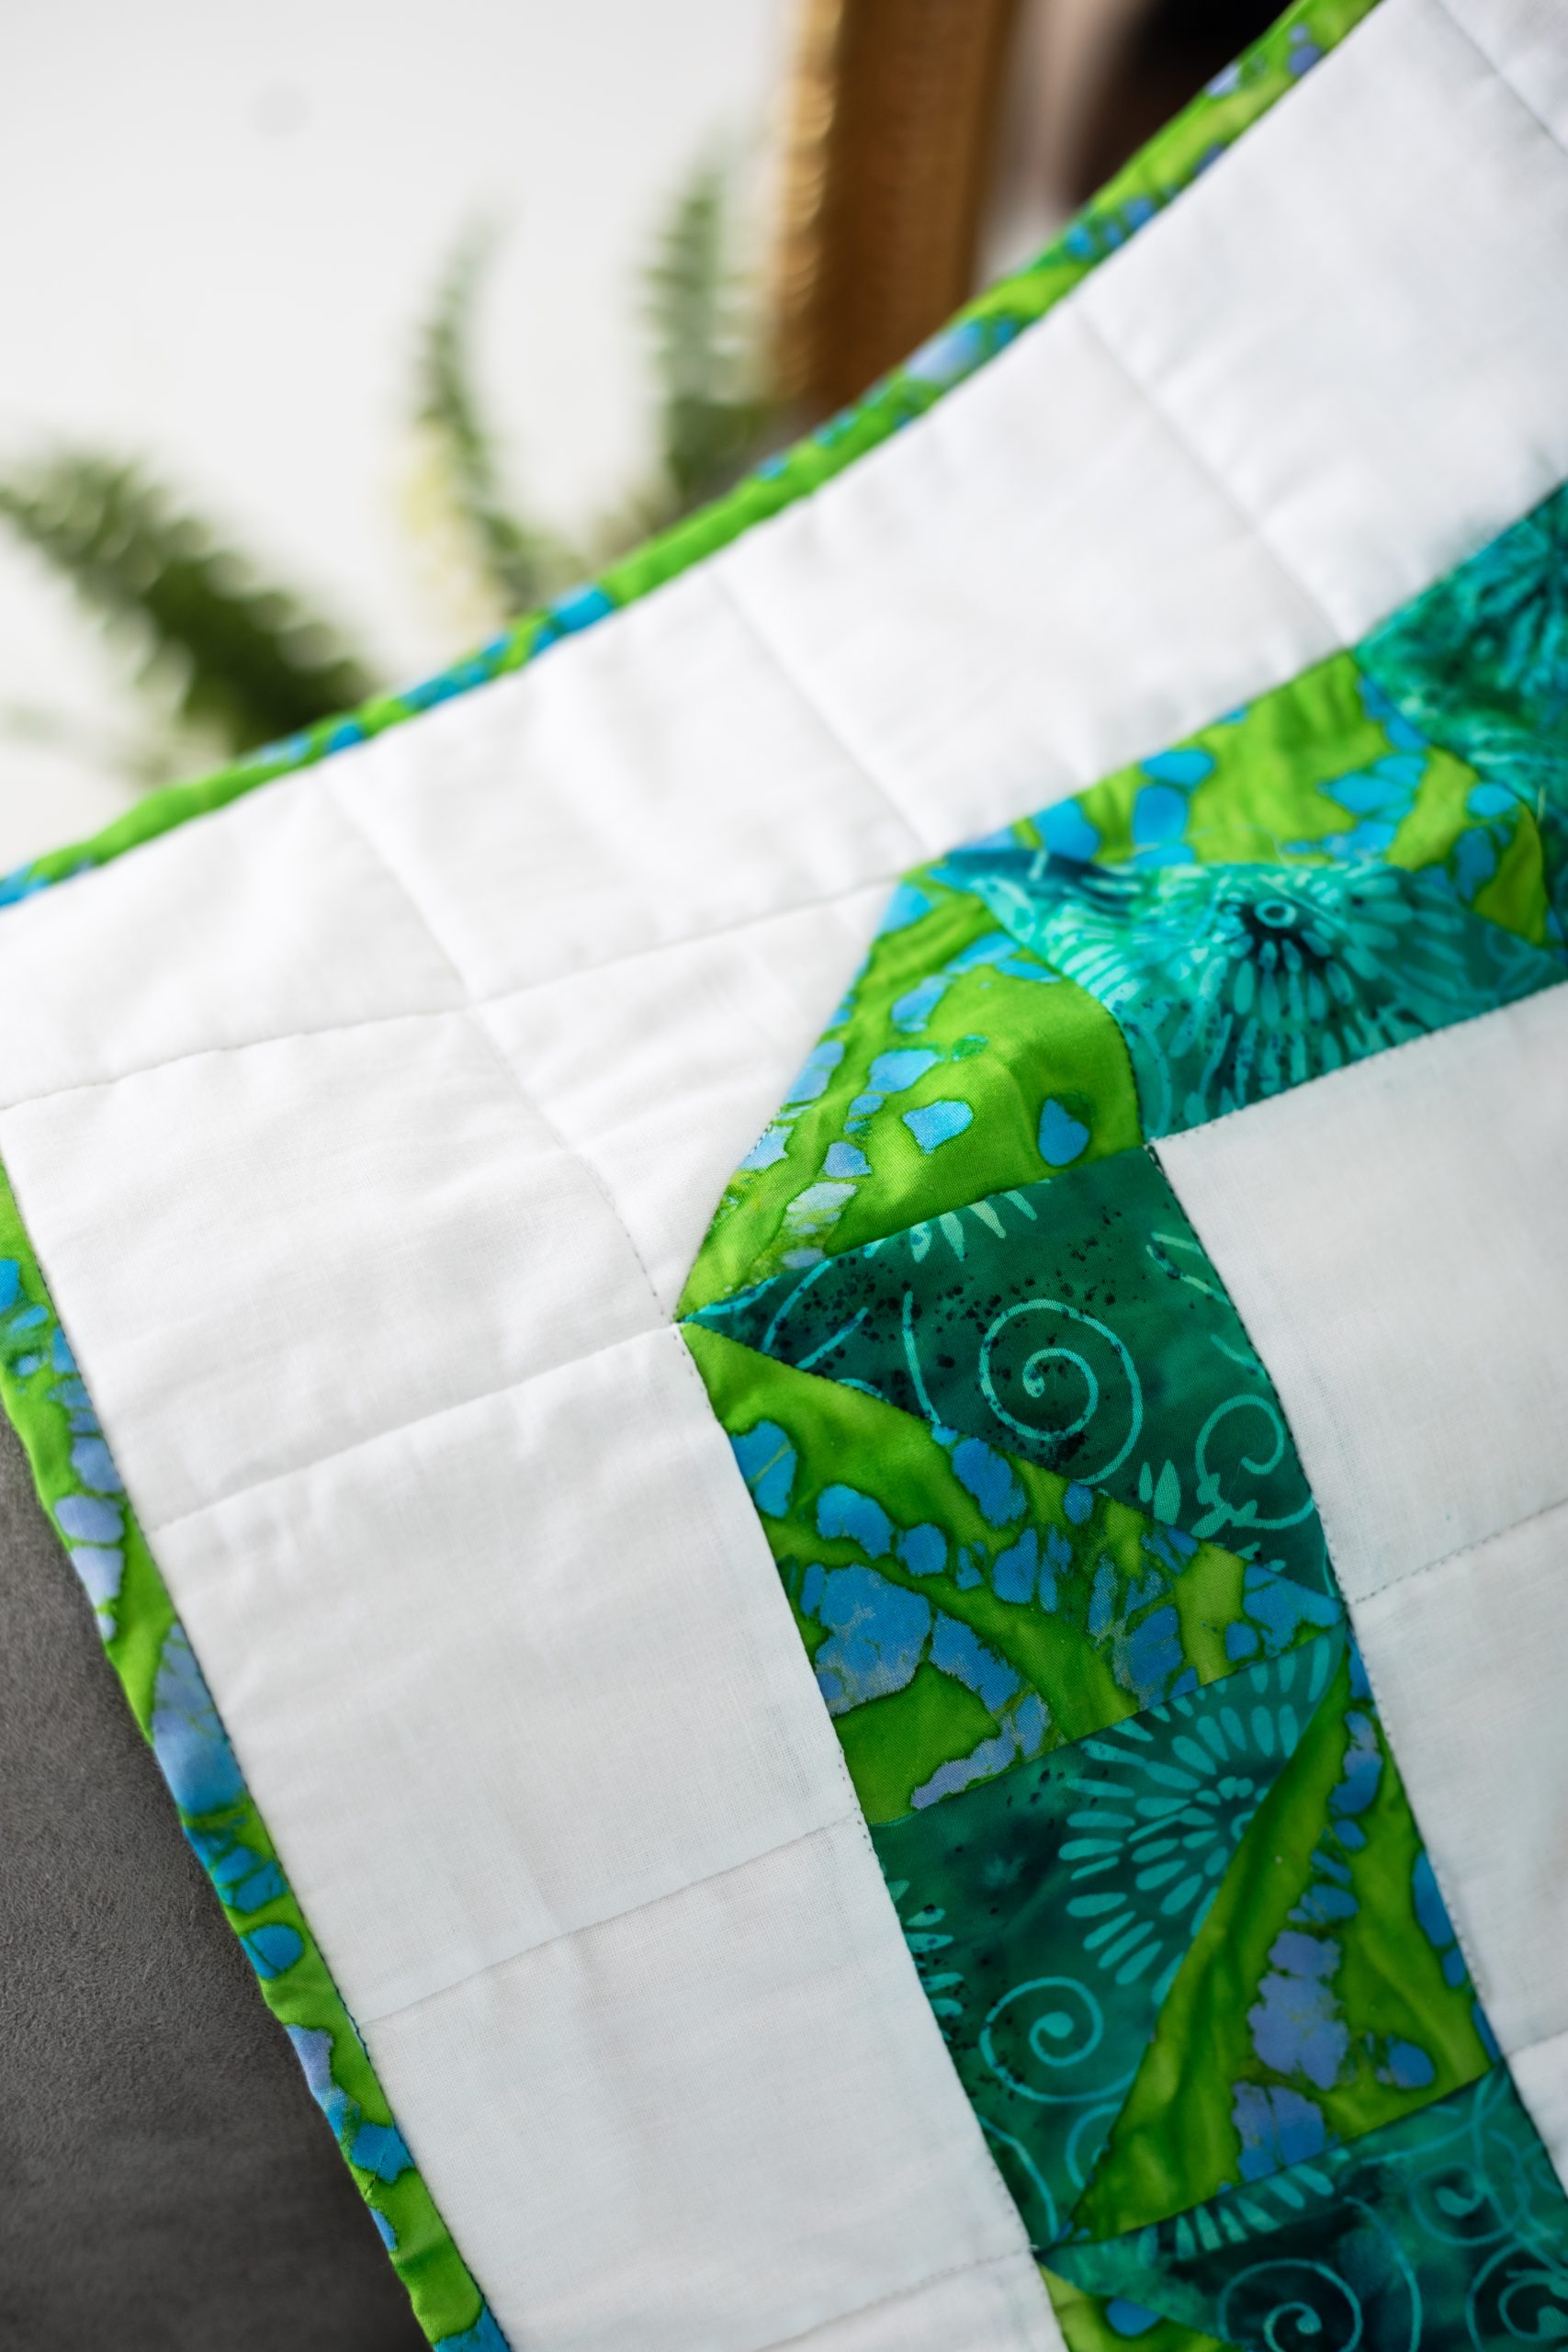
- Begin by cutting out your patchwork pieces using a rotary cutter and mat. This quilt is created from a mixture of 3 1/2” squares and half square triangles (HSTs)*. To start with, from white cotton cut 72 3 1/2” squares, and five 4” squares. Then, cut 24 4” squares from dark green cotton, and 23 4” squares from light green cotton.
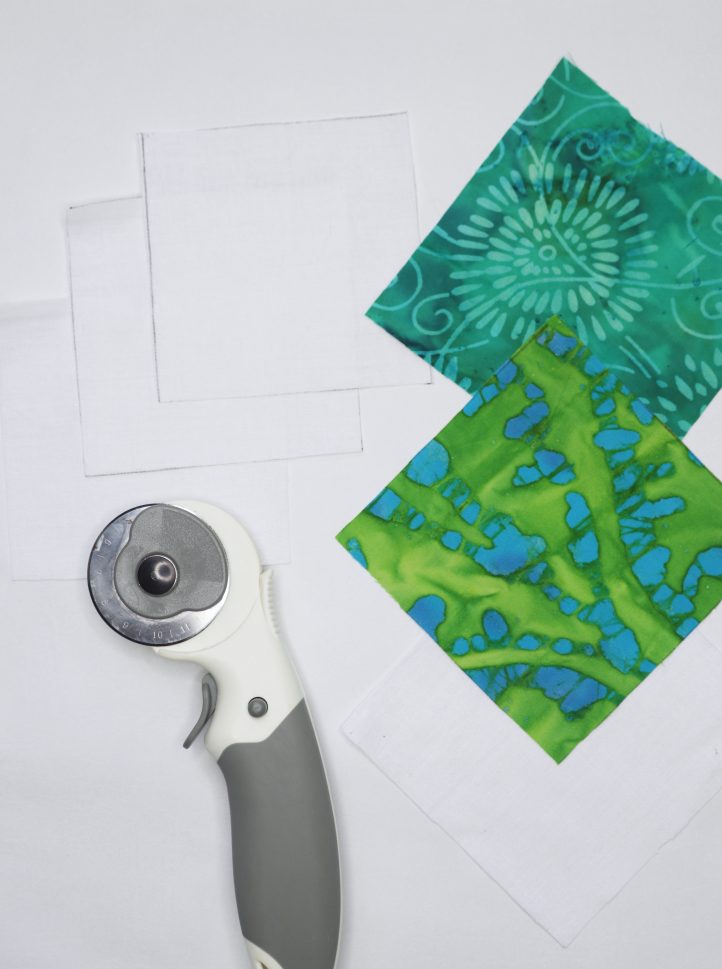
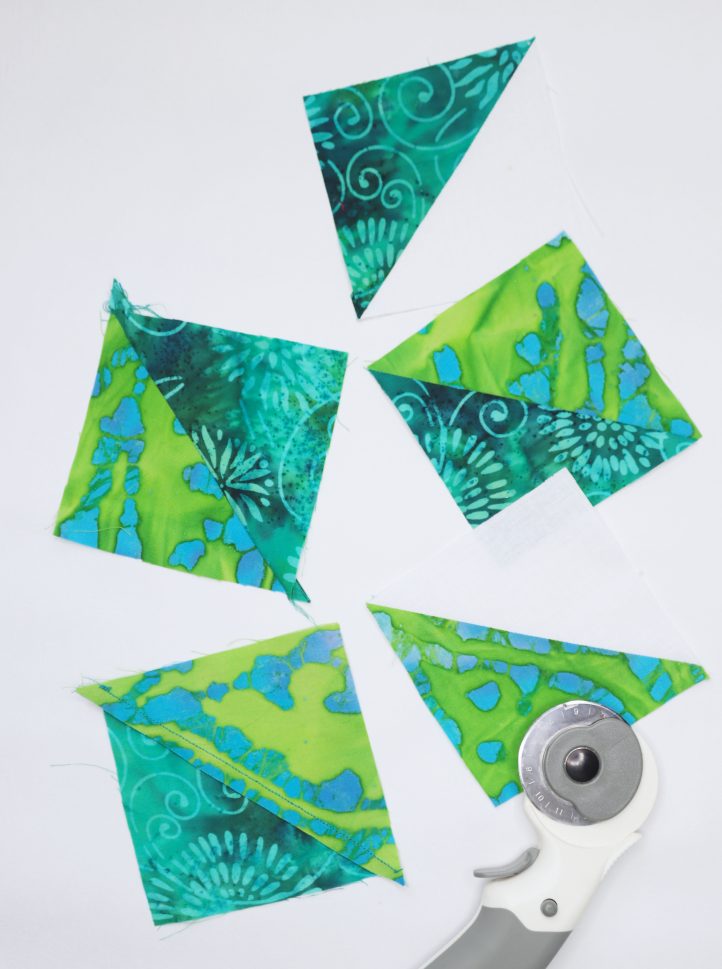
- Next, create your HSTs. You’ll need to make five light green/white HSTs, four dark green/white HSTs, and thirty-nine dark green/light green HSTs. To start with, we’ll make the green/green ones. Take one dark green square and one light green square and place them together with right sides facing. Use a ruler to draw a diagonal line across the shape from corner to corner, then two parallel lines, each a 1/4” out from the central diagonal line.
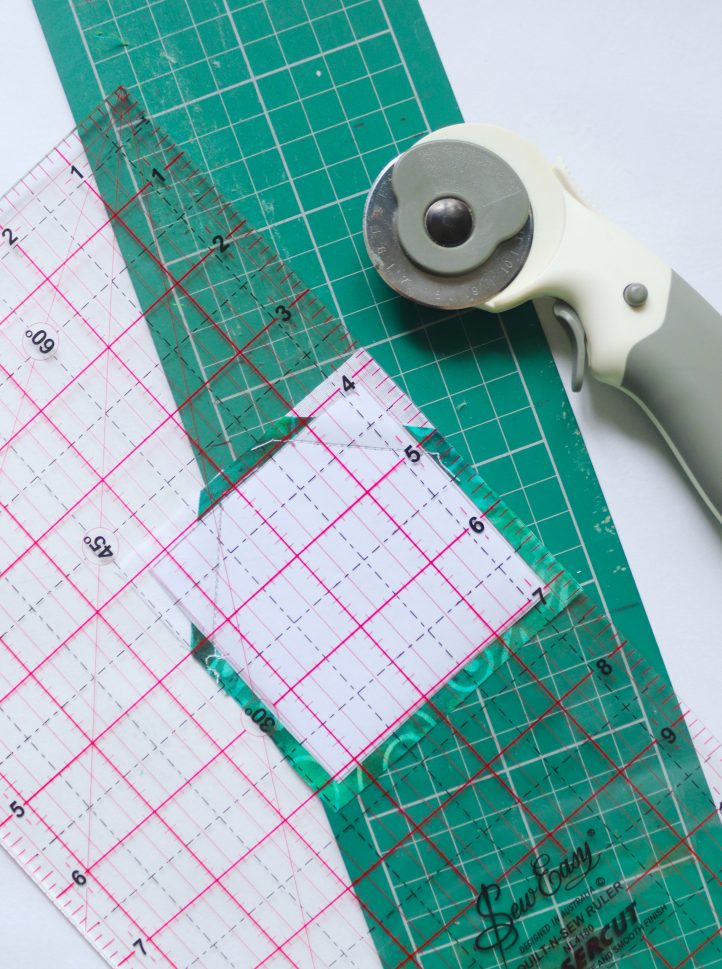
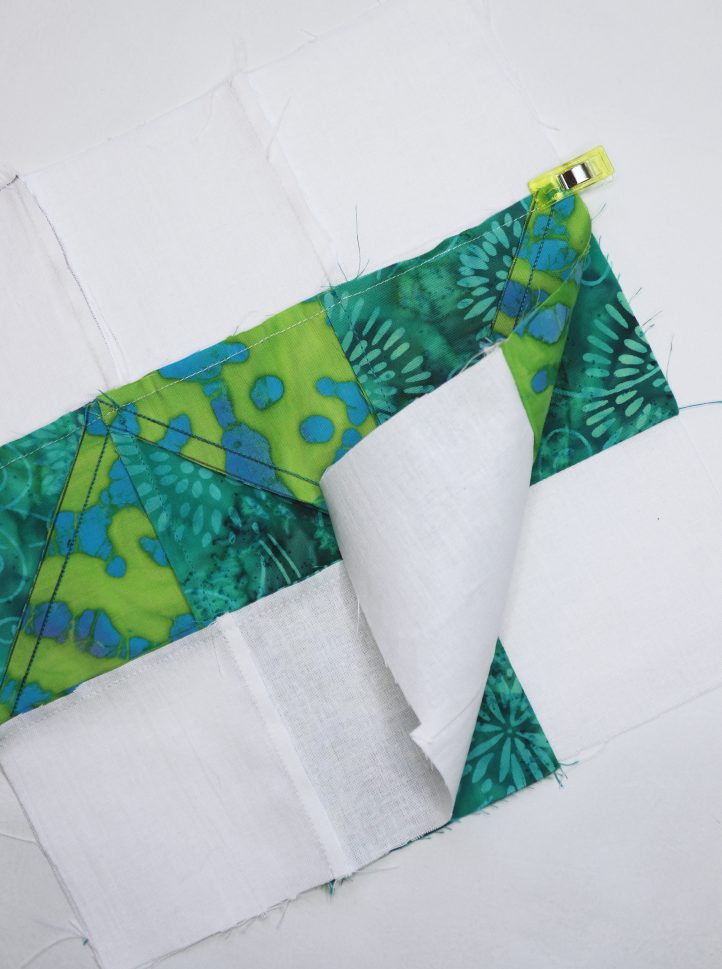
- Work a straight machine stitch down each of the outer lines. Cut along the central line, to split the work into two triangles. Open each triangle out along the seam and press, to reveal two finished HSTs – it’s as simple as that! Repeat these steps to make all of your HSTs, then trim each one down to exactly 3 1/2” square using a rotary cutter.
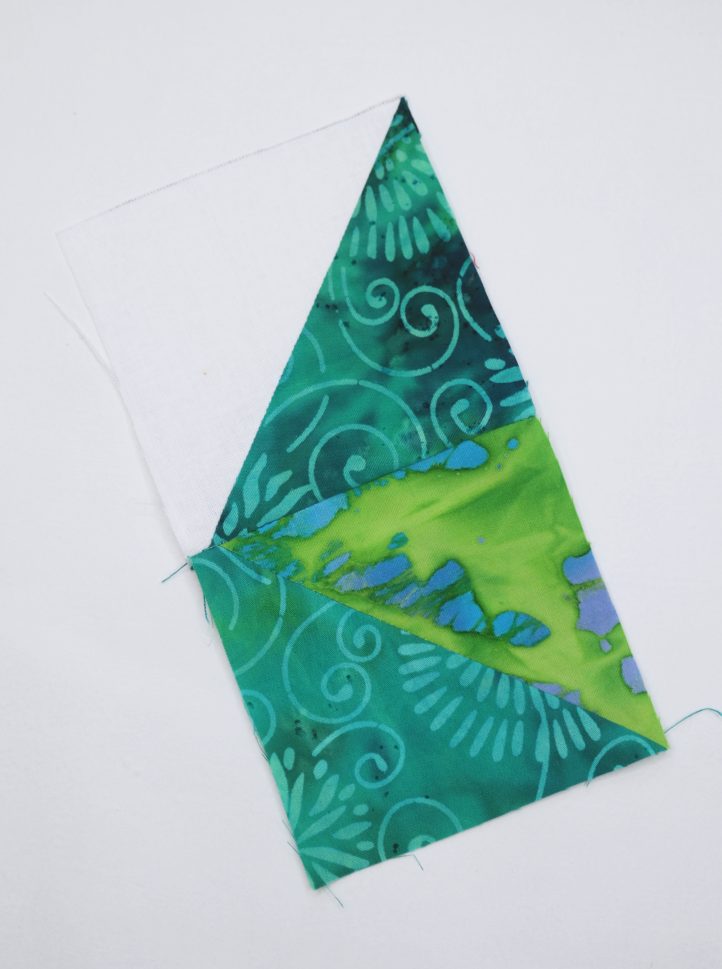
- Next, you need to make your snake’s head using the paper piecing method. Download and print the Snake Head template, then take a dark green 4” square and place it against the back of the template, with the right side of the fabric facing out. Take two small scraps of white cotton and place each one over parts 2 and 3 of the template (with the right side of the white fabric facing the right side of the green fabric), then stitch along each of the diagonal seams between the green and white parts of the template. Trim the seam allowances back to 1/4”, then open the work out and press. Finally, trim the square down to 3 1/2”.
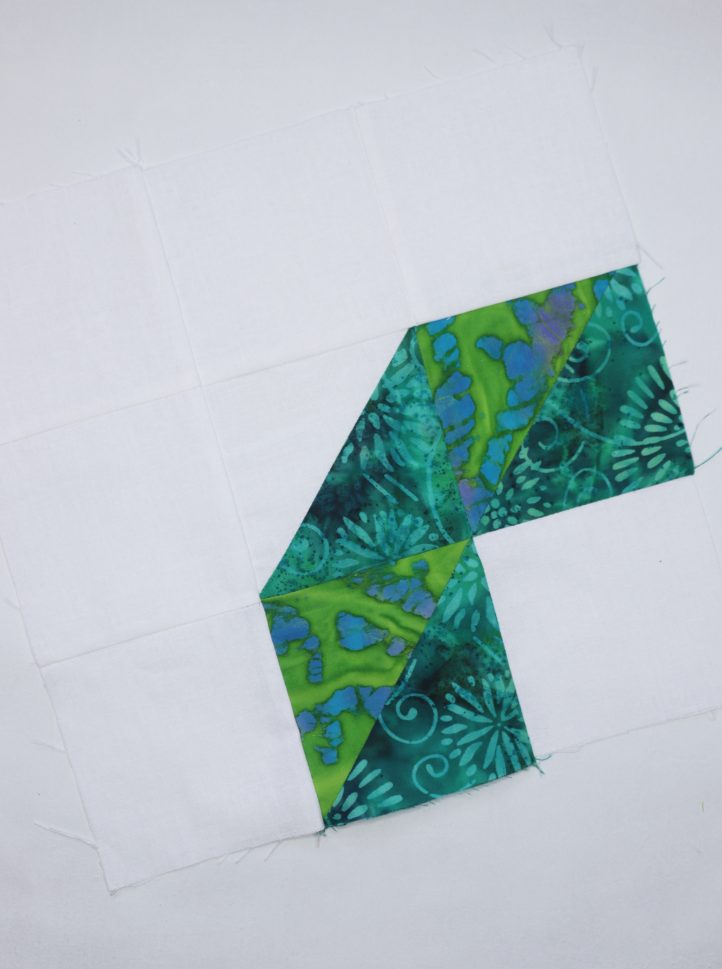
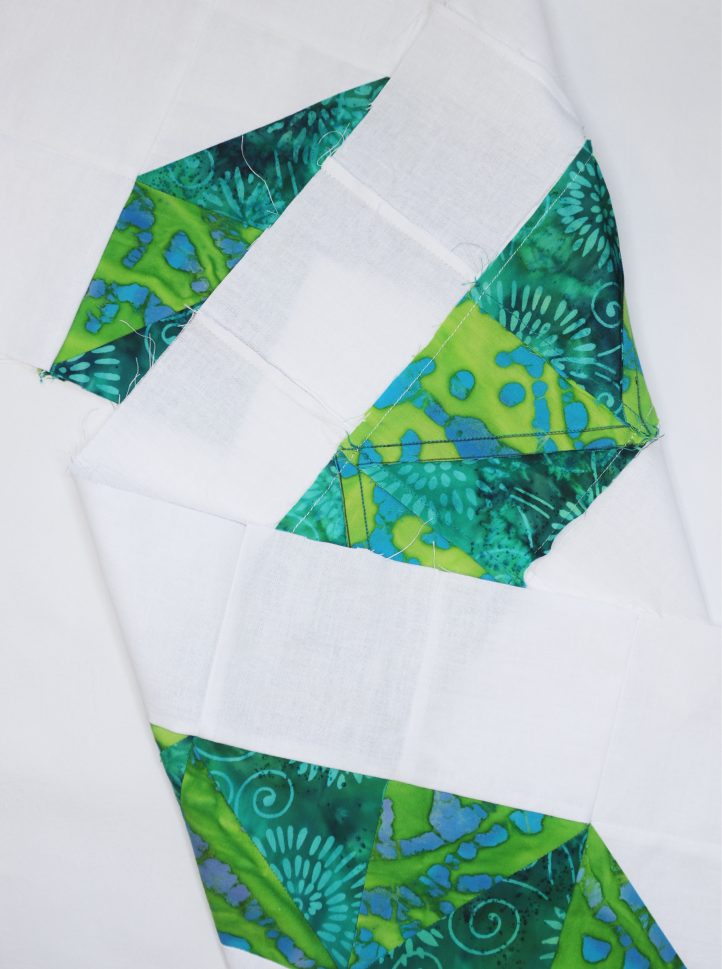
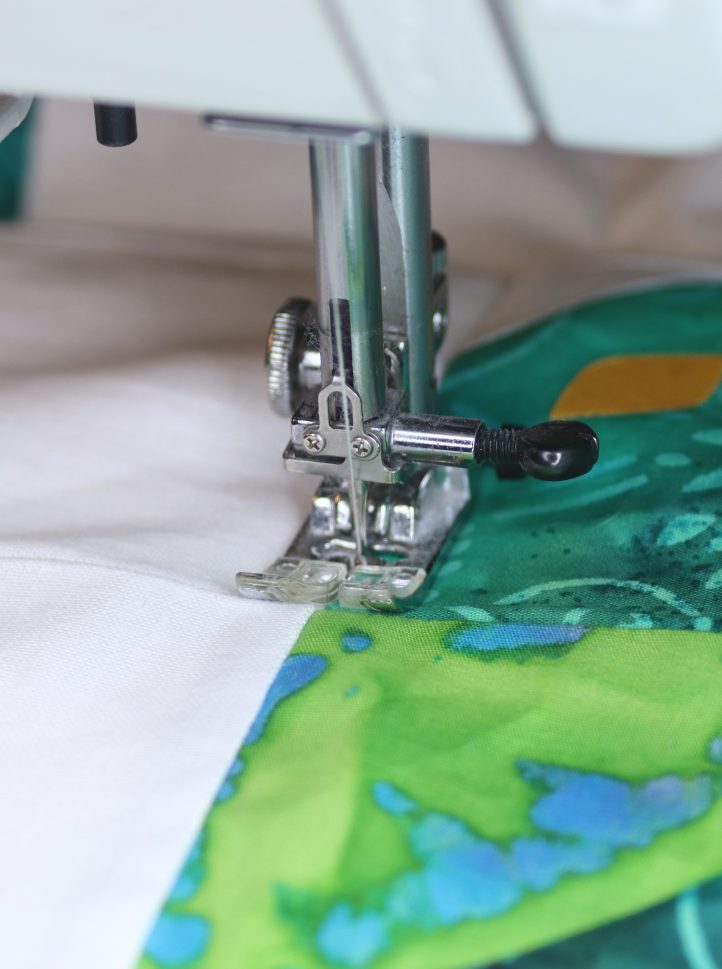
- To make construction easier, we’ve split our quilt top into blocks – see our diagram below. The black lines show the individual squares and HSTs, and the pink lines denote where each block starts and finishes. You’ll work on one block at a time, starting with Block 1. (Note: See printable diagram at the bottom of this pattern). Begin by placing two of your Block 1 squares or HSTs together, then stitch along the side that joins them, leaving a 1/4” seam allowance. Once stitched, open the squares out and press.
- Continue to stitch your Block 1 squares together until the entire block is constructed. Press the work, taking the time to set all the seam allowances in the same direction if possible. Once you’ve finished Block 1, move onto Block 2, Block 3, and so on until every block is complete.
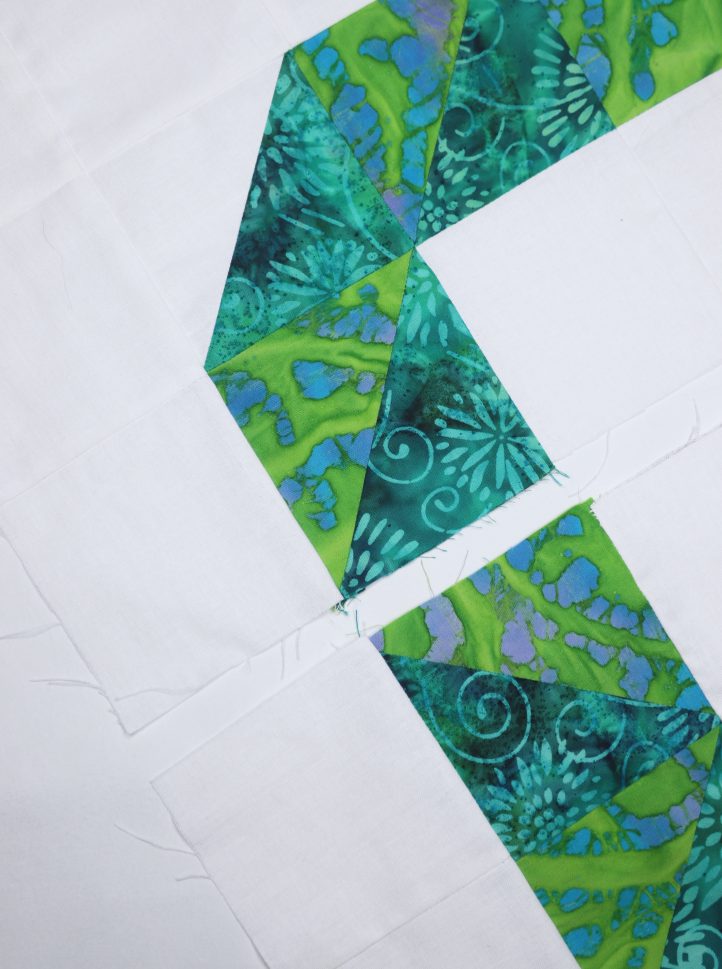
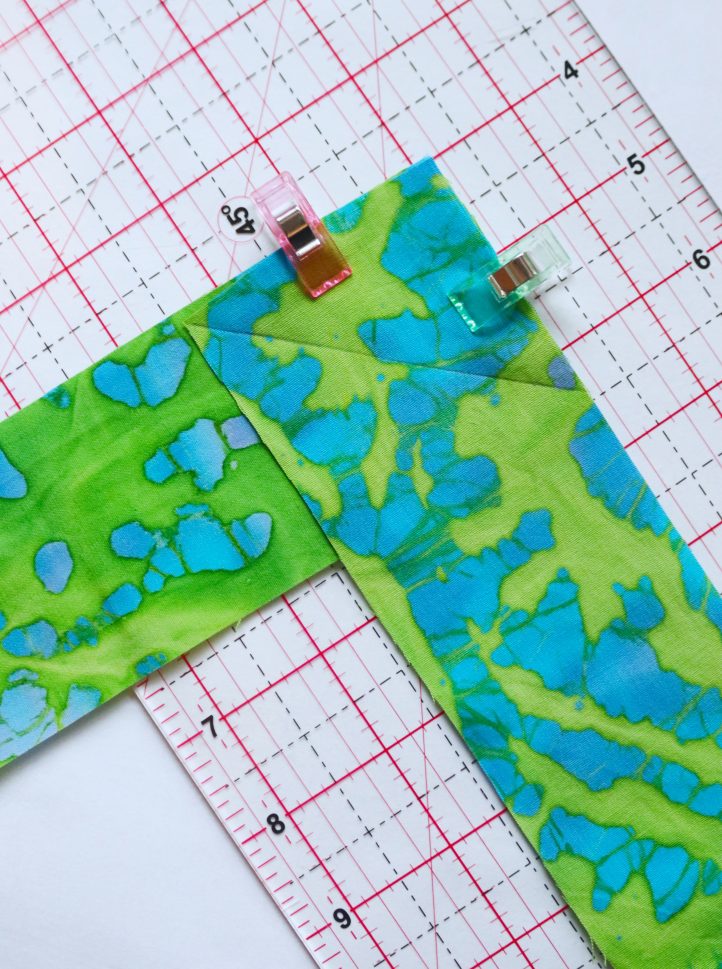
- Now it’s time to start joining your blocks! Take Blocks 1 and 2 and place them together with right sides facing, taking the time to ensure the seam lines match up across each one. Pin or clip into place then stitch along the edge that joins them with a 1/4” seam allowance, and press.
- Continue to stitch the blocks together, until Blocks 1-4 have been joined into a row. Repeat, to join Blocks 5-8 together into a second row, then Blocks 9-12 in a third, and finally Blocks 13-16 into a fourth.
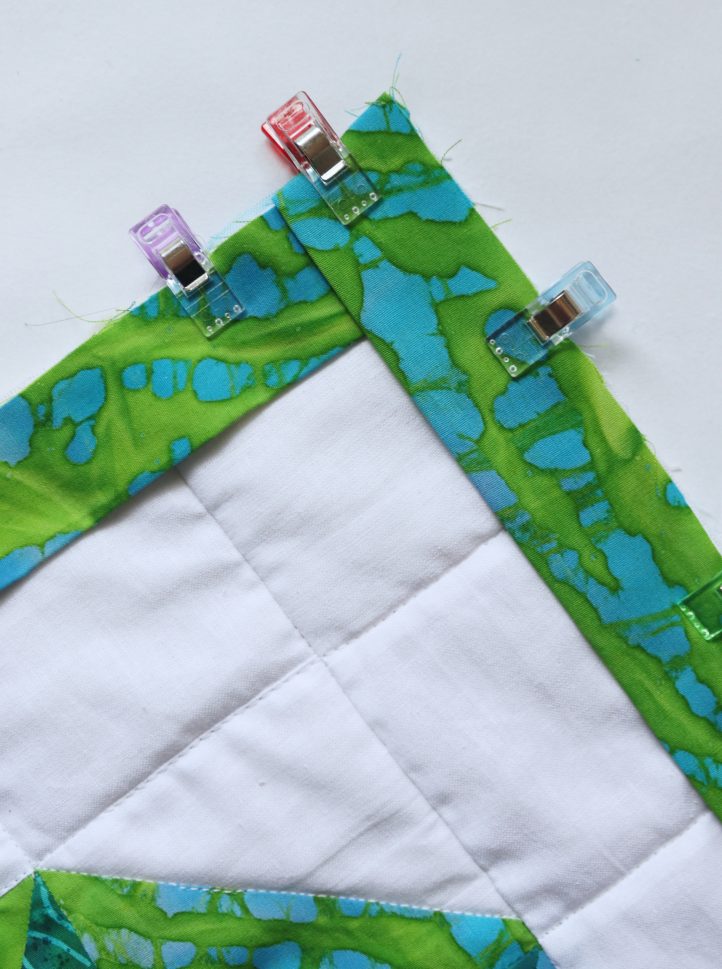
- Now, it’s time to join each row of blocks together to finish the quilt top. Line the top row of blocks up with the one below, with right sides facing. Clip or pin into place then stitch, leaving a 1/4” seam allowance. Repeat until all your blocks have been joined together, to create a 33” square quilt top.
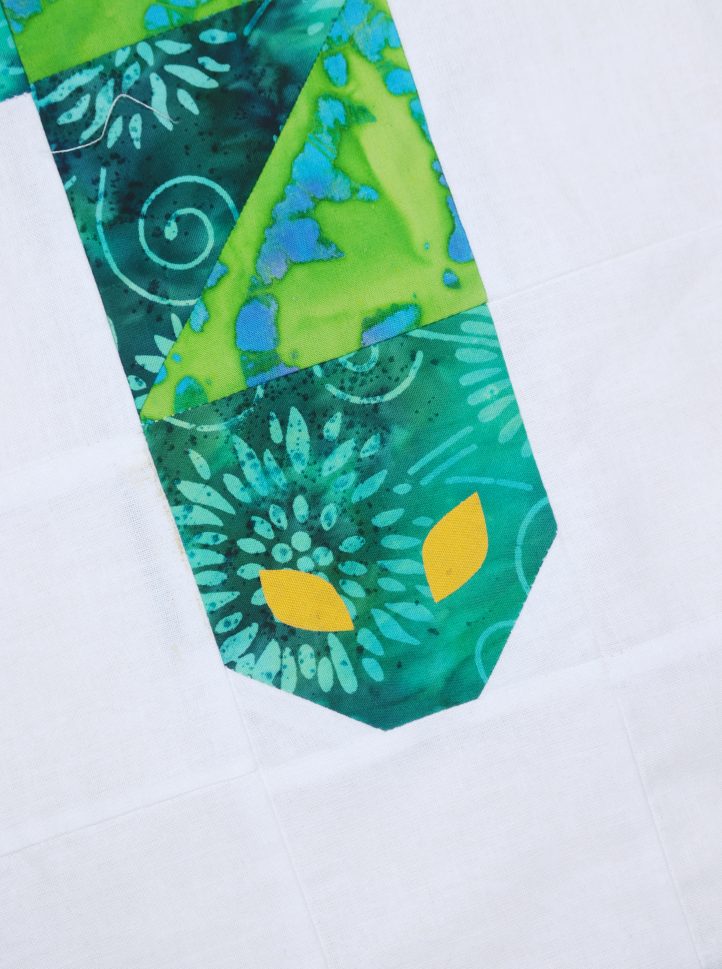
- Add fusible webbing to the back of your yellow cotton scrap and cut two eye shapes from it. Place them into position onto the snake’s face, then press to fix them to the work. Hand stitch around the edge of each eye using yellow thread.
- It’s time to join your quilt layers. On a large work surface (a clean floor will do if you don’t have a table big enough!), lay out your backing fabric with the right side facing down, ensuring it is smooth and without any wrinkles. Place your quilt batting on top of it, again making sure it is flat and smooth. Finally, add your snake quilt top, with the right side facing up. Clip or pin all three layers together.

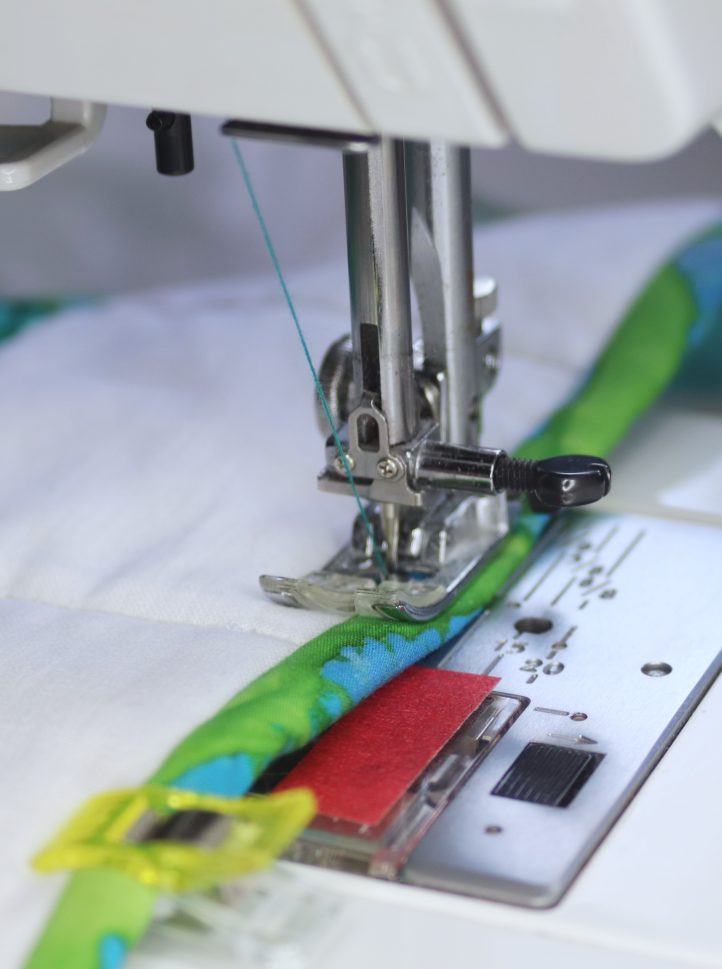
- Quilt the layers together. To do this, we kept things simple by stitching-in-the-ditch – that is, top stitching along each seam line, which conceals the quilting stitches within the existing seams for a really neat finish. Start from the center of the quilt and work your way outwards, making sure to match your thread to your fabric, using white thread when working over the white squares, and green thread when stitching over the green snake. Continue until you’ve stitched over every single seam, and the entire work is quilted. Now, lay the quilt out flat and trim away any excess backing fabric and batting from around the edge, so they are the same size as the quilt top.
- Make your quilt binding. Measure the circumference of your quilt – it should be around 132”, so you’ll need around 150” of binding (we’ve included a little excess to cover the mitered corners, the join, and any potential errors!). To make your binding, cut several long 2 1/2” wide strips from one of your green fabrics. Join them together into one long strip by placing the ends of each together at right angles (with right sides facing) and stitching diagonally across the join. Trim the seam allowance down to 1/4” then press each seam flat to reveal one long, continuous strip. Trim the strip so that it measures 150” in length.
- Fold your binding in half with the right sides facing out, and press. Starting in the middle of the bottom edge, measure out around 5” of the folded binding (leave this unattached for now), then begin to clip the strip along the edges of the quilt, aligning the raw edges of both the binding and the quilt top. When you reach a corner, fold the binding upwards and then back down onto itself, to create a miter and change the direction. Continue to clip the binding all the way around the quilt edge until you reach the point you started. Leave another 5” of binding unclipped, then trim any excess away. Stitch the binding into place with a 1/4” seam allowance, leaving the first and last 5” of the clipped binding unstitched, in addition to the 5” extra you left unclipped at each end. Take the two unattached ends of the binding and measure and mark the point they meet along the edge of the quilt. Clip and then stitch them together at the mark, with the right sides facing. Trim away the excess seam allowance and finally, sew the joined binding to the edge of the quilt to create a neat finish.
- Your binding should now be attached all the way around the quilt, with an almost invisible join at the center of the bottom edge. Wrap the fold of the binding around to the back of the quilt and clip or pin it into position. It should neatly conceal the raw edge of the fabric, as well as the seam line from when you initially stitched the binding into place. You now have two options – you can hand stitch the binding into place at the back of the quilt, or turn the quilt back over so the top is facing upwards and stitch-in-the-ditch around the seam of the binding. Either method works fine – it’s totally up to you and which you prefer. Once stitched, your quilt is bound and completed!