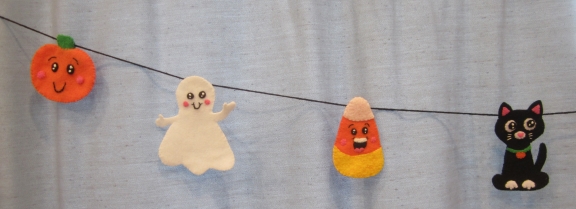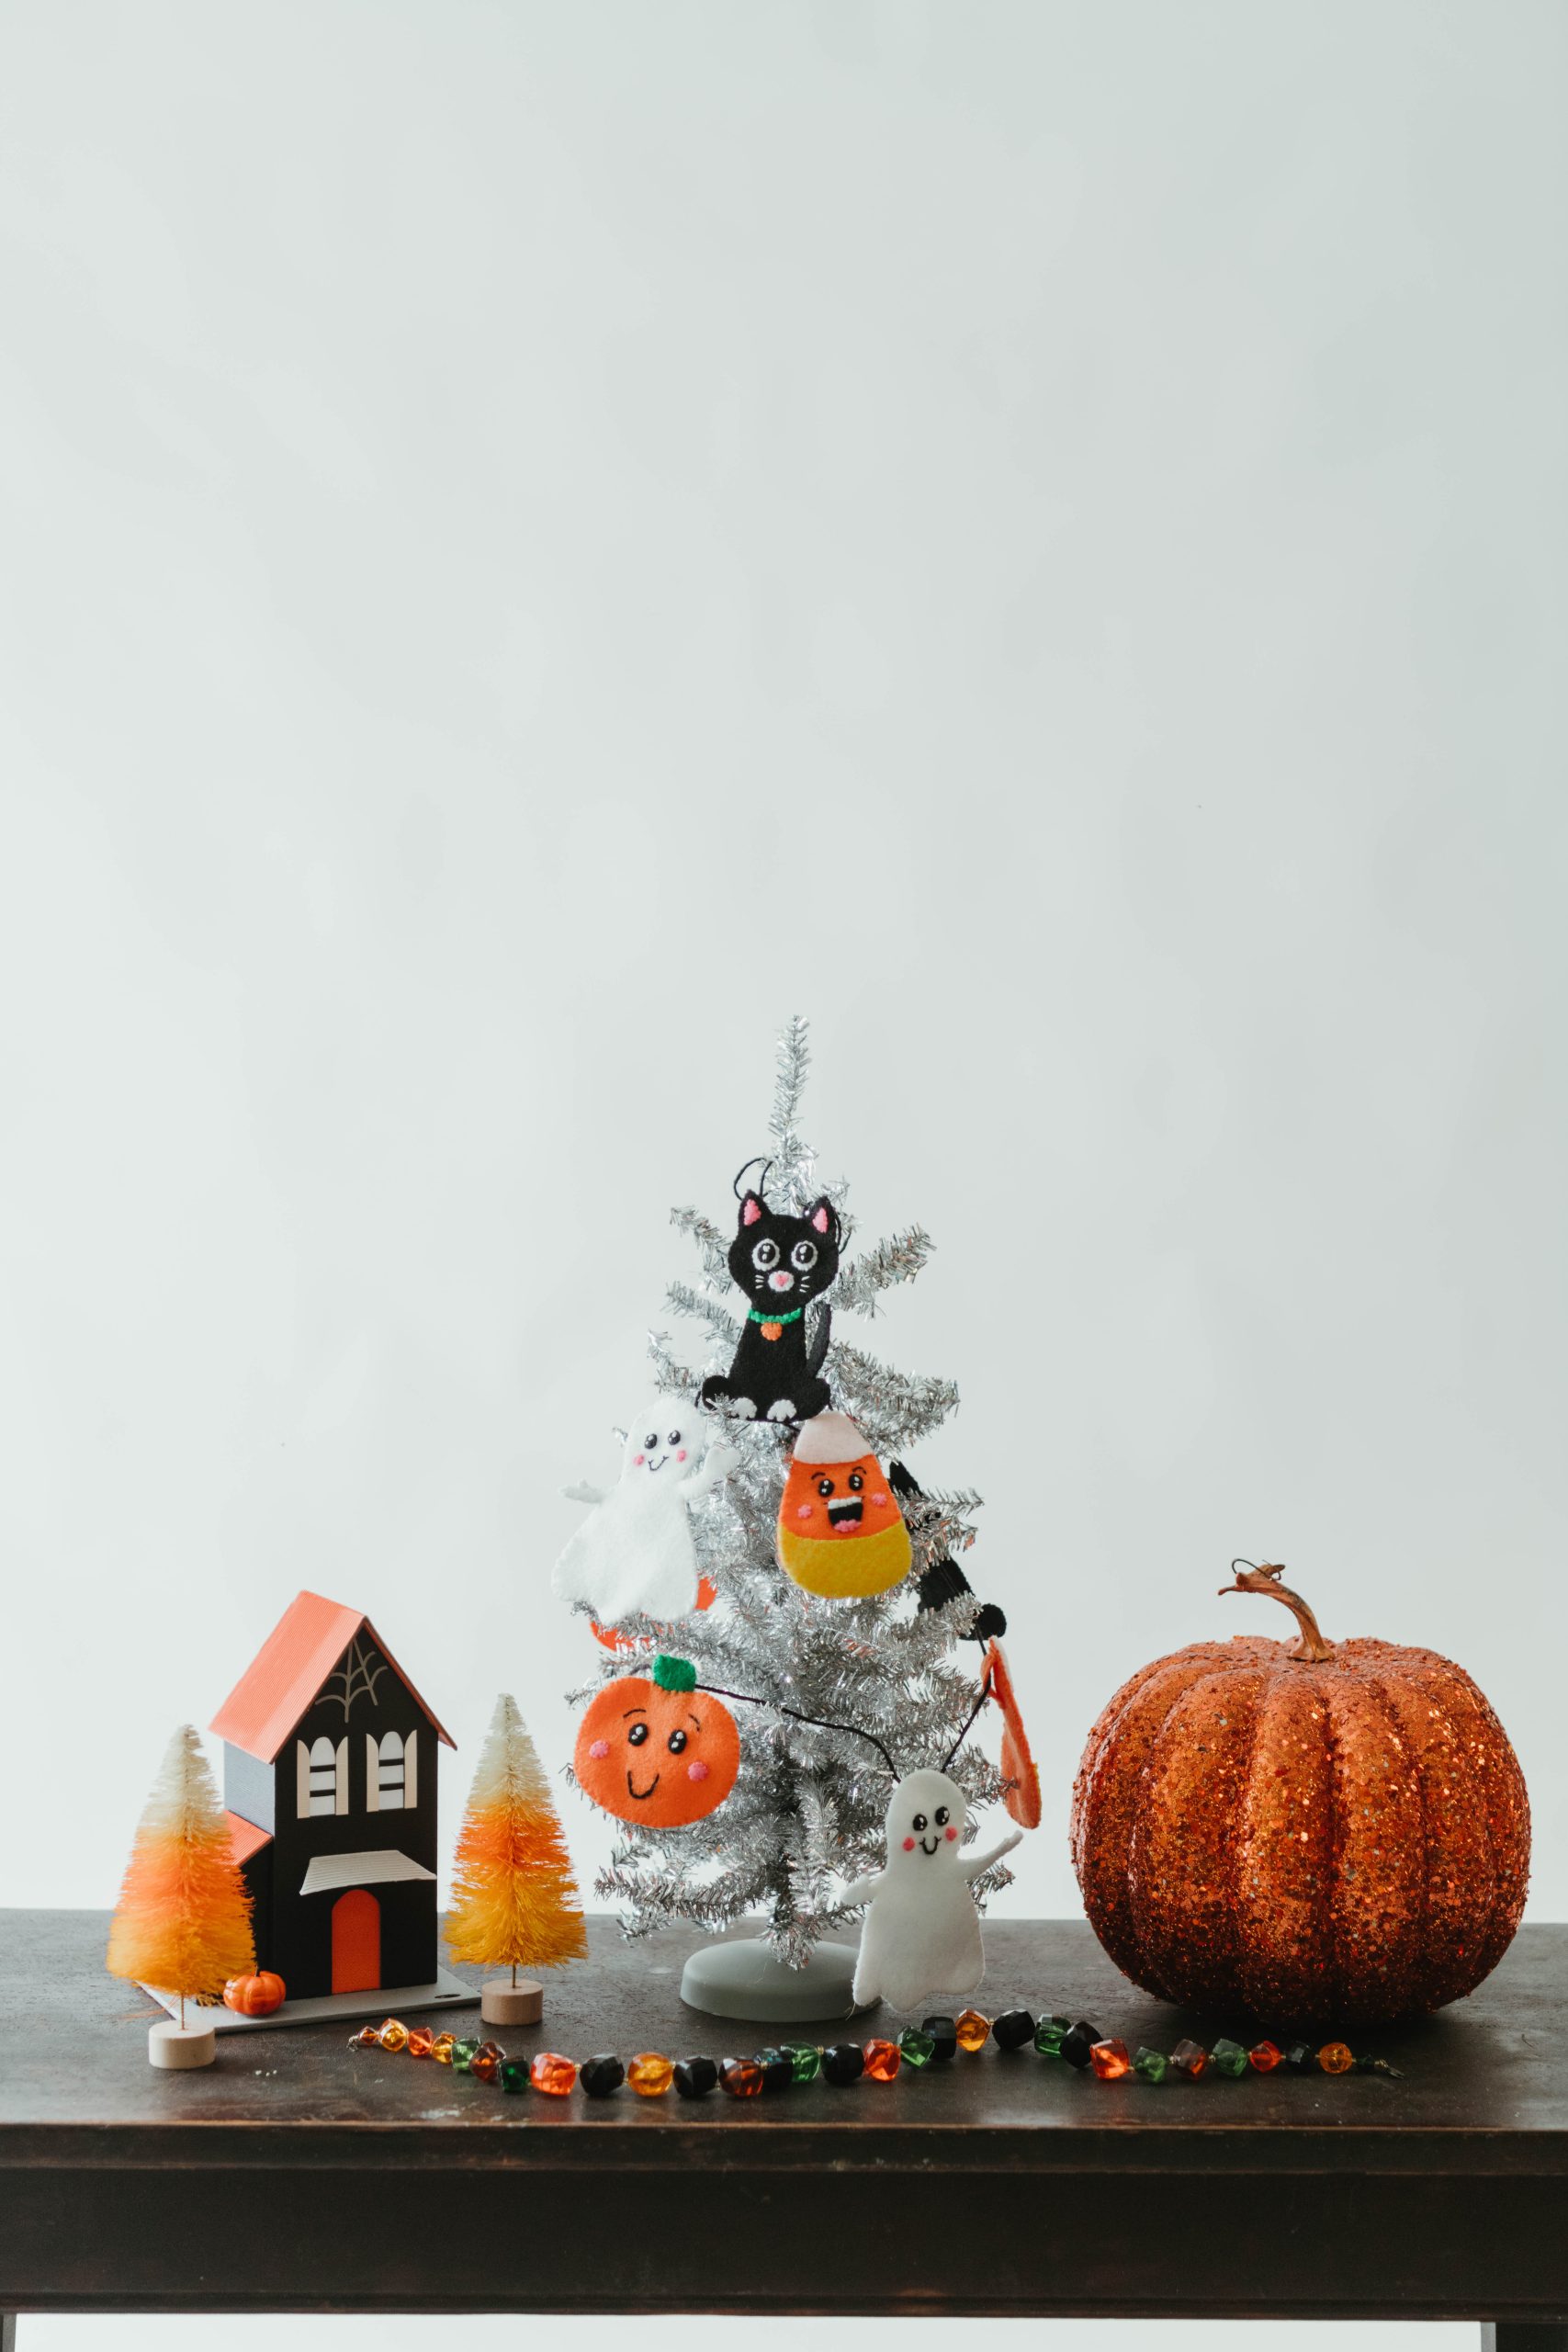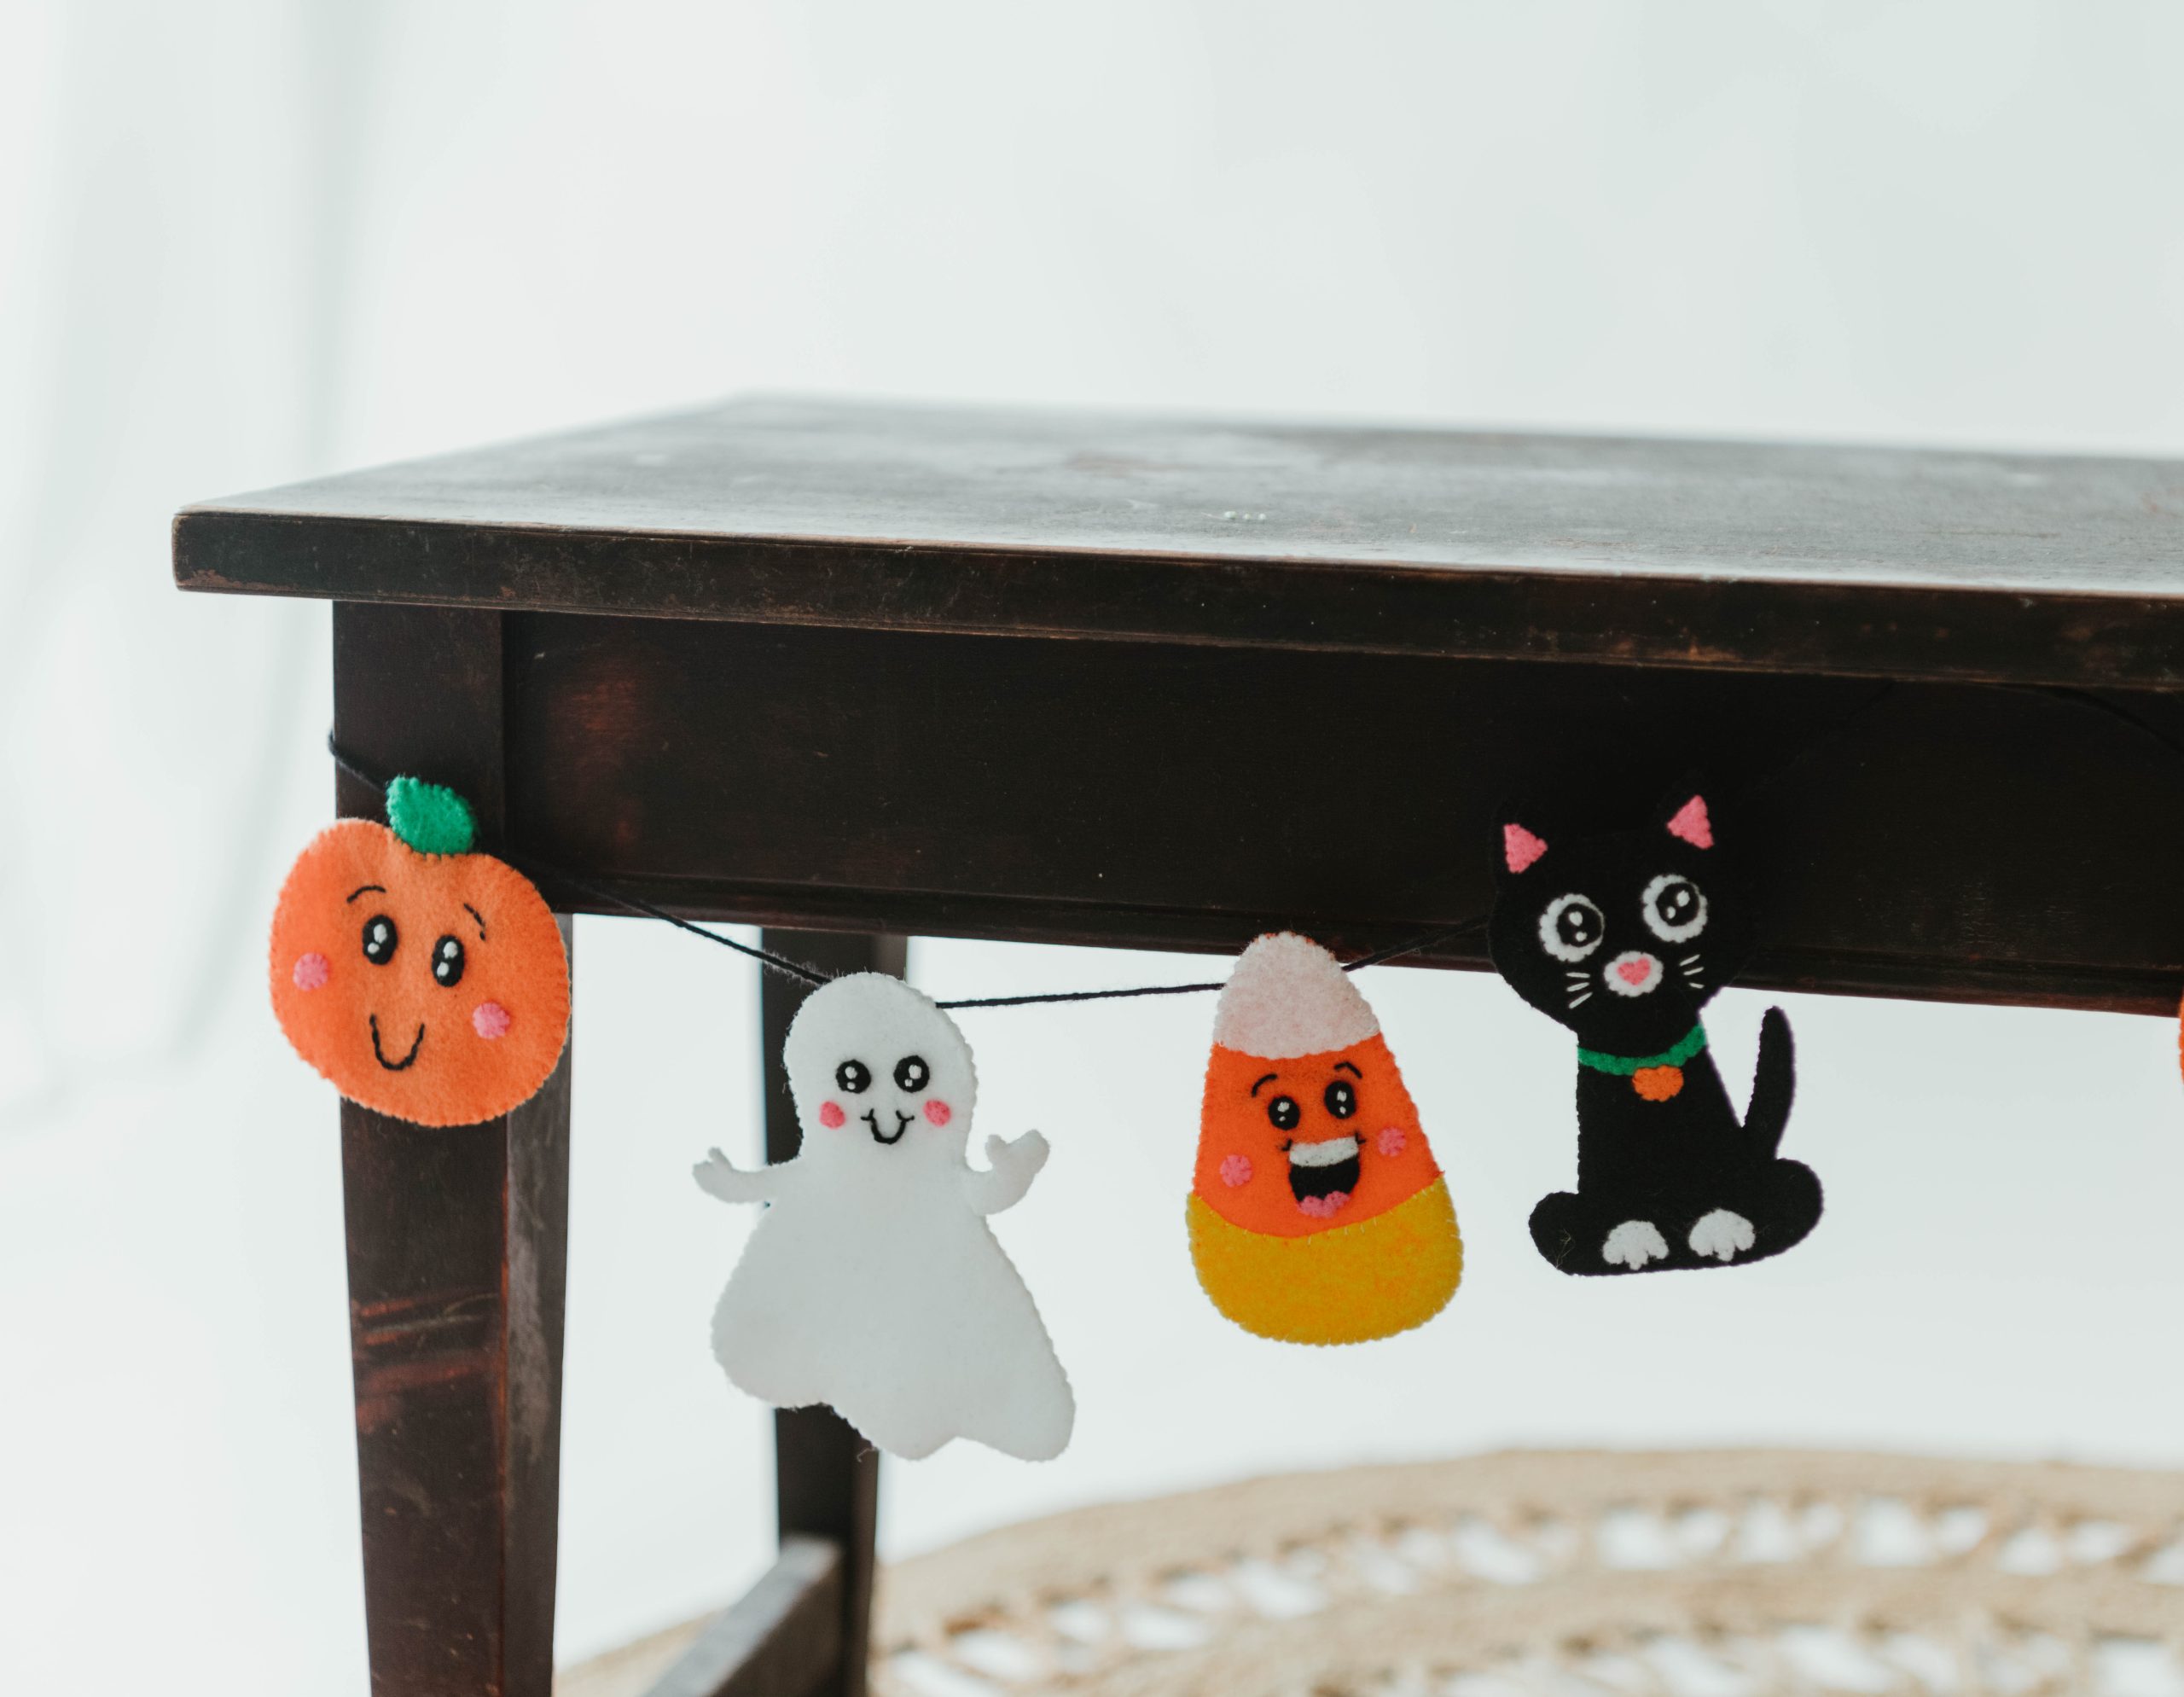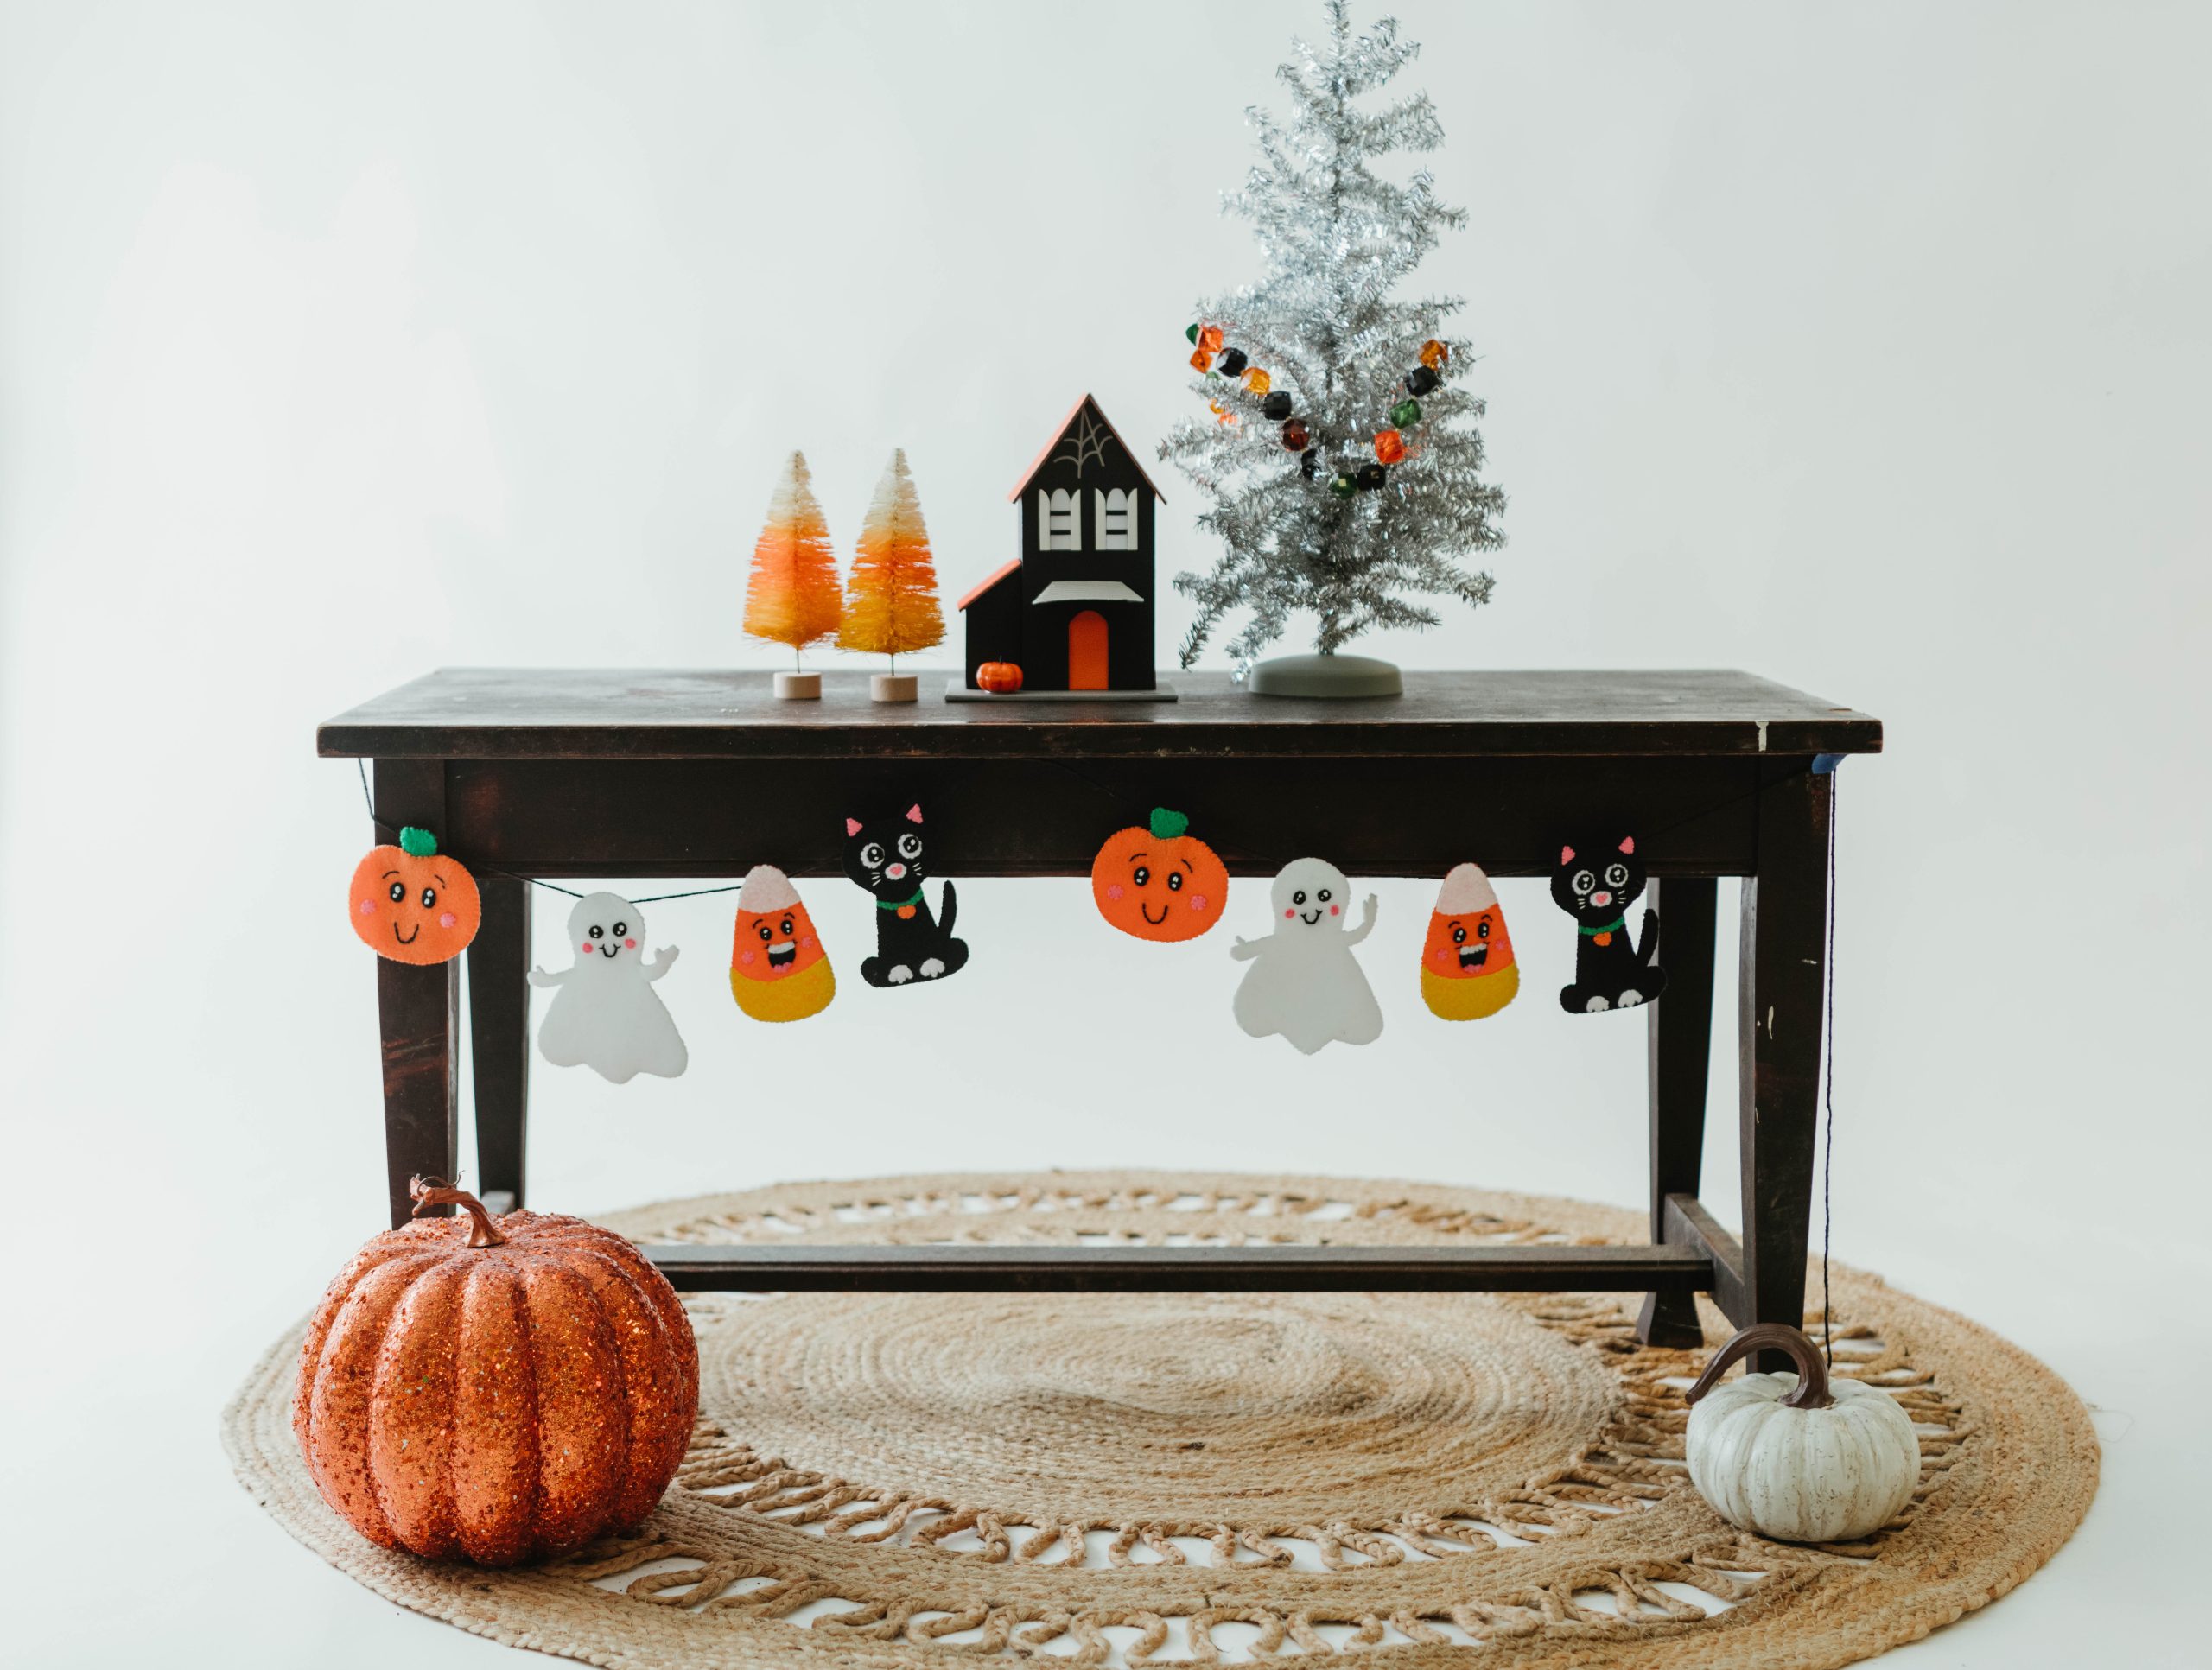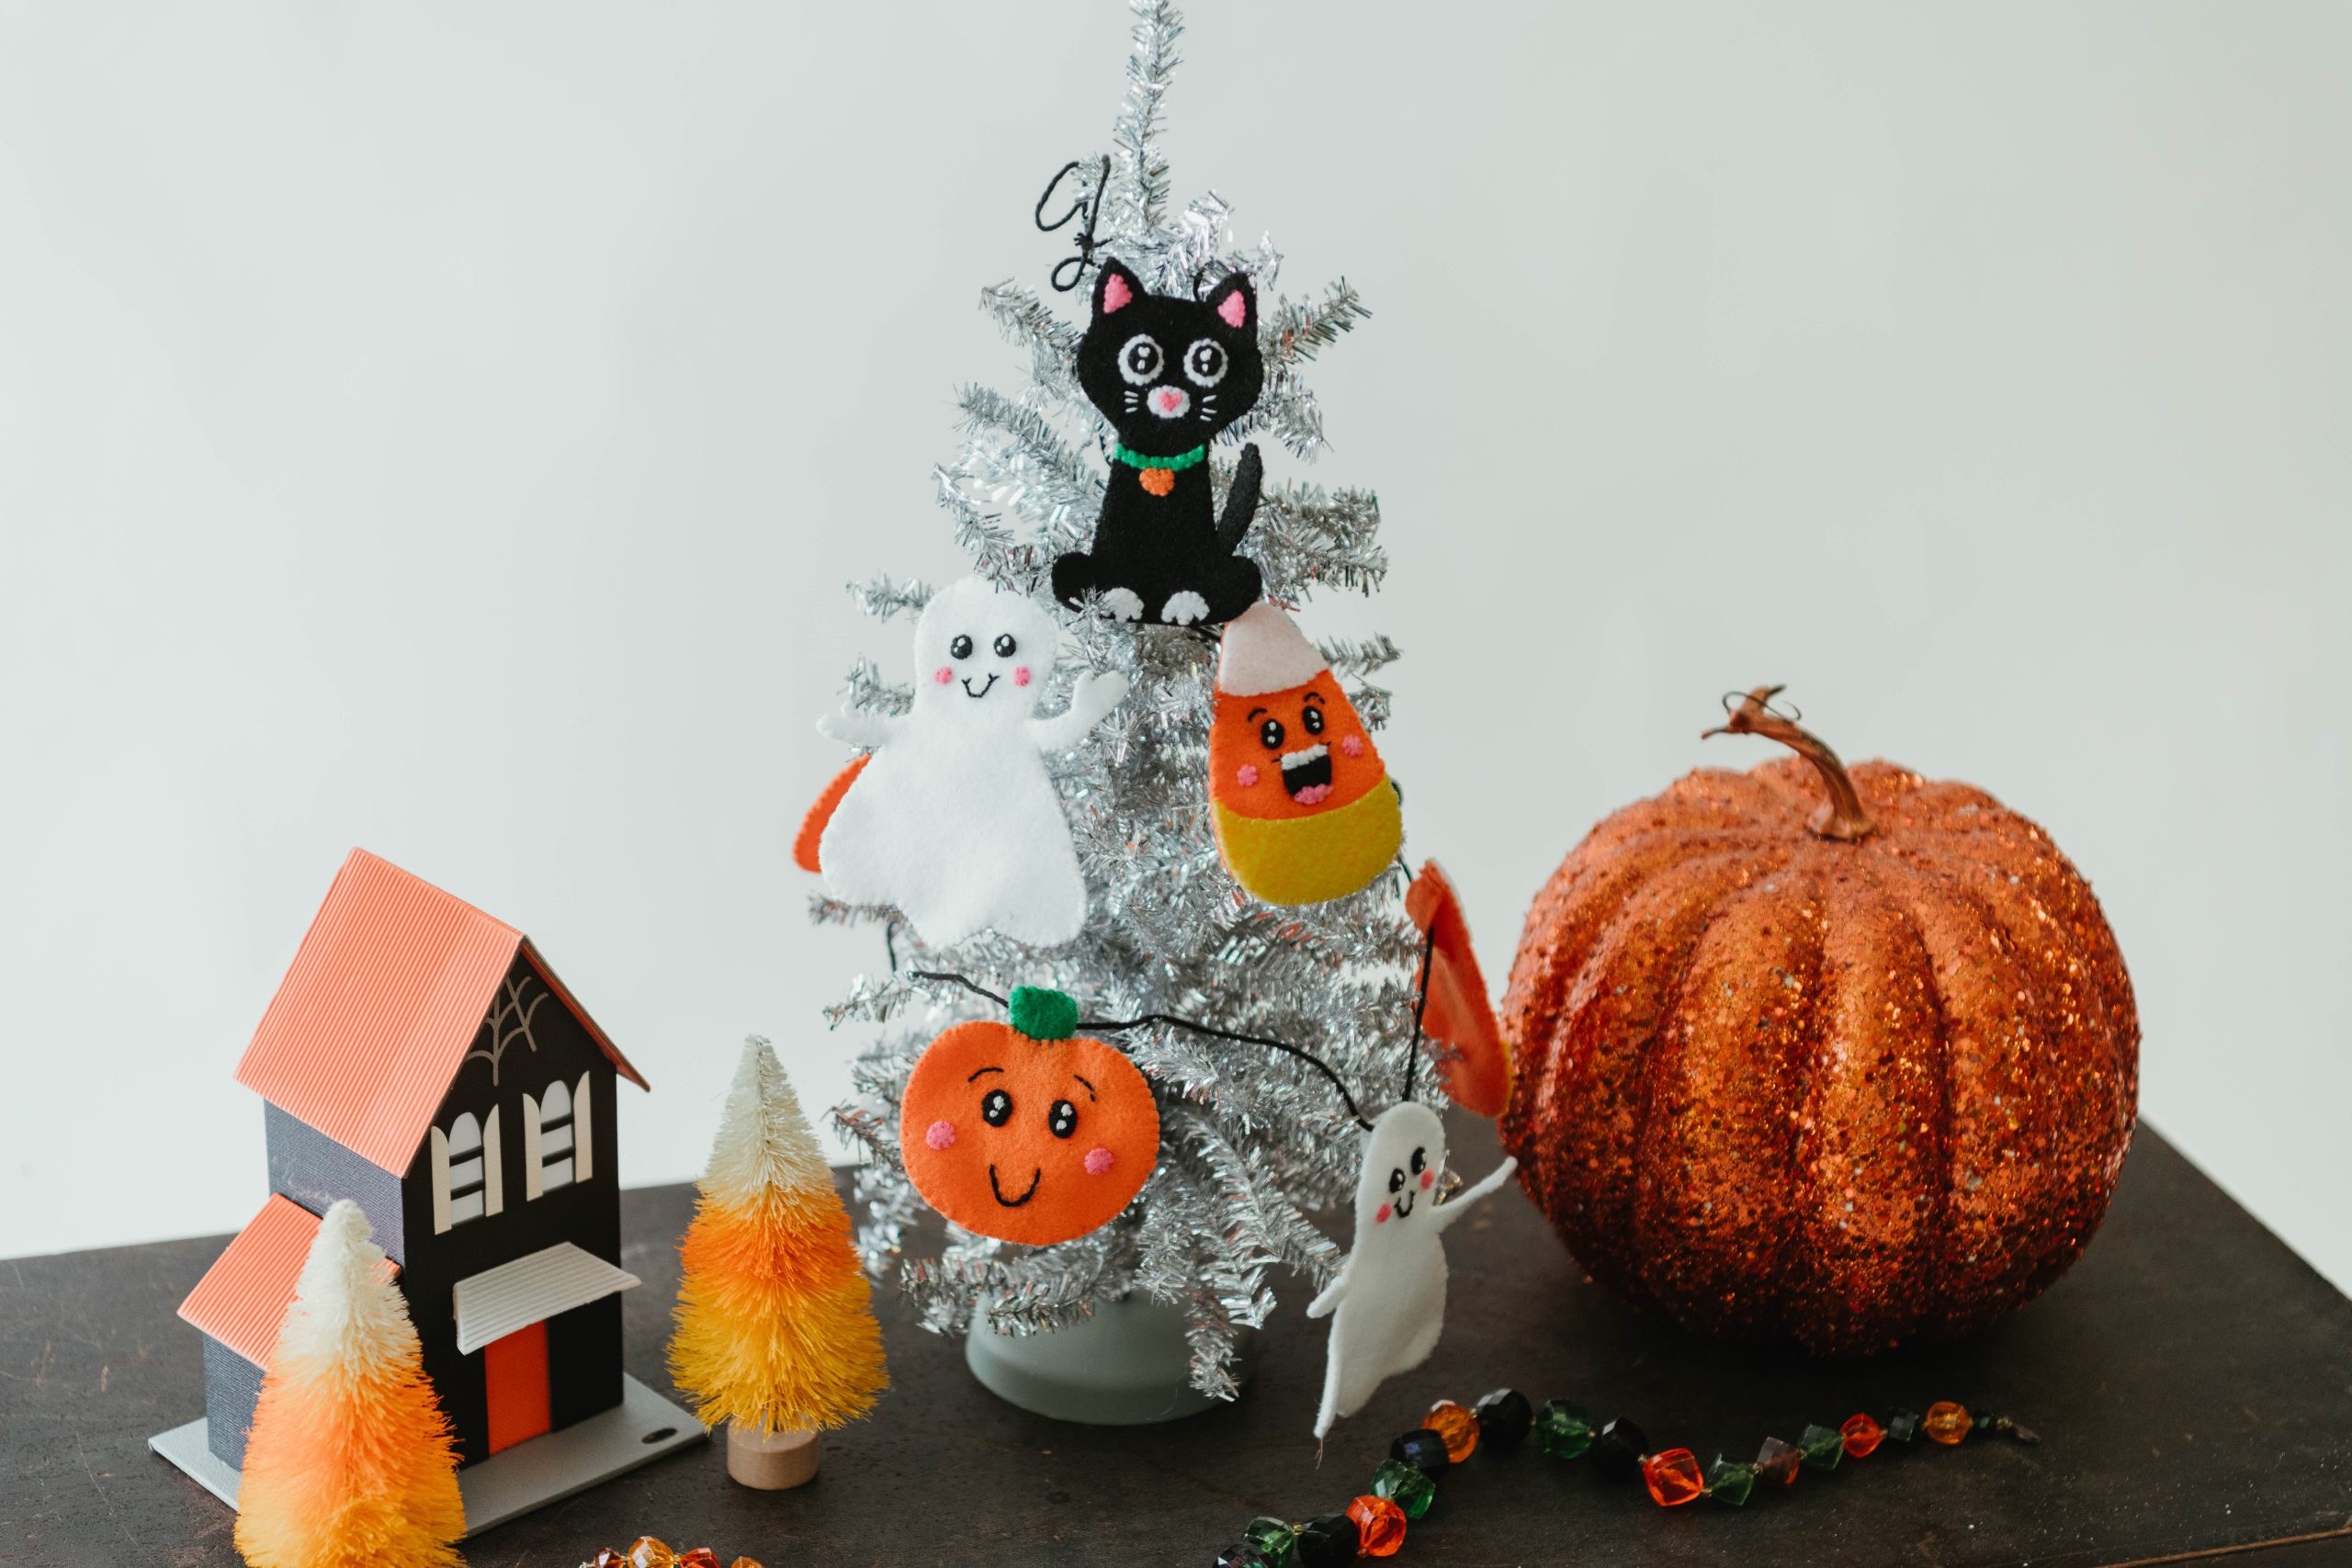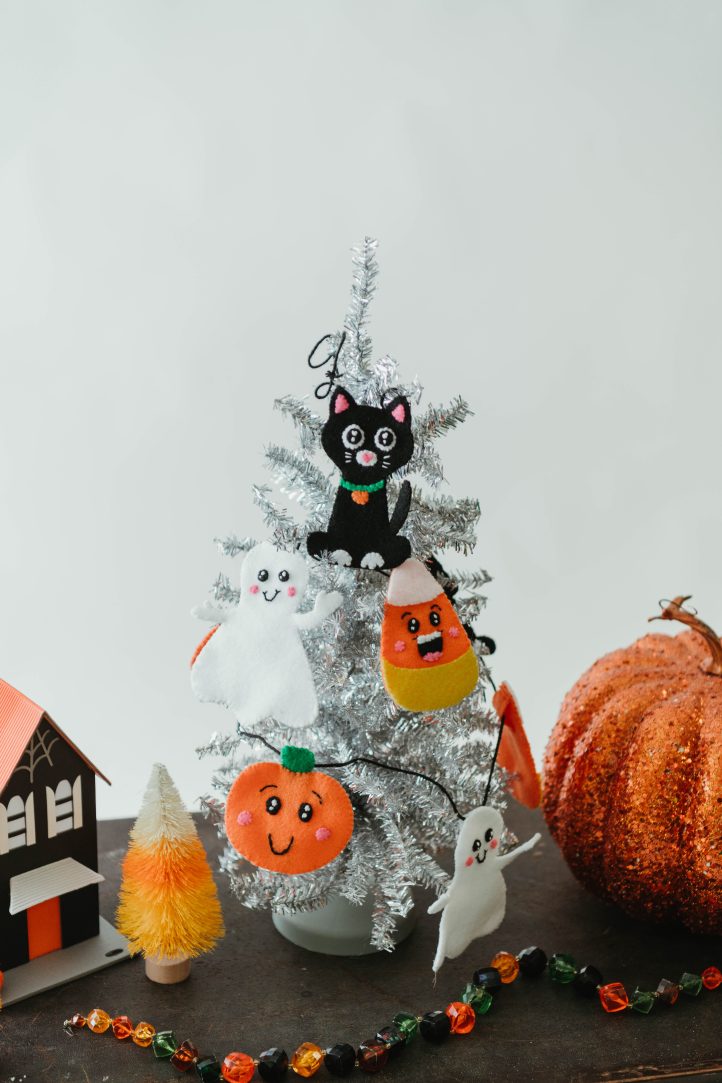
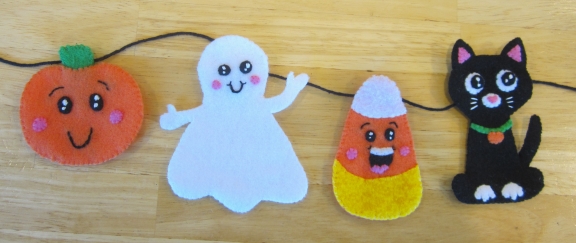
This festive Halloween banner is so cute, it’s frightening! Inspired by adorable Kawaii designs, this Halloween sewing pattern from Christy Jones features four classic holiday motifs (black cats, ghosts, pumpkins and candy corn) on 5 1/2 feet of black yarn. Adorn your mantel or staircase with this spooky cute DIY felt bunting ahead of All Hallows’ Eve with this easily adjustable Halloween sewing project.

Skill Level: Easy
Estimated Time:
- 1 hour per pumpkin, candy corn, or ghost
- 1 1/2 hours per cat
- 15 minutes for final assembly
Materials:
Note: These materials are enough for two of each character.
- 1 piece orange felt (approx. 9 x 12 inches)
- 1 piece black felt (approx. 9 x 12 inches)
- 1 piece white felt (approx. 9 x 12 inches)
- Scrap yellow felt
- Scrap bright pink felt
- Scrap green felt
- Matching threads
- White embroidery floss OR white fabric paint
- Black embroidery floss OR black fabric paint
- Embroidery needle (if using floss)
- Fine-tipped paint brush (optional, if using fabric paint)
- Fine-tipped washable black fabric marker
- 2 yards black string or non-stretchy yarn
- Safety pin
- PDF Templates – These are located at the bottom of this page. Please see printing instructions below.
PRINTING INSTRUCTIONS:
Note: To download the templates, click on the pattern download button at the bottom of the page. We recommend opening your pattern download using Adobe Acrobat.
Sewing Instructions:
PREPARE THE PATTERNS:
Print 1 copy each of the templates (located at the bottom of the page). Cut out all the patterns.
TRANSFER PATTERN MARKINGS TO FELT (OPTIONAL):
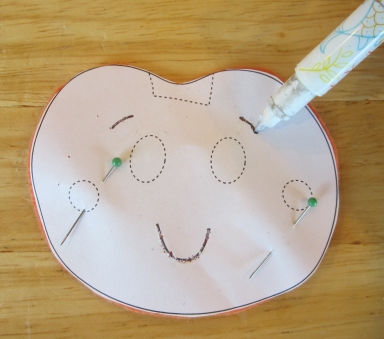
- Use a straight pin to punch many closely spaced holes along the pattern line. The holes should form a nearly continuous line, creating a stencil.
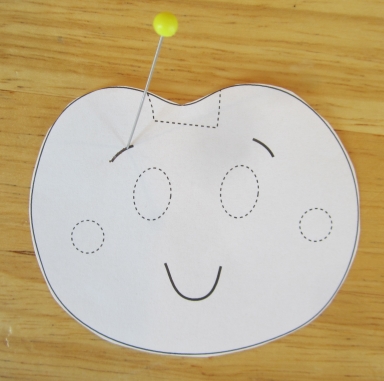
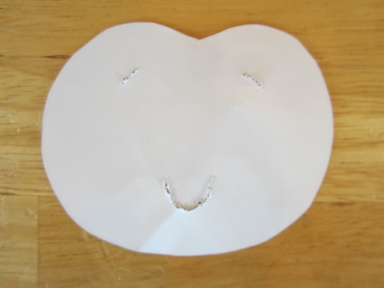
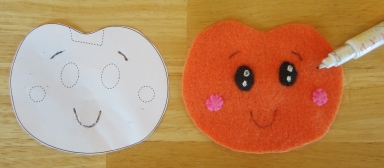
- Press the fine-tipped washable marker through the punched holes to draw the lines onto the felt.
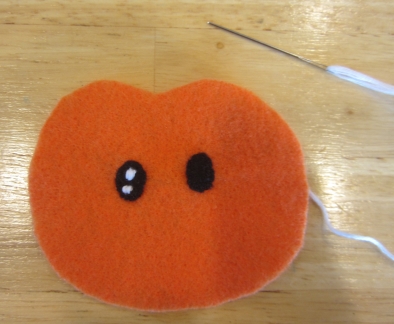
EYE HIGHLIGHTS WITH EMBROIDERY FLOSS:
White eye highlights add to the cute look of these characters. You can make them with embroidery floss or with fabric paint.
- Cut a length of white embroidery floss that’s comfortable to work with. Poke one end through the embroidery needle, leaving a “tail” so the needle stays threaded, and knot the opposite end.
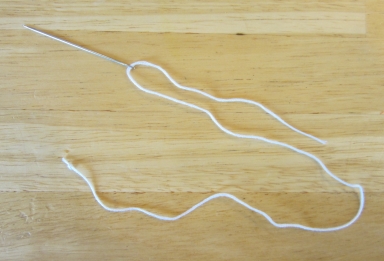
- Poke the needle through the underside of the fabric, where you want the bottom edge of the eye highlight. Poke the needle back down through the fabric where you want the top edge of the eye highlight.
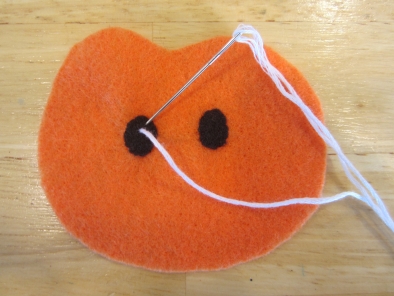
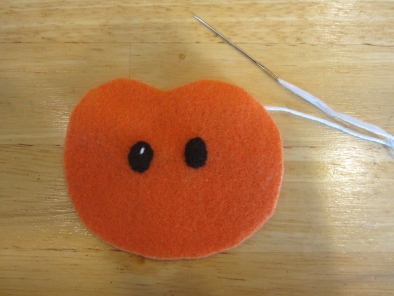
- Add another stitch directly next to the first one. Add 2-3 very closely spaced (or slightly overlapping) additional stitches until the highlight is complete.
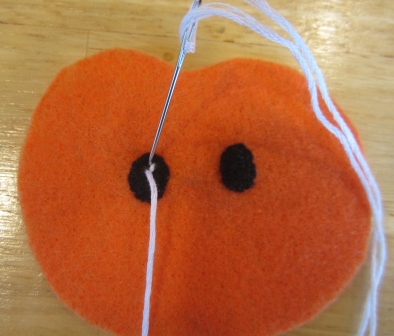

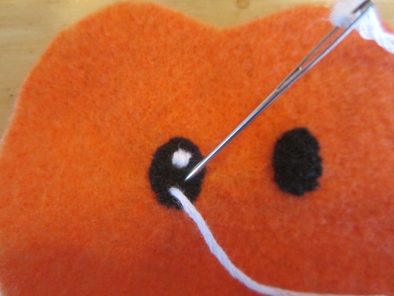
- Add a lower highlight to the eye the same way, using about 3 stitches.
FABRIC PAINT ALTERNATIVE:
If preferred, you can add eye highlights and facial features using white or black “puffy” fabric paint. Apply the paint directly from the tube, or for better control, squirt a small amount of paint onto a palette (such as a paper plate, wax paper, or discarded plastic lid). Use a fine-tipped brush to create small dots for highlights, or fine lines for smiles, eyebrows, and whiskers.
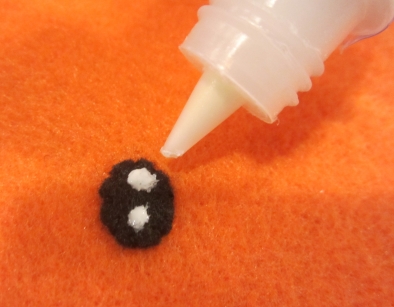
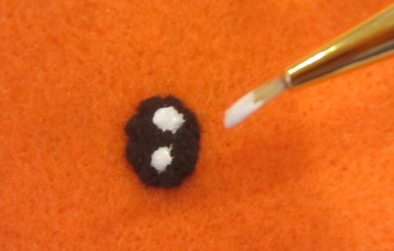
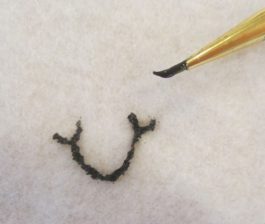
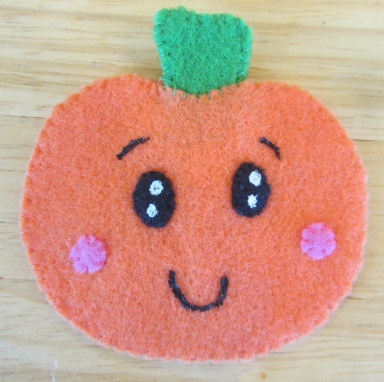
Pumpkin with fabric paint eyebrows, smile, and eye highlights
MAKE THE PUMPKINS:
- Cut 4 pumpkin head pieces from orange felt. Set 2 pieces aside for the backings.
- Cut 4 pumpkin eyes from black felt.
- Cut 4 pumpkin cheeks from pink felt.
- Cut 4 pumpkin stems and 2 backing loops from green felt.
- Position 2 black felt eyes on each pumpkin head. Whipstitch around each eye using black thread.
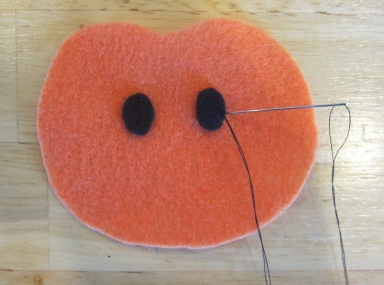
- Add white highlights to the eyes using white embroidery floss or white fabric paint, as described in the instructions above.
- Position 2 pink cheeks on each pumpkin head. Whipstitch the cheeks in place using pink thread.
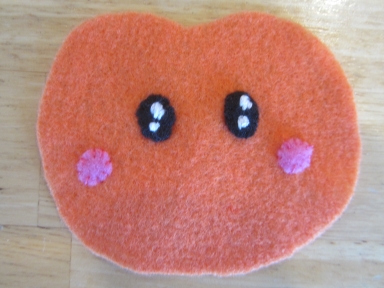
- Using the pattern as reference (or as a stencil, as described in the instructions above), draw the eyebrow and smile lines on the pumpkin heads using a fine-tipped washable fabric marker.
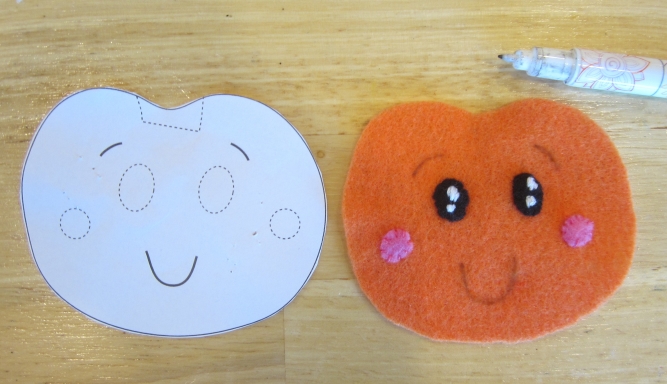
- Cut a length of embroidery floss that is comfortable to work with. Separate the black embroidery floss into two groups of 3 strands. Set half of the strands aside.
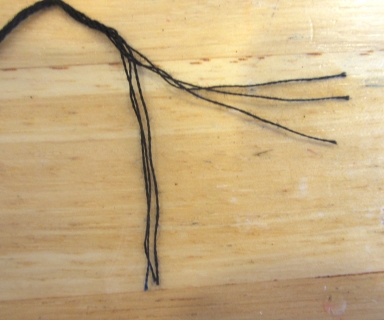
- Backstitch each eyebrow using 3 strands of black embroidery floss. (Or, go over them with black fabric paint.) To do this, push the needle up through the underside of the felt at the beginning of one eyebrow line. Push the needle down through the felt a short distance away.
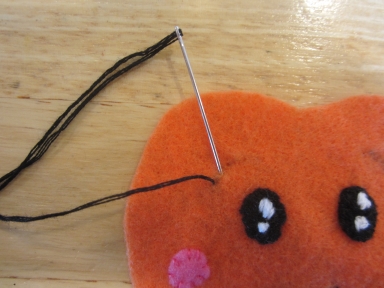
- Poke the needle up through the underside of the felt a little further down the eyebrow line.
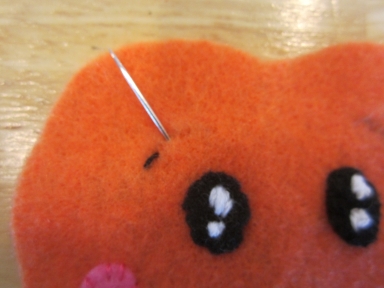
- Push the needle down through the felt, slightly overlapping the end of the first stitch so the floss forms a continuous line. Continue backstitching until the eyebrow line is completely covered. Stitch the second eyebrow the same way.
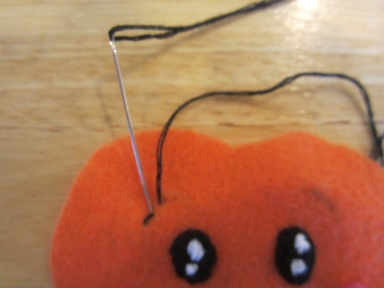
- Backstitch the smile using 6 strands of black embroidery floss. (Or, go over the smile with black fabric paint.)

- Position the pumpkin stem behind the center top of the pumpkin, overlapping them slightly. Pin the stem to the pumpkin.
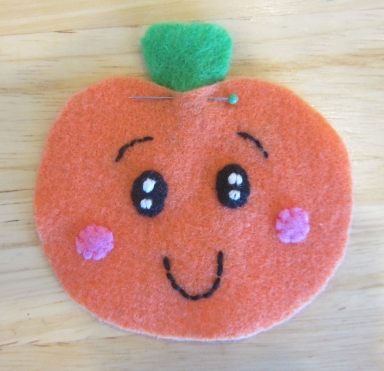
- Whipstitch the stem to the pumpkin using green thread.
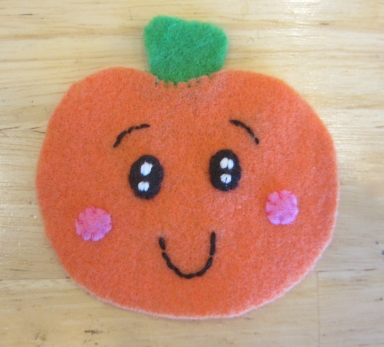
- Attach a stem to the pumpkin backing the same way, making sure that the stems line up when the pumpkin front and back are placed wrong sides together.
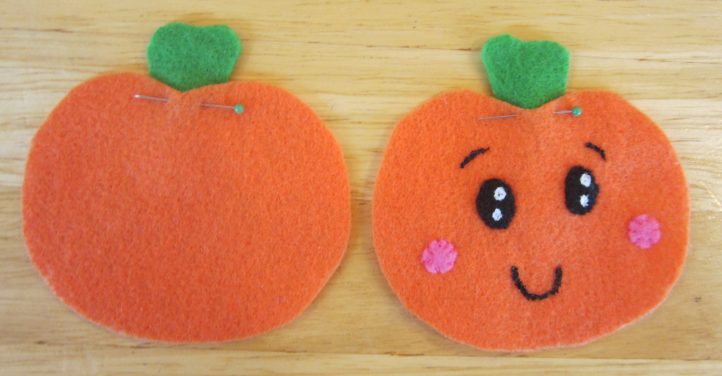
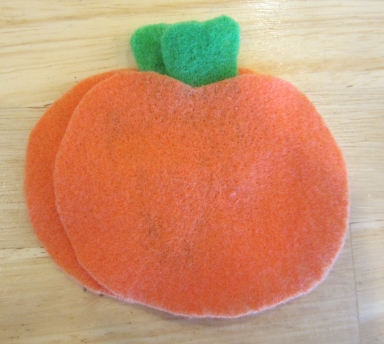
- Pin the short end of a backing loop near the top of the stem on the pumpkin backing. Position the lower short edge of the backing loop so that the loop doesn’t lie completely flat, but has a little bit of curve. Pin the lower end in place.
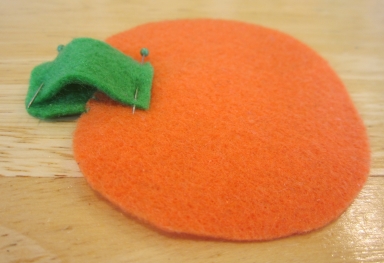
- Backstitch the upper short edge of the backing loop to the stem using green thread. Backstitch the lower short edge of the backing loop to the pumpkin using green thread.
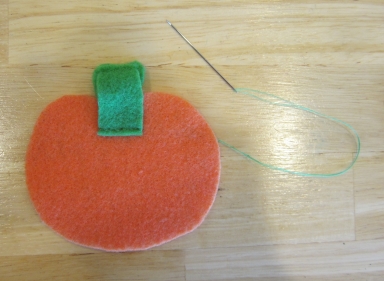

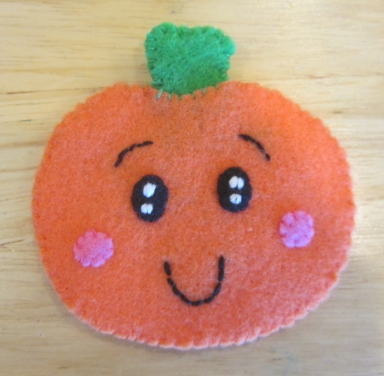
- Place the pumpkin front and pumpkin back wrong sides together, lining them up along all the edges. Pin them in place, then whipstitch them together along all the edges, using orange thread for the pumpkin portion and green thread for the stem. Take care not to stitch the backing loop closed.
MAKE THE CANDY CORN:
- Cut 4 candy corn body pieces from orange felt. Set 2 pieces aside to be the backings.
- Cut 2 candy corn white tops and 2 candy corn teeth from white felt.
- Cut 2 candy corn yellow bottoms from yellow felt.
- Cut 4 candy corn eyes and 2 candy corn mouths from black felt.
- Cut 4 candy corn cheeks and 2 candy corn tongues from pink felt.
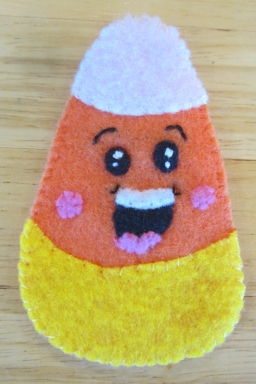
- Position a white candy corn top on each candy corn body. Whipstitch the tops in place using white thread.

- Position a yellow candy corn bottom on each candy corn body. Whipstitch the bottoms in place using yellow thread.
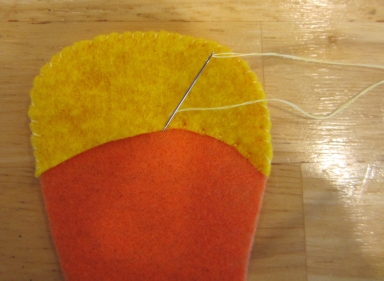
- Position 2 black eyes and 1 black mouth on the orange section of each candy corn. Whipstitch them in place using black thread.

- Add white highlights to the eyes using white embroidery floss or fabric paint, as described in the instructions above.
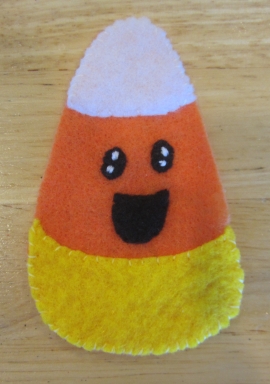
- Position a white teeth piece on the upper edge of each candy corn mouth. Whipstitch in place using white thread.
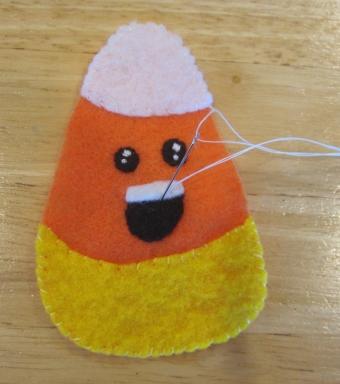
- Position a pink tongue on the center of the lower edge of each candy corn mouth. Whipstitch in place using pink thread.
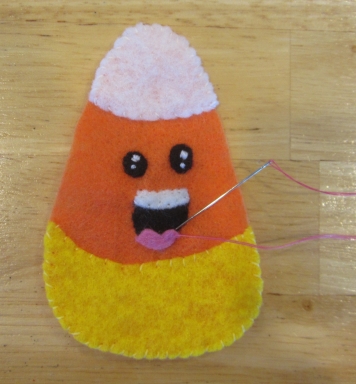
- Position 2 pink cheeks on each candy corn face. Whipstitch in place using pink thread.
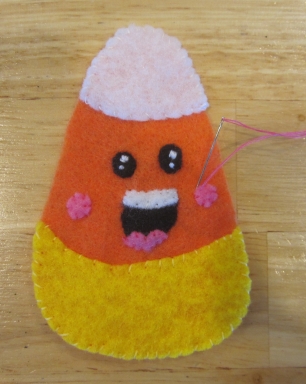
- Using the pattern as reference (or as a stencil, as described in the instructions above) draw eyebrows and the small corner smile lines on each candy corn face using a fine-tipped black fabric marker. Note: You can leave the eyebrows off, if you prefer, for a more “babyish” look.
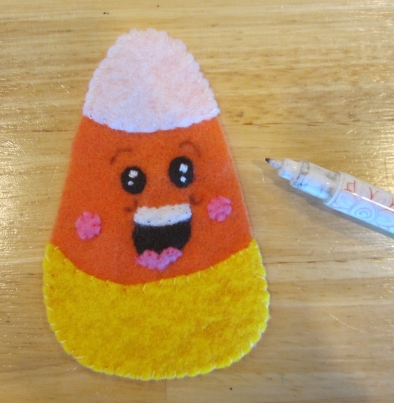
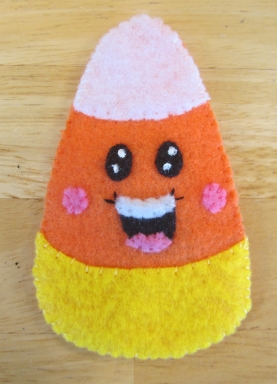
- Backstitch over each eyebrow using 3 strands of black embroidery floss (or black fabric paint).
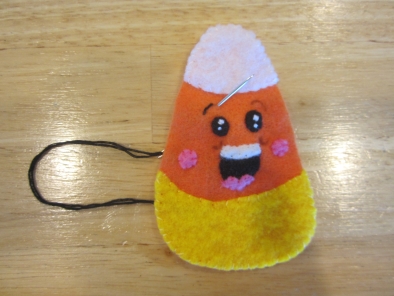
- Use 2 strands of black embroidery floss to stitch two tiny “u” shapes at the upper corners of each mouth (or use black fabric paint).
- Flip the candy corn backing pieces over, so they face the opposite direction from the candy corn fronts. (Note: The candy corn is not quite symmetrical. The front and backing must be facing opposite directions so they line up when placed wrong sides together.)
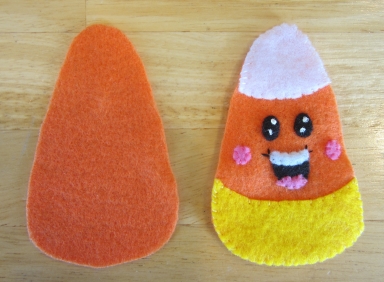
- Pin the short end of a backing loop near the center top of the candy corn backing. Position the lower short edge of the backing loop so that the loop doesn’t lie completely flat, but has a little bit of curve, and pin it in place.
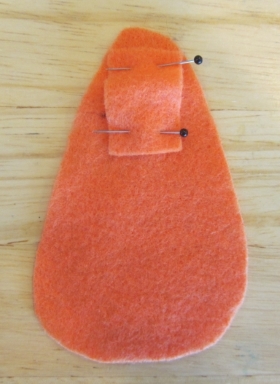
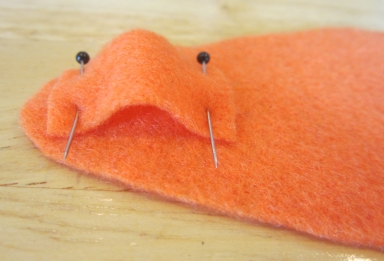
- Backstitch the short ends of each backing loop to the candy corn using orange thread.
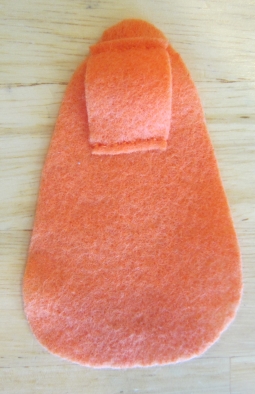
- Place each candy corn front and candy corn backing wrong sides together, lining them up along the edges. Pin the front and backing together.
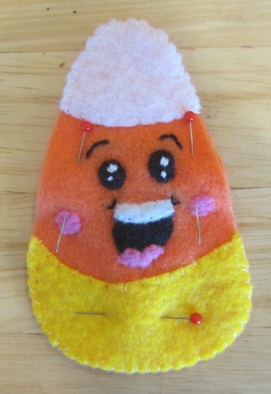
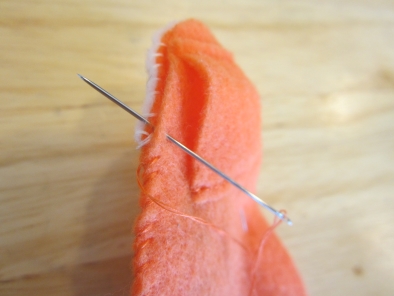
- Whipstitch the candy corn front and backing together. When stitching around the white and yellow areas, try to stitch only through the orange underlayer of the candy corn front, so the stitches don’t show on the white and yellow areas.
MAKE THE GHOSTS:
- Cut 4 ghost body pieces from white felt. Set 2 pieces aside for the backings.
- Cut 2 backing loops from white felt.
- Cut 4 ghost eyes from black felt.
- Cut 4 ghost cheeks from pink felt.
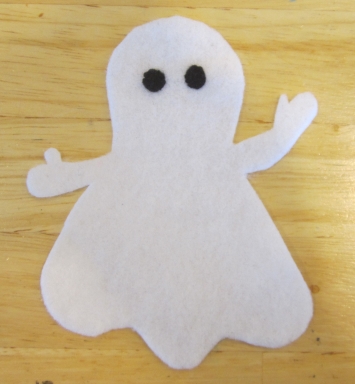
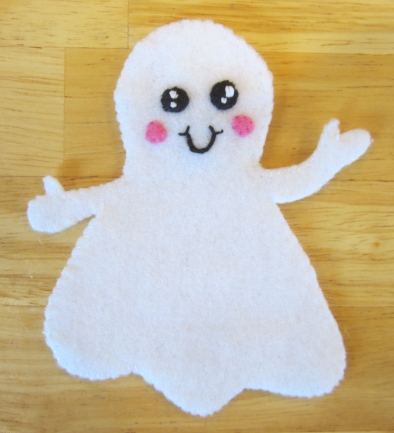
- Position 2 black felt eyes on each ghost face. Whipstitch the eyes in place using black thread.
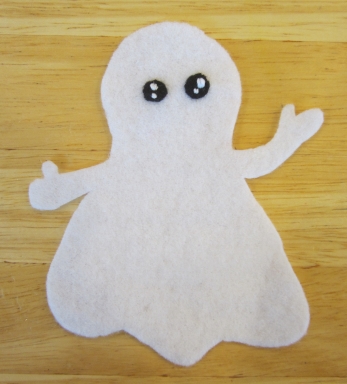
- Add highlights to the ghost eyes using white embroidery floss or fabric paint, following the instructions above.
- Position 2 pink cheeks on each ghost face. Whipstitch the cheeks in place using pink thread.
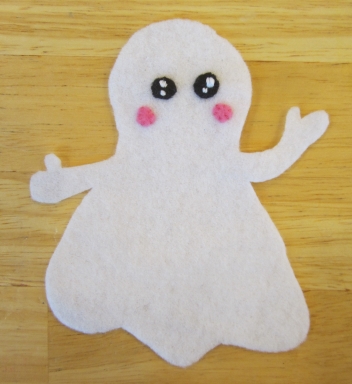
- Using the pattern as reference (or as a stencil, as described in the instructions above) draw the smile on each ghost face using a fine-tipped black fabric marker.

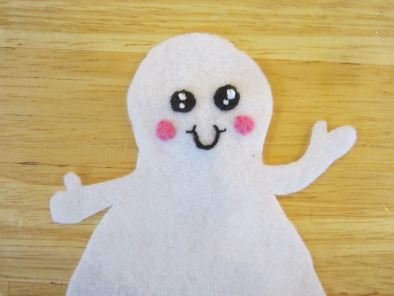
- Backstitch over the smile line with 6 strands of black embroidery floss (or black fabric paint).
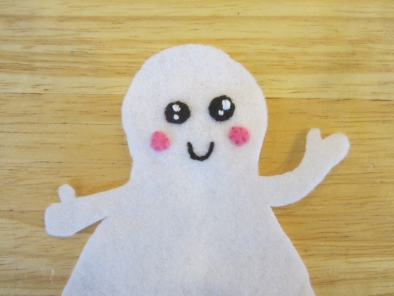
- Use 2 strands of black embroidery floss to stitch two tiny “u” shapes at the ends of the smile (or use black fabric paint).
- Flip the backing pieces over, so they face the opposite direction as the ghost bodies. Pin a short edge of each backing loop near the top center of each ghost backing. Pin the other short edge of the backing loop to the backing so that the loop does not lie completely flat, but has a little bit of a curve to it.
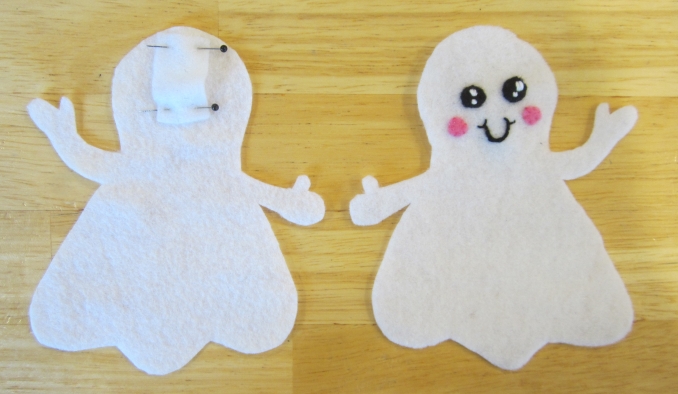
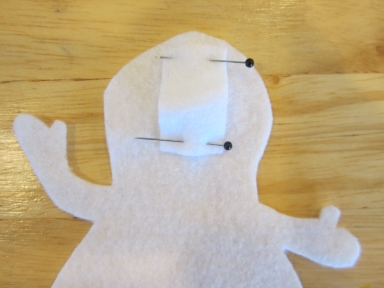
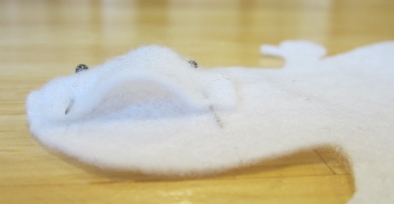
- Backstitch the loops to the ghost backings along both short ends.
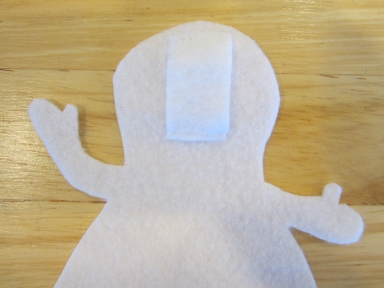
- Place each ghost body and ghost backing wrong sides together, lining them up along the edges, then pin them together. Whipstitch the ghost fronts and backings together with white thread.

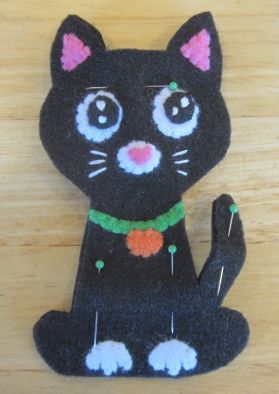
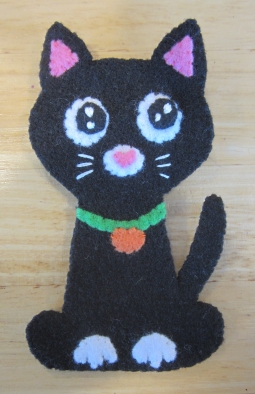
MAKE THE CATS:
- Cut 4 cat bodies and 4 cat pupils from black felt. Set aside 2 bodies to be the backings.
- Cut 4 cat eye whites, 2 cat muzzles, and 4 cat paws from white felt.
- Cut 4 cat inner ears and 2 cat noses from pink felt.
- Cut 2 collars from green felt.
- Cut 2 pumpkin tags from orange felt.
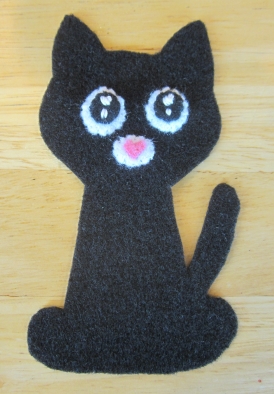
- Position 1 black pupil on each white felt eye. Whipstitch the pupils to the eyes using black thread. Add white eye highlights to each pupil following the instructions above.


- Position 1 cat nose on each white muzzle, then whipstitch each nose in place using pink thread.

- Position 2 cat eye whites and 1 cat muzzle on each head. Whipstitch these pieces in place using white thread.
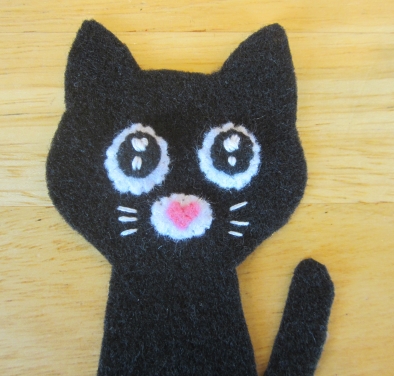
- Cut a length of embroidery floss and separate out 3 strands. Stitch 3 small, straight stitches on each side of the muzzle to make whiskers. (Or use fine lines of white fabric paint.)
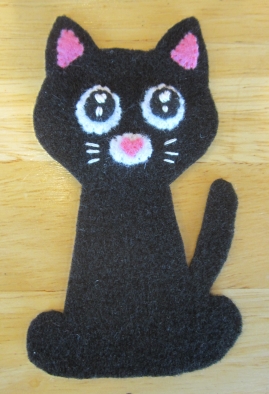
- Position 2 cat inner ears on each head. Whipstitch the inner ears in place using pink thread.
- Position a green collar near the top of each cat body, as marked on the pattern. Whipstitch the collar in place using green thread.
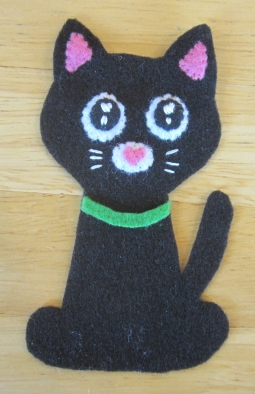
- Position a pumpkin tag in the center of the collar and whipstitch it in place using orange thread.
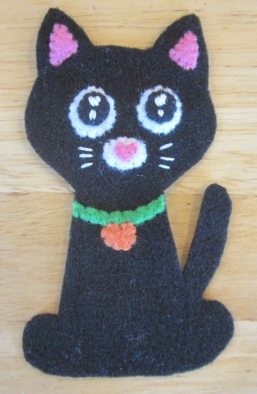
- Position 2 white paws near the lower edge of each cat body. Whipstitch the paws in place with white thread.
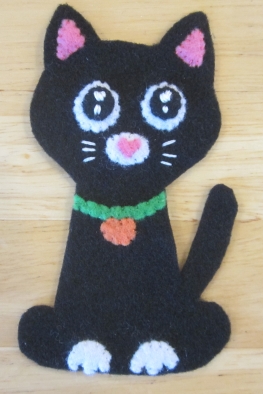
- Flip each cat backing over, so that it faces the opposite direction as the cat fronts. Pin a short end of a backing loop near the top center of each cat backing. Pin the other short ends of the backing loops to the cat backing, so that the loops do not lie completely flat, but have a little curve. Backstitch across both short ends of the backing loop using black thread.
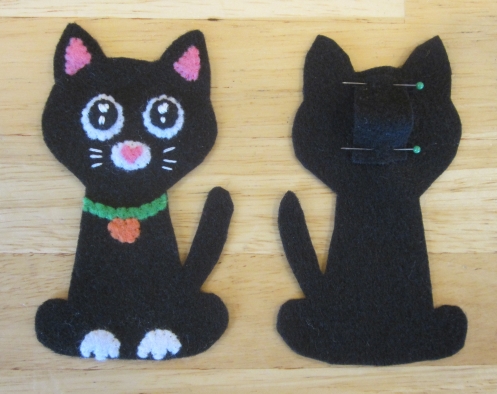
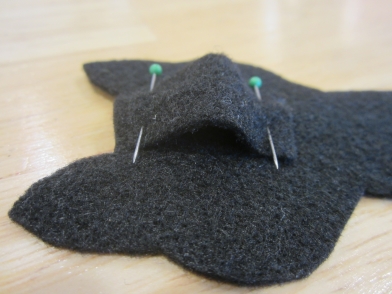

- Position each cat front and cat backing wrong sides together, lining them up along the edges. Pin them together, then whipstitch each cat and backing together using black thread.
STRING THE BUNTING:
- Cut a piece of black string, cord, or non-stretchy yarn 2 yards (6 feet) long. Make a 3-inch loop in one end of the string.

- Grasp both strands of the end of the loop and bring them under the string, forming a second loop.
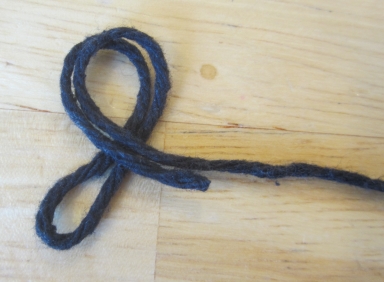
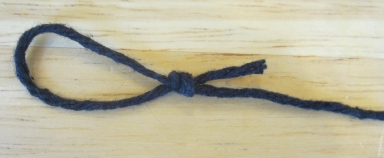
- Put the end of the original loop through the new loop and pull it snug, forming a knot. Trim the tail end of the string. Tie a loop in the other end of the string the same way.
- Attach a safety pin to the end of the loop.
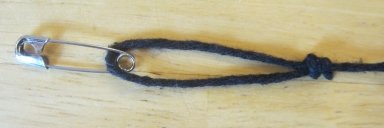
- Push the safety pin through the backing loop of one of the pumpkins.

- Push the pumpkin further down the string to make room for the next character. Add a ghost, then a candy corn, then a cat to the string, threading the safety pin through the backing loop of each character.
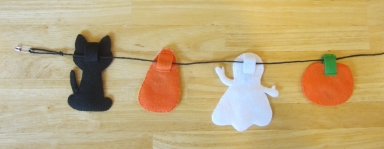
- String the other pumpkin, ghost, candy corn, and cat the same way, pushing the characters down the string to make room for the new ones and spacing them out evenly. The bunting is ready to display and enjoy!
