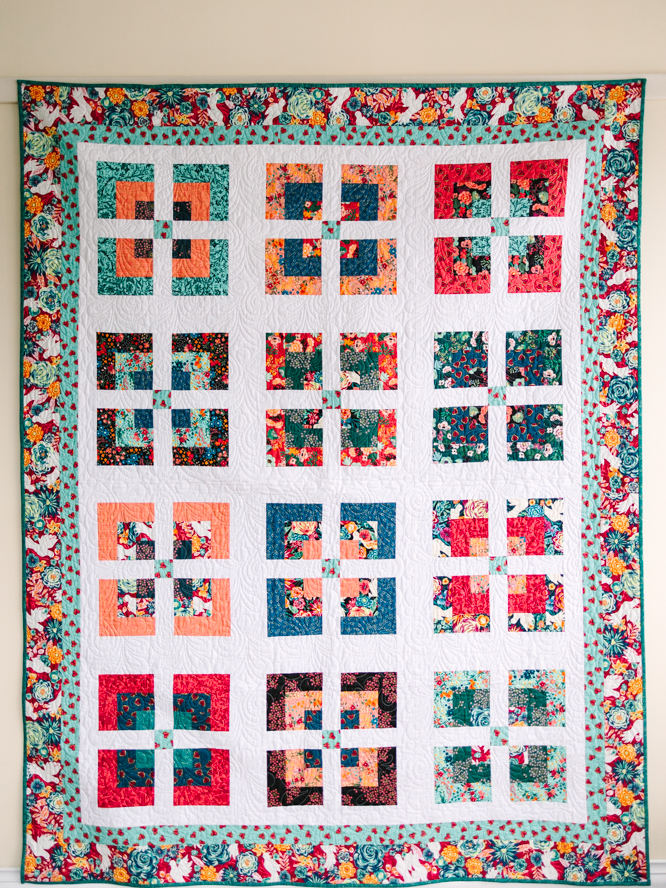
Create a stunning summer quilt with beautiful floral precuts with this jelly roll quilt pattern from Megan Farrell. Resembling a manicured flower garden, this quilt pattern features a unique split and squared design that highlights your fabrics with a contrasting white sashing. Finishing at 66” x 84”, this large quilt would look gorgeous on your bed, draped across your couch or displayed as a wall quilt in your home. Play with bold prints in warm summer colors with this charming quilt pattern.
Finished Size: 66” x 84” (18” Block/12 blocks total)
Materials:
- Basic quilting notions
- Batting
- Fabric Requirements:
- Accent fabric: 1/2 yard
- Jelly roll (total of 36 strips will be used – 12 colors will need 2 strips)
- Background: 2 1/2 yards
- Binding: 3/4 yard (suggested to cut into 2 1/2” strips)
- Suggested Borders:
- Border 1: 2” finished (same as accent)
- Border 2: 4” finished: 1 1/2 yard
Cutting Instructions:
- Background: Qty 30 2 1/2” strips
- 48 each: 2 1/2” x 6 1/2 “ 4 per block
- 24 each: 2 1/2” x 18 1/2” 2 per block
- 24 each: 2 1/2” x 14 1/2” 2 per block
- Accent Fabric:
- 12 each: 2 1/2” squares
- Quantity 6 – 2 1/2” strips for Border #1
- Print/Jelly Roll: Select 3 colors per block; one of the colors will need 2 strips
- 4 each: 2 1/2” Squares Color #1
- 4 each: 2 1/2” squares Color #2
- 4 each: 2 1/2” x 4 1/2” Color #2
- 4 each: 2 1/2” x 4 1/2” Color #3
- 4 each: 2 1/2” x 6 1/2” Color #3
- ****Repeat this for each block
Sewing Instructions:
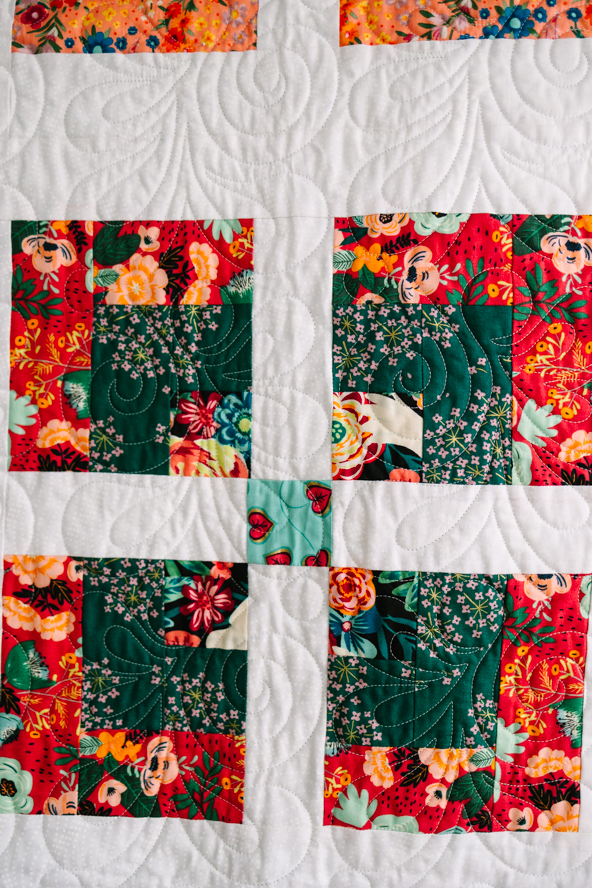
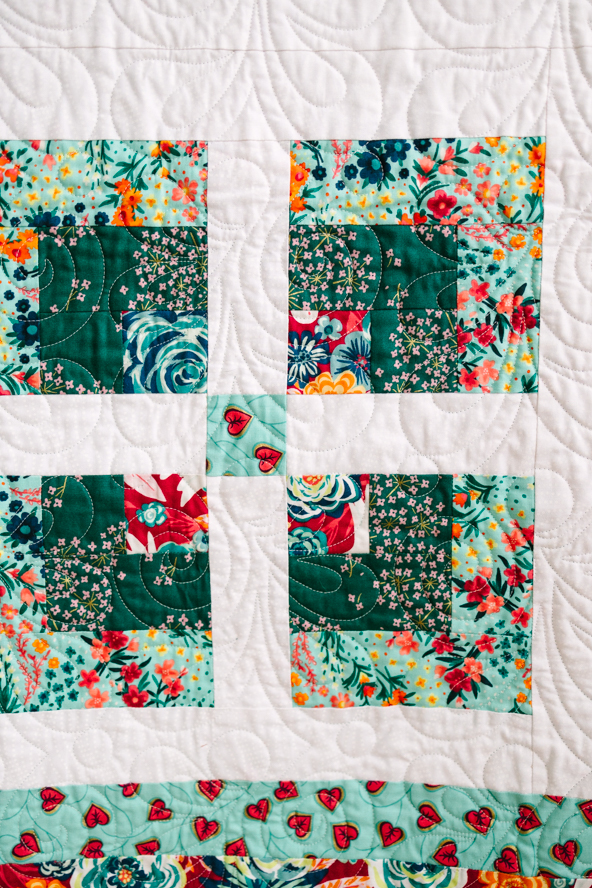
Note: Repeat following steps for each block. (All directions based on 1/4” seam allowance)
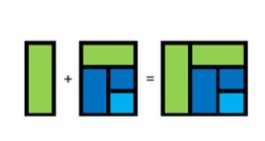
- Make four pairs out of Color #1 2 1/2” squares and Color #2 2 1/2” squares.
- Attach Color #2 2 1/2” x 4 1/2” rectangle to Step 1. This will create a 4 1/2” square.

- Attach Color #3 2 1/2” x 4 1/2” rectangle to Step 2. This will create a rectangle 4 1/2” x 6 1/2”.
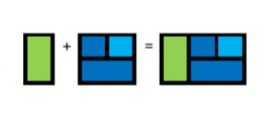
- Attach Color #3 2 1/2” x 6 1/2” rectangle to Step 3. This creates a 6 1/2” square.
- Take two of your 6 1/2” squares from Step 4 and sew 2 1/2” x 6 1/2” background in between them. Orient the blocks with Color #1 touching the sashing/background piece. Repeat this step for remaining 2 6 1/2” blocks from Step 4.

- Create sashing piece for middle of block. Sew one 2 1/2” x 6 1/2” background to 2 1/2” accent square (on the 2 1/2” side). Once this is sewn, add 2 1/2” x 6 1/2” background sashing piece to the other side of the accent square.

- Sew results of Step 5 to either side of Step 6. This is will create a 14 1/2” square, with sashing running in between your 6 1/2” squares created in Steps 1-4.

- Sew 2 1/2” x 14 1/2” background to top and bottom of 14 1/2” square from Step 7.
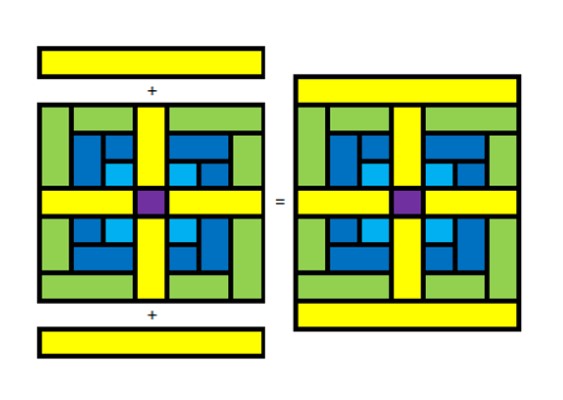
- Sew 2 1/2” x 18 1/2” background to both sides of Step 8 (The two remaining sides.).

- Once all 12 blocks are complete, lay blocks out 3 x 4 and sew together.
- Once all 12 blocks are together, add borders. Suggested 2 1/2” ( 2” finished) Accent and then 4 1/2” final border, then bind edges to close quilt. following (4” finished).