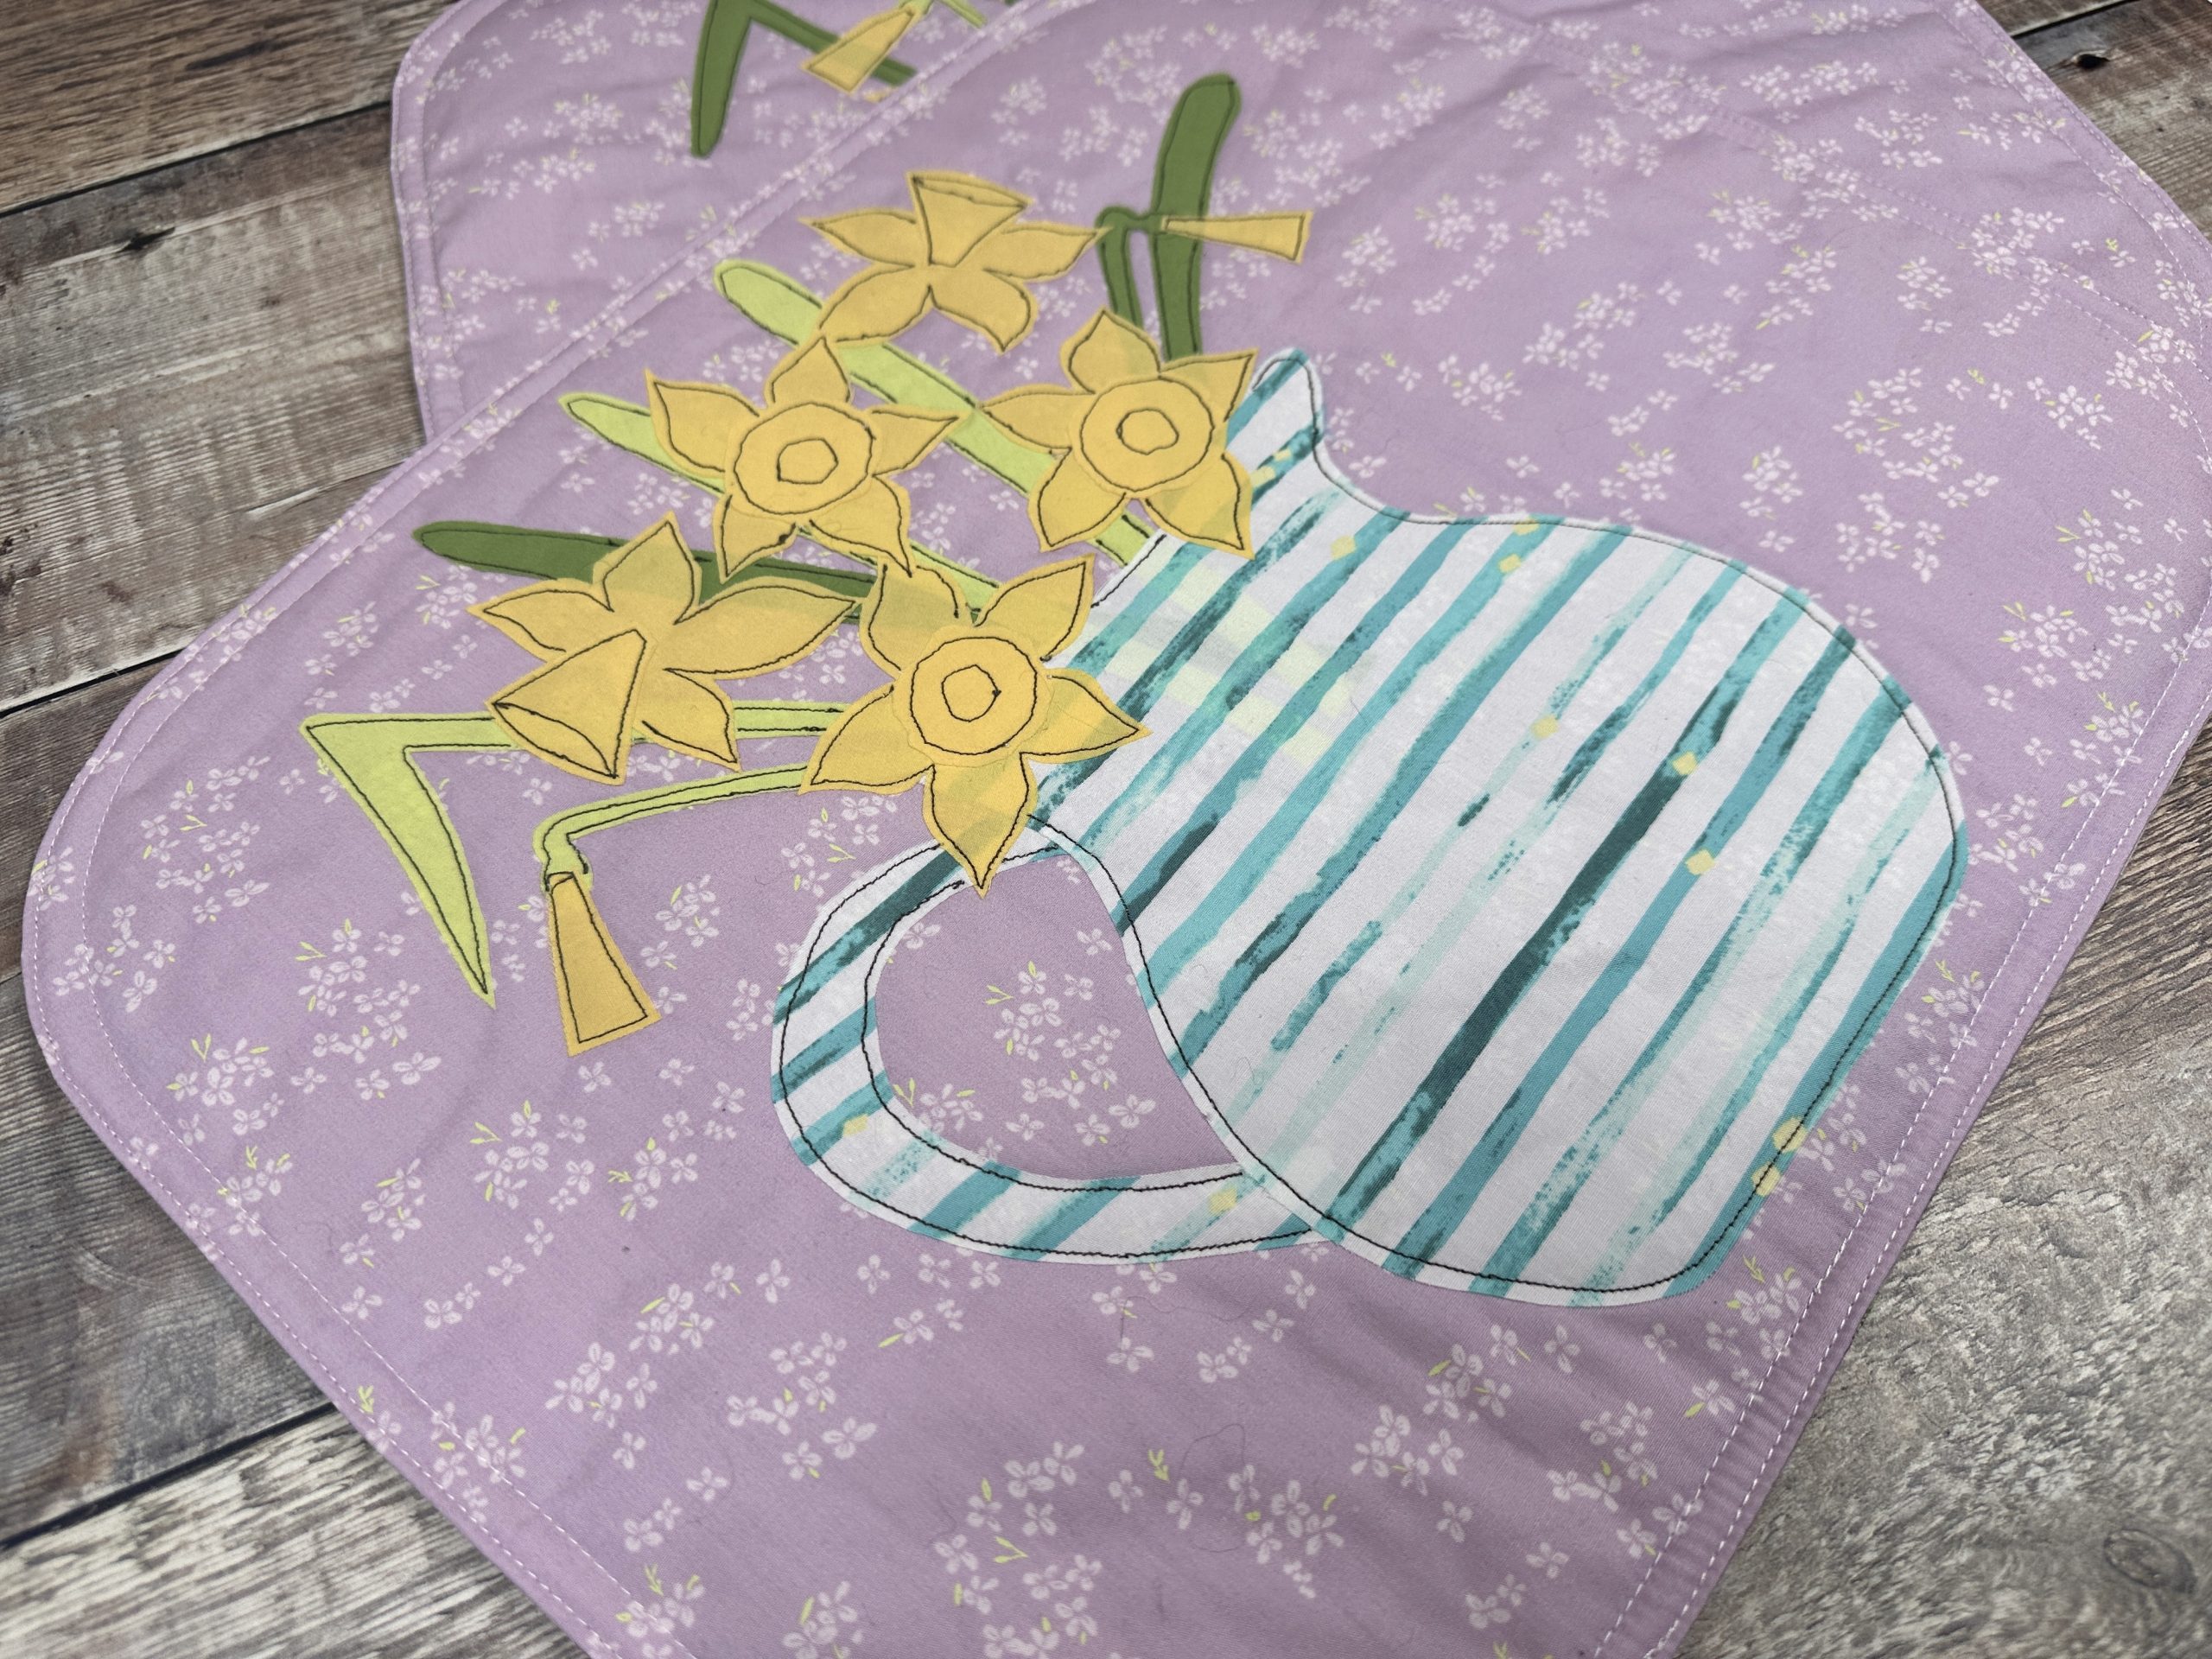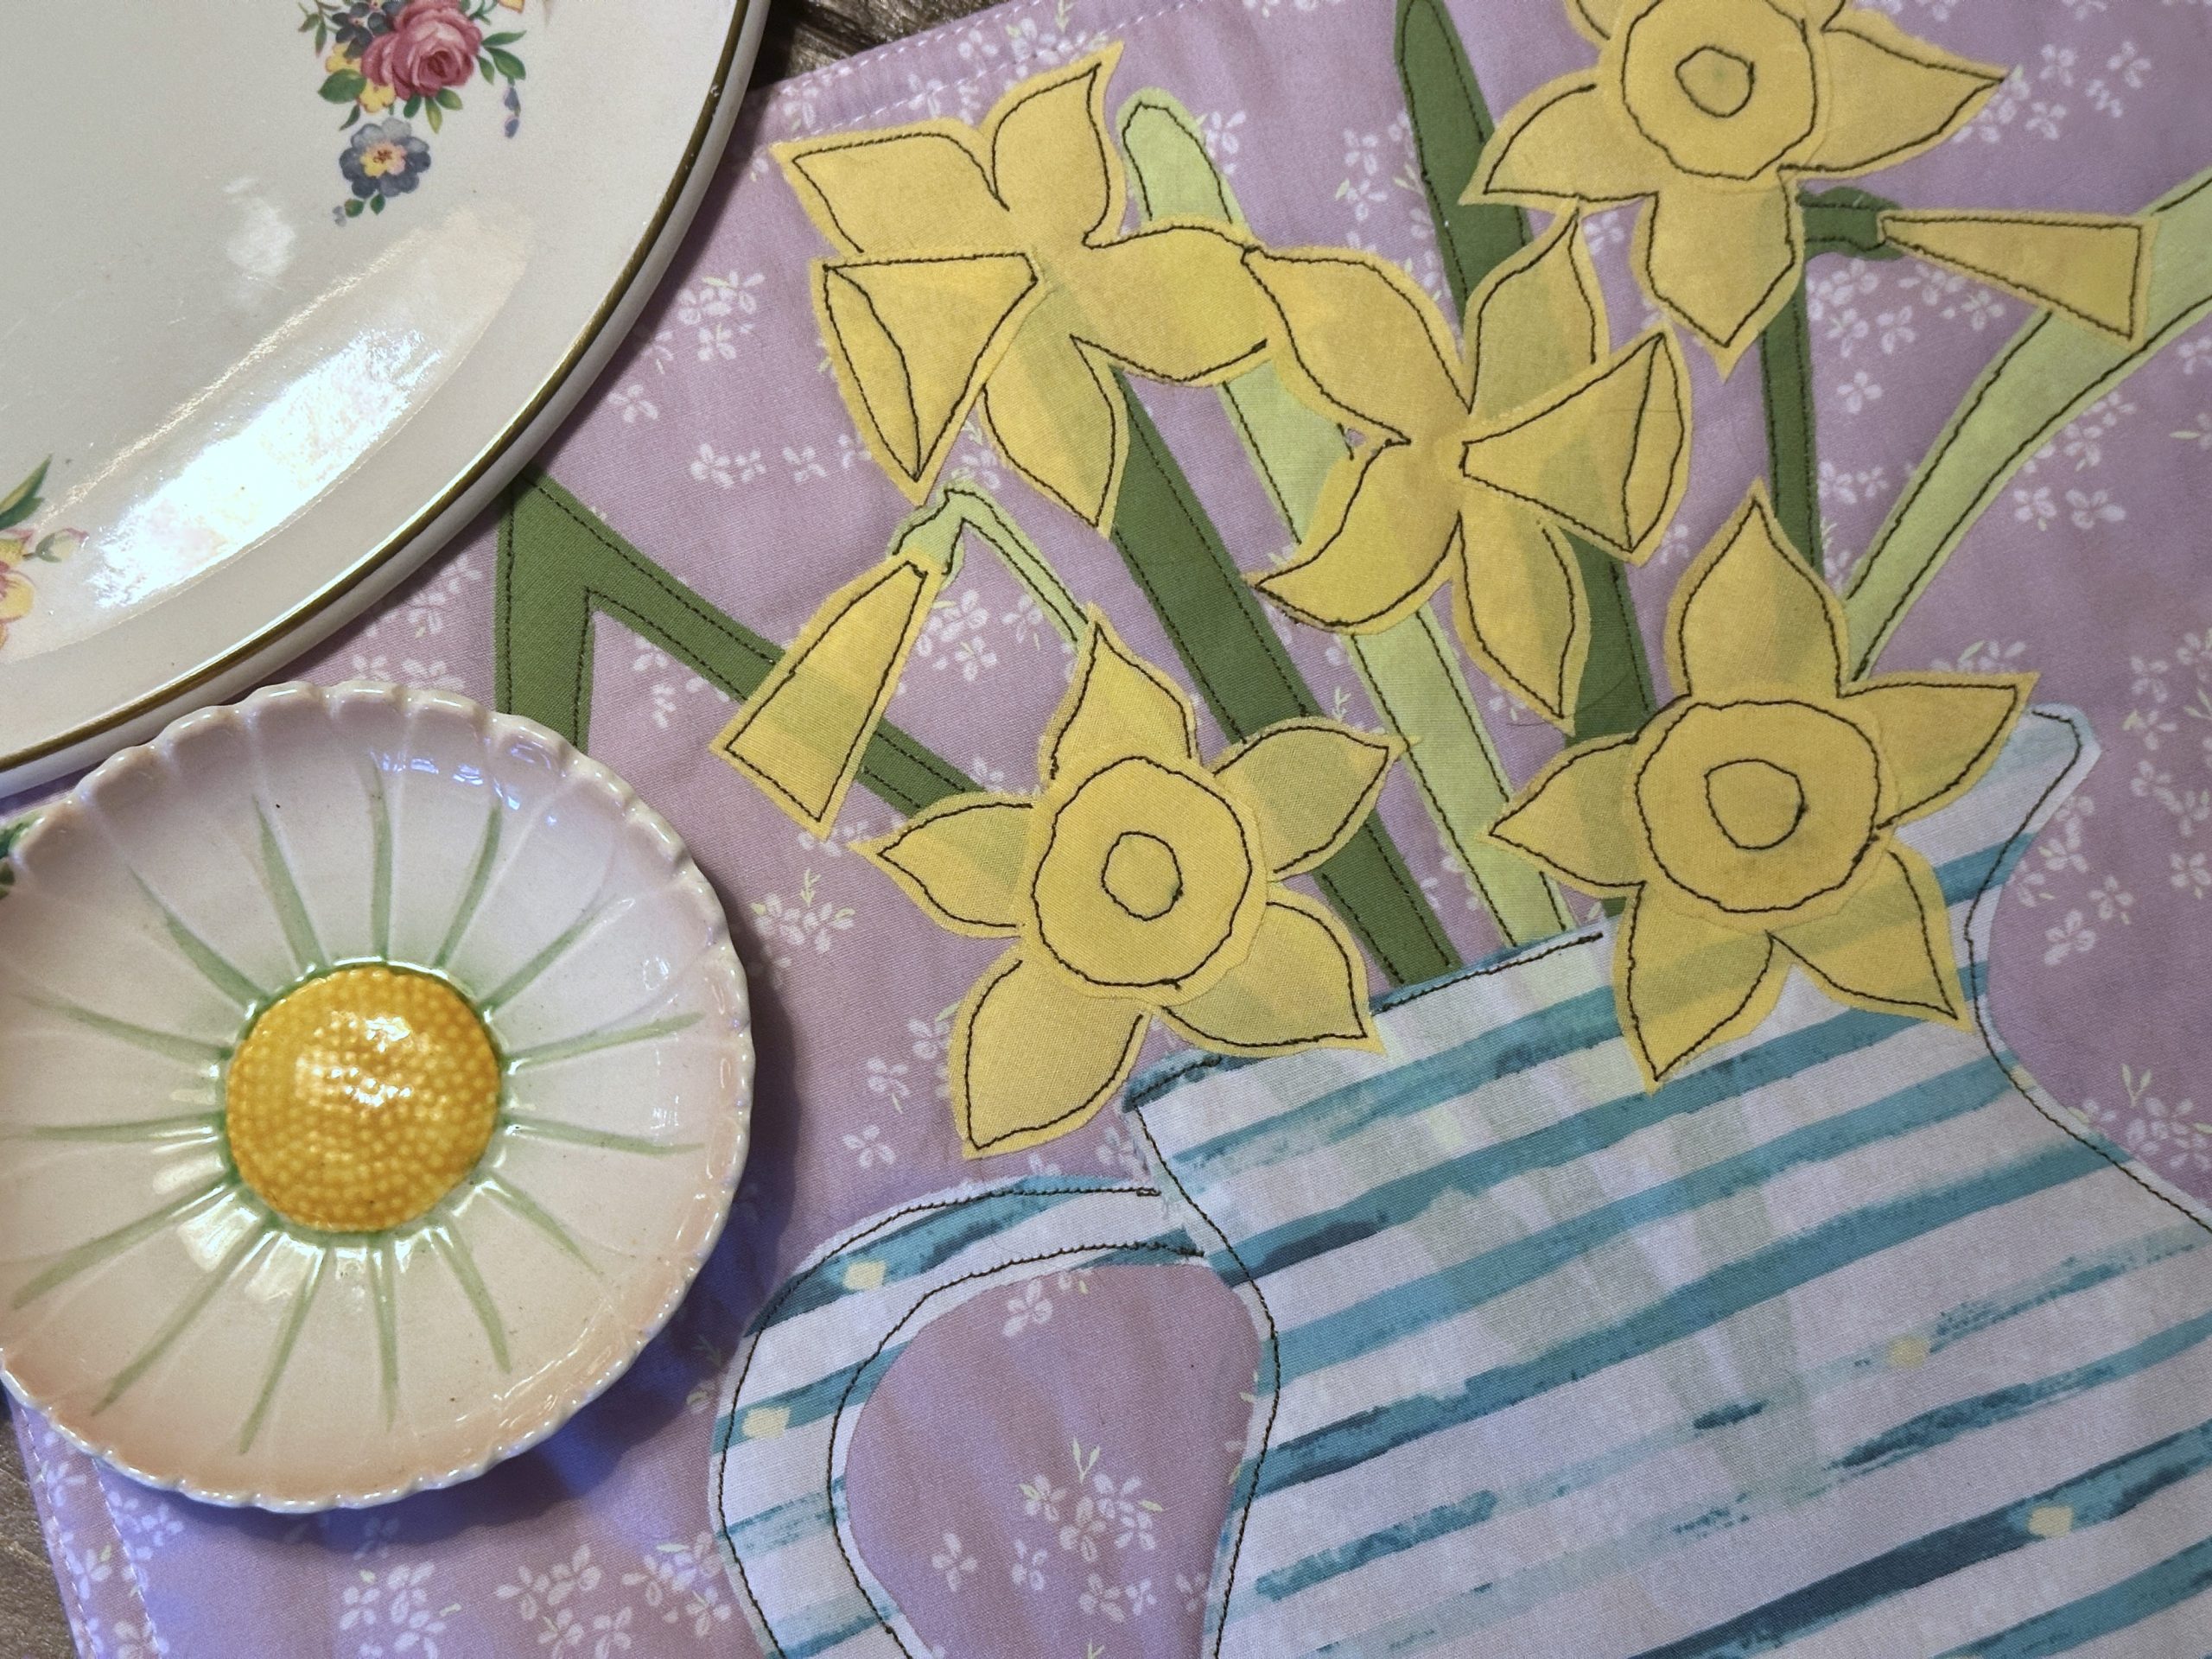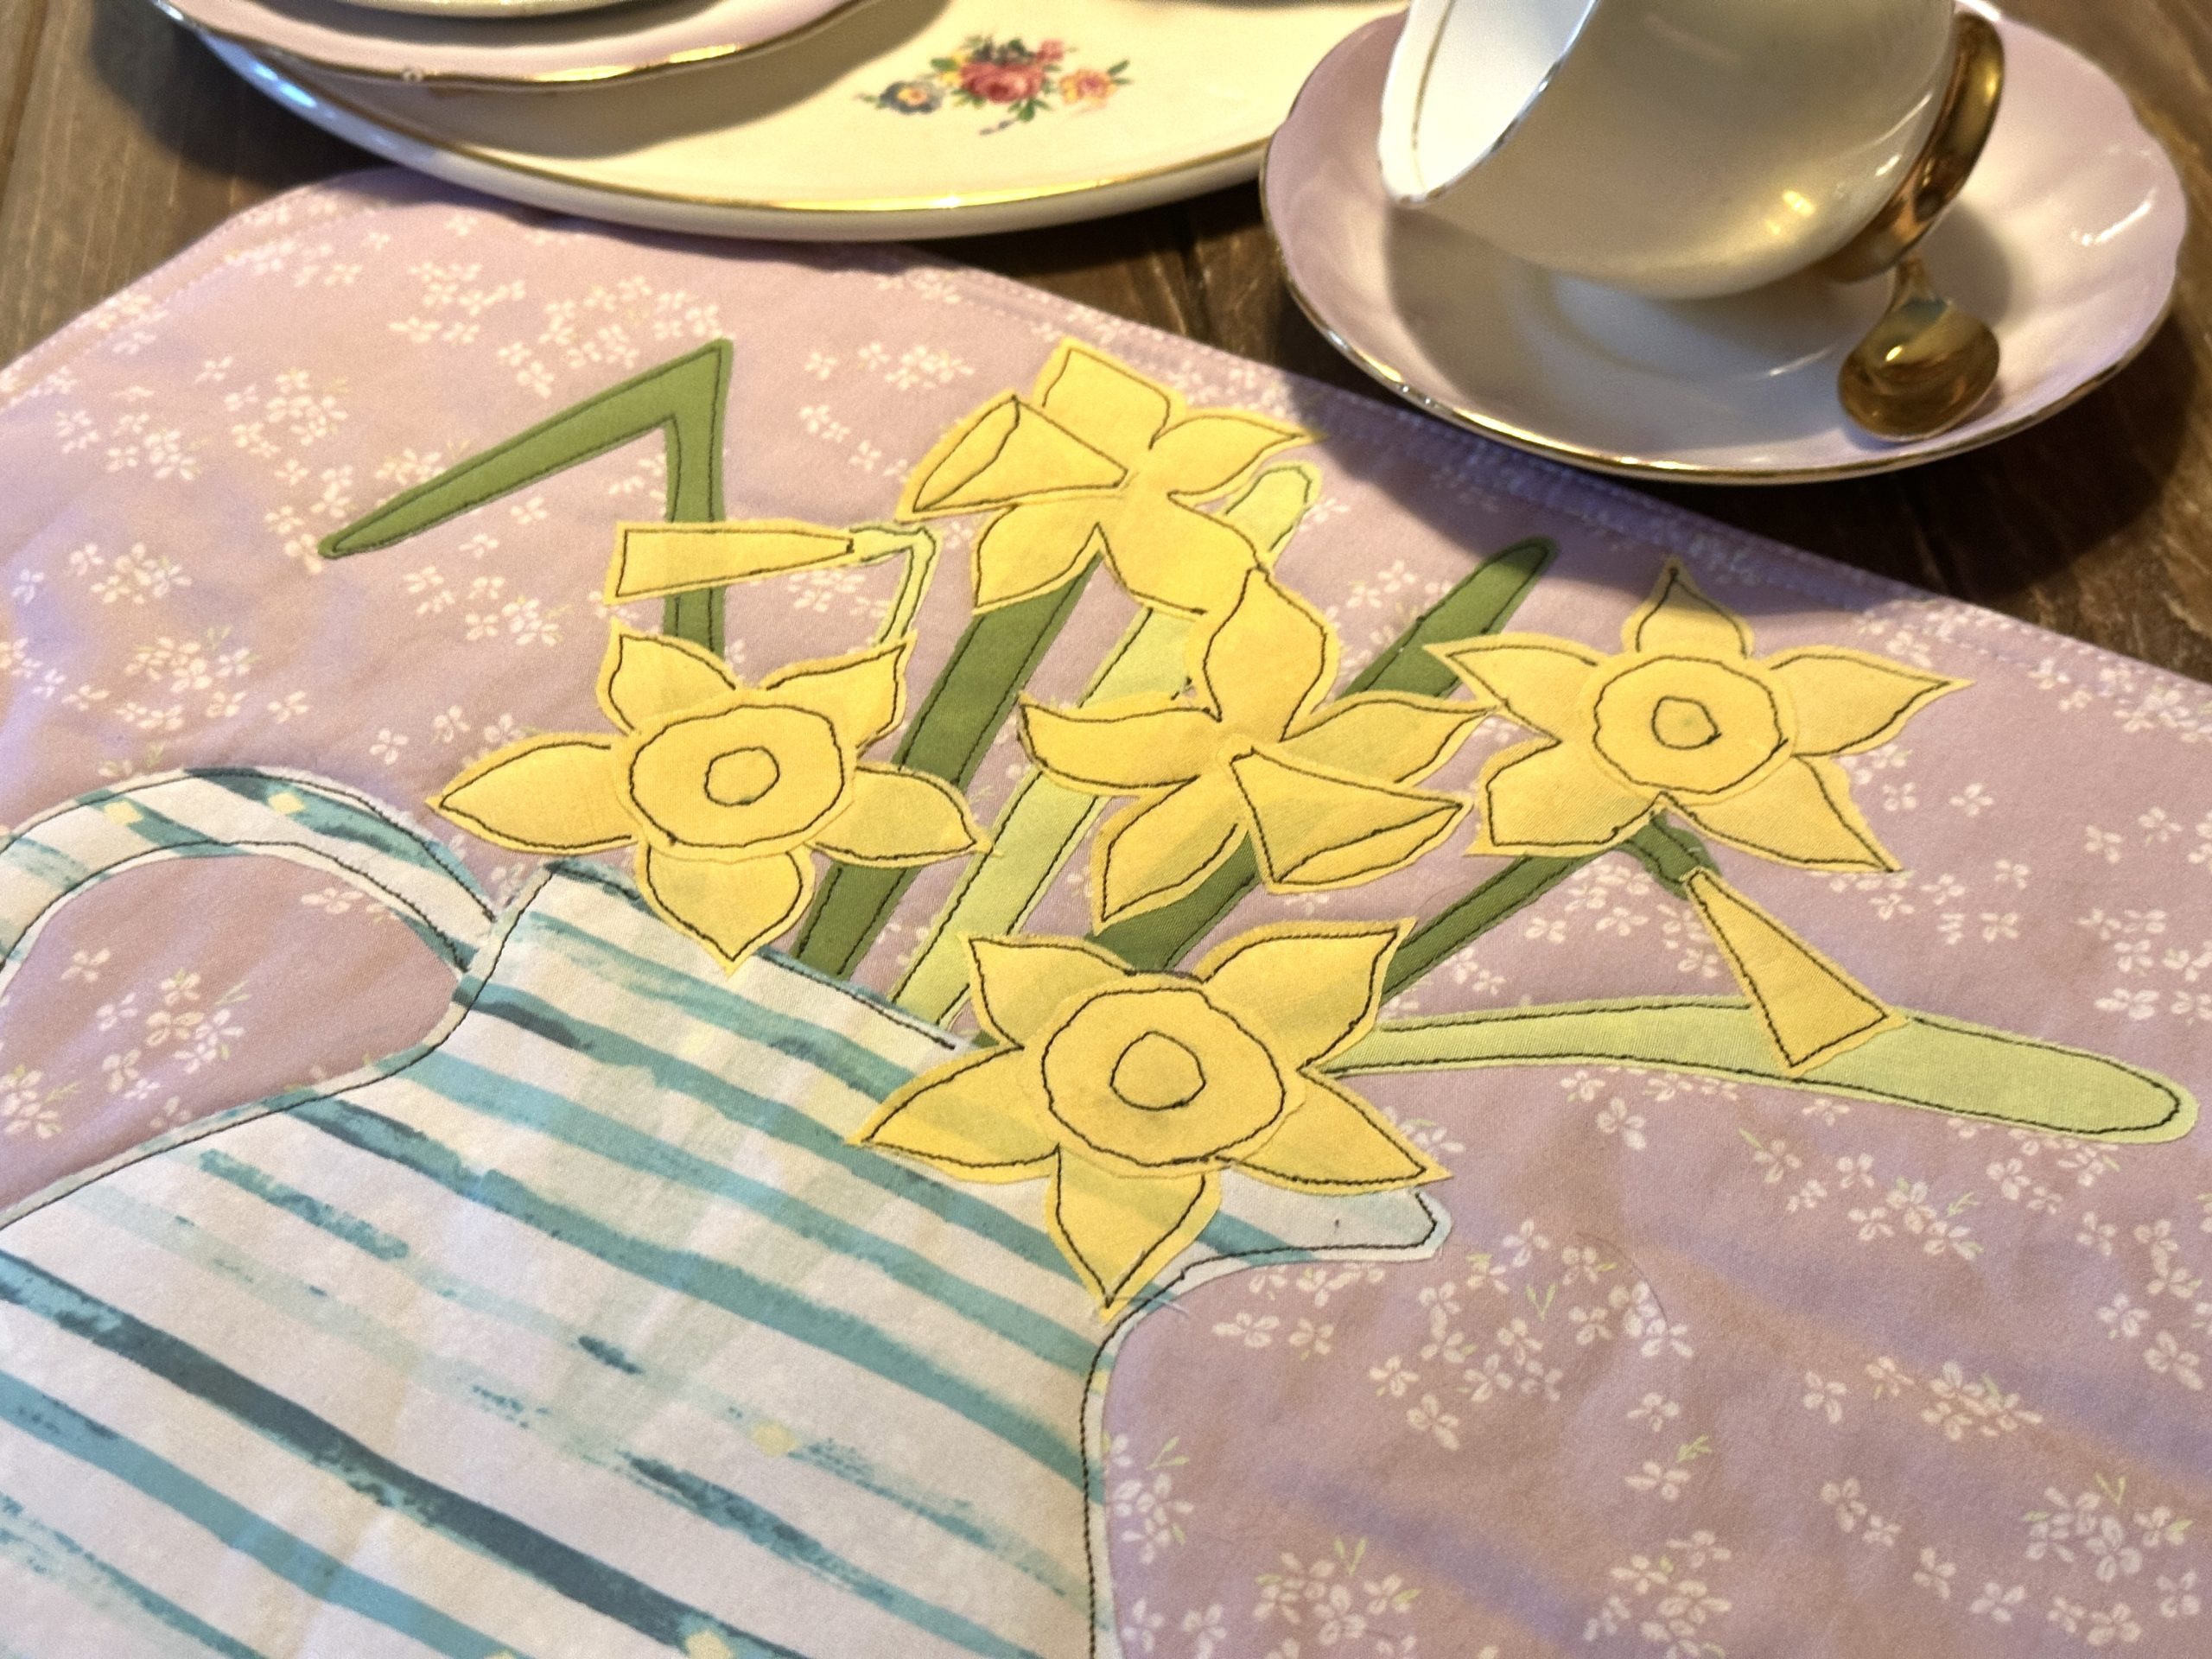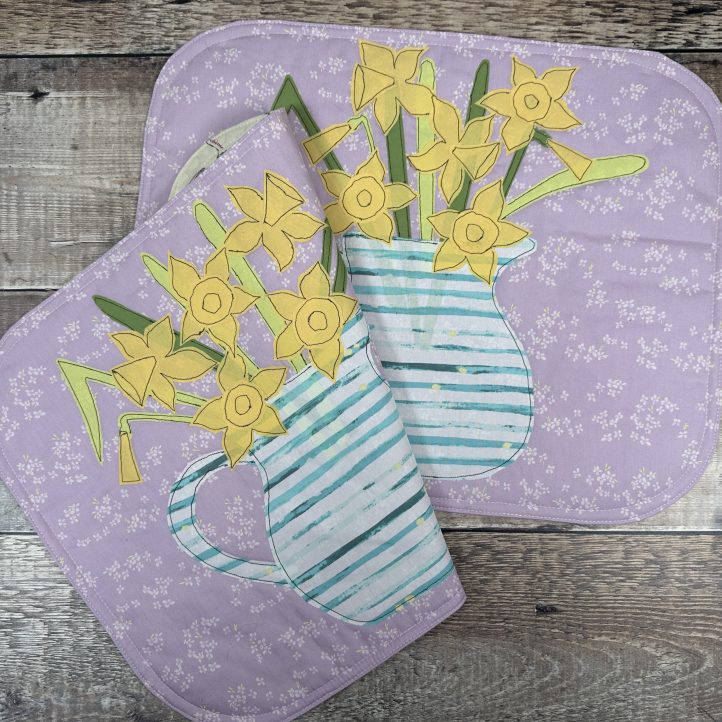
Daffodils in bloom are one of the reliable signs that spring will soon arrive, which is why we can’t wait to show you these beautiful placemats from Debbie von Grabler-Crozier. Made using fat eighths and fat quarters, this spring applique pattern features a striped pitcher of cheerful yellow daffodils and will brighten up your kitchen or dining room table. This placemat sewing pattern is designed for a set of two placemats and would look so pretty if paired with a vase of fresh daffodils to complete your décor.
Designer Note: Seam allowances are all 1/4” and have already been added.
Materials:
- Fabric (Notes: The fabric amounts are enough for two placemats. All fabrics are by Art Gallery Fabrics.)
- 1/2 yd. blender fabric for the background. The designer loves Sweet Nostalgia Soul from the Soul Fusion collection by AGF.
- 1/2 yd. coordinating fabric for the backing. Debbie’s choice is Vie la Bohème from the Soul Fusion collection by AGF.
- Fat quarter fabric for the jug. The designer used Lucciole Marine from the Capri collection by Katarina Roccella for AGF.
- Solid fabrics for the daffodils (from the Pure Elements collection):
- Fat eighth Light Citron for the leaves and stems (green solid I)
- Fat eighth Asparagus for the leaves and stems (green solid II)
- Fat eighth Banana Cream for the flowers and buds
- Interfacing:
- 1/2 yd. H630 fusible batting (Vlieseline)
- 1/2 yd. Bondaweb or similar fusible appliqué medium (Vlieseline)
- Dark colored thread for the appliqué. This might be a dark gray, blue, or black.
- Coordinating threads for all fabrics and trims
- Scissors
- Fabric marking tools
- Extra feet for your sewing machine (darning foot, for example)
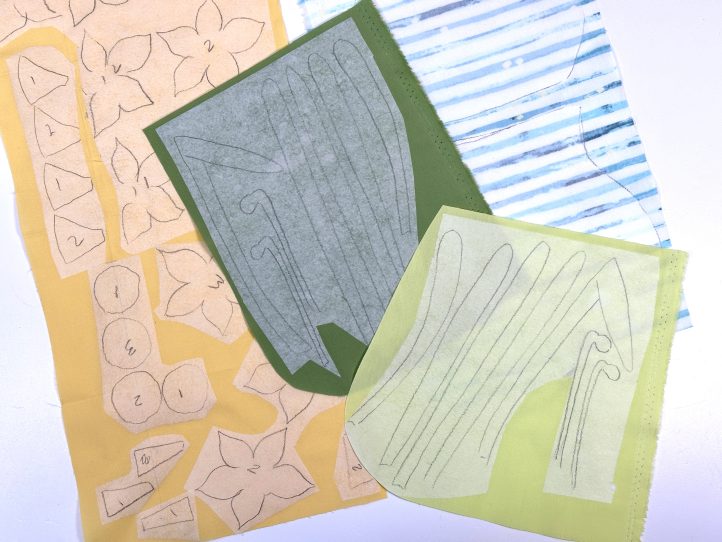
- PDF Pattern – This is located at the bottom of this page. Please see printing instructions below. Note: Dashed lines indicate an applique piece behind another.
PRINTING INSTRUCTIONS:
Note: To download the pattern, click on the pattern download button at the bottom of the page. We recommend opening your pattern download using Adobe Acrobat.
Cutting Instructions:
Note: Cutting amounts are for two placemats.
From the background fabric:
- 2 pieces 16 1/2” wide x 13 1/2” tall for the placemat background
From the backing fabric:
- 2 pieces 16 1/2” wide x 13 1/2” tall for the backing fabric
From the jug fabric:
- 4 pieces (2 jugs and 2 handles) cut using the pattern
From the green solid I fabric:
- 14 pieces cut using the leaf and bud stem patterns
From the green solid II fabric:
- 14 pieces cut using the leaf and bud stem patterns (TIP: Make life easier by tracing all leaves and bud stems onto the darker green and then all leaves and bud stems onto the light. Cut them out and divide them up between the two jugs so that they are similar but not identical.)
From the yellow solid fabric:
- 14 assorted pieces cut using the flower head and bud patterns
From the H630 interfacing:
- 2 pieces 16 1/2” wide x 13 1/2” tall for the placemat interfacing
Sewing Instructions:
MAKING:
Prepare the Appliqué:
TIP: It is quite easy to work on both placemats at the same time. On the PDF pattern, note that the dashed lines indicate applique piece should be behind another piece.
- The Bondaweb has a smooth (paper) and rough (glue) side. Trace the relevant appliqué elements using the patterns onto the paper side of the Bondaweb and cut out roughly.
- Fuse these elements onto their fabrics. Place each appliqué unit Bondaweb glue side down onto the wrong side of the chosen fabric and iron to attach.
- TIP: As you see from the cutting list, you have two colors of green. This is to give your daffodils the appearance of depth in the vase. Mix the leaves up about half and half as described in the cutting notes.
- Cut the appliqué pieces out exactly.
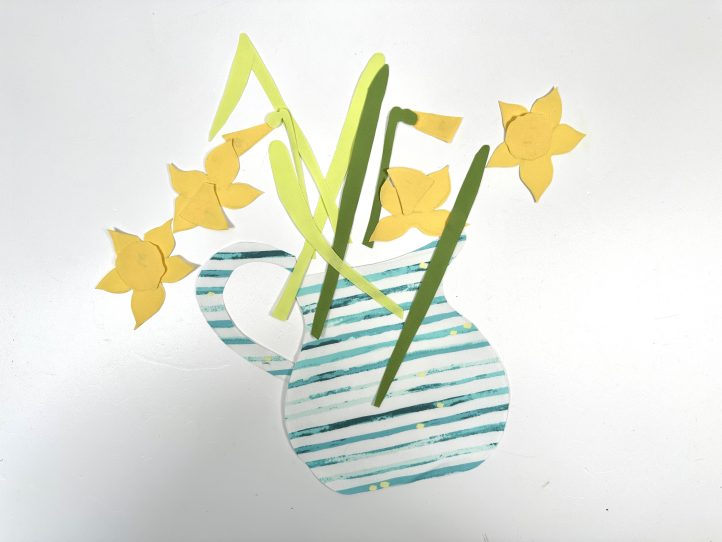
- Lay the jug piece onto the backing paper 1” up from the bottom edge and in the middle and trace around it with a removable marker. Take the jug away. This leaves the outline of the jug so that you can arrange your flowers with confidence.
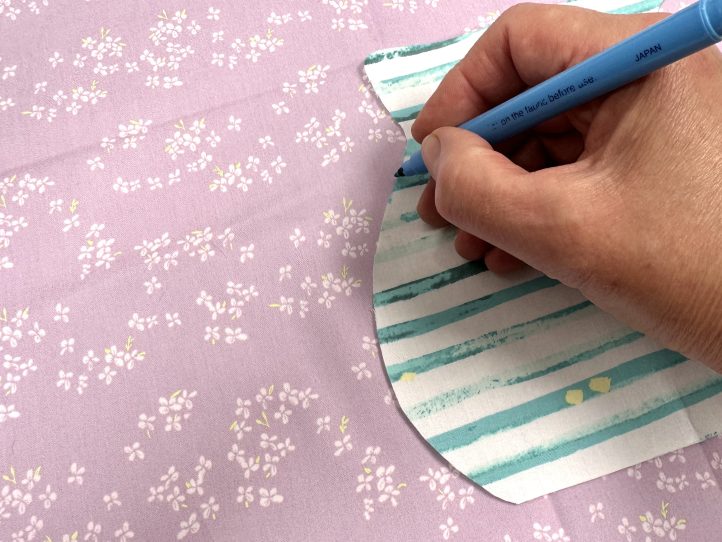
- TIP: Doing this before you remove the paper from the jug makes it a lot easier to trace around!
- Start with the darker green leaves and bud stem. Peel the paper away and lay the pieces onto the background fabric so that they sit into the jug outline. When you are happy, iron them into place.
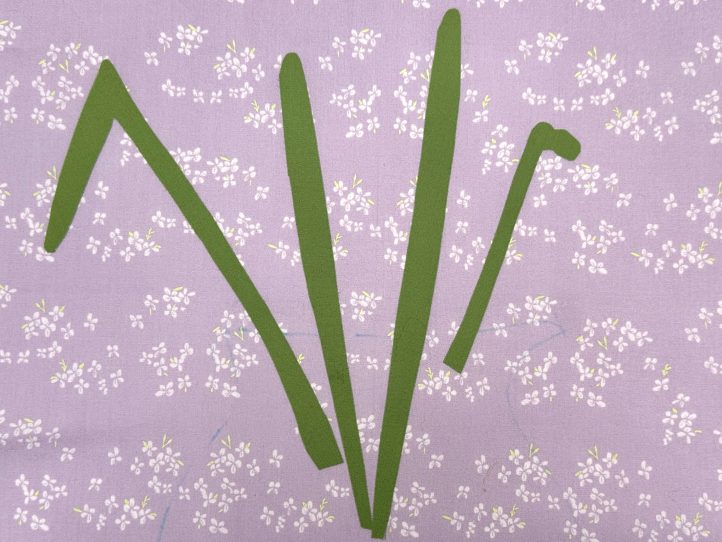
- Add the lighter green leaves and bud stem and then the jug, positioning the handle onto the left hand side.
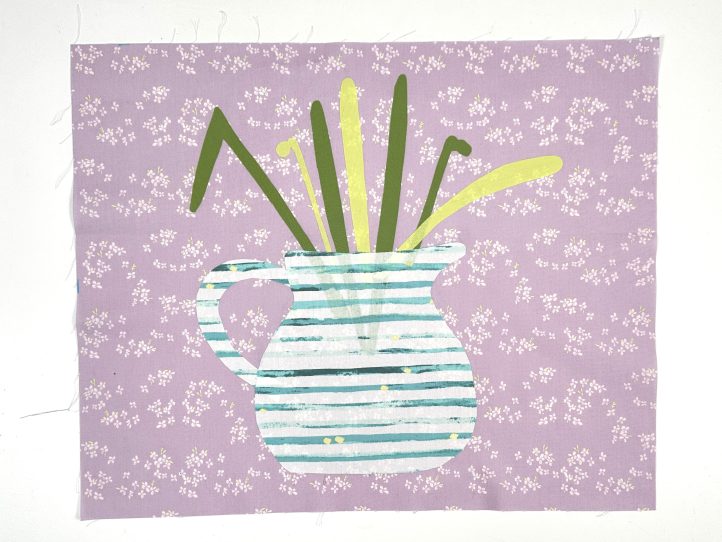
- TIP: Aim to have the appliqué pieces 1” down from the top edge, too.
- Finally add the flowers and buds.
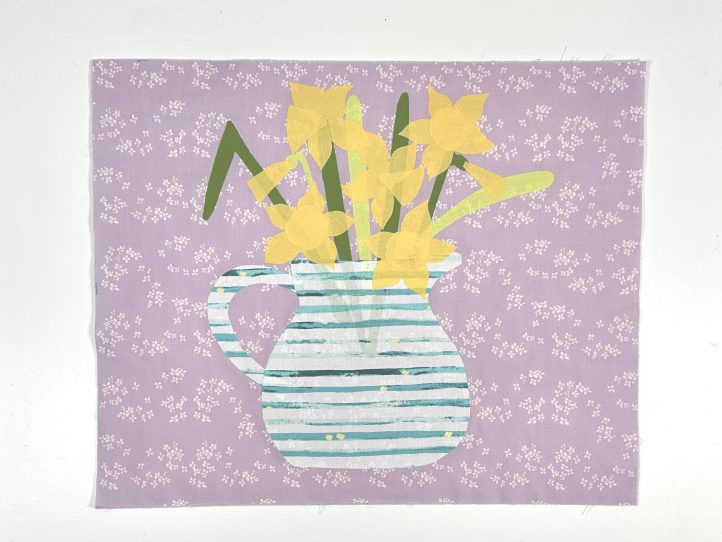
- TIP: You will notice that the flowers do not have any stems. That is to keep the picture from becoming too cluttered. They don’t need stems.
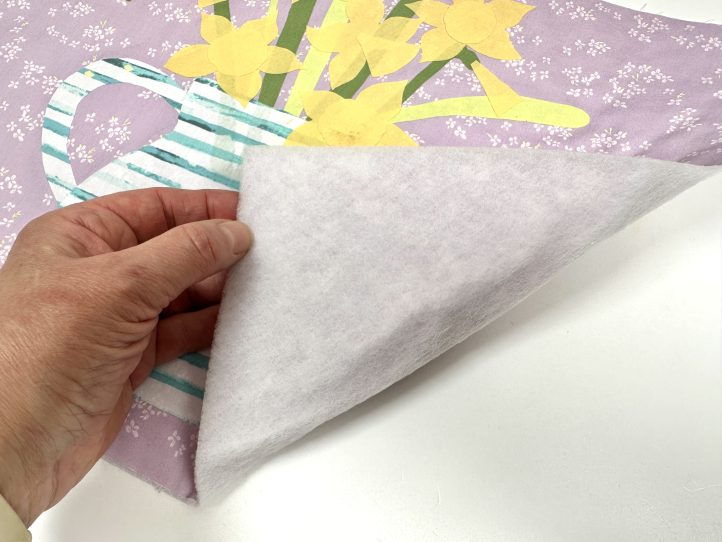
- Fuse the H630 wadding to the wrong side of the background fabric.
- TIP: It is a good idea to draw some removable details onto the flowers to show you where to sew. These details can be found on the pattern.
- If you have not made both placemats at the same time, repeat all of the above for the second.
Complete the Appliqué:
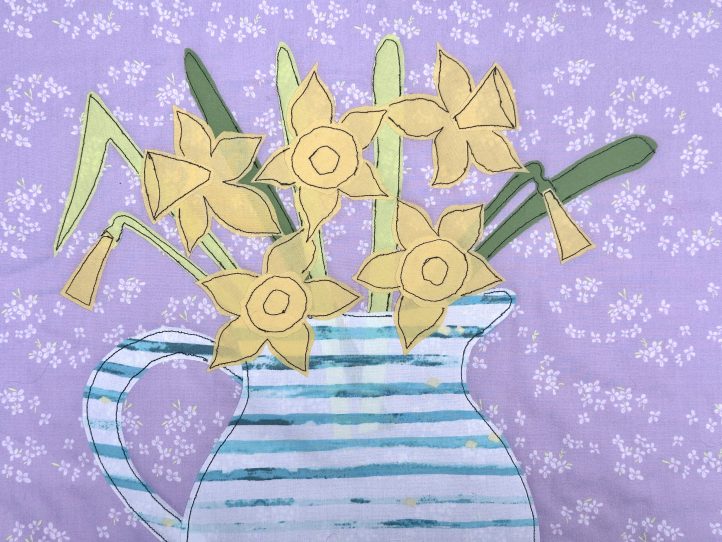
- Set your machine up for Free Motion Embroidery (FME). This is possible on almost all modern sewing machines. Do check your manual for details but the idea is to either drop the feed dogs or to set your stitch length to zero. You will need your darning foot to allow you to embroider smoother curves.
- Thread with your chosen dark thread and embroider the details onto the leaves, stems, flowers, and buds.
- TIP: Embroider in from the edge of each shape about 1/8” and don’t aim for absolutely perfect neatness. The idea is to make it all look hand drawn. Embrace imperfections.
- When you are finished, trim the threads back on the front and the back of the appliqué.
Finishing the Mats:
- Round the corners of the placemat appliqué tops by drawing around something (an upturned teacup or side plate, for example) and then cutting them out.
- Place the trimmed top onto the untrimmed backing fabric, right sides facing and pin or clip. Sew right around the edge, leaving a turning gap on the bottom long edge.
- Trim the backing fabric back to the same size and shape as the trimmed top and notch the rounded corners.
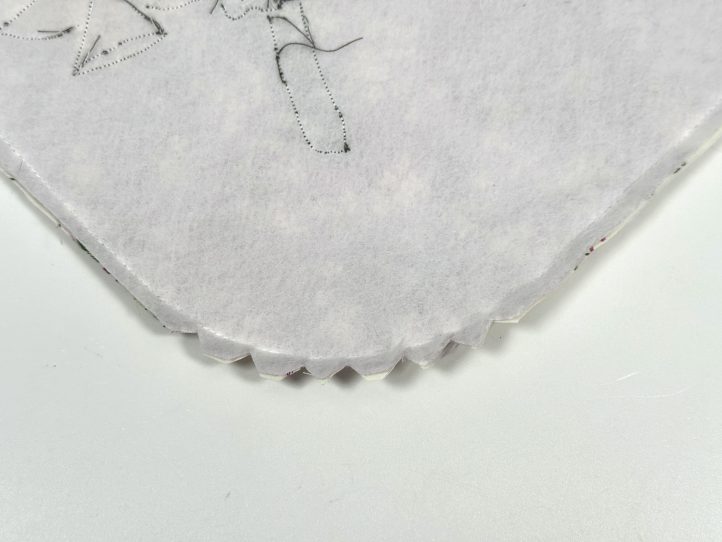
- Turn out through the turning gap and close the gap.
- Topstitch narrowly (1/8”) right around the mat and then come back in with a second row of topstitching 1/4” in from the first.
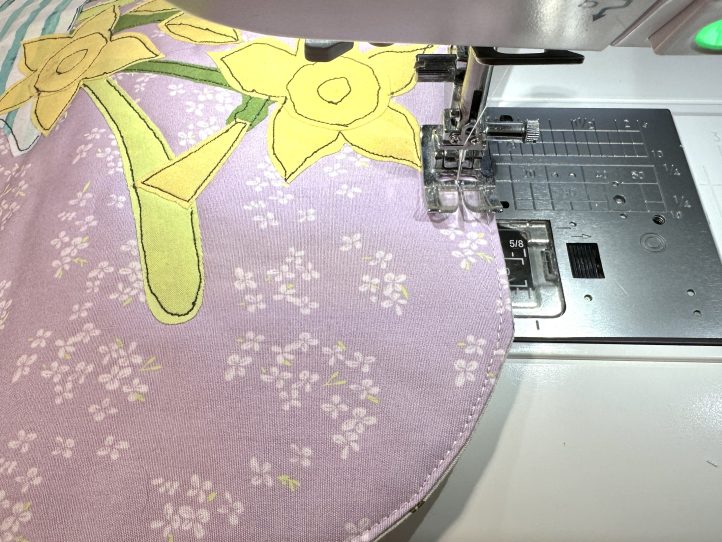
- TIP: You can use a twin needle if you prefer.