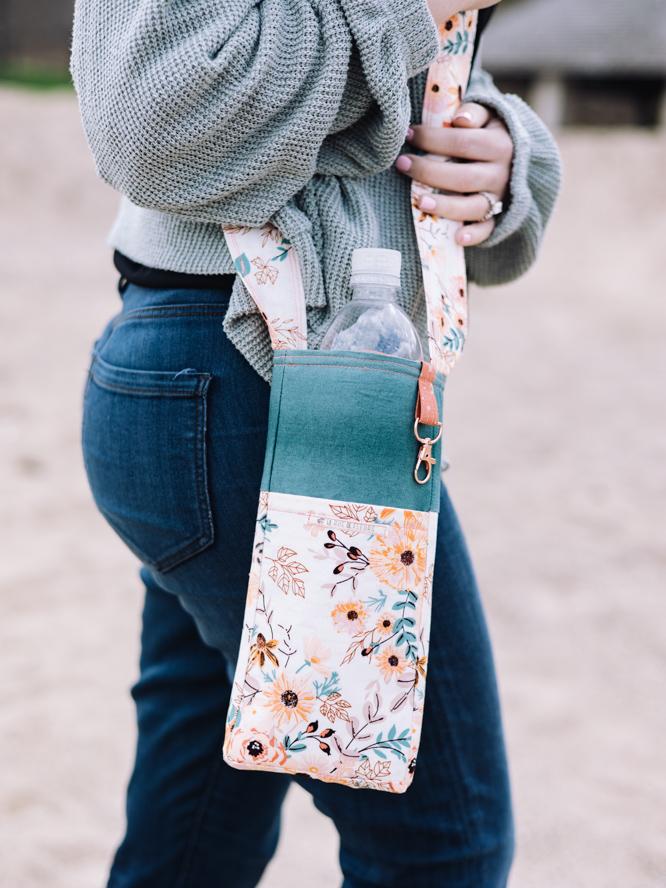
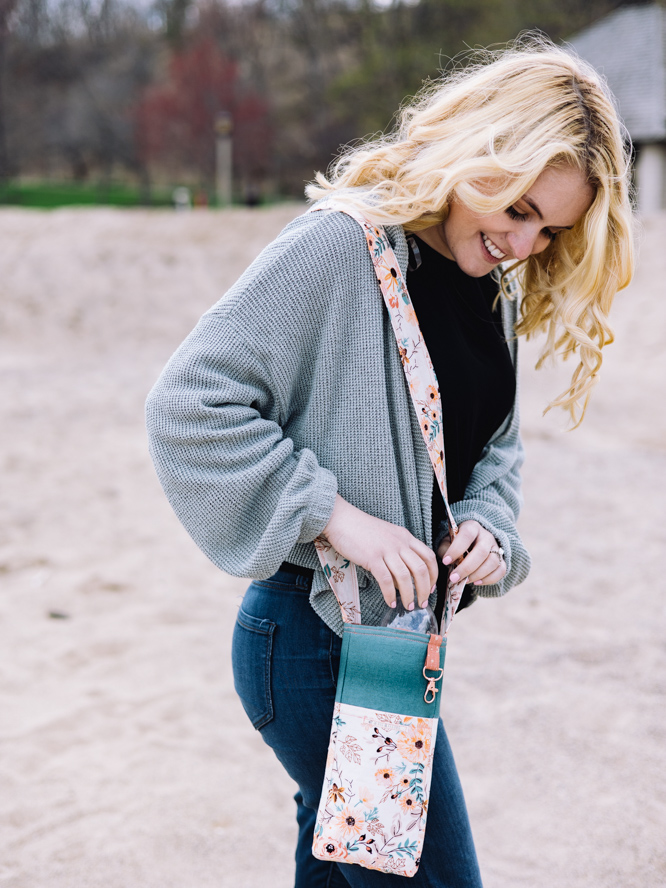
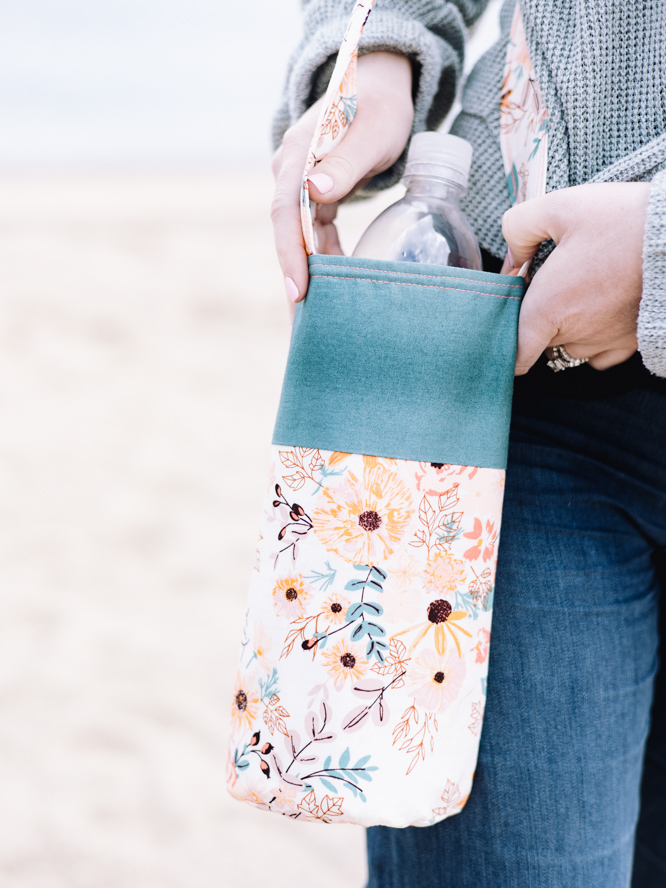
If your water bottle is your daily companion on walks, trips to the gym, or running errands, then you’ll love this helpful sewing project. Make this handy bottle bag to keep your water bottle secure and your hands free during your day-to-day adventures. This intermediate sewing project is designed in summery shades of gold, aqua, and peach and features a lobster claw clasp to hold your keys. Stop worrying about carrying your necessities and enjoy your time outside during warm summer weather with this sewing project.
Skill Level: Intermediate
Finished Dimensions: 9.5”h by 5.75” w, 21” strap drop, 6.25” pocket
Seam Allowances: 1/8” and 1/4”
Materials:
Choose a Main Fabric, Contrasting Fabric, Lining Fabric, and Medium Weight Fusible Interfacing to create the following cuts:
- Floral main fabric
- Cut 1 – 7 x 8”- A (pieced panel bottom)
- Cut 1 – 5 x 7” – B (pocket front)
- Cut 1- exterior bottom curve template – C
- Cut 1 – 4 x 44” WOF – D (strap) Note: WOF = Width of Fabric
- Aqua ombré contrasting fabric
- Cut 1 – 8 x 10 1/2” – E (pocket side base)
- Cut 1 – 3 x 8” – F (pieced panel top)
- Peach dot lining fabric
- Cut 1 – 4 x 2 1/2” – G (fob loop)
- Cut 1 – 8 x 10 1/2” – H (interior pieced panel lining)
- Cut 1 – 5 x 10 1/2 “ – I (interior pocket-side lining)
- Cut 1 – 5 x 7” – J (pocket lining)
- Cut 1 – bottom curve template – K
- Medium weight fusible interfacing
- Cut 1 – 1 3/4 x 44” – L strip (strap)
- Cut 1 – 1/2 “ x 3 1/2″ strip M (fob interfacing)
- Cut 1 – 5 x 7” – N (pocket interface)
- Cut 1 – 5 x 10 1/2” – O (pocket side panel interface)
- Cut 1- 8 x 10 1/2” – P (pieced panel interface)
- Cut 1 – bottom curve template – Q
Special Notions and Templates:
- Medium weight fusible interfacing, such as Pellon 931 TD
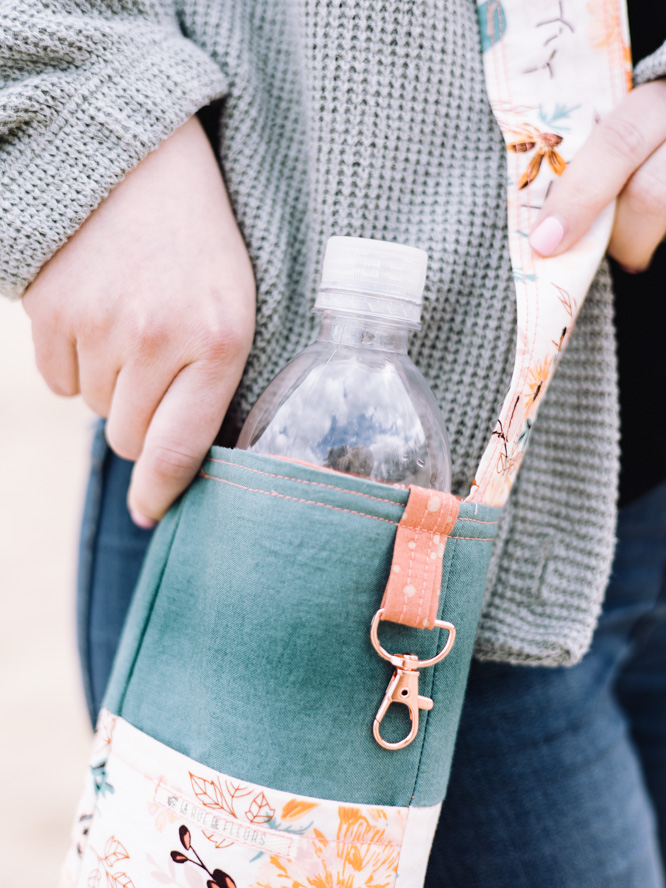
- 1.57 x 1”/25mm swivel lobster claw clasp with D-ring
- Sewing clips
- Bottom curve template PDF – This is located at the bottom of this page. See printing instructions below.
PRINTING INSTRUCTIONS:
To download the PDF template, click on the download button at the bottom of the page. We recommend opening your download using Adobe Acrobat.
Instructions:
CUTTING AND FUSING THE INTERFACING:
- Prepare all cut pieces as instructed above.
- Fuse the medium-weight fusible interfacing, following the manufacturer’s instructions to the wrong sides of the corresponding lining pieces.
- For the strap (D, L) and fob (G, M) pieces, using iron, press the strip in half to find the center. Then fuse the corresponding interfacing to one side of the centerline against the crease, leaving 1/4″ spacing from each end and the side. See Figure 1.

PIECING THE BAG COMPONENTS:
Strap and Fob:
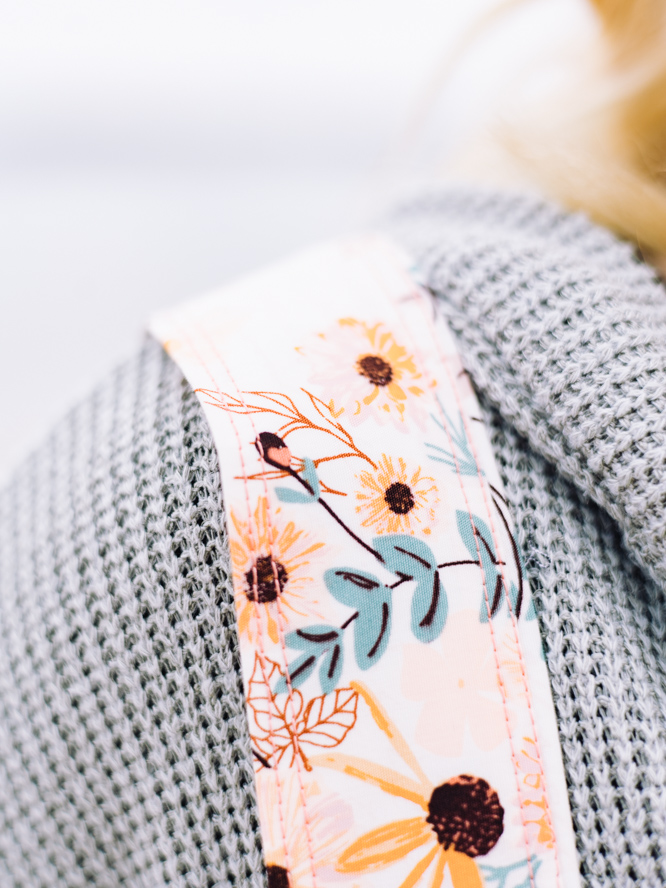
- At the ironing board, press the strap (L) in half to form a strong central crease.
- Open the strap, place the right side of the fabric down, and fold the long WOF edges in toward the wrong side 1/4″. Press with a hot iron to hold the fold and pin sides together along the folded edge. See Figure 1.
- Topstitch approximately 1/8″ around the entire perimeter of the strap to hold the turned edges in place.
- Repeat stitch lines along both long edges approximately 1/4″ from both edges to add stability to the strap. Set aside.
- Repeat steps 1-4 above for the key fob piece.
- Slide D-ring end of clasp onto the fob (G) piece and fold into a loop with the clasp in the center. Tack loop in place with a scant 1/8″ seam along the bottom to hold. Set aside.
Pocket and Pieced Sides:
- Place the pocket front piece (B) and pocket lining pieces (J & N) RST (Right Sides Together) and sew a 1/4″ seam across the top 5″ side.
- Flip the pocket front piece (B) down on top of pocket lining pieces (J & N), lining up both pieces with WST (Wrong Sides Together). Press the entire pocket unit flat. Topstitch the pocket unit approximately 1/4″ from the sewn and folded edge.
- Place the pocket piece on top of the pocket side base (E), lining up the bottom of the pocket with the bottom of the base piece with both right sides facing up. See Figure 2. Pin in place.
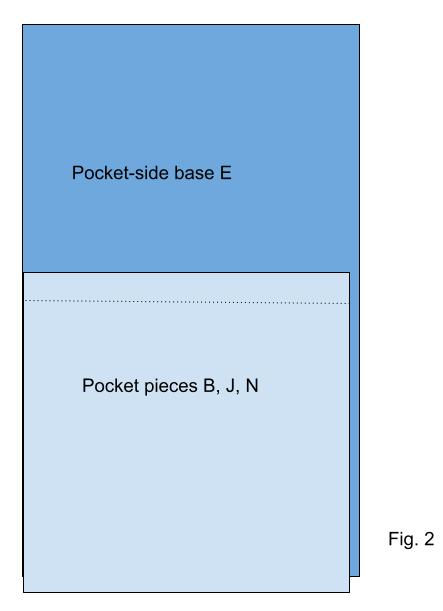
- Secure pocket to pocket base around the exterior three sides with a scant 1/8″ basting seam. Set aside.
- To create the pieced front panel, attach the pieced panel top (F) to the pieced panel bottom (A) along the 8″ length with a 1/4″ seam RST. Press open.
ASSEMBLING THE BAG:
Creating the Interior and Exterior of the Bag Body:
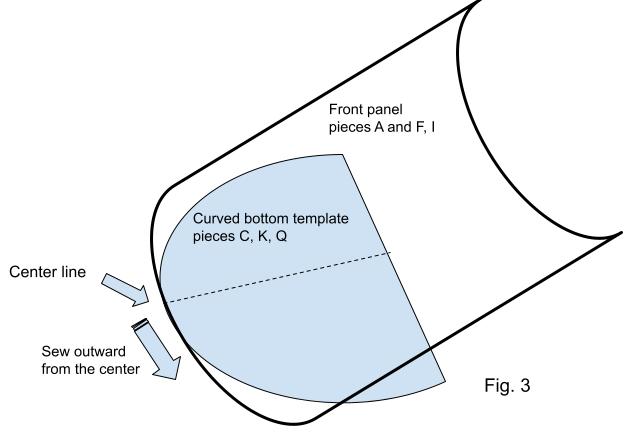
- To create the exterior of the bottle bag, begin by folding the exterior bottom curve (C) in half and pressing to create a centerline.
- Fold the exterior pieced panel in half and press to create a centerline. With RST, match the centerline of the pieced panel with the centerline crease of the bottom curve and pin in place.
- Sew from the center point to one edge with a 1/4″ seam all the way to the end and backstitch to secure, gently easing the straight edge of the pieced panel around the curved bottom edge as you sew. Rotate the piece and repeat for the other side. See Figure 3.
- Starting the seam in from the edge 1/4″, attach the exterior pocket piece (B &E) to the flat side of the bottom curve exterior RST with a 1/4″ seam. End 1/4″ from the other side. Backstitch at the beginning and end to secure. See Figure 4.
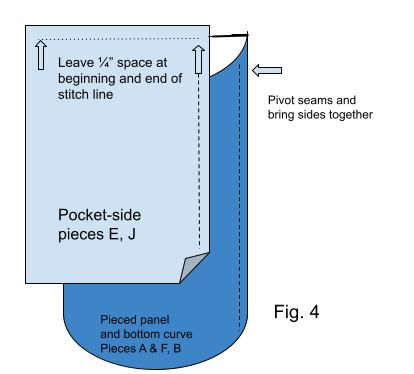
- Pivot the seams and bring the sides of the pieced panel and pocket front together up the sides by folding at the 1/4″ seam indentation and lining pieces up at the pocket top and pieced panel seam with RST. Nest seams in place, then sew each side together with a 1/4″ seam. See Figure 4. Set aside.
- Repeat Steps 1 to 5 for the interior lining using pieces H, I, and K. Pinning the interior bottom curve (K) in place before sewing will help reduce creasing with the interfaced fabric.
Attaching the Strap and Fob:
- Turn the exterior of the bag right side out. Place the key fob loop (G) at the top edge of the bag exterior just to the outside of the pocket front and pin in place. Use a scant 1/8″ seam to tack the fob in place. See Figure 5.
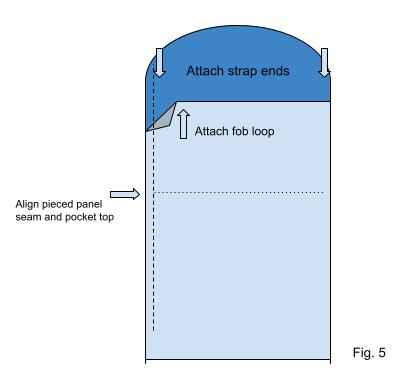
- With the interior of the bag right side in, insert the strap (D) with the wrong side against the right side of the bag interior. Line up the raw end of the strap with the top of the bag interior just to the inside of the pieced panel seam and pin in place. Use a scant 1/8″ seam to tack the straps in place.
Finishing the Bag:
- Insert the bag exterior into the bag interior with RST. Pin top edges together at the side seams.
- Leaving a 2″ opening at the start and stop, sew along the top edges with a 1/4″ seam to connect the interior and exterior pieces.
- Pull the bag exterior, fob, and strap through the 2″ opening and turn all pieces right side out. Use a dull turning stick, such as a chopstick, to push out the bottom corners and seams of the bag interior.
- Push the bag interior, now with right side out, down into the bag exterior. Then align and smooth the sides and seams together.
- Press around the top edge of the bag with a hot iron, making sure to turn the open hole seam in. Topstitch first 1/8″, then 1/4″ around the entire opening of the bag to secure the hole opening and finish the Eco Bottle Bag.
I was excited about this bag…but the letters on the pieces, and instructions DoN’T match up! Is there a tutorial for this online? I am a seasoned sewist, and am unable to follow the instructions as written!
Hello there! We’re so sorry that the instructions are confusing. Is there a particular piece/letter that doesn’t match up with the instructions? Let us know and we can reach out to the designer for more info. Have a great day! – Ashley, WeLikeSewing