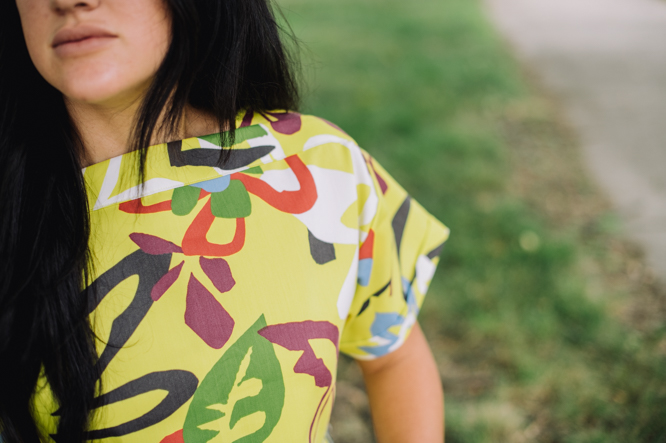
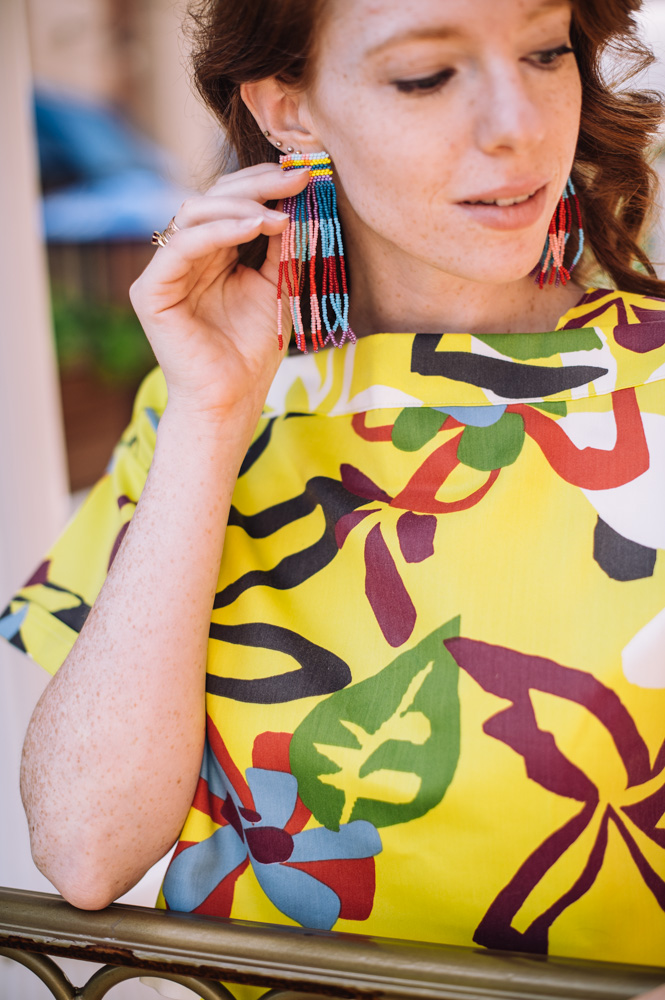
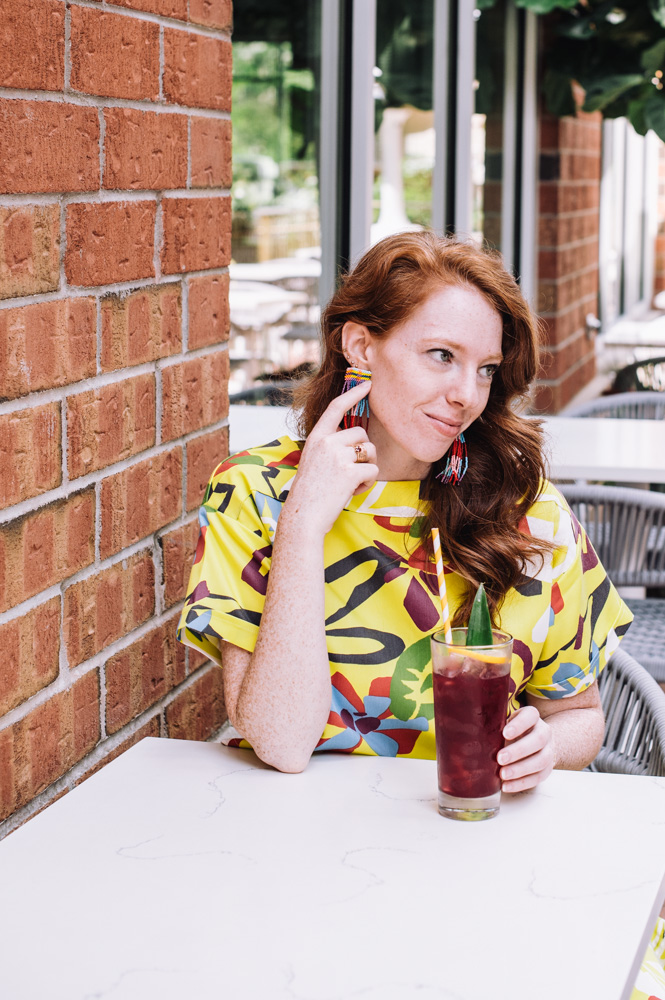
Channel breezy, boho vibes with a cute and comfy t-shirt that’s a perfect fit for your summer wardrobe. This t-shirt pattern features a square neckline, loose fit, and cropped length, hitting around your waistline and making it an excellent option for wearing on its own or layering over a tank. Our favorite element of this design is its focus on zero-waste fashion, meaning you don’t have to worry about wasting fabric. Create a summer top that’s super flattering and incredibly comfortable with this relaxed tee tutorial.
Skill level: Easy
Cut & Sew Time: 3 hours
Materials
- Your measurement: bust circumference, vertical distance from nape to waist.
- Yardage: 1 yd. – 1¼ yards of summer weight woven fabric, 45” (114cm) wide.
- Conventional sewing machine (sample made using Husquvarna -Viking Jade 2.0)
- Steam iron & ironing board
- Sewing kit (scissors, thread snips, tailors chalk, tape measure, press-cloth)
Project Notes
- The style of this cropped tee is loose fitting hitting just shy of the waistline. It utilizes a no-pattern-required approach and is designed around half-width of the fabric to create zero waste. Zero waste fashion is about utilizing existing materials to their full capacity and not producing textile or other material waste. The “pattern” pieces can be marked directly onto the cloth and cut to make quick work of this project. Make it as long or as short in length as you wish.
- Selecting Fabrics For This Project: Look for “drapey” summer-weight fabric with a soft hand. Only fabrics without nap (2-way surface) and prints without directional motifs are suitable for this project due to “railroading” the fabric when it is cut. Plain fabrics and those with symmetrical patterns (such as dots or squares) can be applied both conventionally or railroaded, because it doesn’t matter which way the pattern runs. The term “railroaded” means the design is created from selvage to selvage. Many border prints are railroaded fabrics. The selvage is the finished edge of the cloth usually referred to as straight-of-grain. Obvious diagonal prints are not suitable. No allowance has been made for matching of fabric prints.
- Square Up Fabric For This Project: It is important to square your fabric before beginning any sewing project but especially so here as no pattern is required for this shirt style. The cutting lines are marked directly onto the fabric. This process will ensure your shirt you intend to make is set up for success from the beginning.
- Keep in mind the fiber content of the fabric. Preshrink and true up the grain of your fabric selection, if necessary.
Instructions
Garment Components
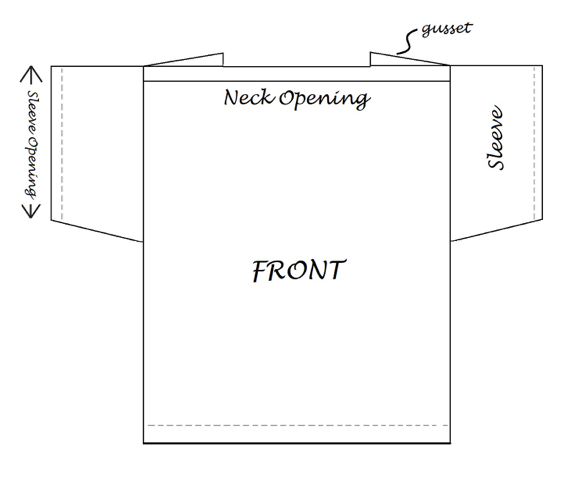
- This casual tee consists of front & back panels with short sleeves and a square neckline. Narrow fabric strips are used to create neck facings and shoulder gussets. Cutting lines are shared to produce zero waste. Sizing is limited by width of goods. Larger sizes and longer finished lengths for this garment may required 60” (152cm) widths of cloth.
- The unit of measure is imperial (inches) with metric in brackets. The ease amount is 4” (10cm) for a “boxy” loose fit.
Marking and Cutting
- The cutting of this tee revolves around the width of the fashion fabric. Narrow cloth will require more yardage while wider goods will need less yardage. For zero waste concept, plain fabrics and those with symmetrical pattern prints can be applied both conventionally or railroaded, because it doesn’t matter which way the pattern run.
- eg. For a Misses size 4, the bust circumference is 34” (86.5 cm) and the nape-to-waist measurement is 16¼” (41.2cm).
- Seam & hem allowances is dependent upon the nature of the fabric used. Seams are exposed so raw edges should be neaten with an appropriate seam finish.
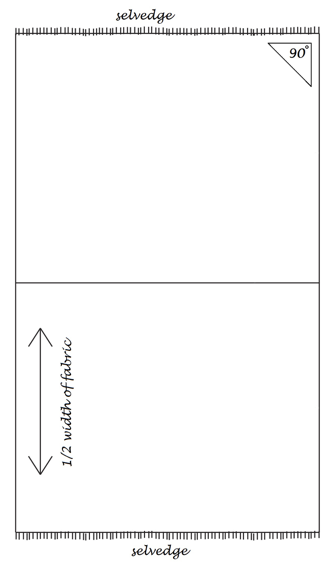
- Before marking out the shirt pieces, be certain that your fabric is squared on straight of grain. Each corner should be a right angle (90º). Straight of grain is always parallel to the selvages of the cloth.
- Mark and cut cloth in a single ply. Design ease and seam allowances are included in the calculations.
- Divide the fabric in half from selvage to selvage and mark a straight line parallel to the selvages. The fabric will be railroaded or hang on the cross-grain. e.g. Misses size 4 used 7/8 yard (31”) of 45” (114cm) wide fabric.
- Measure 1/2 bust circumference + ease + 2 seam allowances. Mark this amount on the straight of grain (parallel to the selvage). These 2 squares with be the front and back panels of the tee. e.g. For Misses size 4, (1/2 x 34”) + 4” + 1½”= 22½” (1/2 x 86.5 cm) + 10cm + 4 cm = 57.25 cm)
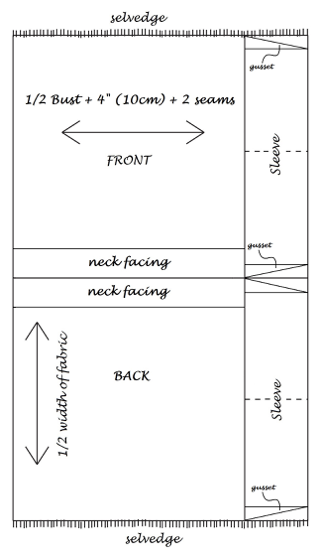
- The remaining fabric will be used for the sleeves, shoulder gussets, and neck facings.
- Sleeve length = 8” (20.5 cm).
- Taper ends of sleeve rectangle to make gussets.
- Shoulder Gusset = 3½” x 8” (9cm x 20.5cm)
- Neck Facing = 4” x 22½” (7.5cm x 54.5cm)
- All garment pieces share the same cutting lines to make this a zero waste project.
Assembly
Note: Seams are exposed raw edges and should be neaten with an appropriate seam finish.
- Make shoulder gussets. To do this, combine 2 wedge pieces to make up a triangle shape. Use a narrow ¼” seam allowance and press all seam open, flat. In total, 4 triangles are needed. Align 2 triangles with face sides together (FST) and stitch straight ends together using ¼” seam allowance to make a diamond shape. Press seam to one side and with face side up, under-stitch the seam. Fold on seam to make a self-lined triangle shape and press flat using a press-cloth. Top-stitch ⅛” from folded edge. Measure length of triangle equal to shoulder length + 1 seam allowance and cut away excess. Repeat steps for other shoulder gusset.
- Apply shoulder gusset to body. To do this, place a gusset at top corner of body panel on wrong side of cloth. The finished edge of the gussets should be directed towards the center of the panel. Pin/baste in place. Note: This is a pullover style – check neckline opening. It should clear your head. If not, adjust your gusset placement.
- Make neckline facing. To do this, fold each facing strip in half lengthwise with wrong sides together (WST) and press along fold line using a press-cloth. Align open side of neck facing to top edge of body panel on its wrong side, encasing the gussets between the layers of cloth. Stitch across top of panel using ⅜” seam allowance. Press seam towards body and grade seam allowances. Under-stitch the seam.
- Apply neckline facing. To do this, fold back facing on itself to lie flat on face side of body panel. Press flat using your press cloth. Top-stitch ⅛” from folded edge along bottom of facing.
- Repeat steps 3 and 4 for back panel.
- Make sleeves. To do this, place sleeve piece face down on work surface and turn over 1 long edge, 1-inch. Press fold flat. Use a presscloth. Turn over folded edge again, and fold 1-inch. Top-stitch ¼” from edge along second fold to encase raw edge. Unfold sleeve edge and press flat.
- With FST, fold sleeve piece in half and align raw edges. Taper sleeve along the short sides with a straight line, approximately 1½” to nil at armhole.
- Attach sleeves. With face sides together, align each sleeve to center of shoulder. Baste/pin in place. Stitch sleeves to body.
- Close and finish garment. To do this, fold garment front & back in half with FST and match up side seams and sleeve seams. Stitch together from hem to wrist in one pass. Press seam open.
- Hem shirt with a double-rolled hem.
Personalize Your Tee
Now that you know how to make the basic tee shape, customize it by adding your own personalized touches. Here are some ideas:
- Round off the square corners of the hemline.
- Add side slits.
- Got extra cloth left over? Add a chest pocket.
- Too boxy? Add a draw-cord or an elastic casing at the waist.
- Want the tee longer? Replace the neck facing pieces with a wide flat braid.


Sunny SoCal Relaxed Summer Tee
Sunny SoCal Relaxed Summer Tee
I love this top! What a really smart and different design. I saw it made up in a crisp linen. Reading the instructions a couple of times and the clarification in the comments for gusset size, make this pretty easy to make. I just hope it suits my larger size.
I’m struggling to understand the shoulder gussets. Is there a video or tutorial in the works?
Hi Anne! We don’t have a video tutorial in the works for this project but I can reach out to the designer to see if he can provide more in-depth instructions about the shoulder gussets. I will update the project as soon as we have more info! Have a great day 🙂 – Ashley, WeLikeSewing
Hi Anne! The designer wrote back with the following instructions about the shoulder gussets: “Regarding the gusset, it can be a diamond shape or 2 triangles sewn together to make the diamond shape. The gusset is folded in half to produce a triangle with 1 clean edge. The folded edge is about 3 inches wide. The 2 other sides of the triangle get inserted and sewn to the front and back pieces and their respective facings. They are about 4 inches long.” Let us know if you have any other questions! – Ashley, WeLikeSewing
Could you show a close-up picture of the gussets and how they are attached? How big should each wedge piece be?
I agree with Eunice. This is useless.
There is no way to save or print here. This is useless and inconvenient.
Hi Eunice! There is no printable pattern for this project because the designer designed this project for readers to self-draft the tee to their specific measurements. You can however always print the instructions off; you can do this in several ways, including highlighting the selected text and hitting Ctrl+P. You can save patterns by hitting the Favorites button at the top of each project. Have a great day! – Ashley, WeLikeSewing