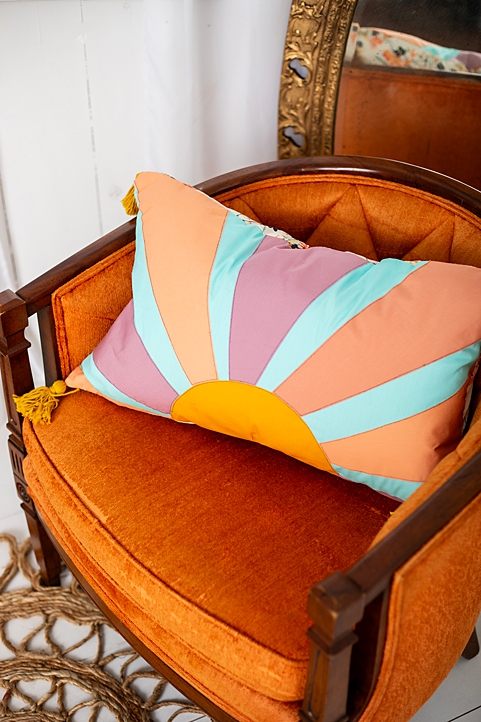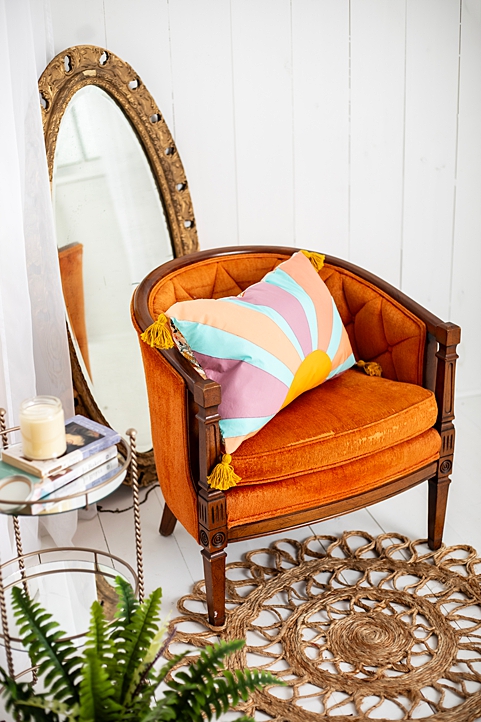
Dress up your living room, office or bedroom for spring with a cheerful cushion cover. Designed by Debbie von Grabler-Crozier, this appliqué cushion cover pattern features an appliqued sun and brightly colored sun rays in shades of lilac, peach and turquoise. Finished with playful yarn tassels, this cushion cover pattern fits a 25” x 15” pillow insert, making this throw pillow cover an easy way to update your home décor.
Designer Notes:
- This cushion cover is designed to fit a 25” wide x 15” tall cushion. The designer found their cushion insert in IKEA.
- Seam allowances are all 1/4” and have already been added.
Materials:
- Fabrics: (Note: Fabrics are all by Art Gallery Fabrics (AGF).)
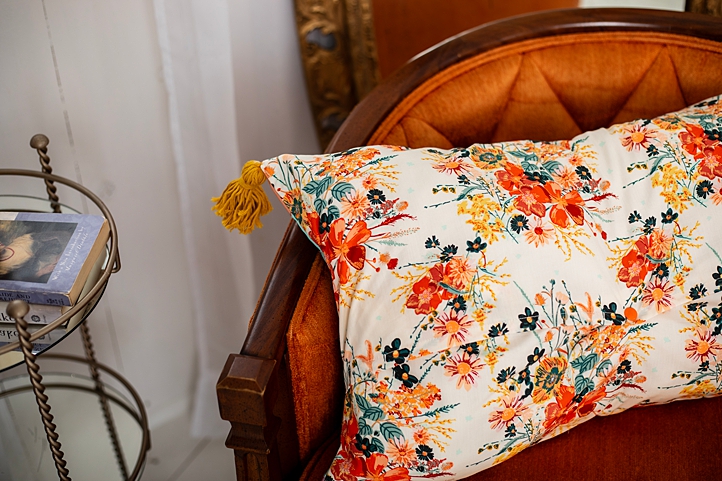
- 1/2 yard printed fabric for the backing fabric. The designer loves Painted Prairie Six form the Season of Tribute (Listen to Your Heart) collection by Sharon Holland for AGF.
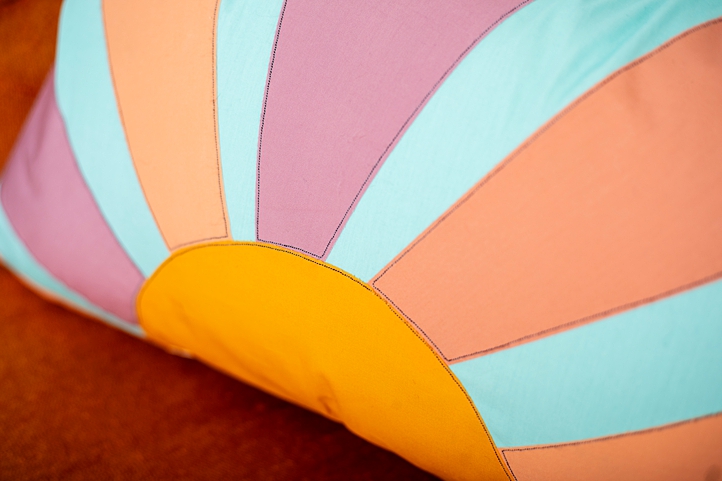
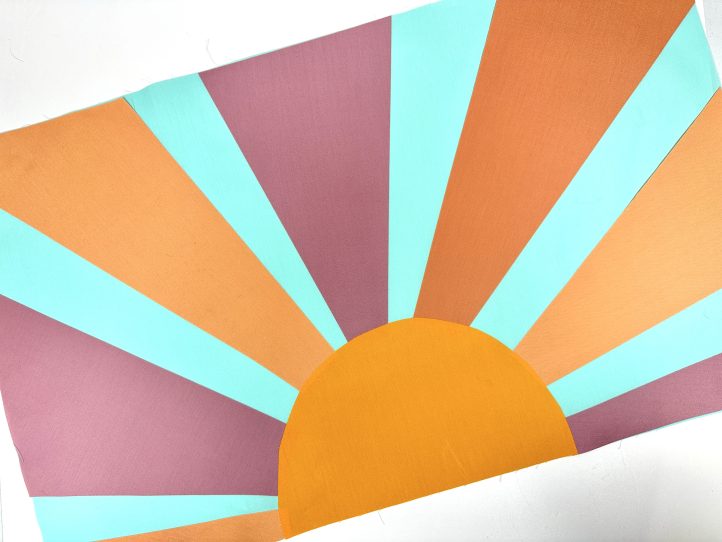
- Solid fabrics for the sun. The designer chose (from the Pure Elements collection by AGF):
- Fat Eighth Snap Dragon (dark peach)
- Fat Eighth Sweet Fig (pink mauve)
- Fat Eighth Apricot Crepe (apricot)
- 12” sq. Summer Sun (deep yellow)
- 1/2 yard solid fabric for the background. The designer’s is Fresh Water from the Pure Elements collection by AGF.
- Interfacing: 3/4 yard Bondaweb (Vlieseline)
- Black thread for the appliqué
- 1x 50 gram ball deep yellow cotton yarn for the tassels
- Strong thread (to match the color of the tassel yarn) such as Perlé Coton a Broder to tie the tassels
- Hand needle, size 14 or larger for yarn
- Tassel maker- The designer loves the Clover turquoise one.
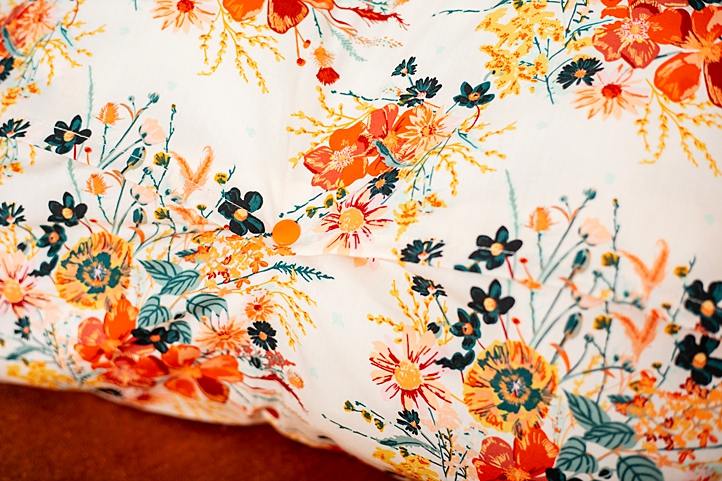
- 1 Kam snap or similar closure and the tool to attach it *Optional
- Coordinating threads for all fabrics and trims
- Scissors
- Markers
- Extra feet for your sewing machine (zipper foot for example)
- PDF Template – This is located at the bottom of this page. Please see printing instructions below.
PRINTING INSTRUCTIONS:
Note: To download the template, click on the pattern download button at the bottom of the page. We recommend opening your pattern download using Adobe Acrobat.
Cutting Instructions:
From the backing fabric:
- 1 piece 25” wide x 11” tall for the back top panel
- 1 piece 25” wide x 11” tall for the back lower panel
From the sunburst solids:
- See the Preparation section for details.
From the background fabric:
- 1 piece 25” wide x 15” tall for the backing fabric
From the Bondaweb:
- See the Preparation section for details.
Sewing Instructions:
PREPARATION:
The Appliqué:
The Bondaweb has a rough (glue) side and a smooth (paper side). With the smooth side uppermost, trace the sun ray pieces using sunburst template.
- Cut these pieces out roughly and fuse them, rough side down, onto your chosen sunray solids.

- TIP: For the rays, you can place the colors in any order or amount depending on your preference. The designer chose yellow for the sun center but you do not have to.
- Cut the appliqué pieces out exactly, remove the paper and arrange them onto the backing fabric. Iron them to bond them to the fabric.
- Thread your machine with black thread and use a very short (the shortest that your machine will allow whilst still moving forward) stitch to appliqué the pieces on, stitching about 1/8” in from the edge of each shape.

- TIP: Because the cushion cover is not lined, it is a good idea to use black in the top of the machine and a color to match the turquoise background fabric in the bobbin. This looks neater.
- Trim the treads right back.
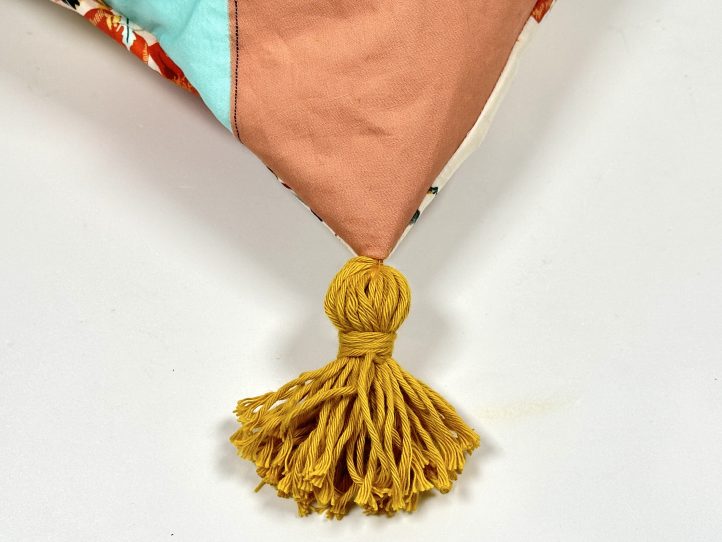
The Tassels:
- Make a tassel by setting the tassel maker on the smallest setting. Wrap the yarn 20 times around the maker.

- Tie the ‘waist’ of the tassel with the strong thread and leave the thread ends long (about 5”).
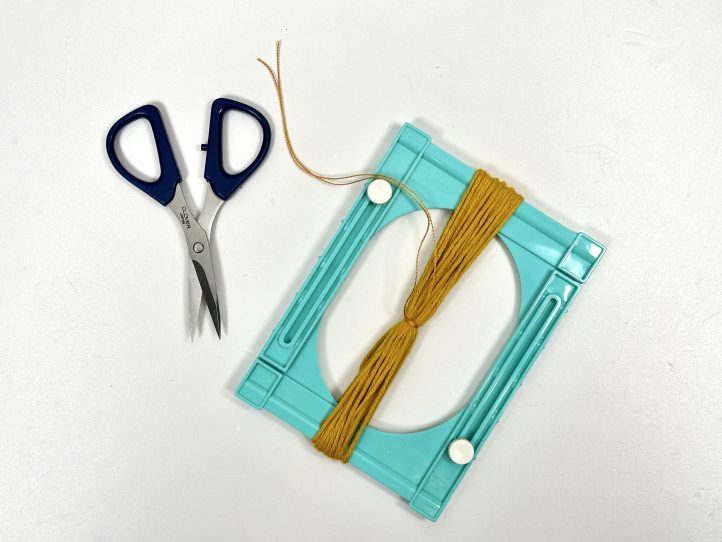
- Remove from the tassel maker and finish the tassel with a wrap of yarn in the center.
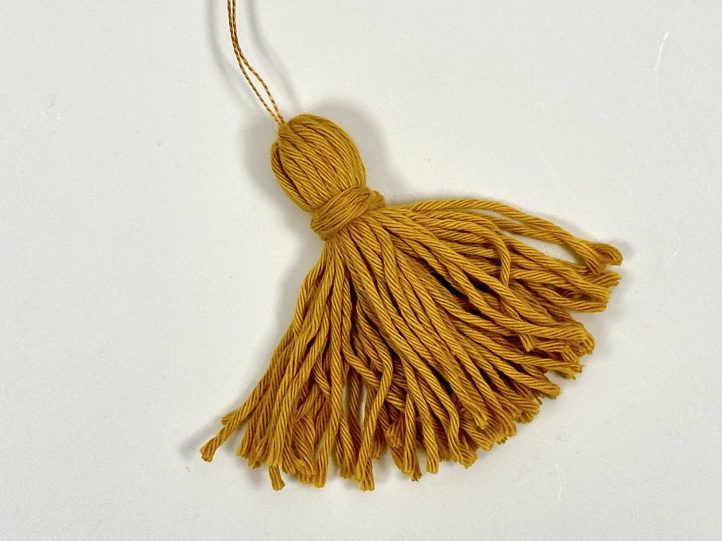
- Make three more tassels.
The Back:
- You have two back panels. Hem the lower long edge of the upper panel and the top long edge of the lower panel. To hem the edge, fold it over by 3/8” and press. Fold by another 1/2” and press again.

- Sew the hem with coordinating thread. Repeat for the other panel.
- Lay the lower panel right side up onto a flat surface. The hem will be to the top. Lay the upper panel, also right side up on top of it (the hem on the lower edge) so that the two panels overlap by 5” on the hemmed edges.

- TIP: These have to be exactly the same size as the appliquéd front panel so before sewing, check that they are the same size and adjust as needed.
- When you are satisfied with the fit, pin or clip the sides and sew them down the sides where they overlap to make one panel.
MAKING:
- This case is French seamed so pin or clip the back panel wrong sides together to the appliquéd front panel. Sew narrowly (1/8”) all around the outer leaving no gaps and attaching a tassel to each corner.

- Turn the cover inside out and press those sides so that the seam is perfect and crisp.
- Sew right around again, this time a normal 1/4” seam. This will enclose the raw edge and ensure that the case looks great from all angles.
- Turn the cushion cover the right way out again and gently push the corners out.
- Hand stitch attach a tassel to each corner and bury the attaching thread inside the tassels.
- Insert your cushion into the casing.
- TIP: Although the envelope overlap at the back is quite generous, a Kam snap or similar in the center does help to keep the cushion cover neatly closed.