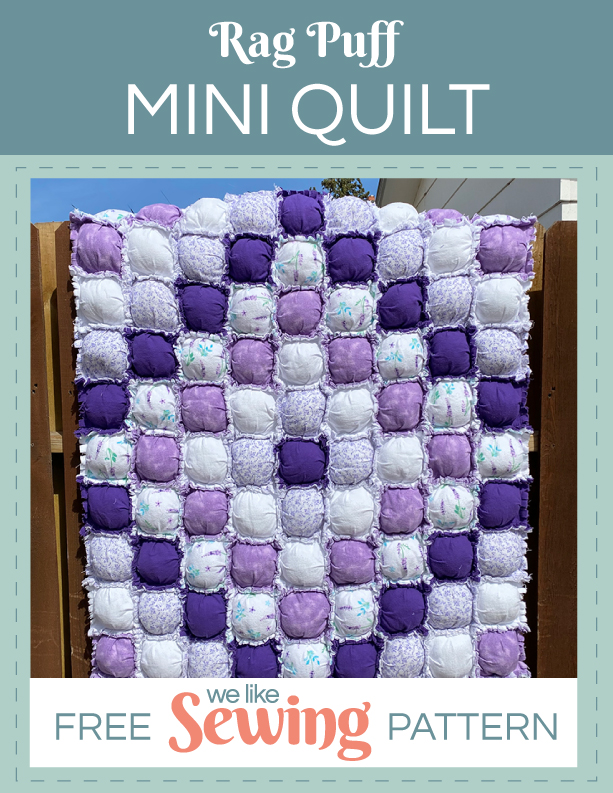
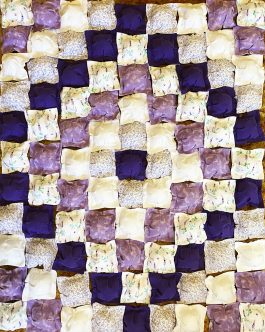
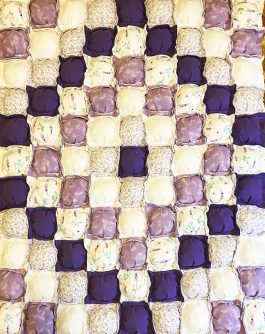
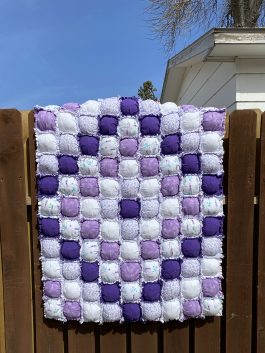
Design a quick, easy, and super soft rag quilt in a single weekend with this must-make quilting project. This Quick & Easy Rag Puff Mini Quilt is made in calming shades of lavender and plum and uses the puff quilt method (also known as the biscuit quilt) to create a design that’s as beautiful as it is snuggle-worthy. Our rag puff quilt finishes at 45″ x 50″, so it’s perfect to use as a comfy lap quilt to keep in your living room or as a homemade toddler or crib quilt for your grandchild. Forget about traditional piecework and experiment with something new with this simple quilt tutorial.
Finished size: 45” x 50”.
Materials
- Poly-fil® from Fairfield World, 32 0unces
- Flannel fabric, 2 yards, 5 assorted patterns/shades
- Thread
Tools
- Sewing machine
- Ruler
- Pins
- Iron
- Rotary cutter (optional)
- Cutting mat
- Scissors
- Washing machine
- Dryer
Sewing Instructions
- Choose five fabrics in assorted color values, prints, and solids. Pre-wash and dry your fabrics and then iron.
- Cut the twenty 6″ squares from the four lightest colored fabrics and nineteen 6″ squares from the darkest fabric.
- Cut the twenty 7″ squares from the four lightest colored fabrics and nineteen 7″ squares from the darkest fabric.
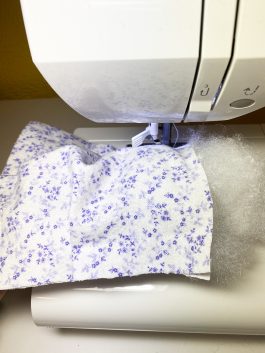
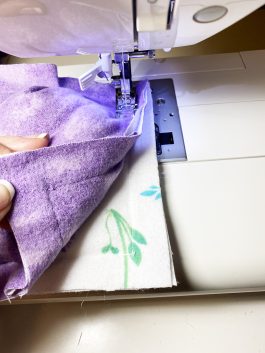
- Place the wrong sides together of a 6″ and 7″ square (same pattern), lining up the edges on two sides.
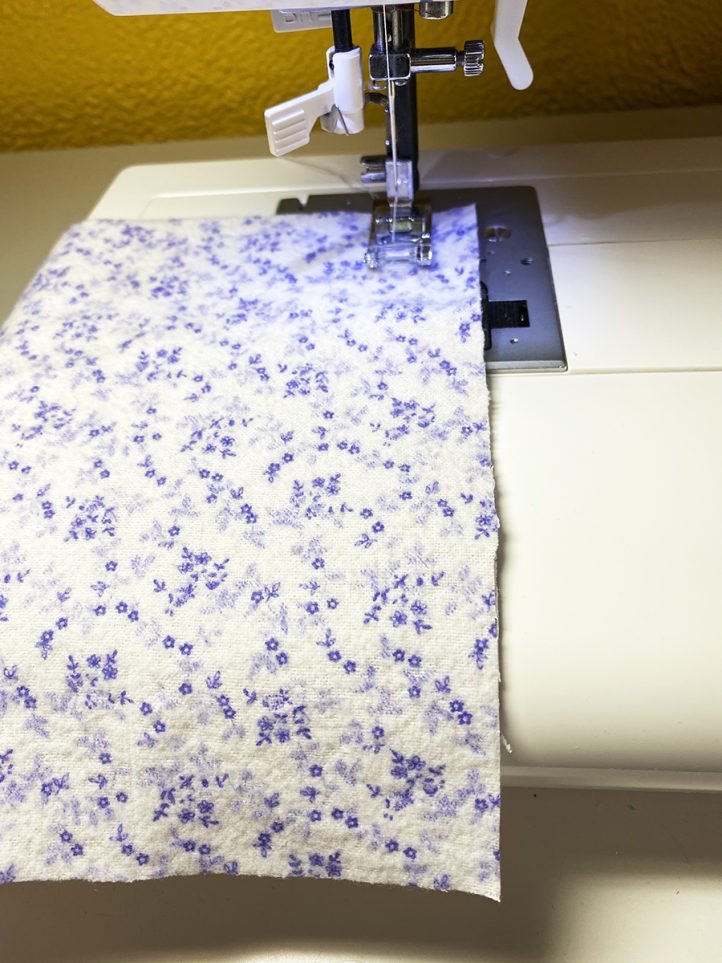
- Bring the corner edges together on the bottom edge.

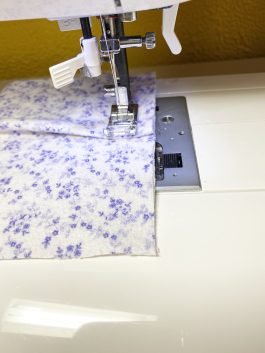
- There will be excess fabric. Make a pleat in the middle of the square and fold the pleat down.
- Stitch the edge starting at about ¾” down from the top, and over the pleat with a scant ¾” seam to within ¾” from the bottom edge.
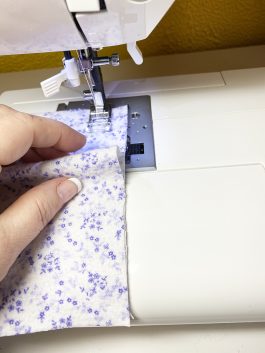
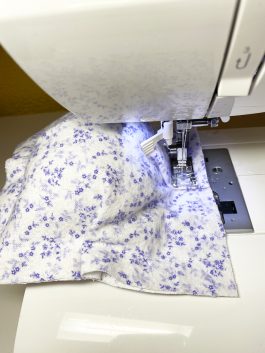
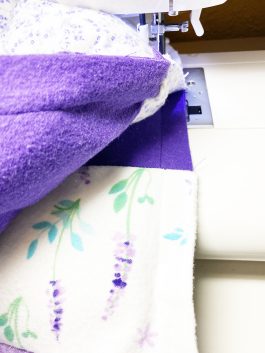
- Leave the needle in and turn the square.
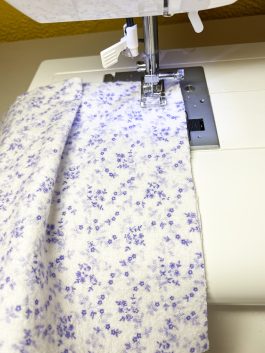
- Match the bottom corners.
- Form the pleat and stitch, as the previous side. Repeat for the third side. Then, leave the needle in and turn the squares.
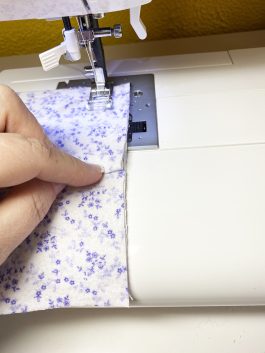
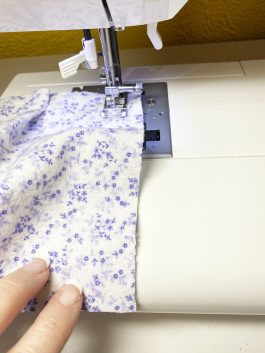
- Stuff the opening with Poly-fil®, so it is fluffy and light, not packed.
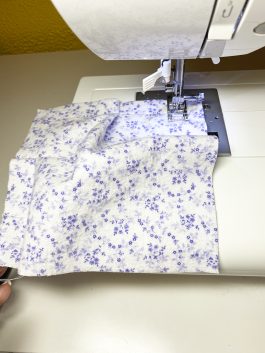
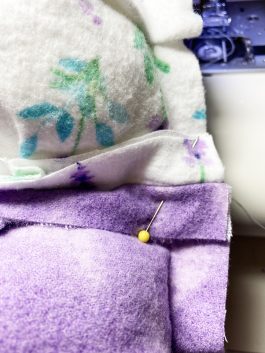
- Form the pleat and stitch as the previous three sides. One PUFF is completed. Repeat for the other ninety-eight sets of squares.
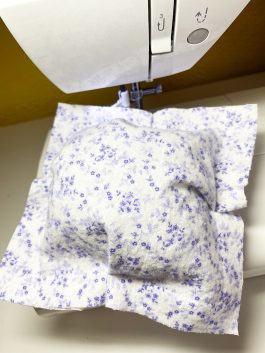
- Lay all of the puffs out as shown or create your own design.
- Beginning with the first row, place the puffs wrong sides together and stitch with a generous ¾″ seam.
- Continue until all the puffs are sewn together in the row. Repeat for the rest of the rows.
- Place the first and second rows wrong sides together, being sure to match up the seams and stitch in place. Continue stitching rows in order until complete.
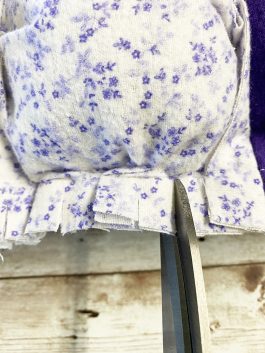
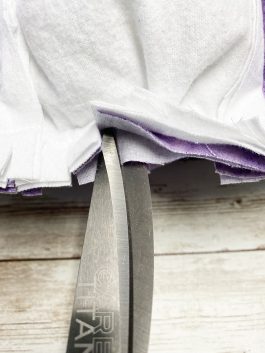
- On the front side, clip the raw edges, being sure not to clip through the stitching. Clip the folded part of the pleats both on the top side and bottom. Repeat until the raw edges are done, including the outside edge.

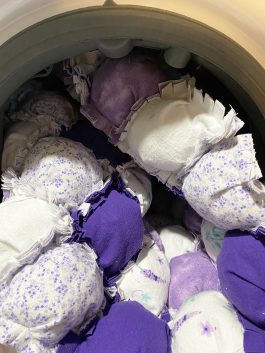
- Place into the washing machine, wash, and then dry. This fluffs up the rag seams. Enjoy!
Designer Tips
- Pre-wash all of your fabric.
- Iron your fabric before cutting.
- Use 100% cottons instead of flannel.
- For a fuller rag look, take a one-inch seam and add an extra layer of backing fabric.
- You can change up the design if you want, experiment, and have fun!
- Use more or less colors as desired.
- Use fabric scraps for a scrappy rag puff quilt.
I halved the amount of stuffing. It was still over-stuffed, for my taste. Wouldn’t make again.
My daughter and I have been making these since the weather has gotten chilly. One thing I recommend is getting a walking foot and using lots of pins to hold the material together. Also an alternative to the rag style is sewing all the squares together and using a solid back piece and think creating rows of four from the bottom and stuffing them, then stitching across the whole row and repeating. It does lose the rag style effect but for beginners it a lot less stitching.
Thanks so much for sharing your advice, Amanda! Have a great day 🙂 – Ashley, We Like Sewing
I’m very new to sewing. Is it 2 yards of each of the fabrics for a total of 10 yards? Or do the 5 colors make up the 2 yards? What is the difficulty level of this pattern?
Thank you for the free pattern. I love it!
You’re so welcome! Thank you for the kind comment 🙂 – Ashley, We Like Sewing
Thank you! My daughter wanted something she could use year round and this is perfect..
Thank you for the free, downloadable pattern for the “Rag Puff Mini Quilt”. Mary Viti ????
You’re so welcome, Mary! Have a great day 🙂 – Ashley, WeLikeSewing
It would be great if these patterns were downloadable so I could print/save for future use. Seems to me if you are offering a freebie, it would be nice to be able to save it.
There was a a. Option to print it
Hi Debra! While several of our magazine patterns do have downloadable components, this rag quilt pattern does not. You can, however, print off the instructions or save it as a Favorite by hitting the “Favorite” button at the top of the pattern. Have a great day! – Ashley, WeLikeSewing
This also sounds fun to me. I plan to make one.
Hello! This is really cute! Have you experimented with it and sewn the right sides together so there is no raggedy bits in between rows? Would that work or would there need to be some kind of sashing in between? Thanks!
You can sew right sides together, but you will need to be careful to match up these bulky puffs. What you could do is make the it with a design in your back of the puff. That way you have the rag on one side and a regular pattern on the back also. So whatever side you like you use. It is just so much easier and better looking with the flat sides sewn together. 2 bulky puffs is hard to sew and you would need to sew a back on it to get rid of all the ragged edges. Then also would need to quilt it to the backing fabric by sewing in-between the puffs with a stitch in the ditch kind of thing. Whatever you try, best of luck. Hope it all works out the way you want it to be. Happy sewing.
Thank you so much for your helpful tips, Becky! Have a great day 🙂 – Ashley, WeLikeSewing
My first real quilt was a puff baby quilt. Between the 3 fabric layers & the stuffing (I really packed the stuffing in there) it was probably to heavy to use on top of a baby but it was clearly padded enough to use under the baby with plenty of cushion. It was beautiful. I had no clue what I was doing -just followed along with you tube. Might try it again with your pattern. Thanks for sharing.
I have always wondered how to make one!
I made two of theses. One has unicorn’s and pastel solid colors. The other had Care Bears and darker solid colors. So cute
Those color schemes sound so fun, Carol! We’re so glad you enjoyed this pattern 🙂 – Ashley, WeLikeSewing
My mother did the puff quilt many years ago, using nylon stockings.
I’d love to see that.
Years ago I tried a similar quilt , only used old nylon stockings as filler! It was a beautiful fluffy quilt and dried quickly after washing! Now stockings a thing of
The past!
What a creative idea, Bette! Thanks so much for sharing. – Ashley, WeLikeSewing
So excited to try this…going to be Christmas gifts for sure!
I LIKE MY RAG QUILTS FLAT 5 X 5. I WILL TRY A FEW OF YOUR METHODS FOR A NEW EXPERIENCE, HOWEVER, AT THE MOMENT STUFFING A RAG QUILT BLOCK DOES NOT APPEAL TO ME.
I do my squares ahead of time and when travel long vacation road trips bring with me and stuff on the way. Then I hand sew the square shut. Passes the time and also helps keep me from being a nervous rider!! I usually use my kids old plastic craft/food trays with the pockets on the side!
How many squares across and how many squares down
Hi Sheila! This quilt has 9 squares across and 11 squares down, making a total of 99 squares. Have a great day! – Ashley, WeLikeSewing
how can I get this exact color scheme
Hello there! Ann used a color scheme of flannels in assorted patterns and shades. It doesn’t seem like she used a precut bundle, so we recommend visiting your local fabric store and spending some time checking out how different shades of purple mix with each other. Ann used white, white with a small purple floral print, white with a medium purple floral print, lavender, and deep purple. Hope this helps! – Ashley, WeLikeSewing
Looks like fun
Looking forward to trying this.
Way to cute! Time for some fun!! I’m ready to make this!! ????????
Cool
I have been sick for so long. I can not wait to start sewing again. This looks like a great place to start. I love the colors you choose. God bless.
Hi Paulina! We hope our colorful sewing and quilting projects brighten your day! – Ashley, WeLikeSewing
I look forward to making this.
This looks like fun to make.
interesting!