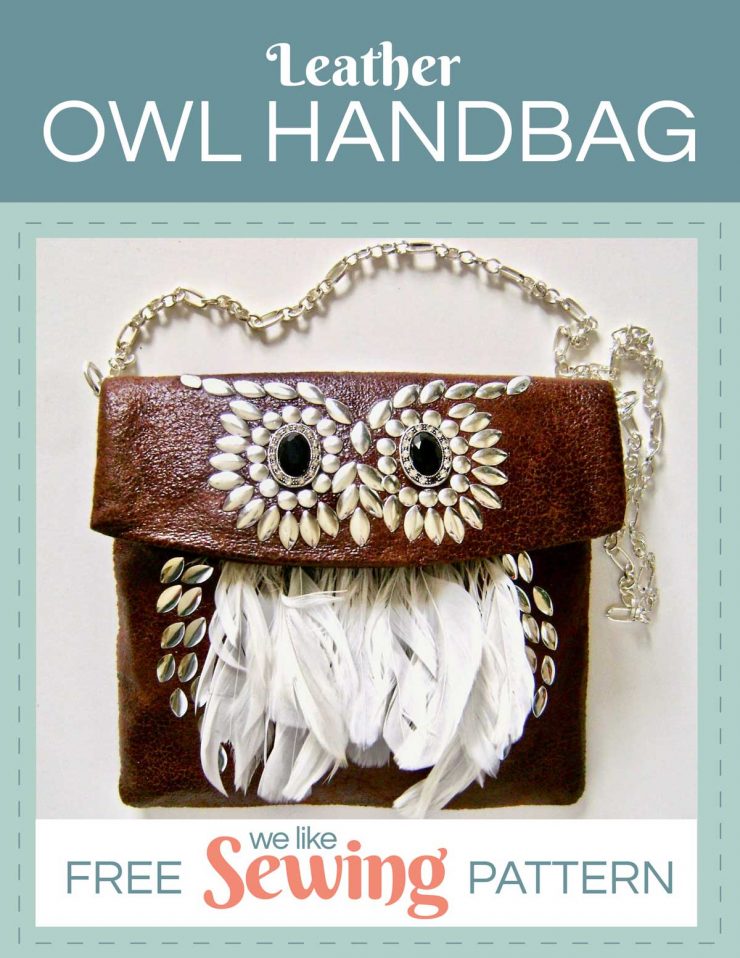
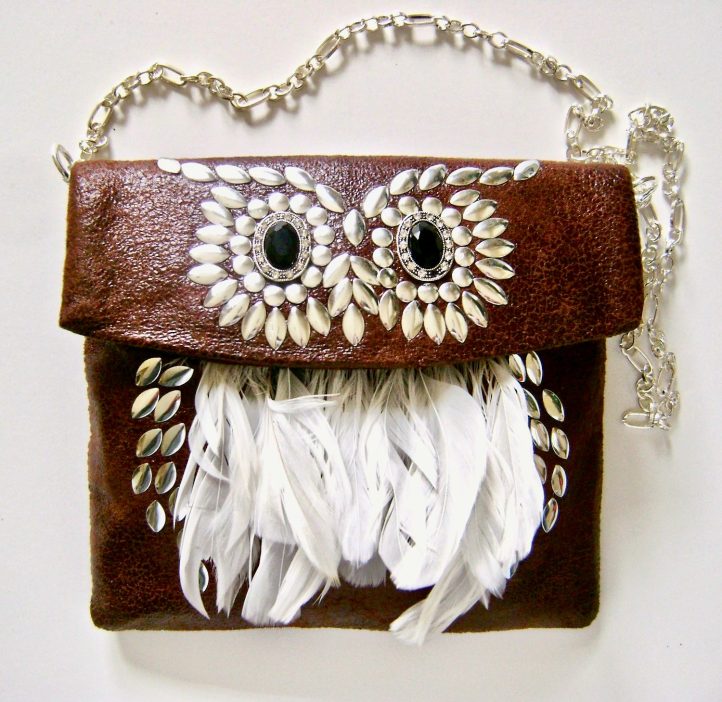
Sometimes you need a purse with a little personality – and this Leather Owl Handbag is definitely going to do the trick. Featuring faux leather, feathers, metal accents and and an adorable owl face, this fun project is perfect for a weekend spent sewing. Measuring six inches wide by six and a half inches long, this playful purse boasts two inner pockets that are roomy enough to hold all your necessities for an evening out. Donned with a magnetic clasp to keep the front flap securely closed, add a silver chain to finish off the look.
Finished size: 6″ wide x 6.5″ long
Materials
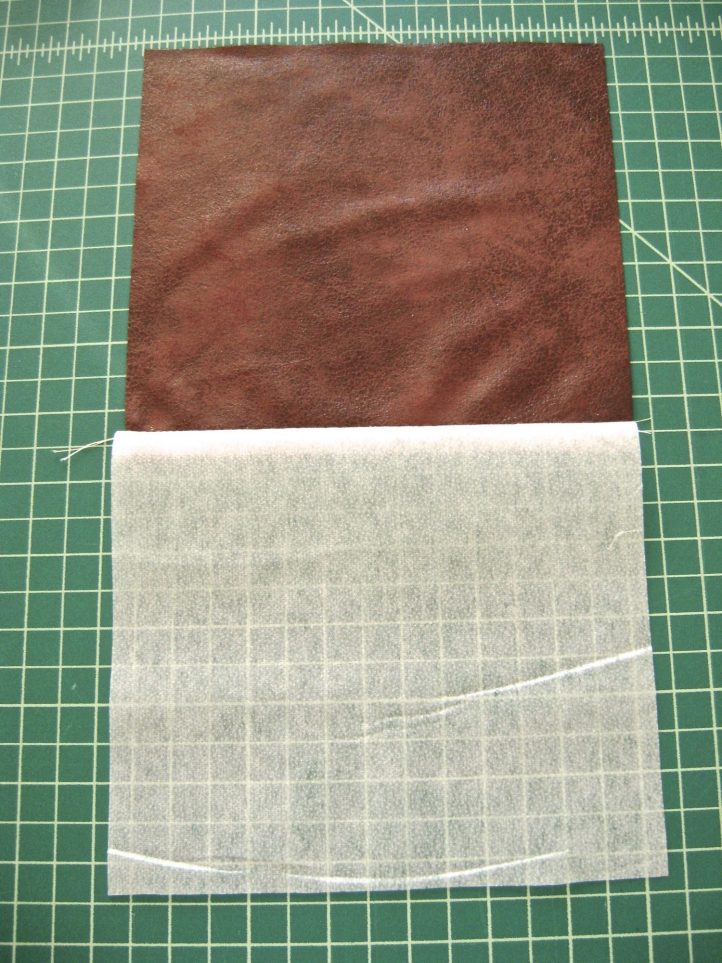
- 1/3 yard faux leather (purse and lining)
- 1/3 yard fleece
- 1/3 yard fusible interfacing
- 3″ x 7″ plastic mesh
- 10–20 small craft feathers in white
- Round and oval Hotfix silver nailheads
- Magnetic clasp
- 2 round toggle clasps
- Chain for strap
- Dazzle Tac Glue
- Sewing notions
- 2 oval beads for eyes approximately .75″ long
Notes: All seams have a .50″ allowance. The same fabric is used for the outer purse and lining pieces.
Sewing Instructions
-
- Download the PDF patterns (Back Panel Lining, Back Panel, Front Panel and Mesh Insert and Inside Pocket and Feather Cover) and print them out. You should have a total of six pattern pieces in addition to the separate sewing instructions. Cut out the pattern pieces and fuse interfacing to all pieces except the feather cover and pocket.
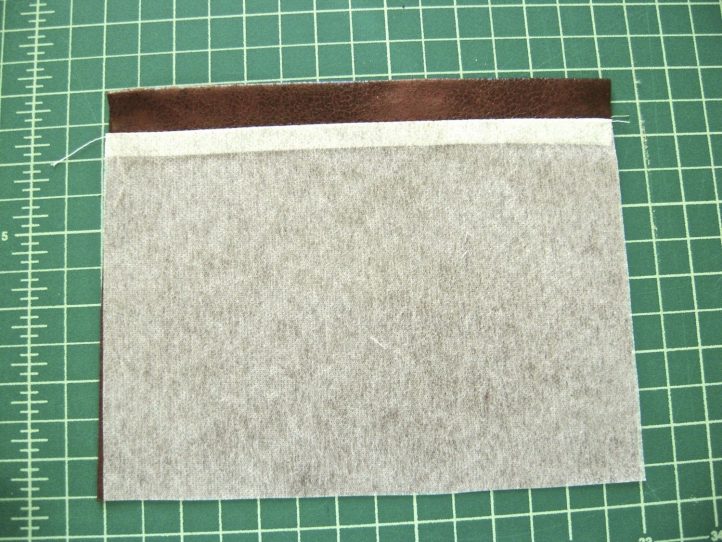
- Sew interfacing along the curved edge of the feather cover with right sides together.
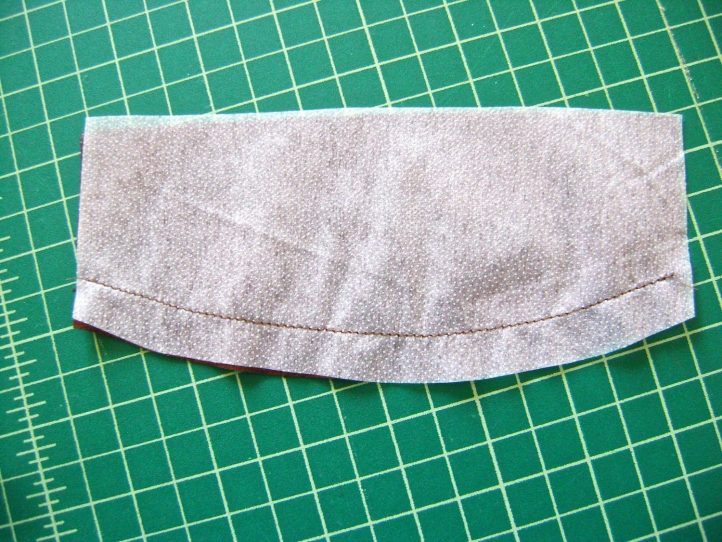
- Trim the seam. Turn the two pieces right side out and fuse.
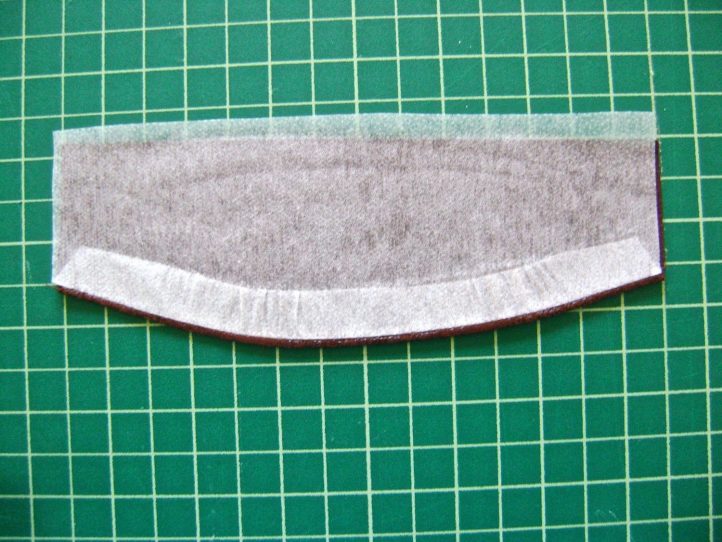
- Place the right sides of the front panel and front lining together with the feature cover edge in between. Match all notches. Stitch through the layers. Cut out a piece of interfacing that will fit under the cover for step 5.
FEATHERS
-
-
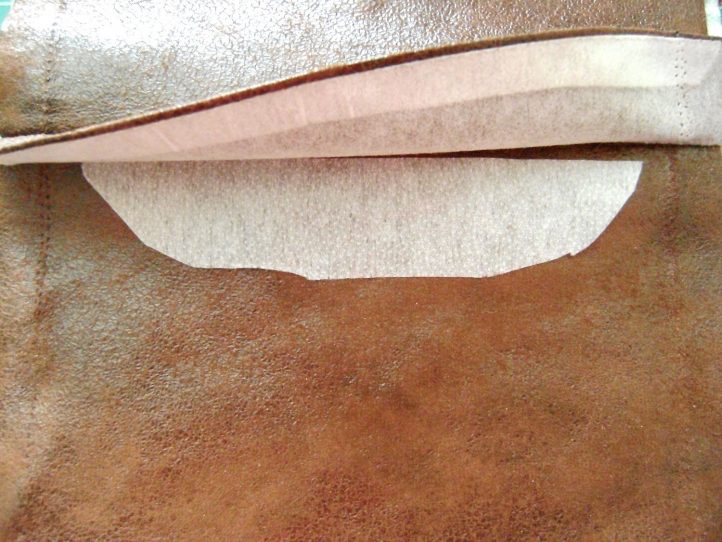
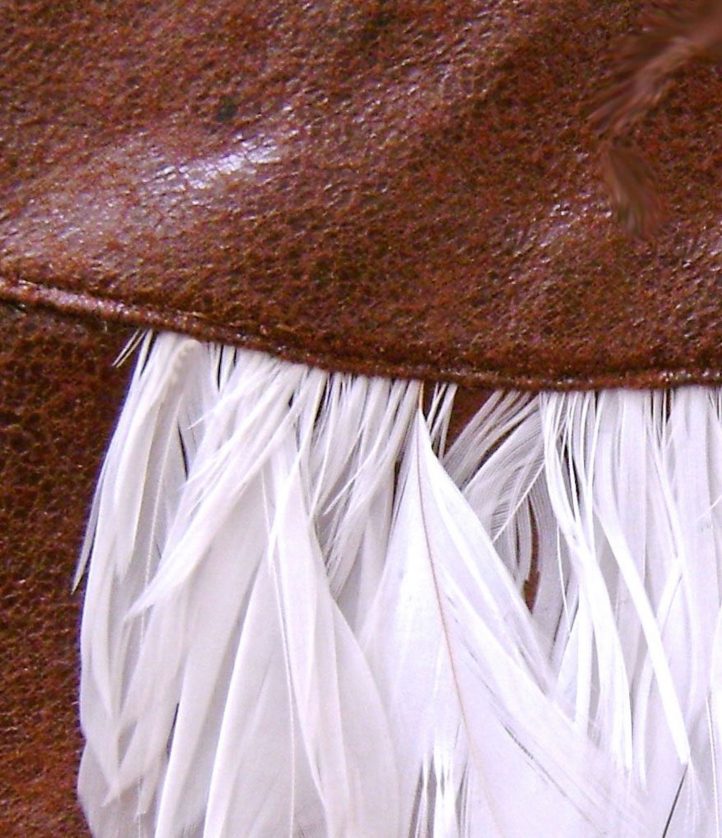
- Slip feathers under the interfacing centered on the front. Iron the interfacing to hold the feathers in place temporarily. Do not iron the feathers. Check to be sure the feather cover will hide the quills once sewed in place. Apply glue to the feather quills to hold them permanently. Allow the glue to dry.
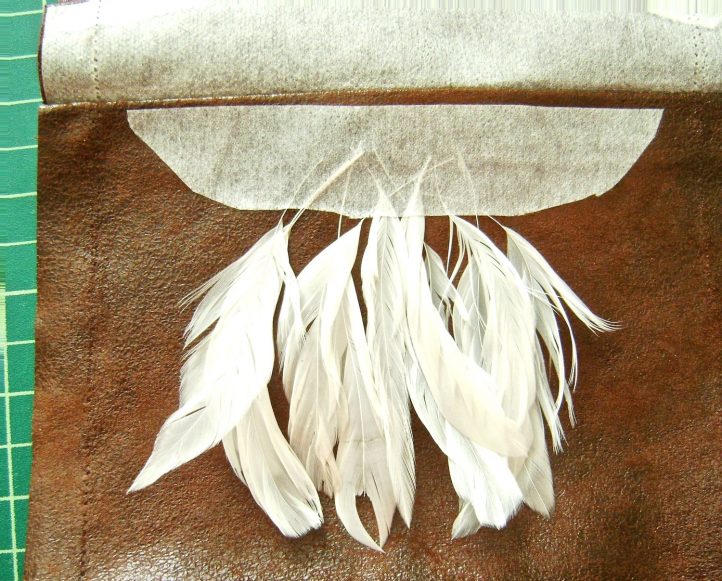
- Topstitch the feather cover to the front panel close to the curve and across the feathers.
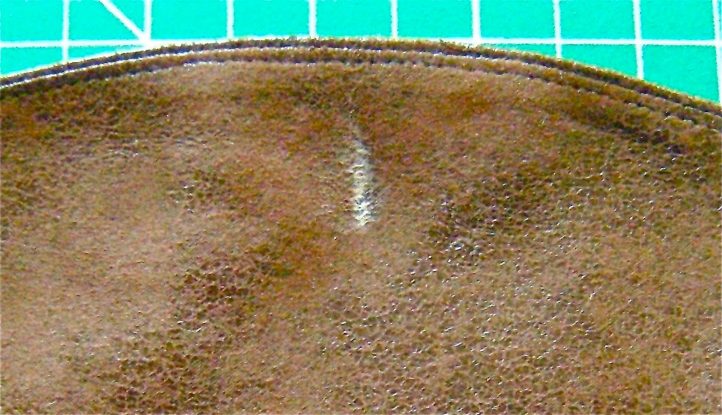
- Flank the feathers with nailheads, extending down the purse from the flap. Sew the curved edge of the front flap and the lining flap with right sides facing each other. Trim the seam allowance and topstitch it to the lining. Press with wrong sides facing. (I used the same fabric for my lining as my outer purse.) Use chalk to mark the placement of the clasp on the flap lining.
- Slip feathers under the interfacing centered on the front. Iron the interfacing to hold the feathers in place temporarily. Do not iron the feathers. Check to be sure the feather cover will hide the quills once sewed in place. Apply glue to the feather quills to hold them permanently. Allow the glue to dry.
-
THE OWL FACE
-
-
- Trim the seam allowance and topstitch it to the lining. I used the same fabric for my lining as my outer purse. Use a piece of chalk to mark the placement of the clasp on the flap lining.
- Trim seam allowance from the front flap pattern piece and alight the pattern with the fabric edge.
- Stick pins in the four corners of the nose piercing through the fabric. Pull the paper off the fabric without disturbing the pins.
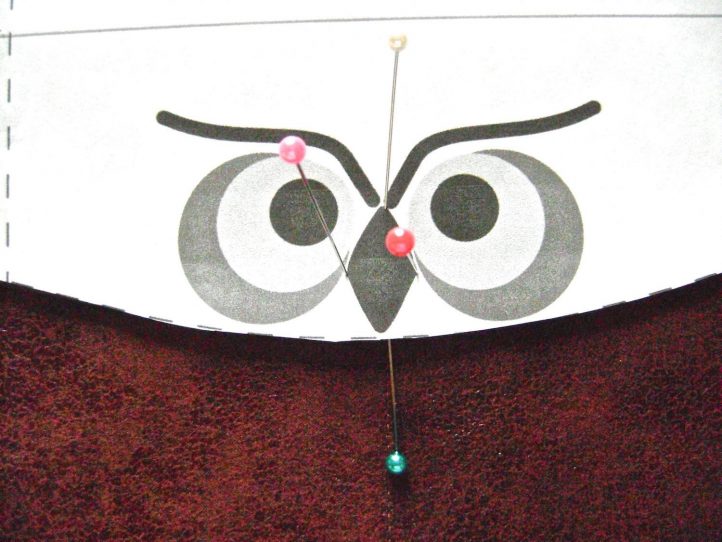
- Position 5 Nailhead pieces within the pins. Remove the pins. Cover the naiheads with a cloth and hold an iron on them for about 45 seconds.
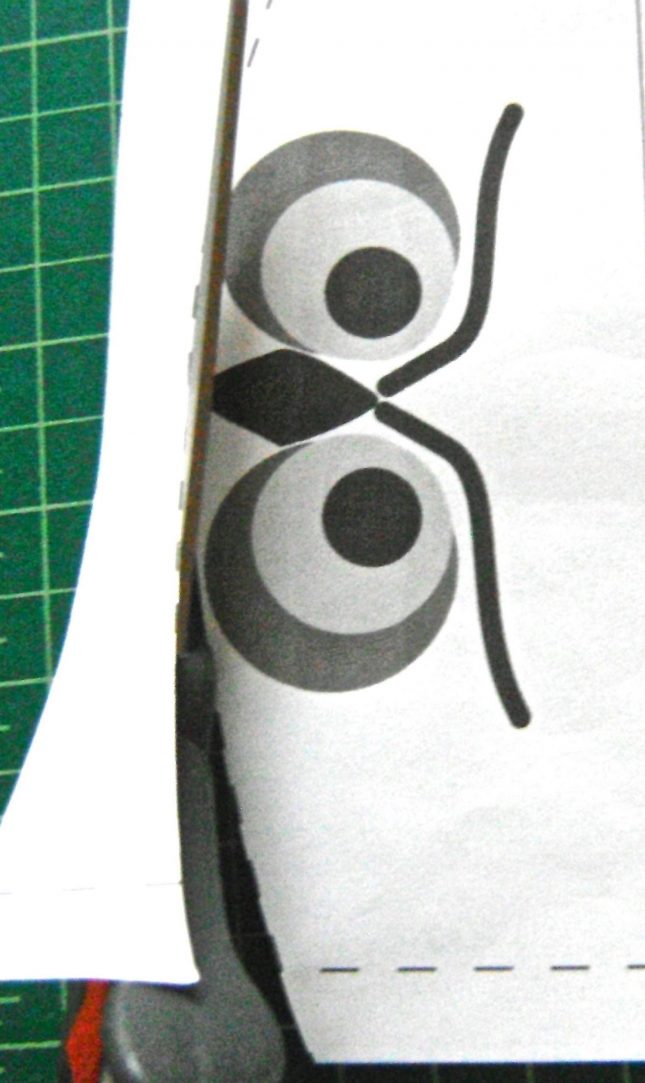
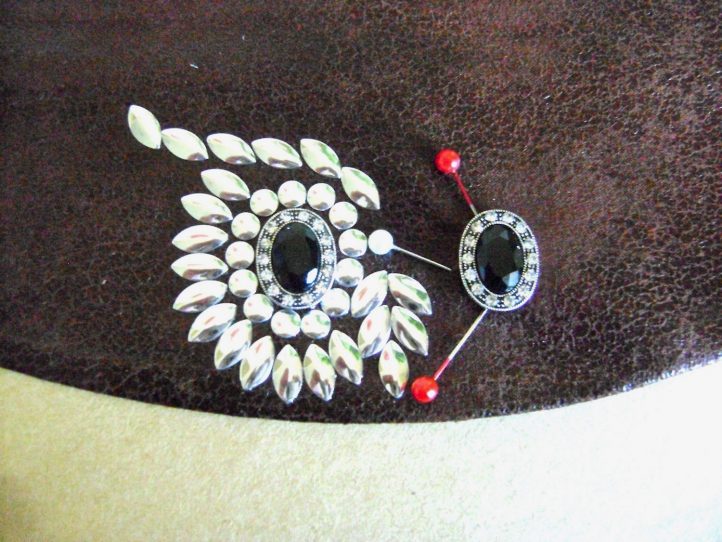
- Align the pattern piece to the fabric again. Cut out the eye. Position the center eye bead and border it with pins to mark its placement. Remove the pat- tern, then the pins.
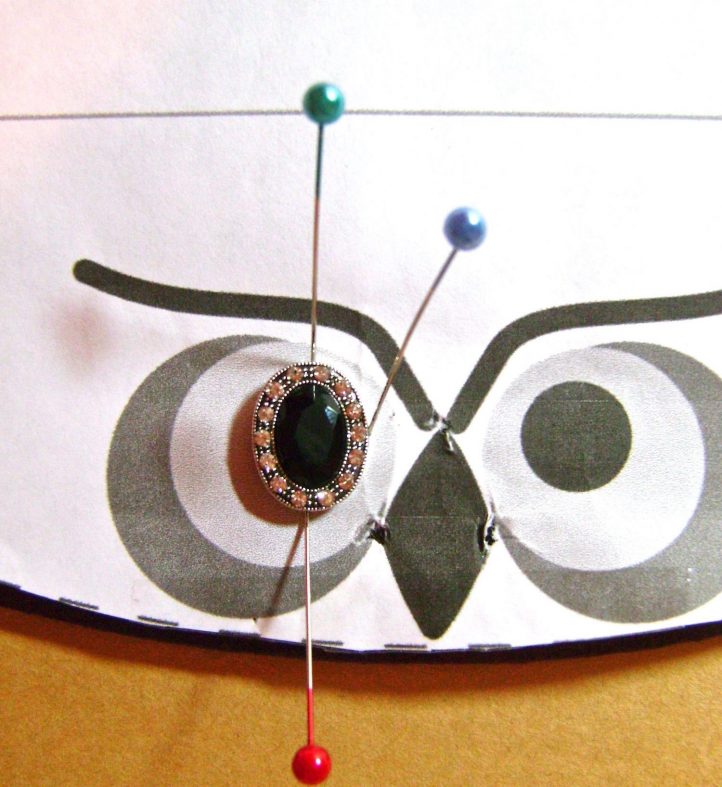
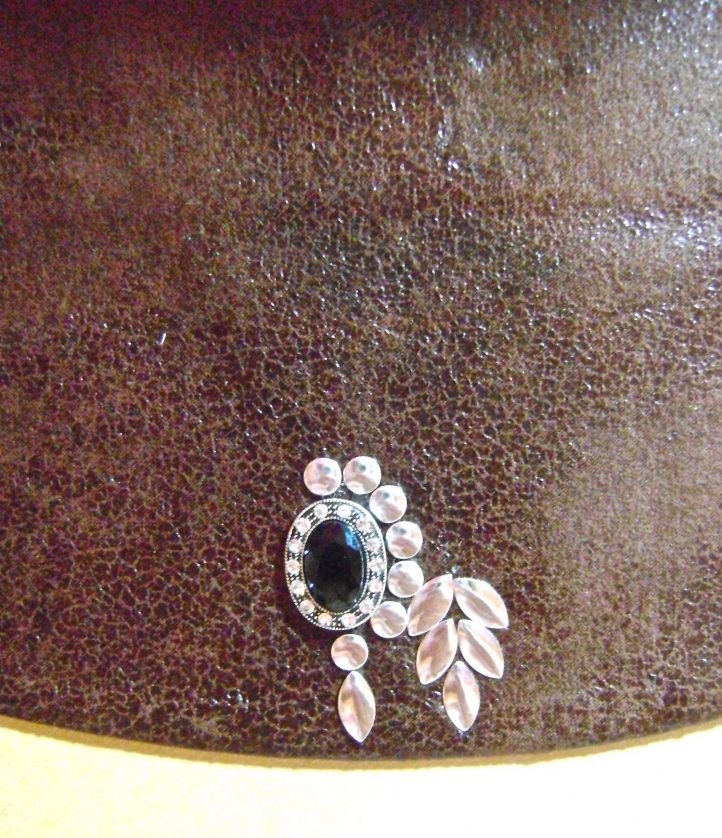
- Circle the eye with round nailheads.
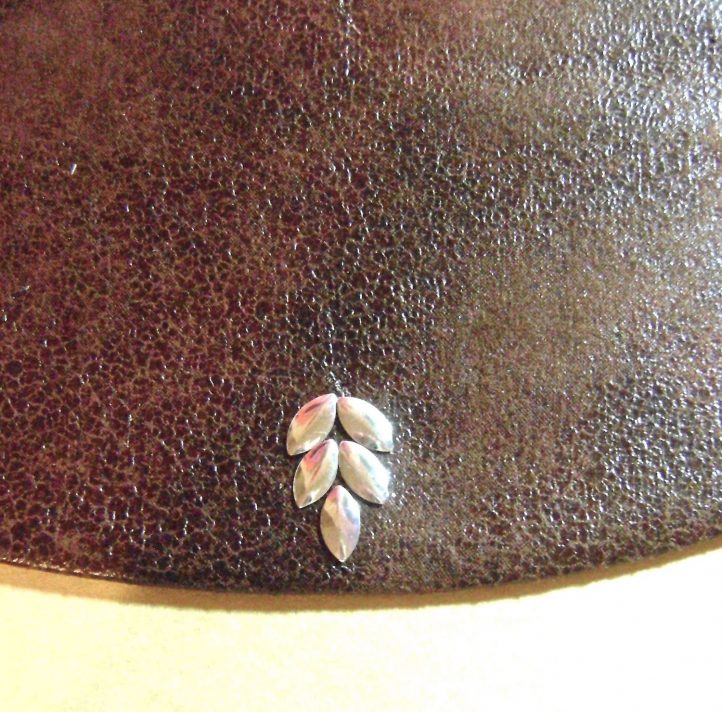
- When the circle is complete, follow with the placement of the oval nailheads, including the eyebrow. Cover all the metal with cloth and press with the iron. Work on the right eye and eyebrow following the same steps. Glue the large eye beads to the fabric and allow them to dry.
- Trim the seam allowance and topstitch it to the lining. I used the same fabric for my lining as my outer purse. Use a piece of chalk to mark the placement of the clasp on the flap lining.
-
INSIDE POCKET
-
-
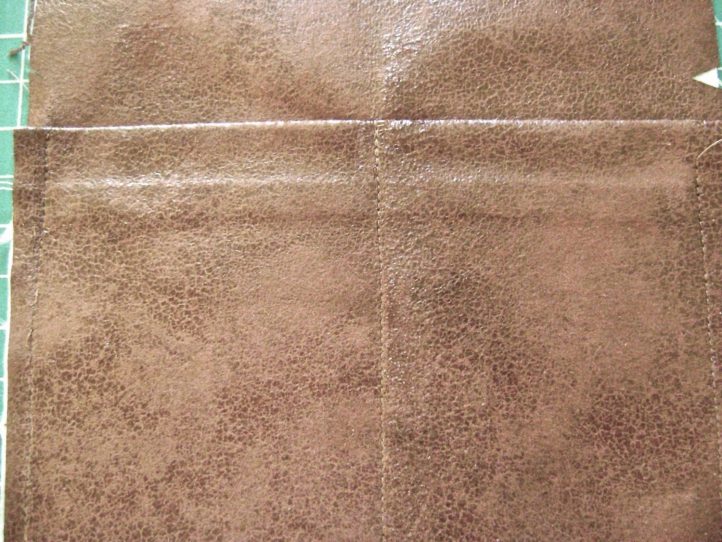
- With right sides together, sew the pocket interfacing to the pocket fabric.
- Fold the pocket and facing with wrong sides together. Create a .50″ hem at the top of the pocket. Fuse together.
- Pin the wrong side of the pocket to the right side of the back panel lining, matching the top edge to the arrows. Baste the vertical edges. Sew a seam with regular stitching down the center of the pocket to create two compartments or sew one side wider than the other to accommodate a larger phone or other device.
- With right sides together, sew the pocket interfacing to the pocket fabric.
-
ASSEMBLY
-
-
- Cut away .75″ from the bottom edge of the back fleece piece. Tuck the fleece curved end into the curved end of the front flap and pin in place, aligning the long side edges.
- Position the plastic mesh against the wrong side of the back panel lining, in between the fabric and the fleece. Fit into the flap curve. Trim edges of the mesh if necessary so they will not be caught in the seams during sewing. The clasp prongs are all that’s necessary to hold the mesh in place.
- Cut a piece of stiff cardboard a little larger than the size of the clasp. Mark and slit the prong openings. Adding cardboard strengthens and supports the clasp.
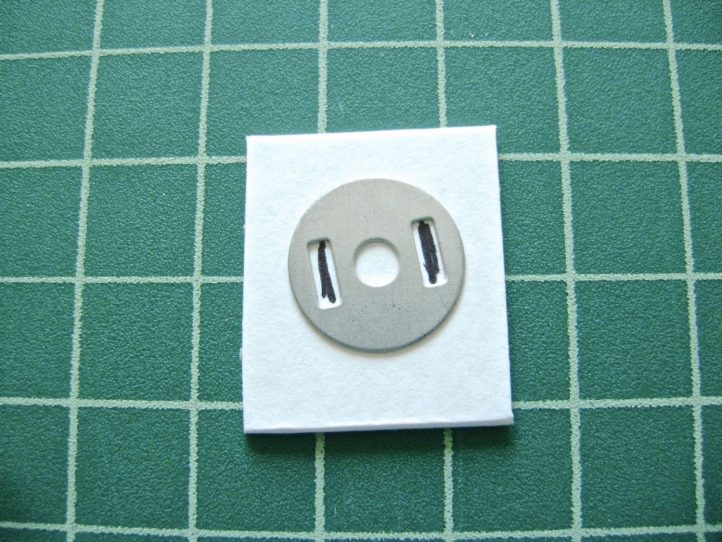
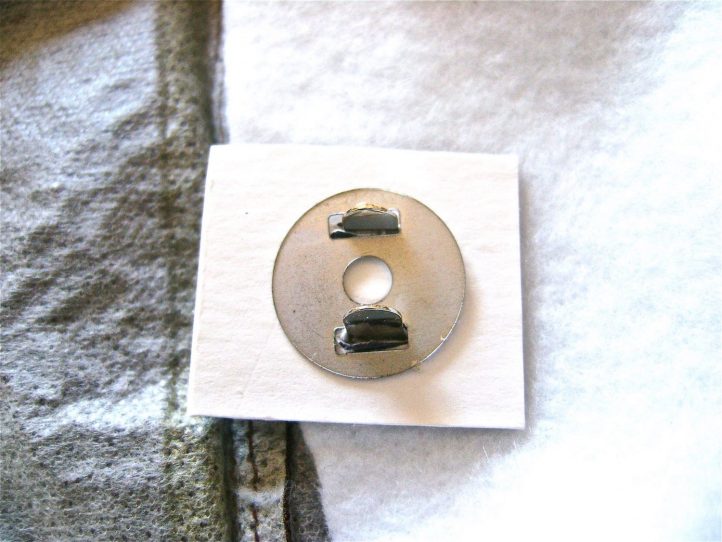
- Place half of the clasp into the right side of the back lining, through the mesh, the fleece and the cardboard. Bend the prongs.
- Sew the sides of the flap with right sides together. Sew only to the dots indicated on the pattern.
- Cut away 1.25″ from the front fleece piece. Align the top edge of the fleece to the top of the front and pin in place, aligning the long side edges. Only the sides sides need to be sewn into the bag.
- With right sides together, sew across the bottom edges of the lining pieces matching the notches shown on the pattern. Sew only 1.25″ from each side edge toward the center with normal stitching. Sew the middle of the seam with a basting stitch. Press the seam open and remove the basting.
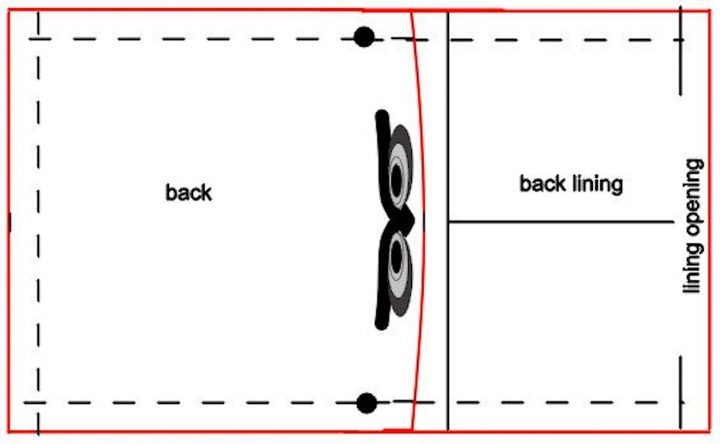
- Attach the other half of the clasp to the center of the feather cover. See the pattern piece for placement.
- Sew together the bottom seams of the back and the front panels with right sides together.
- Lay the work flat with the bottom seams to the left and right. One bottom seam should be partially open. The purse back will be against the front and the two linings against each other. Pin the flap down so it is facing away from the front and back. Sew together the side seams from the bottom edges to the circles. Unpin and move the flap to the oppo- site side, facing away from the linings. Sew together the side seam linings from the bottom edge to the circles. This will leave the flap free.
- Trim the seams and cut the corners diagonally. Pull the purse right side out through the opening in the lining. Slip stitch the lining closed and stuff it into the purse.
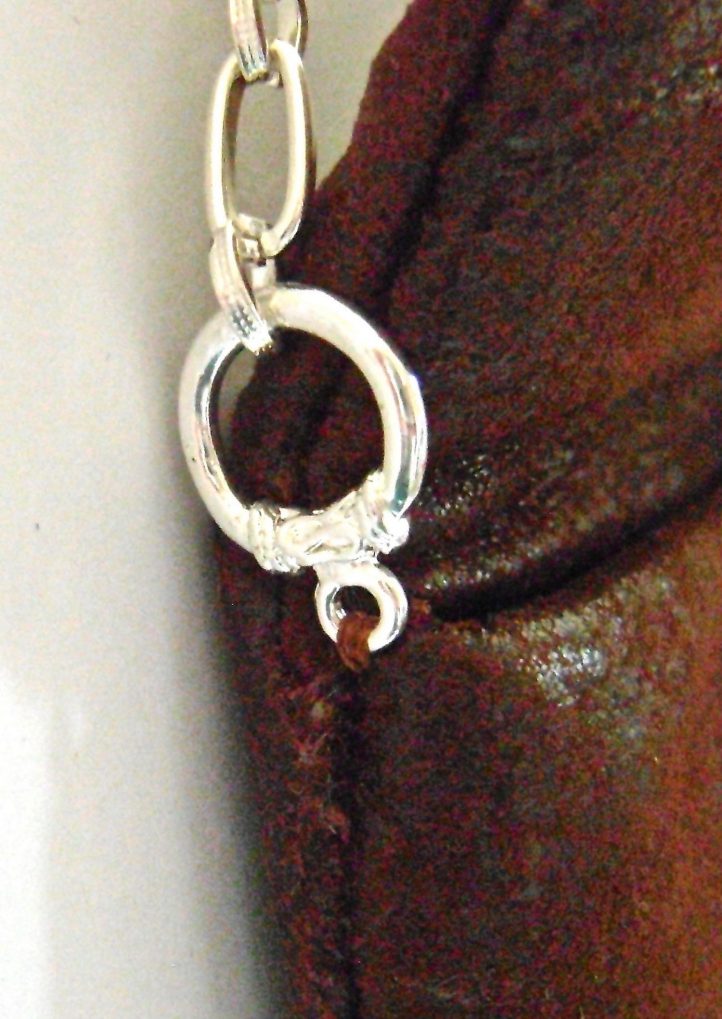
- Hand sew the loop of a toggle clasp to each top side edge of the purse. Attach chain to the clasp.
-
DESIGNER’S NOTE
My rhinestone-rimmed, black eye beads were slider beads with loops on the back. I cut off the loops with wire cutters so they would lay flat on the fabric and adhered them with glue. You can substitute flat black beads and attach hot fix rhinestones around them for the same look.
EDITOR’S NOTE
As managing editor of We Like Sewing magazine, let me be the first to say welcome! I’ve been a craft enthusiast for most of my life (I was six years old when my grandma showed me how to knit my own scarf and I was that kid who sewed her own Halloween costume when I couldn’t find what I was looking for in the store.) I can honestly say, I have one of the best jobs in the world. Working with so many talented designers, seeing so many inspiring projects every day – it’s something I try to never take for granted.
It’s also extremely important to the We Like Sewing team that we’re always inspiring you – whether that’s with a gorgeous new quilt project or a beautifully created sewn holiday dress. And that’s what we hope to do today with this sewing freebie for the Leather Owl Handbag.
If you are new to our magazine, I truly hope you enjoy this free sewing project. This is just a taste of the type of projects we offer to our gold club members. From simple sewn bags, to trendy tops and totes, to adorable quilted ornaments and sewn holiday décor, We Like Sewing caters to sewists and quilters of all skill levels and interests.
I hope you enjoy,

Please cancel my subscroption
Hi Jackie! Our customer service team has responded to your request via email. Thanks so much! – Ashley, We Like Sewing
I was able to download these (Back Panel Lining, Back Panel, Front Panel and Mesh Insert and Inside Pocket and Feather Cover) but not the instruction.
Hi there! While the pattern pieces are PDFs, the instructions are not in PDF format. You can print off the instructions, either by hitting the Print icon or by using the Crtl + P buttons. Have a great day! – Ashley, We Like Sewing
There seems to be some difficulty downloading the lamb pattern and directions. I, too, am having difficulties and hope you will email me the pattern and directions to the stuffed lamb. Thanks,
Jean
Emailed! – Ashley, We Like Sewing
Judy November 1st 2024
How do I receive the download, I tried clicking the red favorite 287 button twice , nothing happened
Hi Judy! I’ve sent you the pattern pieces via email. Please let us know if you have any questions. Have a great day! – Ashley, We Like Sewing
How do I get the instructions to download? I am a brand new member and seem to be having difficulties getting things.
Hi Helen! Just emailed you 🙂 – Ashley, We Like Sewing
interesting
How. much is the subscription per month?
Hello there! A 1-year subscription to We Like Sewing is $59 USD. Please let us know if you have any other questions. Have a great day! – Ashley, We Like Sewing
Hi … Was able to download the pattern pieces but there are no instructions. Please send instructions to me. Thanks.
Hi Joan! Just emailed you 🙂 Let me know if you have any questions! – Ashley, We Like Sewing
What a cute purse!
I’ve been sewing for 65 years. Worked in fabric business for 30 years. I’m almost 86 and still have lots of energy. Love sewing, have made patterns in past and wrote newsletter, Carol’s Bits & Pieces
I didn’t receive the instructions when I downloaded the pdfs. Could you send them to me?
Thank you, Eileene
I clicked on the link in my email to sign in and print the freebie. I did download, and print, all 6 of the pattern pieces but no instructions printed with it as you said. This is what I’m referring to: ” You should have a total of six pattern pieces in addition to the separate sewing instructions.” Can you, please, send me a link to the instructions that I can print out? Thanks. crazyglitterlady@gmail.com
Hello! I just emailed you the instructions. Please let me know if you have any issues accessing them. Have a great day! – Ashley, We Like Sewing
I opened each of the separate pattern pieces and could not determine how to download any of them.
Hi Teresa! When you open the links to the pattern pieces, you should see a download arrow in the top right corner next to the print icon. This may vary depending on what browser you are using, but this is where the download button appears in Firefox. Simply hit the download icon and save the pattern to your computer. Please let us know if you have any other questions. Have a great day! – Ashley, WeLikeSewing
In Step 1, the last pattern download is listed as “Feature Cover,” but it should be “Feather Cover.”
Thank you so much for catching this error! We’ve updated the label of this download so that it is correct. Have a great day! – Ashley, WeLikeSewing
Sounds like the tryers of this project are experiencing lots of various problems. Is it an advanced pattern. It keeps saying these patterns are for beginners and are simplified, but it doesn’t sound like it when reading all the problems that have come up. I don’t know whether I take the chance of trying this for my great-granddaughters or not!
Do a muslin or simple fabric to see if it works for you
where do you find the owl face template BONUS: I could not find it in the instructions
Carolyn M
Hi Carolyn! The designer did not create a face template for this project. Instead, she walks you through the process of creating the face in the instructions. Hope this clears things up! – Ashley, WeLikeSewing
There is no download button.
Hi Billie! For this freebie, the downloads/printable templates are located in Step 1 of the instructions. Let us know if you have any questions! – Ashley, WeLikeSewing
Unsubscribe me PLEASE. ????????????
Hi Sue! I’ve passed your info along to our customer team to unsubscribe you. Have a great day! – Ashley, WeLikeSewing
Hi, The pattern links I see on the page.Thank you
Hi, The pattern links I see can not see on the page.Thank you
Hello there! You can find the pattern links for this project in Step 1 of the Sewing Instructions section of this tutorial. Hope this helps! – Ashley, WeLikeSewing
Hi there
Love this project, but having a hard time finding the supplies you used here.
Can you advise where to get them please.
TIA
Hi Sue! Which supplies are you having difficulties finding? The Dazzle Tac Glue and magnetic clasps can be found on Amazon. The silver nail heads can be found in multiple shops on Etsy. For the chains and other hardware, I would suggest checking out the jewelry making section of your local craft store. Let us know if you have any other questions! – Ashley, WeLikeSewing
Hi
Can you provide the size of the nail heads you used here as well as the size of the beads for the eyes. Thanks
Hi there! The size of the beads for the eyes is listed as approximately .75″ long. We will need to reach out to the designer for information regarding the nail heads. It appears that the oval nail heads typically come in 4x8mm or 5x10mm, while there is more size variation in the round nail heads. We will update this project once we have more information. Thank you for your patience! – Ashley, WeLikeSewing
Hi Sue,
I see that your message about this bag were a while ago, but figured maybe I could help you, and maybe create a friend along the way??? WRITE ME IF SO, magsmail@comcast.net
The body of the bag I do suggest Ebay or Amazon or if you’re into it, thrift shops?
I personally know that the fancy eyes are buttons, or if you rather, check out the beading area at
JoAnns’….I know too that you can find the following there as well: the chain,its’clips, the lining, the snap closure , the feathers, and the glues and any other rhinestones for around the mouth,eyes and or body. My final thoughts to you are ,are try to take a picture of it with you.
Have a Merry Christmas, Maggie
Hi
I was able to print patterns but no instructions
Hello there! So glad you were able to print the patterns for this project. All of the step-by-step instructions are included below in the “Sewing Instructions” section of this page. Hope this helps! – Ashley, WeLikeSewing
Hi sorry but no instructions came up to print, just the patterns.
Hi Sue! The PDFs will just have the patterns in them. To print off the instructions on the page, you have a few options. You can just select Print and print the entire page off, you can highlight the instructions and then right click and hit Print (which should print off only the highlighted text), or you can copy and paste the instructions into Word and print from there. Hope this helps! – Ashley, WeLikeSewing
Where is a picture of the completed owl
Hi Carolyn! While there is no close-up image of the completed owl’s face in the step-by-step instructions, the main image for this project contains a picture of the completed owl. We will also update this tutorial to include a completed owl image, located at the bottom of this page. Thanks so much! – Ashley, WeLikeSewing
Where is the download to PDF button not listed.
Hello! If you scroll down to Step 1 in the instructions, you will find all of the PDF patterns links. Simply click on these to open and download them. Have a great day! – Ashley, WeLikeSewing
tHIS LINK HAS FAILED
Hi Eugenia! I was able to open the links for this project. Are you able to open any or is there one in particular that isn’t working for you? Let us know! Have a great day! – Ashley, WeLikeSewing
Looking for a bear pattern. Hadn’t used mine in a very long time and seems some tiny 4 legged, long tailed babies needed a nest. Paper and fuzzy fabric are excellent for making their baby bed.
Hi Jenny! At this time, we do not have any bear sewing patterns (although that is a great idea for us to incorporate in a future issue). We do have a very cute lamb pattern that you may like; that pattern can be found in our October 2021 issue. Have a great day! – Ashley, WeLikeSewing
Cannot wait to get started! Thank you!
Thankyou for the pattern
The pattern links all fail.
Hi Suzanne! We’re so sorry that you’re having issues accessing the pattern links. This issue should now be resolved. Please let us know if you are still unable to access the pattern links. Have a great day! – Ashley, WeLikeSewing
CUTE!!!’