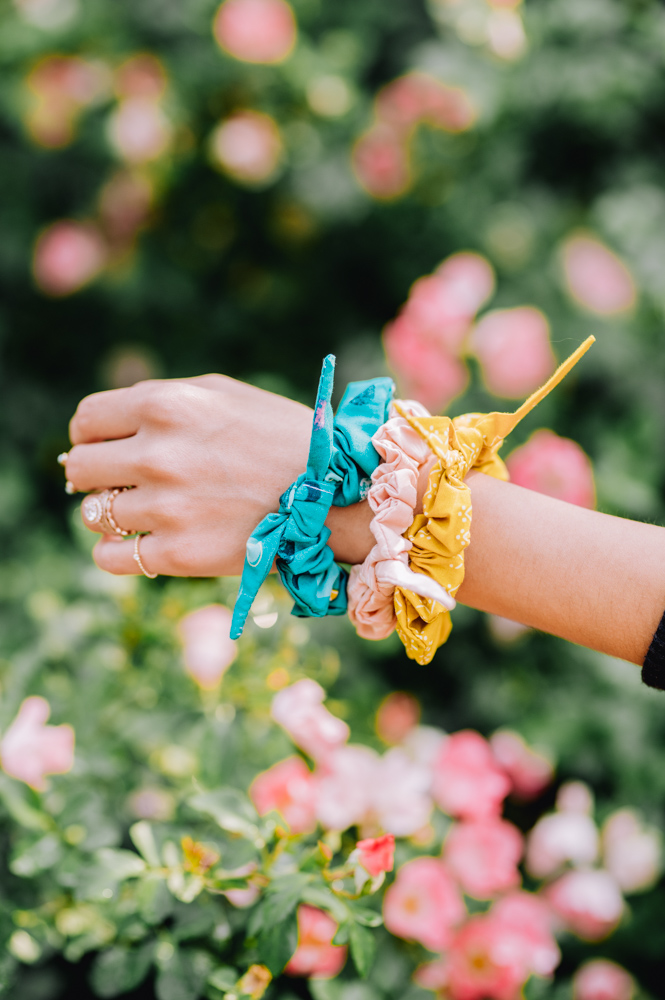
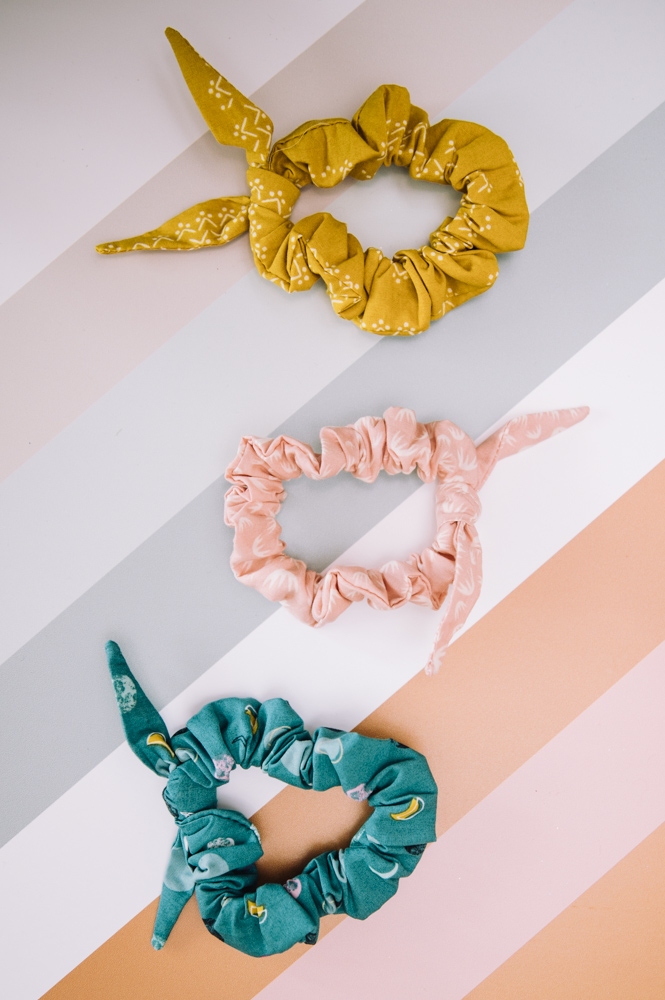
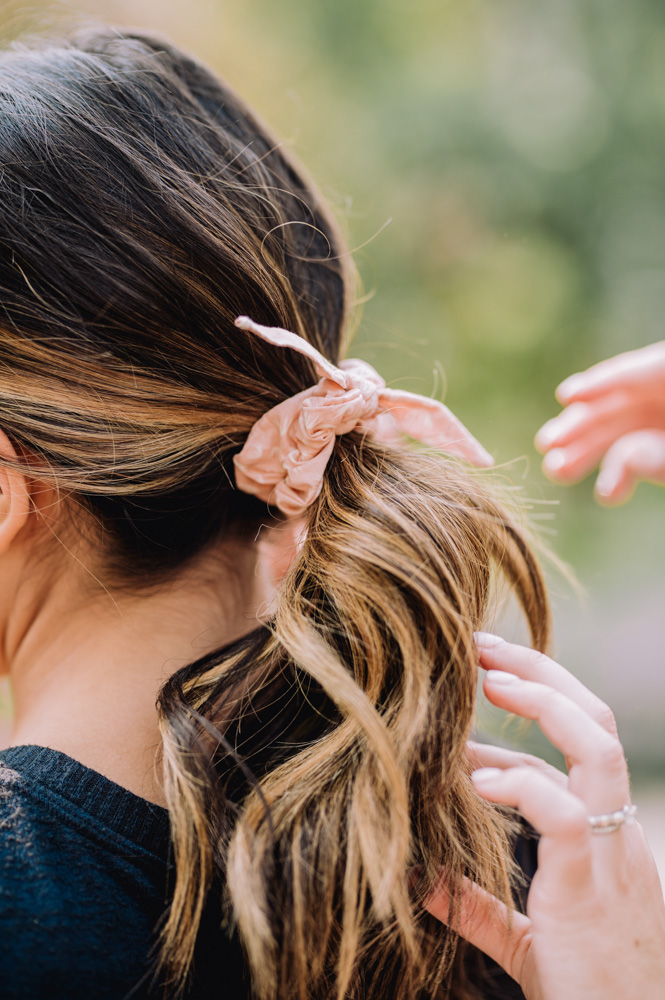
Save your lovely locks from damaging elastic hair ties by sewing your own scrunchies. Tame your mane with this easy sewing tutorial that shows you how to make stylish hair accessories using beginner sewing skills. This sewing project uses quilting cotton in cute prints and features a decorative tie to finish off your scrunchie. Whether you’re keeping your hair out of your face or wearing your scrunchie as a fabric bracelet, you’re sure to look completely fabulous!
Skill Level: Beginner
Tools
- Rotary cutter
- Cutting mat
- Ruler
- Scissors (if not using a rotary cutter)
- Medium or large sized safety pin
- Iron
- Fabric turner tool (or chopstick, pencil, or something similar)
- Sewing machine
Materials
- 1/8 yard quilting cotton
- 1/4 yard flat 1/4” wide elastic
- Matching thread
Sewing Instructions
CUTTING
- For the scrunchie: Cut a 3” x 22” strip of fabric and an 8” long piece of elastic.
- Fold each of the 3” wide ends in 1/4” and press to create a crease on each side.
- For the decorative tie: Cut a 3” x 8” strip of fabric. Fold it in half the long way, right sides together, and press flat. Cut each side from the fold to 1 1/2” in from the non-folded side, so there is a point at each end. Fold the short edge down 1/4” and press to create a crease for sewing.
SEWING THE SCRUNCHIE
- Fold the 3” x 22” strip of fabric in half the long way, right sides together. Beginning half-way across the width of one short end, sew along the 1/4” crease to the edge, then pivot and sew all the way down the long side using a 1/4” seam allowance. Backstitch at both ends. Do not sew along the other short end.
- Hook a fabric turner tool, chopstick, pencil, or something similar into the half-sewn end and push through to turn the long tube right side out. Push out the one sewn corner and flatten the tube (no need to press it).
- Attach one end of the elastic to the safety pin. Use the safety pin to guide and pull the elastic through the tube, making sure to hold onto the other end so it doesn’t get lost inside the tube. Sew the two ends of the elastic together using a 1/4” seam allowance.
- Tuck the raw edge of the scrunchie tube under along the 1/4” crease line. Tuck the half-sewn edge inside the newly folded edge to completely hide the sewn-edge and the elastic.
- Using matching thread, and making sure to backstitch both ends of your seam, sew down the folded edge to attach the scrunchie fabric to itself and to the elastic.
SEWING THE DECORATIVE TIE
- Using a 1/4″ seam allowance, begin sewing shortly before the pivot of one slanted edge, then pivot and sew all the way down the side to reach the long edge of the fabric. Repeat on the other side.
- Using the opening created on the short edge of the fabric, turn the decorative tie right side out and poke out the corners with a fabric turner tool.
- Fold in the open fabric on the short edge along the crease that you created after cutting. Using matching thread, and backstitching at both ends, sew the opening closed close to the edge.
FINISHING THE SCRUNCHIE
- Tie the decorative tie around the scrunchie seam to hide the stitch line. One knot should be enough to securely hold the tie on.
- Voila! You’ve created an adorable scrunchie!
Maybe I’m not very smart but I do NOT understand the directions. Having diagrams of what to do at each step would be tremendously helpful. I think someone who has sewn a scrunchie might understand the written directions, but I have not and do not.
Totally awesome. I can make a dozen and sell them.