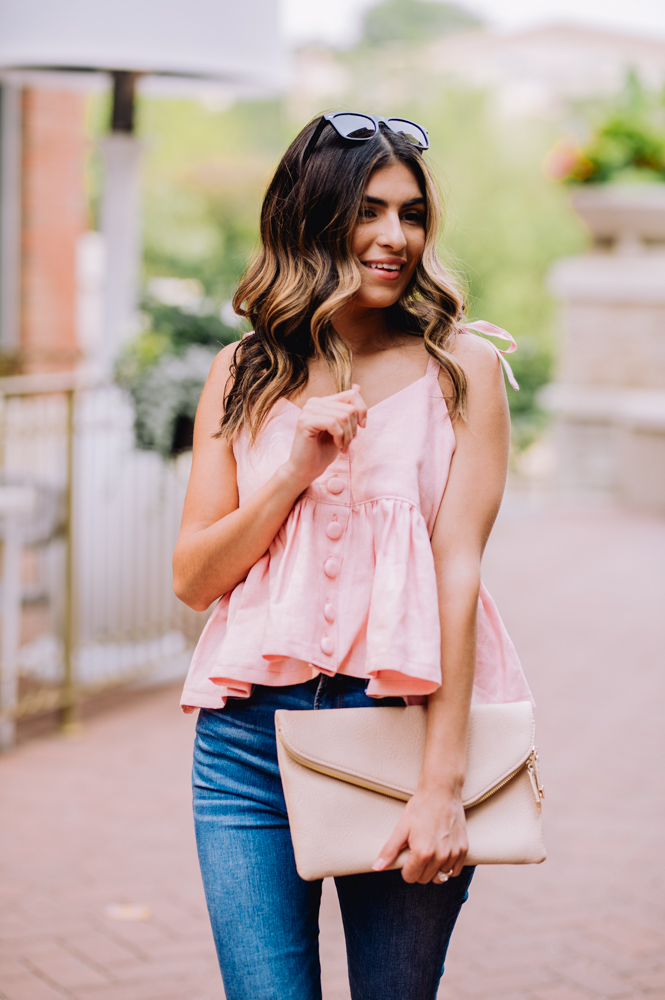
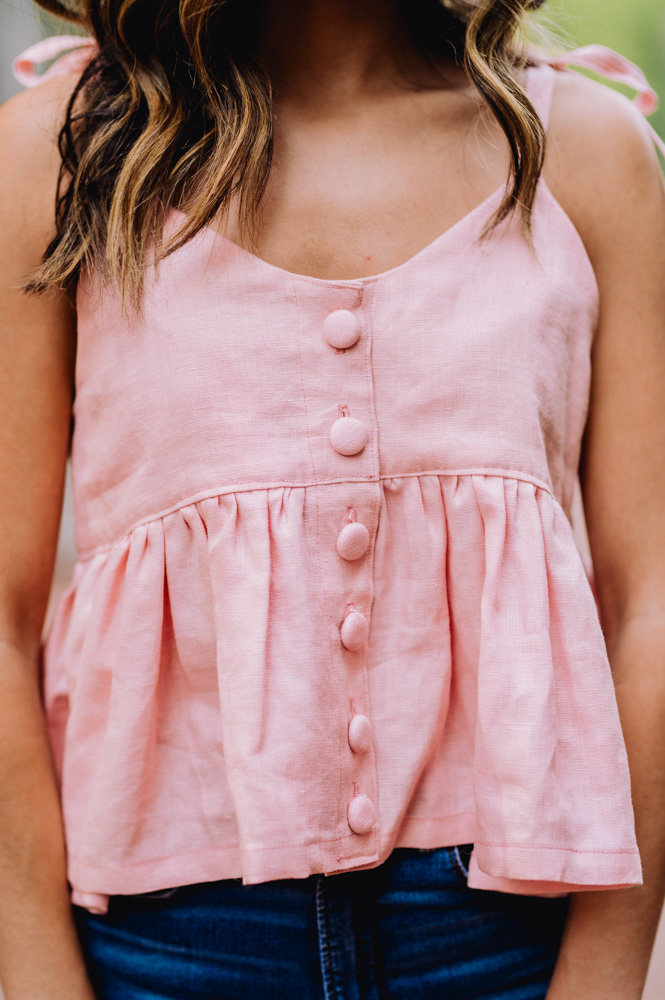
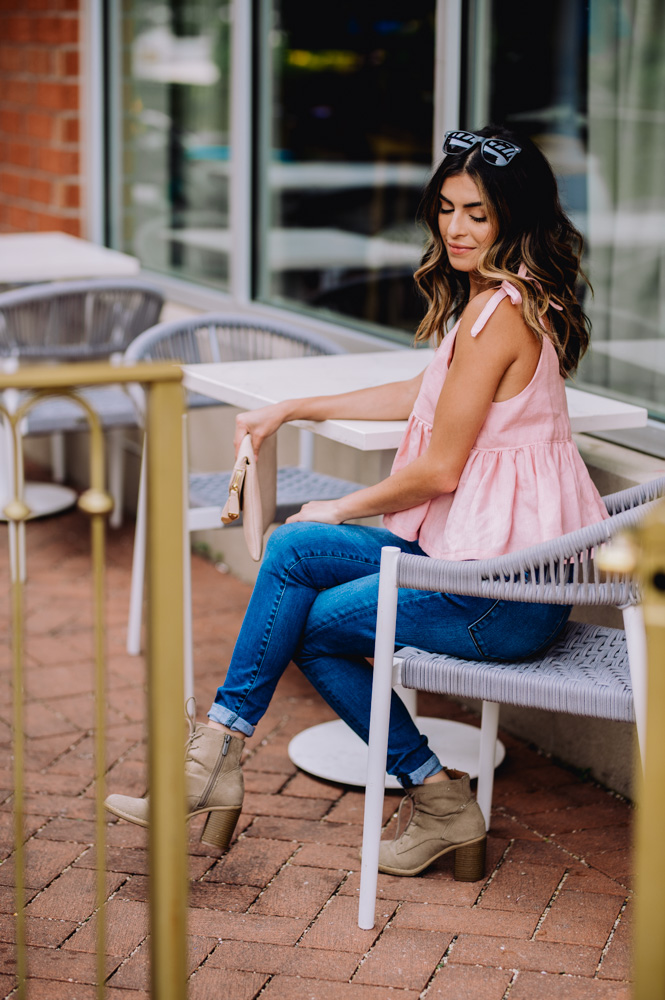
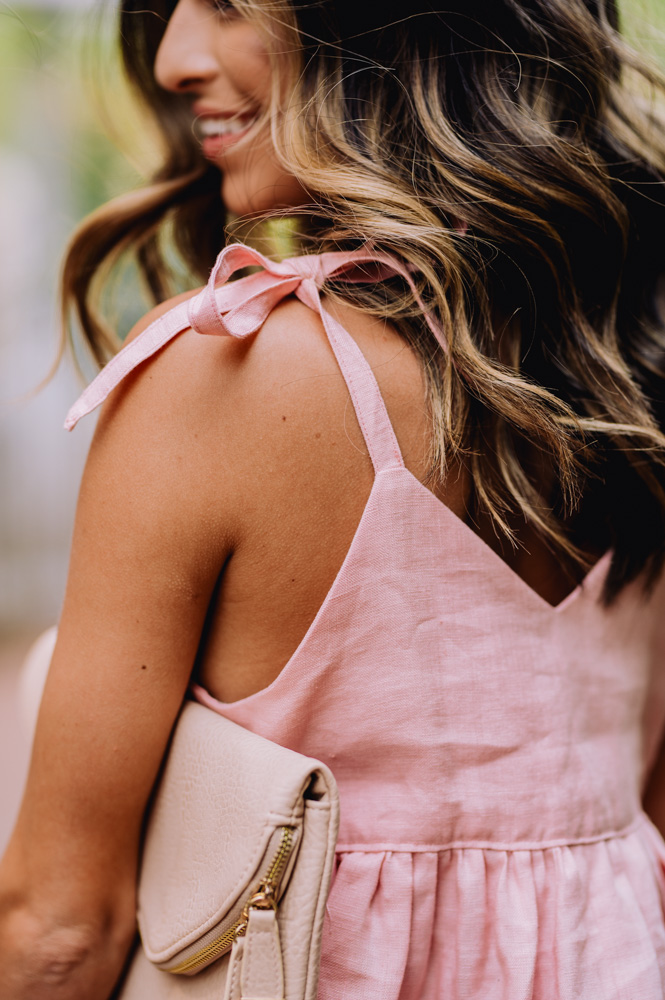
Turn heads with this flirty babydoll tank top that’s totally on trend! Design a pretty summer top that instantly dresses up your favorite pair of jeans or shorts while still being lightweight and comfortable. This tank top pattern is ideal for light to medium weight woven fabrics like linen or broadcloth and has a cropped fit, so it looks darling when paired with high-waisted leggings or jeans. Add snaps or buttonholes to your bodice for a fun front detail.
Skill level: Easy
Sizes: XS (S, M, L, XL, 2X, 3X, 4X, 5X)
Finished Bust: 32 (36, 40, 44, 48, 52, 56, 60, 64)”
Tools
- Sewing machine
- Scissors
Materials
- 1 1/4 (1 1/4, 1 1/2, 1 1/2, 1 3/4, 1 3/4, 2, 2 1/4, 2 1/2) yds light to medium weight woven fabric. yds 44/45” wide fabric. Suitable fabrics include linen and linen blends, broadcloath, poplin, gauze
- 3/4” covered button kit for 6 buttons
- Coordinating thread
- PDF Pattern – This is located at the bottom of this page. See printing instructions below.
Pattern Notes
- 1/2” seam allowance allowed on all seams unless otherwise noted.
- Yardage requirements assume you are lining the bodice with the fashion fabric. You can always choose to use a different lining fabric, which would change your fashion fabric yardage requirement.
- If you don’t enjoy buttonholes (I know some people don’t!), you can sew the buttons in place and use large snaps underneath them for the same look/effect.
PRINTING INSTRUCTIONS:
To download the PDF pattern, click on the download button at the bottom of the page. We recommend opening your download using Adobe Acrobat.
Instructions
CUTTING
- Cut 2 Backs on fold (1 each fashion fabric and lining – see note) and 4 Fronts (2 each fashion fabric and lining, mirrored).
- Cut 4 straps.
- Cut 2 rectangles, each 9 (9 1/2, 10, 10 1/2, 11, 12, 12, 13, 13)” x 32 (36, 40, 44, 48, 52, 56, 60, 64)”. Use scraps to cut out button covers using template included in your kit.
SEWING
Straps
- With RS together, fold each Strap in half lengthwise. Sew raw long side and the angled short side using 1/4” seam allowance. Clip corners, turn right side out and press.
- Topstitch around Straps, 1/8” in from outer edge.
- Set aside Straps.
Skirt
- With RS together, stitch the two rectangles together along one short edge. Press open seam. Overlock or use your sewing machine’s zig zag setting to cover the raw edges.
- Using the basting setting on your machine, run 2 lines of stitching across the top, within the seam allowance, to use for gathering. Leave the first and last 3” (all sizes) unstitched.
- Hem bottom edge of skirt by pressing raw edge under 1/4”, then pressing the fold up 3/4” and top stitching into place.
Bodice
- With RS together, matching pattern notches, stitch Fronts to Back at side seams for fashion fabric, and again for lining. Press seams open.
- Pin the raw edge of each strap to the top point on the RS of the fashion fabric.
- Pin the lining on top of the fashion fabric/straps, RS facing. Sew all the way across the top edge, from lining cut line to lining cut line.
- Clip corners and valleys, turn. Press.
- Turn 1/2” along bottom raw edge with WS facing and press.
Attach Skirt to Bodice
- Gather the top edge of the skirt until the skirt is the same width as the assembled bodice, adjusting gathers so they are evenly spaced, noting there are no gathers in the first or last 3”.
- With RS together, stitch the Skirt to the Bodice, making sure to only attach the fashion fabric and not to catch any of the lining. Press seam up towards Bodice.
Front Hems
- Press under 1/2” on Front edges of fashion fabric and 1/2″ of Front edges of lining.
- Press under 1 1/2” more of fashion fabric, towards the WS of the work and pin into place.
- The fashion fabric should fold neatly under the front edges of the linings.
- Topstitch the lower edge of lining into place, covering the seam allowance.
- Top stitch along the rectangular Front fold, through the lining.
FINISHING
- Using the template, mark your buttonholes on the right Front.
- Using your machine’s recommended buttonhole settings, stitch and cut the buttonholes.
- Cover your buttons as recommended in your button kit.
- Sew the buttons opposite the buttonholes.
Heartbreaker Cropped Babydoll Tank
Heartbreaker Cropped Babydoll Tank
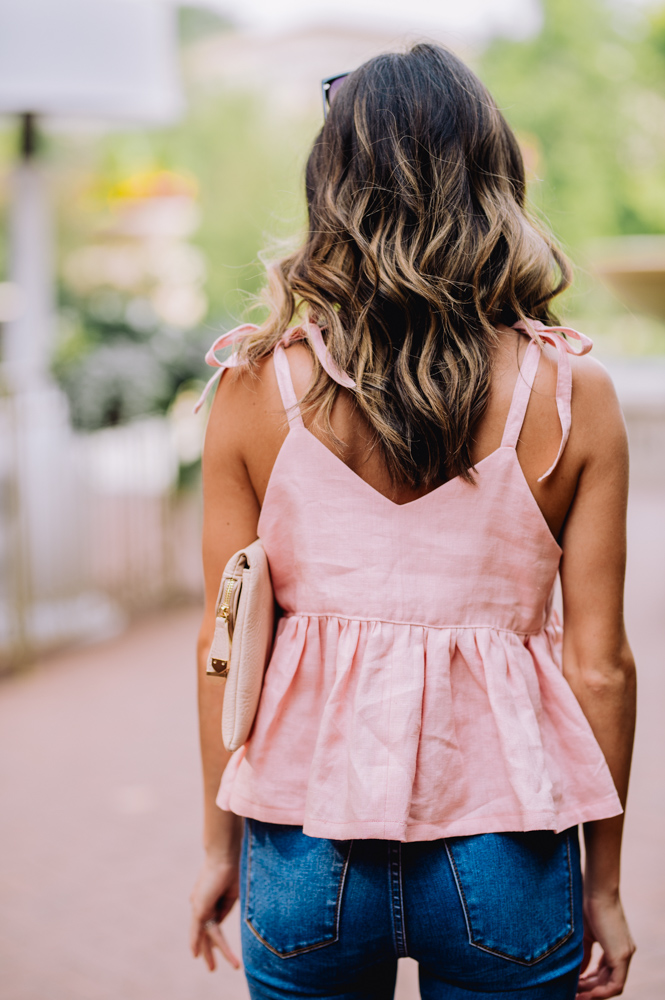
Heartbreaker Cropped Babydoll Tank
Heartbreaker Cropped Babydoll Tank
Heartbreaker Cropped Babydoll Tank
Heartbreaker Cropped Babydoll Tank
I cannot download patterns, they won’t open!
Hi Regina! We’re so sorry you are having issues opening the patterns. I was able to open and download this pattern. I would recommend checking your browser settings to make sure they allow pop-ups for our site. I’ve also updated this page to include printing instructions. Let us know if this helps! – Ashley, WeLikeSewing
I just paid to become a gold member but received no instructions to set up an account in order to download PDFs or patterns. Please send instructions.
Hi Beatrix! Our customer service will be able to help you set up an account. You can reach them by scrolling to the bottom of our homepage and clicking on the “Contact Us” link. Once your account is created, you’ll scroll to the bottom of the page to print out the PDFs or other printables. Let us know if you have any other questions. Have a great day! – Ashley, WeLikeSewing
I can’t find the pattern for the Heartbreaker Cropped Babydoll Tank. Where do I get it please?
Hi Sewing Enthusiast! The pattern is located at the very bottom of the project and is available to our Gold members as a PDF. Let us know if you’re still having difficulties accessing the pattern. Have a great day! – Ashley, WeLikeSewing
I love sewing . Clothes . Bags . Anything and everything.