New quilters, this one’s for you! Designer Amanda Ogden is here to introduce you to the classic flying geese quilt block. The flying geese block is an excellent foundational block for all quilters to learn, as its design features many possible block combinations. Learn how to make the traditional flying geese block, as well as how to turn this skill into making other blocks, like a windmill block or 8-point star. If you’re new to quilting but are unsure where to begin, this easy quilt block pattern is the perfect place to start.
What Is a Flying Geese Block?
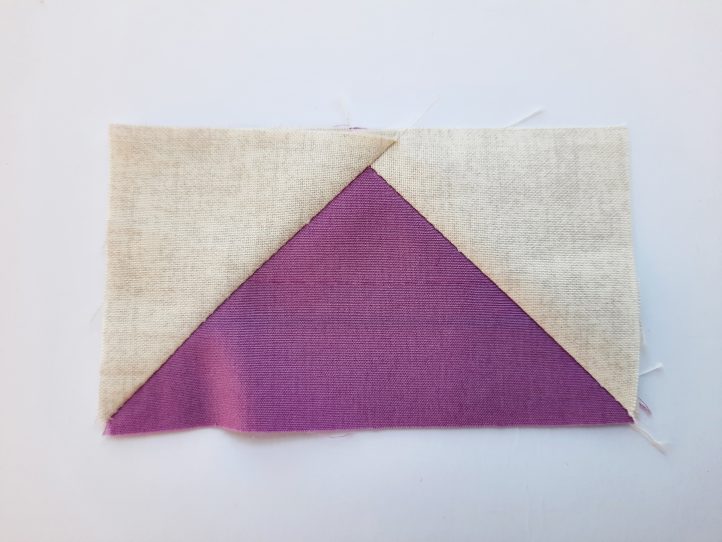
This is a single ‘Flying Goose’ block.
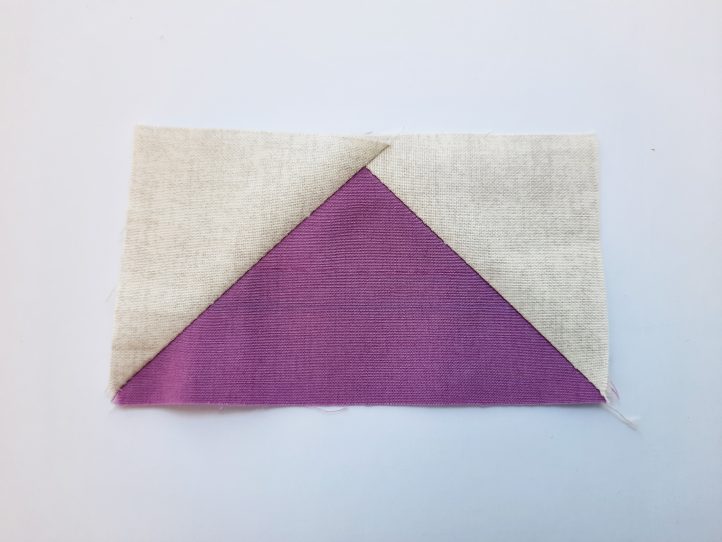
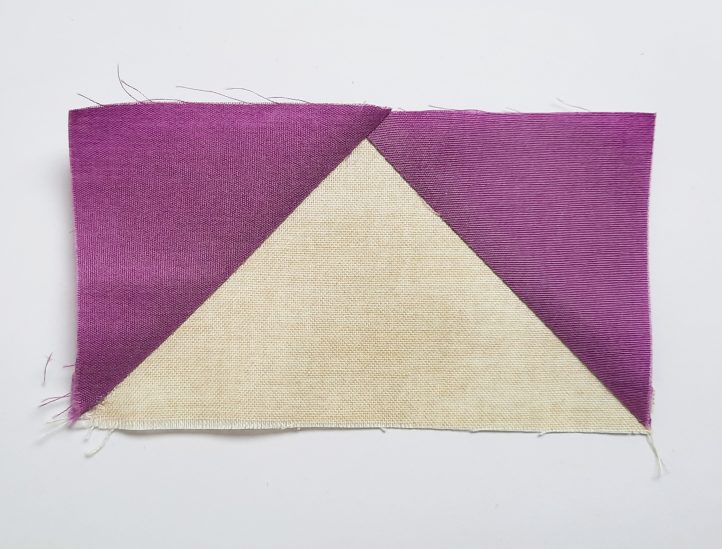
As you can see, it is made up of three triangles. The larger, central triangle is the ‘goose’ and the two outside, smaller triangles are the ‘sky’. It often works well to have a contrast between a darker ‘goose’ fabric and a ‘lighter sky’, as seen above. However, you can also reverse the fabrics and have a light-colored ‘goose’ against a darker ‘sky’, as seen below.
Flying geese can be combined in many different ways and can also be useful in completing other patchwork blocks.
Materials
To practice making Flying Geese blocks, you will need a variety of fabric scraps. You may like to choose some darker-toned and some lighter-toned, so you can experiment with the effects seen in the blocks above. Choose solid colors and low-volume prints. Once you have practiced these blocks, you might also like to try using fabrics which have a narrow stripe. The size of each fabric piece will depend on the size you choose for your Flying Geese blocks (see ‘The Flying Geese Formula’ below).
How to Make Flying Geese Blocks
It is possible to make a Flying Goose block by cutting out triangles (one large and two small), but the method shown below is a really easy way of cutting and piecing the block. You will use a little more fabric than you would by just cutting triangles, but the process is easy and it produces accurate results.
Cutting Instructions
To make a Flying Goose block that will measure 4″ x 2” (finished size), you need to cut:
- One oblong of darker fabric: 4 1/2″ x 2 1/2”
- Two squares of lighter fabric, each: 2 1/2″ x 2 1/2”
The Flying Geese Formula
The measurements seen above in the cutting instructions give you your formula each time you make Flying Geese blocks by this method, whatever finished size you need. Your ‘goose’ always needs to be (at its finished size) twice as wide as it is high. Having decided on the size, you then need to add 1/2” to the width and 1/2” to the height (for the standard 1/4” seam allowances). Your ‘sky’ pieces need to be squares which measure the same finished height of the goose plus 1/2” on each side (for the seam allowances).
So, for example, for a block with a finished size of 6″ x 3”, you would need one oblong 6 1/2″ x 3 1/2” and two squares 3 1/2″ x 3 1/2”. You can use this formula with any finished block size measurement you choose.
Sewing Instructions:
MAKING A 4″ X 2″ FINISHED BLOCK:
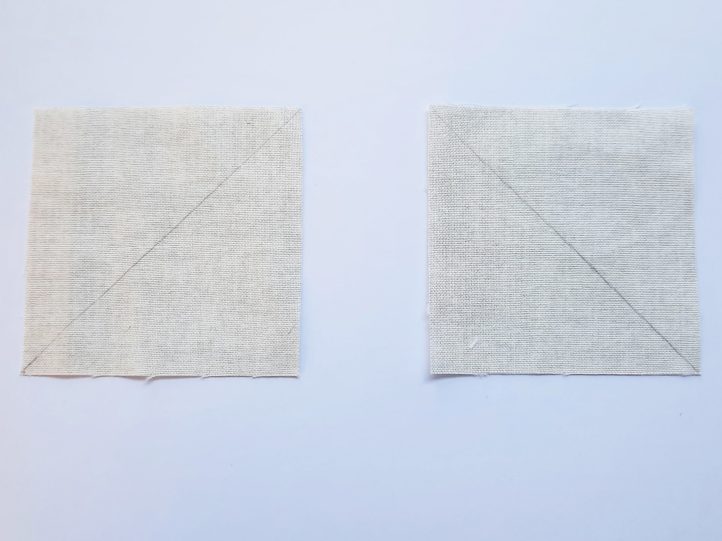
- Using a pencil or erasable fabric marker, draw a single diagonal line from corner to corner across the wrong side of each of the 2 1/2″ x 2 1/2” squares.
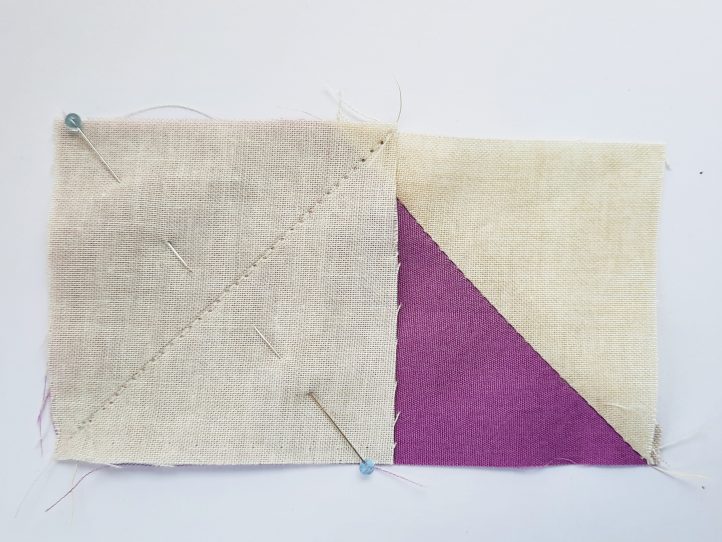
- Place a square right sides together on top of the 4 1/2″ x 2 1/2” oblong, aligning the square with the right-hand end of the oblong. Pin in place.
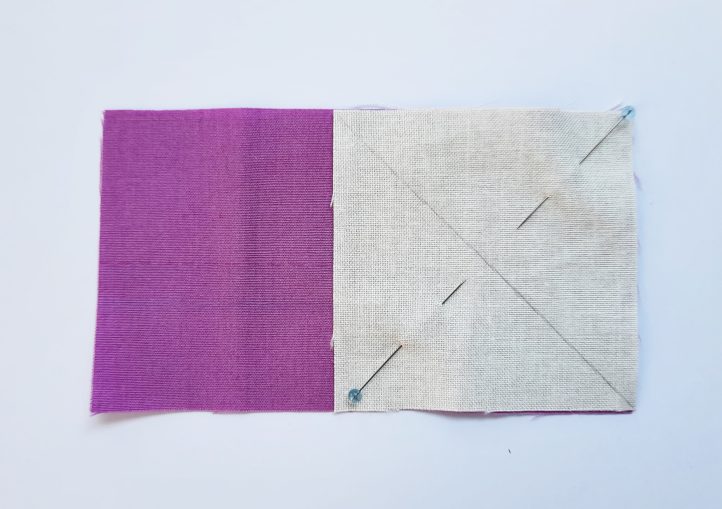
- Stitch on the marked line.
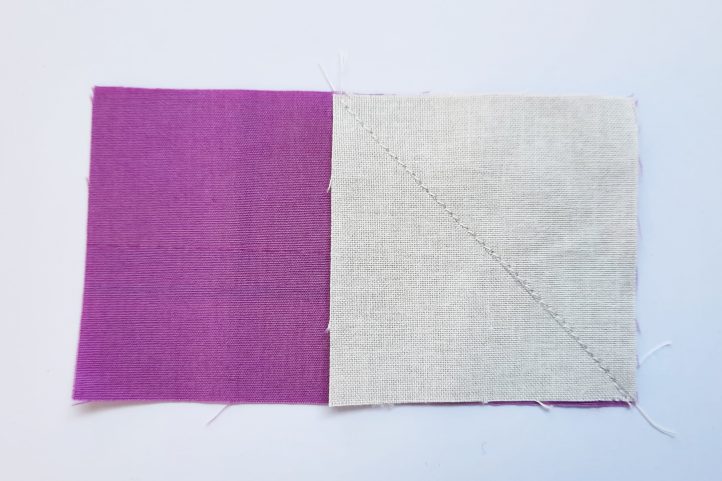
- Take out the pins and fold the lower part of the square up towards the right-hand corner, so it aligns exactly with the corner. Press.

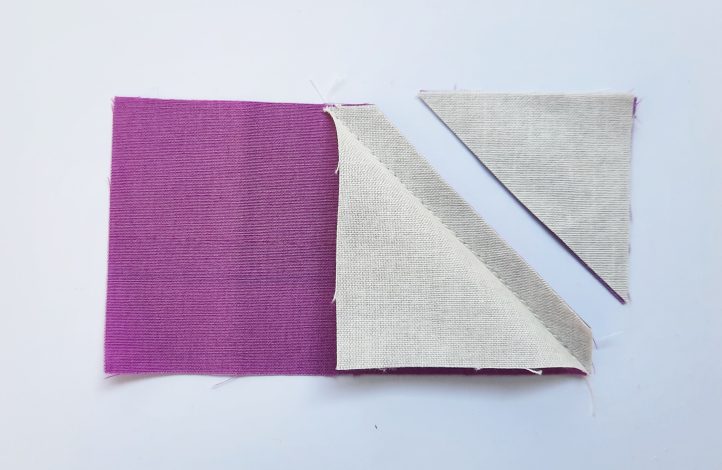
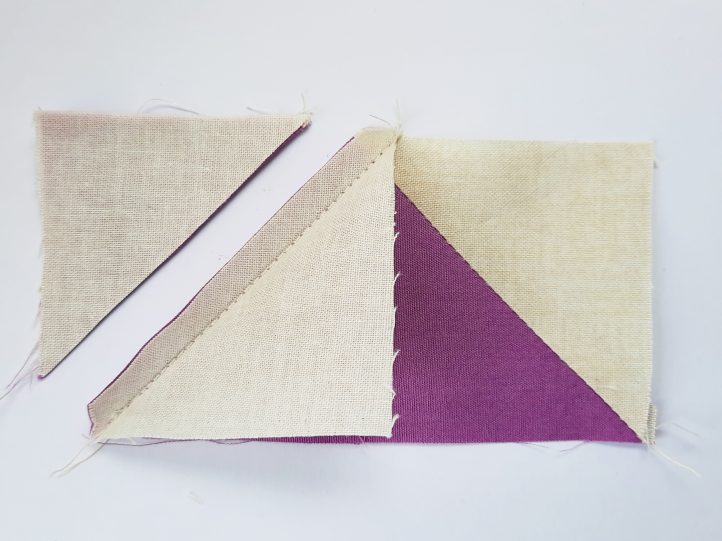
- Fold the upper part of the ‘sky’ piece out of the way and trim the corner of the ‘sky’ and the corner of the ‘goose’ piece, at a distance exactly 1/4” away from the stitched line.
- Re-fold the ‘sky’ piece. Press again and then pin the second 2 1/2″ x 2 1/2” square right sides together to the left-hand end of the oblong, aligning the square with the left-hand end of the oblong. Pin in place. This piece will slightly overlap the one you added in Steps 2-5.
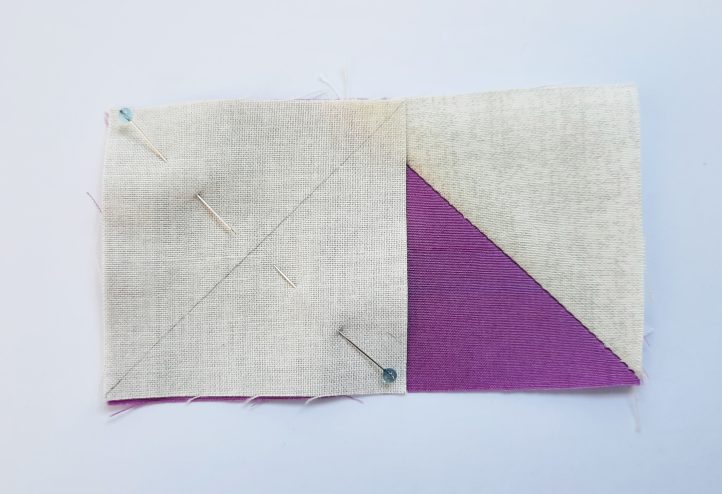
- Stitch on the marked line.
- Take out the pins and fold the lower part of the square up towards the left-hand corner, so it aligns exactly with the corner. Press.
- Fold the upper part of the ‘sky’ piece out of the way and trim the corner of the ‘sky’ and the corner from the ‘goose’ piece, at a distance exactly 1/4” away from the stitched line, as you did before.
- The block is complete. Press well.
- Try following Steps 1-10 again, but this time choose a light-toned fabric for the goose and a dark-toned fabric for the sky. It will produce a block like this.
HOW TO USE YOUR FLYING GEESE BLOCKS:
One way to use your blocks is to join them together in a horizontal row. This looks good in a quilt border or a row-by-row sample quilt, for example.
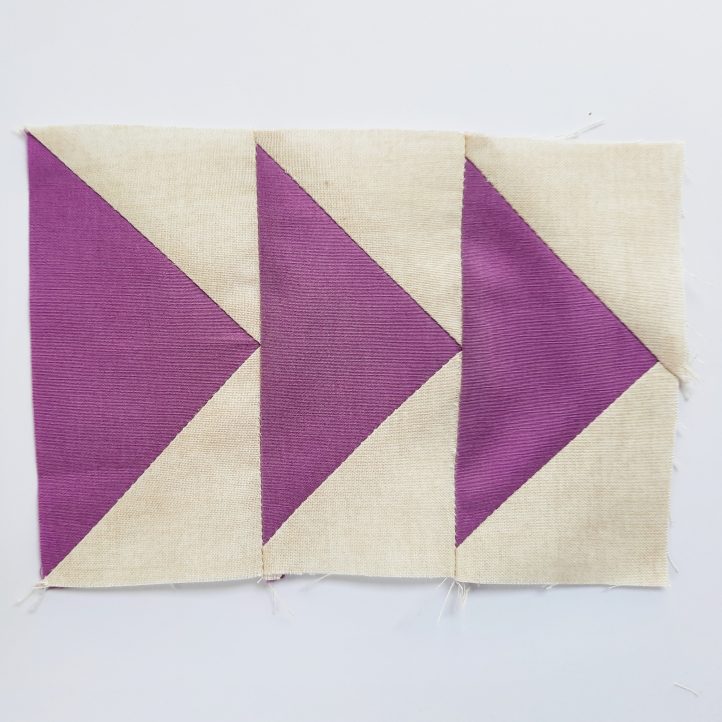
It is very important when joining these blocks that you pin them, right sides together, with a pin exactly at the top of the ‘goose’ point. Then when you stitch, your sewing line needs to pass just above the point, so that on the right side, the point shows perfectly.
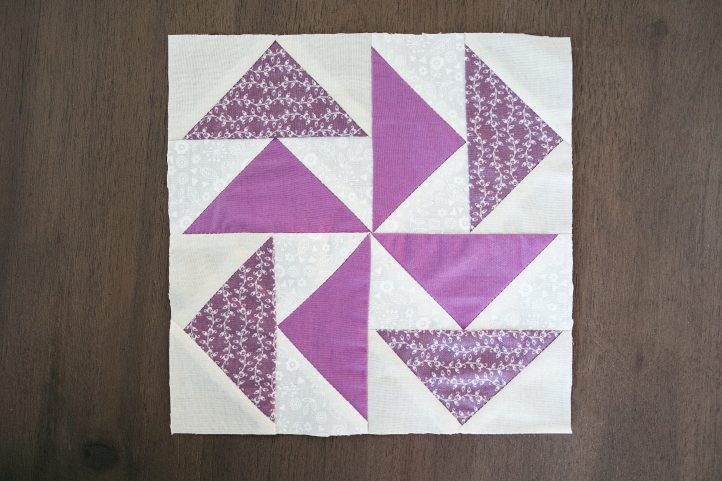
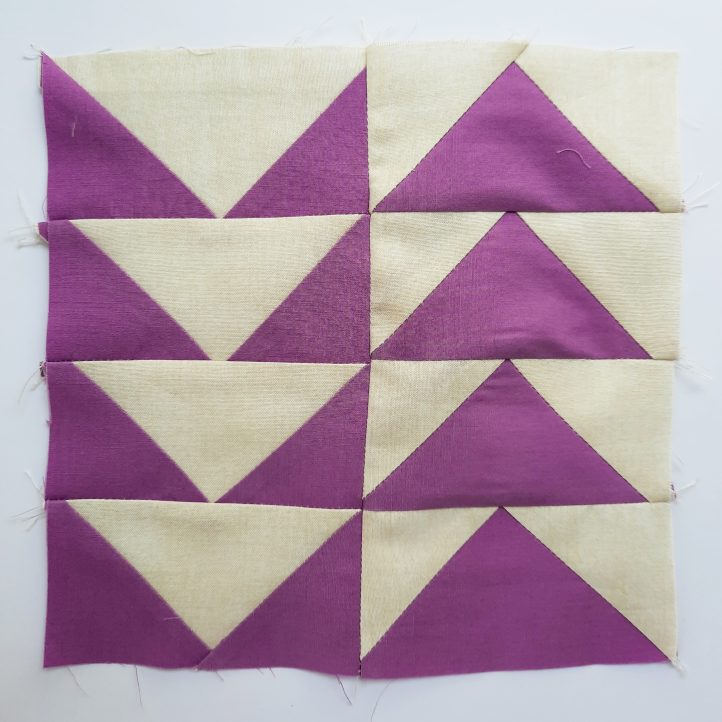
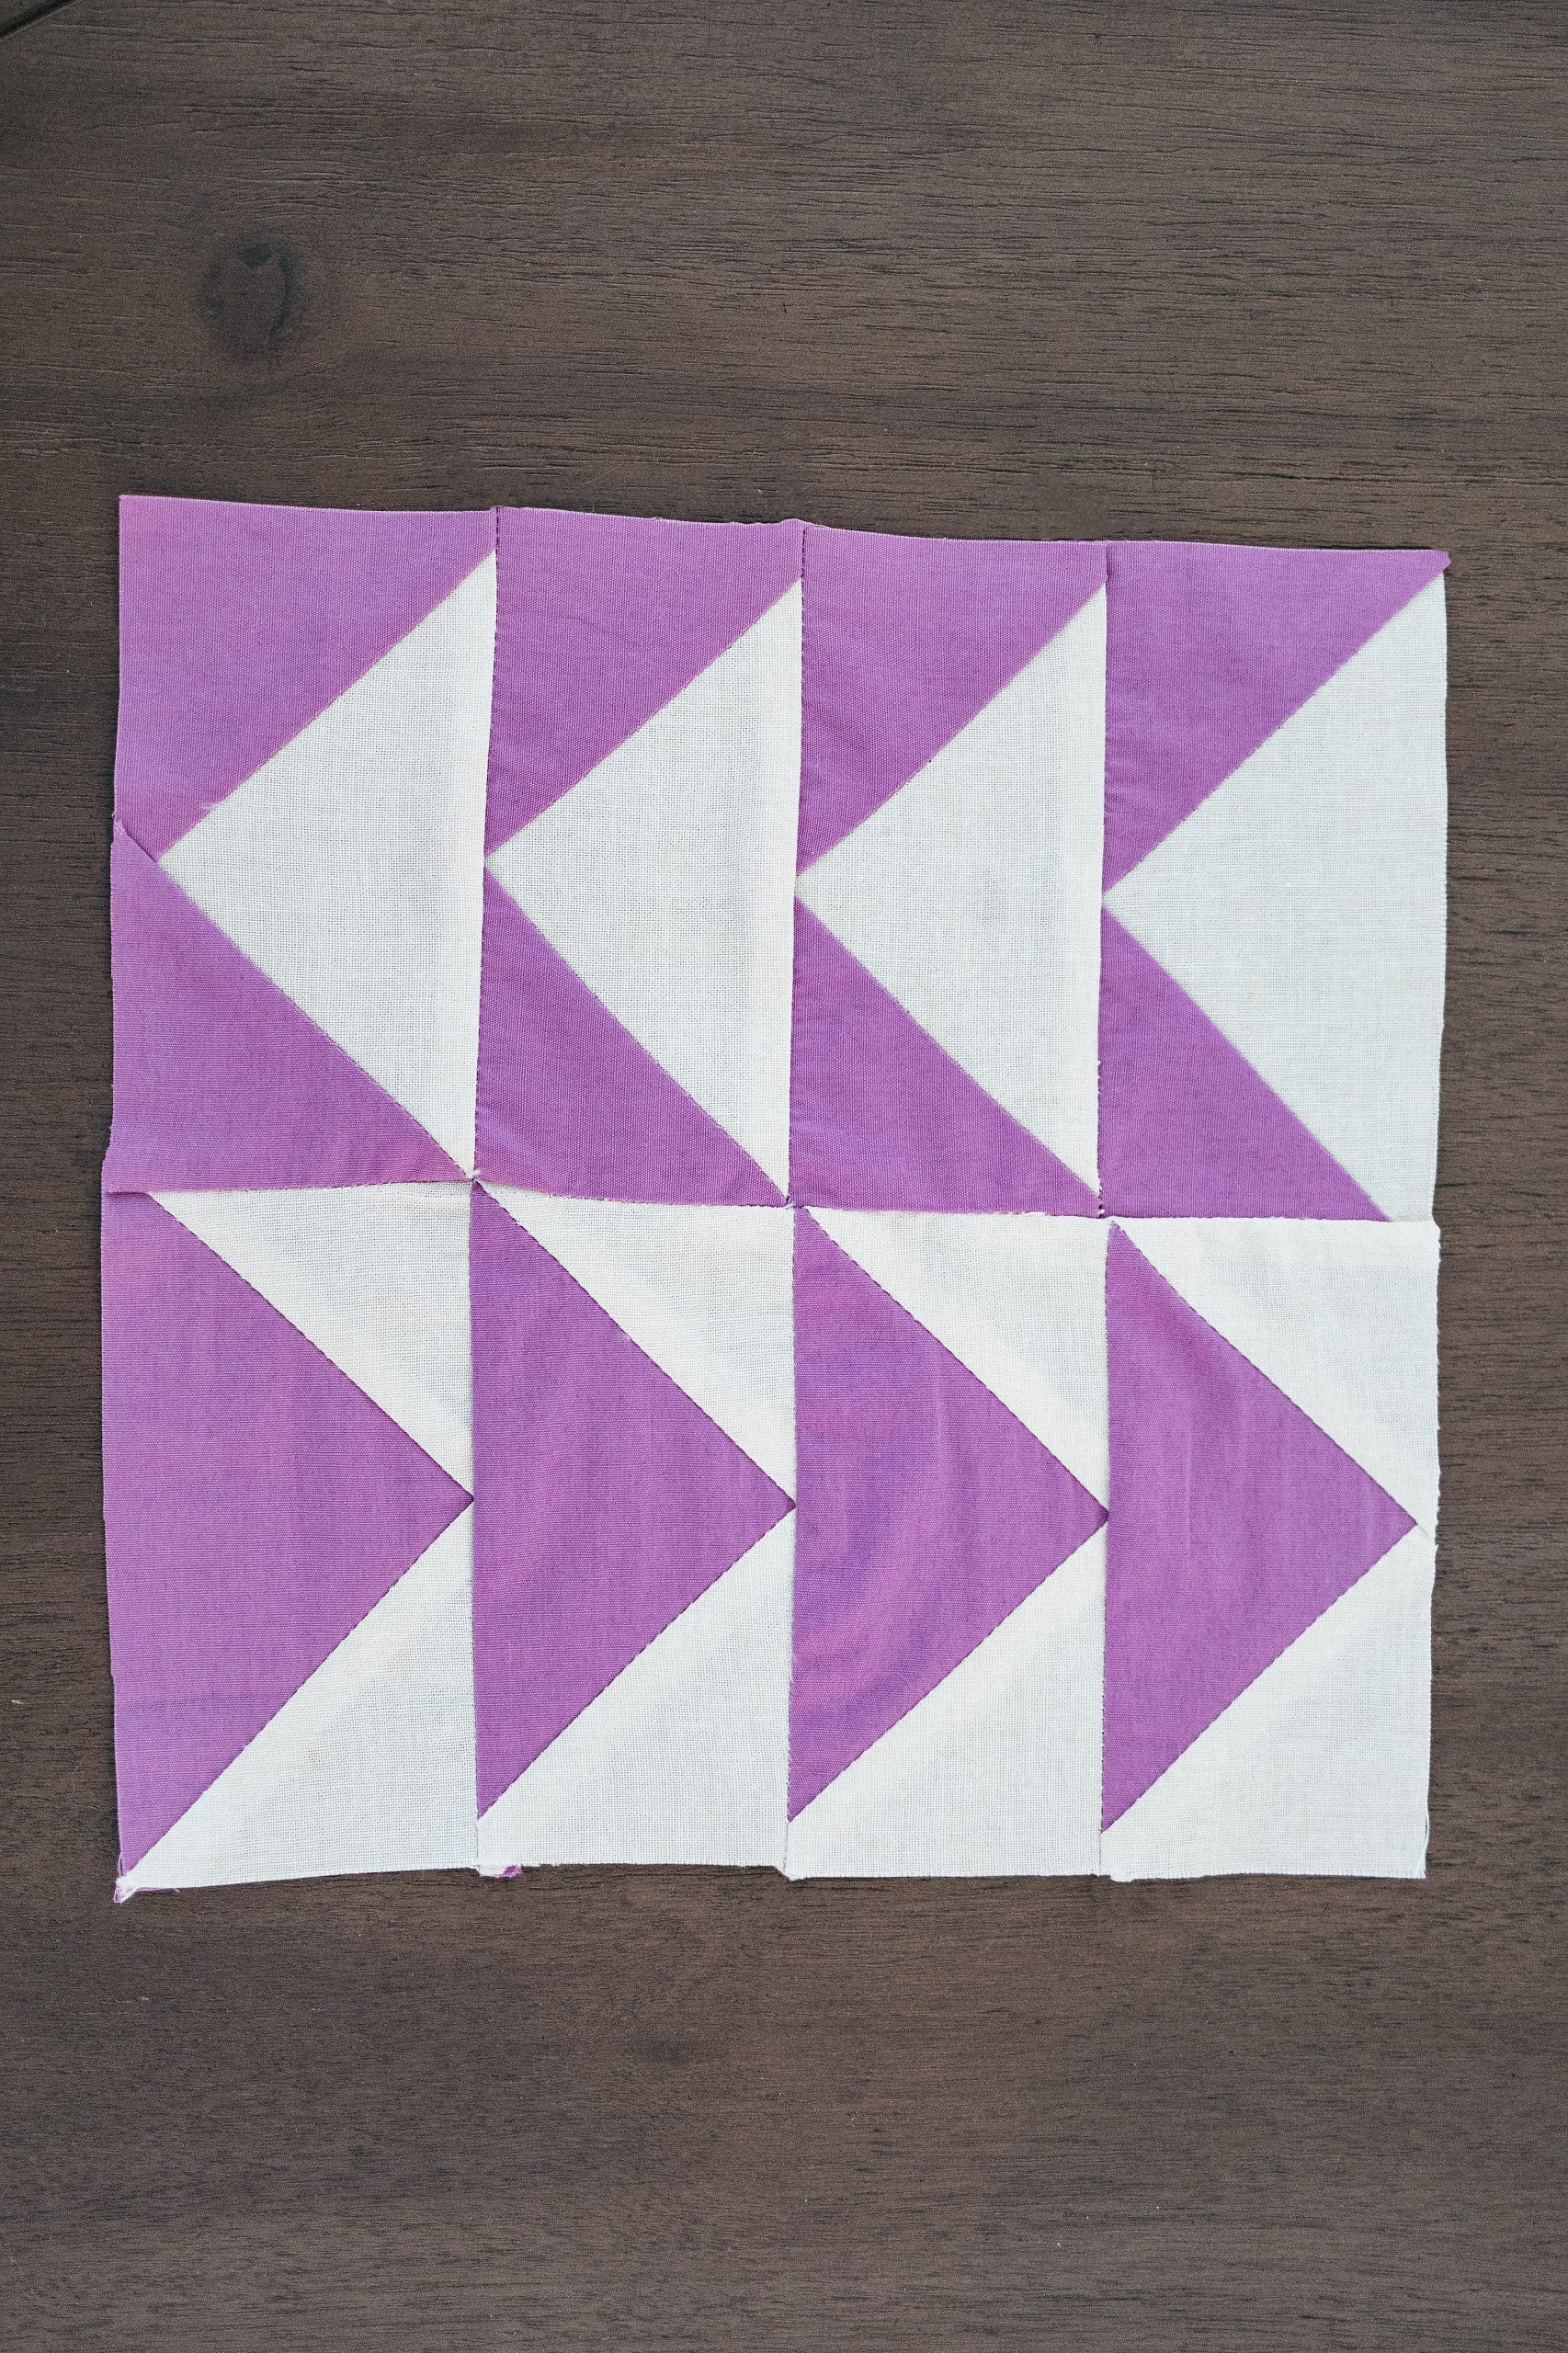
You can combine your flying geese to make a block. To make this block with 4″ x 2” (finished) geese, you will need a piece of fabric 21″ x 12” in each of two colors.
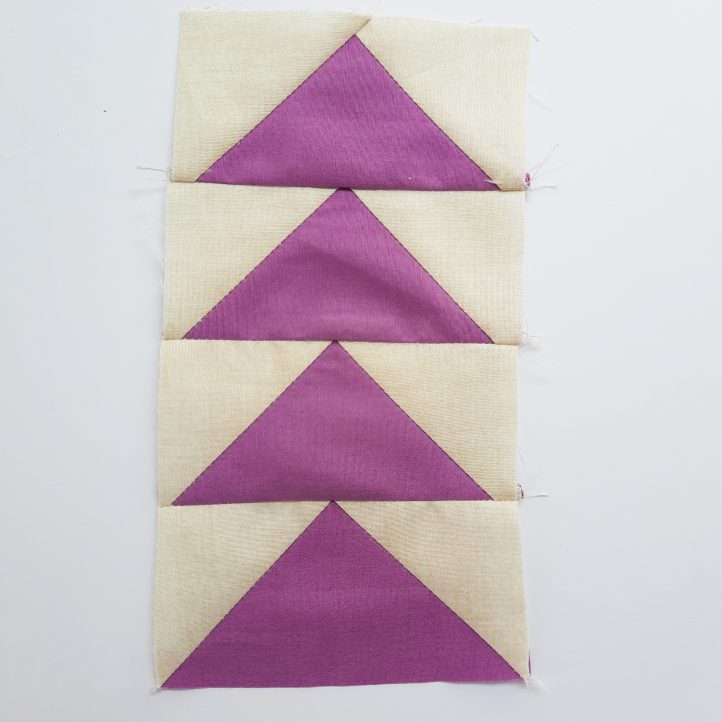
- Follow instructions 1-10 above to make four flying geese with darker-toned ‘geese’ and lighter-toned ‘sky’.
- Join them one to another with all the geese pointing upwards.
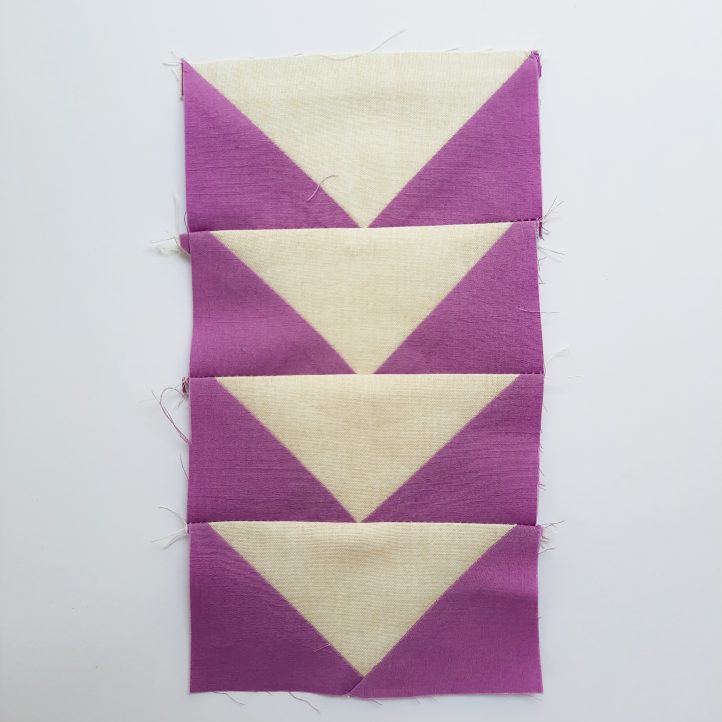
- Follow instructions 1-10 in the above section to make four flying geese with lighter-toned geese and darker-toned sky.
- Join them one to another with all the geese pointing upwards. Then turn the unit through 180 degrees.
- Join the two strips of flying geese blocks, aligning the horizontal seams. This gives you an 8″ x 8” (finished) block.
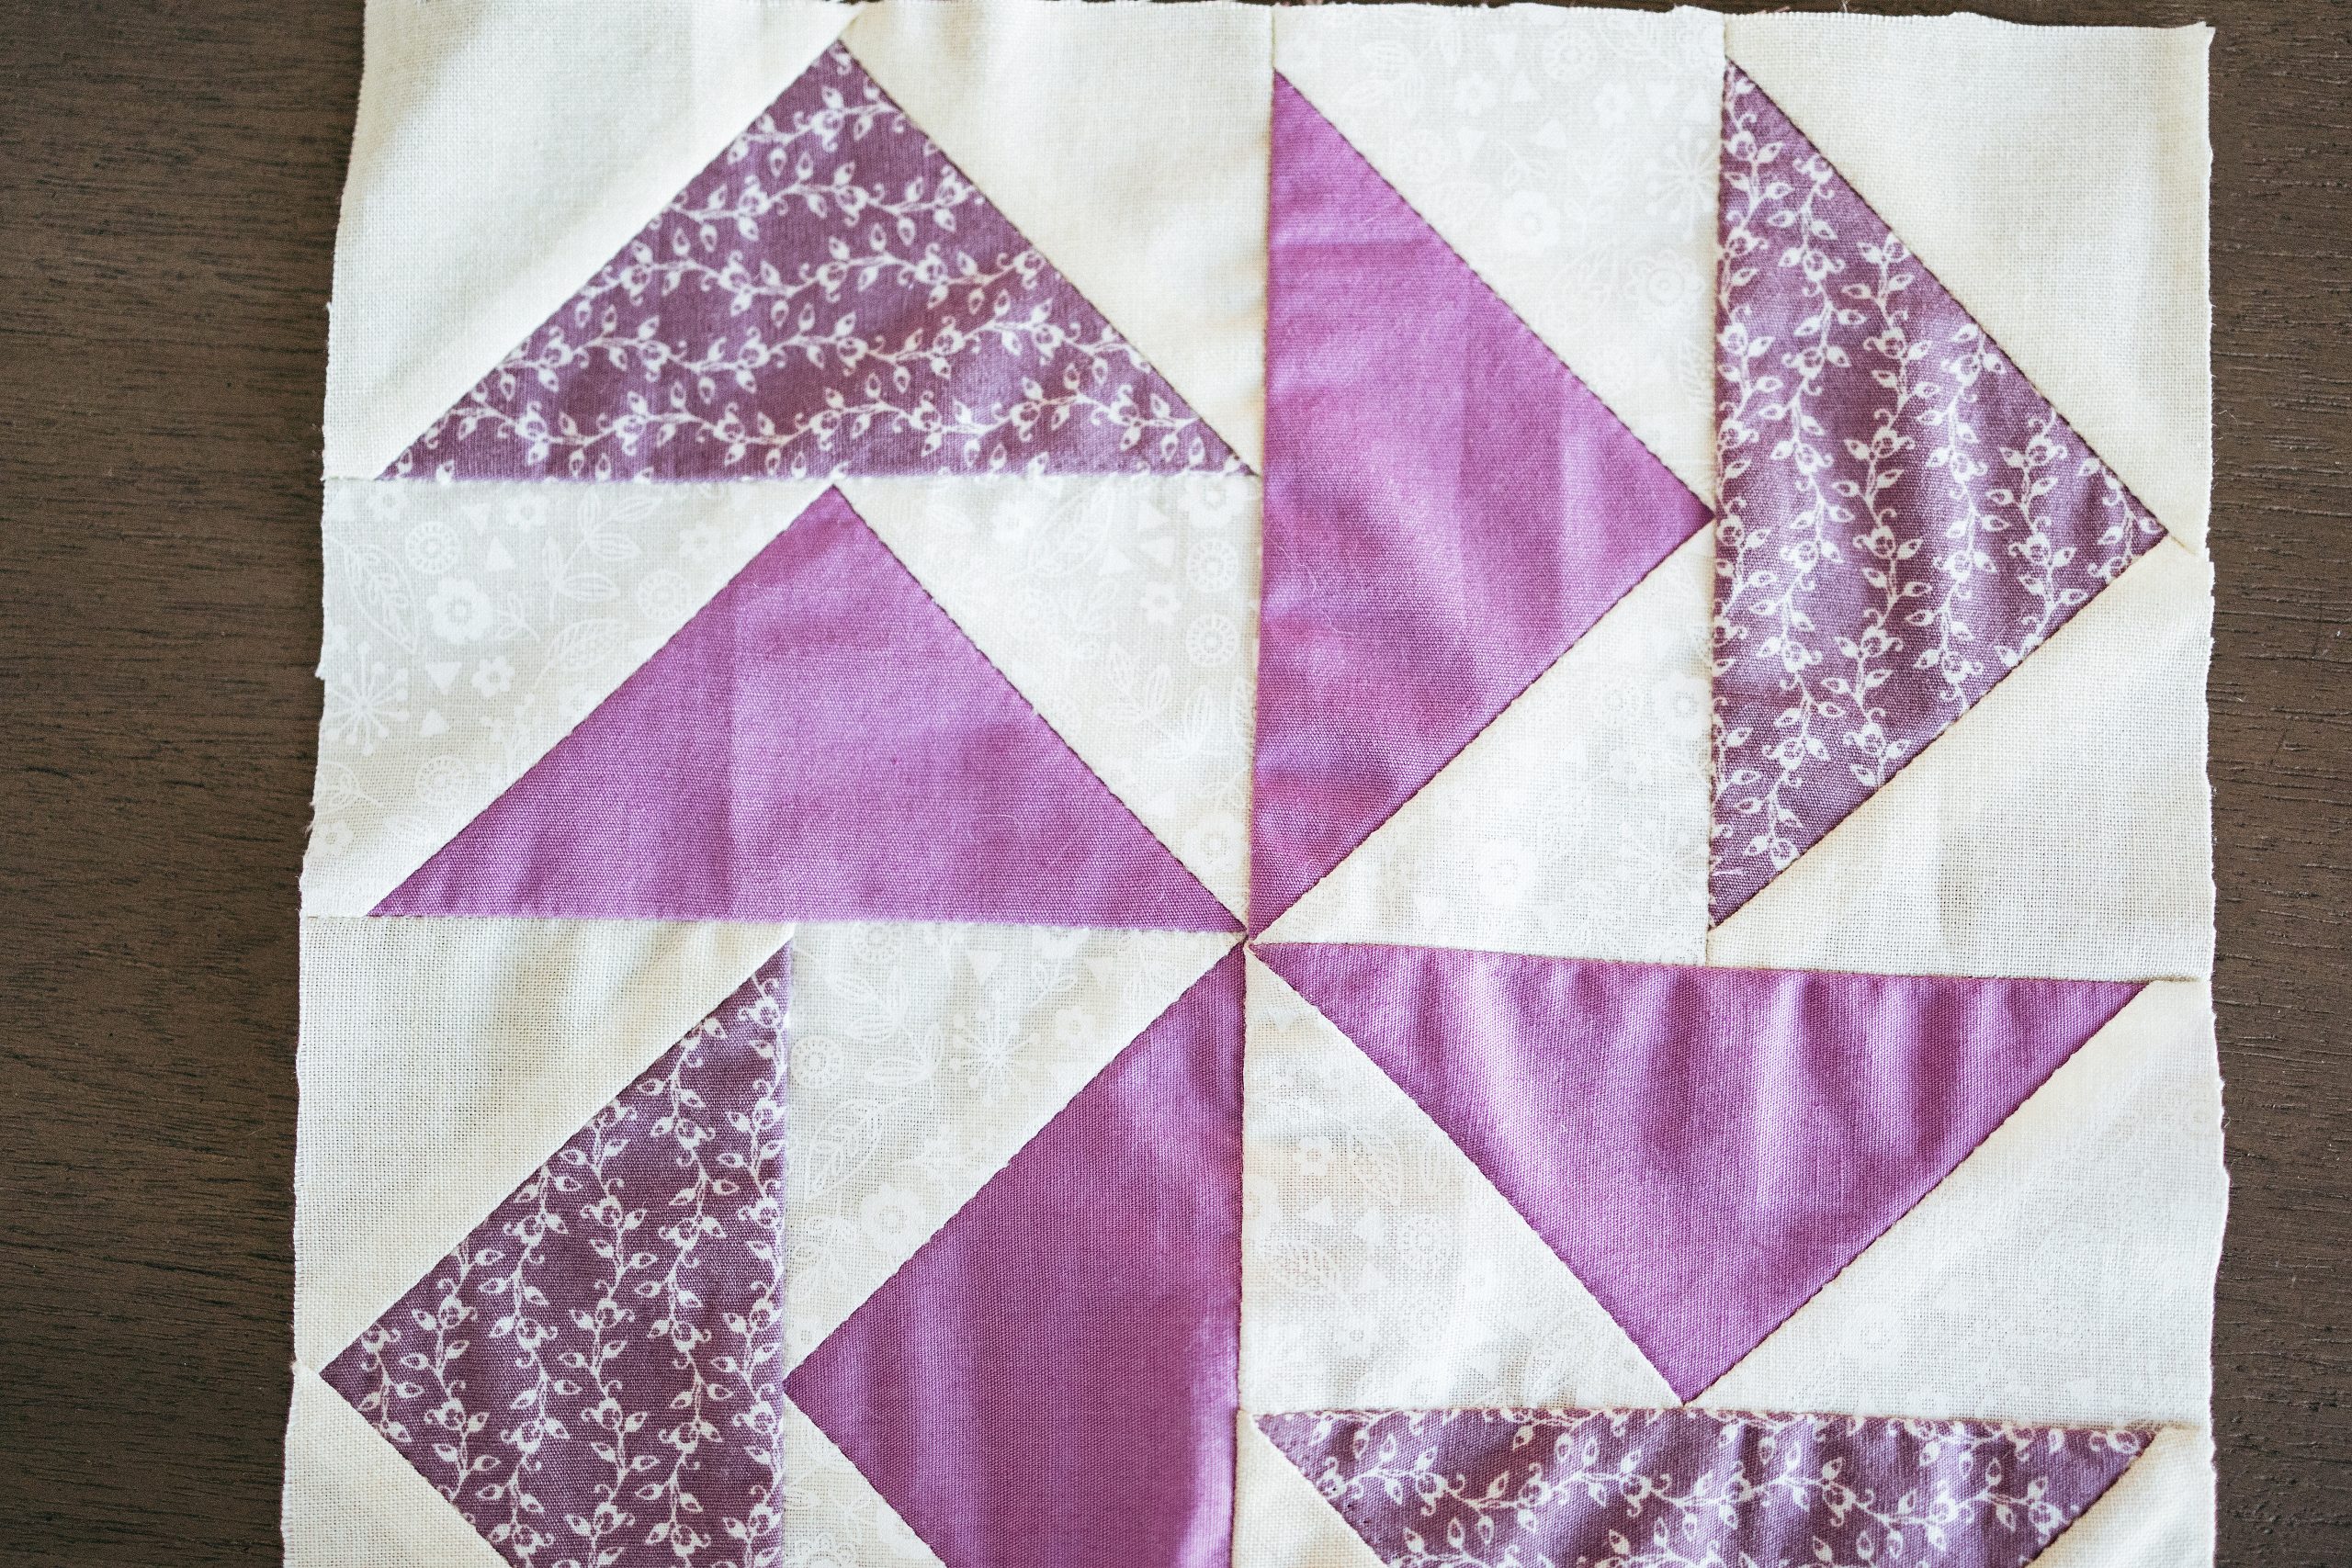
Another variation you can try with flying geese blocks is to keep the background fabric the same for all of them, but just vary the fabric used for the ‘geese’ part of the blocks.
To make this block, you will need a piece of fabric 10″ x 6” in two different colors (or two tones of the same color). Here, a solid (Fabric A) and a print (Fabric B) have been used for the ‘geese’ and a piece of neutral fabric 11″ x 11” (Fabric C) for the background ‘sky’.
- Follow instructions 1-10 in the first section once more, but this time keep your background ‘sky’ fabric (Fabric C) the same throughout and make four ‘geese’ in Fabric A and four ‘geese’ in Fabric B.
- Join your flying geese blocks in pairs, with the Fabric B block below the Fabric A block.
- Lay the pairs out on your work-table as two rows of two blocks.
- Rotate the pairs until they look like the finished block shown below.

- Join the pairs, then join the rows. Press.
This also yields an 8″ x 8” finished block. (But don’t forget, you can make this block to any size, using the ‘Flying Geese Formula’.)
Note that sewing two Flying Geese together will always make a square block, which can be used in different ways within a quilt.
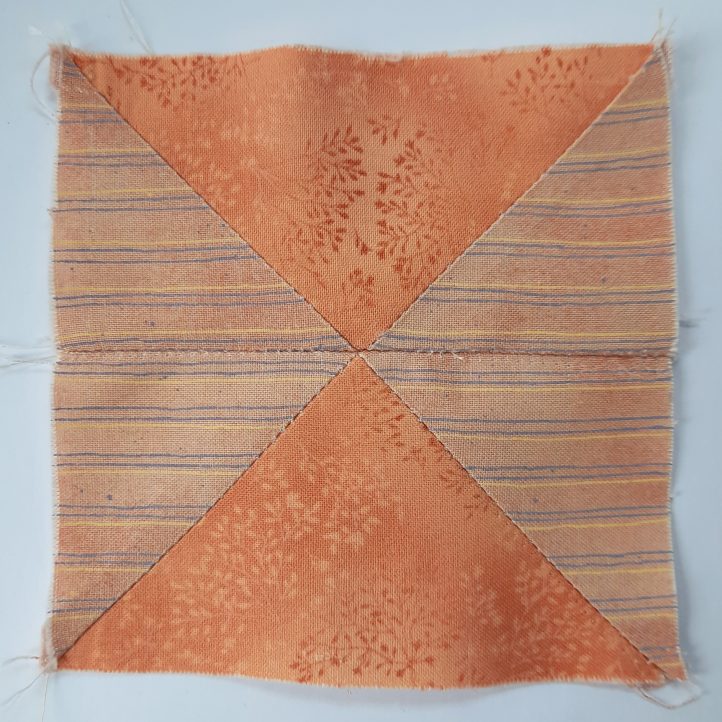
USING STRIPED FABRICS:
Using striped fabrics allows you to play with Flying Geese blocks in a new way.
You can use the striped fabric for the ‘goose’.
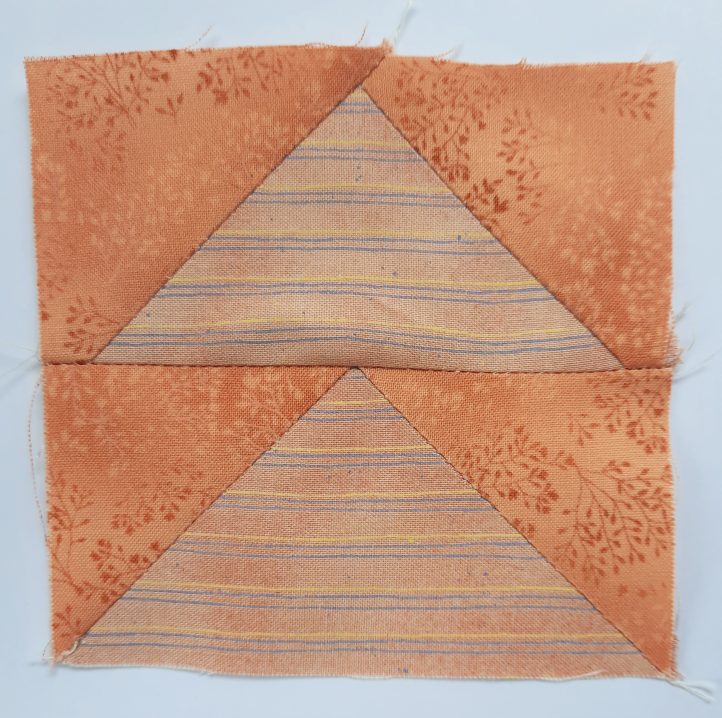
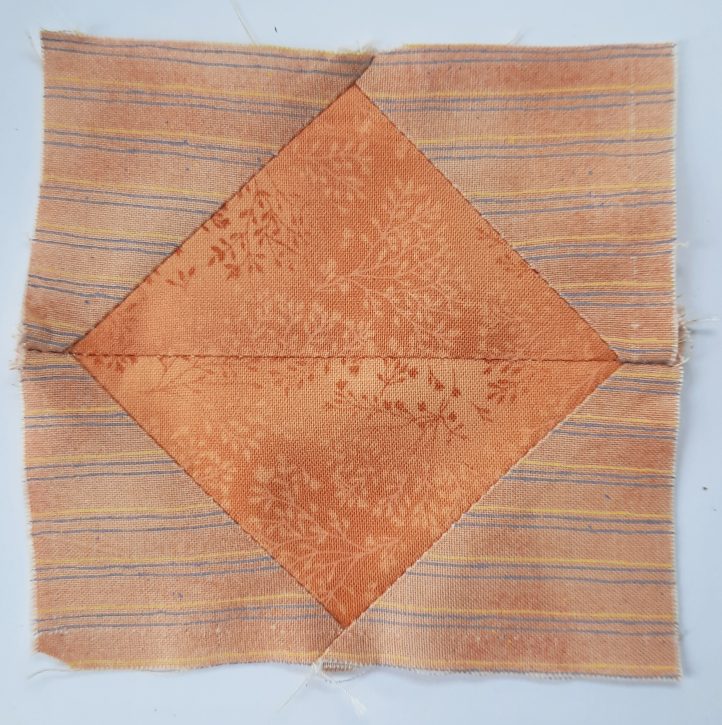
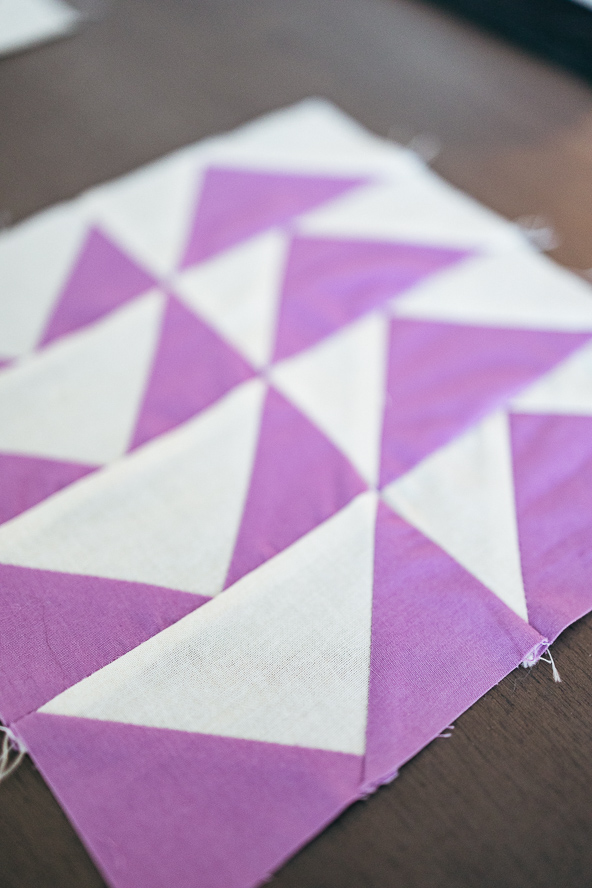
If you use the striped fabric for the ’sky’ however, you need to pin your striped squares on carefully. To achieve horizontal stripes in the finished block (as seen in the photo below), you need to pin the square on to the oblong with the stripes in the square fabric running vertically. When you fold the square up (as in instruction 4 in the first section above), the stripes change direction!
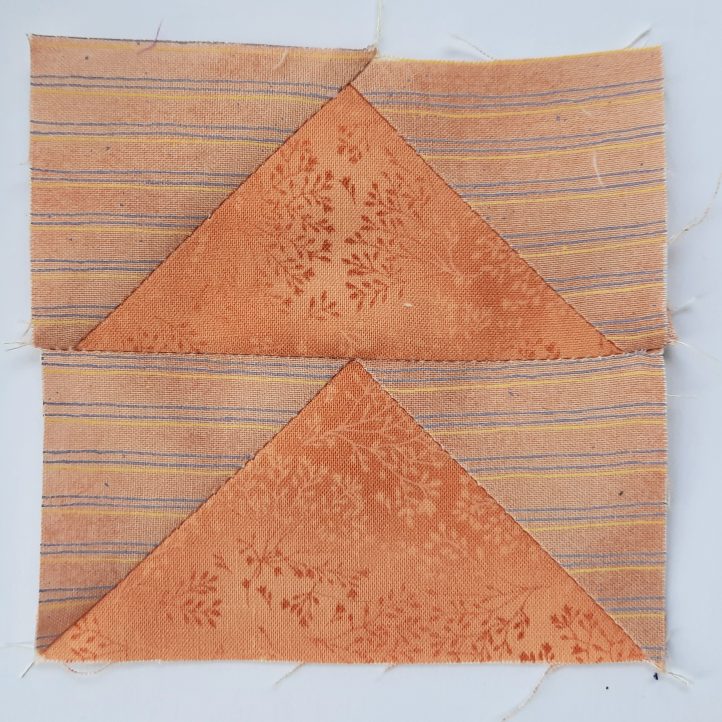
You can join your Flying Geese blocks in ways other than having them all point in the same direction. Here, two blocks have been joined with the wider ‘goose’ sides together.
You can also join them with the points together.
USING FLYING GEESE BLOCKS IN OTHER PATCHWORK BLOCKS:
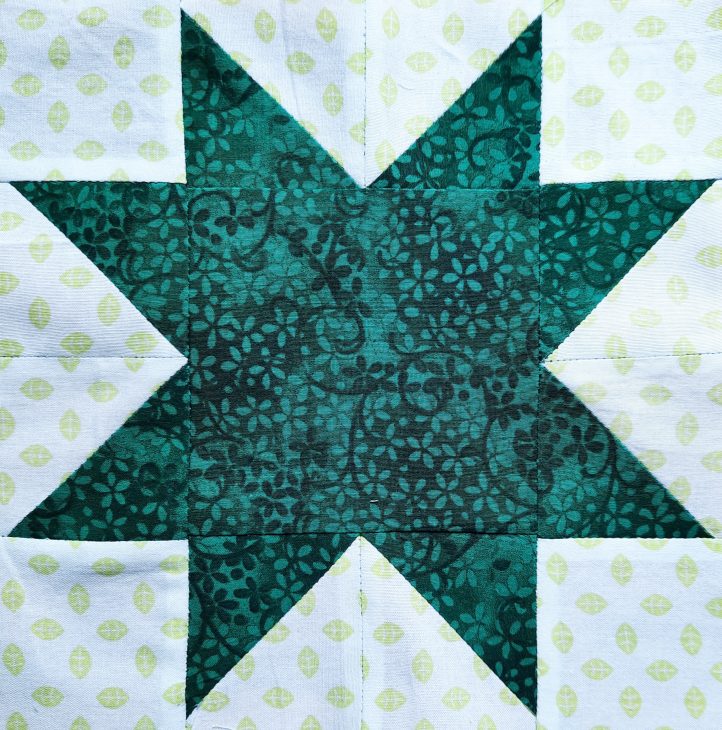
Once you have practiced Flying Geese blocks, you can find ways of using them to simplify other patchwork blocks. Below is a photo of an 8″ x 8” (finished) Eight-Point Star. The ‘arms’ of the star on each side have each been created using two half-square triangle blocks, using green and white print squares, each cut out at 2 7/8″ x 2 7/8”. Instead of these two blocks, a single Flying Geese block could be used (made with the same measurements and with the same instructions as steps 1-9 in the first section above). This could be both easier and more accurate.
Flying Geese blocks are versatile and useful!
Can you make flying geese with paper pieces?
Hi Sandy! While this tutorial is not a paper piecing pattern, you can make flying geese blocks using paper piecing methods. We suggest checking out some Youtube videos on this specific technique. Have a great day! – Ashley, We Like Sewing
I have a hard time making these all the same and I see in some of your pics yours are also different. I cut all the same but sometimes I have seam allowances and others I don’t.