Update your winter wardrobe with a simple and sophisticated sweater pattern. Designed by Kimberly Payne, this sweater sewing pattern features a deep v-neckline and contrasting trim on the neckline and cuffs. Wear your v-neck sweater on its own or layer it over a basic tank top in a coordinating color. Featuring a loose, comfortable fit, this winter clothing pattern is a must-have for your cold weather wardrobe.
Designer Notes:
- Seam allowance 3/8” unless otherwise noted.
- Finish seam allowance with serger or zig zag stitch.
Materials:
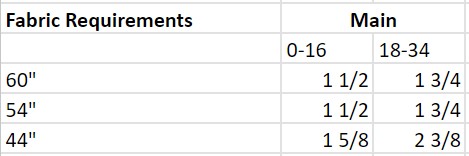
- Fabric (see Fabric Requirements below)
- Ribbing – 3/8 yard
- PDF Pattern – This is located at the bottom of this page. Please see printing instructions below.
FINISHED GARMENT MEASUREMENTS:


PRINTING INSTRUCTIONS:
Note: To download the pattern, click on the pattern download button at the bottom of the page. We recommend opening your pattern download using Adobe Acrobat.
Color Key:

Sewing Instructions:
- Place the front and back pieces with right sides together along shoulder seam. Stitch together and press seam allowance towards the back. Repeat with second shoulder seam.
- With front and back right side up on a flat surface. Match the shoulder point on the sleeve with the shoulder seam. Match the underarm points and pin in place. Pin the rest of the sleeve into the armhole. Stitch the sleeve in place. Repeat with remaining sleeve.
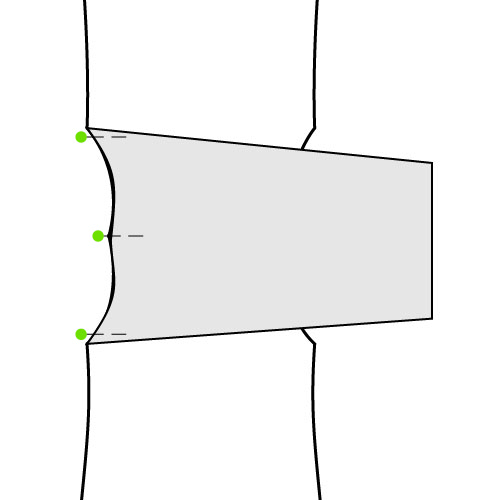
- Tip: The sleeve does not need to be stretched but simply manipulated to fit the convex shape of the sleeve into the concave shape of the armhole.
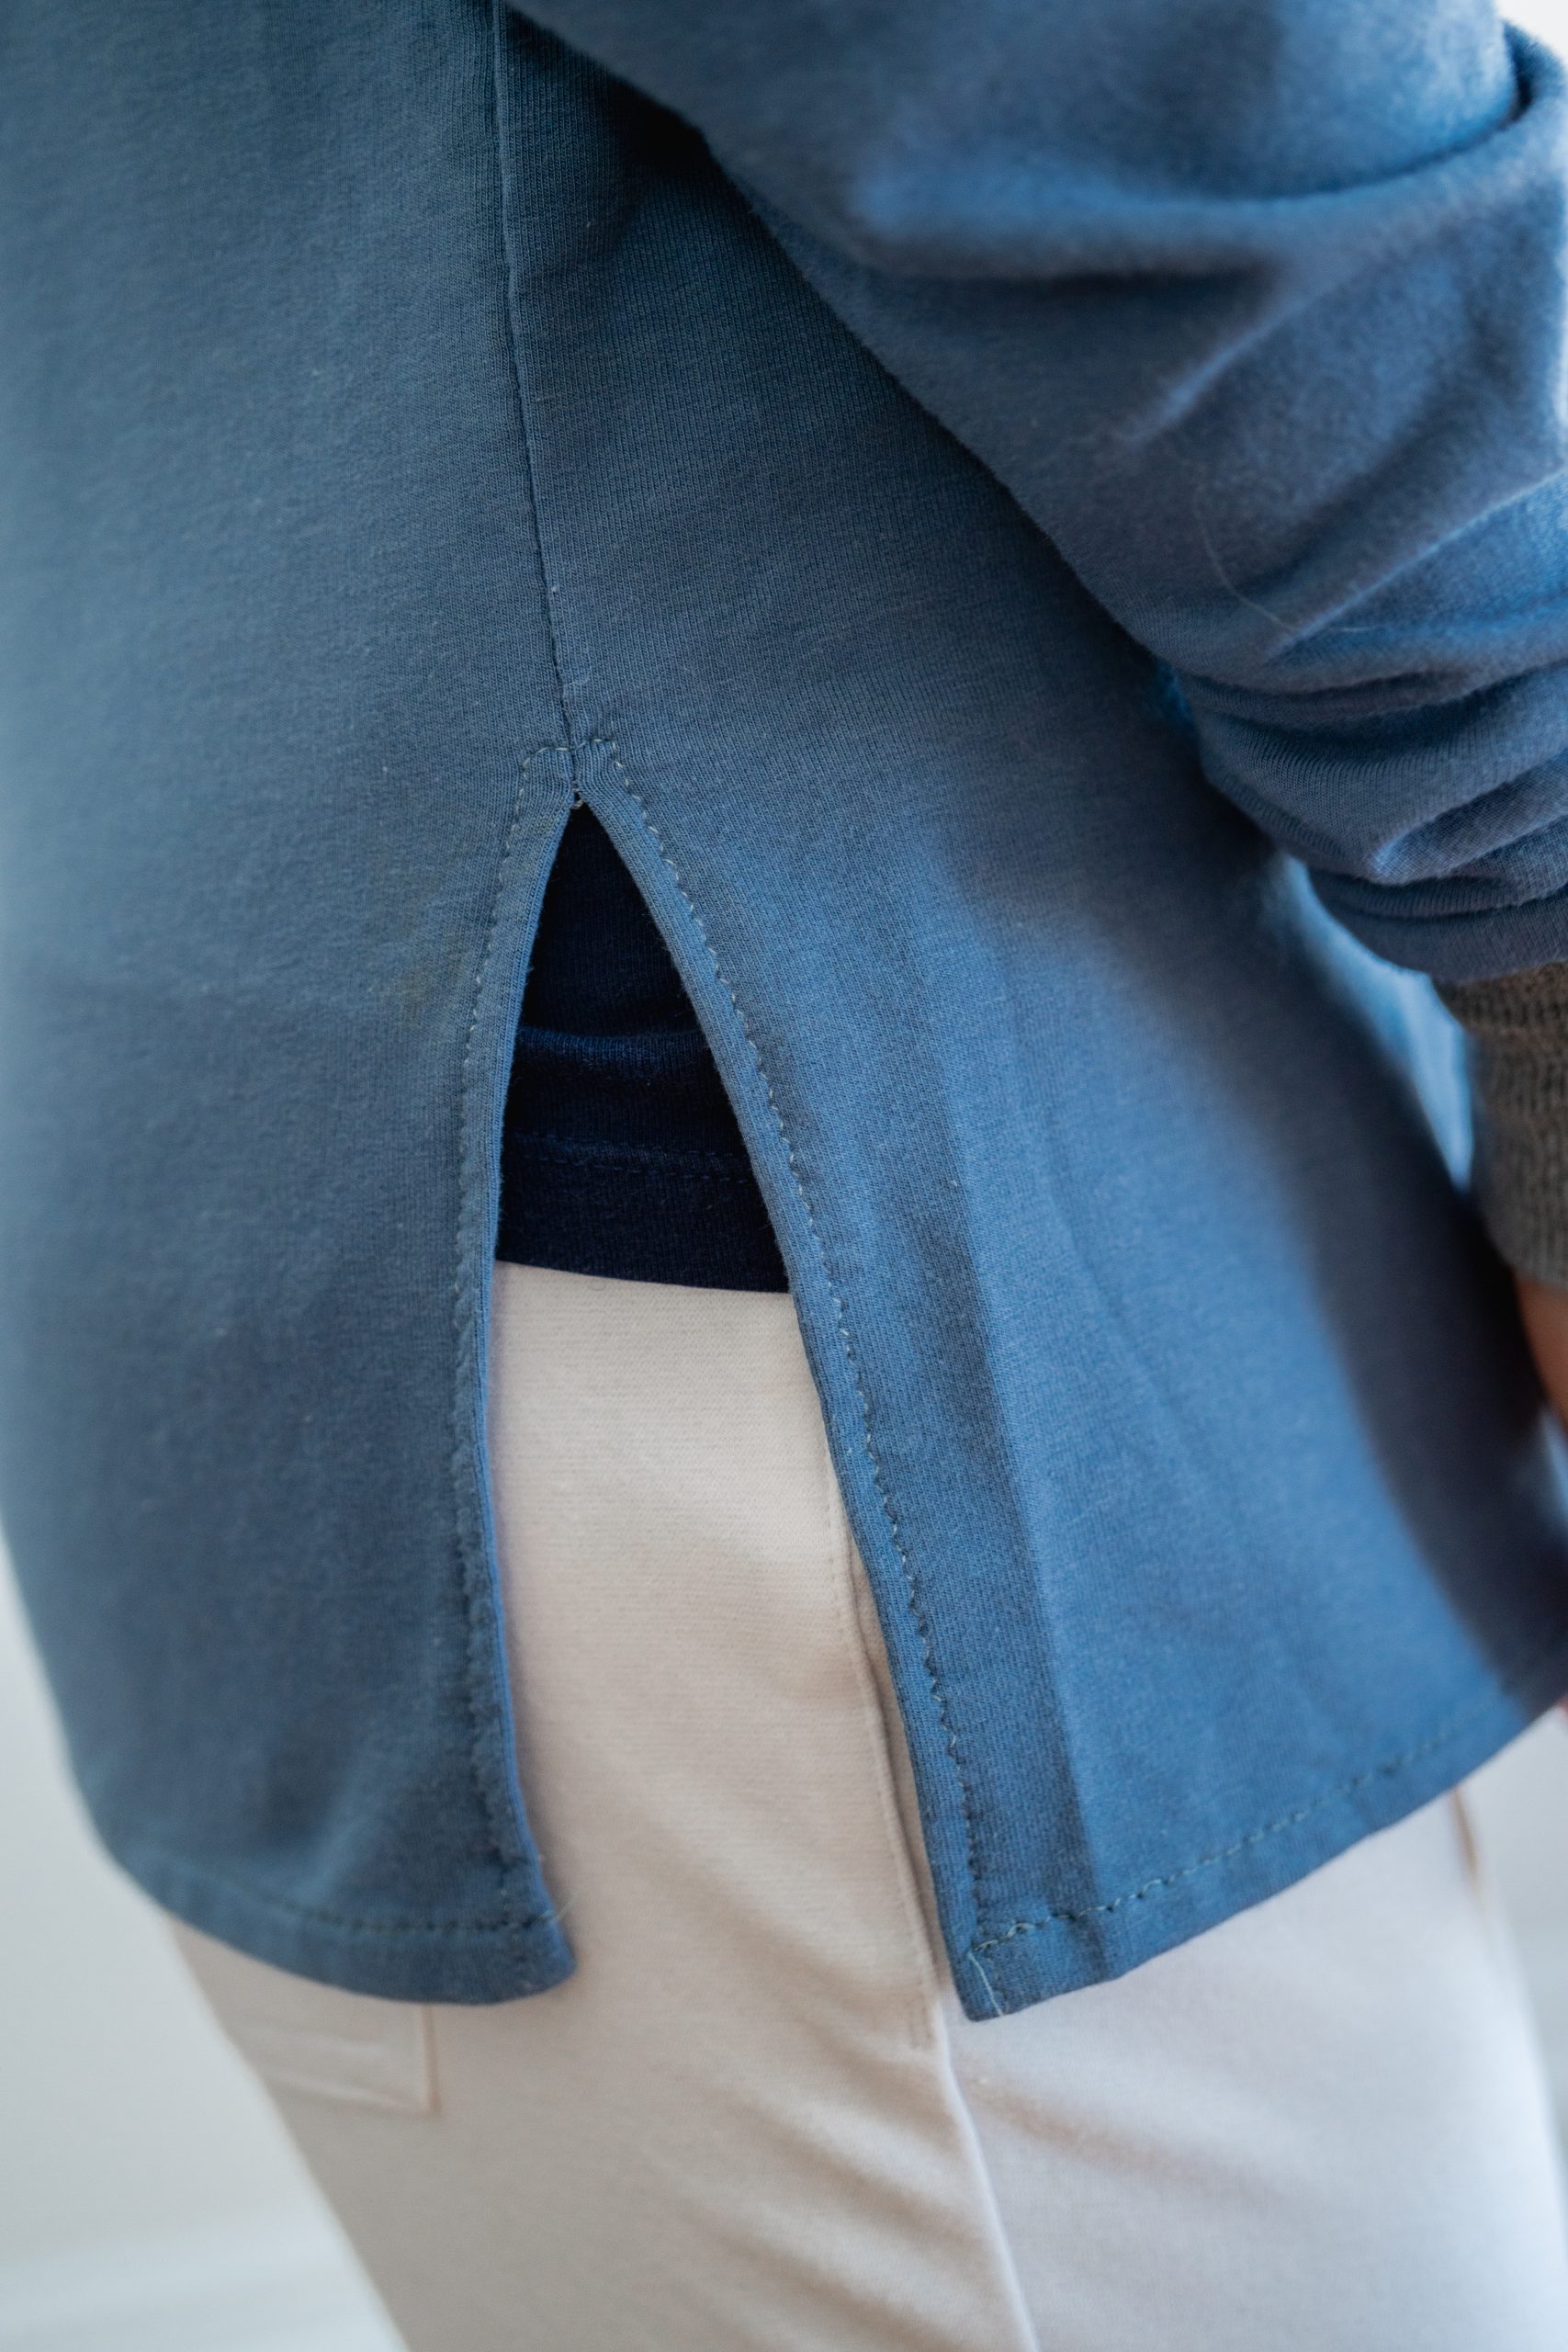
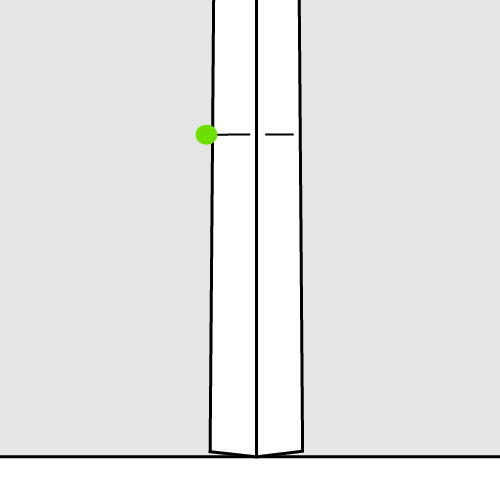
- With right sides together, match the front and back piece along the side seam. Mark the point on the side seam where the side slit will begin. Stitch up the sleeve and down from the underarm point to the notch, making sure to backstitch. Change the stitch length to a baste and continue sewing from the notch to the bottom hem.
- Press the seam allowance open down the side of the shirt. By sewing a basting stitch on the previous step, it helps get a crisp split hem.
- With the notch marked, stitch up from the bottom hem to the notch across the top and down the other side. Stitch this step with a 1/4” seam allowance. This step can be sewn with a straight stitch that has been lengthened to 3.5. With a seam ripper, remove the basting stitch from the previous step. Be careful at the top so as not to cut through the topstitching from the previous step.
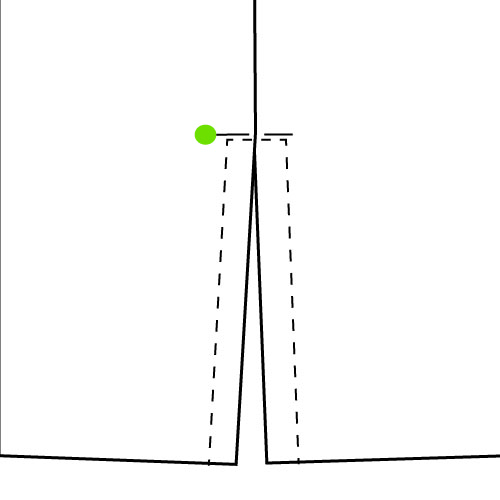
- Fold the neckband in half, right sides together, matching the notched ends. Stitch together starting at the center of the v and stitching out towards the point repeat with the second side of the v. Clip into the notch v to the stitch line but make sure not to go through. Press the seam allowance open.

- Fold the neckband in half with wrong sides together. Divide the neckband into quarters. Using the front v as a reference, mark the center back (CB). Fold the front v and CB together to determine the other two quarter points, pin. Stitch the neckband together along outside edge of the v with 3/8” seam allowance.

- Divide the neckline into quarters. Mark the center front (CF) and CB with a pin. By folding those pins together, you can find the halfway point between CF and CB. This will not be the shoulder seams.
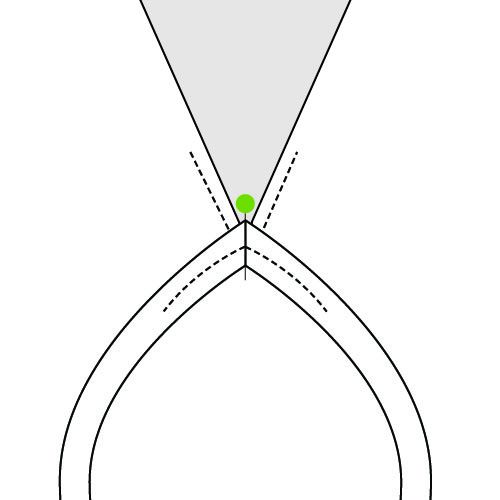
- Stitch a basting stitch along the front neckline v with 3/8” seam allowance for 1 inch on either side of the point. Clip into the v to the stitch line but make sure not to go through.

- With the v of the neckband pointing towards the top of the sweater, match the point in the stitchline of the neckband with the point in the stitchline on the sweater. Pin in place. The point of the neckband may extend beyond the neckline of the sweater.
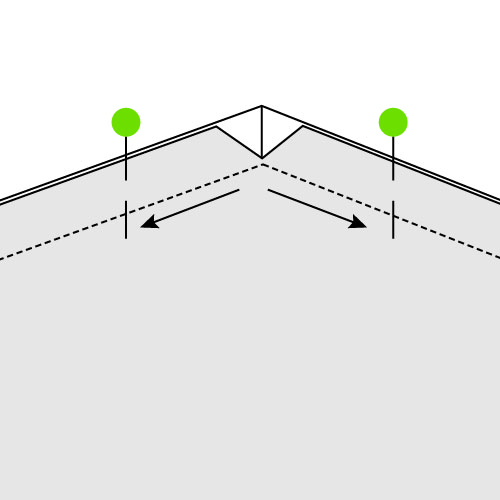
- Working from the wrong side of the sweater, open the v notched into the front neckline. Align the raw edges of the neckband with the neckline. Pin in place. Starting from the center front point, with the needle down, move all excess fabric to the left and stitch up the stitchline 1 inch. Place the needle back at the center front point, move all excess fabric to the right and stitch up the other side along the stitchline 1 inch.
- To attach the rest of the neckband piece, match up the pins in the neckband with the CB and quarter points of the sweater. This will not be the shoulder seams. Stitch the rest of the neckband while slightly stretching to fit. Topstitch around the neckline to secure the seam allowance to the shirt.
- With right sides together, stitch the short ends of the cuff together, forming a tube. Fold the tube over on itself with wrong sides together, making sure to match up the seam.
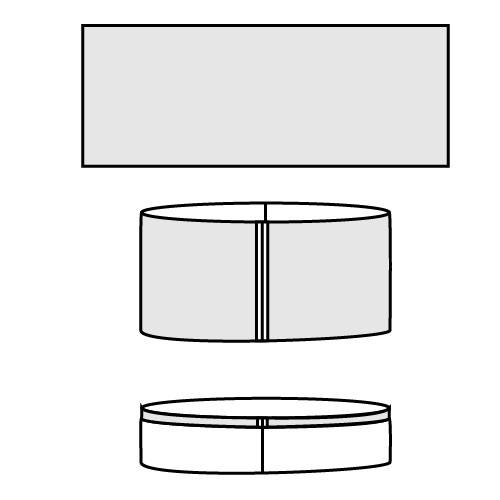
- With the sweater right sides out, slip the cuff over the end of the sleeve matching up the sleeve seam with the cuff seam. Stitch in place. Repeat with remaining sleeve.
- To hem, fold the bottom hem towards the wrong side 1/2” and press well. Stitch hem in place 1/8” from inside raw edge.