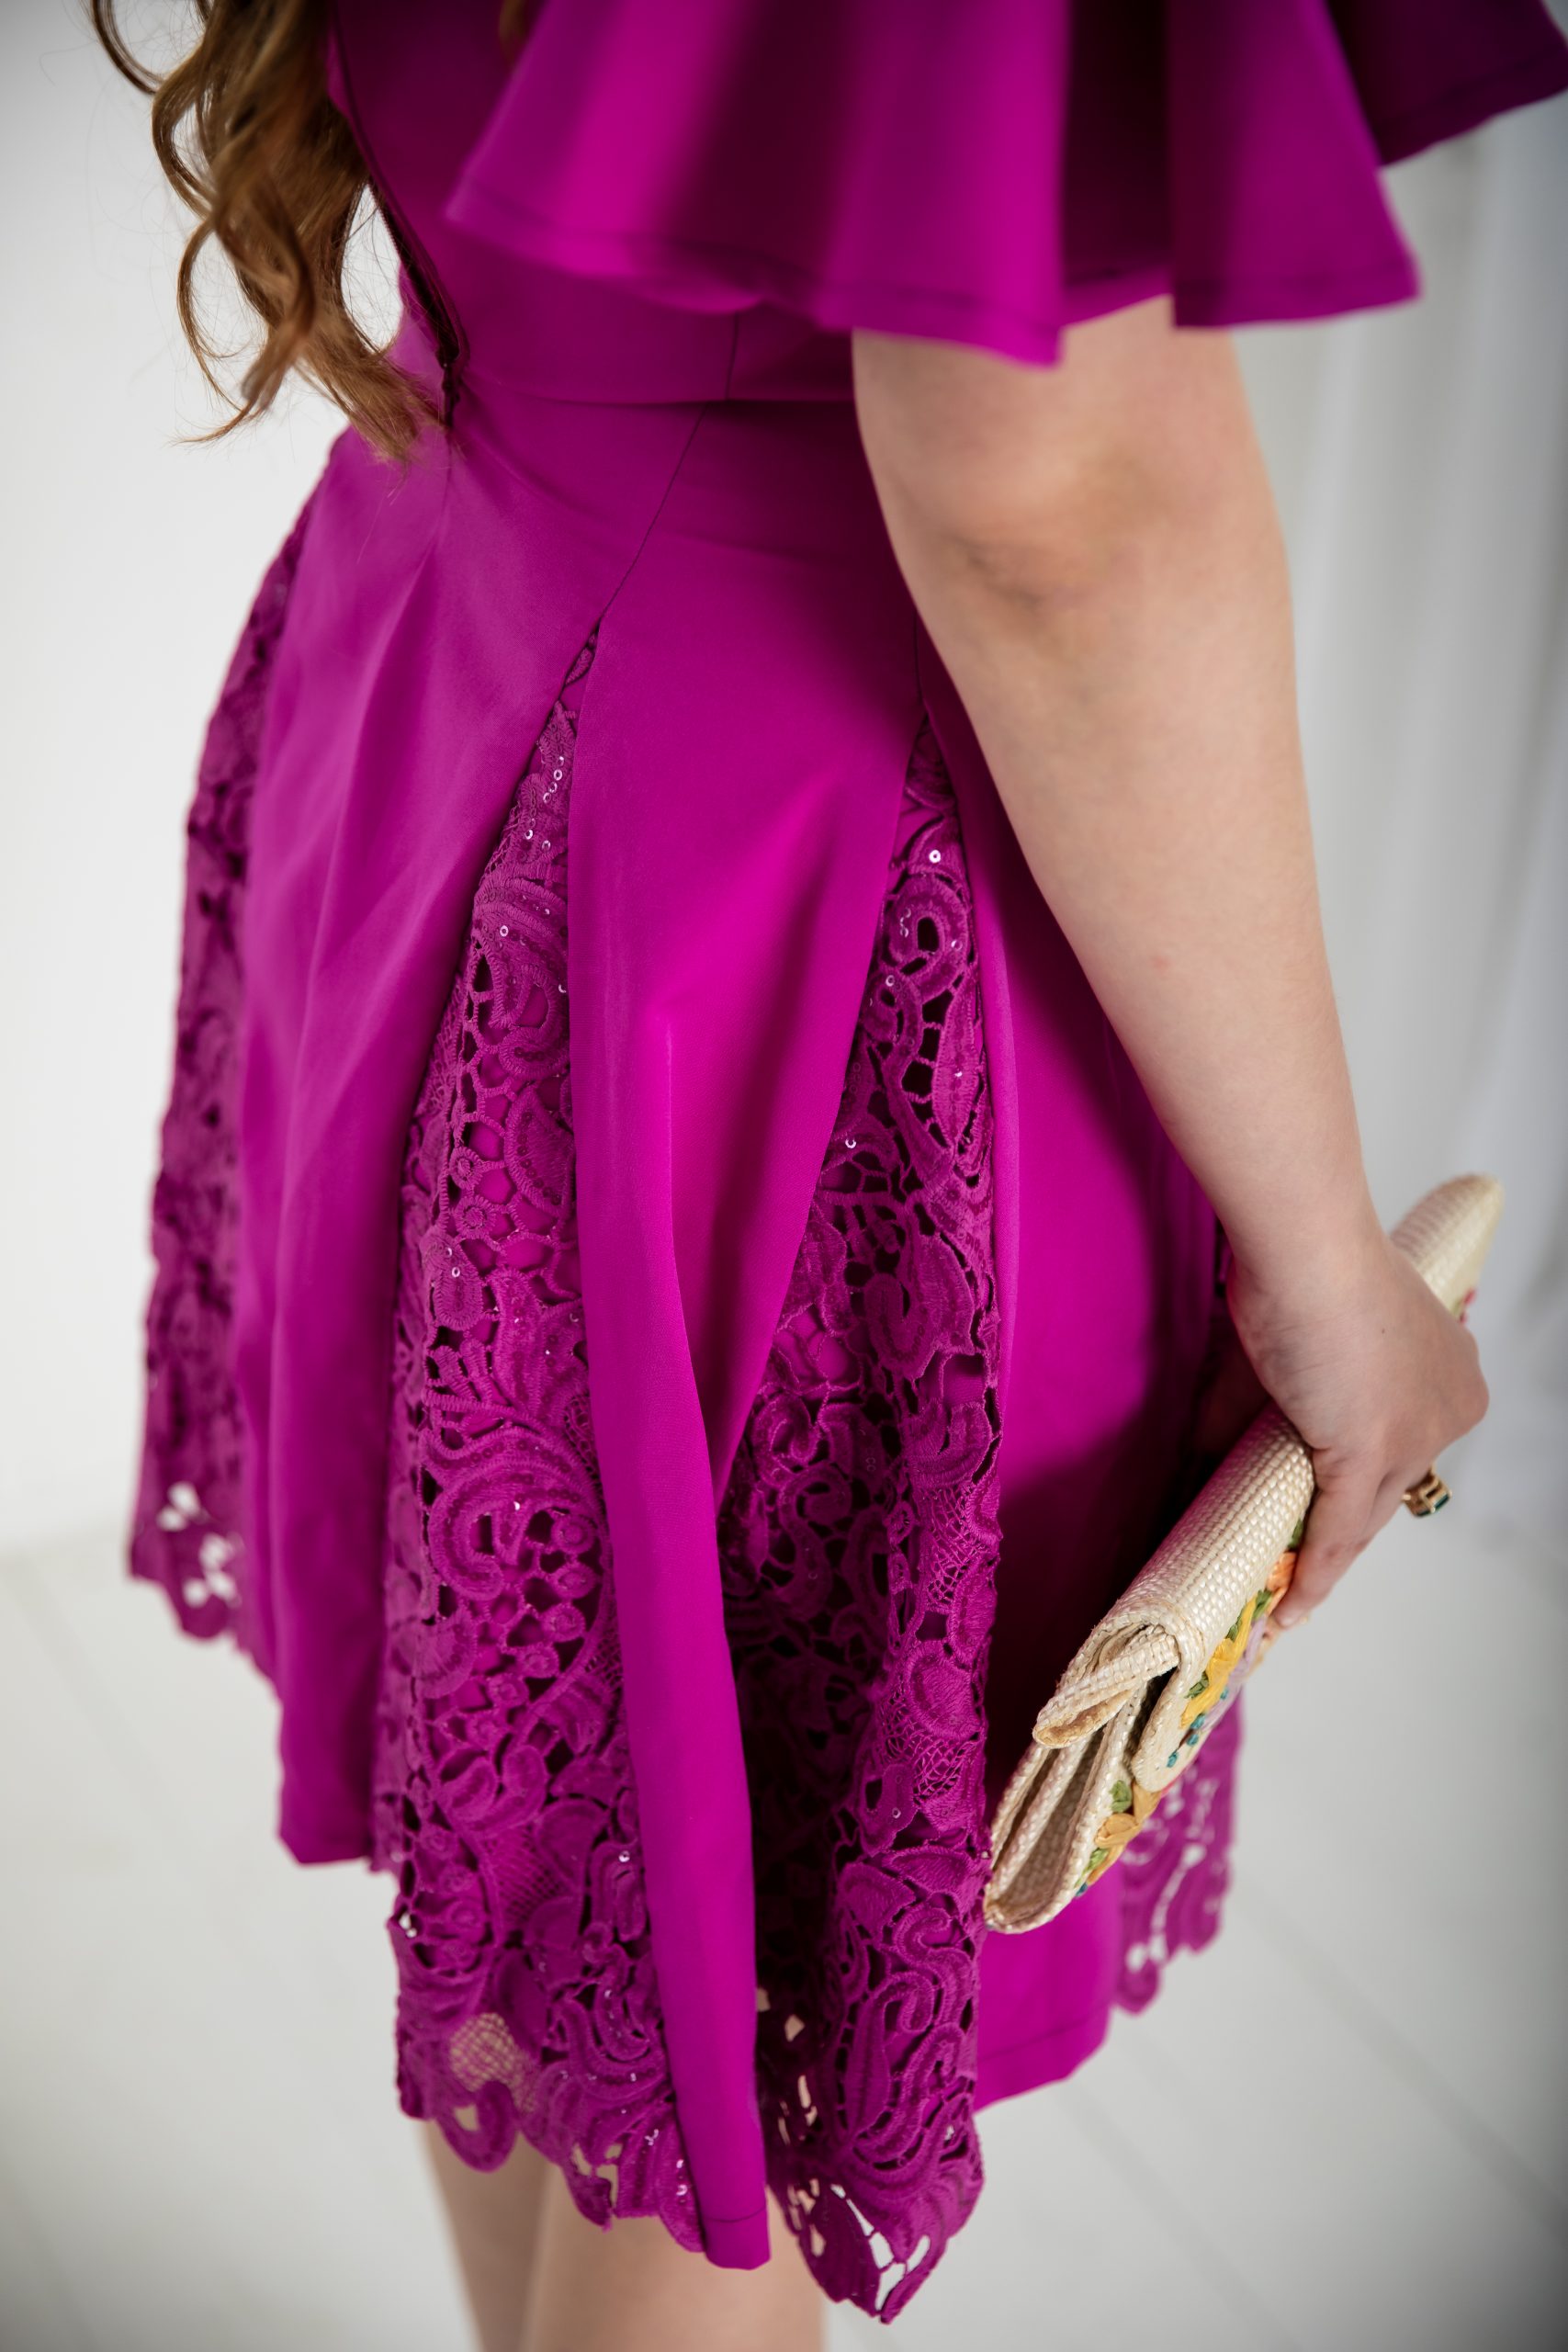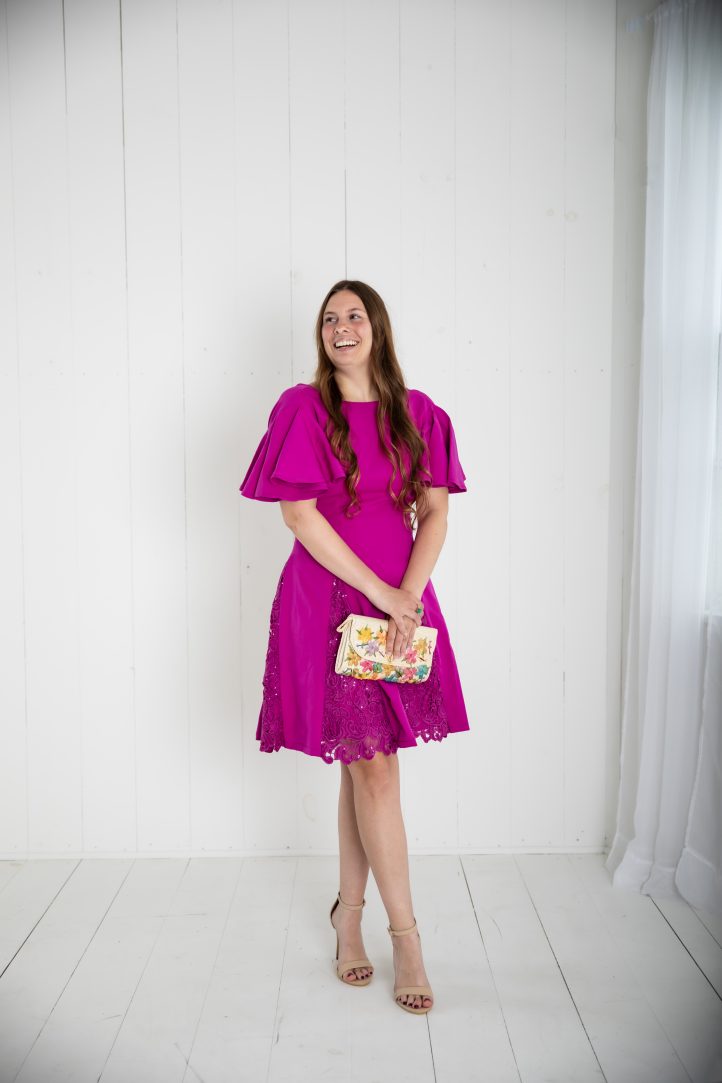
Perfect for date night or your next wedding, this stunning dress pattern from Aishat Sulaiman will be your go-to look for special occasions. Made in a luxe purple, this cocktail dress pattern features butterfly sleeves, a back zipper, and trending drop waist. The highlight of this pattern is the playful godet lace inserts, which add texture and additional movement to the pattern’s skirt.
Pattern Overview:
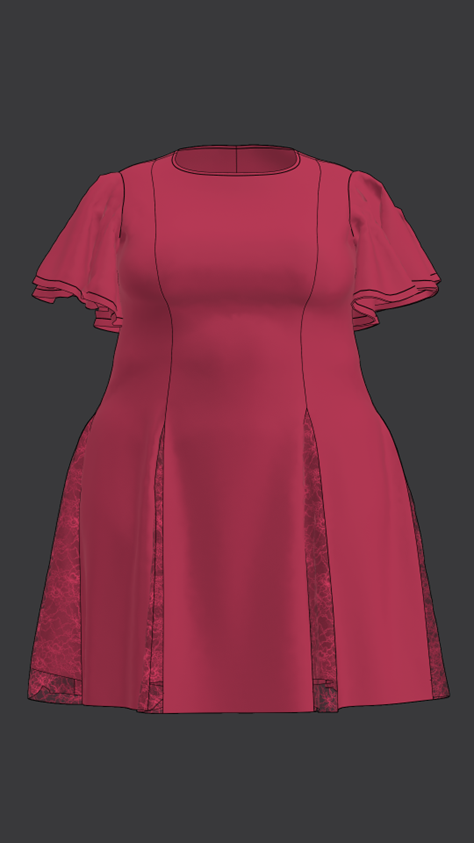
The Avery Butterfly Sleeve Dress Pattern is a form fitting knee-length dress with a drop waist godet insert featuring a butterfly sleeve and a back zipper.
Materials:
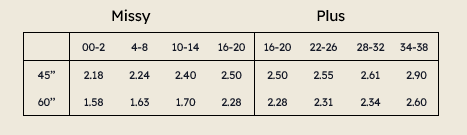
All calculations are on a single layer. If you want to cut your fabric on the fold, increase consumption by 0.5 yards. When purchasing fabric, please account for shrinkage and buy 5% more than required.
FABRIC REQUIREMENTS – YARDAGE:
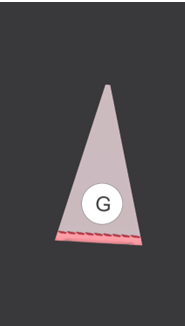
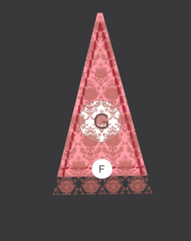
For this pattern, we have two godet options (one for fabric with decorative selvedge (F) and the other without (H). If you will be making the godet in an opaque fabric, you do not need the godet lining fabric (G). The fabric requirements for the godets and its lining were estimated separately from those of other patterns.
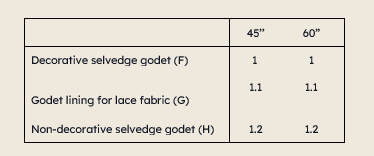
Fabric estimation for patterns A, B, C, D, E, I and J:
- Recommended fabrics: This dress is best made in fabric with a little stretch (a firm two way-stretch fabric) e.g. London crepe.
- All-purpose polyester thread
- Sewing machine (capable of a straight stitch)
- Needle
- Zipper
- Scissors
- Double-Folded Bias Tape
- PDF Pattern – This is located at the bottom of this page. Please see printing instructions below.
Tips: All-natural fiber and some synthetic materials undergo shrinkage during their first wash and can change the texture and hand feel. (Aishat prefers the look and feel of washed fabrics.) Pre-washing is necessary if you want your garment washable after sewn (without shrinking). Giving the washed material a light press before cutting will ensure your paper pattern pieces can lay smoothly on top.
SELECTING YOUR SIZE:
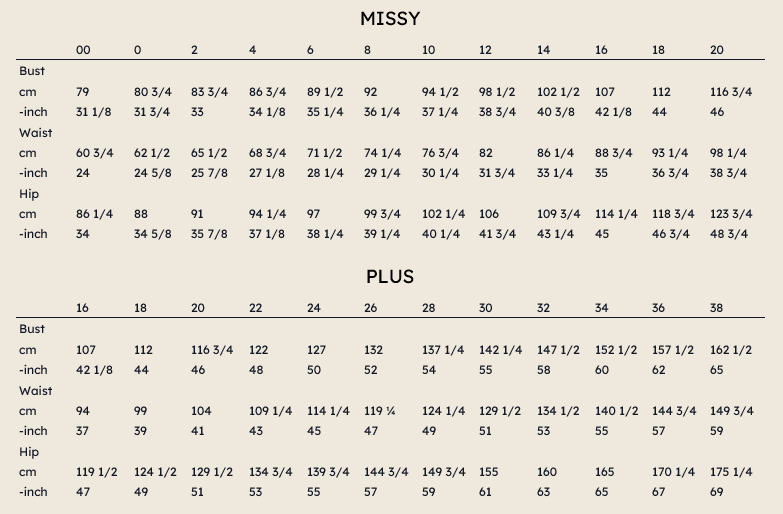
Body Measurements (Imperial and Metric):
Start by taking your body measurements. Measure the circumference of your bust, waist and hips by pulling the measuring tape snugly; it should fit tightly around your skin but not too tight. Measure directly over bare skin or typical-for-you undergarments. Keep the tape parallel with the floor, and ensure it is not twisted. Compare your measurements to the “body” measurements in the chart above to see your recommended size.
PRINTING INSTRUCTIONS:
Note: To download the pattern, click on the pattern download button at the bottom of the page. We recommend opening your pattern download using Adobe Acrobat.
First, determine if you will print your pattern at home or have it printed by an online or local copy shop. Your digital pattern includes a folder for both printing options.
Once your file is open, you can proceed to print. You may also use the “Layers” panel to toggle on or off pattern lines for various sizes. Toggle off the pattern lines for any sizes you do *not* wish to print. You should now see only the line for the size you did not toggle off displayed.
Note: Pattern lines may overlap; you are advised to print one size at a time. It is easiest to cut out the pattern when only one size is printed at a time.
Print at a Copy Shop: A0
Online pattern printers and local copy shops can print a large format paper pattern economically.
Print at Home: Letter Size or A4 Paper
Each “Print at Home” file can be printed on a letter size or A4 Paper. You will need a PDF viewer to print this pattern. You can download Adobe Reader for free if you do not have a PDF viewer already.
PATTERN PREPARATION:
Check out the pattern inventory.
PATTERN INVENTORY:
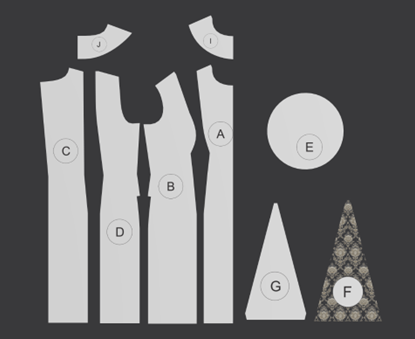
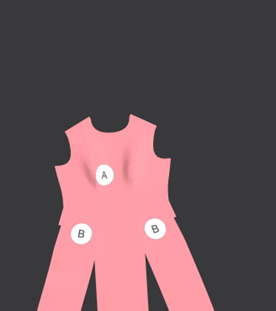
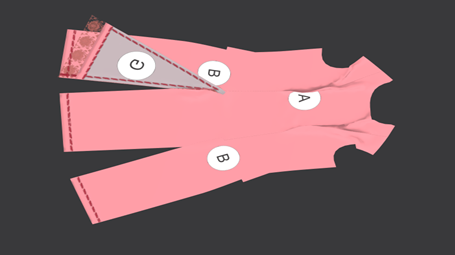
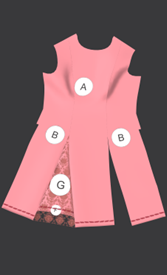
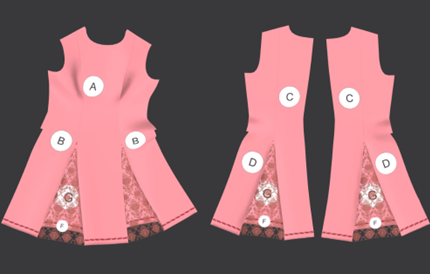
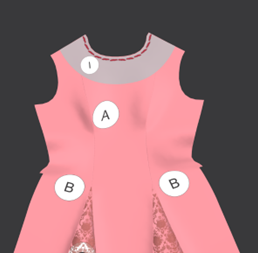
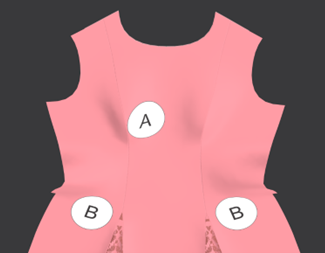
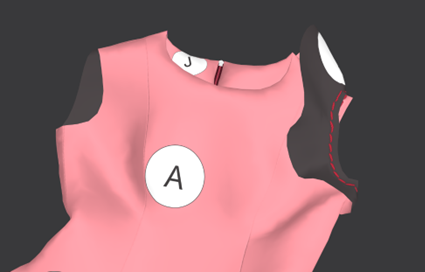
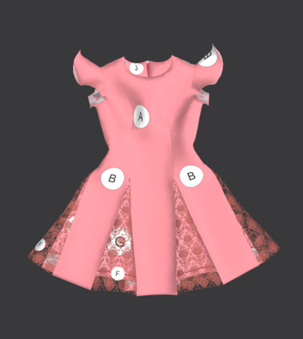
A – CENTER FRONT (Cut x1 on fold in fabric)
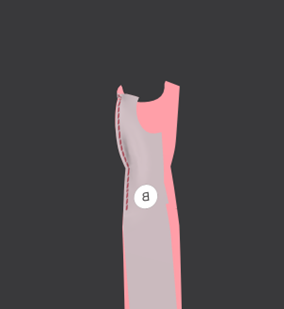
B – SIDE FRONT (Cut x2 in fabric)
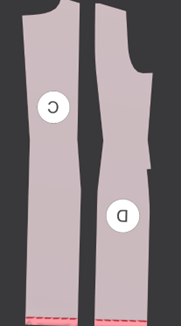
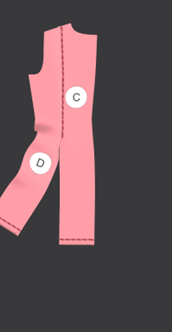
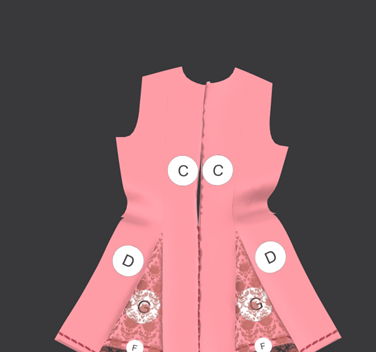
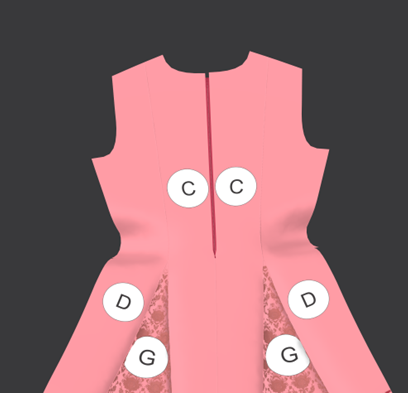
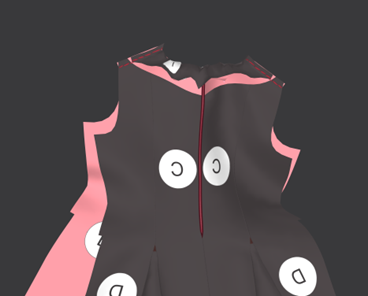
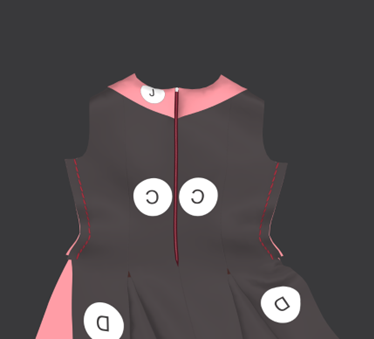
C – CENTER BACK (Cut x2 in fabric)
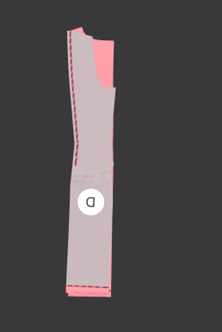
D – SIDE BACK (Cut x2 in fabric)
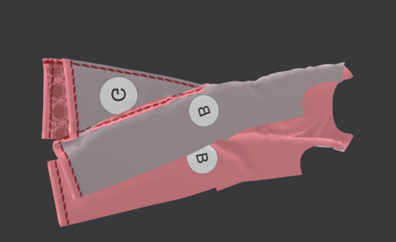
E – BUTTERFLY SLEEVE (Cut x2 in fabric) Note: The inner circle on the sleeve is to be cut on the fabric as it represents the armhole.
F /H – DECORATIVE SELVEDGE GODET/ NON-DECORATIVE SELVEDGE GODET (Cut x6 in preferred fabric for godet)
G – LINING FOR LACE GODET (Cut x6 in main fabric)
I – FRONT NECKLINE FACING (Cut x1 on fold in fabric and fusible interfacing)
J – BACK NECKLINE FACING (Cut x2 in fabric and fusible interfacing)
PATTERN LAYOUT:
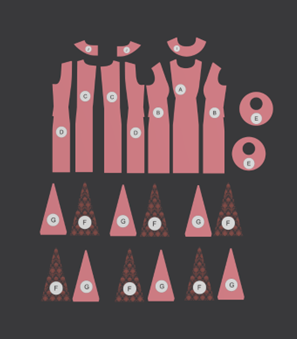
The layout in the sewing instruction image below is a suggestive layout on a single-lay fabric that may not work for all sizes. Feel free to play around with the pattern placement to minimize fabric wastage, but ensure the grainlines remain parallel to the selvedge or your preferred cutting direction. Transfer all markings to fabric, especially the double line notches, as they indicate the point to which godet is attached, and notches on the sleeve pattern, as it is needed for sleeve placement.
Sewing Instructions:
The image below shows how all patterns should look after cutting in main fabric. Remember to add interfacing to the neckline facings.
- Hem all pattern pieces using 1-inch seam allowance except the godet with decorative selvedge. If you are using a non-decorative selvedge godet, you can leave the hem until you are done with sewing.
- Baste stitch each lace godet to the lining with the right side of the lining facing the wrong side of the lace fabric.
- With the right side facing each other, pin the side panel to the center front piece matching up the notches and sew in place up to the double notches on both pieces. Repeat for the second side piece.
- Following the process in the previous step repeat the same for the back pieces. Now press all seam open.
- Take your godet fabric and draw a line using 1/2-inch seam allowances, the point where they intersect is the top and the point where sewing should stop for the godet.

- Now pin the godet to one side of the opening between the side front and center front while matching the point of intersection of seam allowance on the godet to the double notch point where sewing ends.
- Using 1/2-inch seam allowance and very small stitch length, start sewing the godet to the garment. While sewing, ensure that the garment is laid out flat to prevent sewing on fold or bunching up fabric. Do not back stitch at the intersection point, as it may ruin the insert, as the very small stitches are sufficient to secure the point of intersection. Return to your regular stitch length at about 1-inch down from the point of intersection and sew down to the end of the garment and remember to back stitch at the end of the garment.
- Pin the other side of the godet to the opening and sew in starting from the point of intersection as outlined in details in the previous step instruction. Press the seams away from the godet and repeat the process for the second opening in front and the two openings on the back pieces.
- Press the seams away from the godet and repeat the process for the second opening in front and the two openings on the back pieces.
- With the right side of the back pieces together, measure down from the neckline your preferred length of zipper and stitch down from this point using 1-inch seam allowance. Open up the seam and iron in place.

- Sew in the zipper into the space using a 1-inch seam allowance, ensuring that the teeth of the zipper are starting 1/2-inch down from the beginning of the neckline so as to give space to sew in the facing.
- Sew the front facing onto the front piece using 1/2-inch with the right side together. Notch the seam allowance, turn the facing to the wrong side of the front piece and iron in place. Repeat the same process for the back piece and facing.
- With the right sides together, sew the shoulder of the front and back pieces together using 1/2-inch seam allowance and iron in place.
- Still on the wrong side, match up the sides of the front and back pieces, pin in place and sew up to the double line notch using 1-inch seam allowance.
- Now insert godet into the opening on both side using the instruction described earlier.
- Finish the hem of the sleeve using bias tape. To attach sleeve to the dress, the notch on the sleeve is to be matched with the under arm of the dress (the point at which front and back pieces were sewn together), then pin around and sew using 1/2-inch seam allowance.
- Repeat the previous step for the second sleeve and press in place.
You’ve done it! I hope you’re so proud.