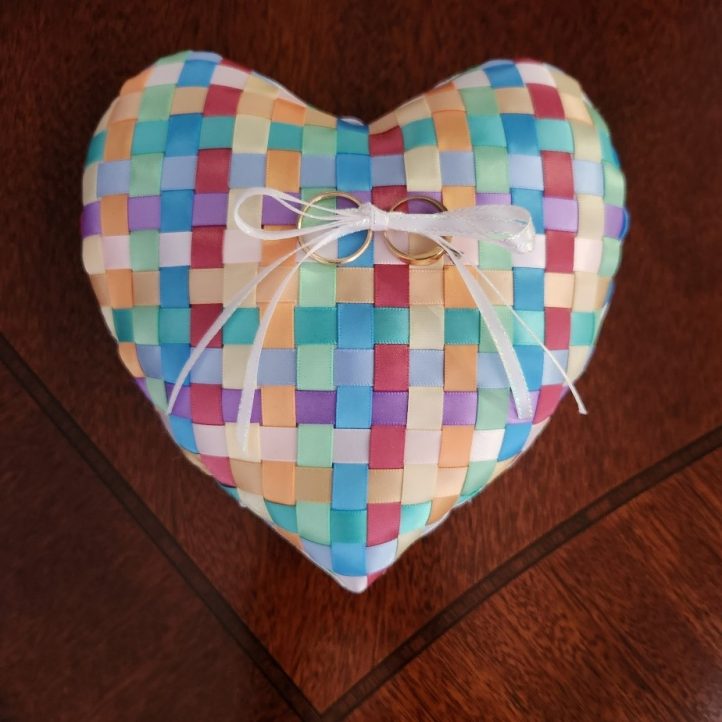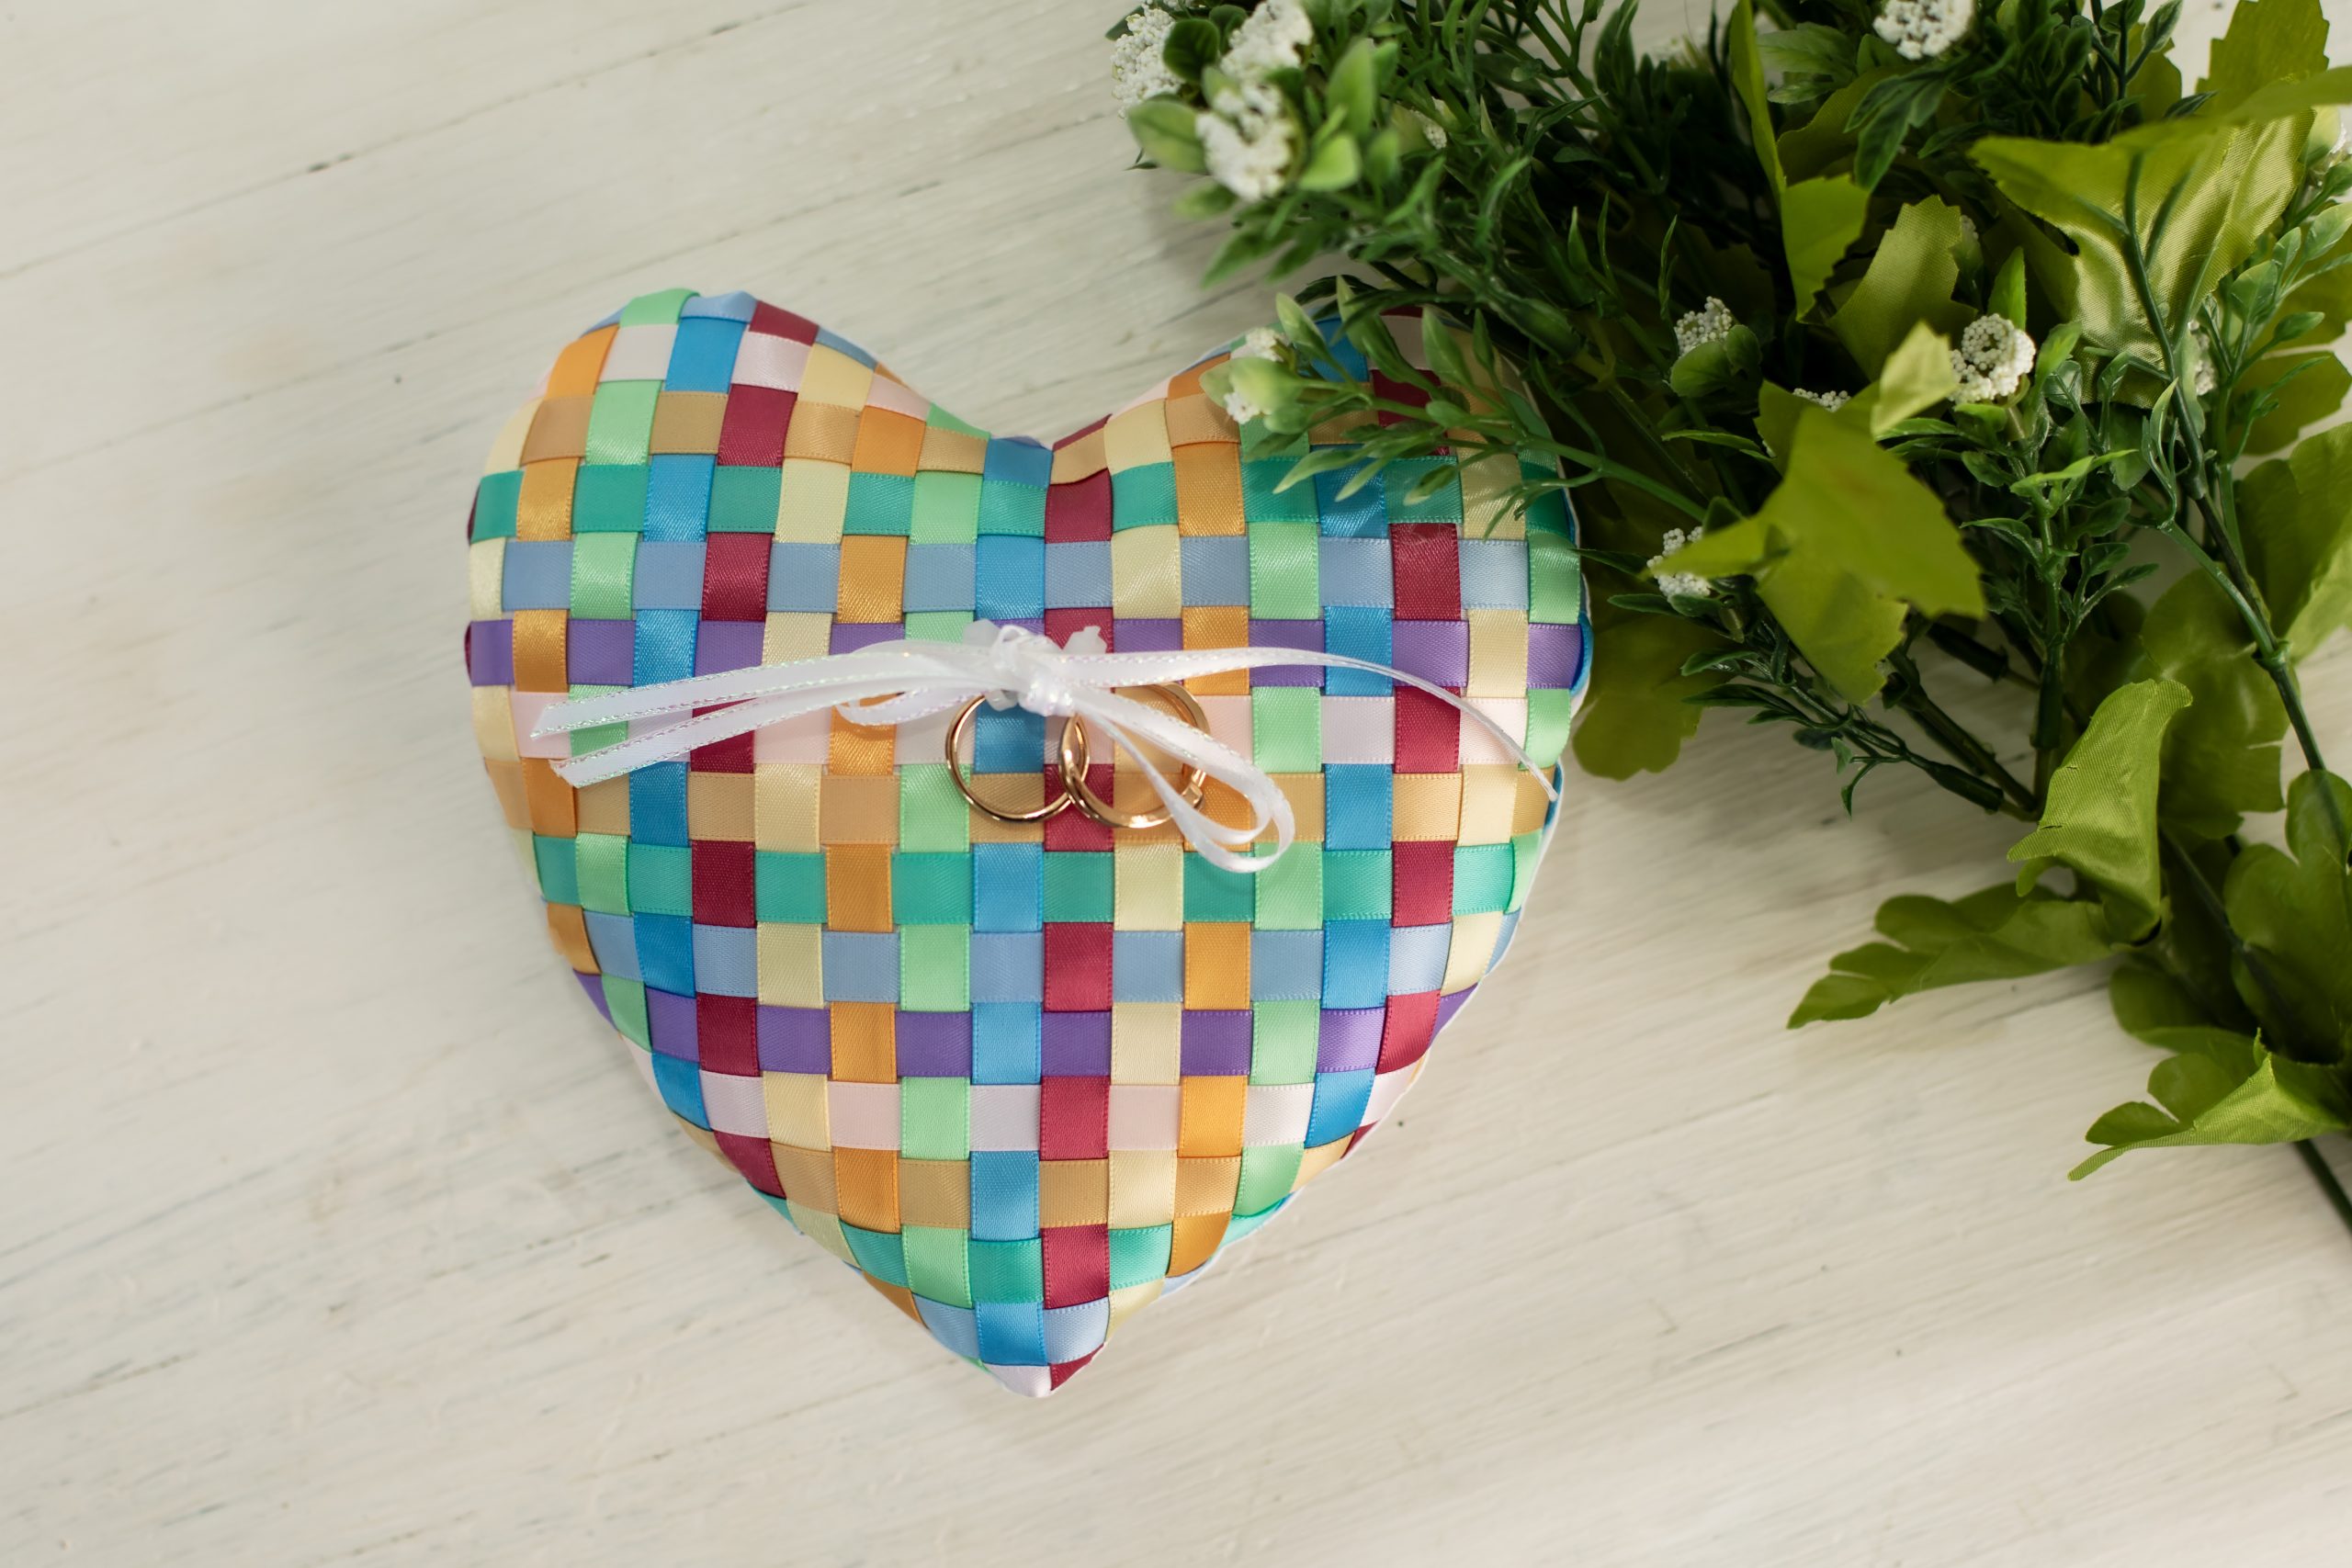
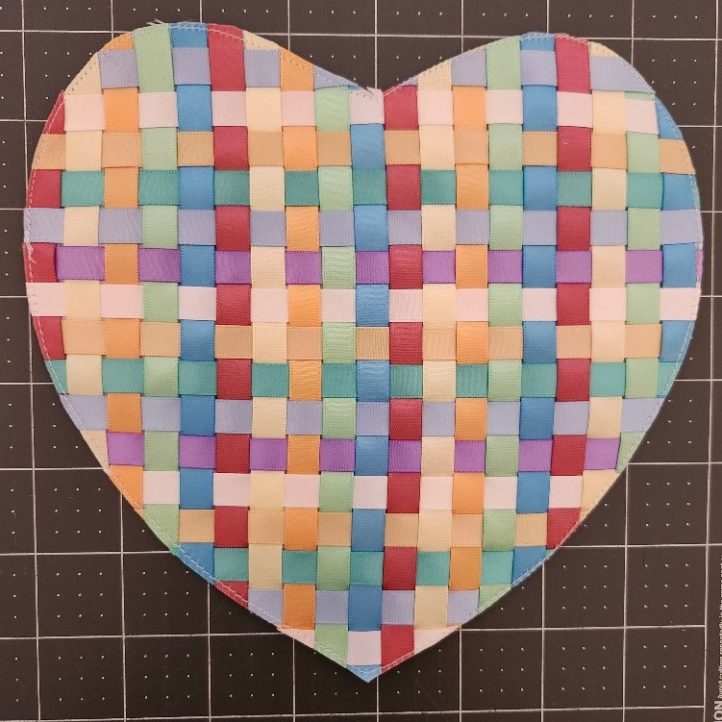
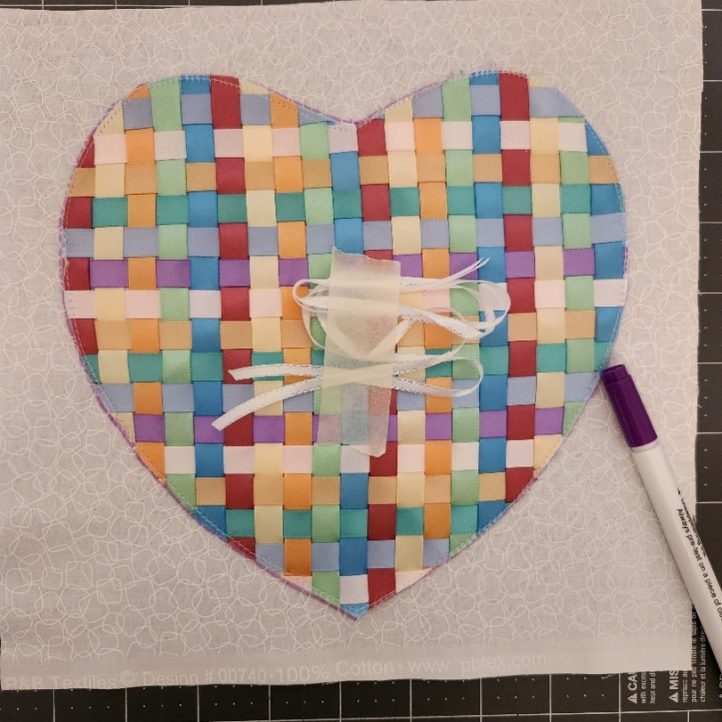
Wedding season is upon us, so why not create a sweet keepsake for the lucky couple in your life? This sweet ring bearer pillow pattern from Sujata Ryan features a pillow top made by ribbon weaving and features additional ribbons for securing the wedding rings. Make your ring bearer pillow in all white for a classic look, in the bridal party colors to match wedding décor, or in a rainbow of pastels like in the sewn example.
Skill Level: Intermediate
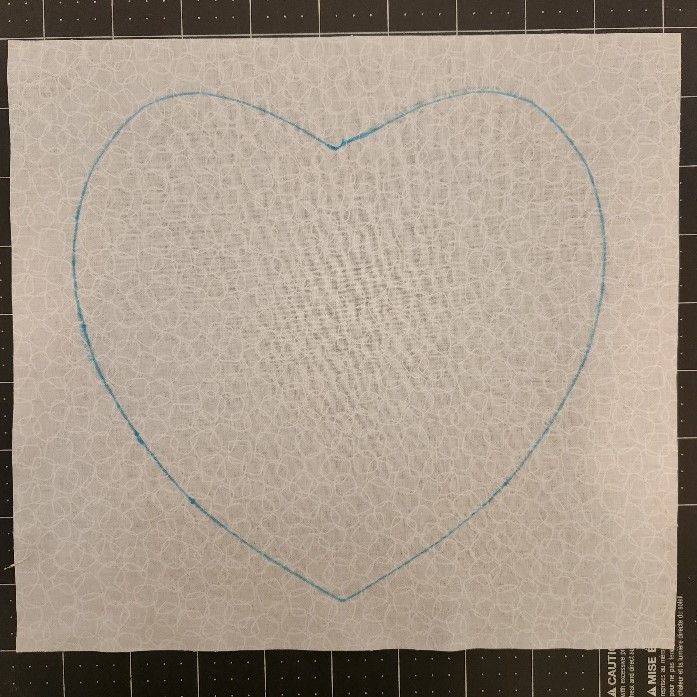
Finished Size: 7 inch x 7 inch heart
Seam Allowance: 1/4 inch
Materials:
- Fabric – Two 10 inch x 10 inch cotton squares (in white or one of the wedding colors)
- Ribbons – 3/8 inch wide double face satin ribbon, in choice of wedding colors
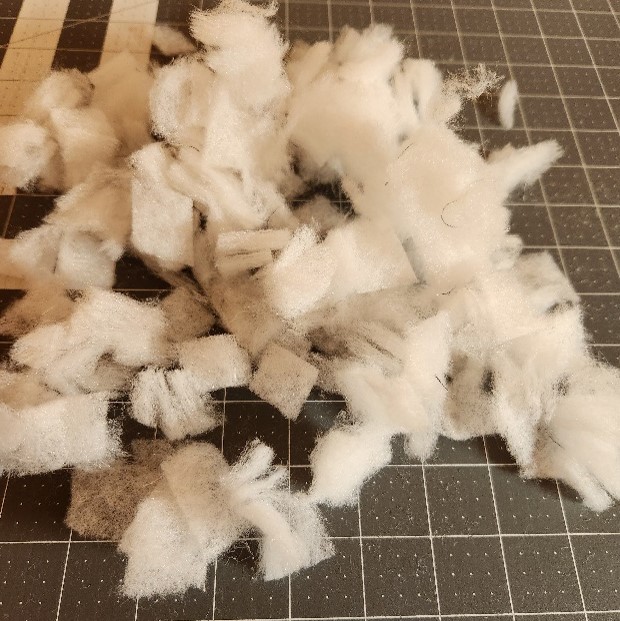
- Filling for pillow – Small package of filler, or use scrap pieces of batting cut into smaller pieces
- Glue stick (Elmer’s Purple School Glue Stick works well)
- Fabric marking pen
- Optional: Cardstock or cardboard for the heart template
- Optional: Sewing stiletto
- PDF Template – This is located at the bottom of this page. See printing instructions below.
PRINTING INSTRUCTIONS:
To download the PDF template, click on the download button at the bottom of the page. We recommend opening your download using Adobe Acrobat.
Sewing Instructions:
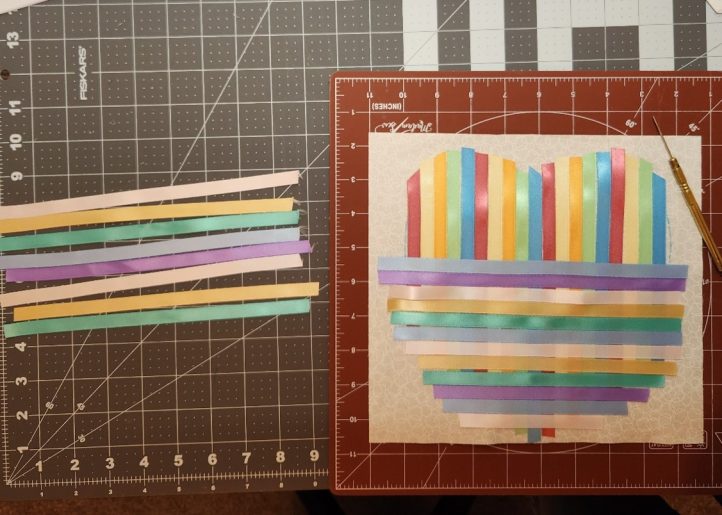
- After choosing the colors for the pillow, open the ribbons and iron them flat so there are no folds or wrinkles in them.
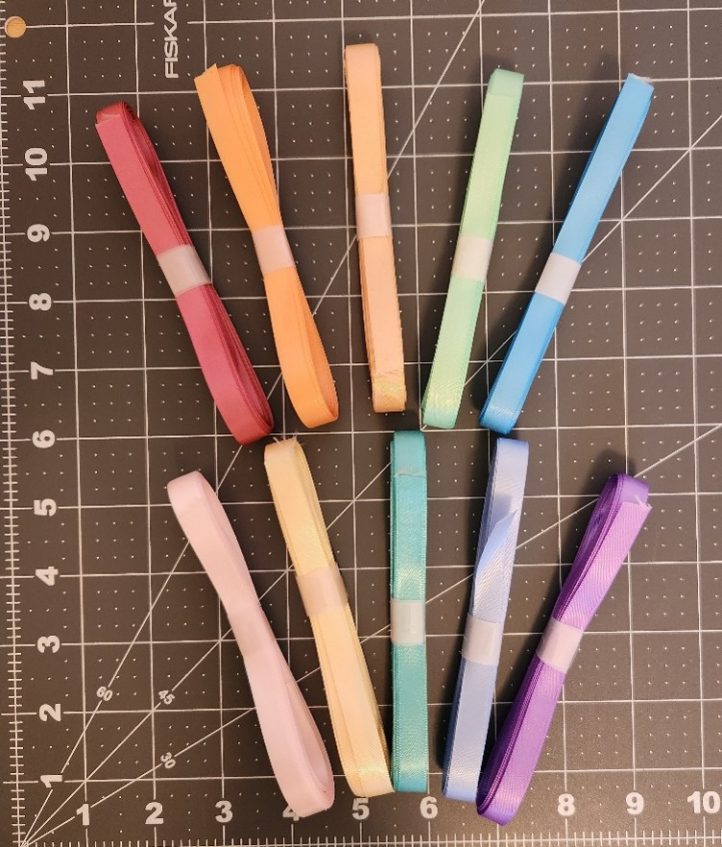
Top row: Vertical ribbon colors. Bottom row: Horizontal ribbon colors.
- Print out the PDF template. Cut out the heart, using this paper heart as a template. Or glue or trace it onto cardstock. Cut out the cardstock heart template.
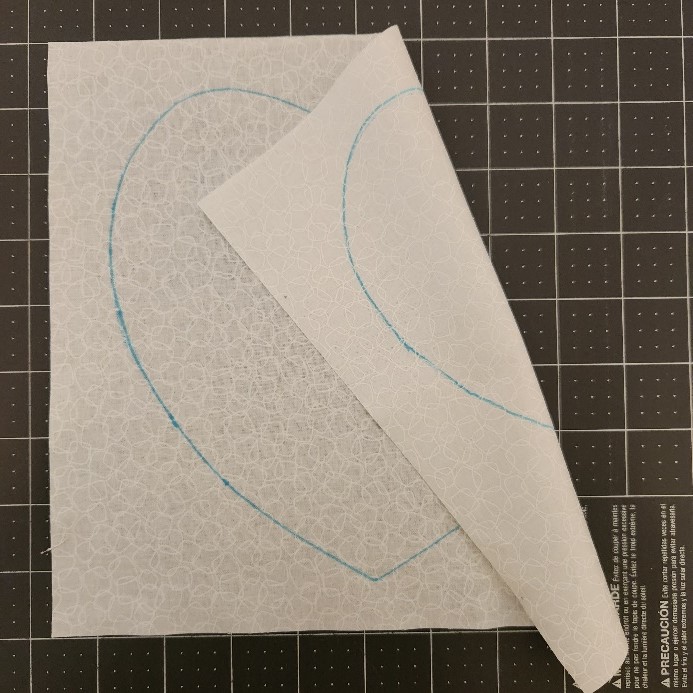
- Trace the PDF template on the right side of the pillow front. Turn the pillow front over and trace it again on the same lines on the back.
- Tip: Taping the pillow front onto a window or glass door can help make the heart traced on the front easier to see and trace on the back.
- Tip: Taping the pillow front onto a window or glass door can help make the heart traced on the front easier to see and trace on the back.
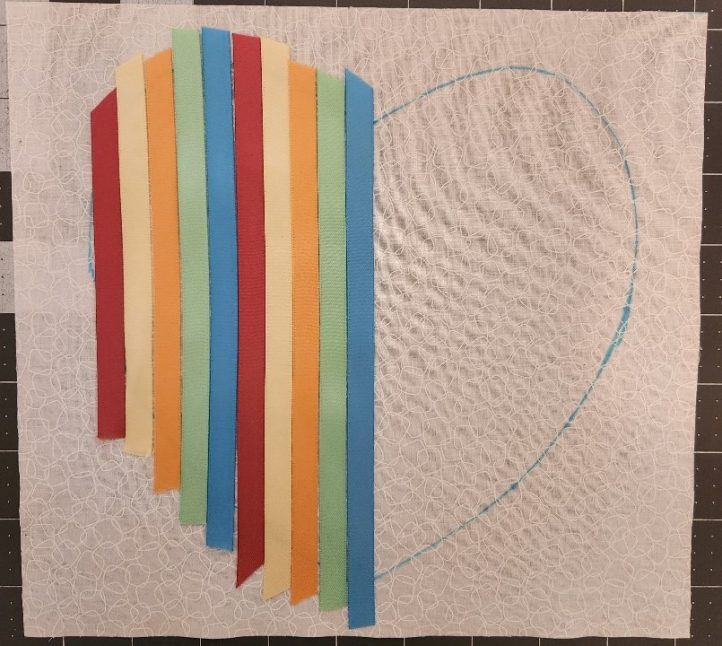
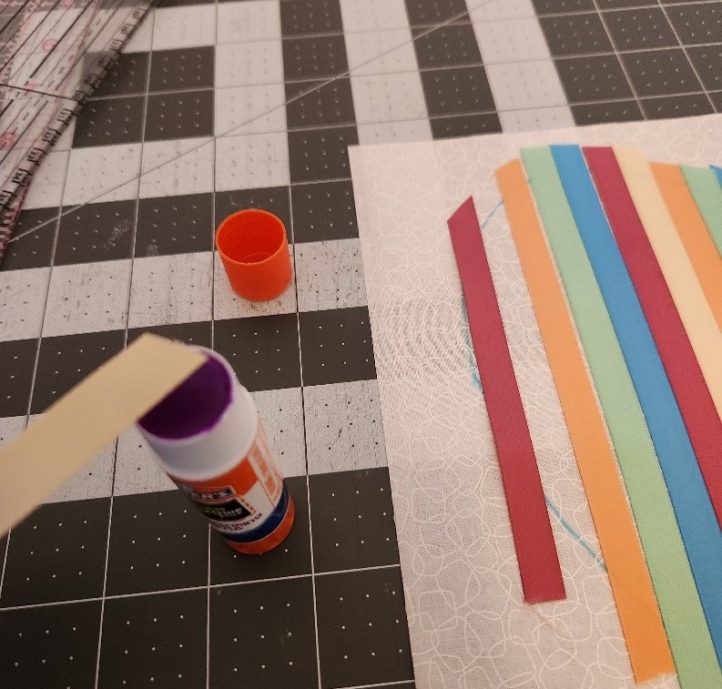
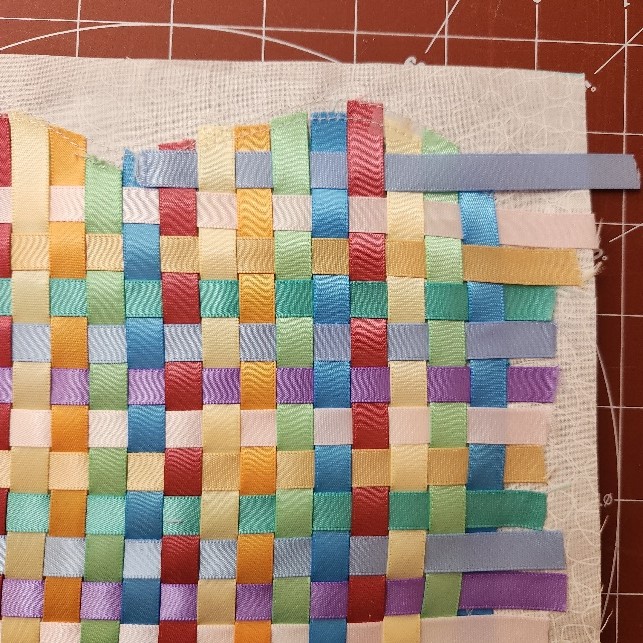
- Begin laying out strips of ribbon to cover the heart vertically, starting from the left and moving to the right, in the order of colors chosen.
- Make sure each piece of ribbon extends 1/2 to 1 inch longer at the top and bottom edges of the heart.
- Make sure each piece of ribbon extends 1/2 to 1 inch longer at the top and bottom edges of the heart.
- After the vertical ribbons have been placed, place a small dab of glue at the top and bottom edges of each ribbon to hold it in place. Be careful to apply a small dab of glue only at the edge of the ribbon.
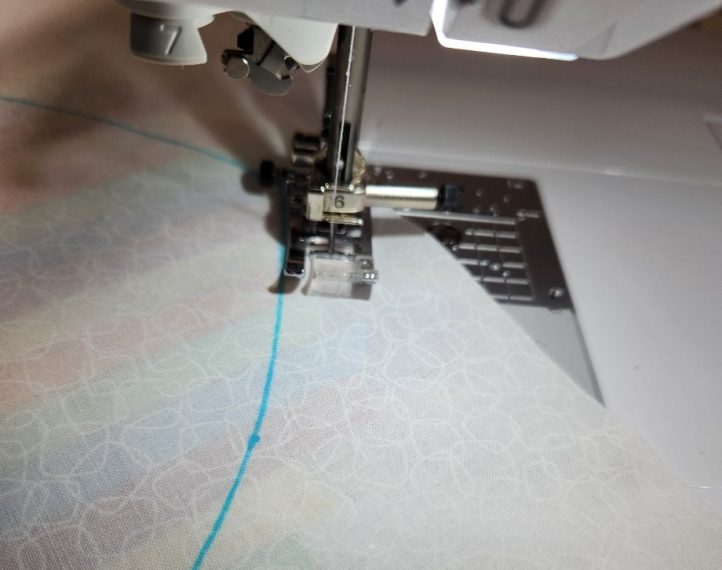
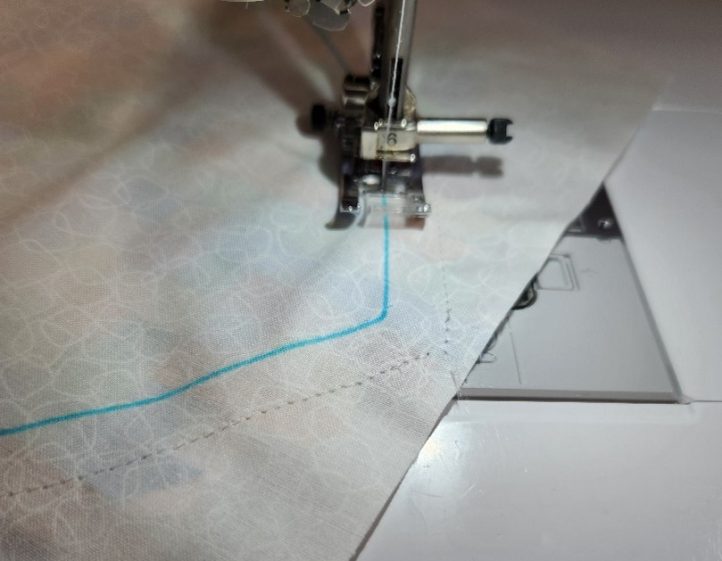
- After the glue has dried, turn the pillow front over. On the back, stitch around the heart outline 1/2 inch away from the line. This stitching will anchor the vertical ribbons in place.
- Lay out the horizontal ribbons in the order of the colors chosen, again extending each ribbon 1/2 to 1 inch past the side edges of the heart.
- Remove the horizontal ribbons and place them in order next to the pillow front fabric, in readiness for weaving them.
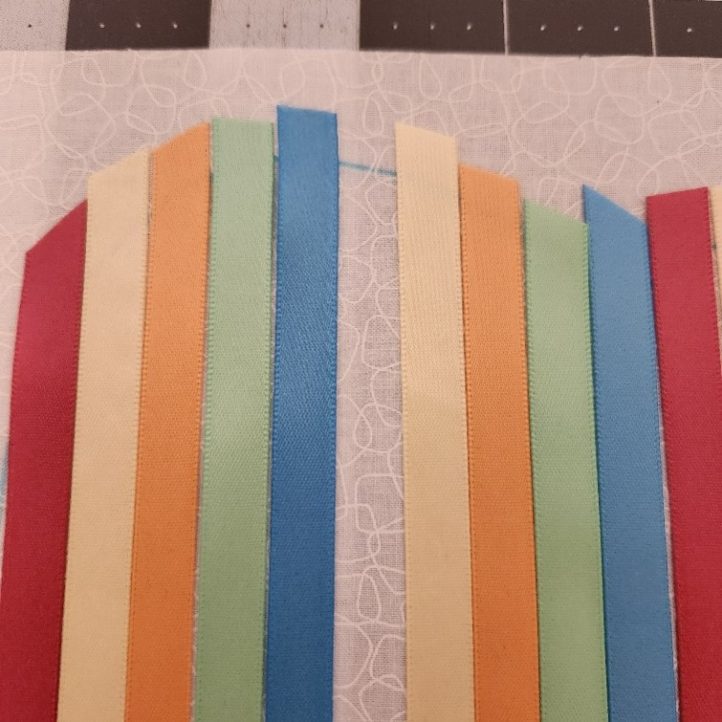
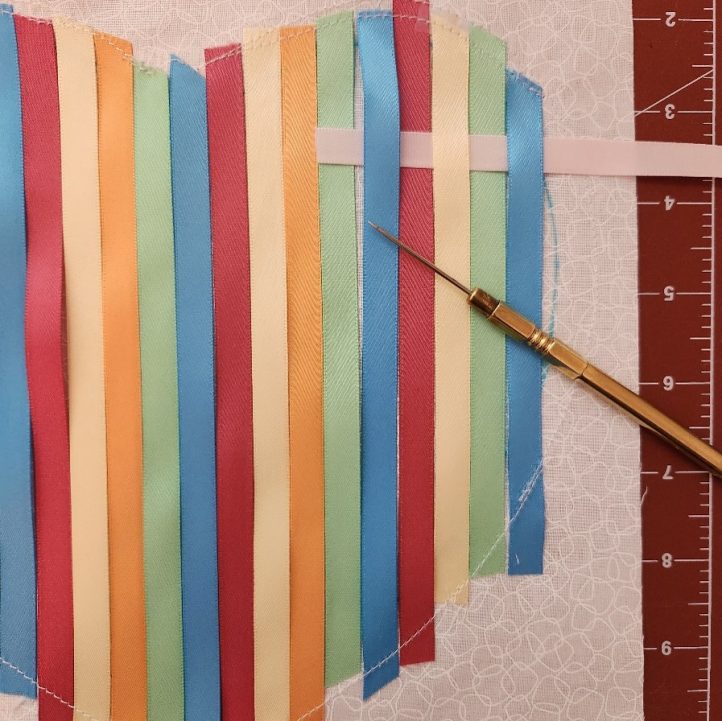
- Begin weaving at the first full row under the indent in the center of the heart.
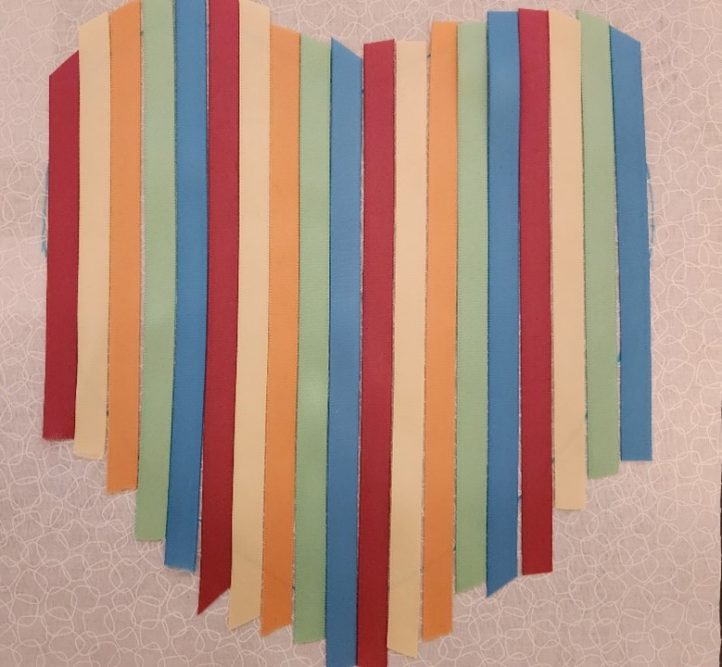
- Weave the first horizontal ribbon from right to left, going over and under each vertical ribbon as shown below.
- A sewing stiletto is a handy tool for moving the ribbon through and/or lifting vertical ribbons to move the horizontal ribbon through.
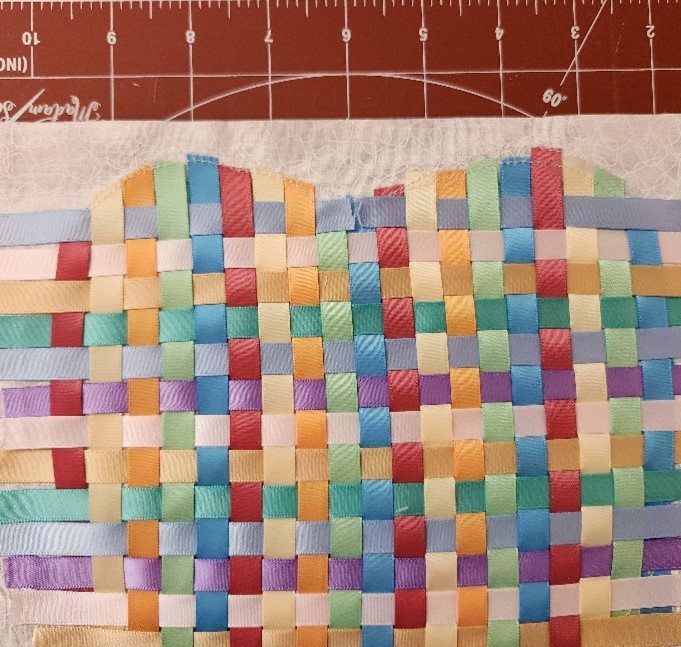
- Continue weaving the horizontal ribbons in order, alternating whether the next ribbon goes under the vertical ribbon or over it.
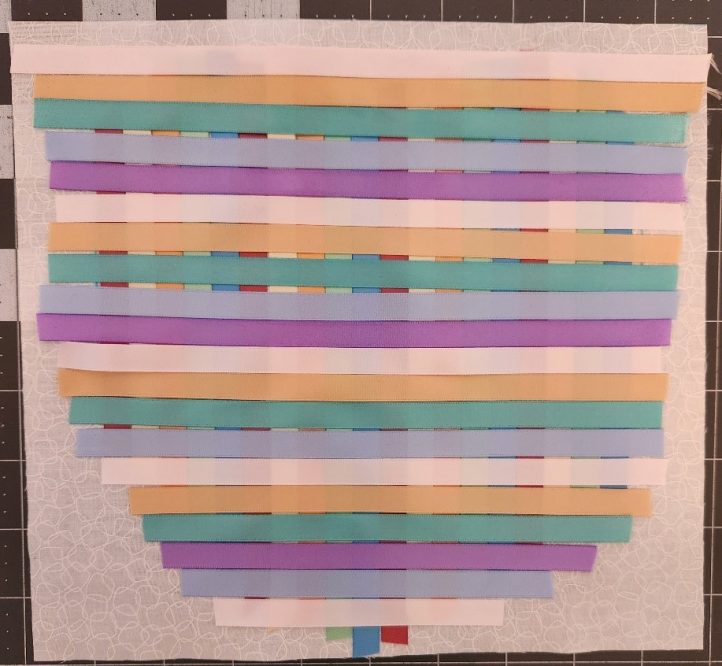
- After weaving a new horizontal ribbon, slide it up as snugly as possible against the row above it.
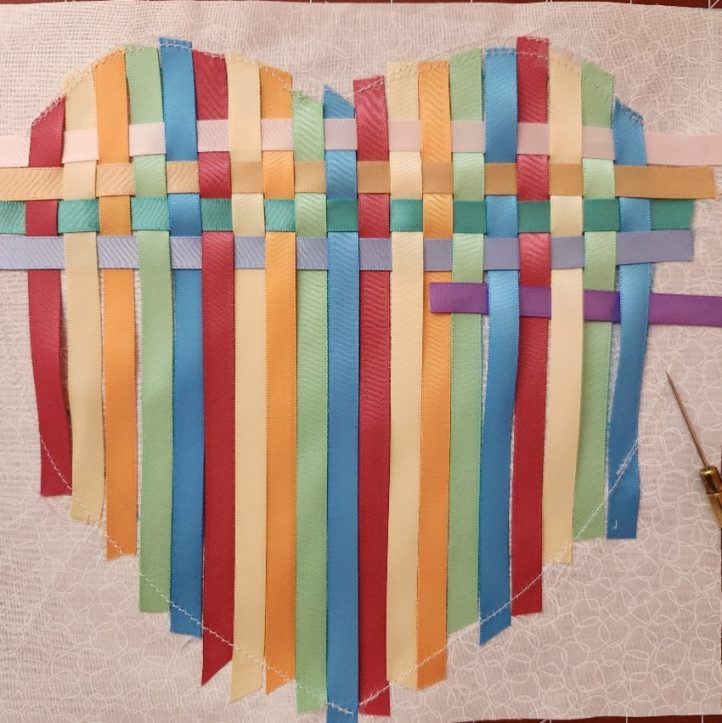
- Continue until all horizontal ribbons for the main part of the heart are woven.
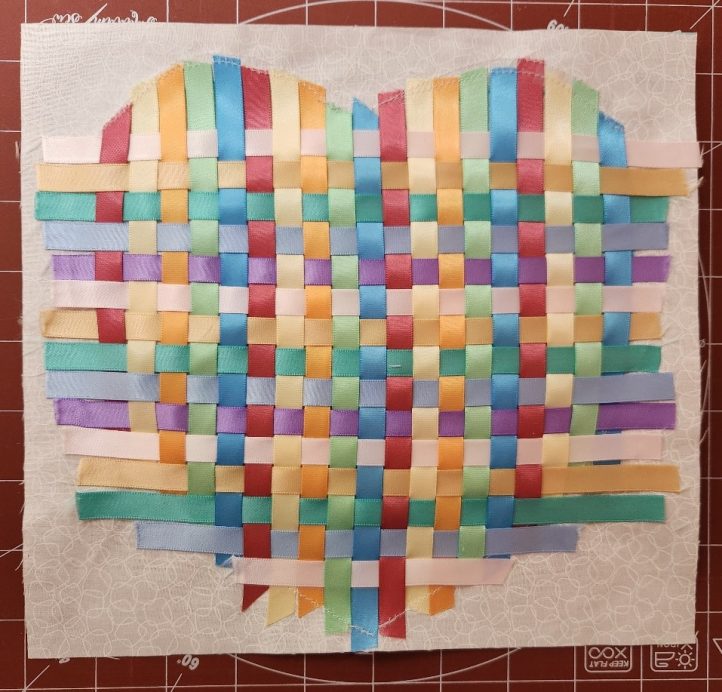
- For the two rounded curves at the top of the heart, weave a ribbon from right to left above the first horizontal ribbon until the top ribbon emerges near the indent of the heart. Trim the ribbon, leaving 1/2 to 1 inch extra allowance past the edges. Repeat for the other curve.
- After weaving a new horizontal ribbon, slide it up as snugly as possible against the row above it.
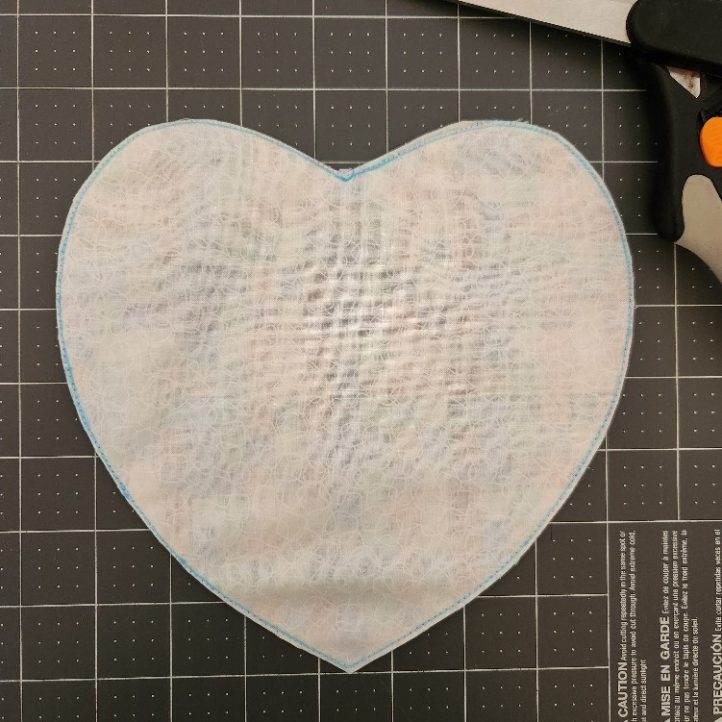
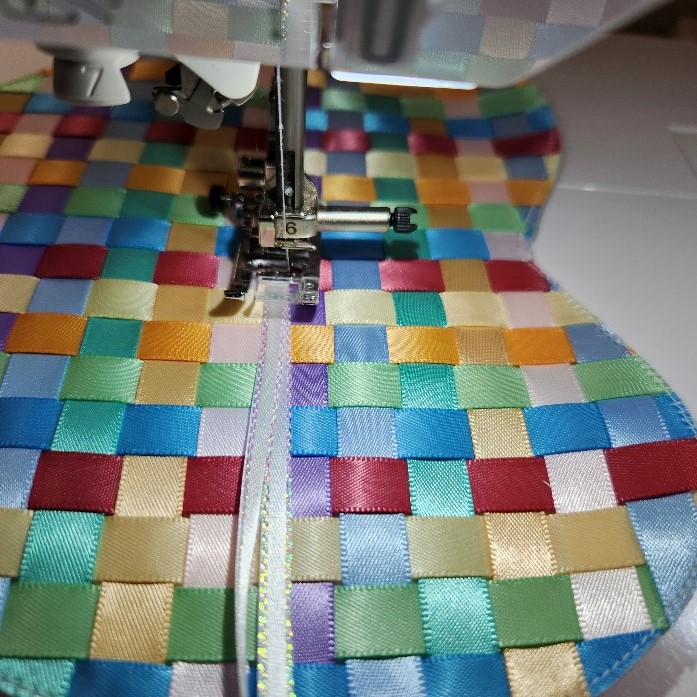
- Carefully turn over the pillow front. Stitch on the heart outline, using a short stitch length like 2.0 mm or 20 stitches per inch. This will help ensure that ribbon edges are caught by more than one stitch.
- Carefully trim the heart very close to the heart outline.
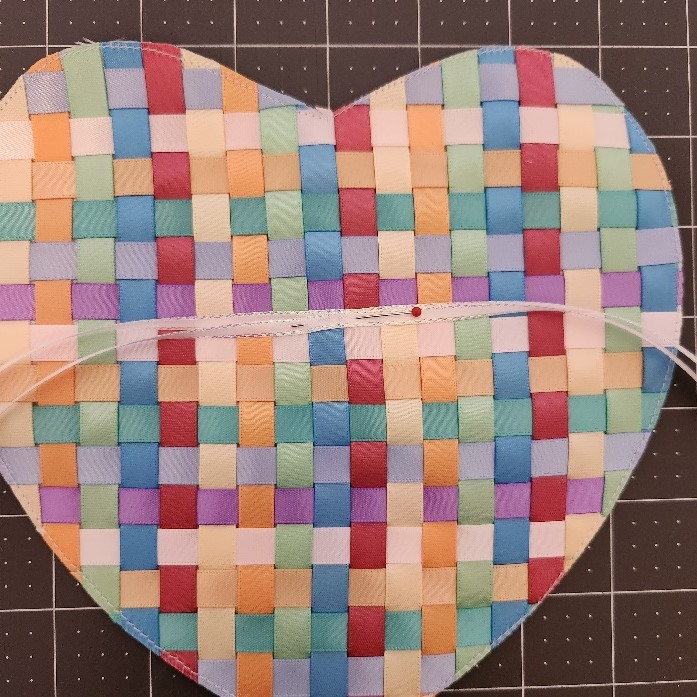
- Cut 1 or 2 ribbons for holding the rings, at least 16 inches long. (One ribbon is sufficient but two can look more decorative.)
- Fold the ribbon(s) in half to find the mid-point. Place the midpoint 2 1/4 inches straight down from the indent point of the heart.
- Pin the ribbon(s) in place. Attach the ribbons to the pillow front using a zigzag stitch wide enough to cover the ribbon and a shorter stitch length. Stitch for 3/4 to 1 inch.
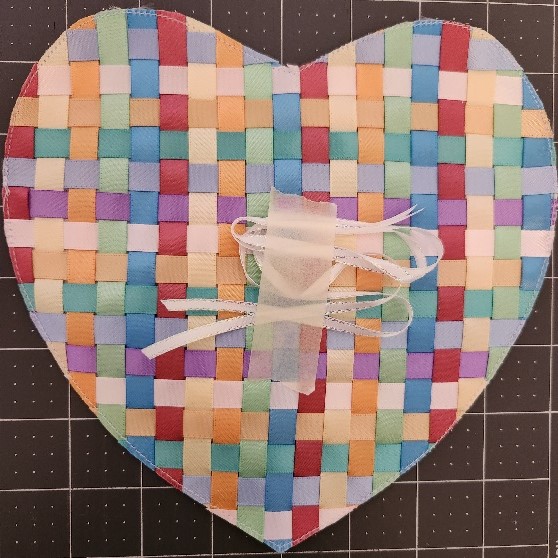
- To prevent the ring-ribbons from getting caught in subsequent stitching, fold them small enough to fit within the pillow front and hold them in place with a piece of tape.
- Trace the heart shape onto the second 10 inch square of fabric, for the pillow back. Cut out the pillow back.
- Pin the pillow front to the pillow back, right sides together.
- Stitch 1/4 inch seam using a short stitch length (2.0 or 20 stitches per inch), leaving a 1 to 2 inch opening along the side of the heart.
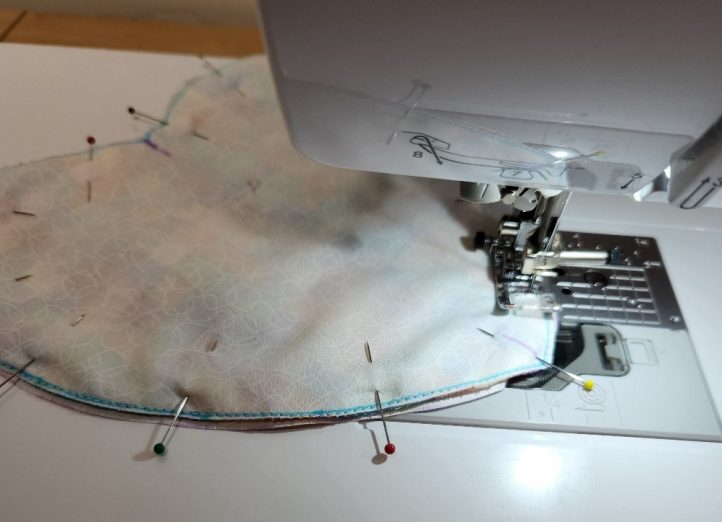
- Stitch 1/4 inch seam using a short stitch length (2.0 or 20 stitches per inch), leaving a 1 to 2 inch opening along the side of the heart.
- Trim the seam at the bottom corner point of the heart. Cut notches into the curves to reduce bulk and make smoother curves once turned right side out.
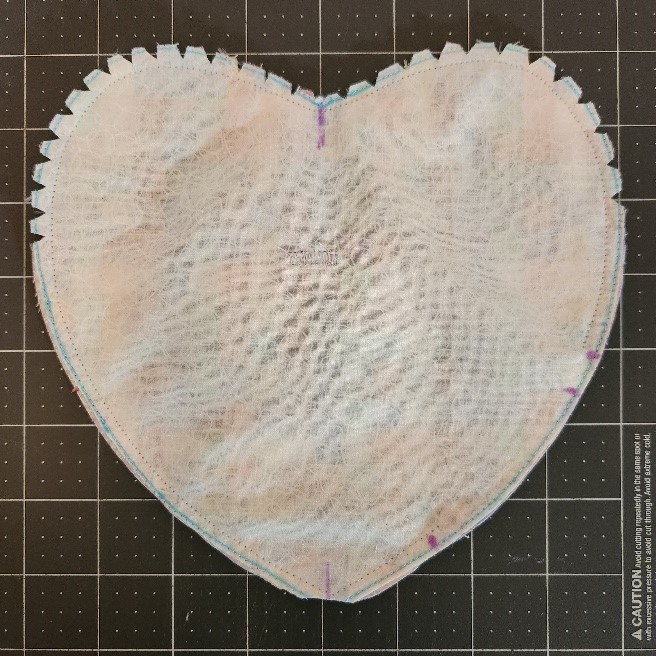
Cut notches at the curves. Trim straight across at the corner.
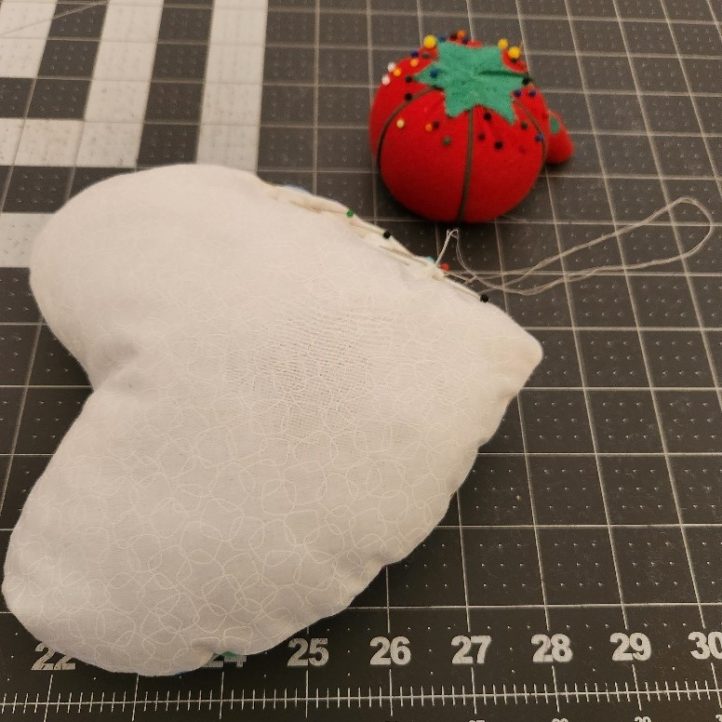
- Carefully turn the pillow right side out. Fold the opening edges in 1/4 inch. Press with an iron to form clear creases.
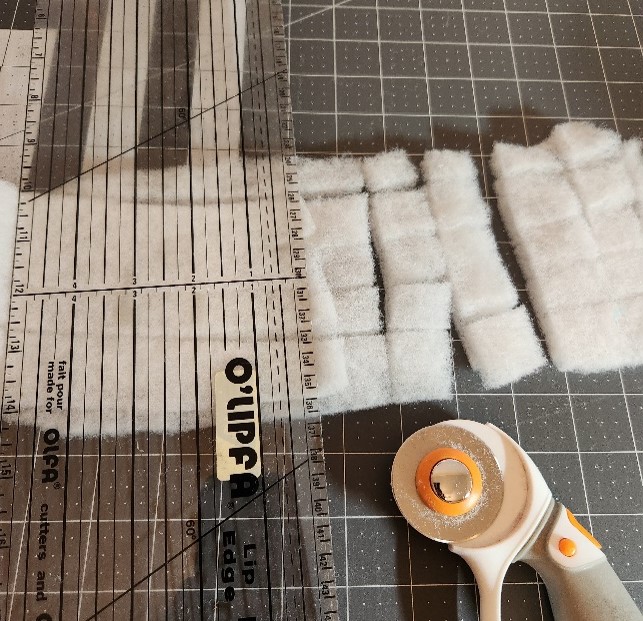
- Insert pillow stuffing into the pillow through the opening. To use scrap pieces of batting, cut multiple pieces in one direction. Rotate the strips and cut again in a different direction. Pull apart the small pieces to make fluffy filling.
- Pin the opening edges together. Hand-sew the opening shut using thread in a coordinating color. Make small stitches close together to be sure to catch all the ribbon edges along the opening.
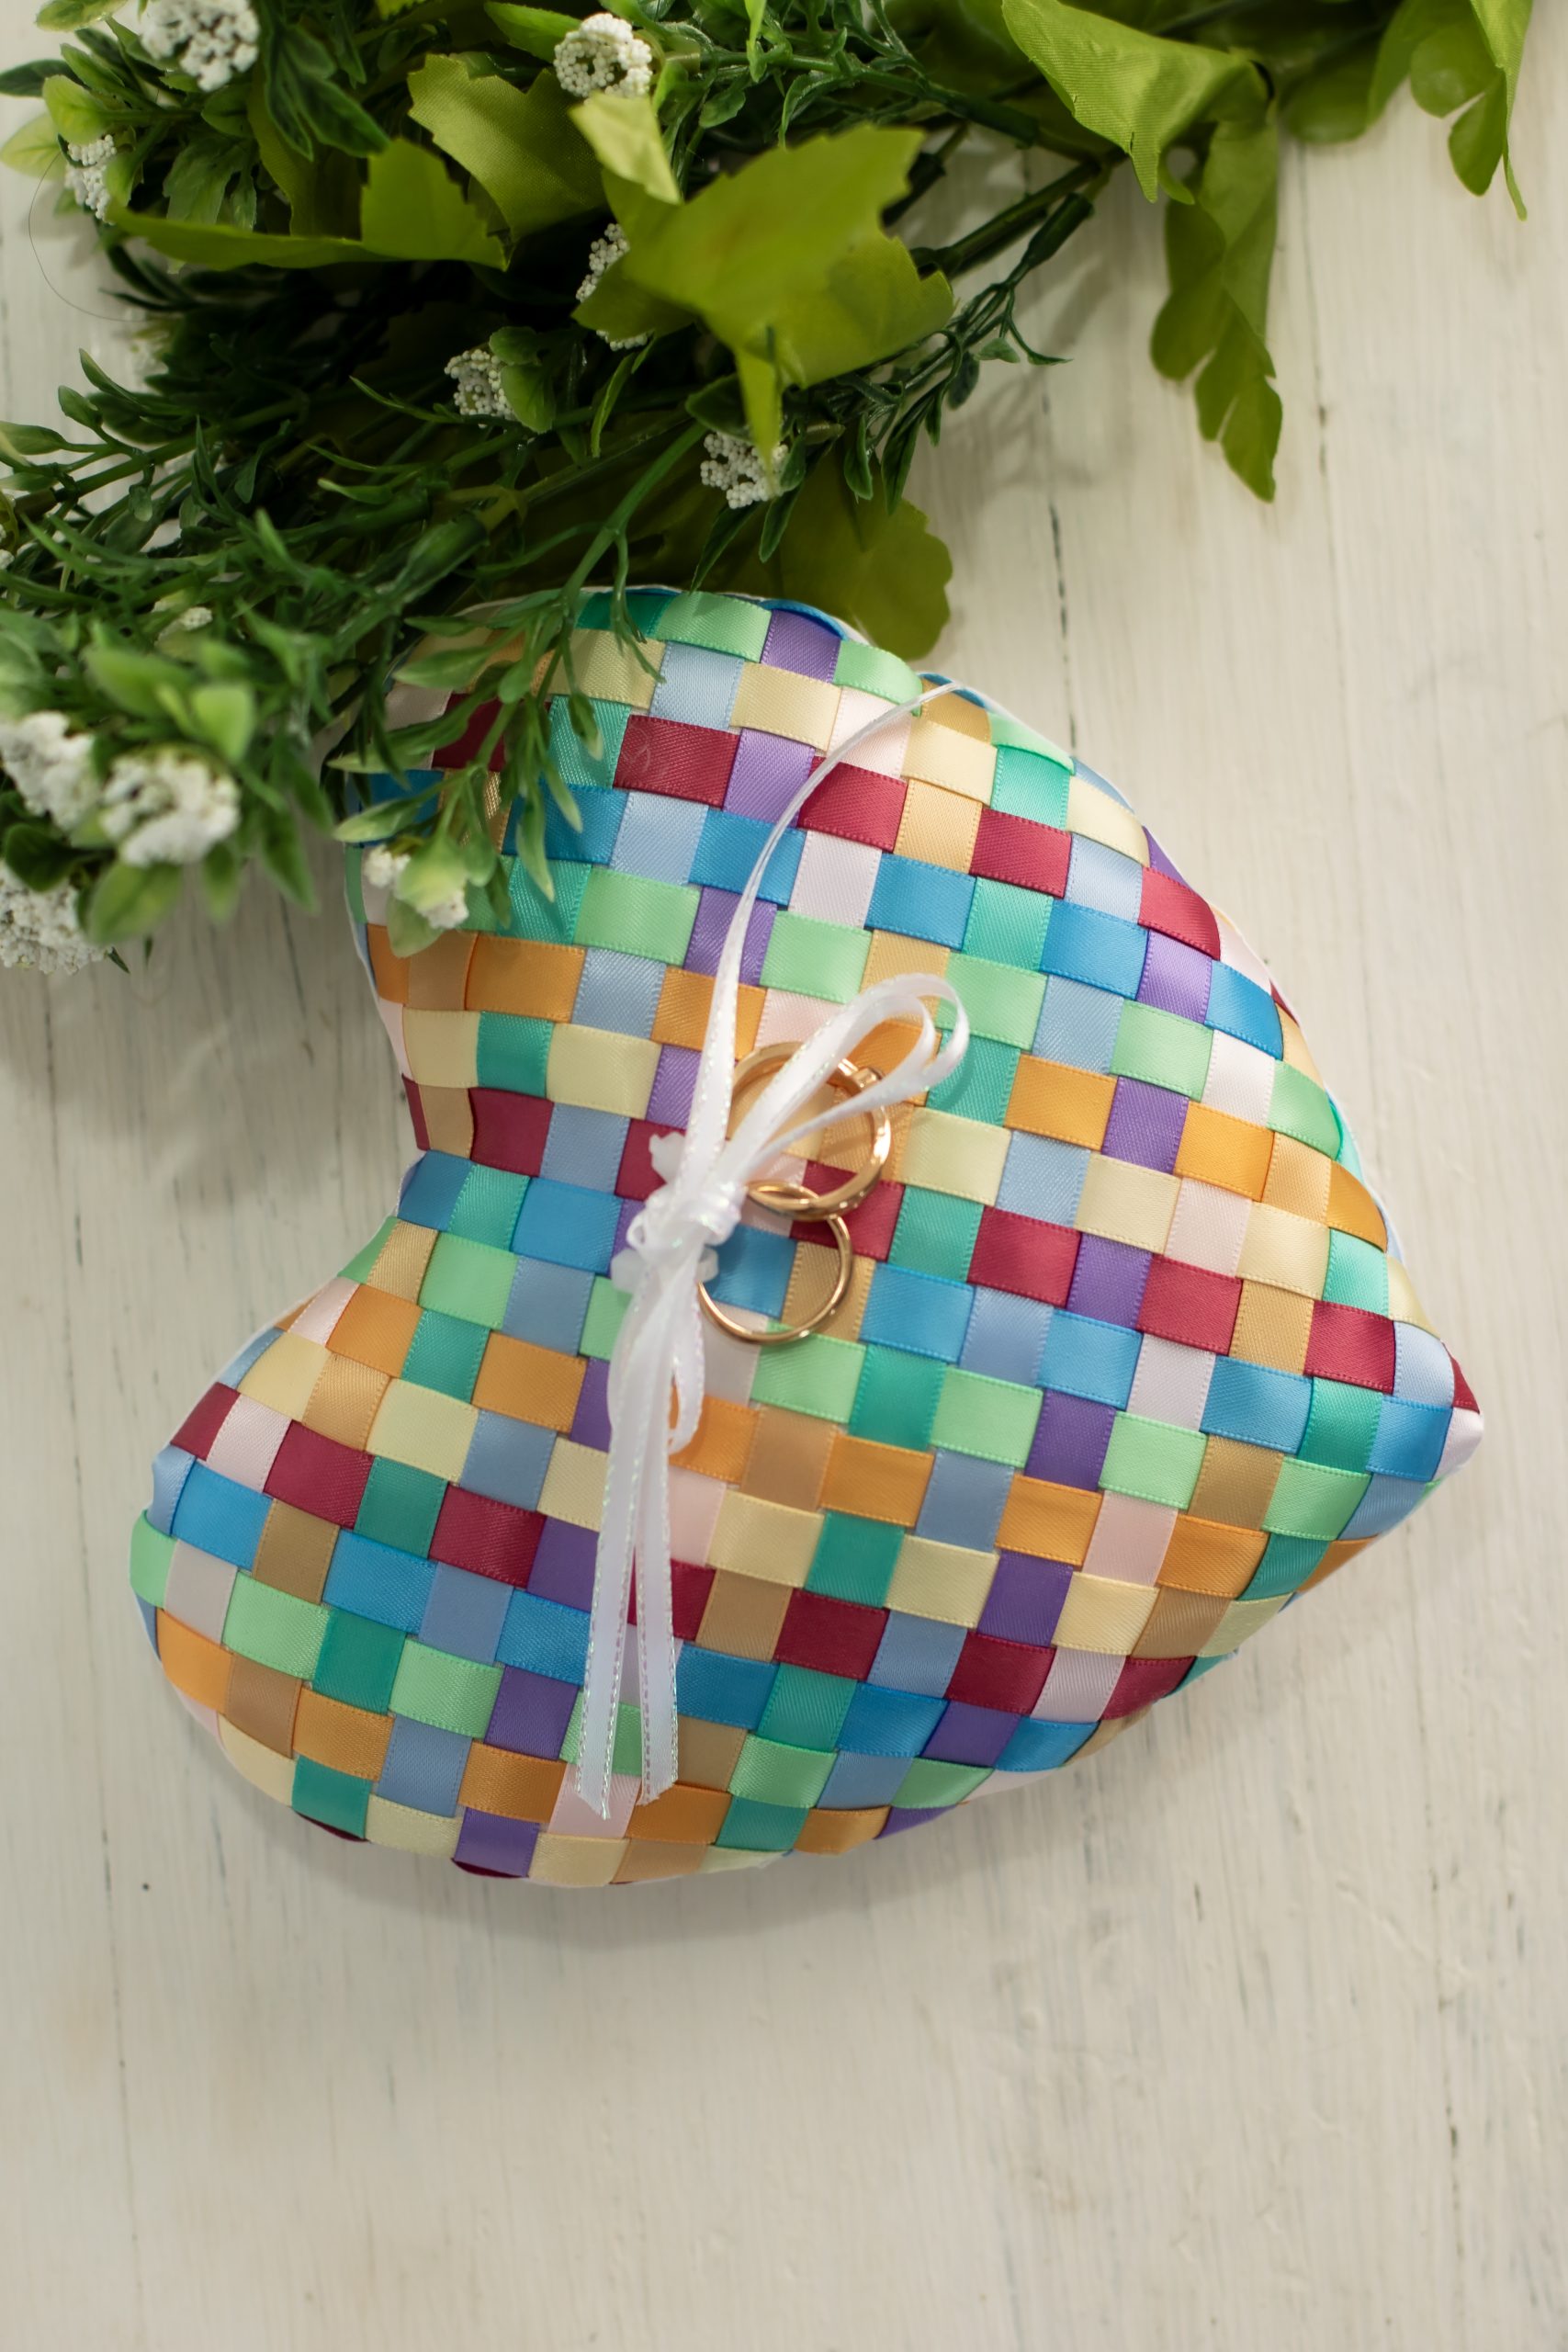
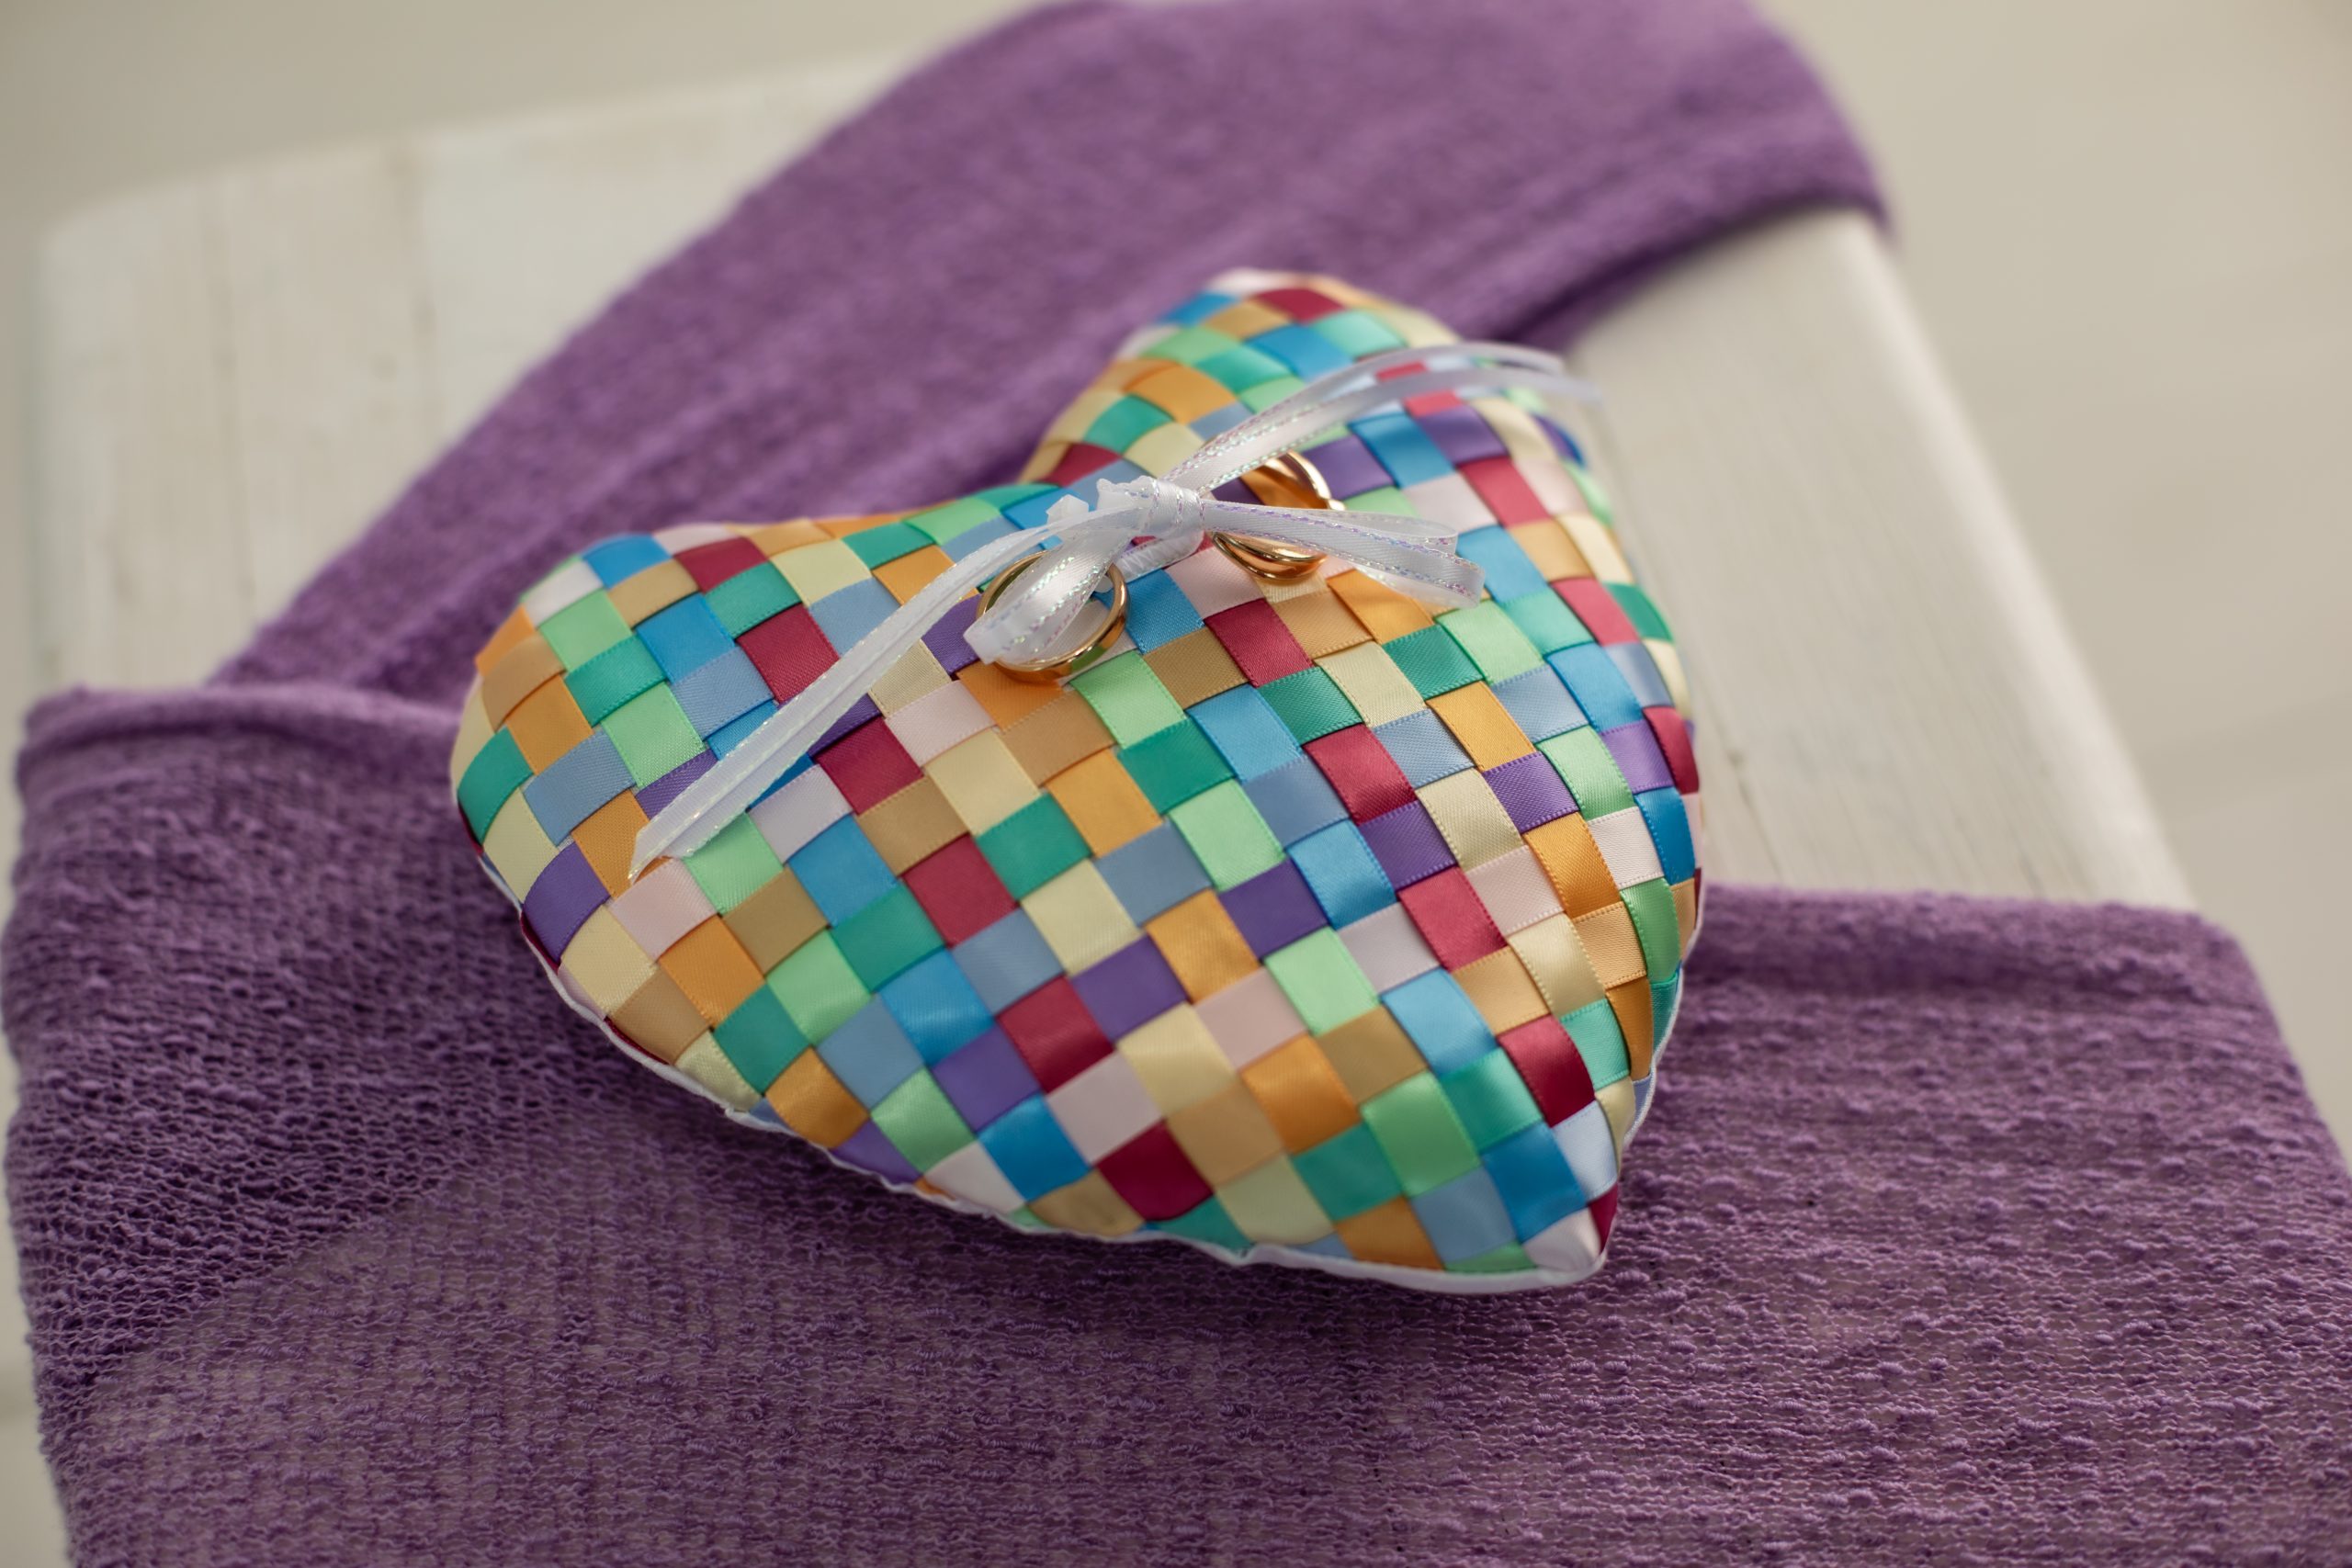
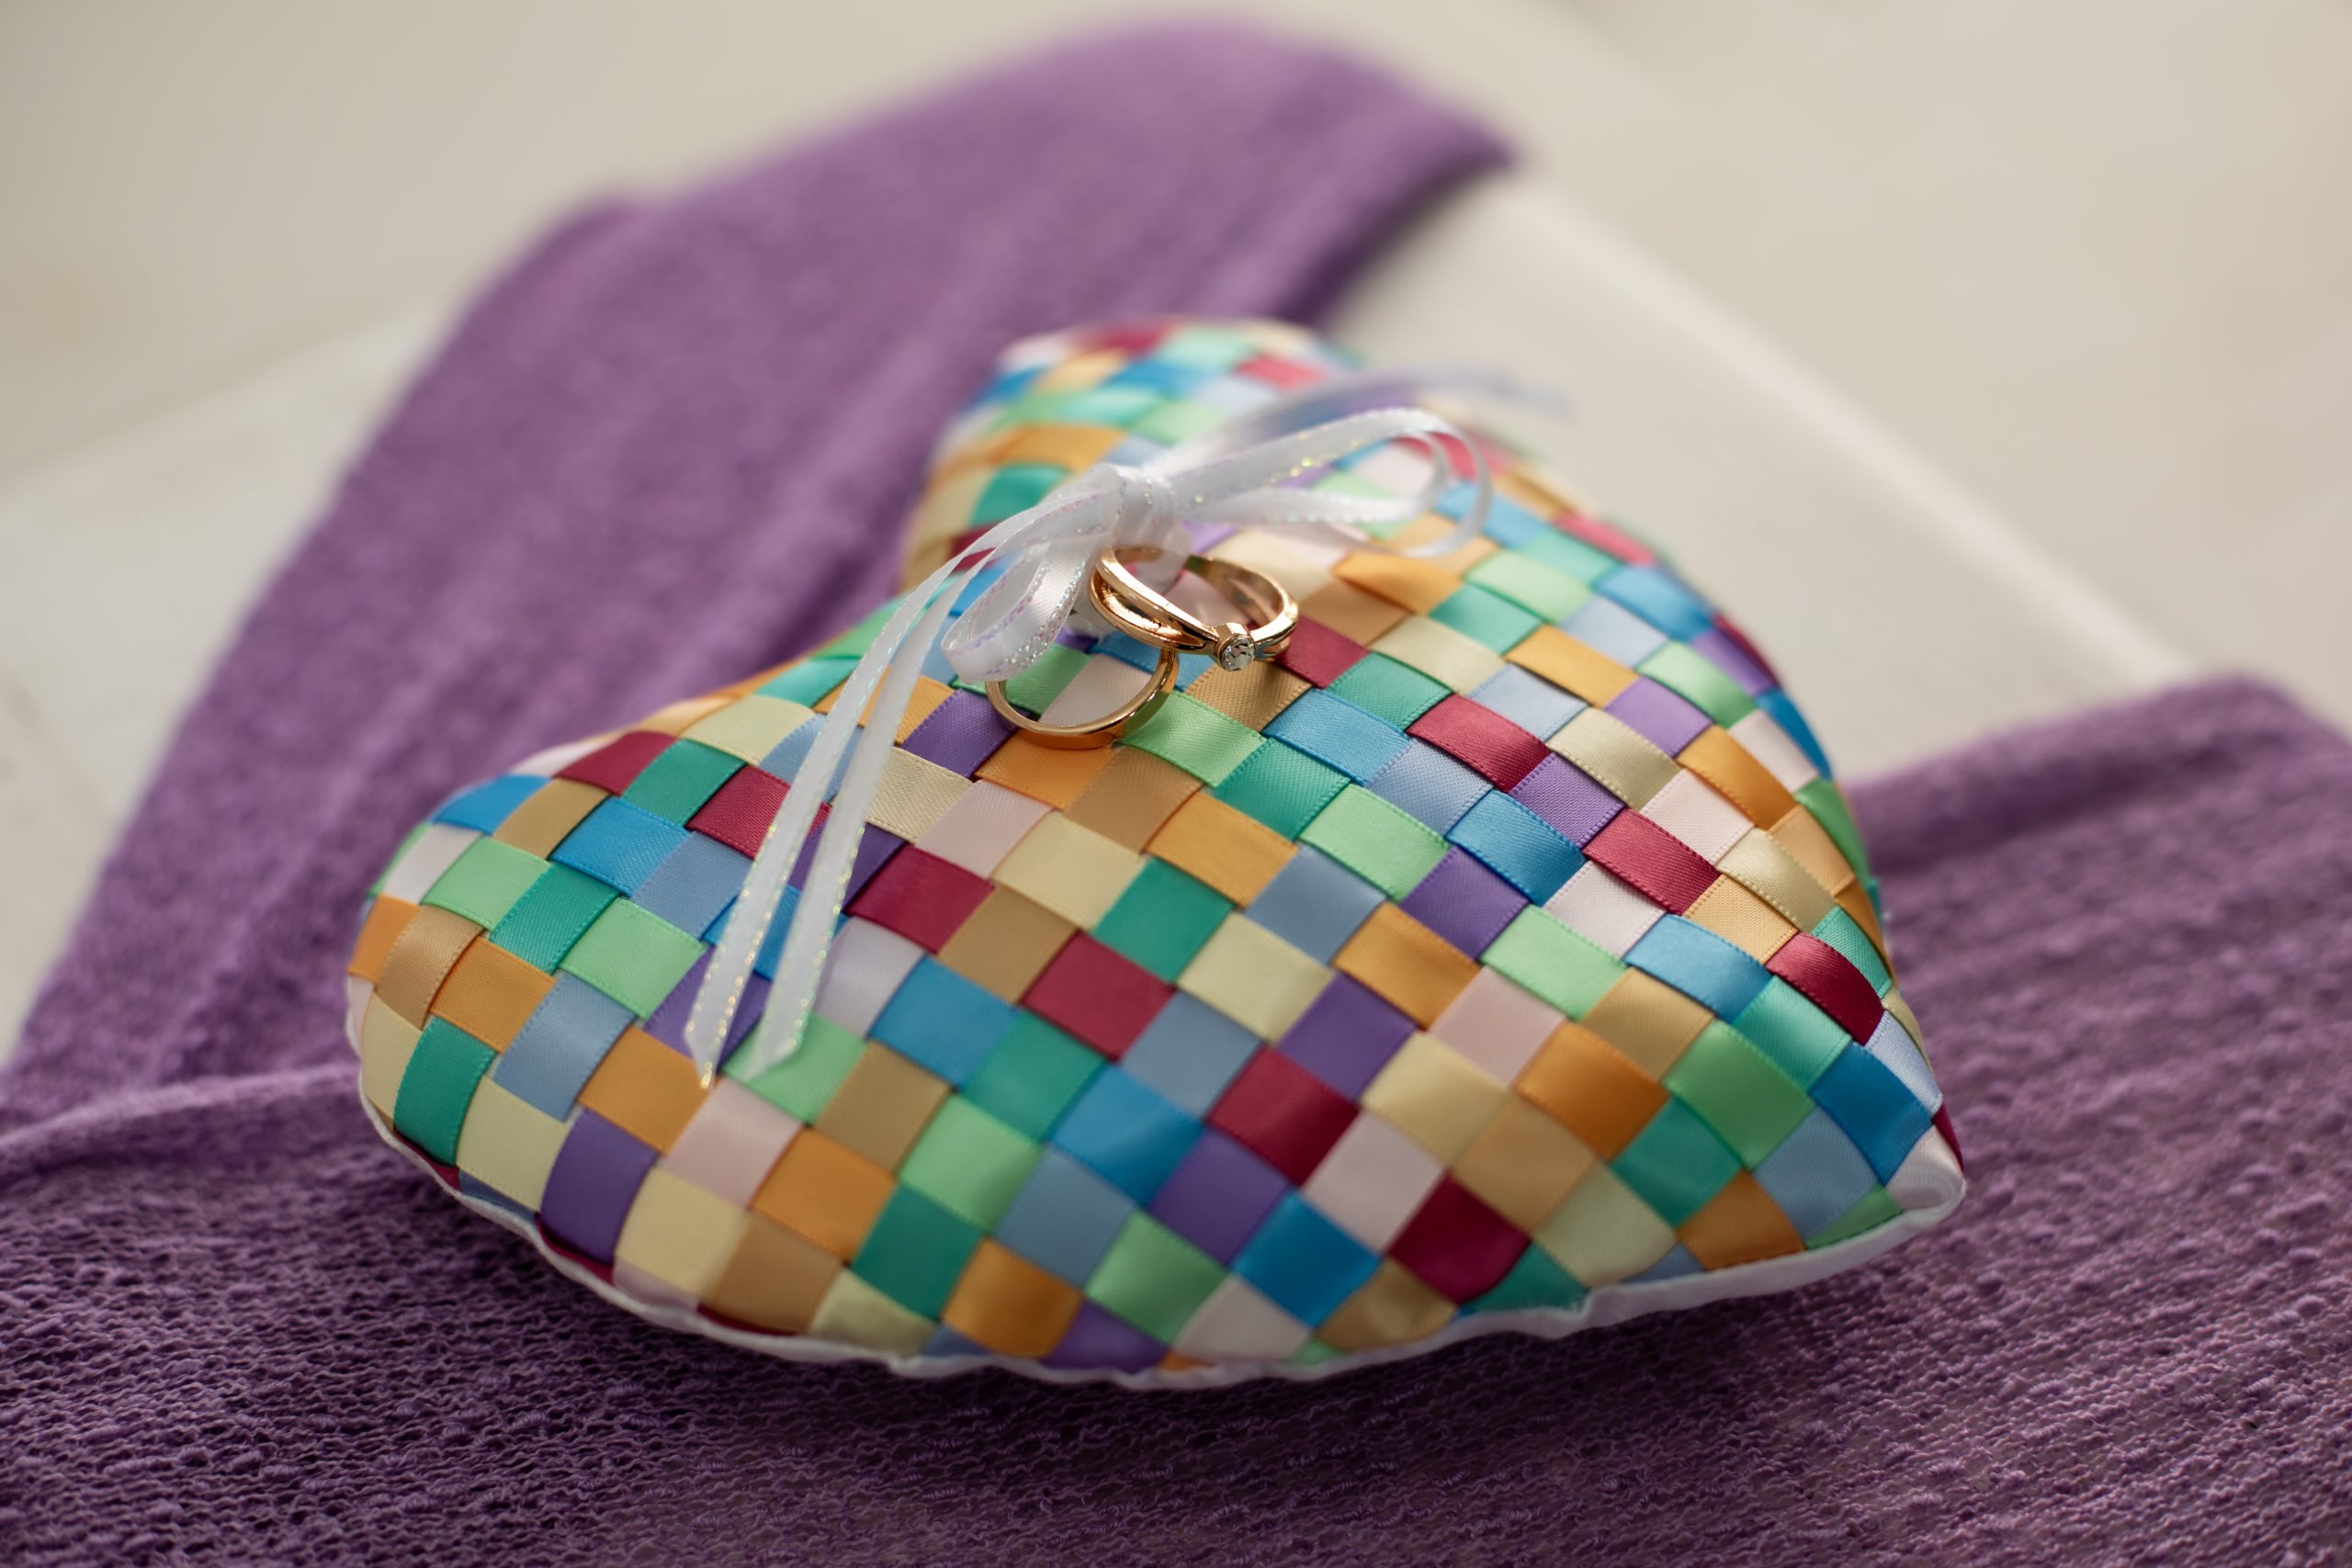
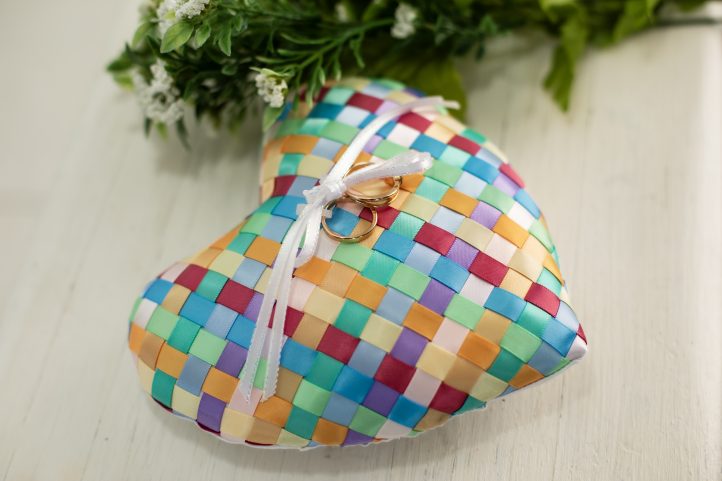
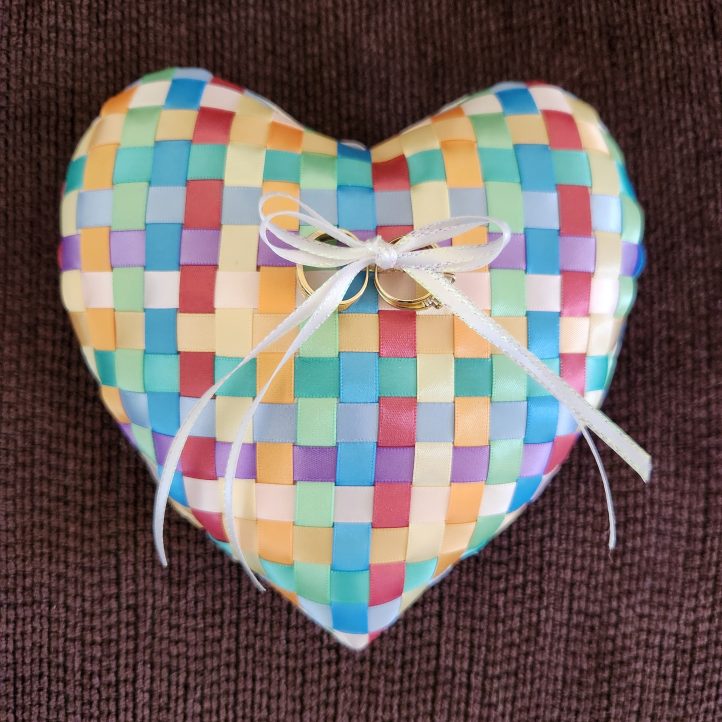
- The ribbon weaving ring bearer pillow is now finished! Tie the rings onto the pillow and form a decorative bow!