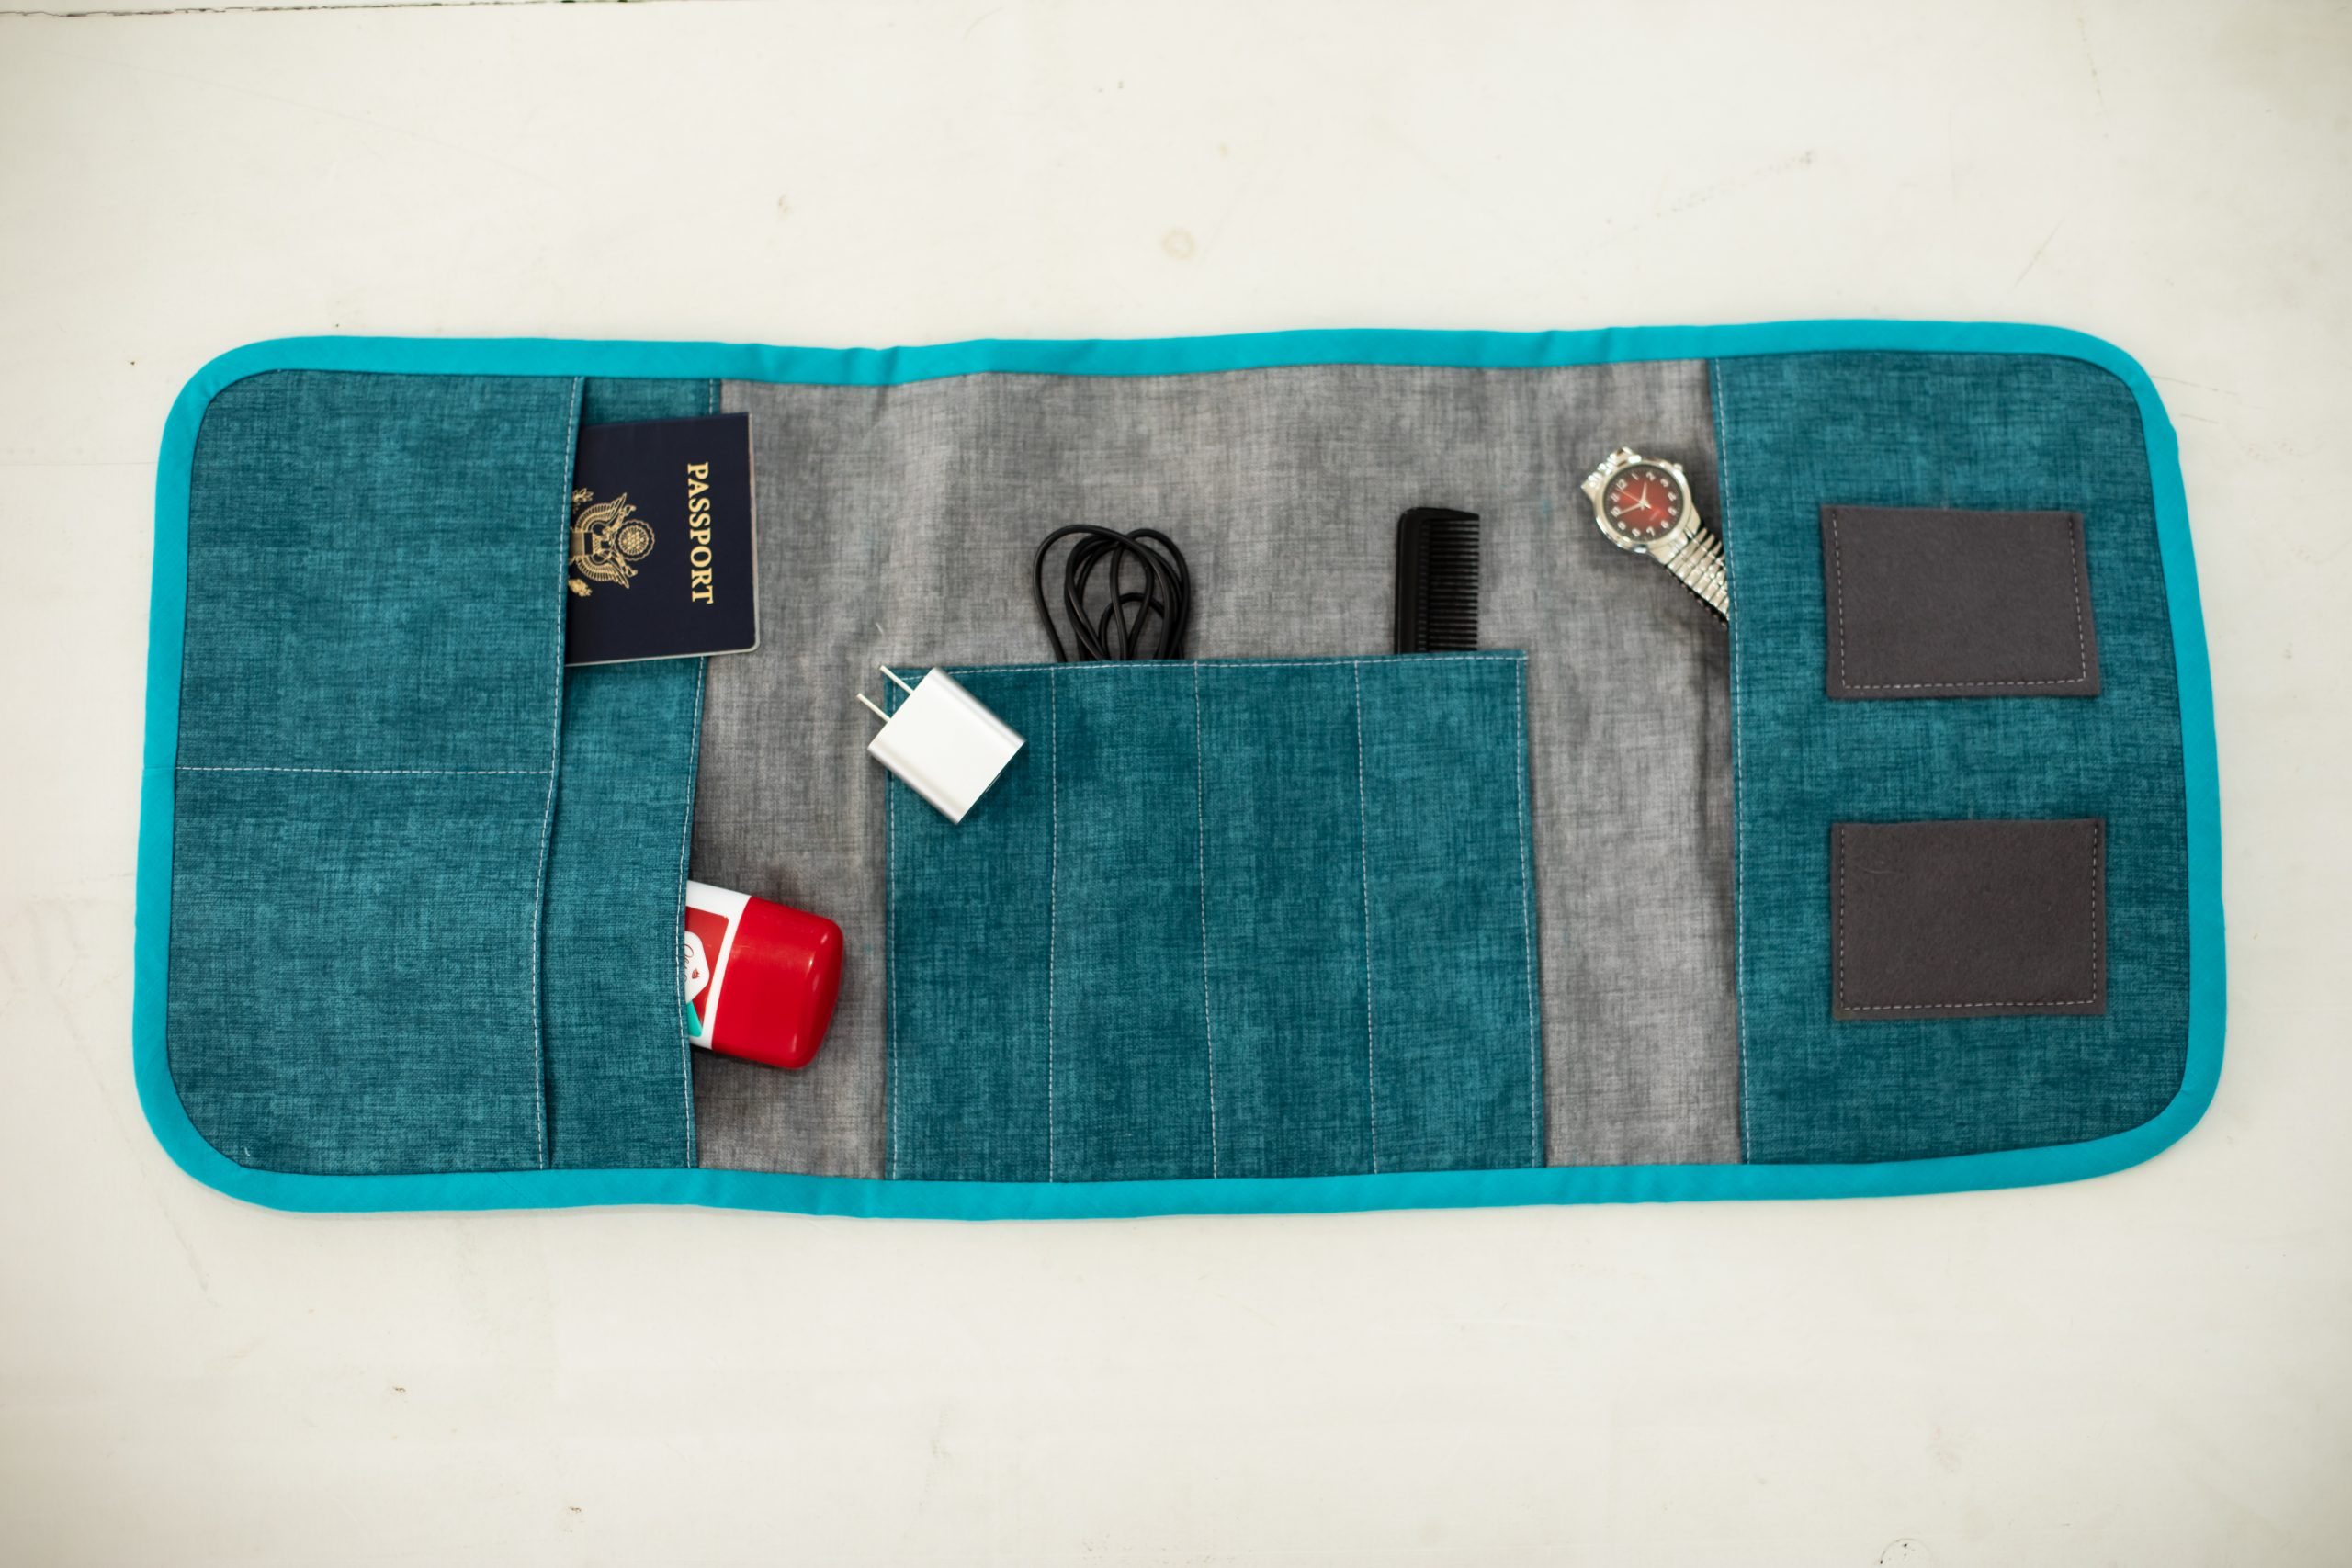
Sew Dad or Granddad a thoughtful Father’s Day gift that he can use daily with this project from Sophie Tarrant. Featuring multiple compartments to hold his necessities, this dad bag pattern has a retro-inspired exterior and securely fastens with a sturdy strap and clip. This gift sewing pattern isn’t just for Dad though, as kids can easily use this bag pattern to store their art supplies, hair accessories, or summer road trip essentials.
Skill Level: Beginner
Finished Size: 29” (inches) x 13” (inches) unfolded, 10” (inches) x 13” (inches) folded
Designer Note: Layer by Layer: When hand stitching through multiple layers (as when adding your strap to the outside of your folder), you can use a curved needle or a longer hand needle to easily pass through the various layers of fabric without puckering the edges or catching the lining. This makes the process smoother and helps maintain an even stitch along the strap.
Materials:
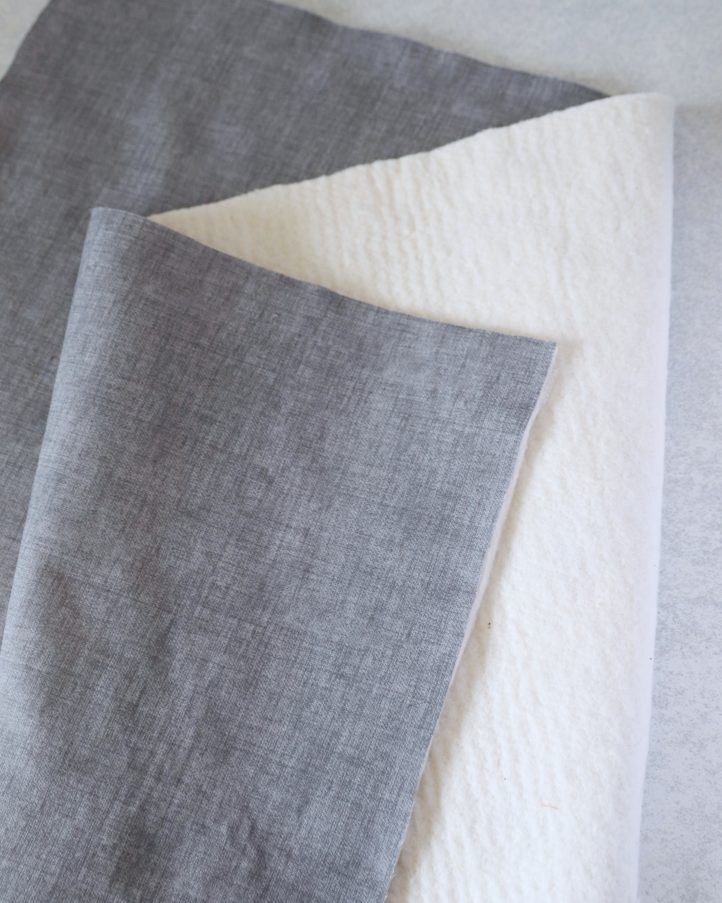
- Fabric: Blue cotton, gray cotton, and teal cotton, one yard of each
- Quilt wadding or thick felt: One yard
- Felt: Gray, one fat quarter
- Fusible webbing: One yard
- 1/2” single or double folded bias tape: Teal, three yards
- Striped strapping: 1-1/2” wide, one yard
- Buckle and slider set: 1-1/2” wide
- Thread: White
Tools:
- Rotary cutter and cutting mat
- Tape measure
- Quilting ruler
- Pins
- Sewing clips
- Sewing machine
- Iron
Sewing Instructions:
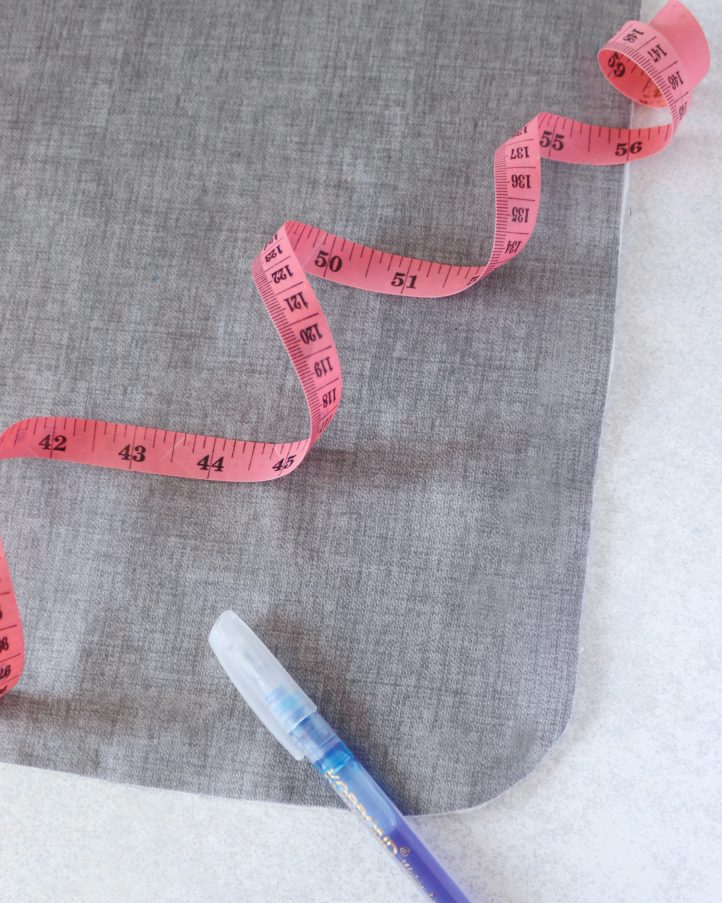
- Start by cutting your outer and lining fabrics to size. We used a teal cotton for the outer and a gray cotton for the lining. Use fusible webbing to back each piece with quilt wadding or thick felt, then cut a 29” x 13” rectangle from both the outer and lining layers.
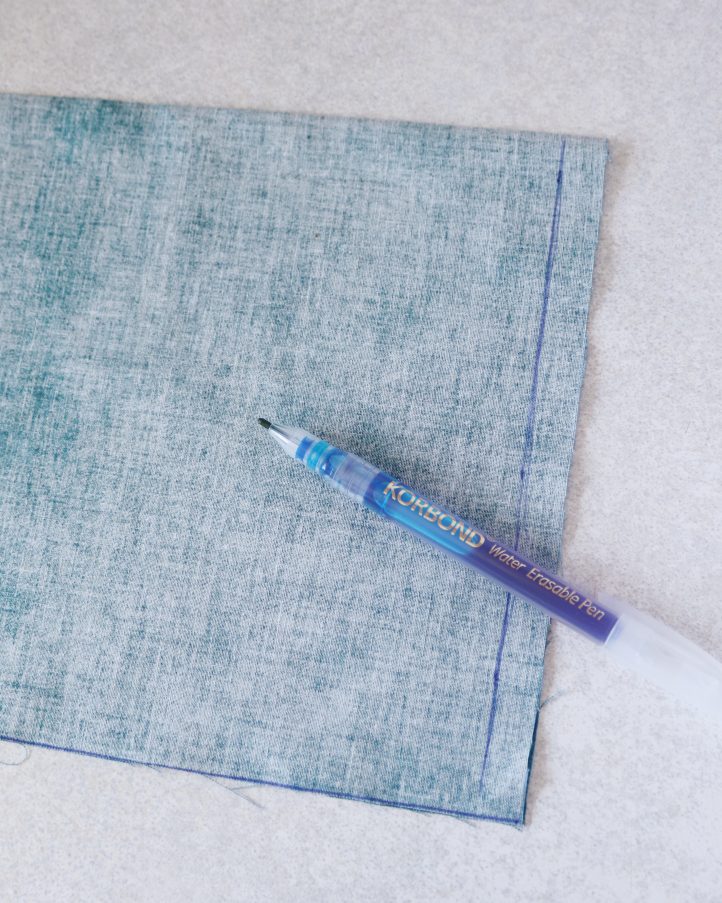
- Use a cup or similar round object to curve off the corners of both your outer and lining rectangles. Set the outer piece aside for now – you won’t need it again until a later step. Lay the lining fabric right side up, then use a chalk marker to divide the fabric into three vertical sections: mark the left and center sections at 10” wide each, and the right-hand section at 9” wide.
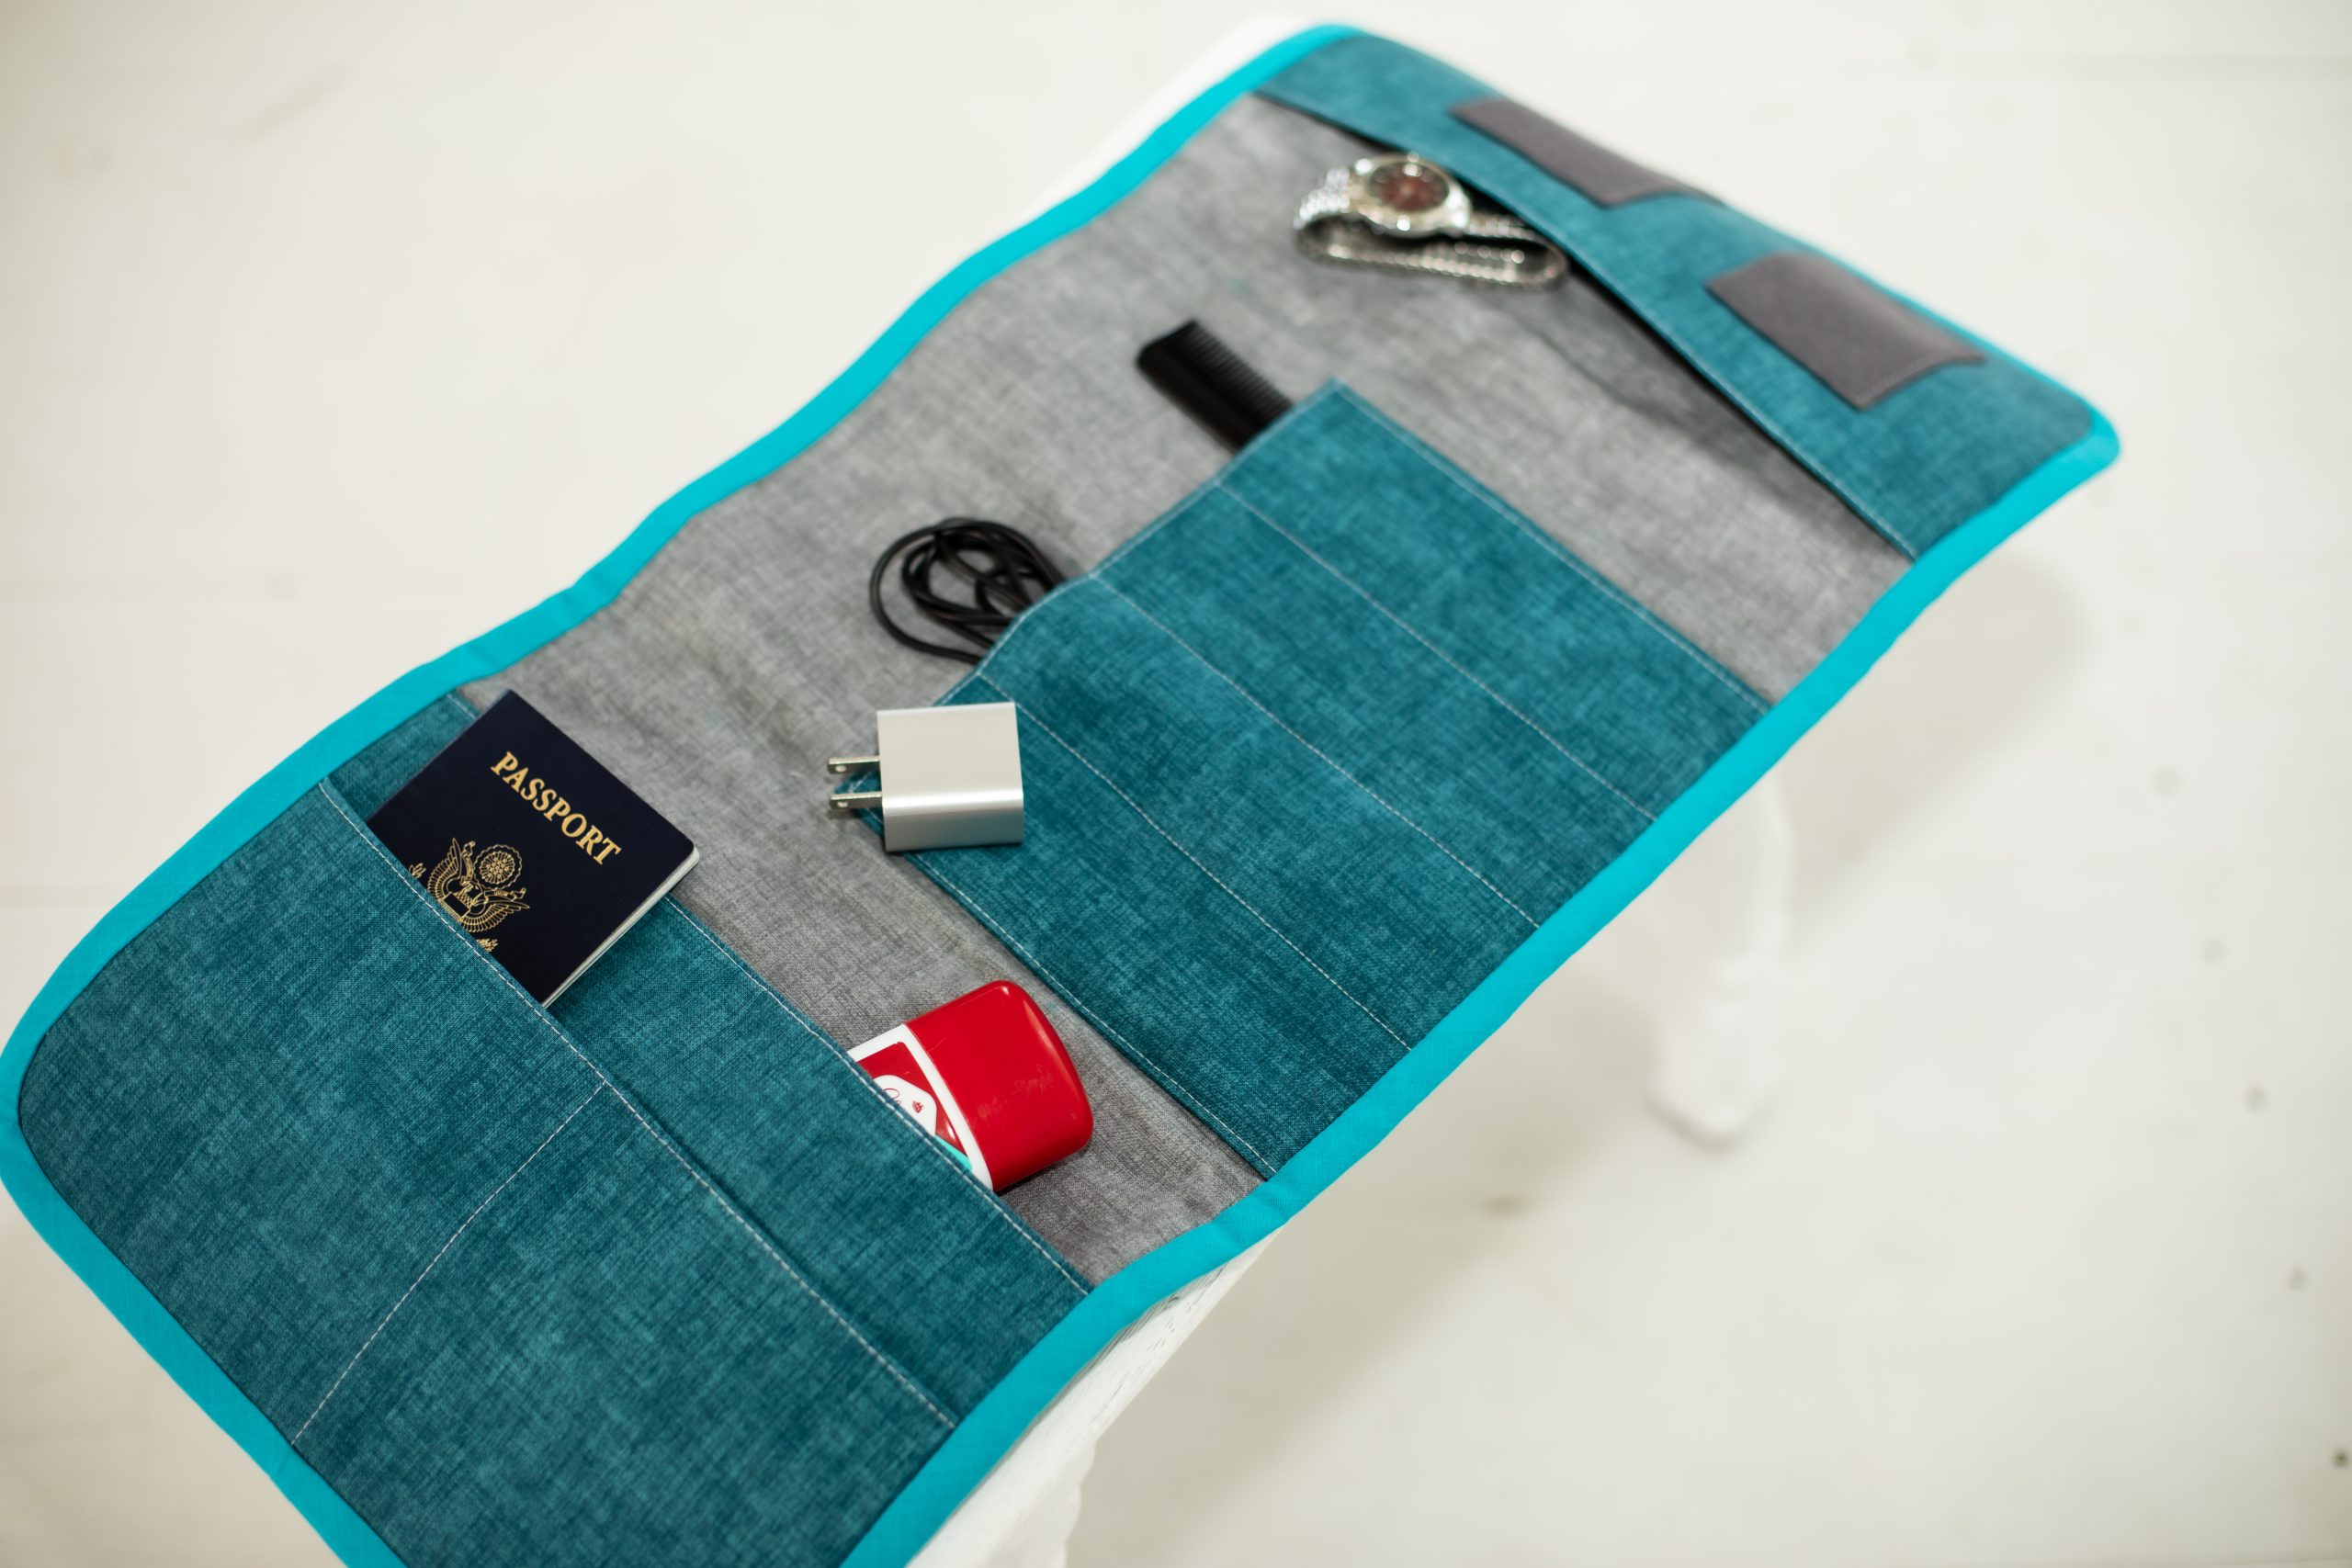
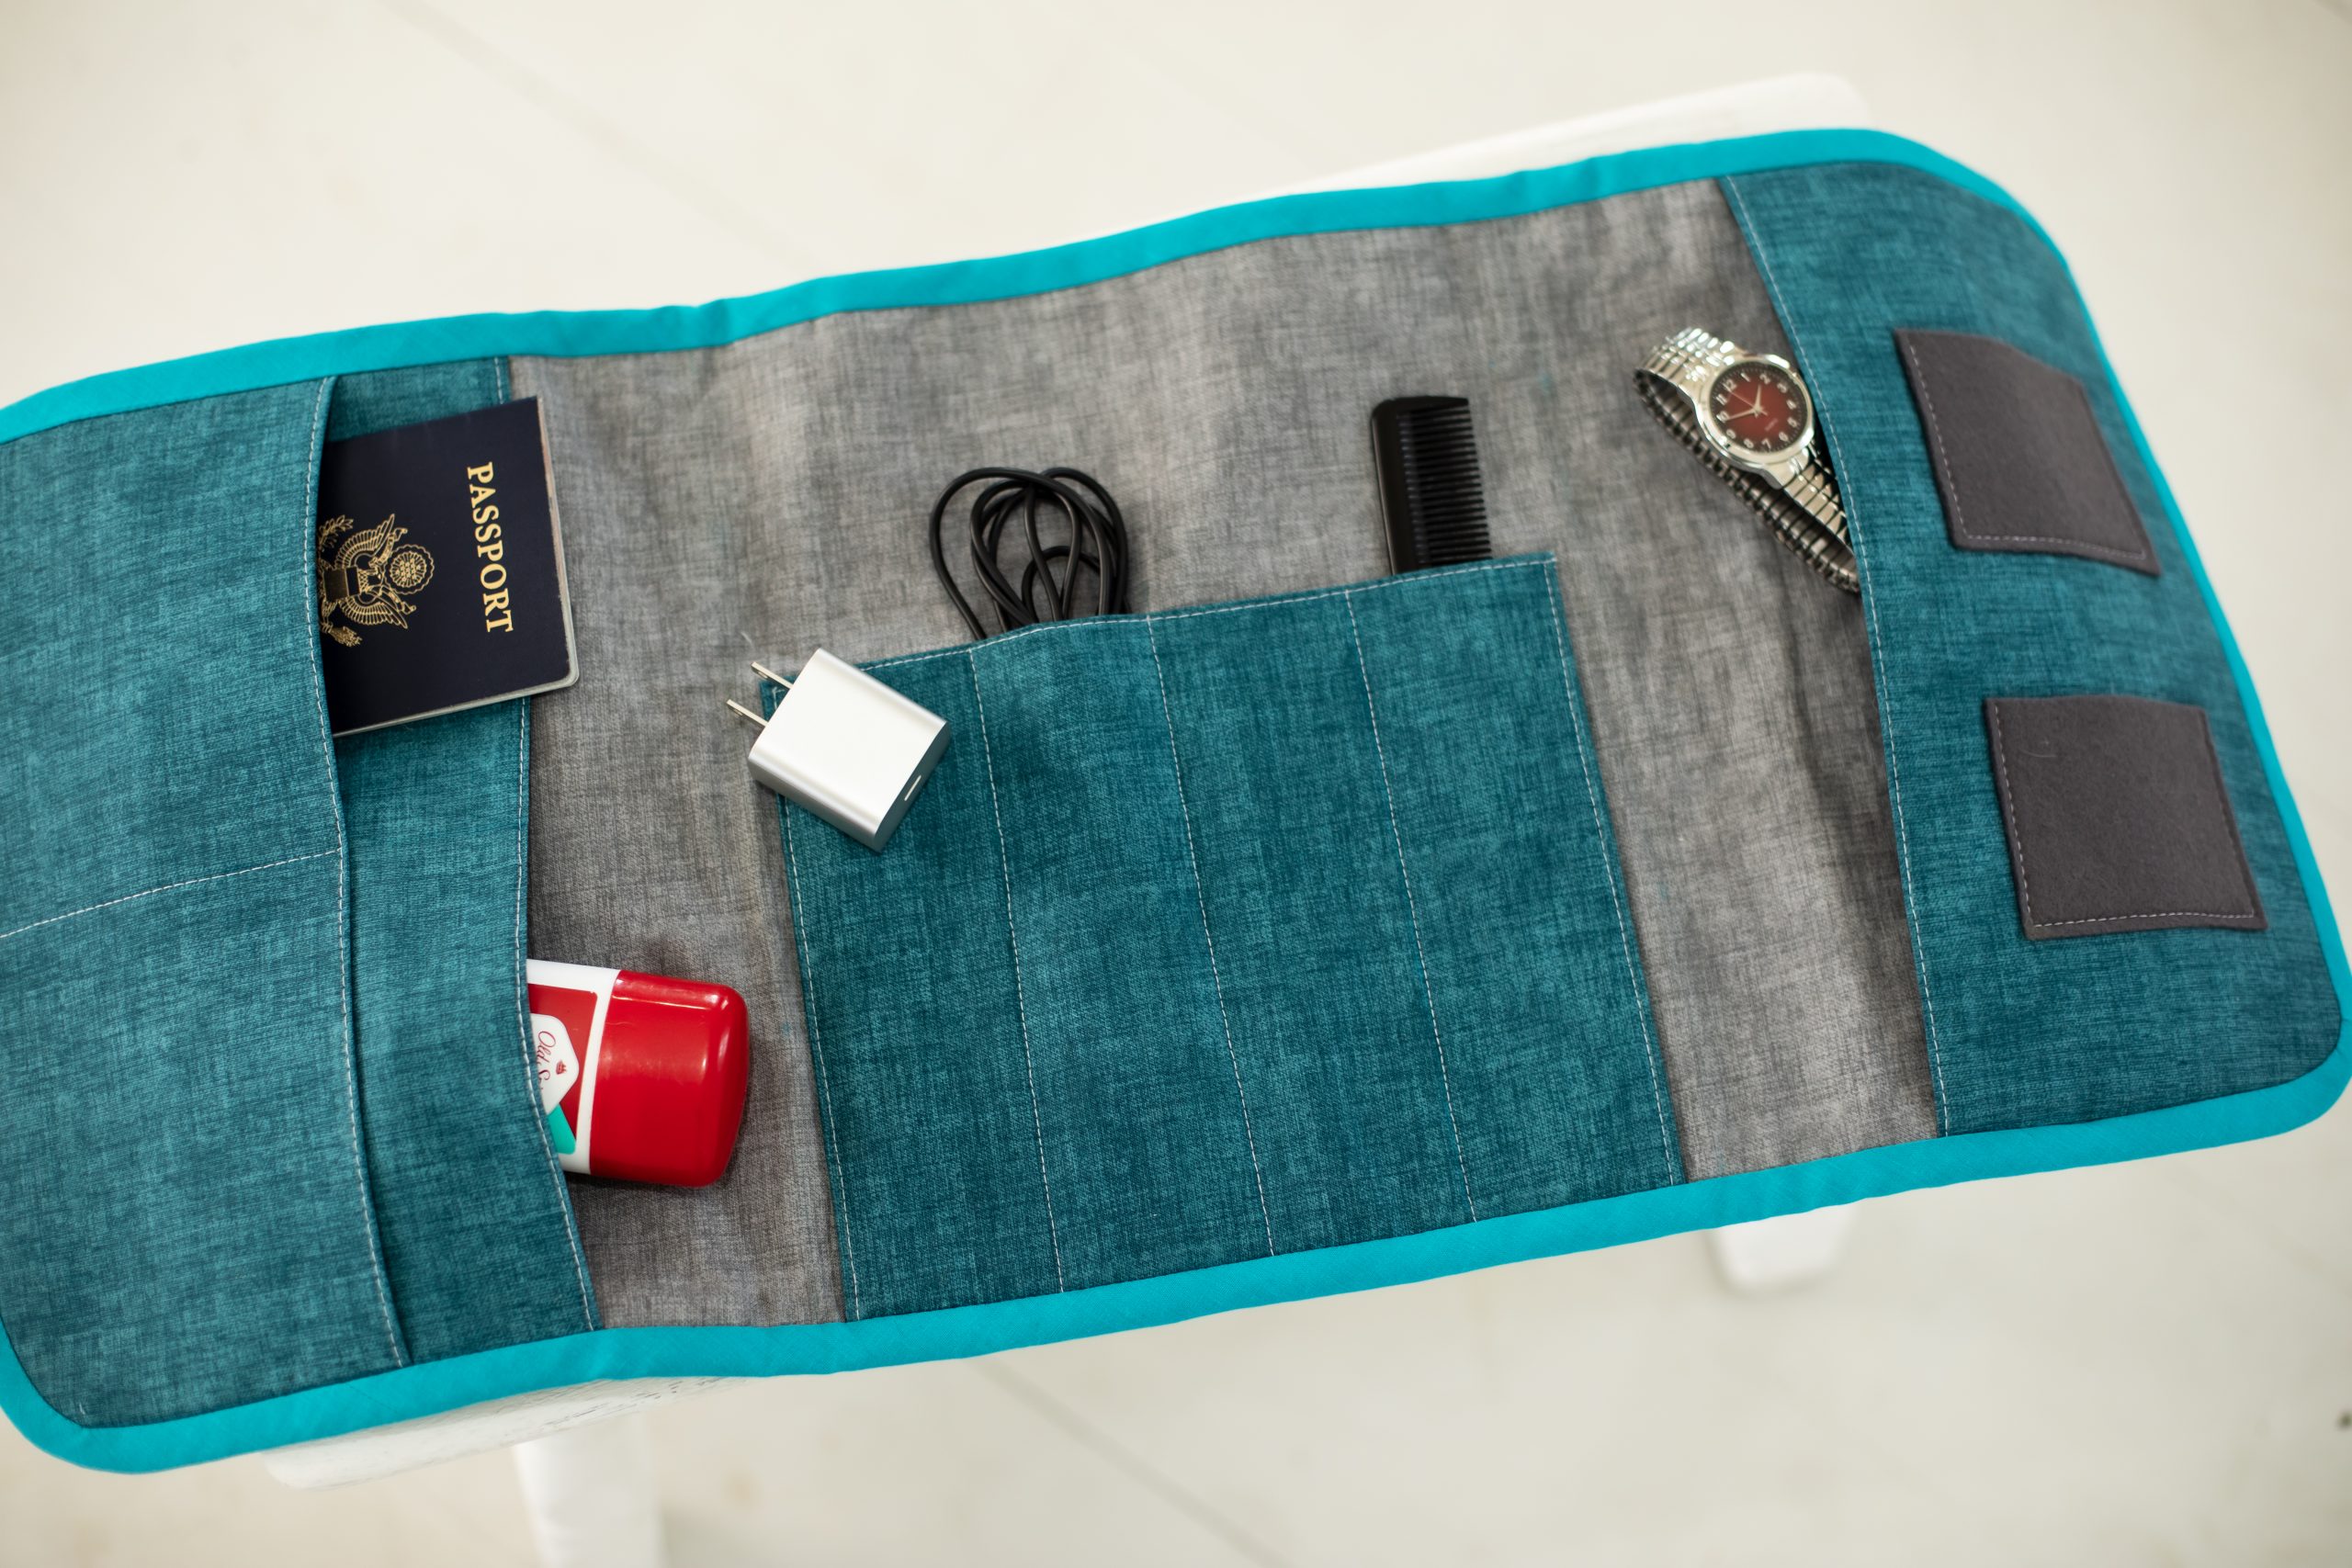
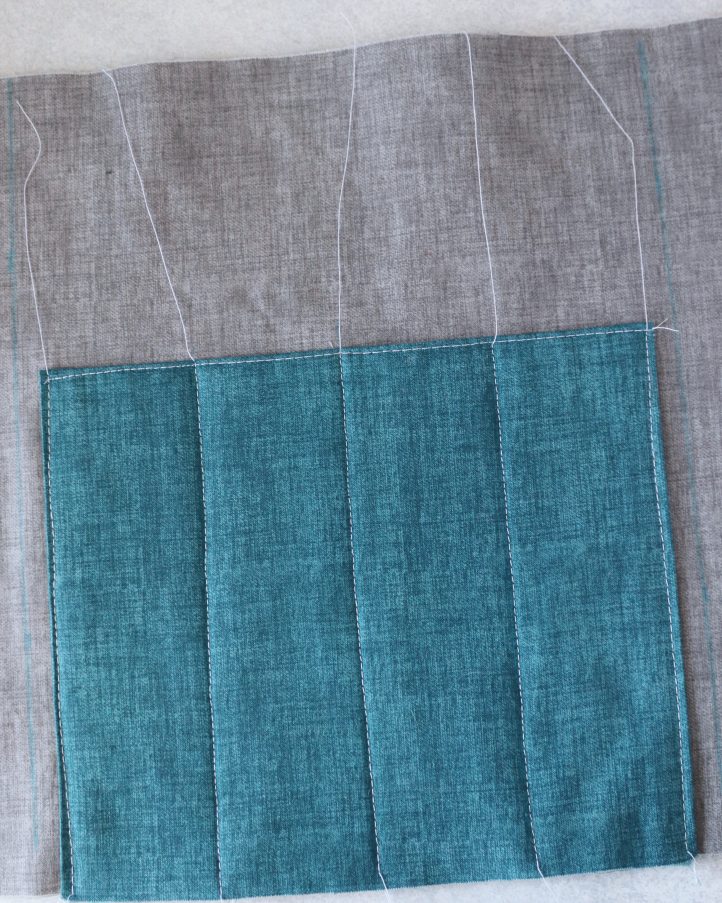
- Next, we’ll make the center pen pocket. Cut an 11” x 16” rectangle from your mottled blue cotton. Fold it in half with right sides facing, so it measures 11” x 8”. Stitch down both short sides using a 1/2” seam allowance. Turn the pocket right sides out, making sure to poke out the corners neatly, then press it flat. Slide an 8” x 10” piece of quilt wadding between the fabric layers to give the pocket structure. Set your machine to a 3mm (1/8”) straight stitch and sew an edge stitch along the top of the pocket, 1/8” from the edge, as a decorative finish.
- Use a ruler and chalk to mark three vertical lines on the pocket, dividing it into four equal sections, each 2-1/2” wide. Pin the pocket in place on the center section of the lining, aligning the bottom edge of the pocket with the bottom of the lining, and matching the pocket’s sides with the dividing lines you marked in Step 2. Top stitch down both side edges of the pocket with a 1/8” seam allowance, then stitch along each of the three marked divider lines to secure the pocket and create four pen slots.
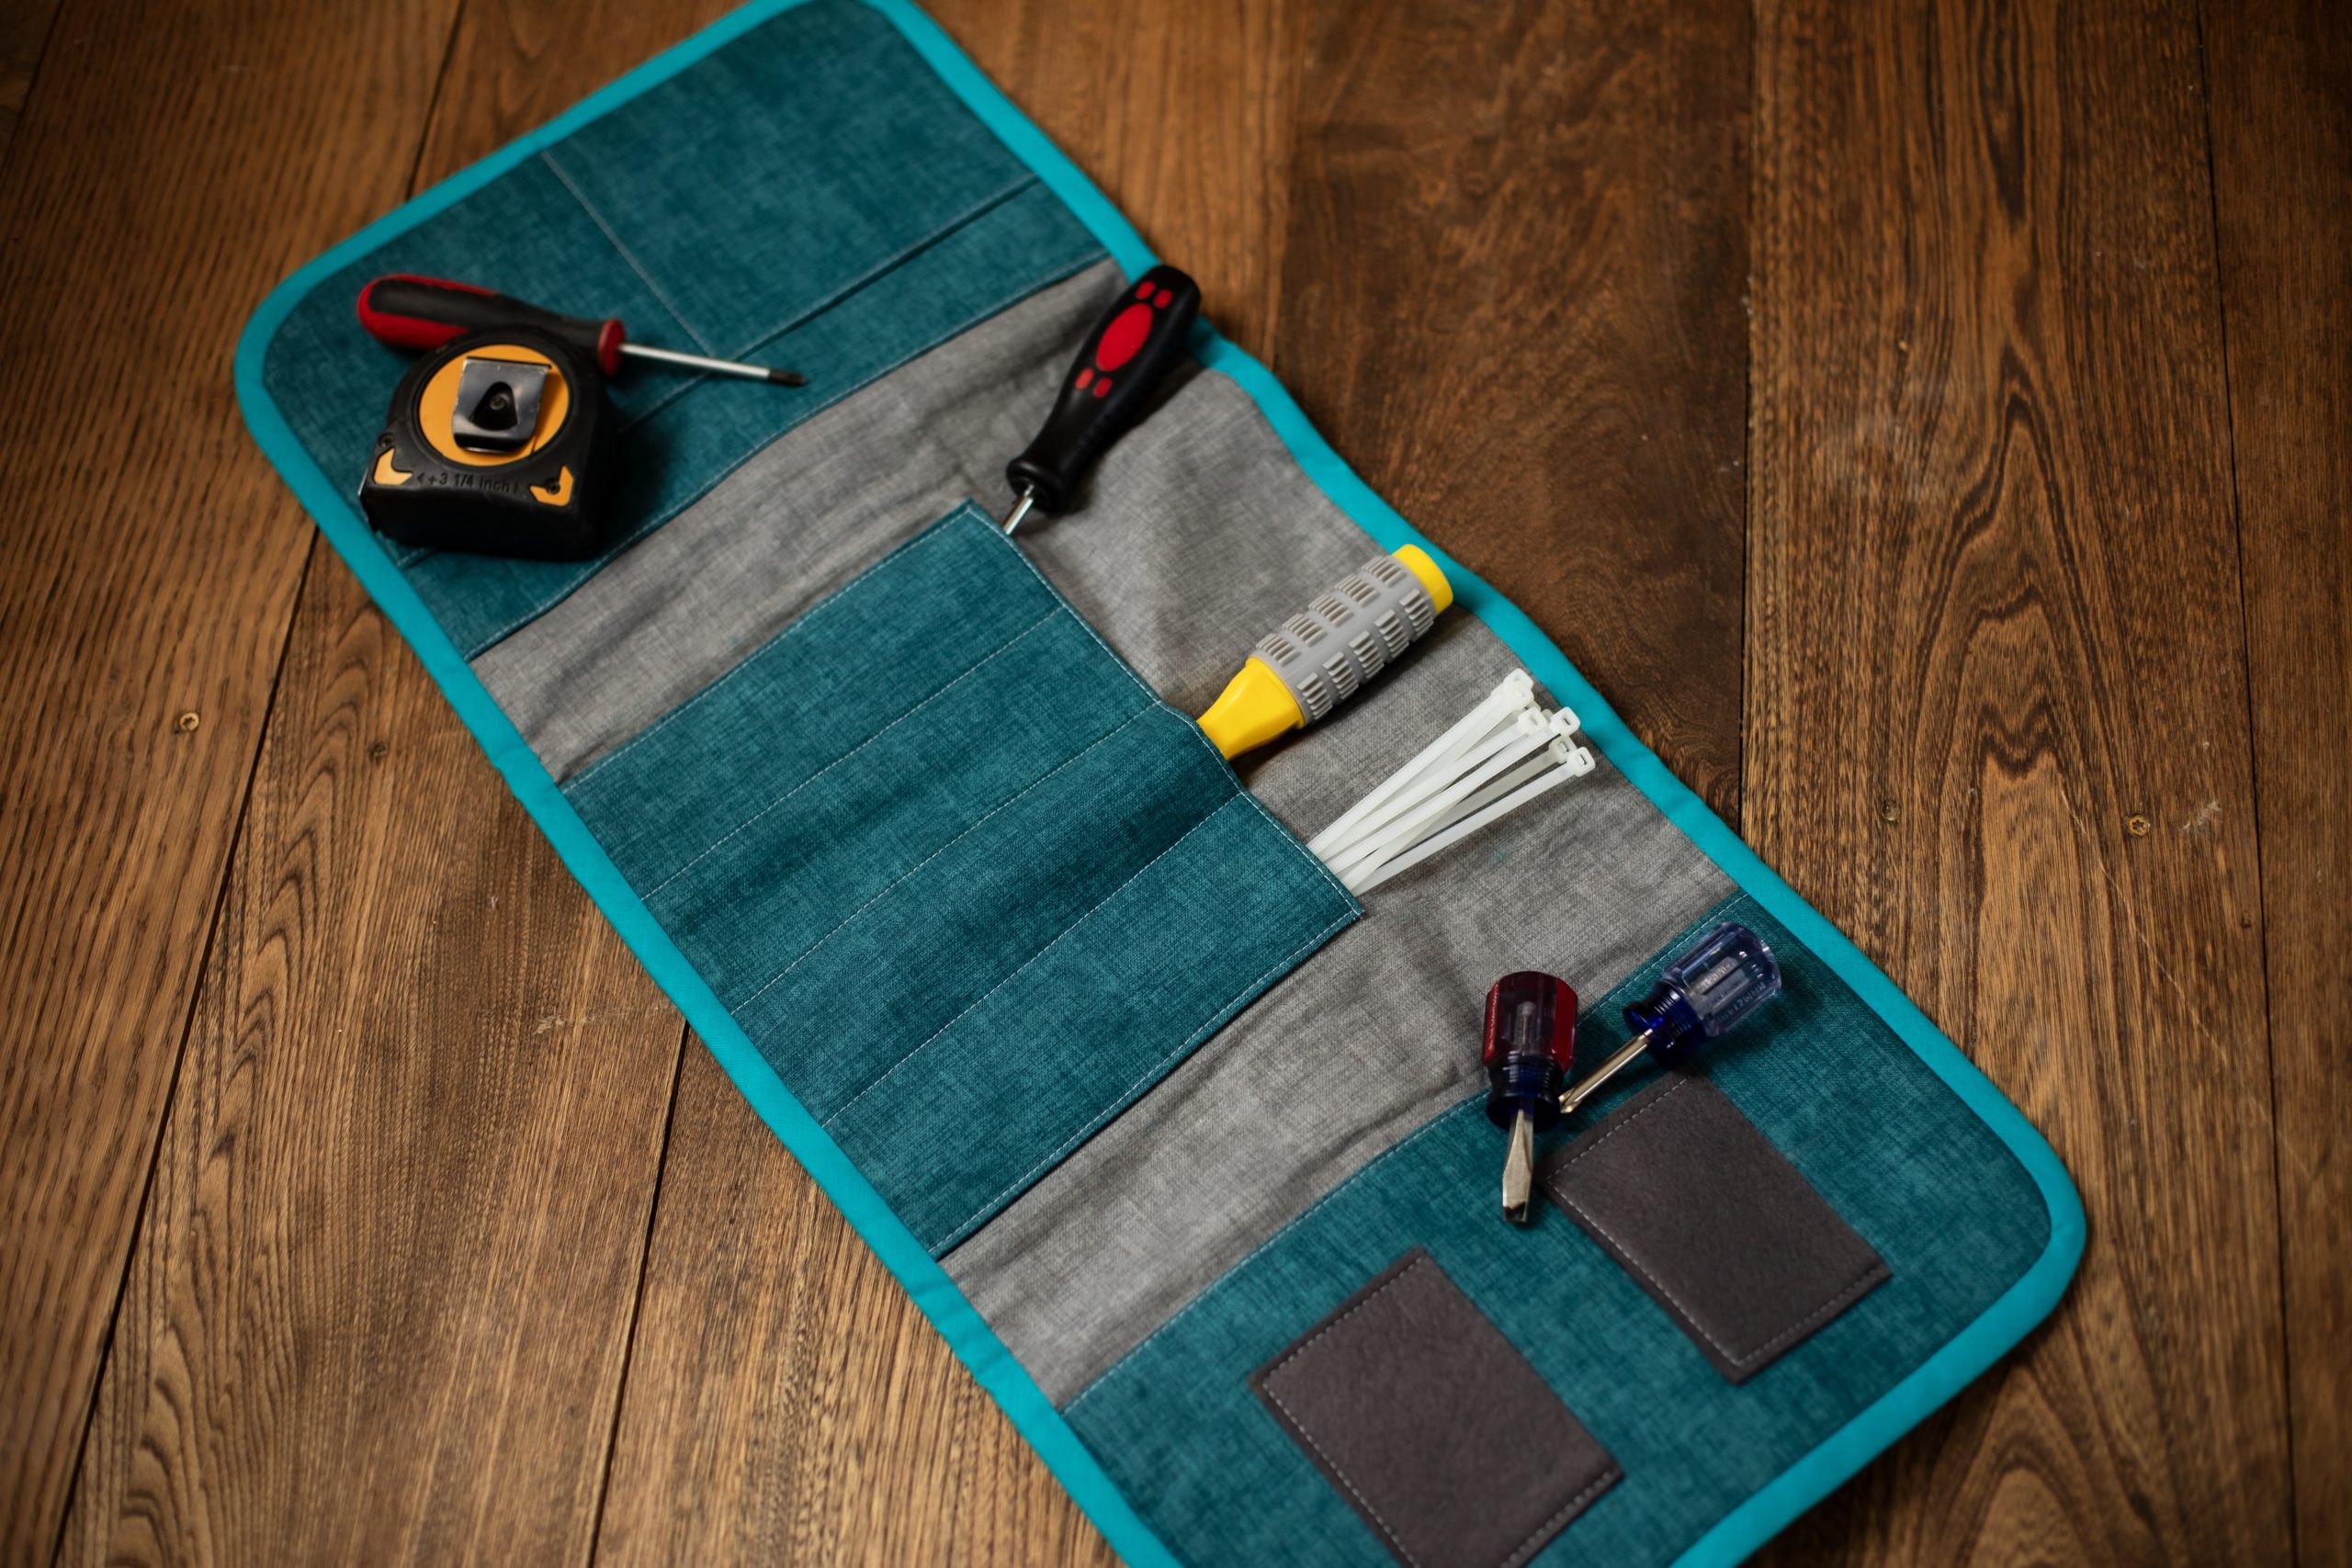
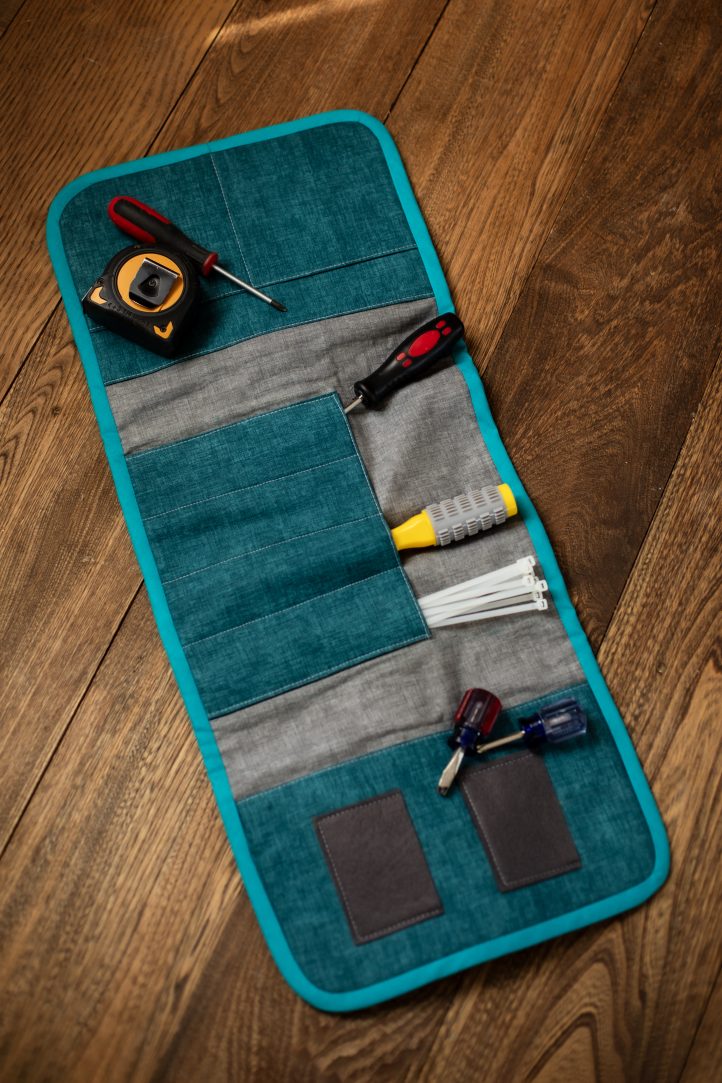
- To create the left-hand device pocket, cut a 13” x 16” rectangle from the mottled blue cotton and fold it in half with the right sides facing out, so it measures 13” x 8”. Cut a 13” x 8” piece of quilt wadding or felt and sandwich it between the fabric layers. Top stitch across the folded edge of the pocket, just as you did in Step 3. Next, make a second pocket in the same way, using a 13” x 12” piece of mottled blue cotton, folding it to create a 13” x 6” pocket. Layer this smaller pocket on top of the larger one, aligning the open edges. Stitch down the center of the smaller pocket to secure it in place, dividing it into two sections.

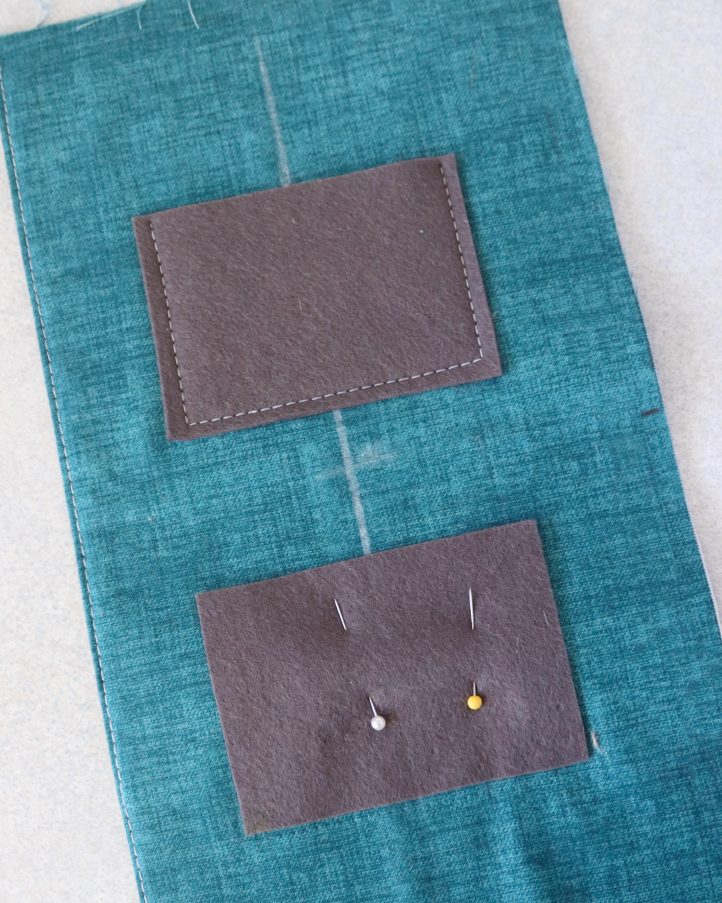
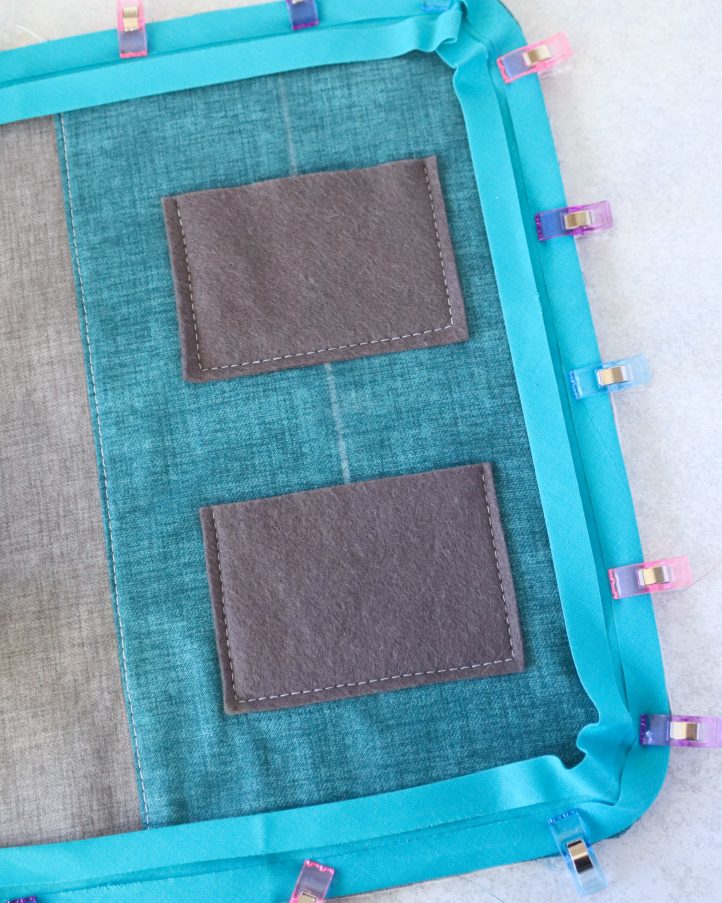
- Make another pocket using a 13” x 14” piece of mottled blue cotton. Fold it in half with the right sides facing out to create a 13” x 7” pocket. Press, then top stitch along the folded edge, just as you did in the previous steps. Next, use a ruler and chalk to mark the vertical center of the pocket. Cut two 4” x 2-3/4” rectangles from gray felt. Position them along the center line, spacing them evenly one above the other. Pin in place, then top stitch around the side and bottom edges of each with a 1/4” seam allowance, leaving the top edges open to create handy card slots.
- It’s time to construct your folder. Lay the lining fabric flat with the right side facing up. Position your pockets on top: place the double-layered device pocket on the left-hand section, and the felt card pocket on the right-hand section, using the marked dividing lines as a guide. Clip or pin the pockets securely in place. Stitch around the sides and bottom edge of each pocket using a 1/4” seam allowance to attach them to the lining.

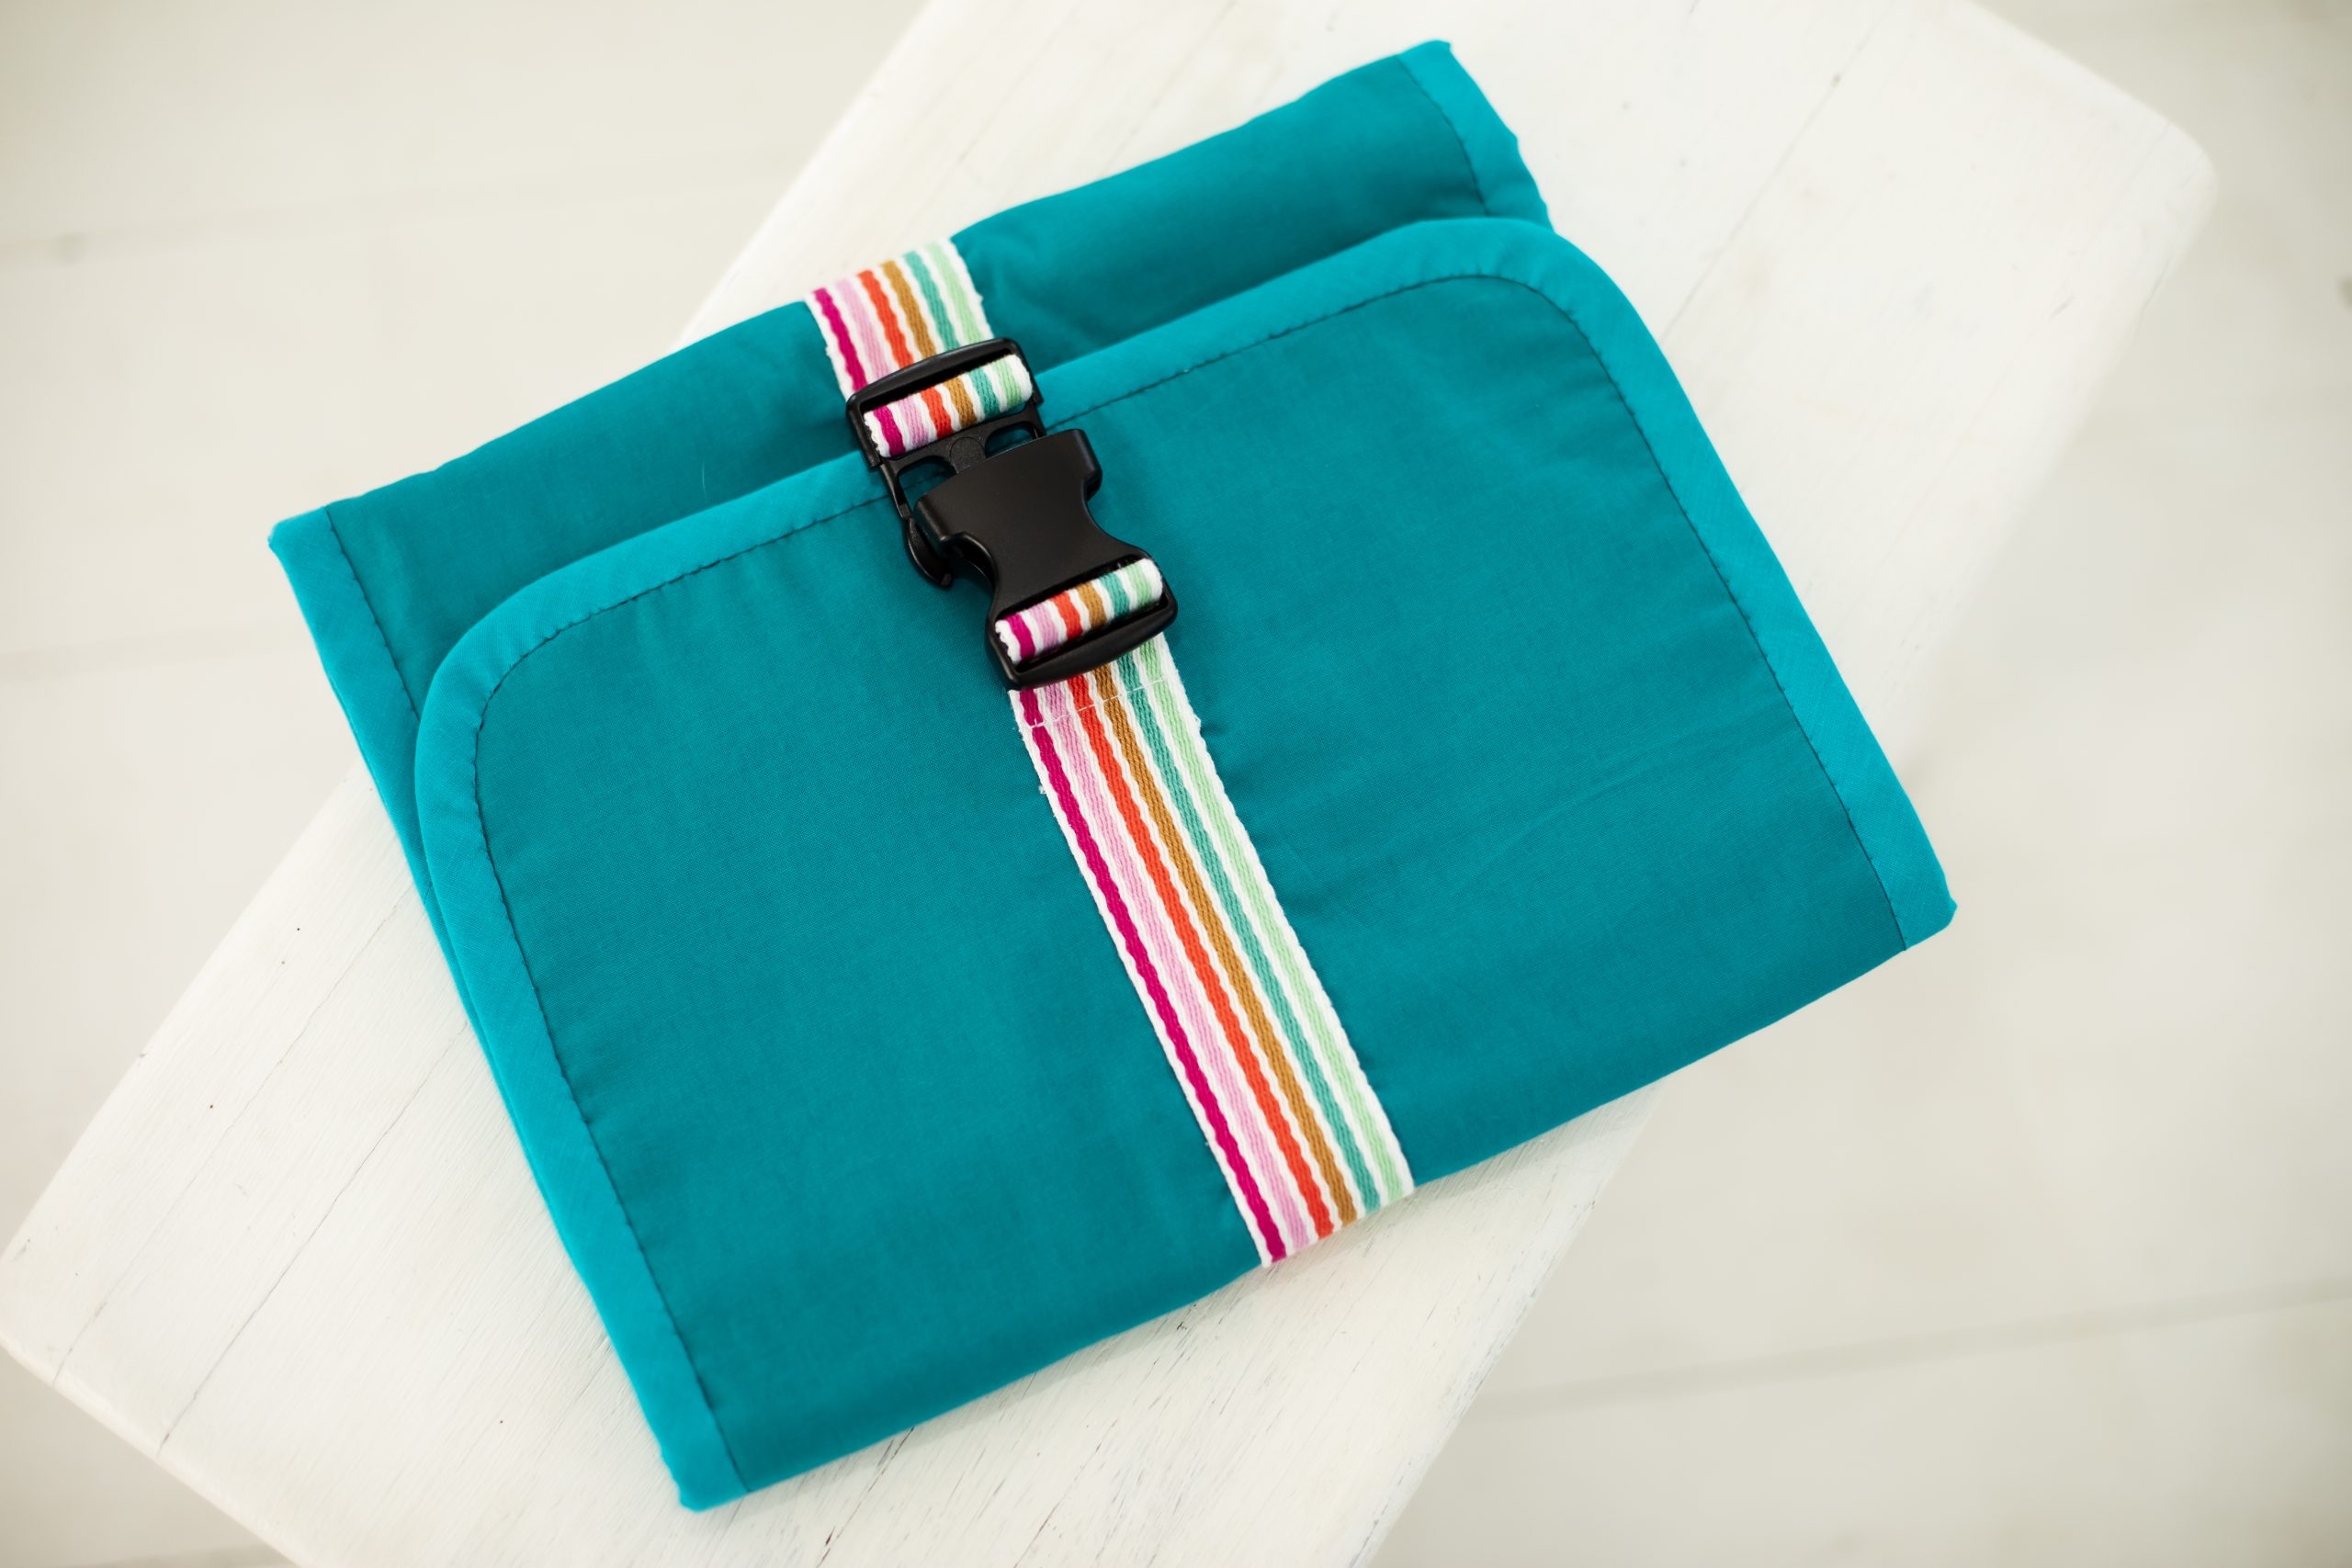
- Finish the raw edges of your folder by adding bias binding. Start by leaving a 3” tail of bias tape, then clip the strip along the edge of the folder, beginning at the center of one long side. Align the raw edge of the binding with the edge of the folder (or folded edge if using double-folded bias tape as shown here) as you go, continuing all the way around. When you return to the starting point, leave another 3” tail of binding free and trim off any excess. Stitch the binding in place using a 1/2” seam allowance, but don’t stitch the first and last 3” just yet. Bring the two loose ends together and mark where they meet. With the right sides facing, sew the ends together at this point, then trim the seam allowance and press it open. Now, stitch the joined binding to the edge to complete the seam. Wrap the binding around to the back of the folder and hand stitch it neatly in place. To close the wallet, start by folding the left-hand section over the center, then fold the right-hand section over the top of that.
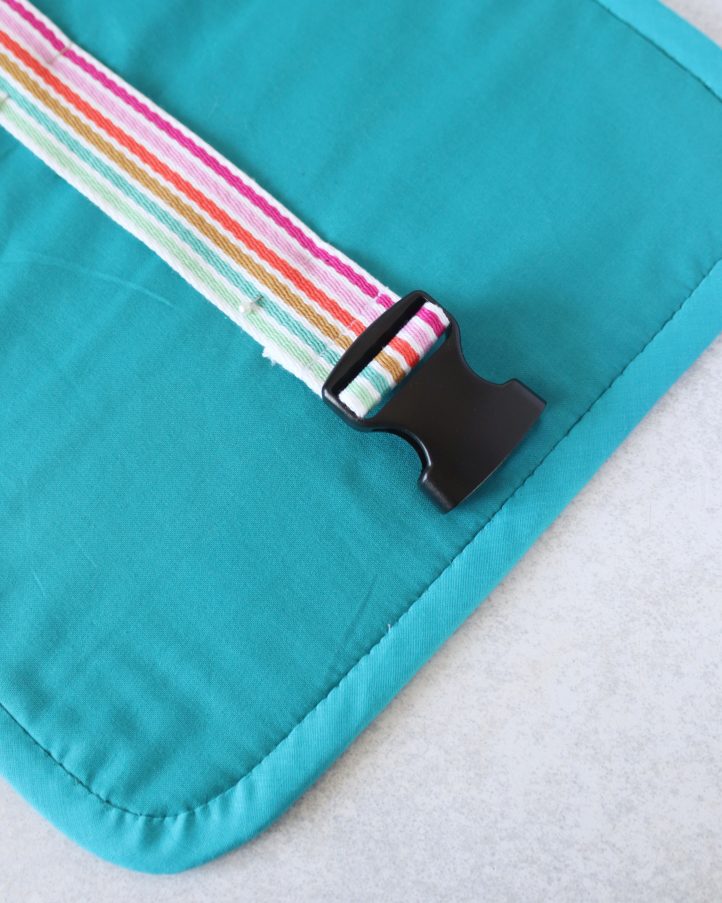
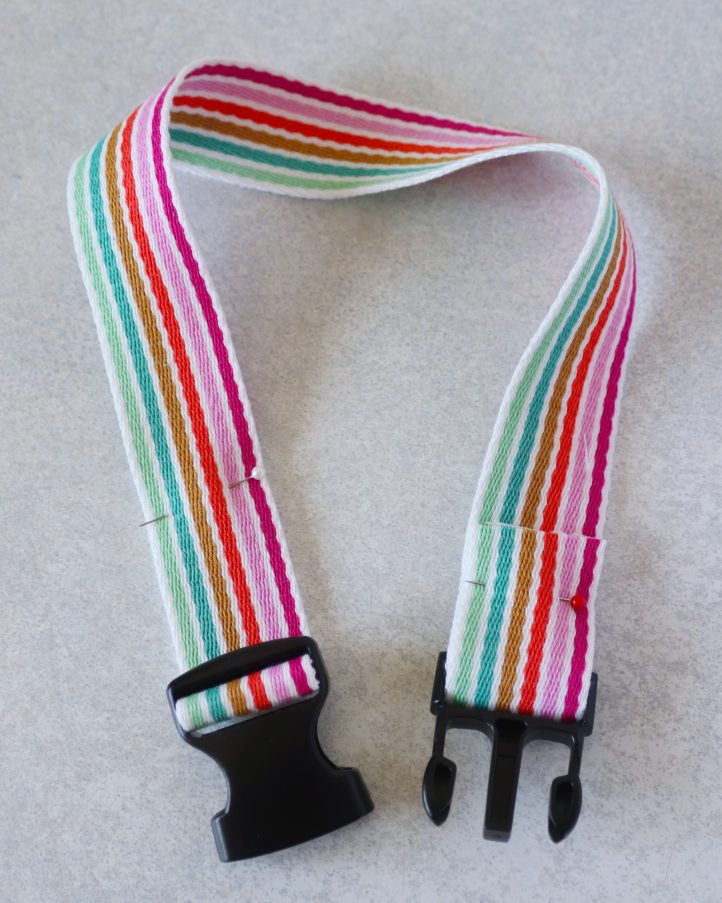
- Wrap a length of web strapping around the center of your folder, adjusting the tightness to your preference. Thread each end of a snap buckle onto the strap and pin it into position. Trim away any excess, then stitch across the folded ends to secure the buckle halves in place.
- Finally, wrap the finished strap around your closed folder and pin it into position along the center. Hand stitch along each long edge of the strap, securing it to the outer fabric and wadding without stitching through to the lining. Ideally, no stitches should be visible inside the folder when it’s open.