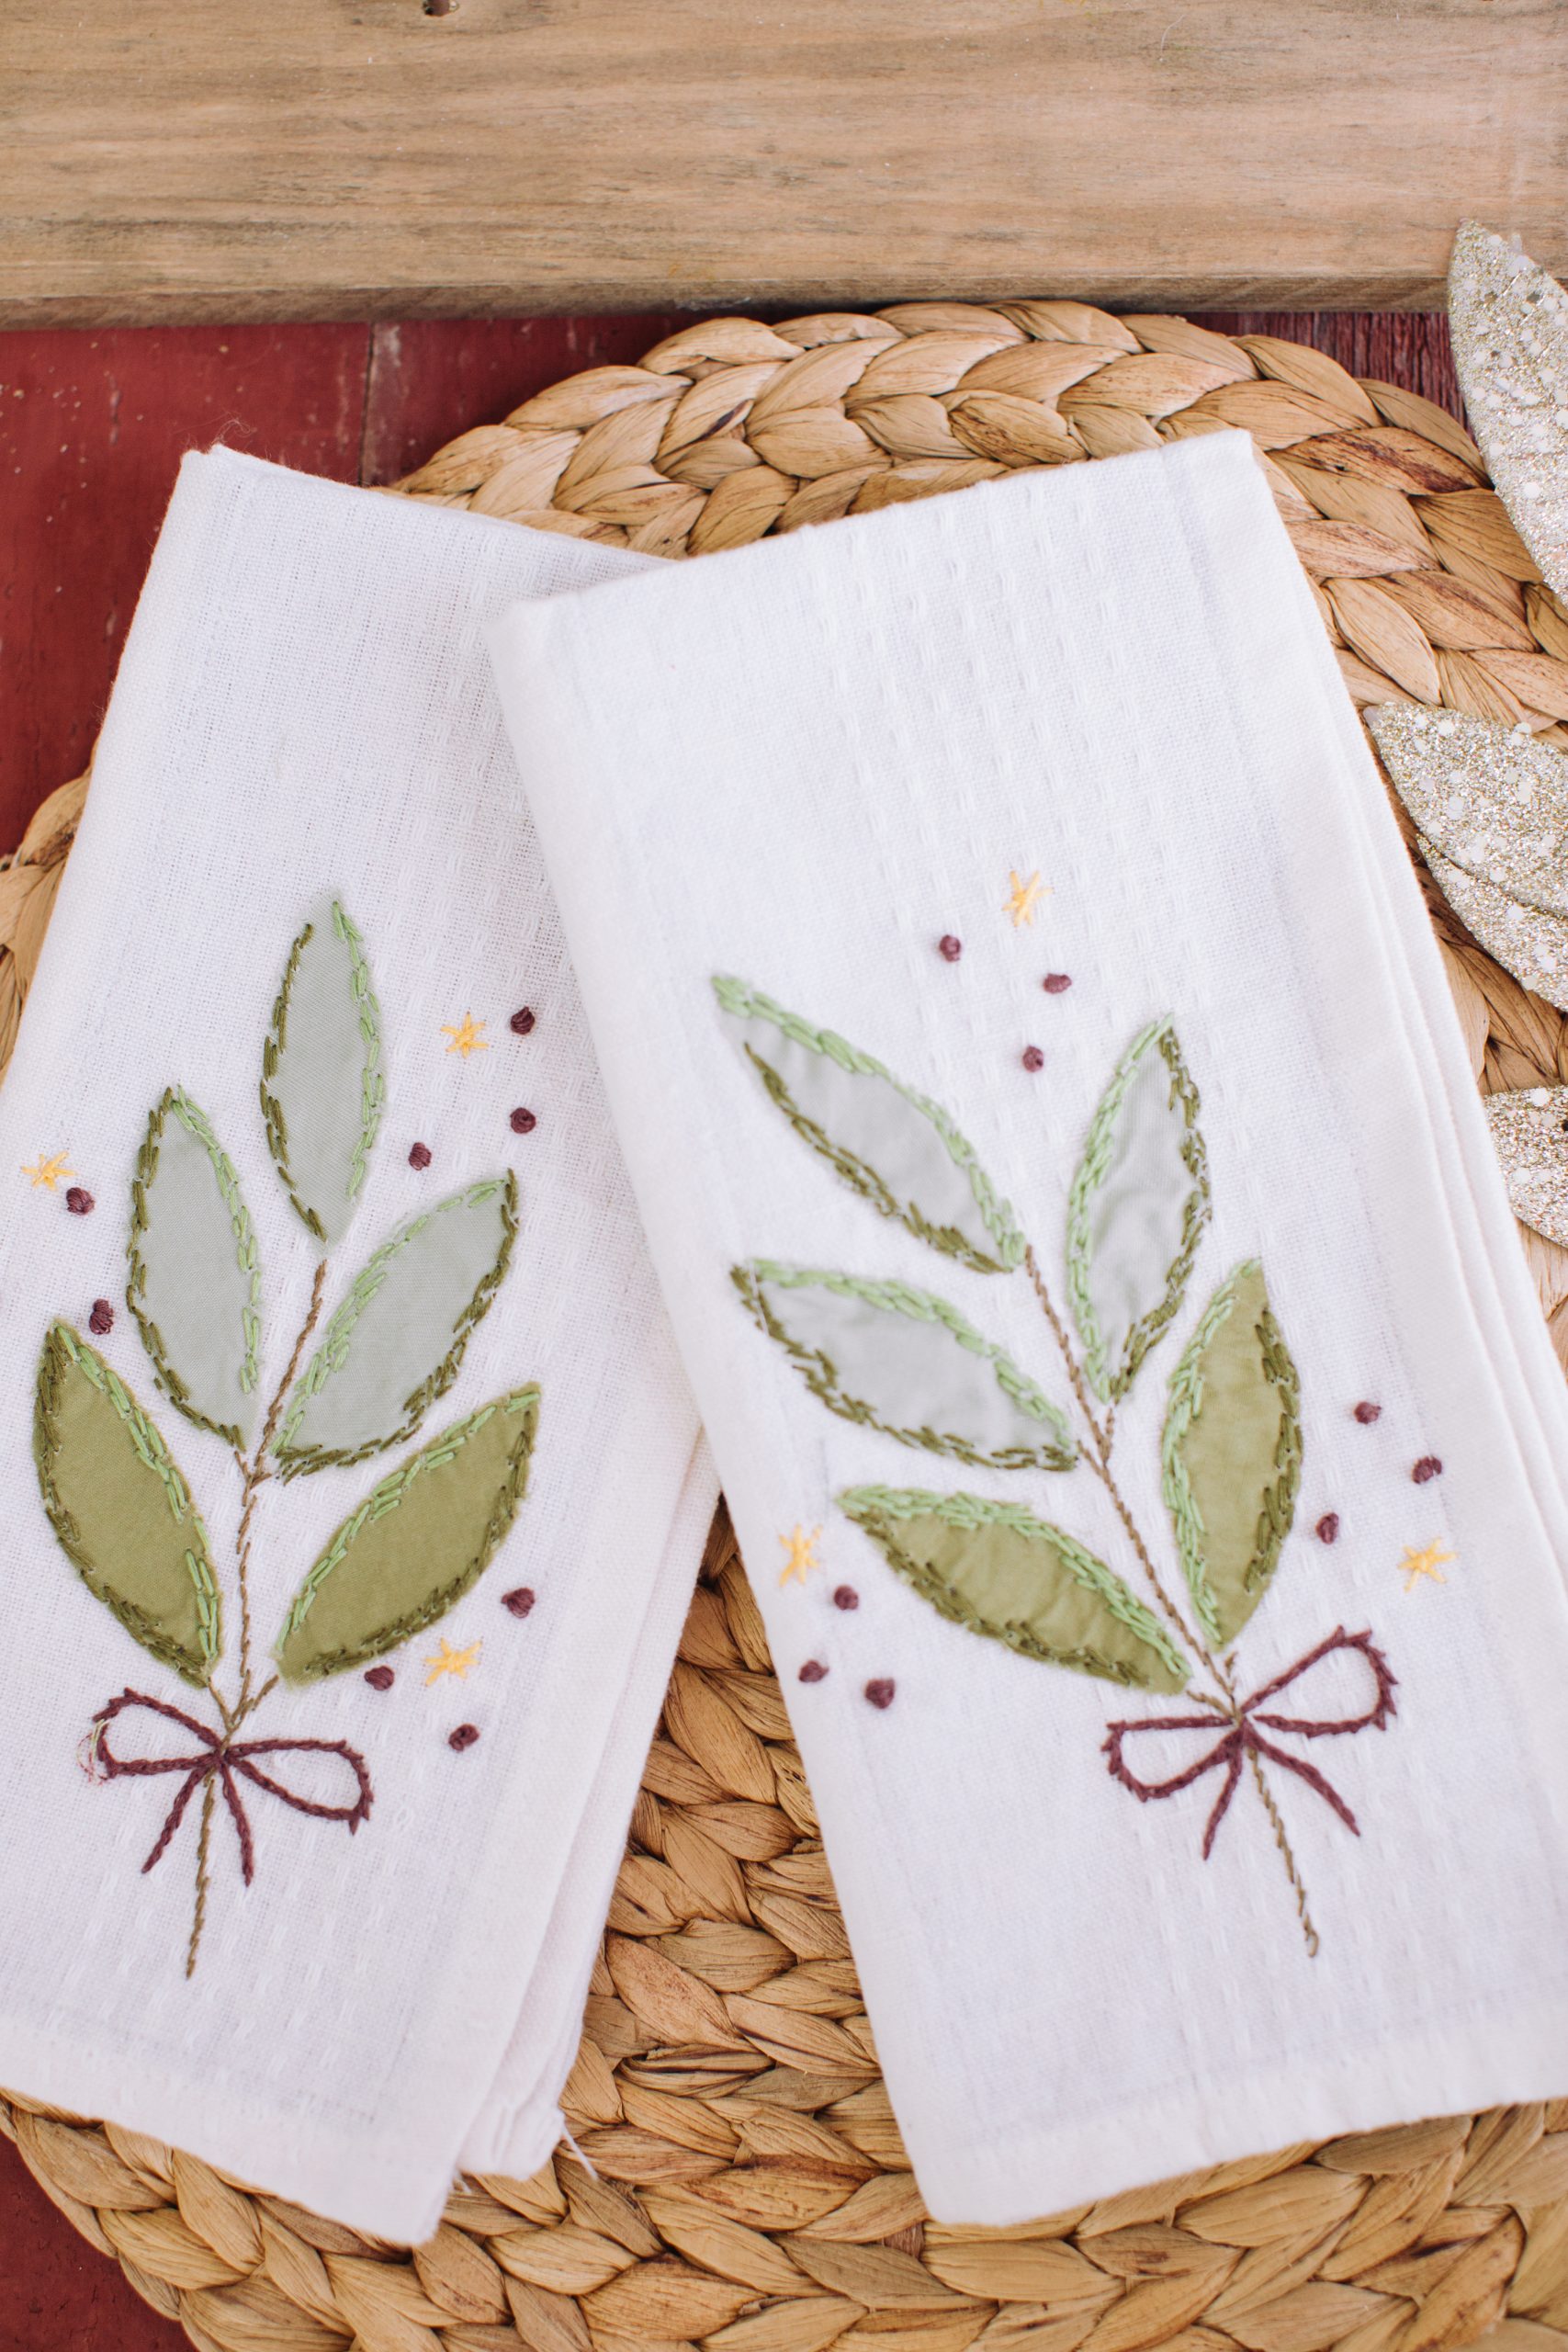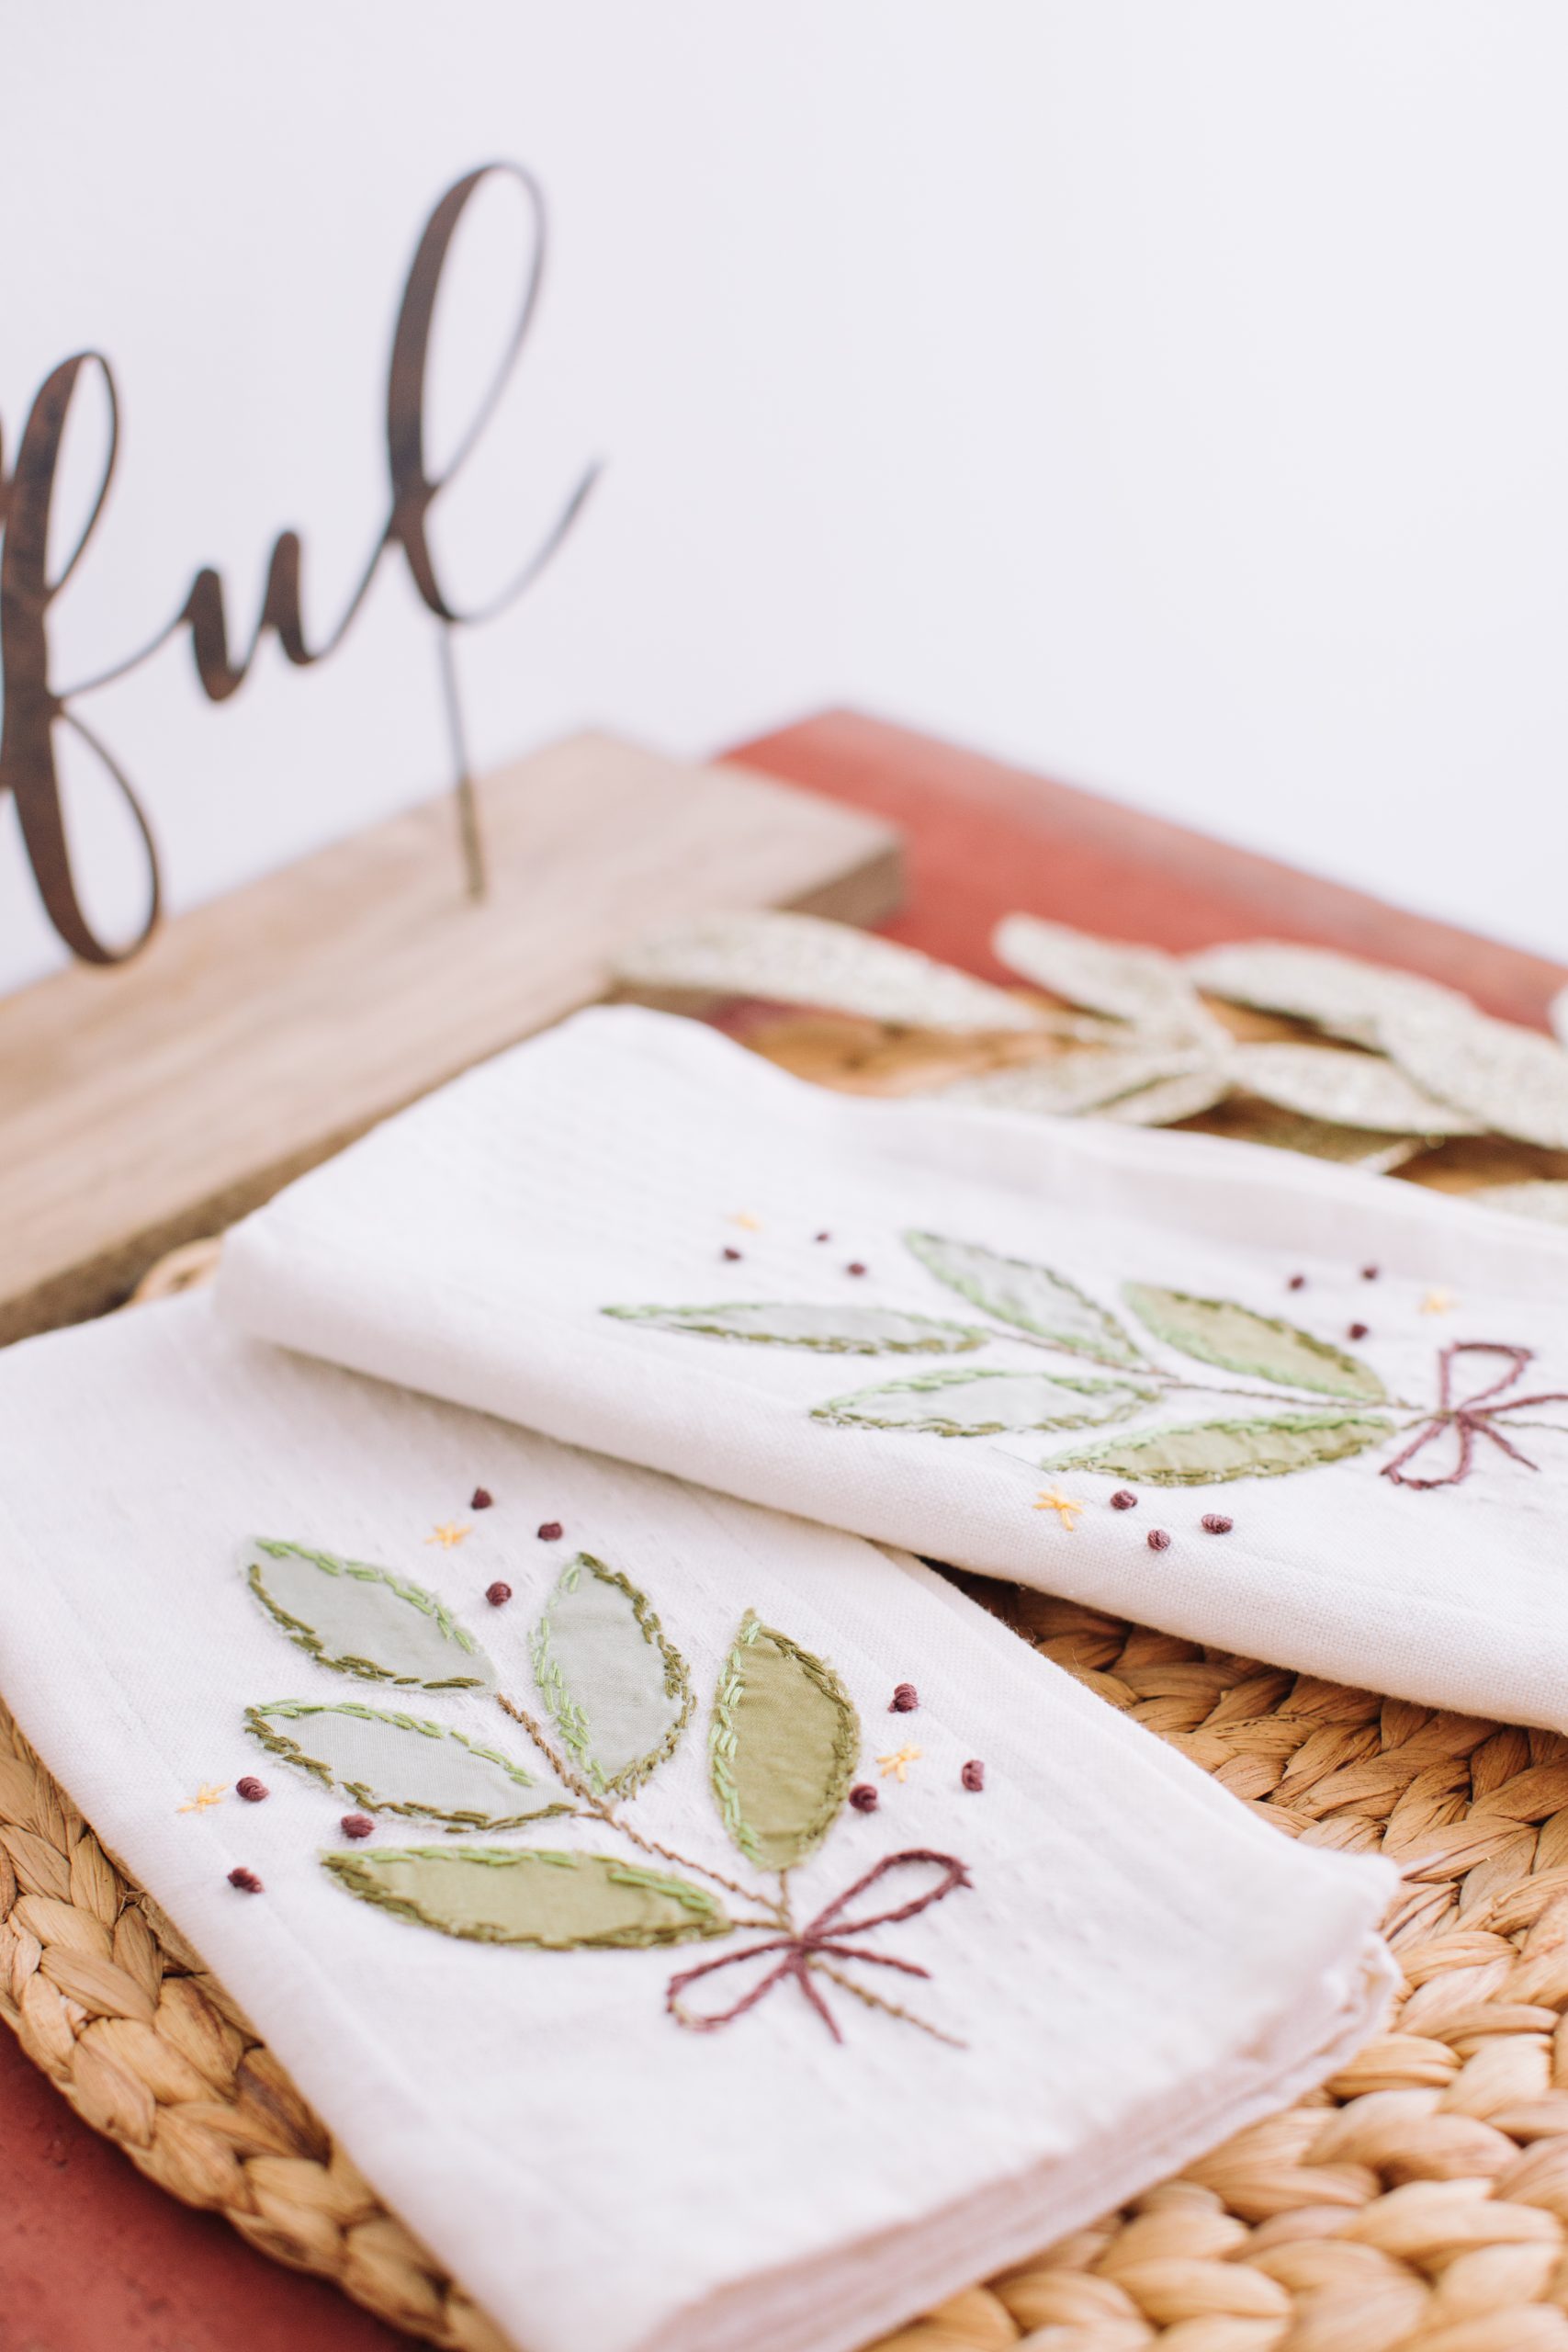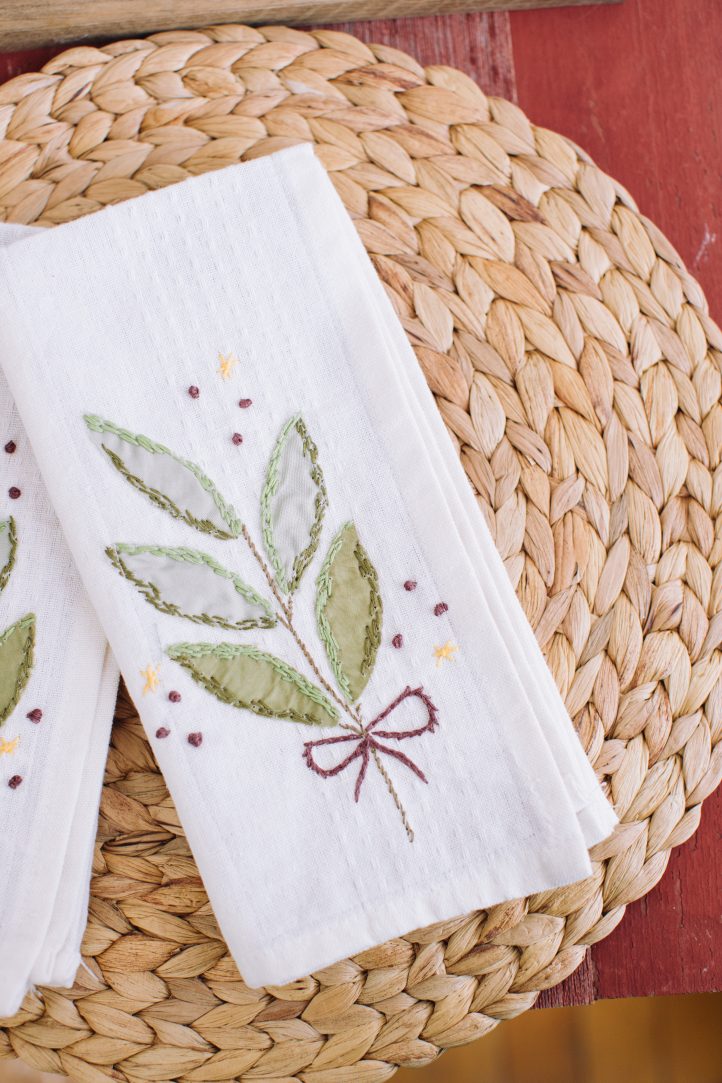
Prepared to get showered in compliments because these stylish holiday napkins are the perfect finishing touch for your Christmas dinner tablescape. Aimed at advanced beginners, this festive appliqué project uses bay laurel and bow motifs to give simple fabric napkins an elegantly embroidered touch. This Christmas embroidery pattern uses both the satin and split stitch and is finished with French knots and decorative stars.
Skill Level: Advanced Beginner
Finished Dimensions: Standard dinner napkins or 18” square
Stitch Techniques: Appliqué: Stay Stitch; Embroidery: Star, Satin, Split and Stem Stitch, French Knot
Materials (per napkin):
- Fabrics:
- Cut 5 – Bay Laurel Template leaves from cotton fabric scraps
- Cut 1 – 4” by 9” lightweight embroidery stabilizer
- Cut 1- 4 1/2” by 18 1/2” length of coordinating cotton print fabric (optional)
- PDF Template – This is located at the bottom of this page. Please see printing instructions below.
Special Notions and Templates:
- Embroidery needle
- Embroidery hoop
- Wax block (optional)
- Embroidery floss; colors shown are: stem brown, DMC 611; light green, DMC 3347; dark green, DMC 469; golden yellow, DMC 741; plum purple, DMC 315
- Lightweight fusible embroidery stabilizer
- Two to Four pack of standard cotton dinner napkins or hemmed fabric pieces measuring 18” by 18” square or similar
PRINTING INSTRUCTIONS:
Note: To download the template, click on the pattern download button at the bottom of the page. We recommend opening your pattern download using Adobe Acrobat.
Instructions:
CUTTING AND PREPARATION:
- Cut out one 4” by 9” square of lightweight embroidery stabilizer and fuse to the backside of the dinner napkin where the design will be applied.
- Fuse stabilizer according to manufacturer instructions. Once fused, flip the napkin right side up and affix into the embroidery hoop.
- Cut out five (5) Bay Laurel Template leaves from various green cotton fabric scraps. Apply fray check liquid according to manufacturer’s instructions to the edges of each leaf appliqué, and allow to dry.
- Use the Figure 1 diagram to lay out the leaves in a branch spray, or arrange over the stabilized area to your liking.
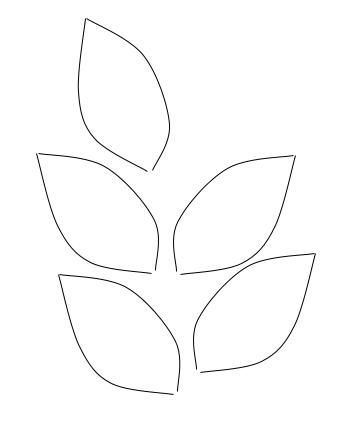
- Use a few dots of fabric glue, glue stick or long stay stitches to hold fabric leaves in place. See Fig 1. above.
- A Stay Stitch is a long single running stitch without a knot at the end of the thread, which allows the stitch to be easily removed when the permanent stitching has been added.
ADHERING THE APPLIQUE WITH THE SATIN SHADING STITCH:
- Using a length of the dark green embroidery floss divided into four (4) strands, bring the knotted end of the needle up from the backside of the napkin in the lower outside left of the first leaf as shown in Figure 1 above. For a thicker line of stitching, use more of the embroidery floss; for thinner lines of stitching, use less than four strands of embroidery floss.
- Insert needle into the leaf near the outer edge and pull embroidery floss through the appliqué and napkin front until taught.
- Bring the needle back up through the leaf appliqué directly beside the first stitch as shown in Figure 2 below.
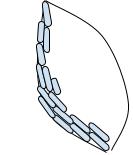
- Insert the needle back down into the leaf next to the first stitch near the outer edge creating the Satin Stitch border.
- The Satin Stitch is an embroidery stitch used to densely fill an area. Stitches come up and down with the needle directly beside the last stitch; however, lengths may be varied to fill the area as necessary.
- Keep stitches under 1/2” to prevent snagging.
- Be mindful not to pull the threads too tight, which may result in fabric puckering.
- Continue creating the Satin Stitches along the outer rim of the bottom of the leaf appliqué, staggering the length of the stitches to create a pleasing effect.
- Once you have sewn the Satin Stitch along the entire bottom edge of the leaf appliqué, bring the needle to the back of the appliqué and napkin and finish with a flat knot. Tuck any loose embroidery floss thread under a few of your stitches to hold it in place and trim away the excess.
- Switch to the lighter green embroidery floss on the needle and repeat the Satin Stitch along the top edge of the leaf appliqué to secure it in place. Remember to stagger the stitch length and depth toward the center of the leaf appliqué to add interest.
- Repeat the steps above until all of the Bay Laurel leaves have been secured.
STITCHING THE STEM STITCH DETAILS:
- Using a stem brown embroidery floss length, divide the strands into two sets of three (3) strands. Thread the needle and prepare for stitching by bringing the needle up from the underside of the napkin, beginning at the bottom of the top bay laurel leaf.
- Insert the needle back down into the napkin top in a short Straight Stitch approximately 3/8” from the beginning.
- Next, bring the needle back up through the napkin halfway along the last stitch directly to the right side of the thread to begin your Stem Stitch. See Figure 3 below.
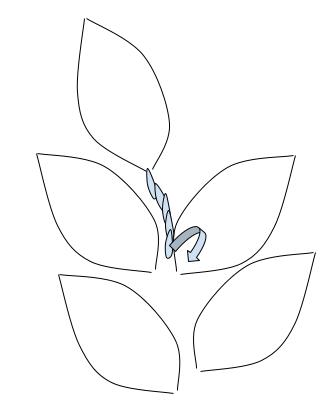
- The Stem Stitch is a stitch used to create a ropelike or braided bark effect. The stitches continue on a straight path but are slightly offset from one another as they work their way along their path.
- To control the breaking of the stitch around a tight angle, keep the stitch length under 1/8” long.
- Be mindful to always bring your needle up to the same side of the stitch as you work down the line.
- Insert the needle back down in line with the ending stitch above. Repeat the Stem Stitch method to complete the Bay Laurel sprig and connect all of the bottoms of the leaves to the central stem branch.
- Bring the stem down from the last set of leaves approximately 2” to finish, knotting the remaining thread in the back and tucking in any loose threads.
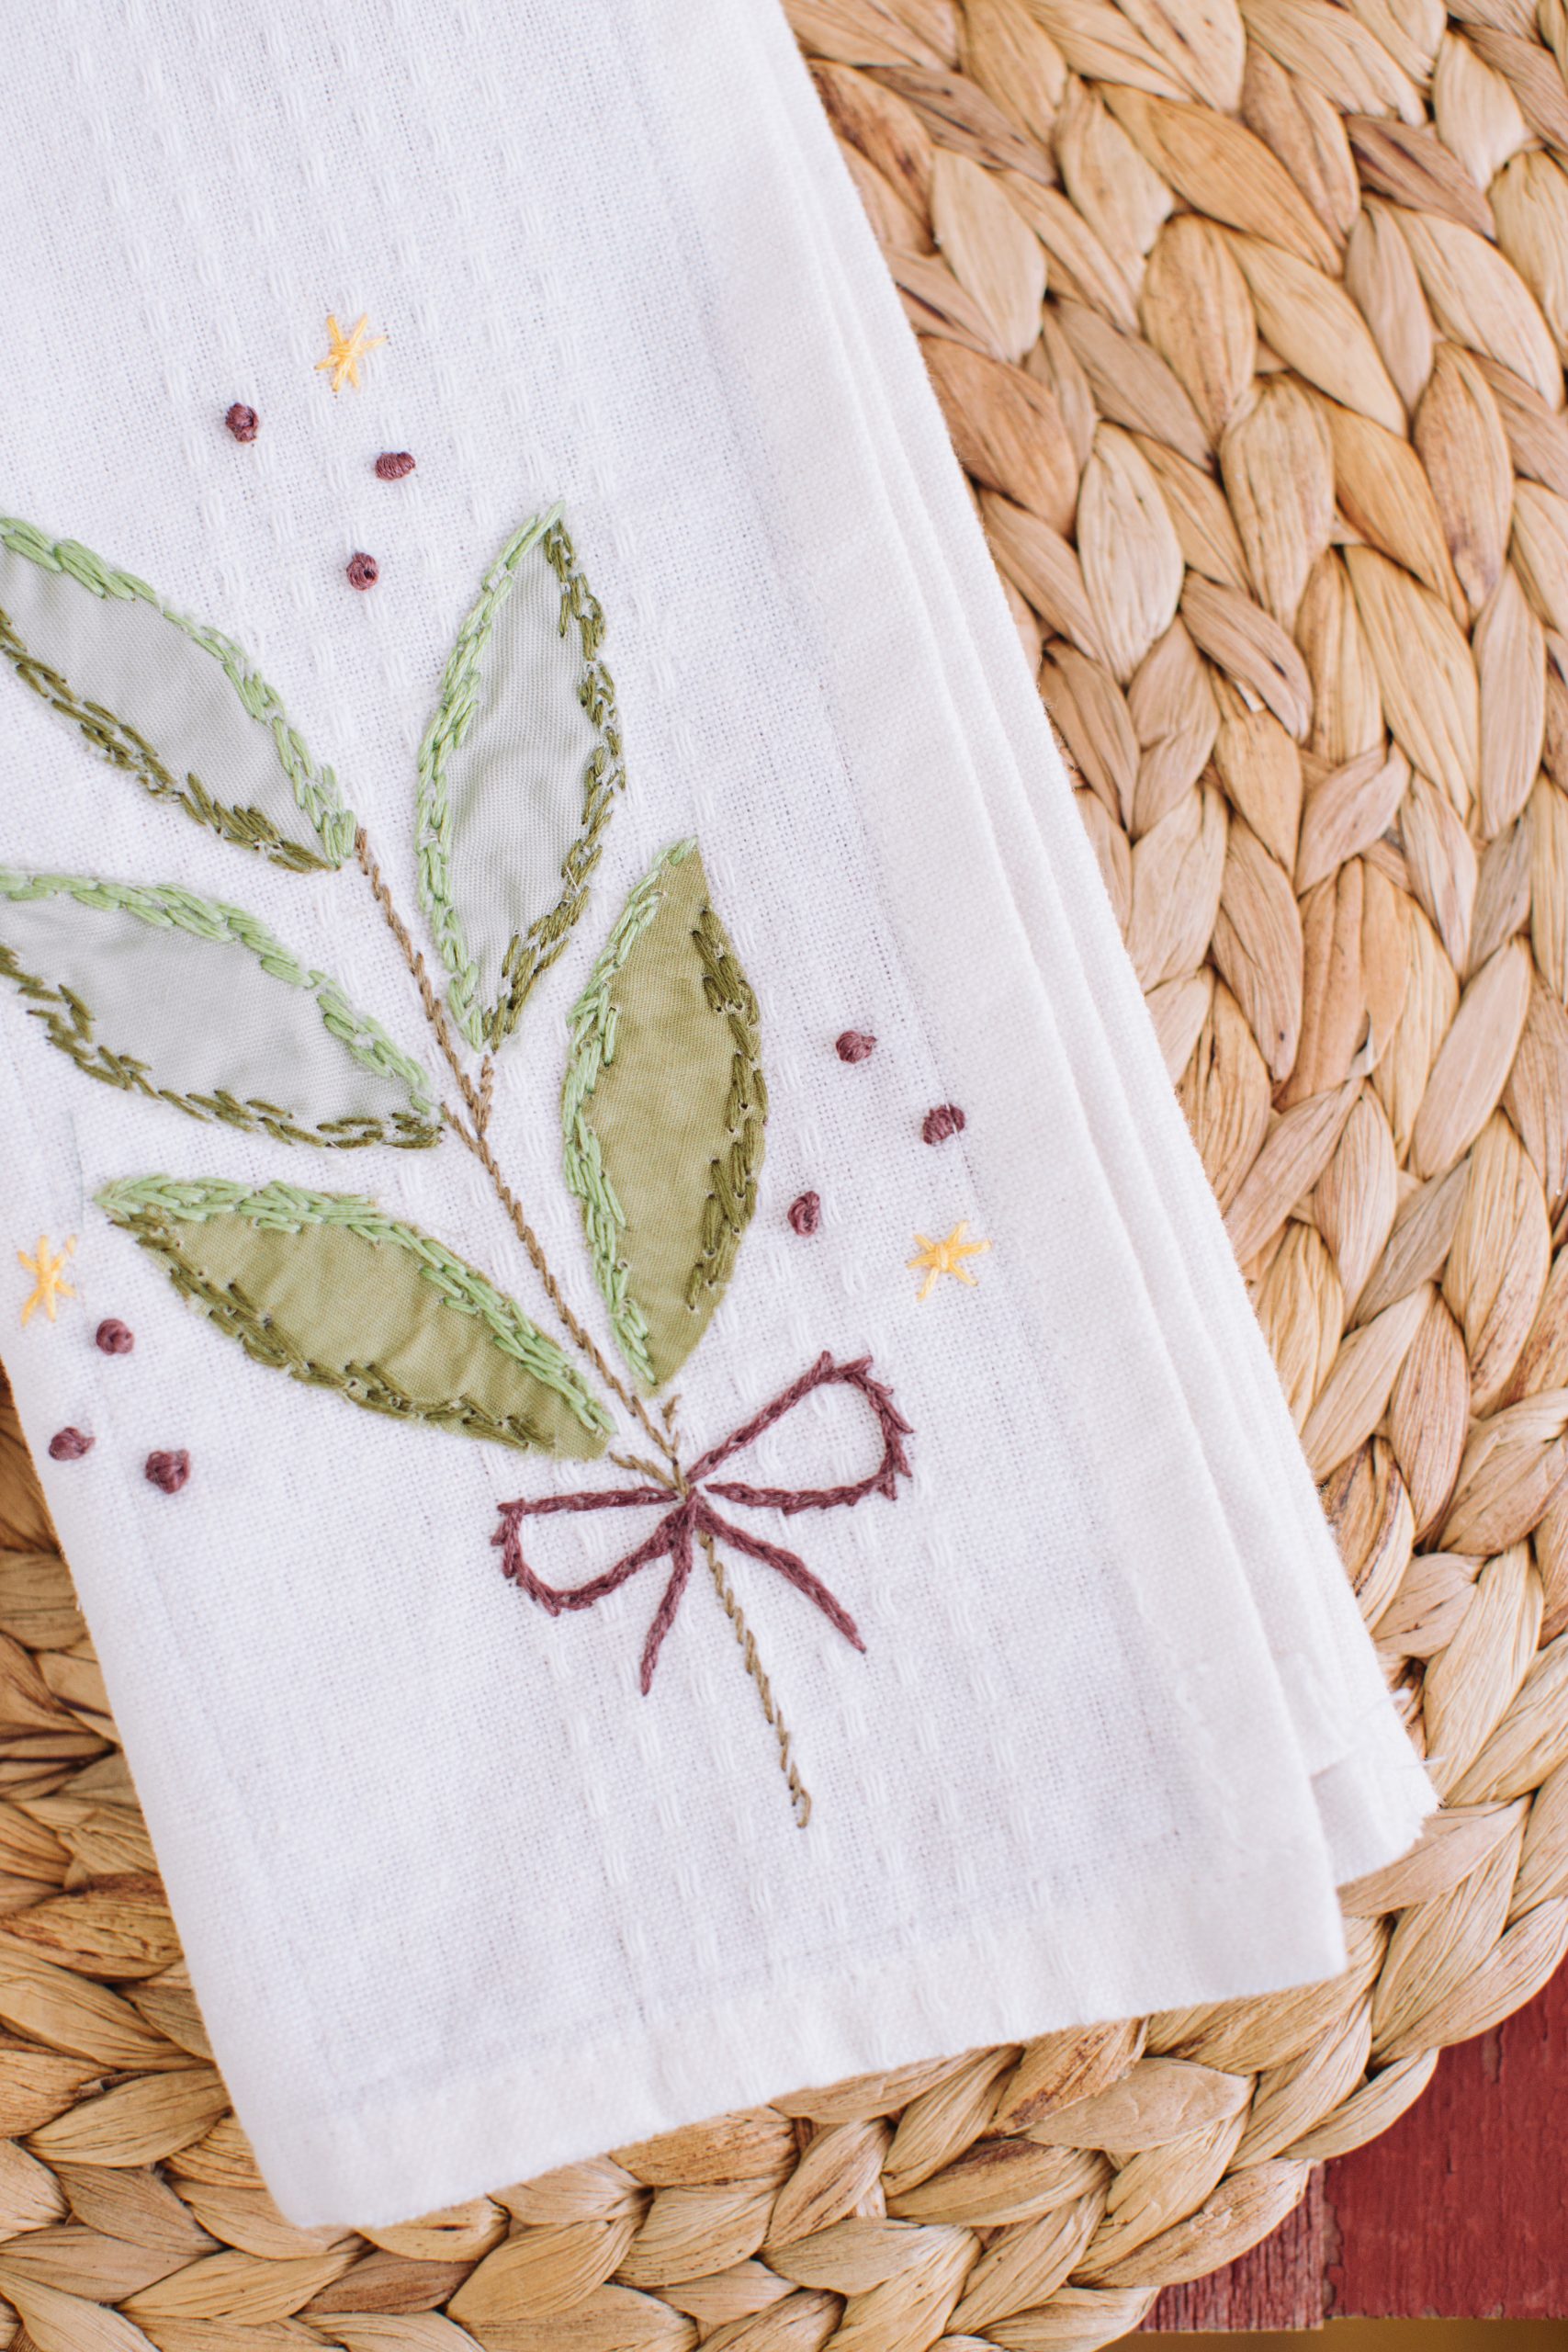
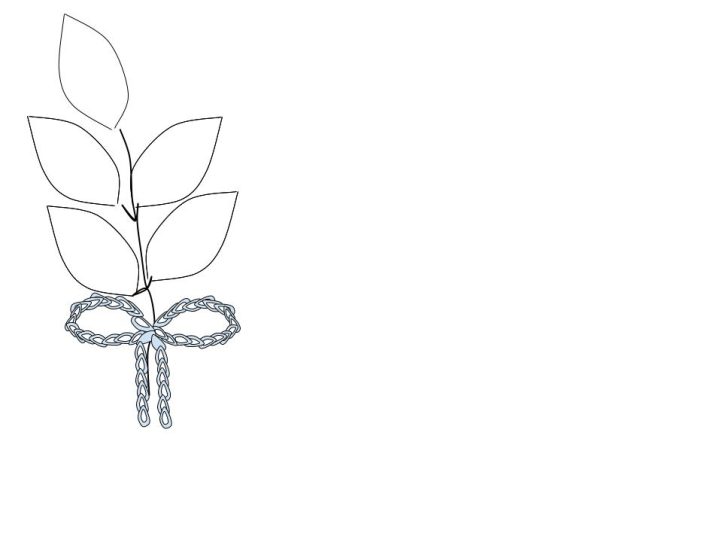
ADDING THE SPLIT STITCH RIBBON DETAIL:
- Using a full six (6) strand section of plum embroidery floss, thread the needle, prepare the knot and bring the needle tip up through the backside of the napkin to the right side of the stem directly below the last leaf.
- Insert the needle heading right back down into the napkin to create an approximate 1/4” length stitch.
- Now, bring the needle back up through the stitch in the center dividing the strands of embroidery floss evenly to either side of the needle as shown in Figure 4a below.
- Insert the needle back down into the napkin approximately 1/4” from the spilt to complete the first Split Stitch or Chain Stitch.
- The Split or Chain Stitch creates an effect where the threads appear to be linked because the strands of floss are split as the needle comes up between them.
- To control the breaking of the stitch around a tight angle, keep the stitch length under 1/8” long.
- Be mindful to bring the needle up through the strands evenly to create a balanced stitch each time.
- Continue the next link of the stitch by bringing the tip of the needle back up through the middle of the previous stitch and placing the needle back into the napkin approximately 1/4” forward from the insertion point.
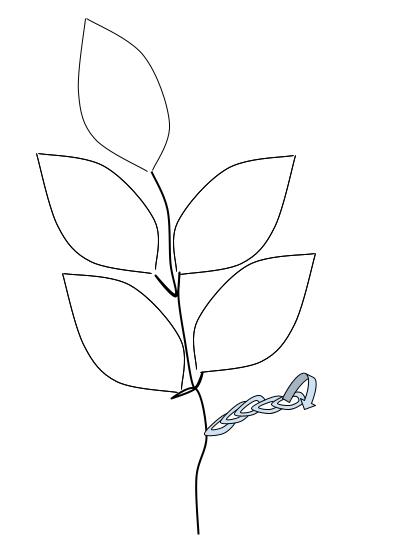
- To make the shape of the ribbon, create approximately five (5) Split Stitches to the right at a slight upward angle as shown in Figure 4a before beginning to turn downward on the sixth (6) stitch.
- Continue stitching down and slightly back toward the stem for five (5) stitches, then begin turning your stitches up and back to the base of the stem to complete the first loop of the ribbon. See Figure 4b below.
- Repeat Steps 6 and 7 to mirror the loop on the left side of the stem.
- To create the tails of the ribbon, continue the last chain from the left side loop over the stem at the bottom of the laurel sprig, and angle it slightly down to the right.
- Continue stitching slightly down and to the right for five to six stitches.
- On the sixth stitch, either cut and knot the threads or bring the floss back up through the previous tail from behind and begin again from the center of the ribbon outward and slightly down and to the left to complete the remaining ribbon tail.
- Finish the final stitch with a knot on the backside of the ribbon tail, tucking any loose threads under previous stitches.
ADDING DECORATIVE STAR AND FRENCH KNOT STITCHES:
- To create small clusters of accent stitches, begin by bringing a length of the plum floss divided into four strands, up through the back of the napkin to the left side of the Bay Laurel Sprig.
- Turn the needle slightly toward the left and wrap the embroidery floss thread four times around the length of the needle. Pull only so they are secure and flat against the needle body, do not pull too tight.
- Next, turn the wrapped needle down into the top of the napkin just slightly over from where the needle came up and begin to pull the needle down into the back of the napkin allowing the wrapped threads to side up the needle and remaining floss as you pull, creating the French Knot.
- The French Knot is a detailed stitch that creates a small knot of thread that rests on top of the fabric.
- To control twisting and premature knotting of the threads, use your non-dominant hand to gently hold and guide the threads as you pull the needle with the dominant hand. Note that coordination of this stitch may take a bit to master, so a practice run or patience to rip out unwanted stitches will be required.
- If the knot is pulling through without catching, make sure to check that the threads are being wrapped from the eye of the needle downwards.
- Continue to the next French Knot by bringing the needle back up through the back of the napkin approximately 1/2” away and slightly at an angle from the last knot and repeat the steps above to complete the French Knot.
- Finish the French Knot cluster by creating a third knot approximately 1/2” away from both prior knots and angled in between each to create a triangle effect. See Figure 5 below.
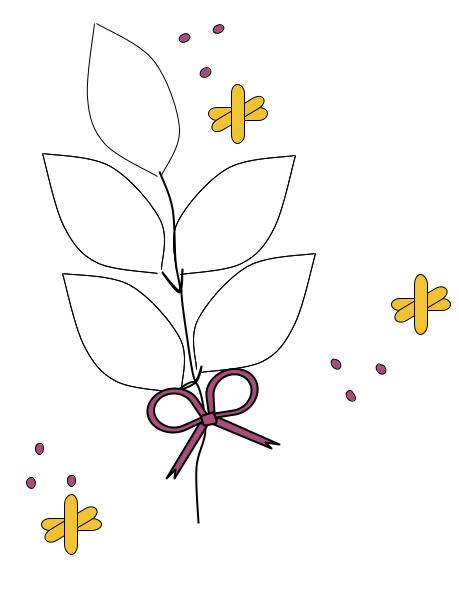
- Complete two (2) additional French Knot clusters to the center top and right side of the Bay Laurel Sprig.
- To create a Star Stitch, begin by inserting the needle up from the back of the napkin threaded with a length of three (3) strands of embroidery floss in the golden color.
- Insert the needle back into the napkin straight up from the starting point and approximately 1/2” away creating a long Straight Stitch.
- Now come back up from the underside of the napkin and insert the needle approximately 1/4” away from and perpendicular to the first stitch.
- Pull the threads through and insert the needle back down into the napkin approximately 1/2” to the other side of the first straight stitch, making sure to cross perpendicularly over the top, making a plus sign shape.
- Repeat the step above, but this time, insert the needle so that the stitch crosses over the center of both former stitches and divides one section of the plus sign in half. See Figure 5 above.
- The Star Stitch is a detailed stitch that creates a simple star shape from three overlapping stitches.
- The order of the placement of the stitches is not important, but care should be taken to make them relatively even in length.
- Note a small stitch can be made to just cross over the central intersection of all of the threads to help hold the longer lengths of stitching in place.
- Complete two (2) additional Star Stitches in the clusters to the center top and right side of the Bay Laurel Sprig.
FINISH THE NAPKIN:
- To finish the back of the Bay Laurel Spring Napkins and seal in the embroidery threads, knots and stabilizer, prepare a length of coordinating cotton fabric measuring 4 1/2” by 18 1/2”.
- Using a hot iron, press all sides of the cotton panel 1/4” to the wrong side to create a small hem.
- Position the cotton panel with wrong sides together onto the back side of the napkin aligning up the longest side of the cotton with the longest side of the napkin and pin in place to hold.
- Using a thread that coordinates with the color of the napkin, top stitch 1/8” from the edges around the entire perimeter of the cotton panel to secure it in place and complete the napkin.