
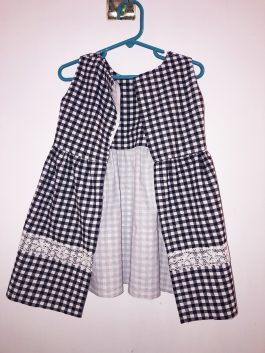
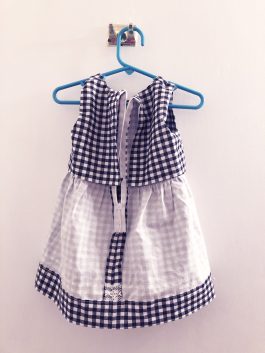
No pattern says “spring is here!” quite like gingham. Design a classic baby dress in chic black and white gingham with this easy sewing pattern. This baby dress pattern features a simple silhouette with a back zipper and can be trimmed in ribbon or lace. A perfect option for Easter Sunday, this spring dress pattern also has a fully lined bodice and is available in three sizes (3, 6, and 12 months). Make your grandbaby a brand new dress to welcome springtime with this adorable baby dress pattern.
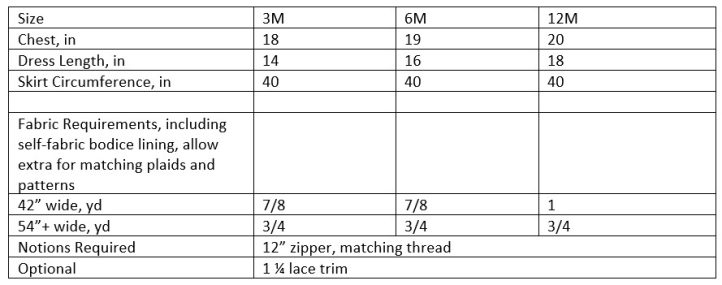
Measurement Chart (Including Materials Needed):
Note: You will also need to print off the PDF pattern. This is found at the bottom of the page. Please see printing instructions below.
PRINTING INSTRUCTIONS:
To download this pattern, click on the pattern download button at the bottom of the page. We recommend opening your pattern download using Adobe Acrobat.
DESIGNER NOTES:
This pattern is for a simple sleeveless dress with zipper back. The bodice front and back are fully lined. You have the option to use fashion fabric for lining or a different lining fabric. 3/8 yard of lining required if using separate fabric. Optional 1 1/4 yard lace trim.
Cutting Instructions:
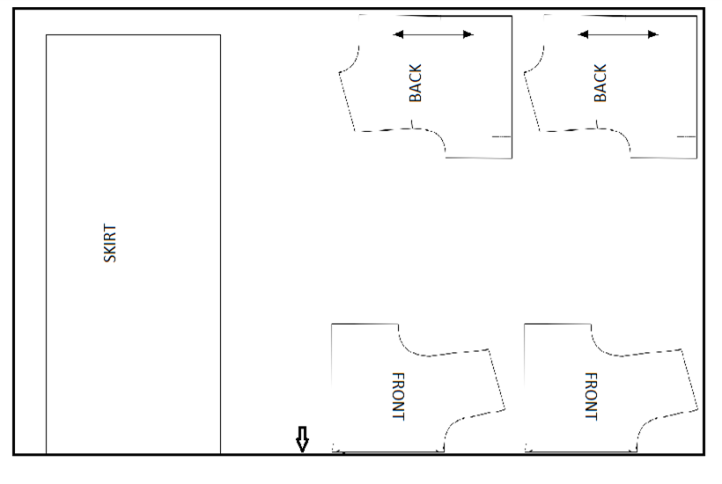
For the skirt, cut a rectangle, 41 1/4” wide, 10 1/2” length for size 3M, 11 1/2” for 6M and 12 1/2” for size 12M. Fig. 1 below is the 45” cutting layout and Fig 2 is 54” and wider cutting layout (see layout images below).
Sewing Instructions:
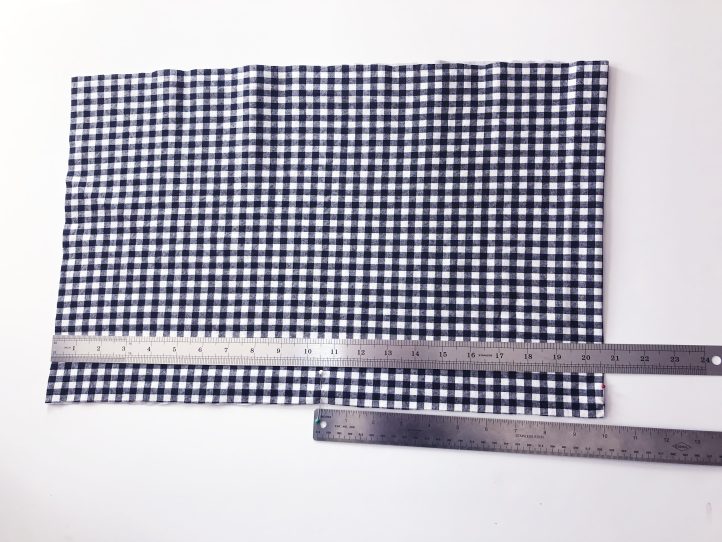
- Notch the center of the rectangle on long edge of skirt piece; this notch lines up with the center front of the bodice. Cut 2 notches 10” away in either direction from the center. These line up with the side seams of the bodice (see pins below the top ruler in the photo below).
BODICE:
- All seam allowances are 5/8”. Stay stitch 1/2” front edge on neck and armhole edges.
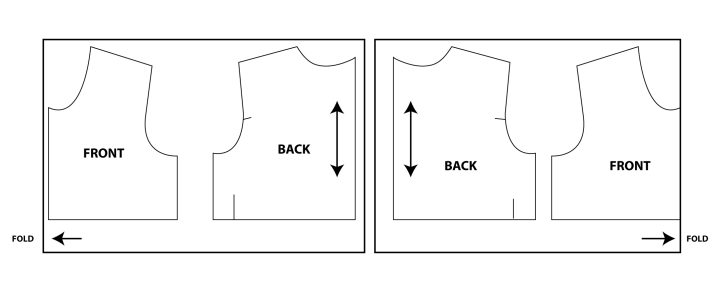
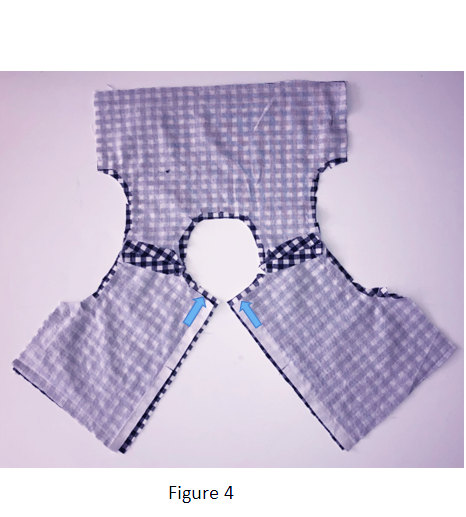
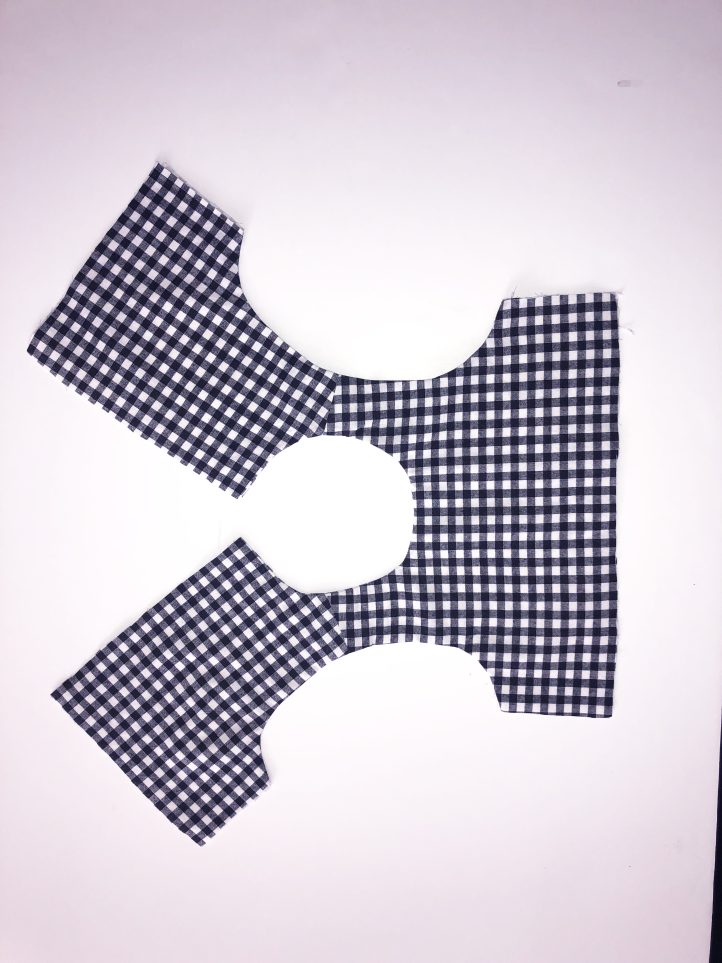
- With right sides together, sew the bodice front and back at the shoulder seams for both the lining and the fashion fabric. Press seams open. Pin the lining and fashion fabric bodices right sides together and sew the armhole seams together. Leave 1 1/4” (2 seam allowances) at the beginning and end of the neck seam (see the arrows in the photo below), unsewn for zipper insertion. Clip curves and trim seams, then turn the bodice right side out and press.
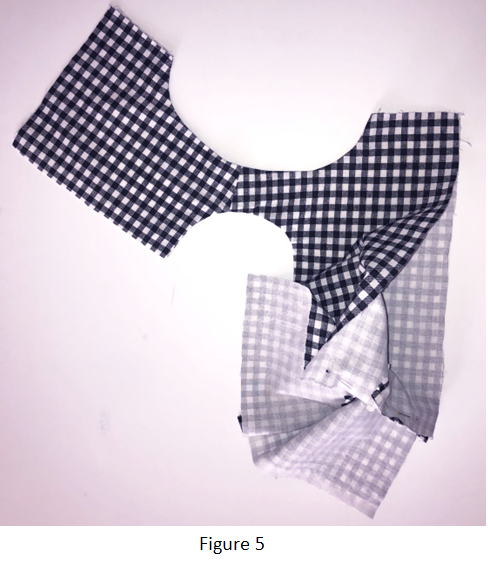
- Turn right side out and press.
- Pin side seams right side of fabrics together, and sew side seams.
SKIRT AND BODICE:
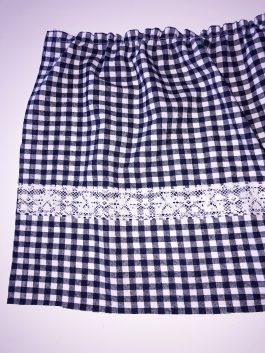
- Sew a row of gathering stitches at the top of the skirt (do not gather the beginning and ending 1 1/4” to allow ungathered section for zipper insertion.) This is also the time to sew optional trim to the skirt. The trim is positioned 4” from the cut lower edge. (2” hem allowed.)
- Sew the skirt to the bodice (outer bodice), matching notches per instructions for cutting skirt.
ZIPPER:
- Insert zipper type of your choice. For standard zippers, sew skirt seam from hem up to length of zipper. For invisible zippers, sew skirt seam after zipper application. Follow package instruction for zipper insertion.
FINISHING:
- Press bodice lining 5/8” all around, hand tack to outer bodice. Hem skirt 2” or to desired length.
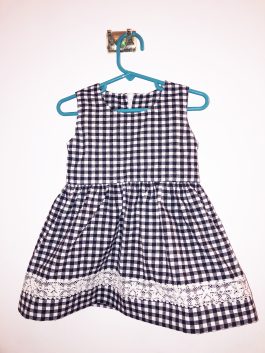


Classic Gingham Baby Dress Pattern
Classic Gingham Baby Dress Pattern

Hi: I downloaded the pattern but am only getting the back bodice. How do I get the entire pattern?
Hi Fahida! If you open the download in Adobe Acrobat and go to the Layers feature on the left side of the screen, you should be able to select both the front and back bodice patterns for the size you need. Please let us know if you have any issues getting the front bodice pattern. – Ashley, WeLikeSewing
I still haven’t seen a response about the bodice back. How do I get that?
Hi Maria! I’m one of the editors at We Like Sewing. The Bodice Back layers were hidden in the original PDF but were still there (you would have had to download the PDF, open it in Adobe Acrobat and then select the layers tab to find all the hidden layers). We have now updated the original PDF so that all layers are automatically on display when you first download it. Please let us know if you have any further questions. Thanks so much!
As a Gold Member, I downloaded the bodice pattern, but it only gave me the front bodice. Where is the back bodice pattern piece?
Hi Louise! I’m one of the editors at We Like Sewing. The Bodice Back layers were hidden in the original PDF but were still there (you would have had to download the PDF, open it in Adobe Acrobat and then select the layers tab to find all the hidden layers). We have now updated the original PDF so that all layers are automatically on display when you first download it. Please let us know if you have any further questions. Thanks so much!
I left a comment about only getting the bodice front and then realized the directions tell about the bottom of the dress, which is fine. But where is the bodice back? Could I also suggest that you have the directions in PDF form as well.
I couldn’t figure out how to print in Acrobat. How will printing the pattern affect the dress bodice?
Hello there! We have found that our readers are able to print our patterns more easily using Adobe Acrobat (File, Print), but you can trying printing them directly from your browser. For some of our clothing patterns, Acrobat allows readers to print only their size using the Layers feature, although that is not applicable for this particular pattern. Please let us know if you have any other questions. Have a great day! – Ashley, WeLikeSewing
I’m a gold member, so why is only the bodice available for me to download?
Please disregard my last comment, I didnt read all the instructions.