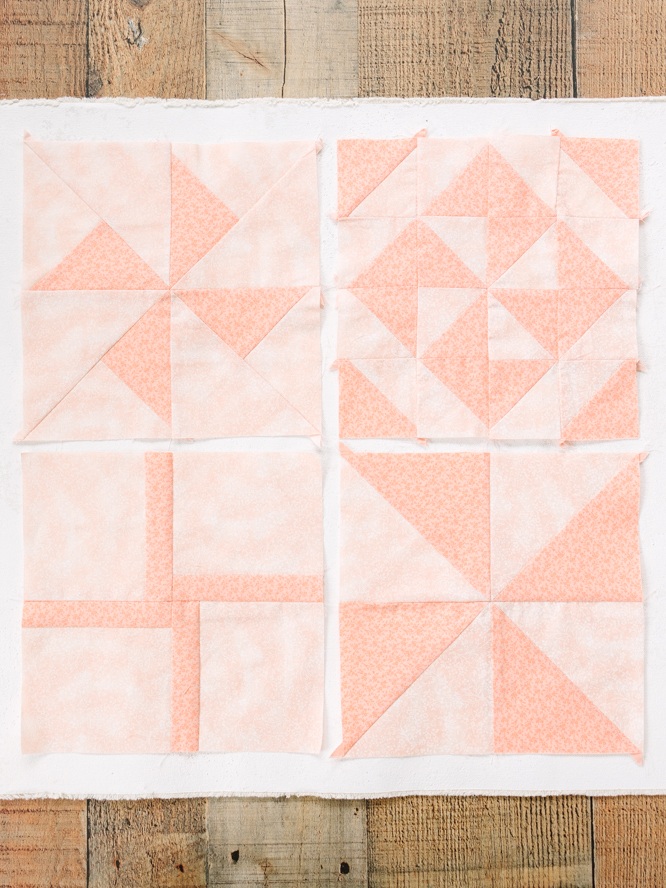
Master making pretty pinwheel blocks with this helpful guide for beginner quilters. In this pattern, you’ll learn how to make four pinwheels: the basic windmill, the turnstile block, the classic pinwheel and a pinwheel variation. Pinwheel blocks are a cornerstone of numerous quilt patterns, so this tutorial is a fantastic way to start small and build up your skills. Add liveliness and movement to your quilts by conquering this basic block pattern.
Materials:
- To make all four Pinwheel blocks below, you need a fat quarter (21″ x 18”) in each of two contrasting colors. Ideally, choose either solid colors or low-volume, non-directional prints. Here, Fabric A is a mid-tone apricot color with a darker-toned small-scale floral print and Fabric B has a shell-pink/very pale pink variegated background with a cream small-scale floral print. Pale pink thread was used for piecing these blocks.
DESIGNER NOTES:
- A 1/4” seam is used throughout.
- On pressing: After completing each seam, press the seam with a hot iron (not with steam) and then open up the fabric pieces and press as directed in the instructions below.
Instructions:
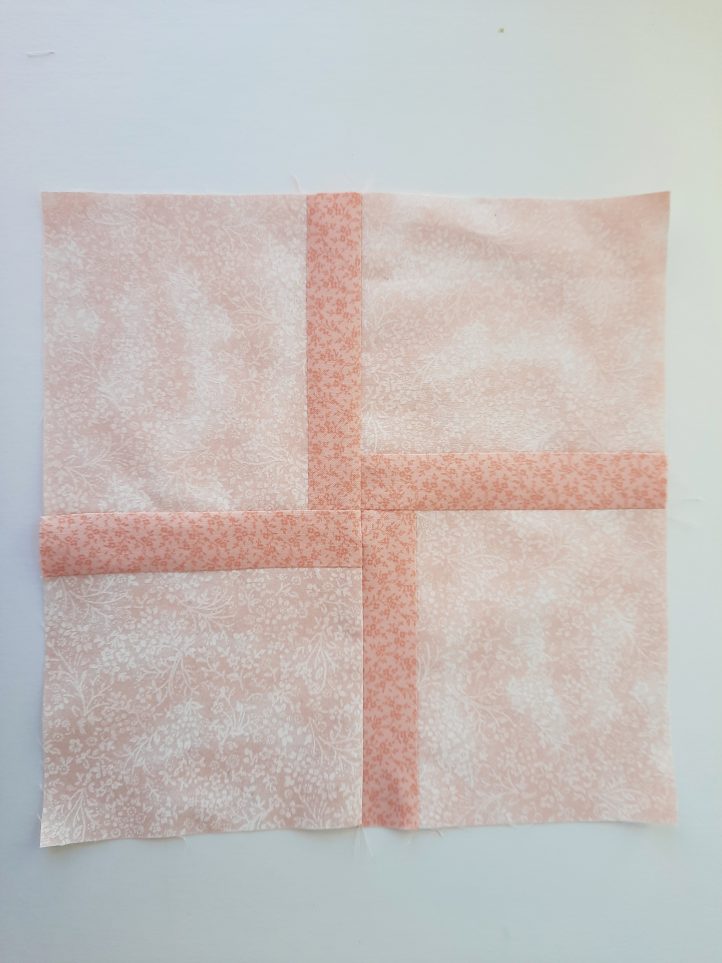
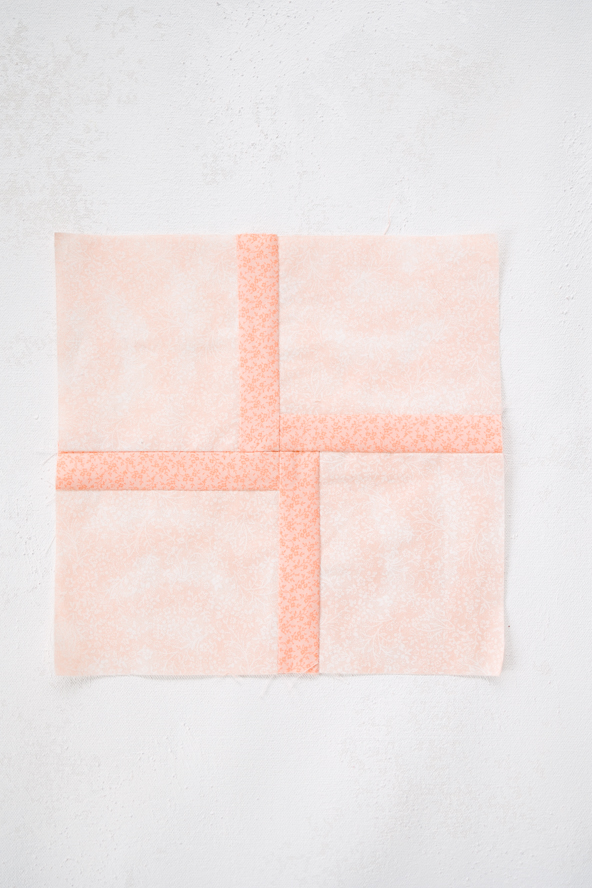
Basic Pinwheel Block:
This makes an 8” (finished) block.
CUTTING INSTRUCTIONS:
- From Fabric A, cut four strips, each 1 3/4″ x 4 1/2”.
- From Fabric B, cut four oblongs, each 3 3/4″ x 4 1/2”.
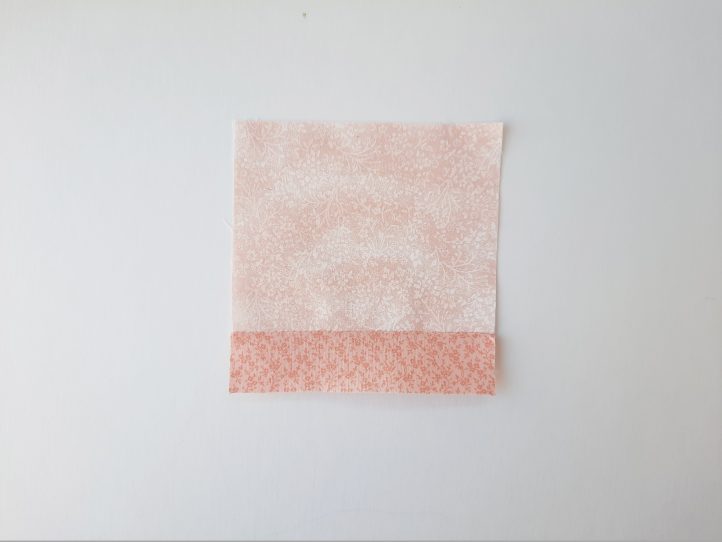
MAKING A BASIC PINWHEEL BLOCK:
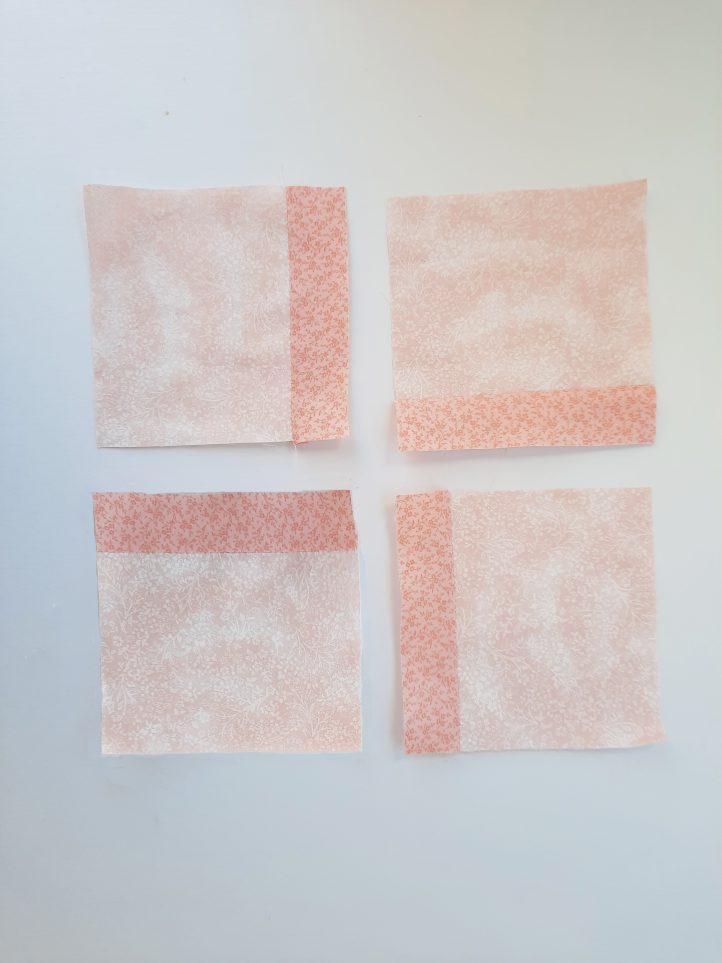
- Join a strip of Fabric A to the bottom of the Fabric B oblong, along the long sides. Press the seam allowances towards the Fabric A strip.
- Repeat Step 1 three more times.
- Lay out the four pieces on the worktable, as shown in the photo.
- Join the top two pieces to make a row and the bottom two pieces to make a row. Press the seam allowances towards the Fabric A strip.
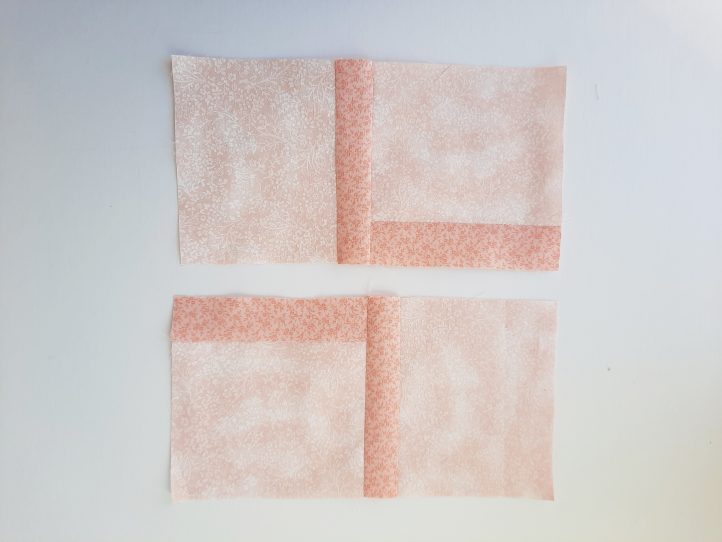
- Join the two rows. Press seam allowances upwards.
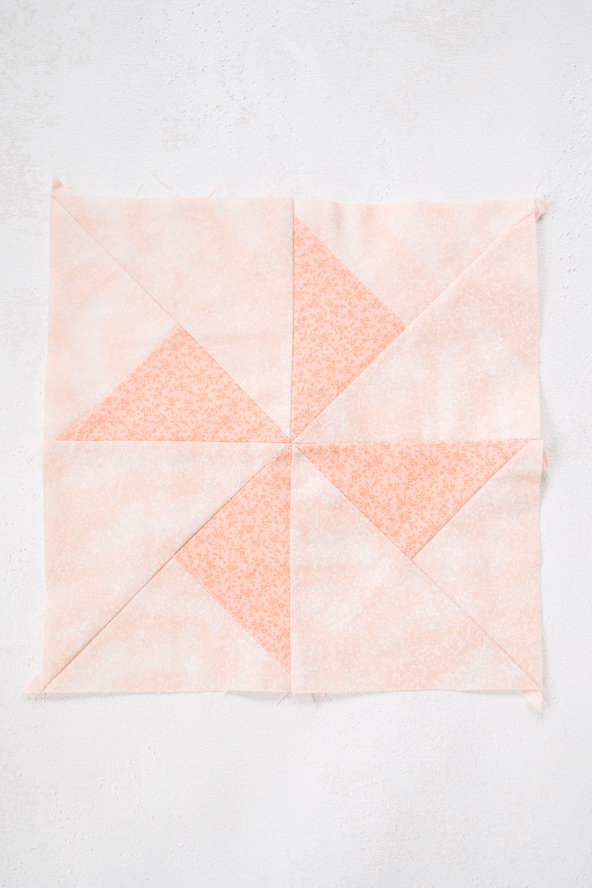
Basic Windmill Block:
This makes an 8” (finished) block.
CUTTING INSTRUCTIONS:
- From Fabric A, cut two squares 4 7/8″ x 4 7/8″.
- From Fabric B, cut two squares 4 7/8″ x 4 7/8”.
MAKING A BASIC WINDMILL BLOCK:
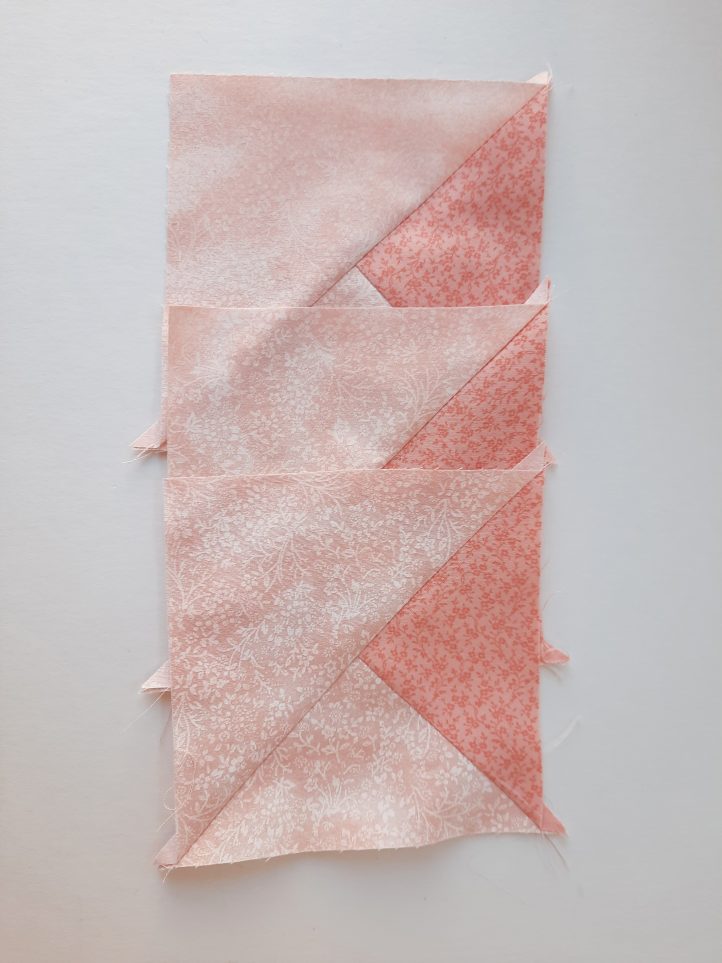
- Draw a diagonal line corner to corner across the back of a Fabric B square.
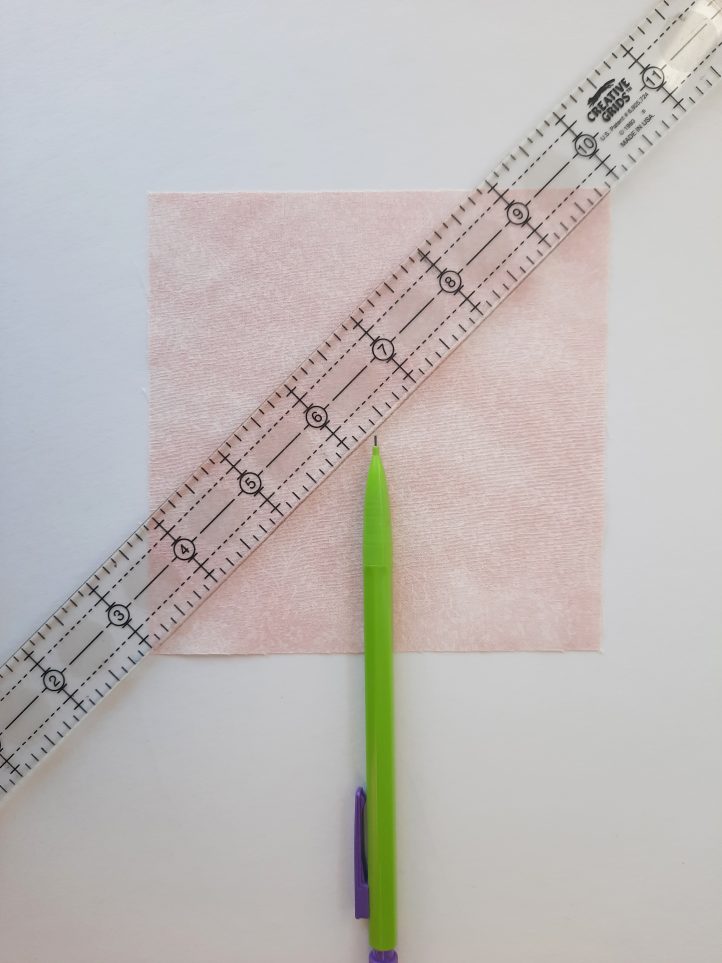
- Place the Fabric B square on top of a Fabric A square and pin.
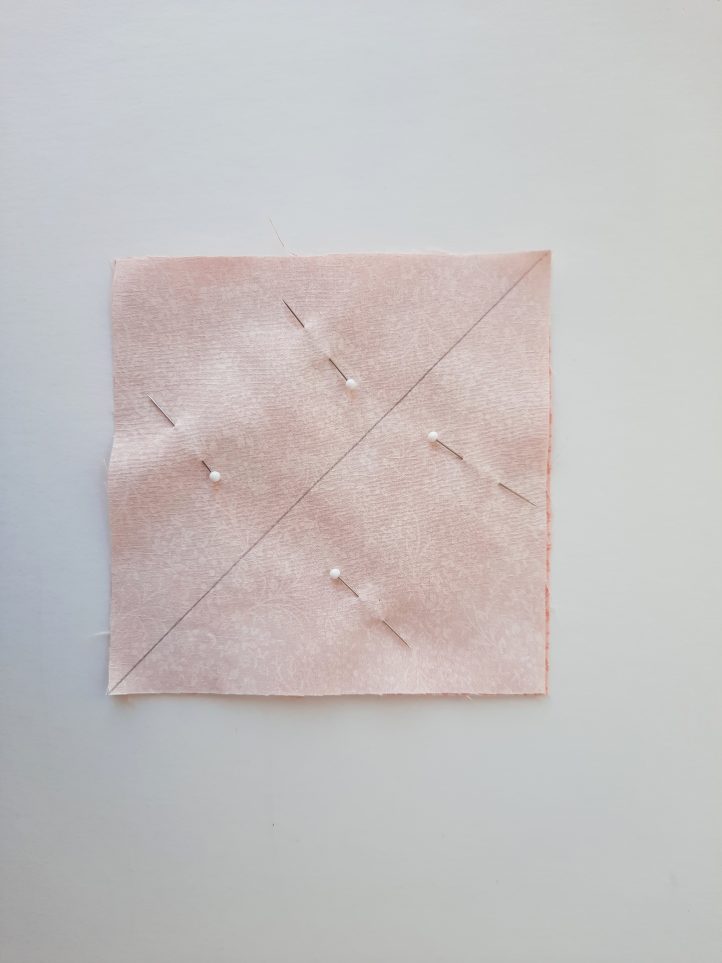
- Do a line of stitching, 1/4” away from the line on the left side of the line. Take the piece out of the machine and do a second line of stitching, 1/4” away from the line on the right side of the line.
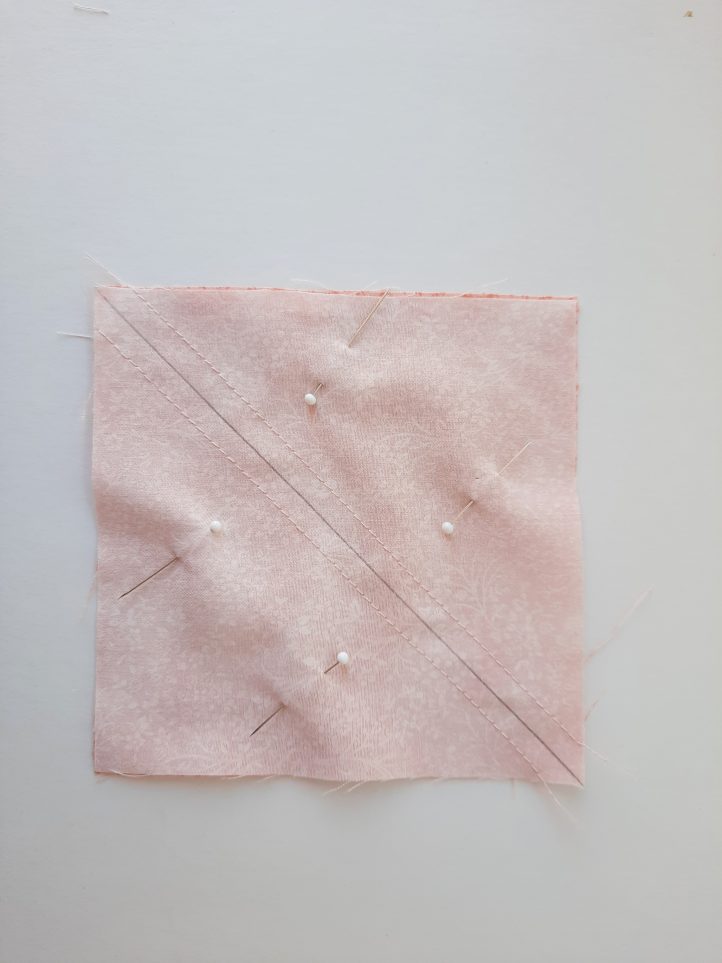
- Cut along the marked line.
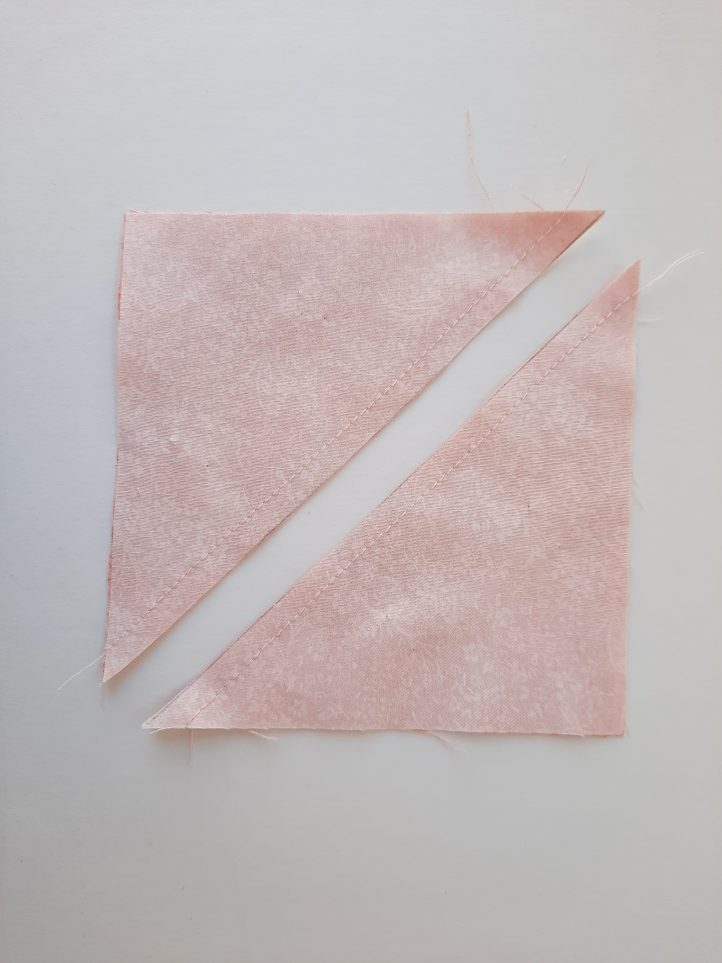
- Open the fabric pieces and press the seam allowances towards Fabric A.
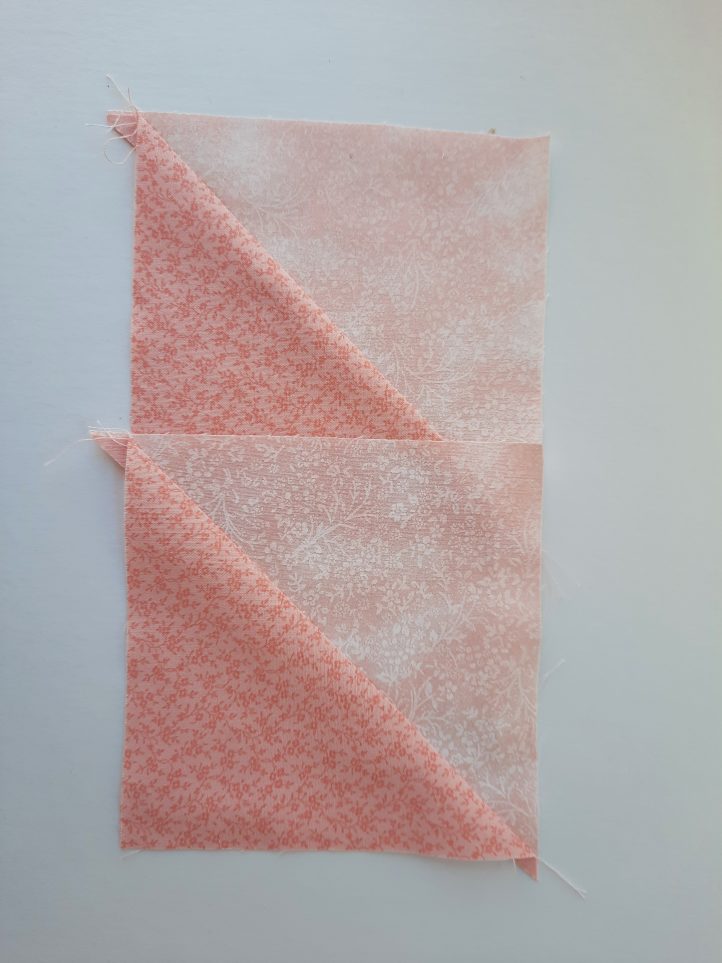
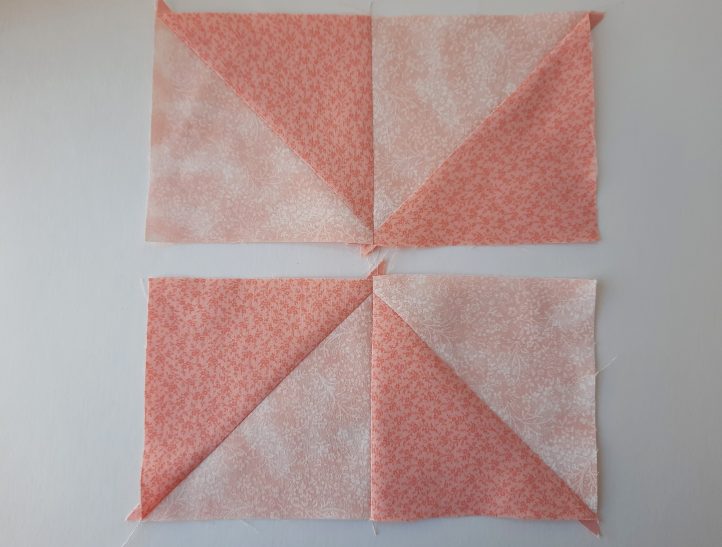
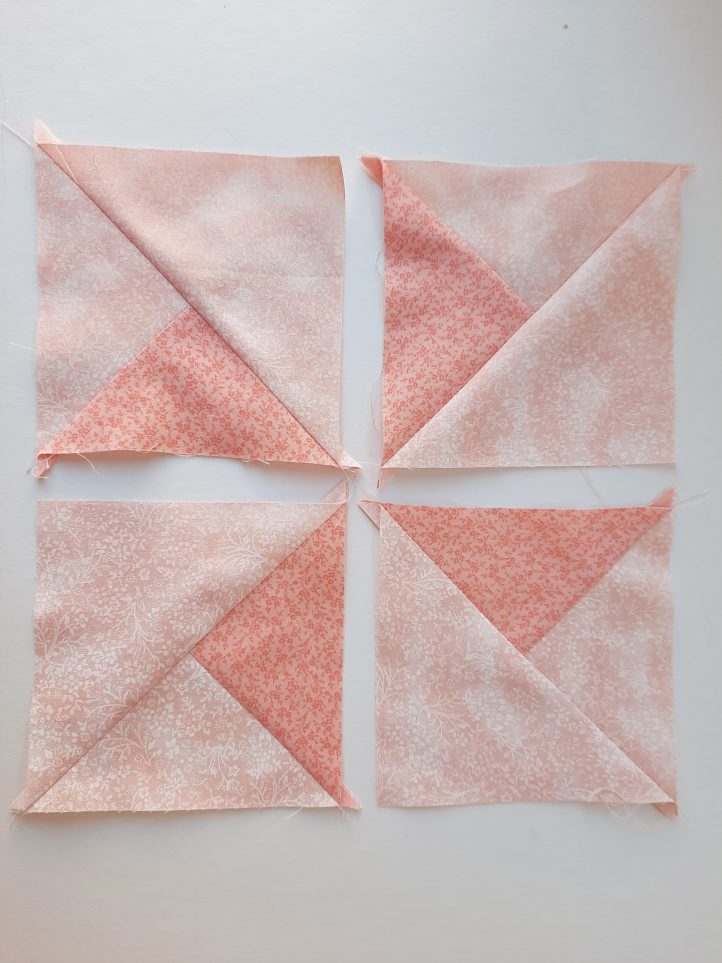
- Repeat Steps 1-5 one more time. Lay out the pieces as shown.
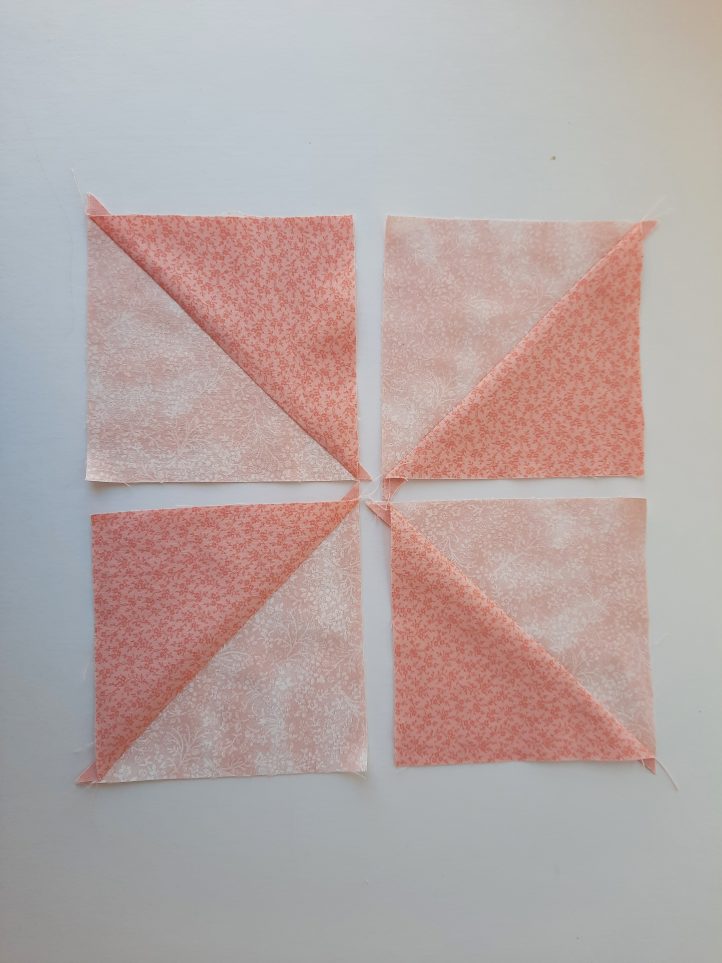
- Pin the top two squares together as shown.
- Stitch the top two squares together. Press seam allowances to the right. Pin, then stitch the lower two squares. Press seam allowances to the left.
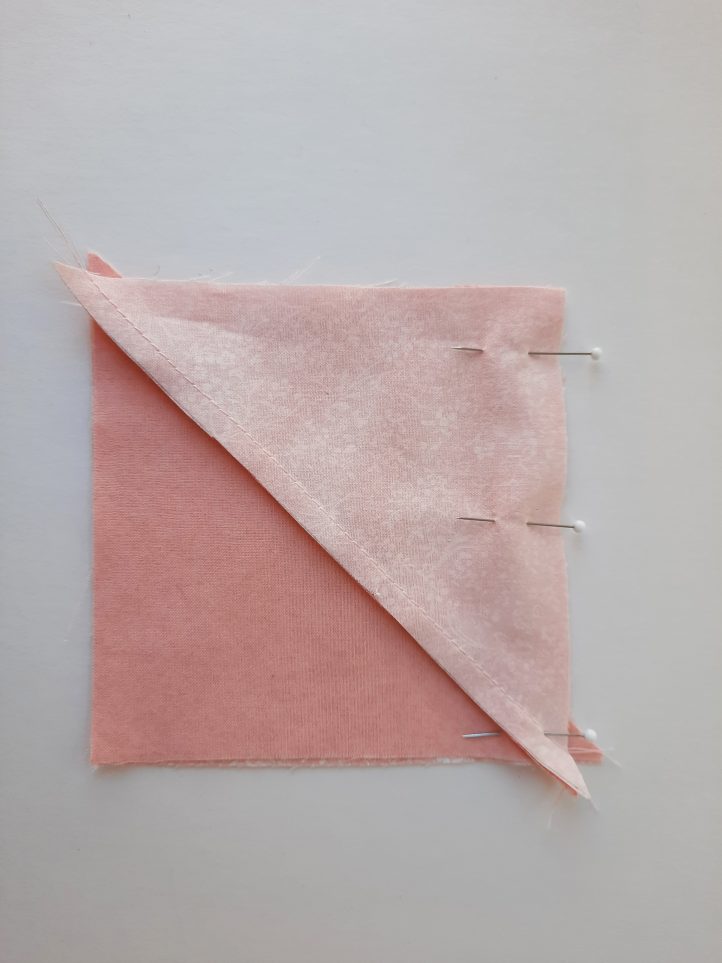
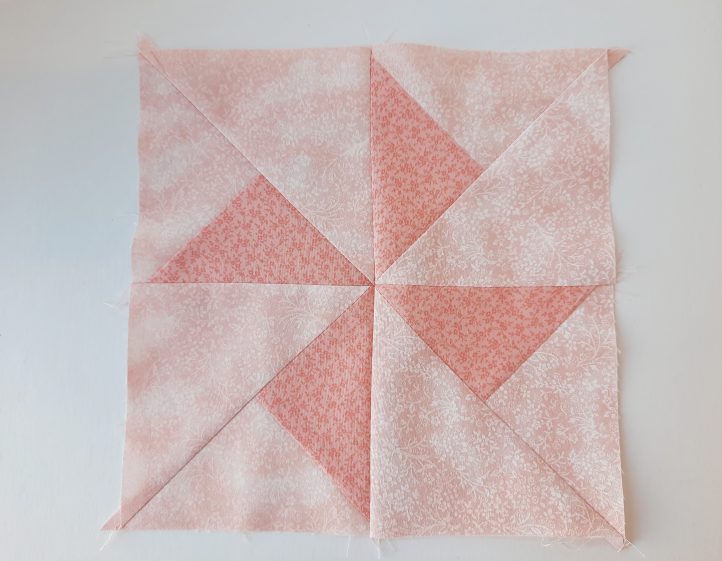
- Pin the two rows together as shown. Inserting extra pins to hold down the seam allowances will help to prevent them from getting caught in the seam.
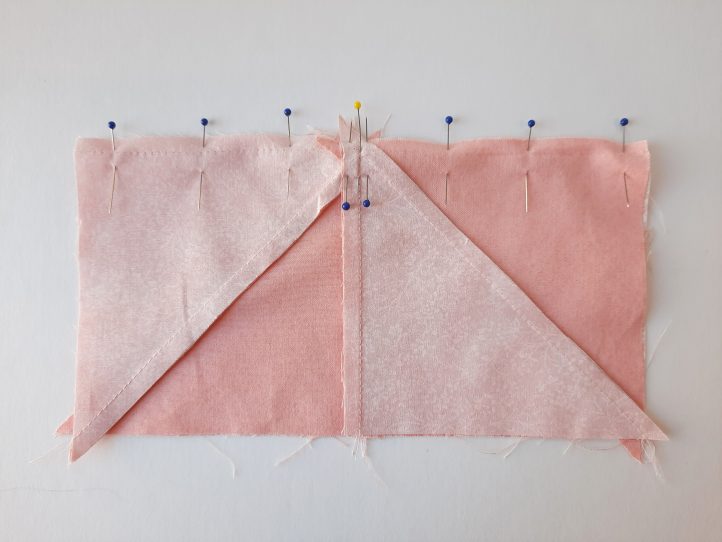
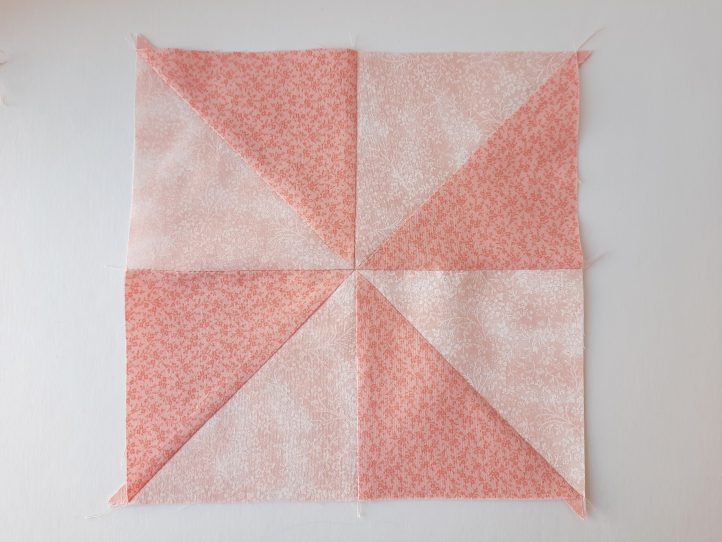
- Join the rows aligning the vertical seams. Make sure that the seam goes through the tips of the triangles. Press seam allowances downwards.
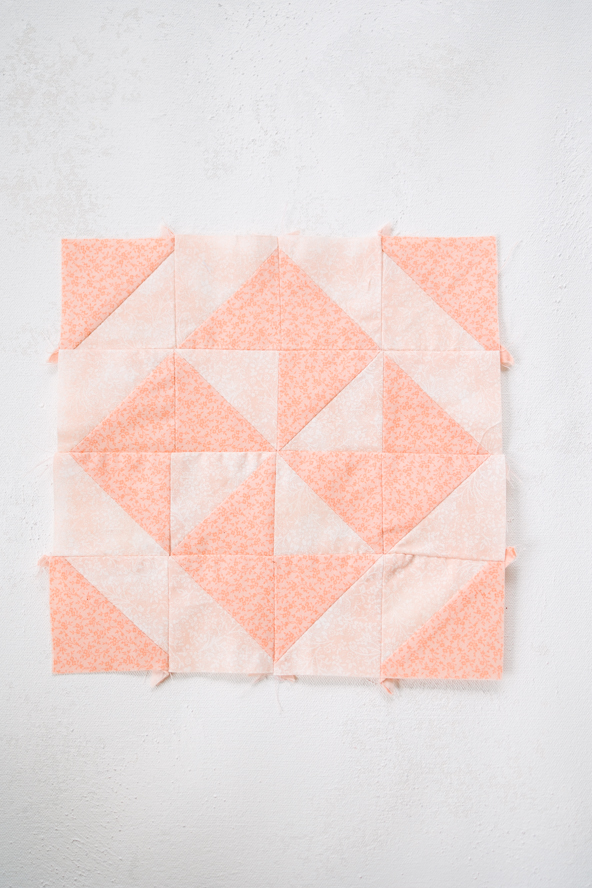
Turnstile Block:
This makes an 8” (finished) block.
CUTTING INSTRUCTIONS:
- From Fabric A, cut one square 5 1/4″ x 5 1/4”.
- From Fabric B, cut one square 5 1/4″ x 5 1/4” and two squares 4 7/8″ x 4 7/8”.
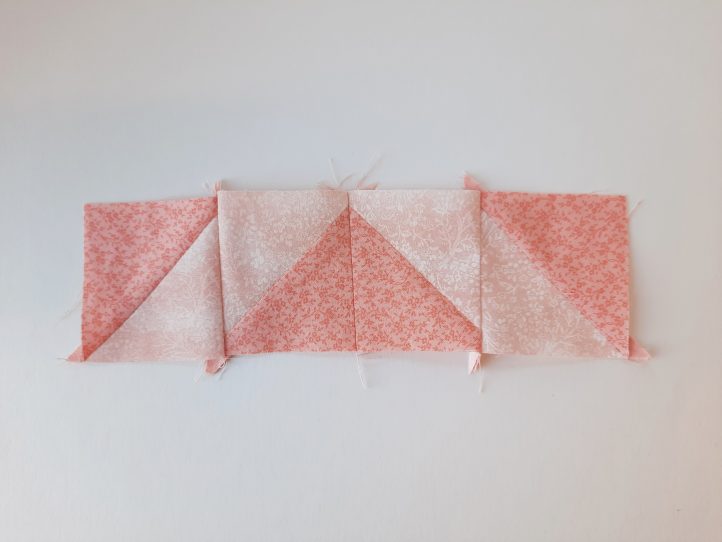
MAKING THE TURNSTILE BLOCK:
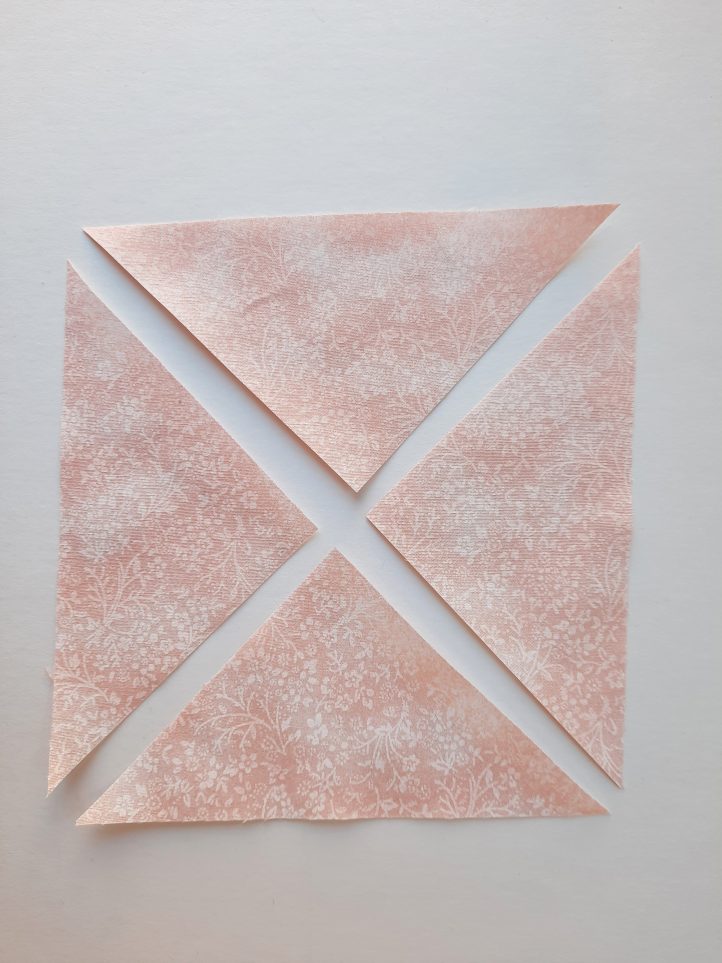
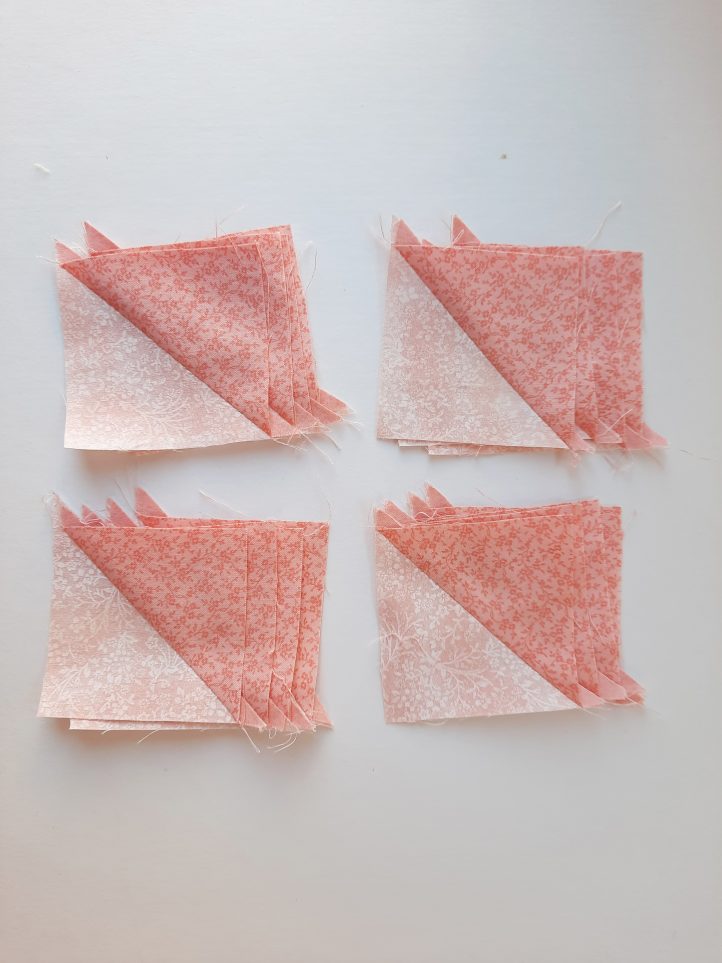
- Cut the Fabric A square twice on the diagonal.
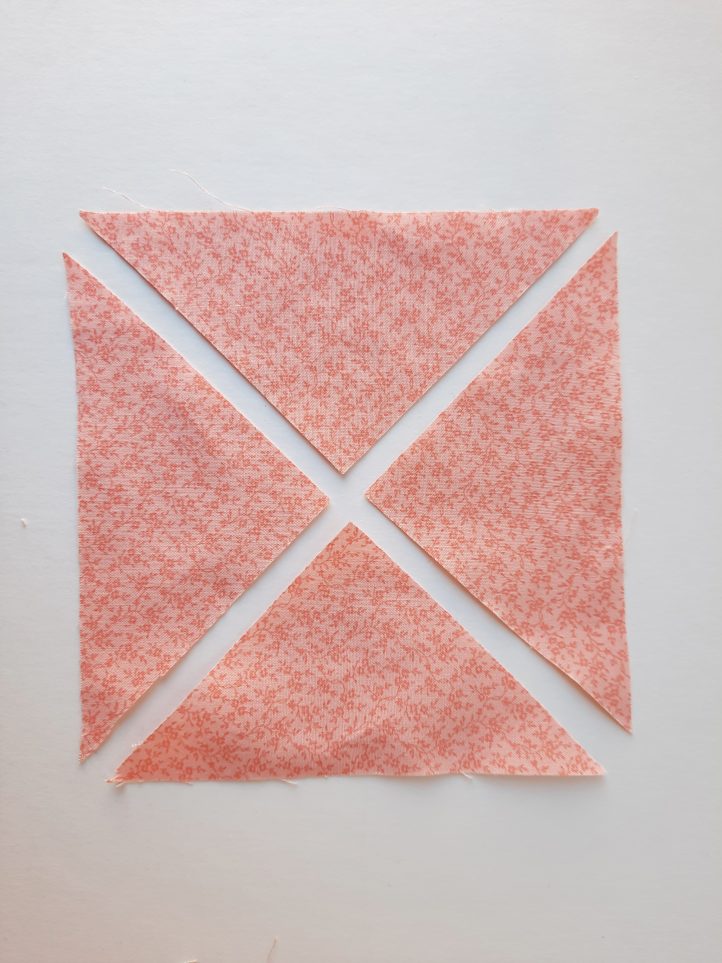
- Cut the Fabric B 5 1/4″ x 5 1/4” square twice on the diagonal.
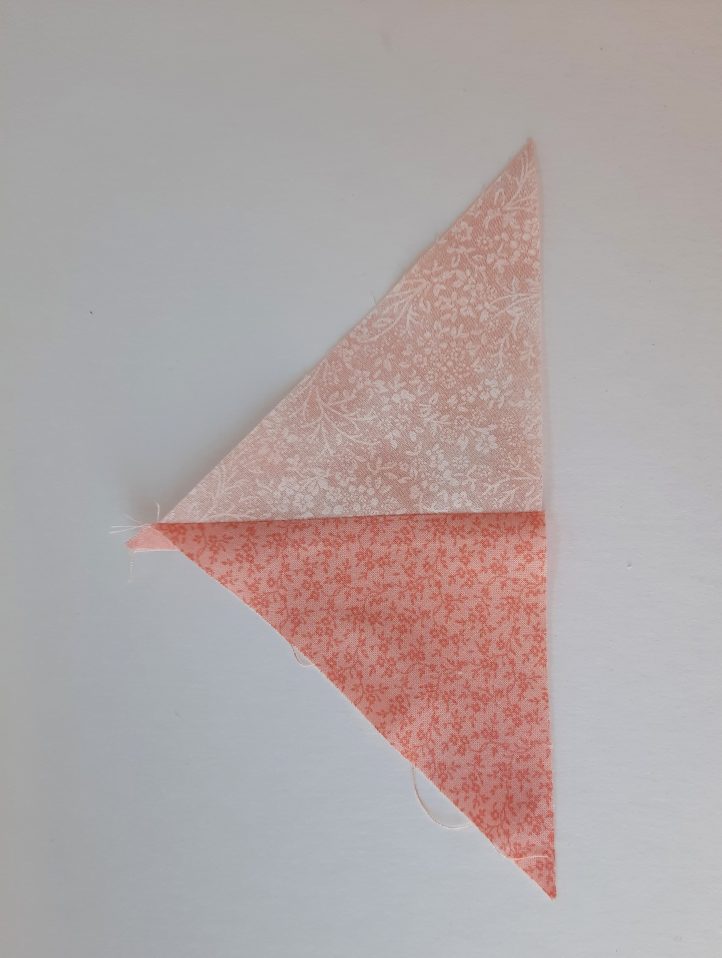
- Join a Fabric A triangle (cut in Step 1) to the left of a Fabric B triangle (cut in Step 2). Press the seam allowances towards Fabric A.
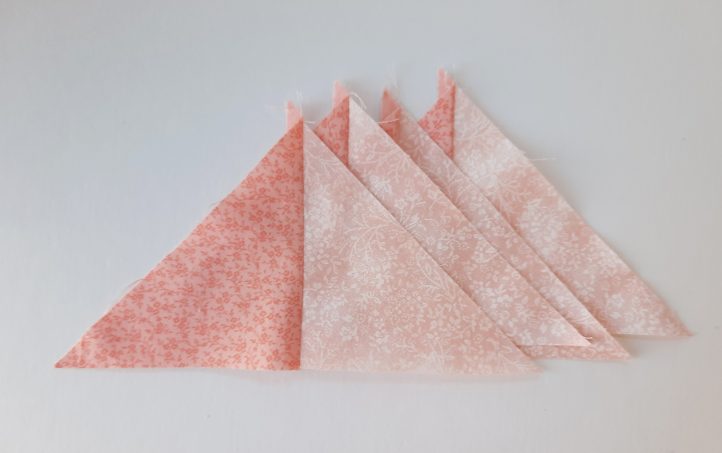
- Repeat Step 3 three more times.
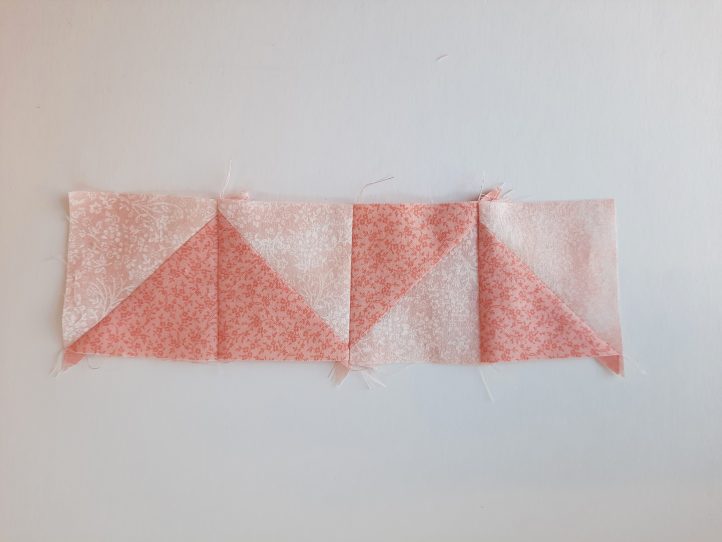
- Cut each of the Fabric B 4 7/8″ x 4 7/8” squares once on the diagonal.
- Place one of the triangles cut in Step 5, right sides together, with the unit made in Step 3. Press seam allowances towards the larger triangle.

- Repeat Step 6 with the remaining three triangles cut in Step 5 and the units made in Step 4. Press as before.
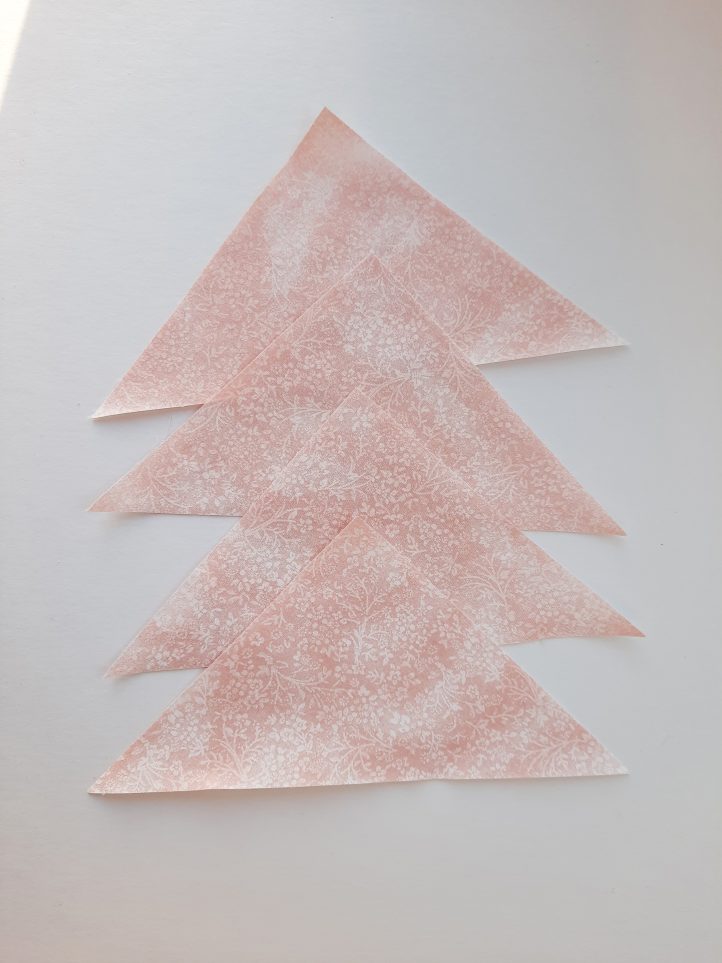
- Lay the four completed pieces on the worktable as shown.
- Repeat Steps 6-9 of the Basic Pinwheel block to join the squares, then the rows, to complete the block.
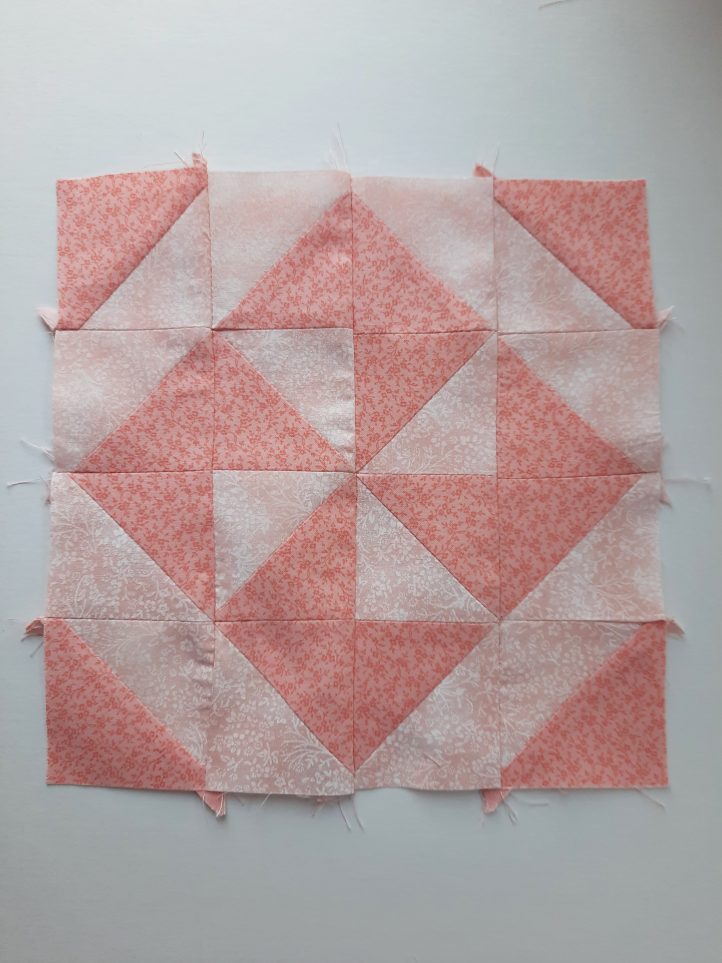
Pinwheel Variation:
This makes an 8” (finished) block.
CUTTING INSTRUCTIONS:
- From Fabric A, cut eight squares 2 7/8″ x 2 7/8”.
- From Fabric B, cut eight squares 2 7/8″ x 2 7/8”.
MAKING THE PINWHEEL VARIATION:
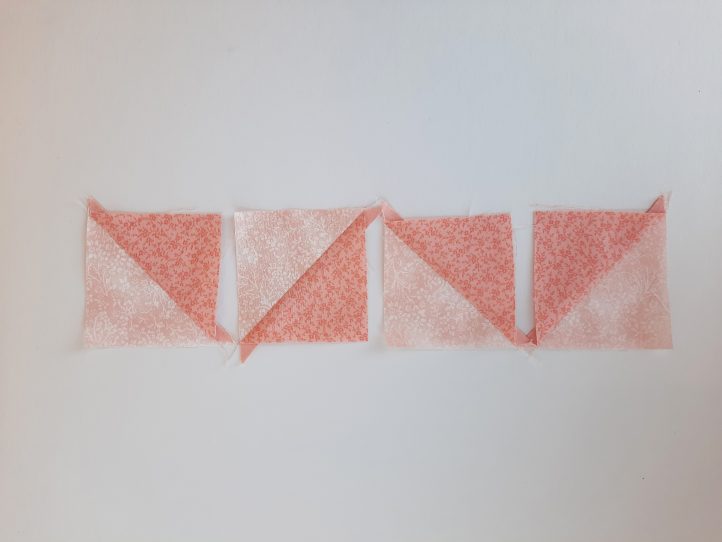
- Take one Fabric A square and one Fabric B square. Follow Steps 1-5 from the ‘Making a Basic Windmill block’ instructions above. Repeat this step seven more times to make 16 half-square triangle blocks in all.
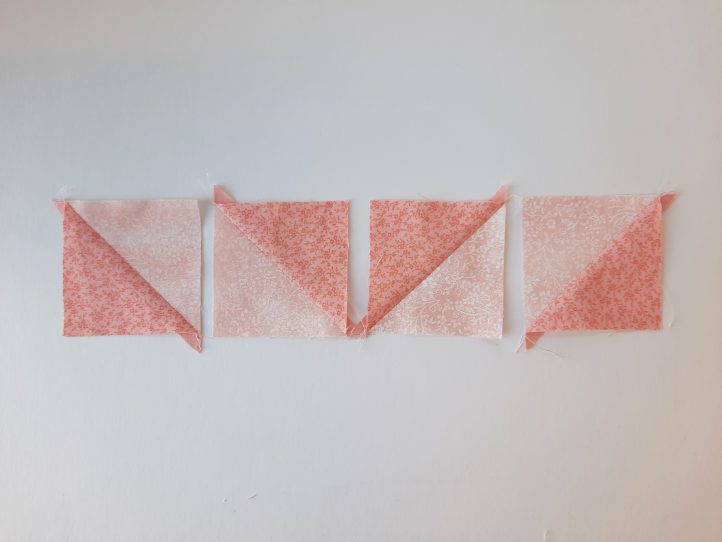
- Make Row 1. Lay out four half-square triangle units as shown.

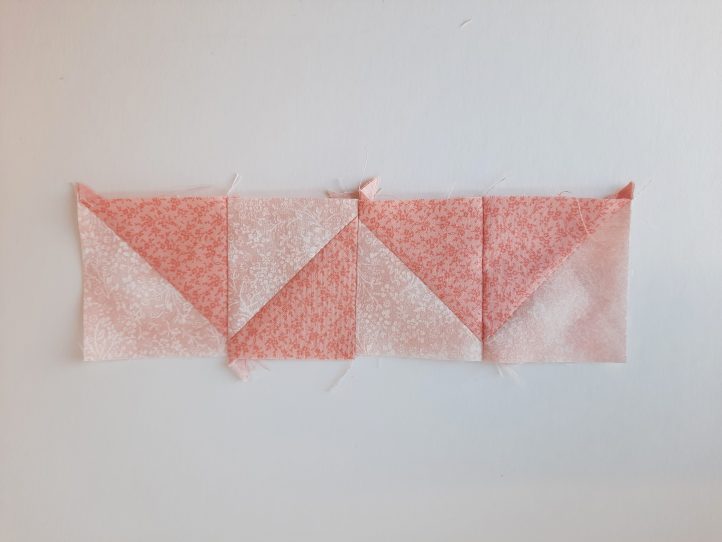
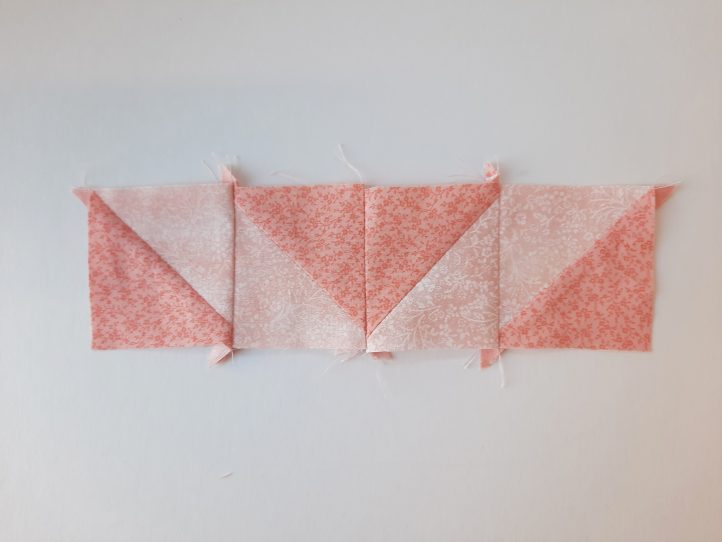
- Join the units in the order in which you laid them out. Press the seams open.
- Make Row 2. Lay out four half-square triangle units as shown.

- Join and press the units as you did in Step 3.
- Make Row 3. Lay out the units as shown.
- Join and press as before.
- Make Row 4. Lay out the units as shown.
- Join and press the units as you did in Step 3.
- Join Row 1 to Row 2. Press seam allowances downwards.
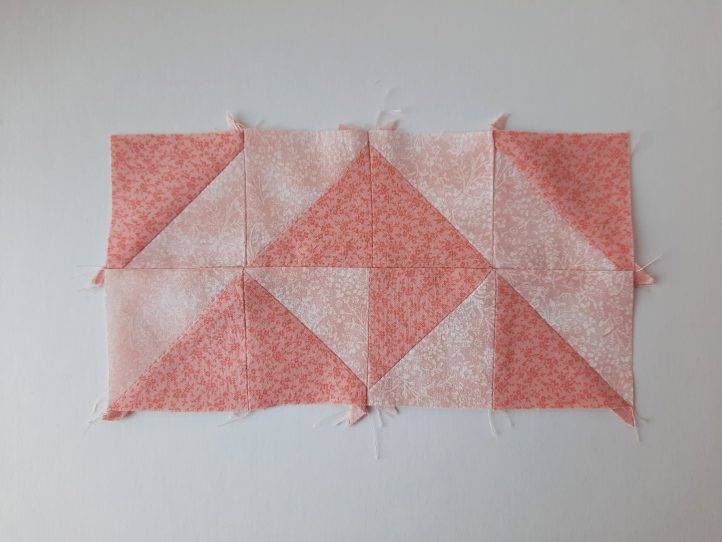
- Join Row 3 to Row 4. Press seam allowances downwards.
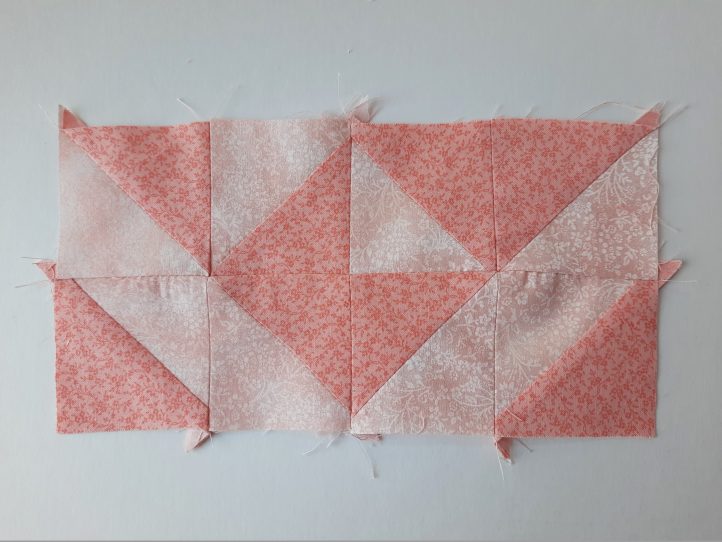
- Join the Row 1/2 section above the Row 3/4 section to complete the block. Press seam allowances downwards.

Extremely lovely
Thanks so much for your kind comment, Karen! Have a great day 🙂 – Ashley, We Like Sewing