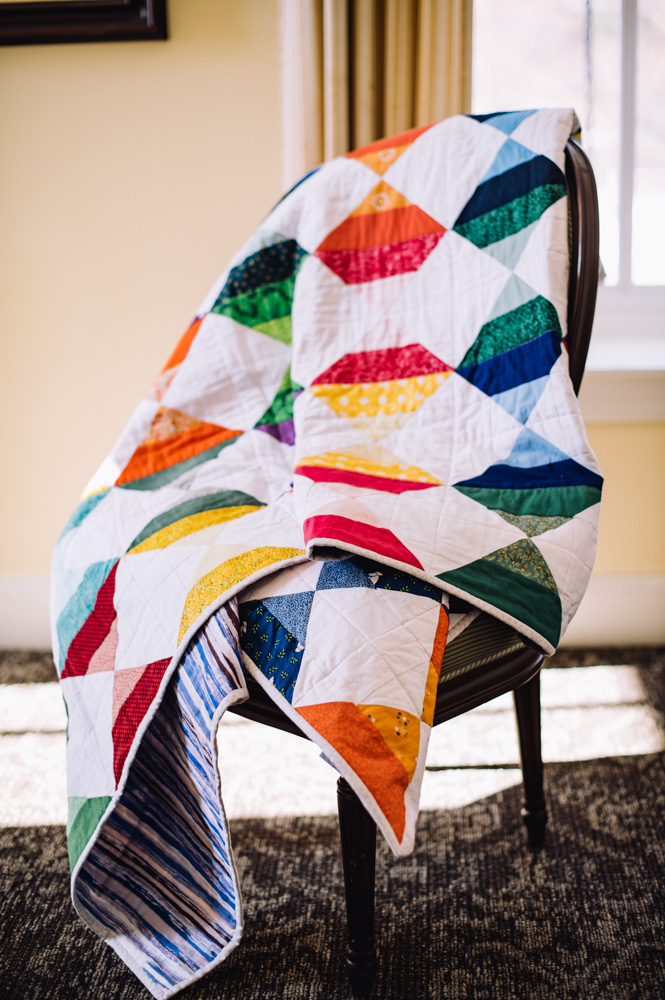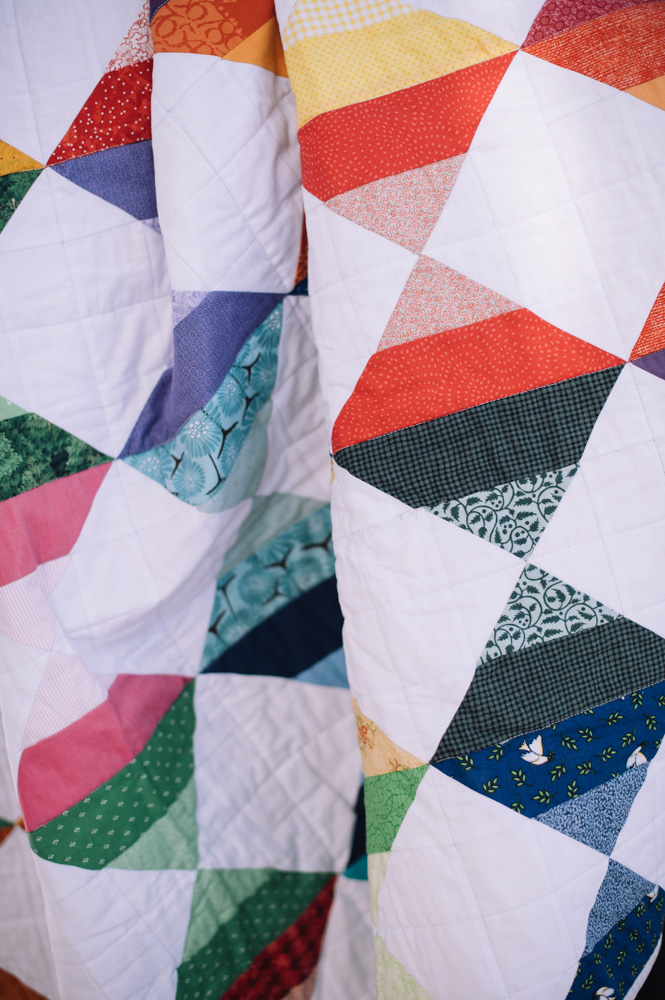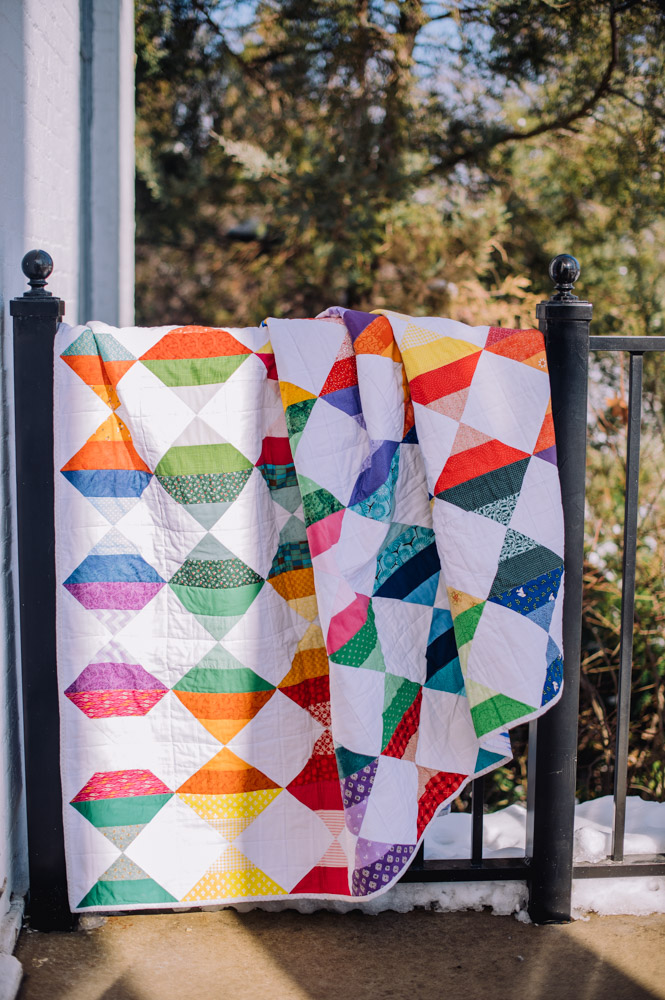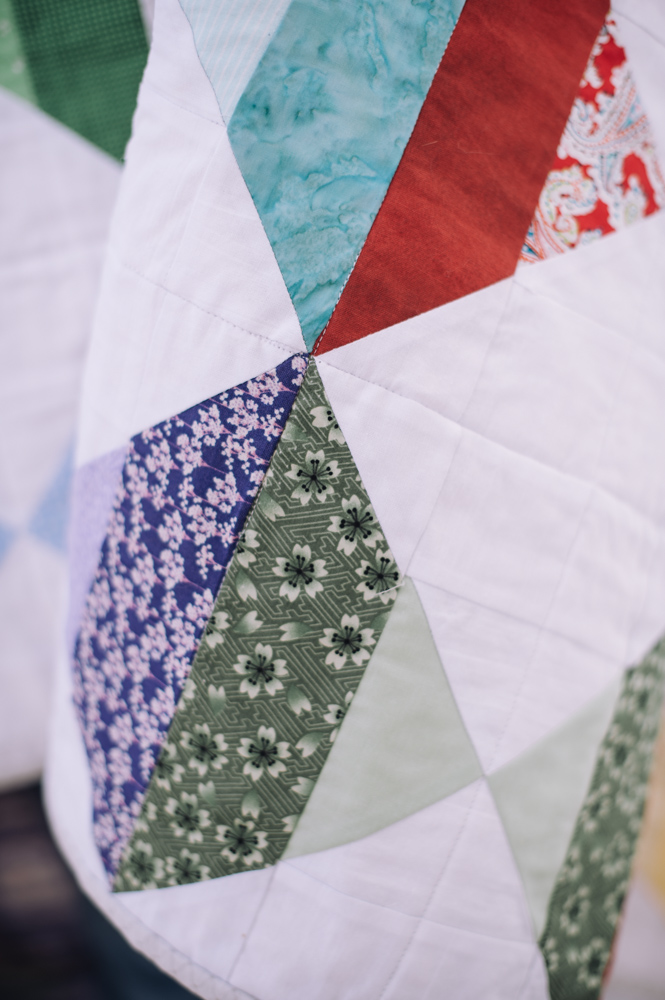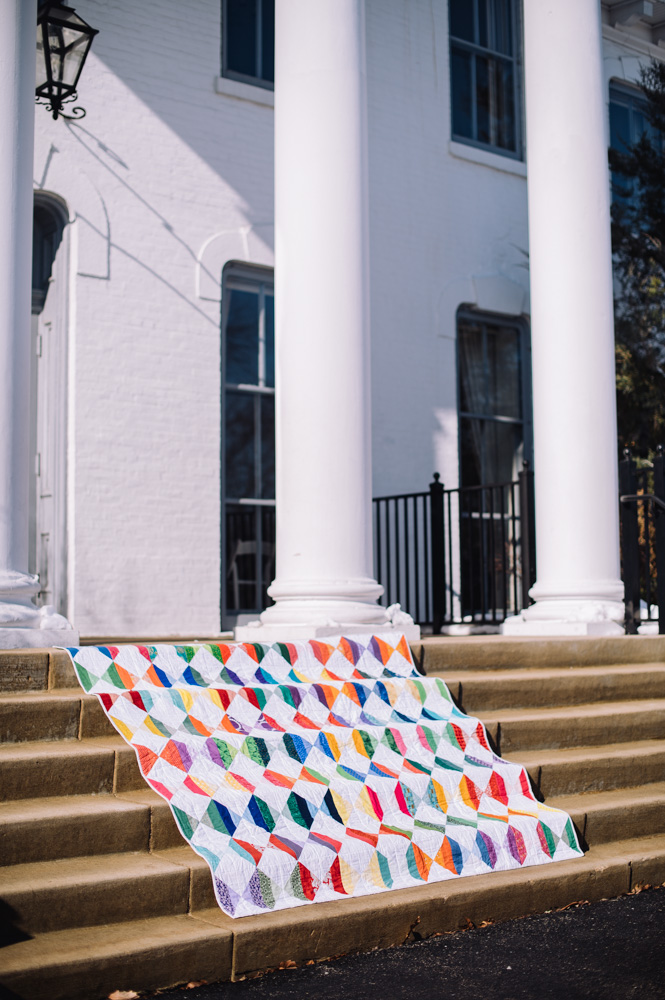
The time to use your brightly colored fabric scraps has come! Create a beautiful quilt that features a dazzling diamond motif in large columns with this quilt pattern. Ideal for scrap fabric, this patchwork quilt uses both dark and light tones in its blocks and is recommended for intermediate quilters. Made using 90 darker fabrics and 45 lighter fabrics, this design is begging you to experiment with color pairings to create a one-of-a-kind quilt. If you’ve been stuck indoors during gray winter months, welcome spring by creating a gorgeous rainbow quilt to brighten up your home.
Finished Size: 81″ x 90”
Skill Level: Intermediate
Materials:
- From cotton fabric 42” wide, you will need:
- Fabric A (white solid): 4 3/4 yards
- Fabric B (orange), Fabric D (purple), Fabric F (blue), Fabric H (dark green), Fabric J (bright green), Fabric L (yellow), Fabric N (aqua), Fabric P (red), and Fabric R (fuschia pink): 3/8 yard of each color if you make all the blocks in the color group the same; for a ‘scrappy’ quilt, you need a piece at least 9 x 5 1/2” for each block
- Fabric C (light orange), Fabric E (mauve), Fabric G (light blue), Fabric I (pale mid-green), Fabric K (light bright green), Fabric M (pale yellow), Fabric O (light aqua), Fabric Q (light red), and Fabric S (pale pink): 1/4 yard of each color if you make all the blocks in the color group the same; for a ‘scrappy’ quilt, you need a piece at least 5 x 5 1/2” for each block
- Note: Solid colors and low-volume prints work well in this quilt.
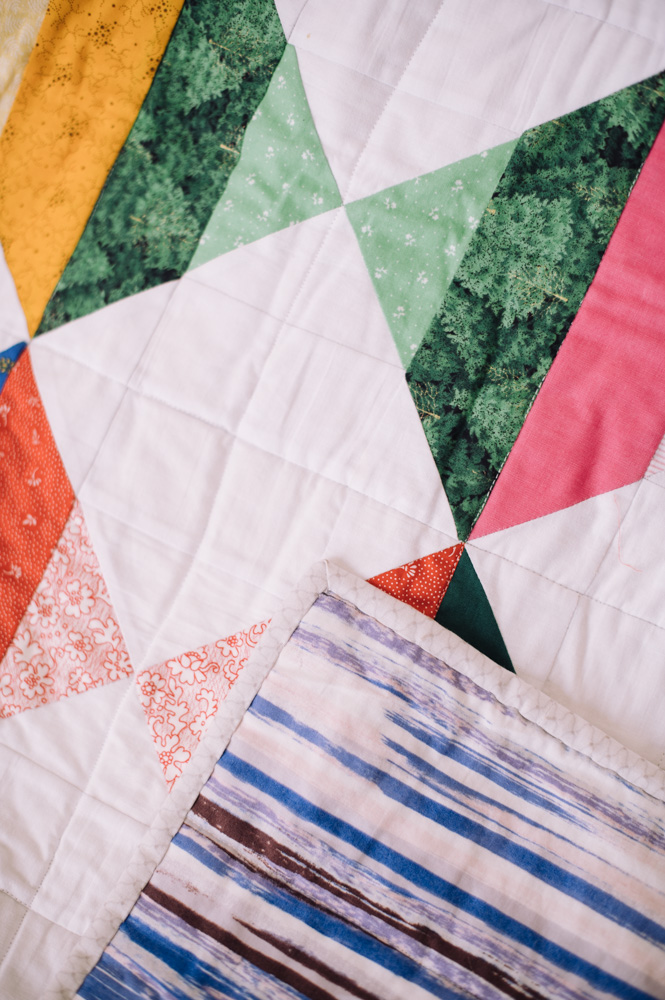
- Backing fabric: 5 1/2 yards
- Binding fabric (pale gray low-volume print): 3/8 yard
- Pale gray thread for sewing and white thread for quilting
- Batting: at least 87″ x 96”
- Pattern diagram – located at bottom of this page.
Cutting Instructions:
- From fabric A, cut 45 squares 5 1/4 x 5 1/4”, 180 oblongs 4 1/2 x 2 1/2” and 360 squares 2 1/2 x 2 1/2”.
- From fabrics B, D, F, H, J, L, N, P, R, cut 20 oblongs 8 1/2 x 2 1/2” from each color (two matching oblongs for each block).
- From fabrics C, E, G, I, K, M, O, Q, S, cut 45 squares 5 1/4 x 5 1/4” (each square will make two block centers).
- Cut and join the backing fabric to make a piece at least 84 x 99”.
- From the binding fabric, cut 9 strips 2 1/4” wide across the width of the fabric, remove the selvedges and join at the short ends to make a strip 352” long.
Sewing Instructions:
MAKING THE PATCHWORK:
- Designer Note: Use a 1/4” seam allowance throughout.
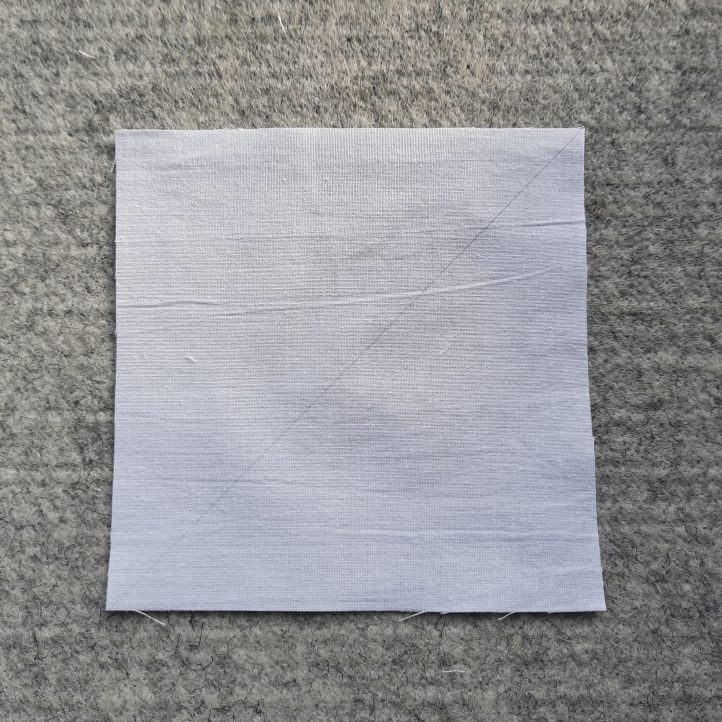
- Make the first block. Draw a diagonal line across one of the Fabric A 5 1/4 x 5 1/4” squares using a sharp pencil or an erasable fabric marker.
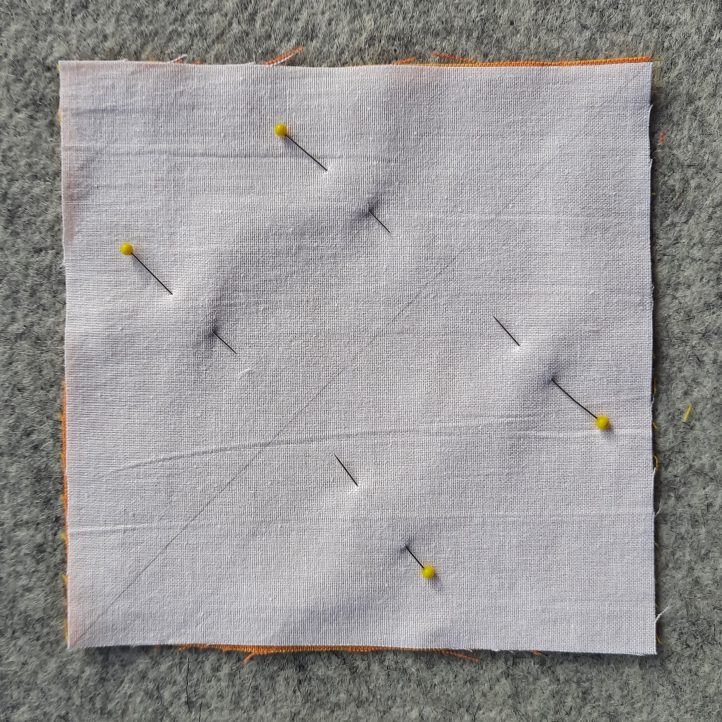
- Place the white square, right sides together, on top of a Fabric C 5 1/4 x 5 1/4” light orange square and pin.
- Stitch 1/4” away from the line, on the left-hand-side of the line, then take the work out of the machine and stitch – in the same direction – 1/4” away from the line, on the right-hand-side of the line.
- Cut down the marked line with scissors.
- Press the seam, then open the triangles and press the seam allowances towards the Fabric C side.
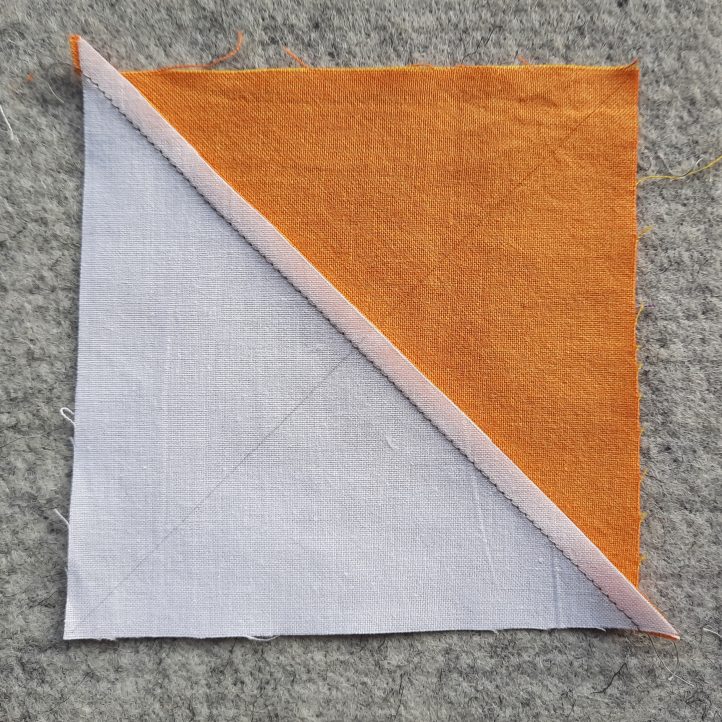
- You now have two half-square triangle units.
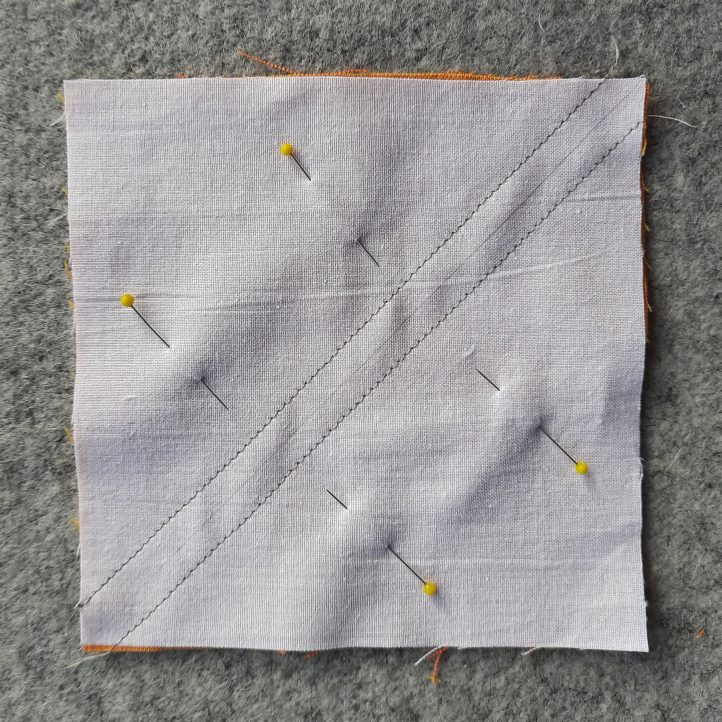
- Draw a diagonal line as you did in Step 1, across the back of one of the units, from the orange corner to the white corner. Now, lay the two units, right sides together, on top of each other, with the orange triangle on top of the white and the white on top of the orange. Pin the pieces together, inserting one pin through the center of the seam in each square, to ensure that they are aligned.
- Stitch 1/4” away from the line, on either side of the line, as you did in Step 3. (Tip: Try to have the seam allowances on the top, facing away from you, so you can ensure that they pass smoothly under the presser foot of the machine.)

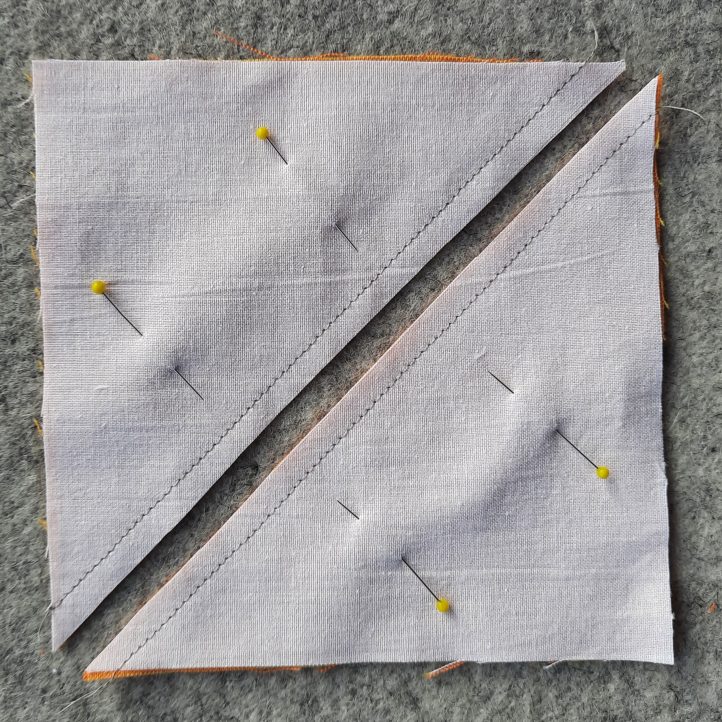
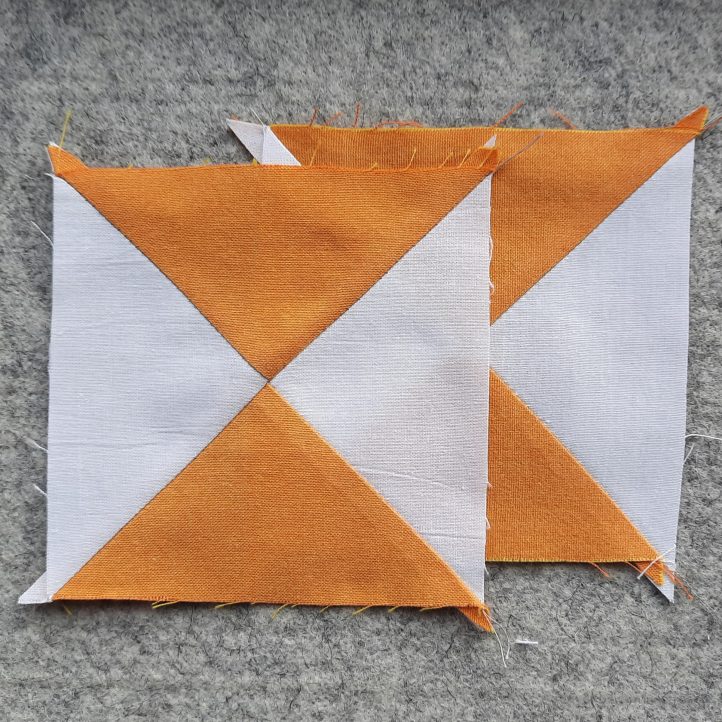
- Cut along the marked line with scissors and press as before. You now have two quarter-square triangle units. Set one aside for use in another orange block and continue with the other.
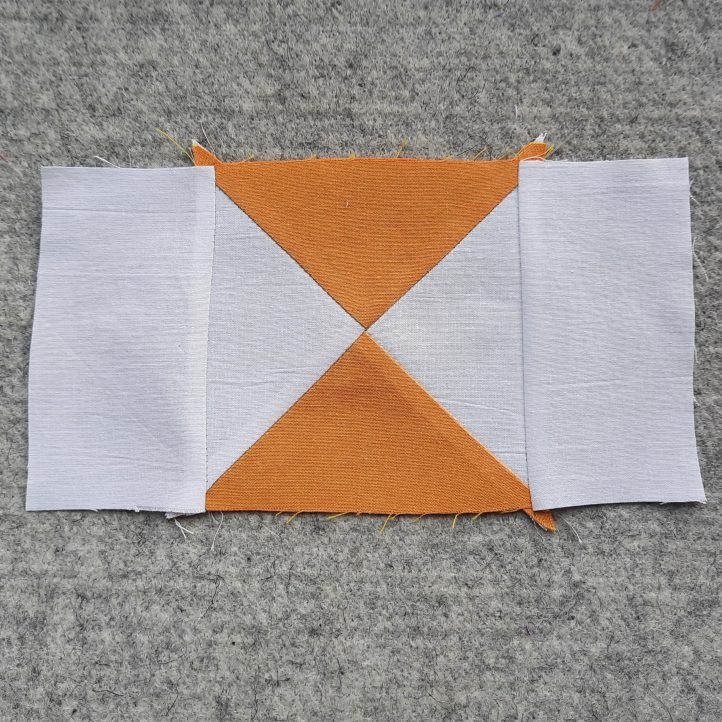
- Pin a Fabric A 4 1/2 x 2 1/2” oblong to each white side of the square unit.
- Stitch, then press, pressing the seam allowances out towards the oblongs.
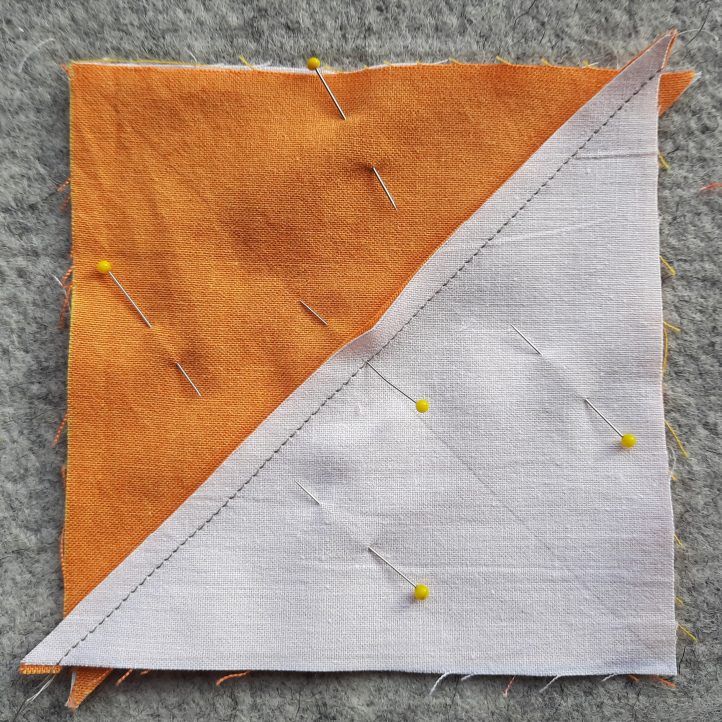
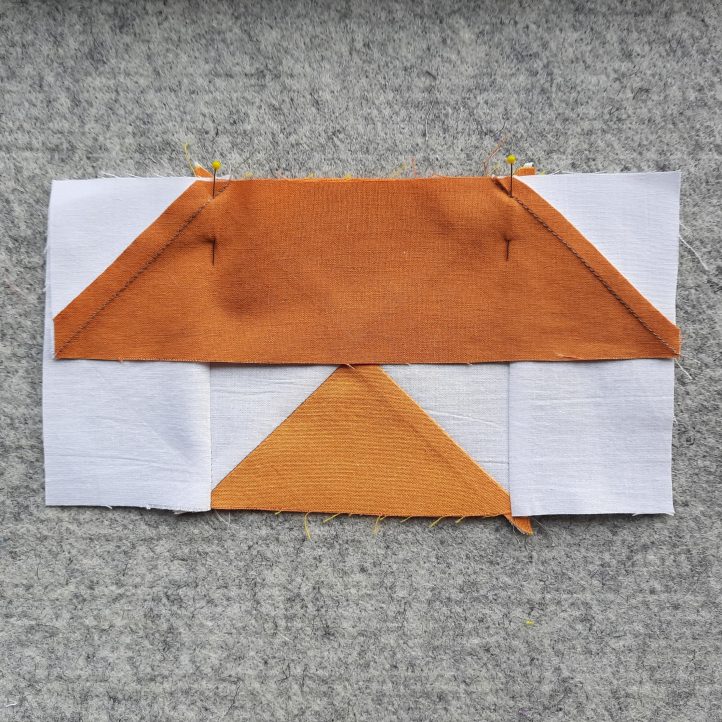
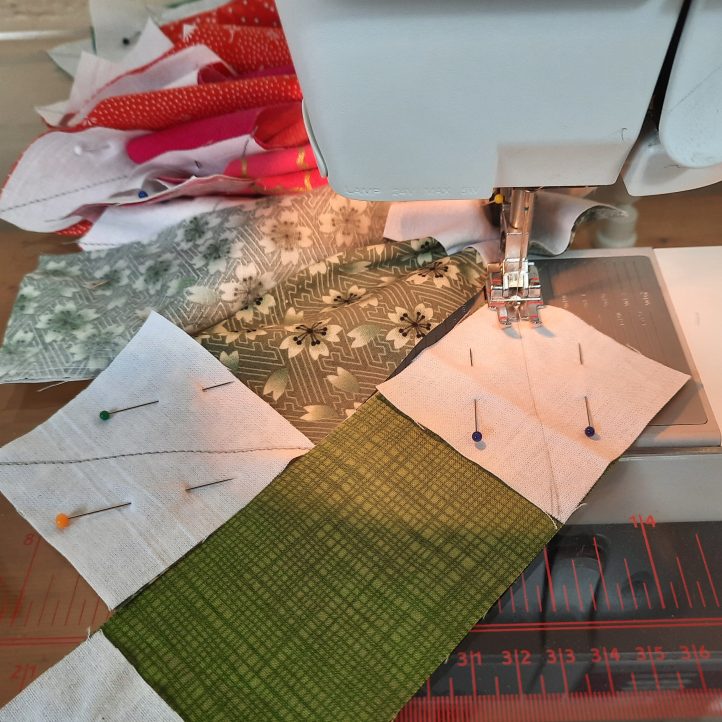
- Draw a diagonal line across four 2 1/2 x 2 1/2” white squares (as you did in Step 1). Place a 2 1/2 x 2 1/2” white square at each end of two 8 1/2 x 2 1/2” Fabric B oblongs with the line running up from left to right at one end and down from left to right at the other end.
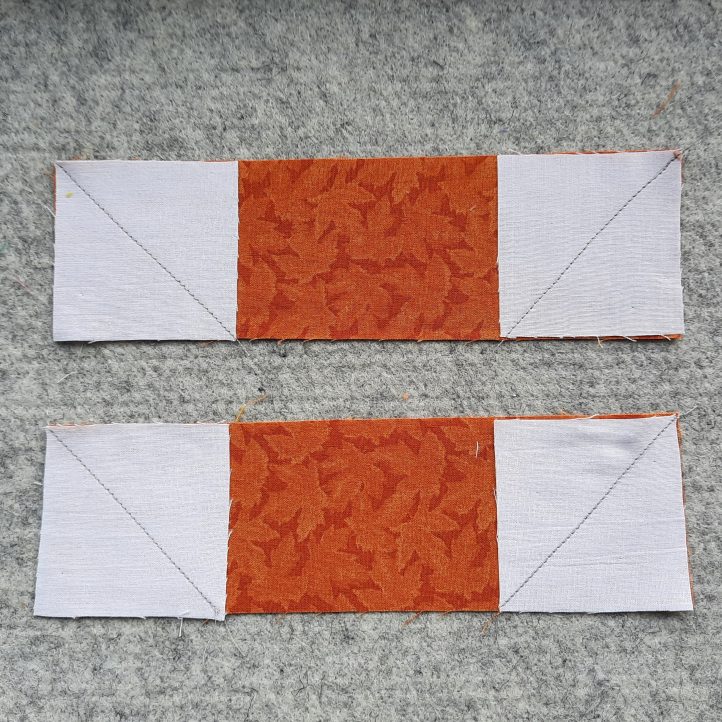
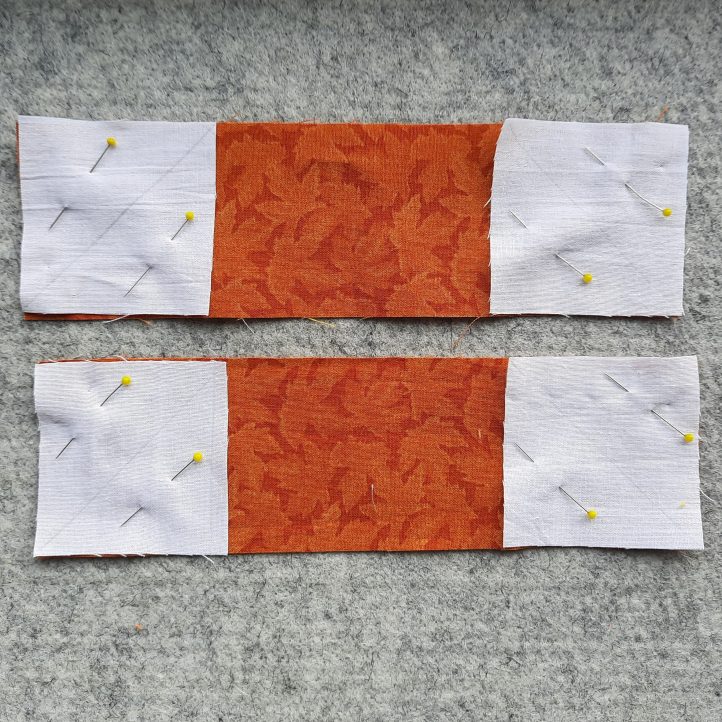
- Pin the squares in place.
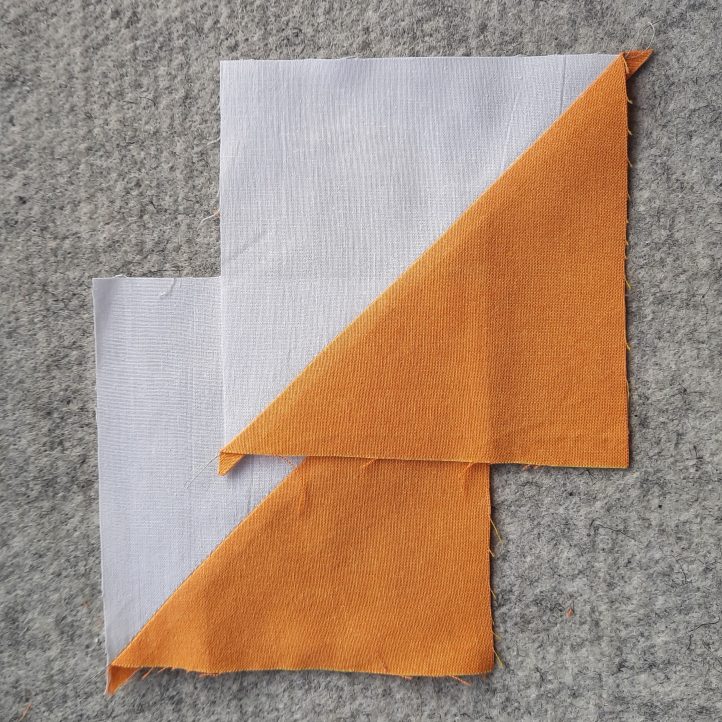
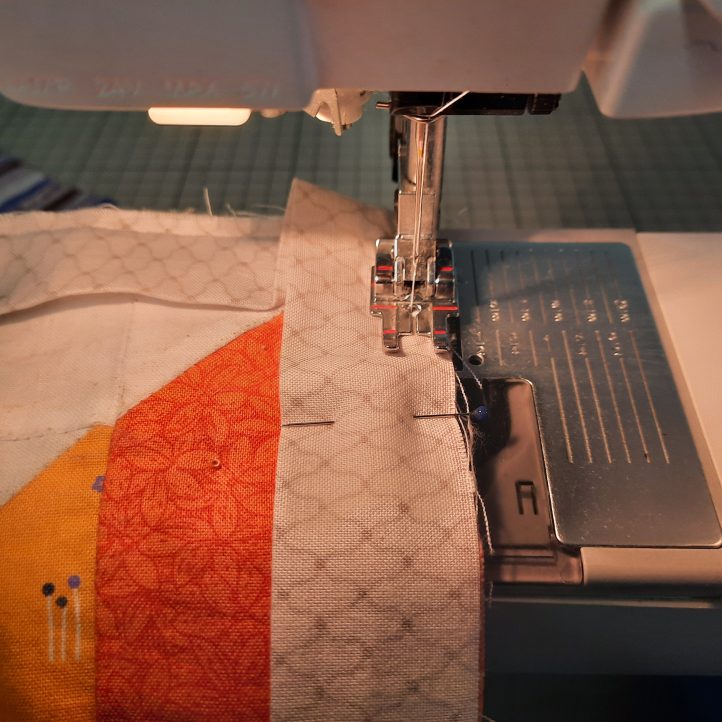
- Stitch both pieces in place, this time stitching on the marked line. Using scissors, trim fabric exactly 1/4” away from the marked line, as shown in the photo.
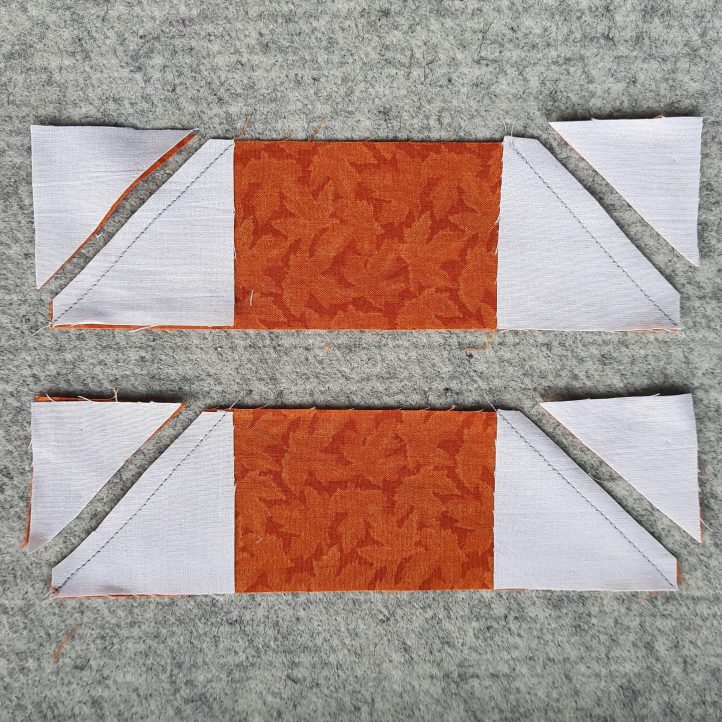
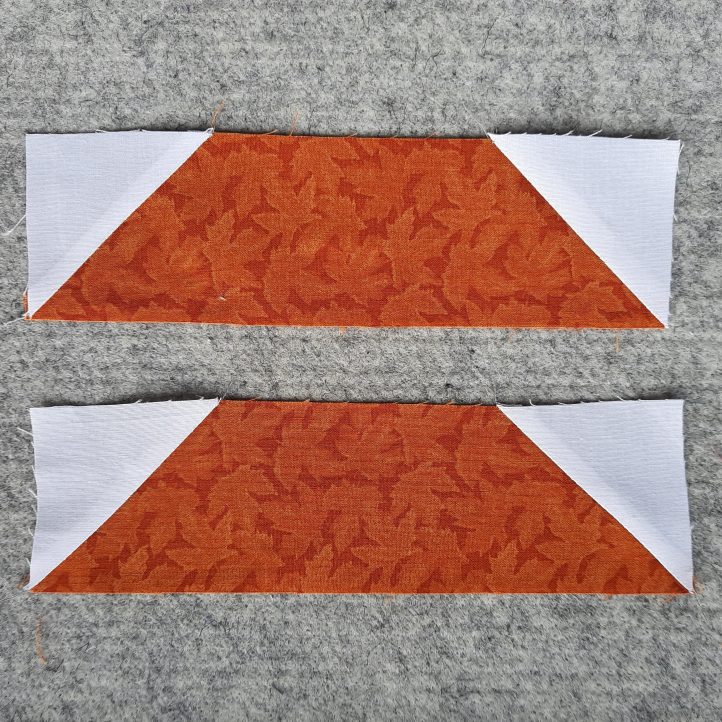
- Open the white triangle and press seam allowances towards the white fabric.
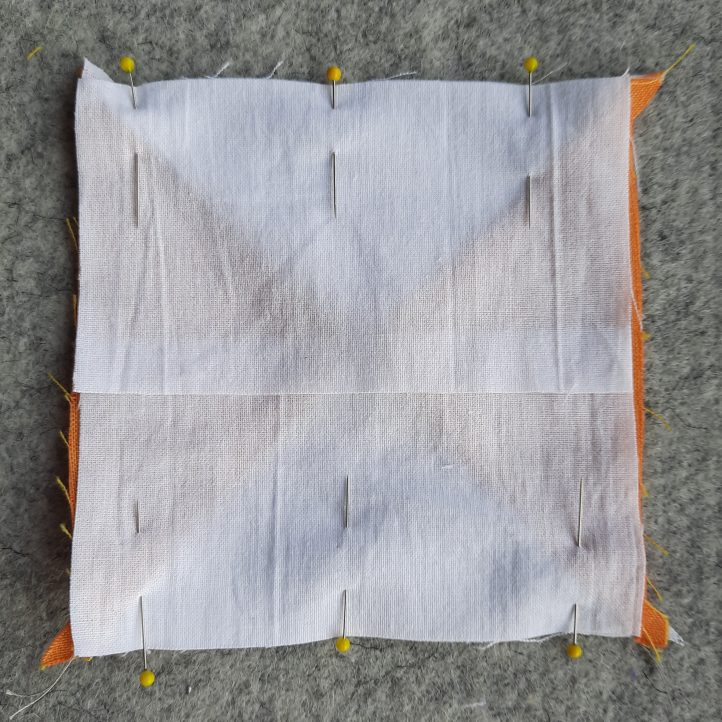
- Take one of the pieces made in Step 15 and place it right sides together, on top of the oblong piece completed in Step 12. Pin in place, ensuring that the Fabric A/C seam aligns exactly with the A/B seam.
- Take the second Step 15 piece and pin it to the bottom of the oblong piece.
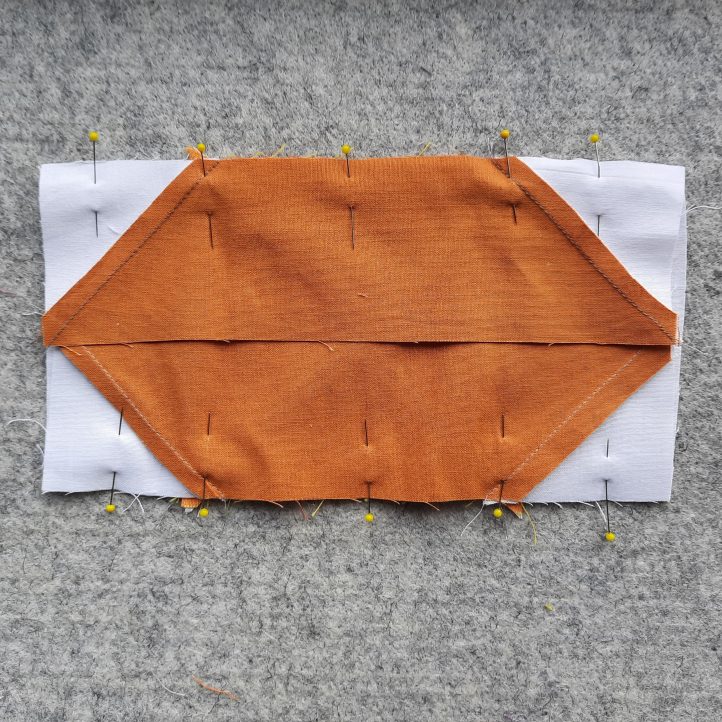
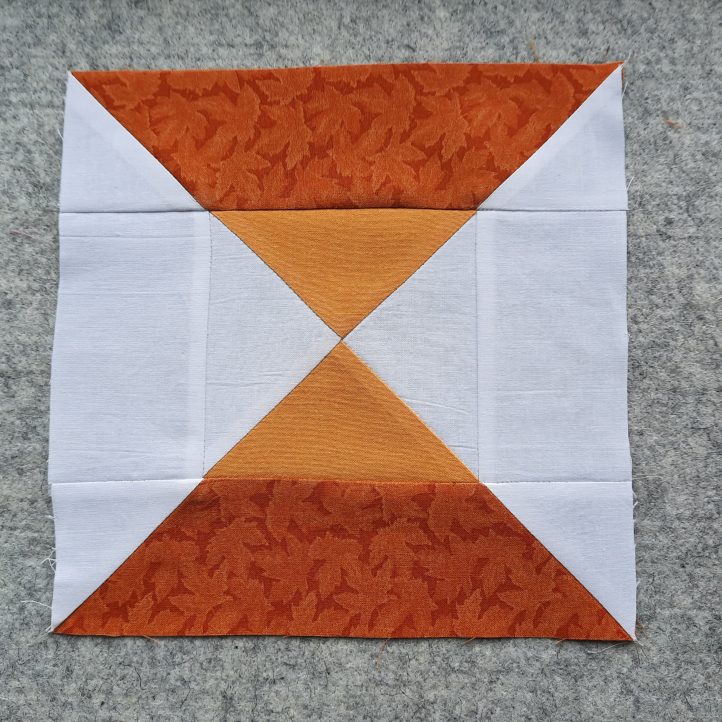
- Stitch the two seams. Press seam allowances out towards the top and out towards the bottom. Block 1 is complete. Keep it by your machine as a template for the remaining blocks.
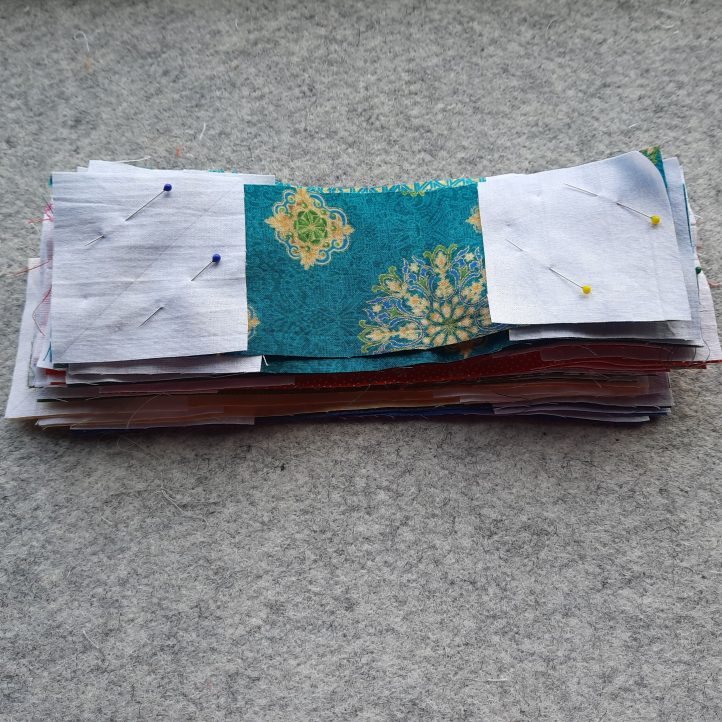
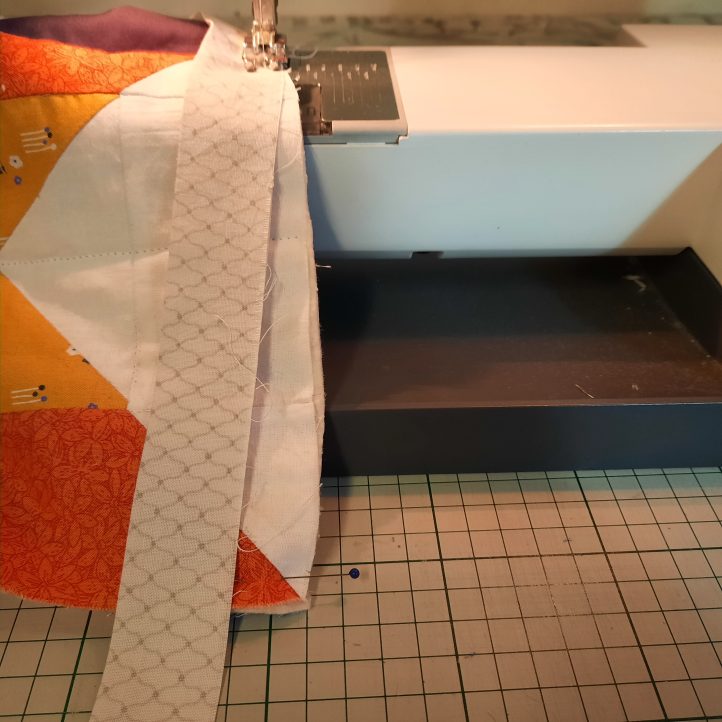
- Make all the remaining blocks in the same way. You can prepare several sets of fabrics ready for stitching as shown in the first photo below. You can then chain-piece them as shown in second photo below.
- Joining the blocks. Join blocks 1-9 following the quilt diagram (located at the bottom of this page) for Row 1. Make Rows 2 – 10 in the same way. Press the seam allowances in the odd-numbered rows to the right and the seam allowances in the even-numbered rows to the left.
- Joining the rows. Join Row 1 to Row 2, ensuring that the vertical seams align and that the seam allowances are facing in opposite directions at those points. Join Rows 3-10 in the same way. Press the quilt top well.
- Layering up the quilt. Press the backing fabric. Find the center of each side (by folding it) and insert a pin at the midway point. Lay it on the floor right side down. Secure the corners with masking tape. Find the center of each side of the batting in the same way and lay the batting on top of the backing. Insert a pin at the mid-point of each side of the quilt top. Lay the quilt top right side up on top of the batting, ensuring that the pins in the top are aligned with the pins in the batting and backing. Join the three layers together, either by using a specialist adhesive spray, or by tacking the layers together in a grid of lines 4” apart, or by using quilters’ safety pins.
- Quilting. This quilt was quilted ‘in the ditch’ (along the seam lines) on a domestic sewing machine, with white thread. Beginning at the center of the quilt, vertical lines were quilted between each of the columns (8” apart). Then, starting at the center, horizontal lines were quilted between each block and across the center of each block (lines 4” apart).
- Binding and finishing. Square up the quilt and trim off the excess batting and backing. Fold the strip of binding in half lengthways and press with an iron. Place the folded binding on top of the right side of the quilt, against the right-hand edge, part-way down one side so the raw edges of the binding line up with the raw edges of the quilt. Leaving a 5” ‘tail’ of binding at the beginning, machine stitch the binding in place 1/4” in from the raw edges. Insert a pin 1/4” (6mm) in from the first corner.
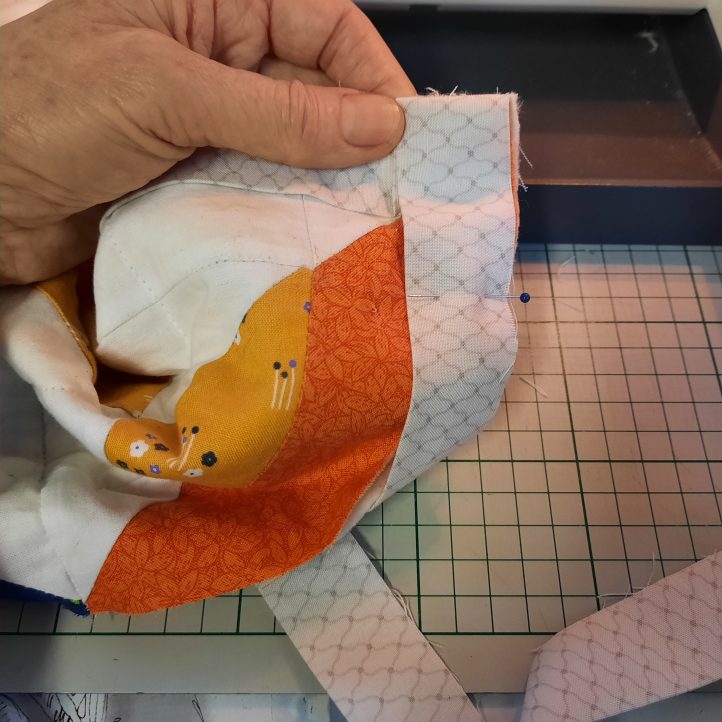
- Stitch as far as the pin, then take out the pin and make the final stitch at the spot where the pin was inserted. Then lift the presser foot lever, with needle down in the fabric, swing work around and stitch straight out to the corner previous line stitching that is at a 45 degree angle. Take the quilt out of the machine. Now fold the long free end of the binding upwards at a 45 degree angle as shown.
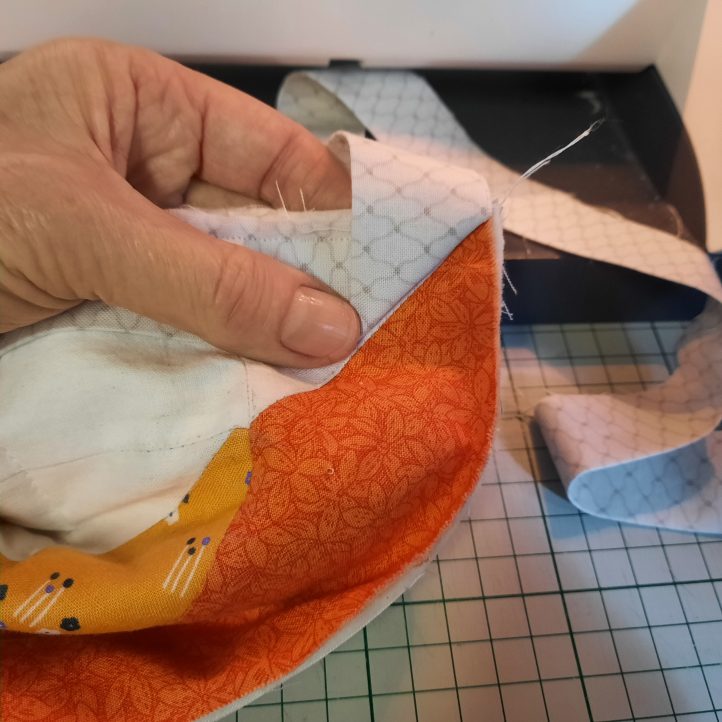
- Next, fold the long end back down again on itself, enclosing the 45 degree angle fold. The top fold should align with the raw edges of the previous side.
- Beginning at the fold, stitch down the next side of the quilt. In the photo, you can see the second binding strip lying neatly on top of the first binding strip.
- Repeat Steps 24-27 three more times.
- On the final side, stop stitching down the binding at a point about 6” from where you started. Take the quilt out of the machine and fold back the two loose ends of binding so that the folds meet. Mark the folds with pins. Trim the ends to about 1” (25mm) beyond the fold.
- Finger–press the folds. Open the ends and pin them together, inserting the pins at right angles.
- Re-fold the binding and check that the fit is right. If it is, trim the seam allowances to 1/4” (6mm).
- Re-fold the binding again and stitch the final piece of binding into place on the quilt.
- Turn the binding to the back of the quilt and slip-stitch the binding to the quilt.