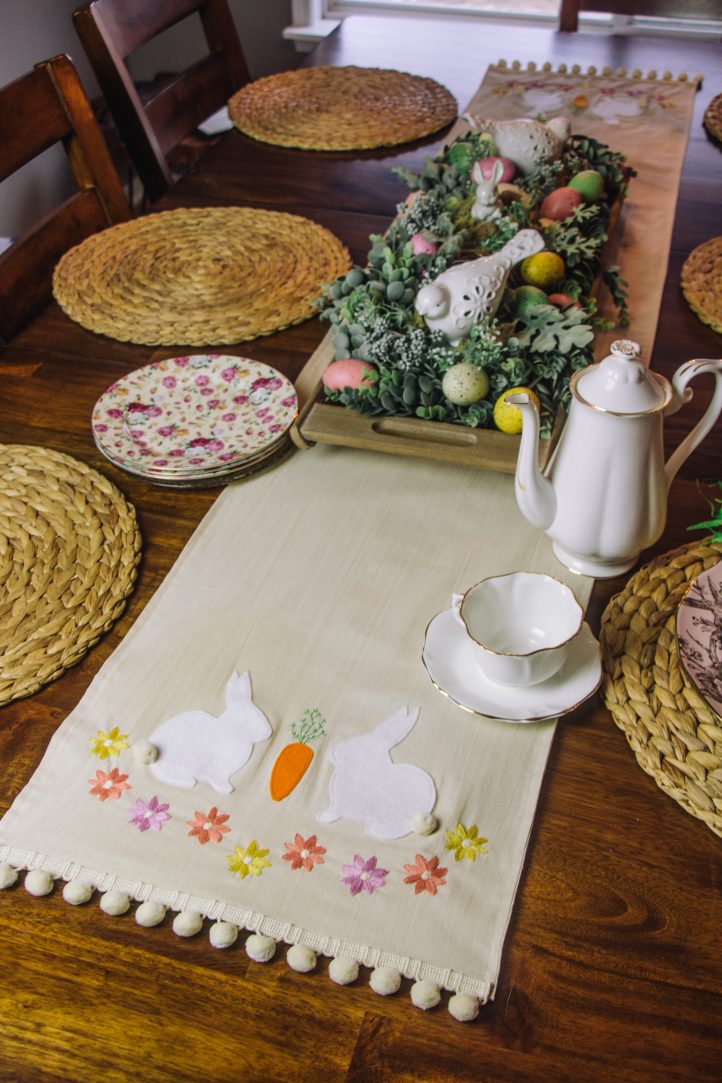
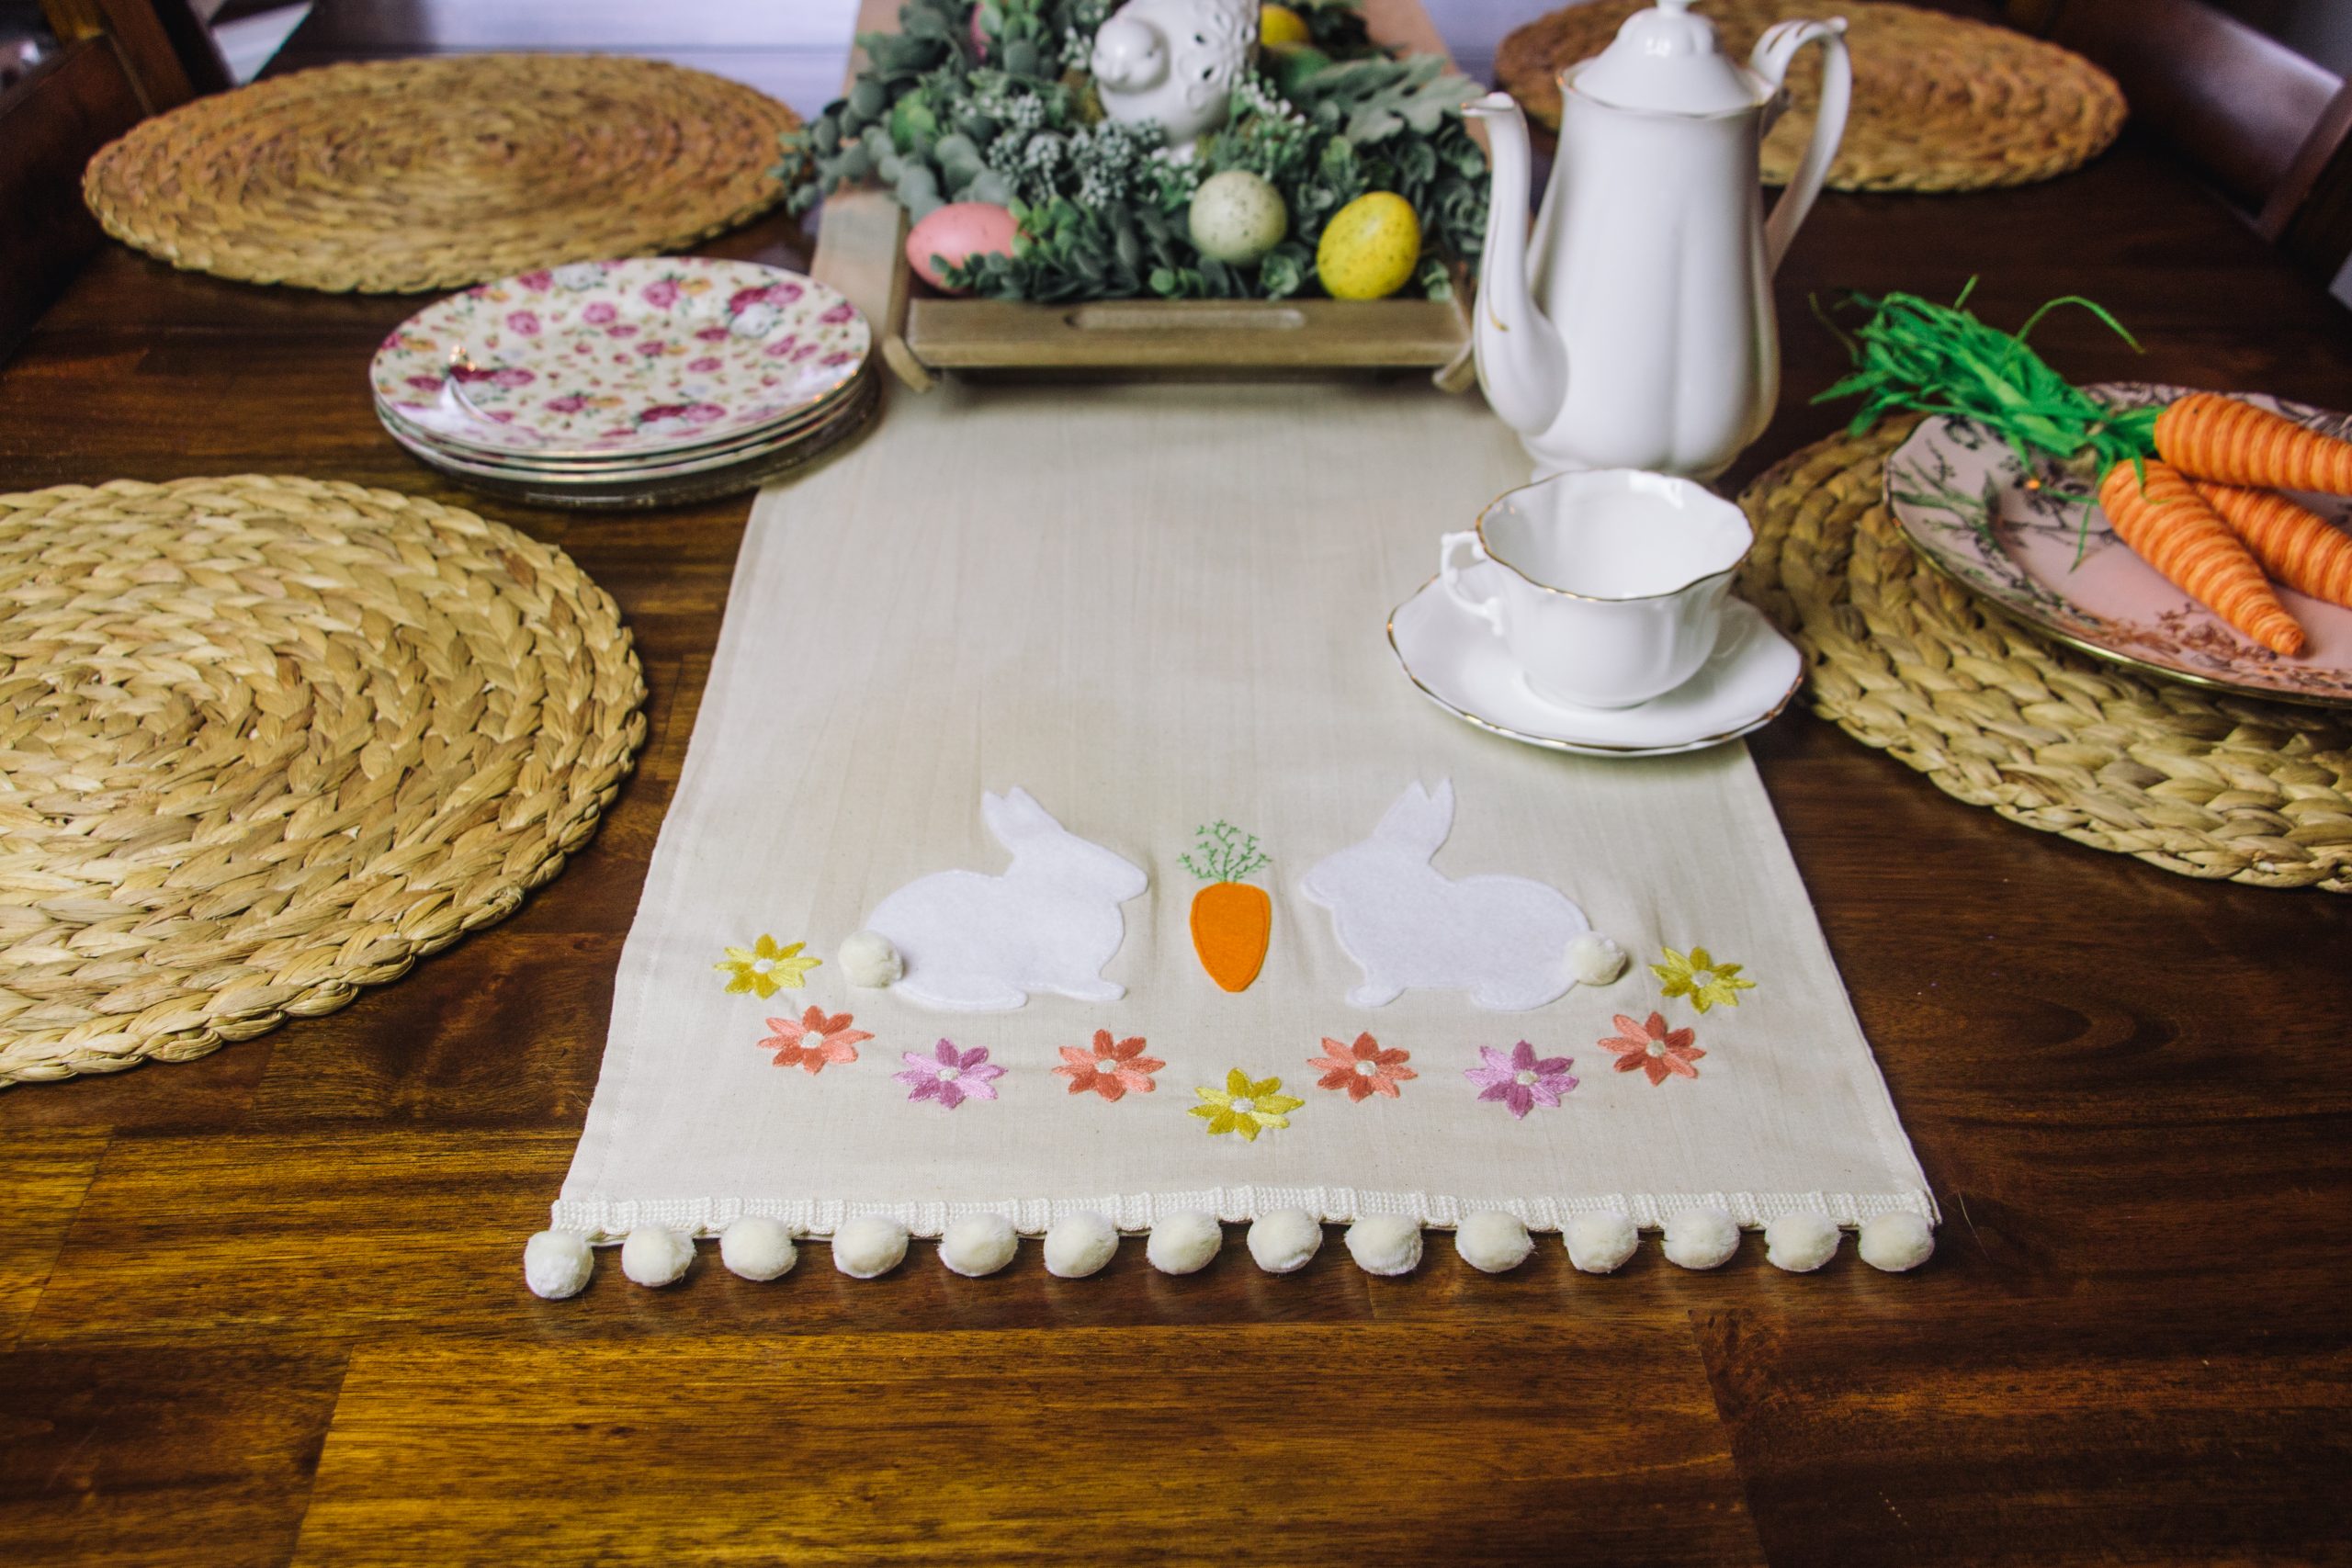
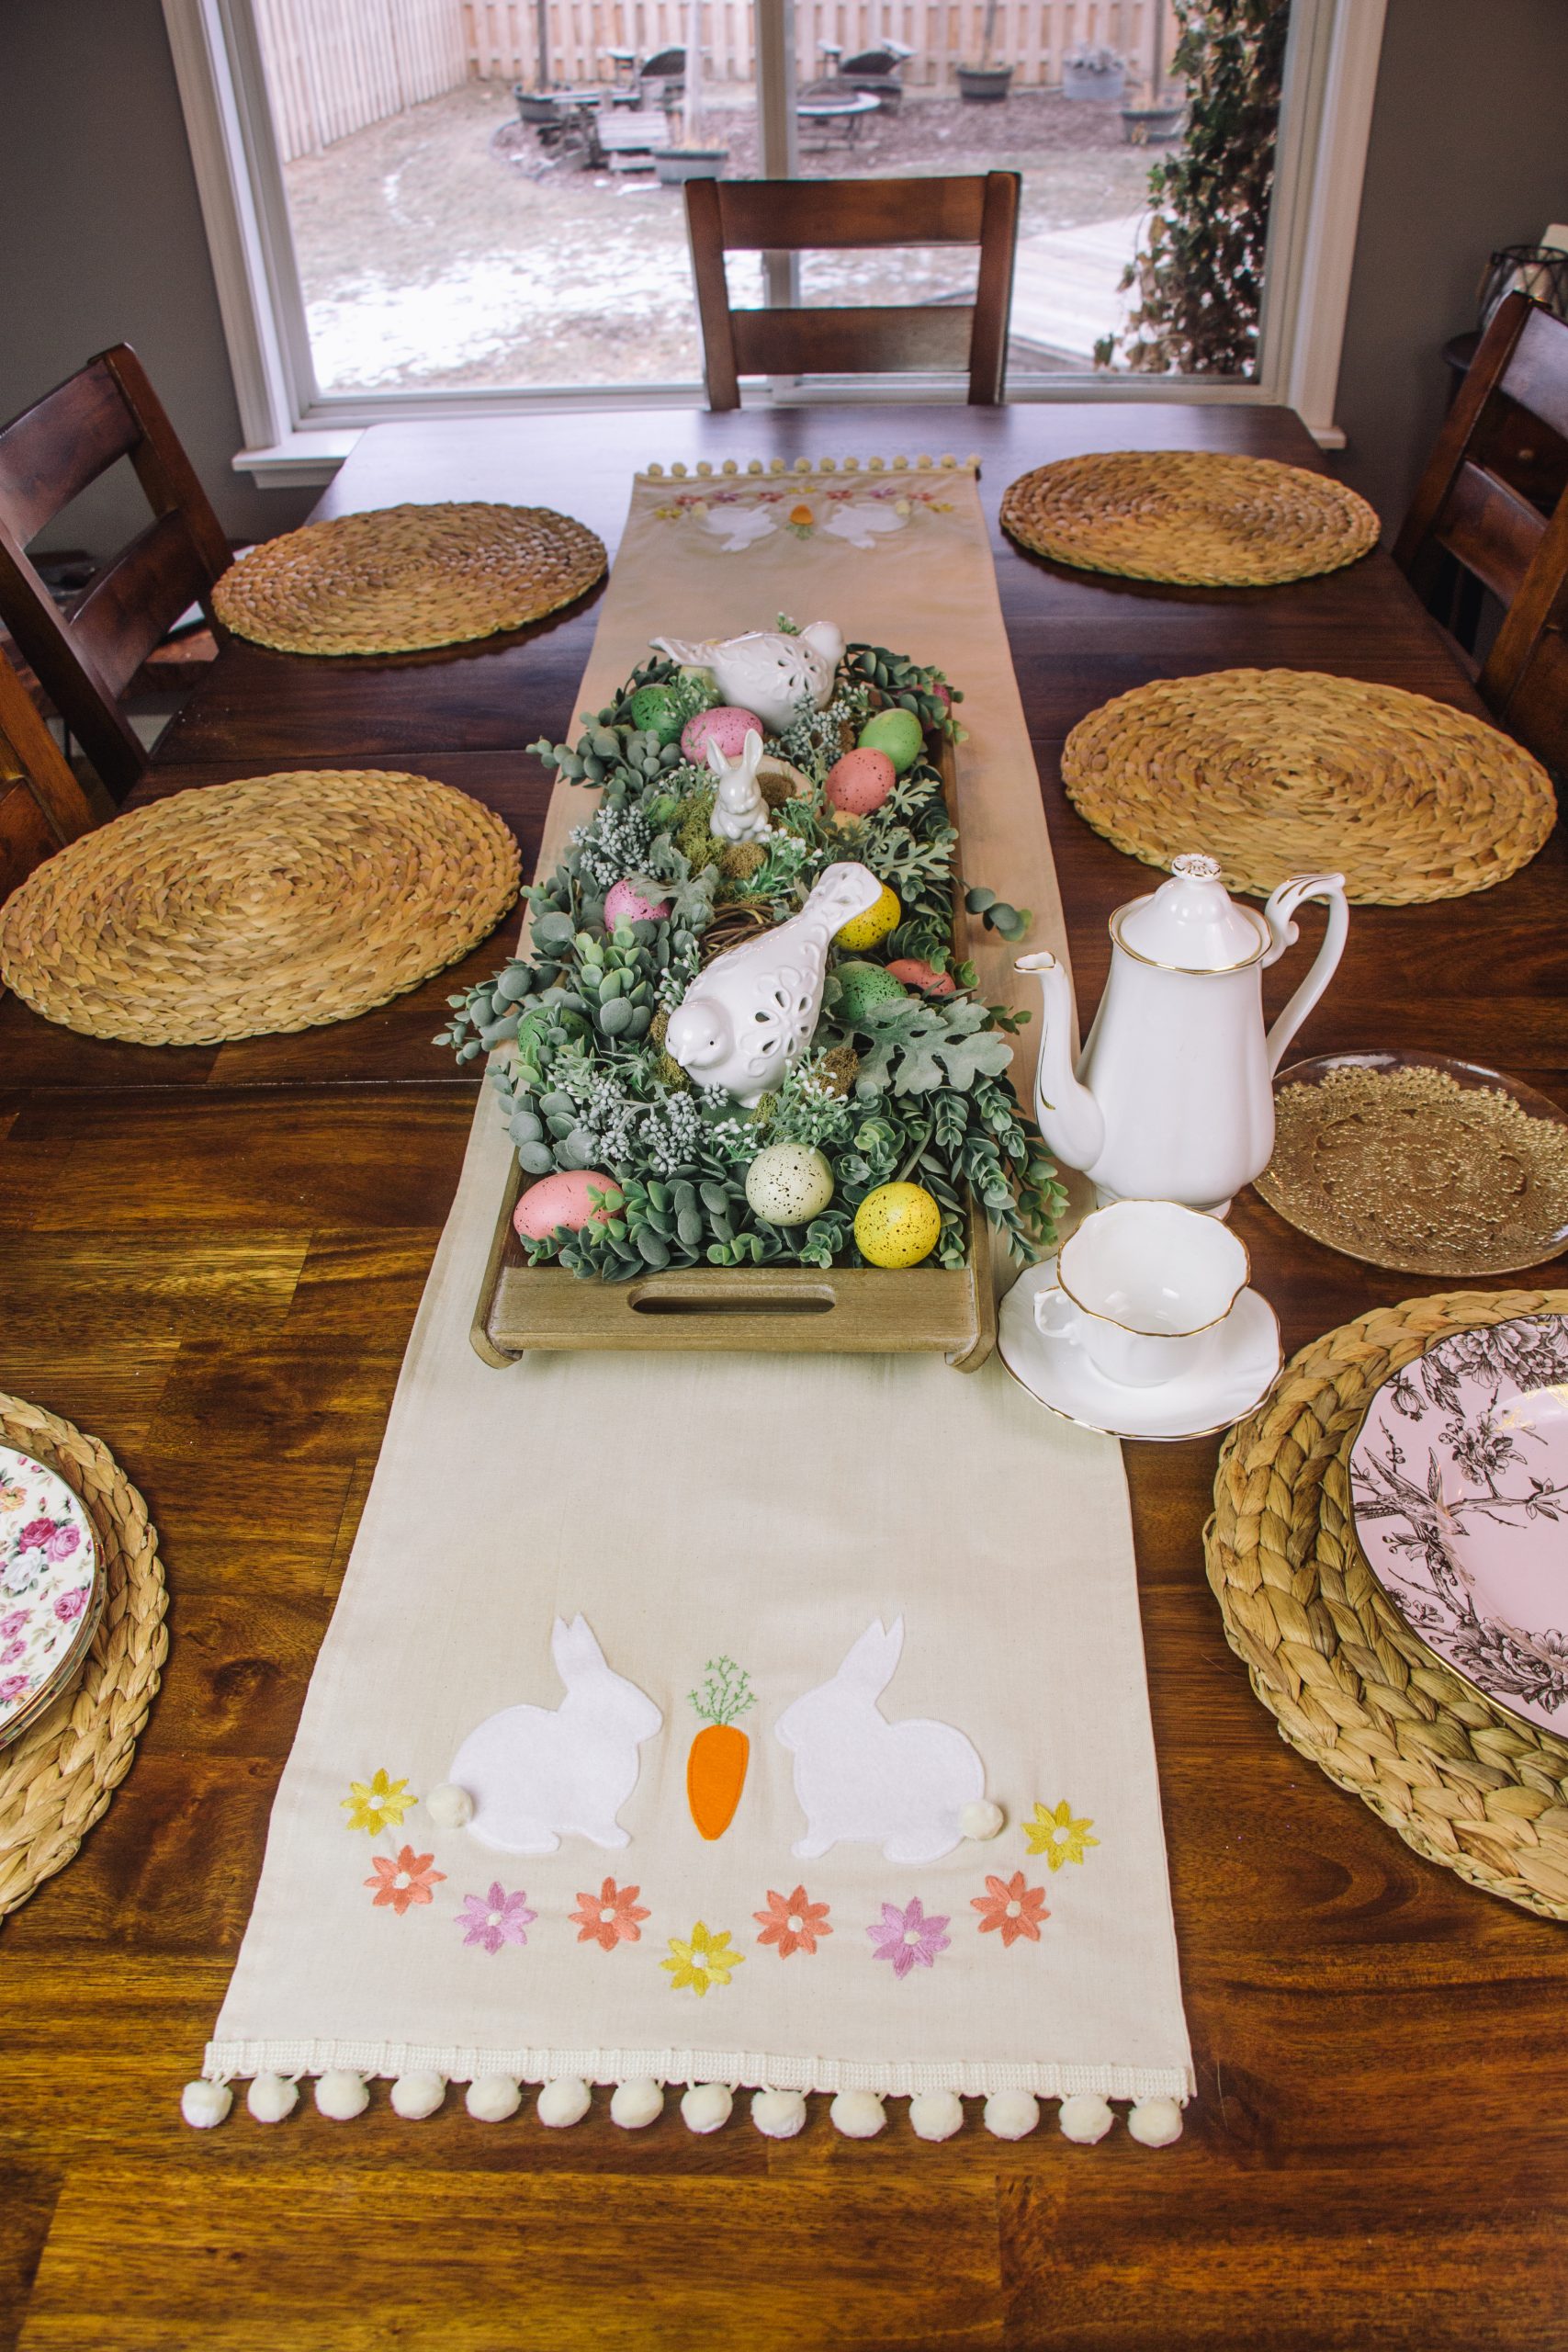
Celebrate the arrival of Spring with an adorable table runner that’s perfect for Easter dinner! Using machine and hand sewing skills, you can design this delightful table runner that features applique bunnies with pompom tails. The embroidered details of spring flowers are what truly sets this table runner apart from anything store-bought, and will make it a treasured piece of holiday décor. Say “Hoppy Easter” with this playful addition to your dining room this spring.
Materials:
- Fabric: calico, to fit your table (see designer notes below)
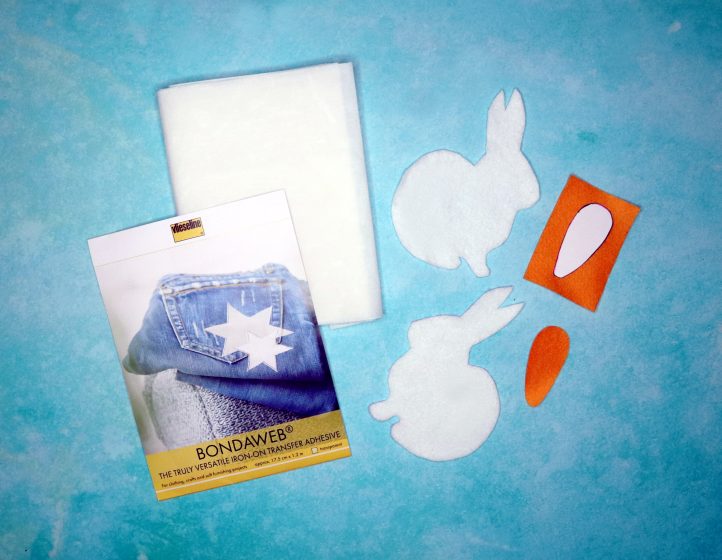
- Felt: white, orange; one sheet of each
- Fusible webbing
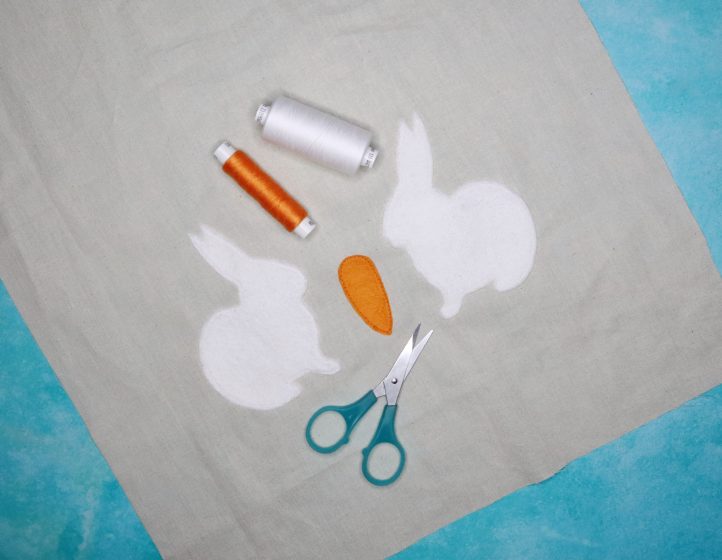
- Sewing thread: white, orange
- Embroidery thread: green, pink, salmon, orange, yellow, off-white
- Pompom trim
- PDF patterns – These are located at the bottom of this page.
Tools:
- Tape measure
- Pencil or water-erasable fabric pen
- Dressmaker’s shears
- Iron and ironing board
- Pins
- Sewing machine
- Large embroidery hoop
- Embroidery needle
Designer Notes:
Before you create your table runner, you’ll need to work out how large it needs to be, and how much fabric you’ll need to buy. Traditionally, a table runner should overhang each end of your table by approximately 6” – 10”. Therefore, to work out how long your runner needs to be, measure your table and add an additional 12”- 20” to the length. Width-wise, we made our sample around 15” across; again, you can scale this up or down to suit your table, but make sure that it’s wide enough to accommodate the embroidered flowers and appliqué design.
Instructions:
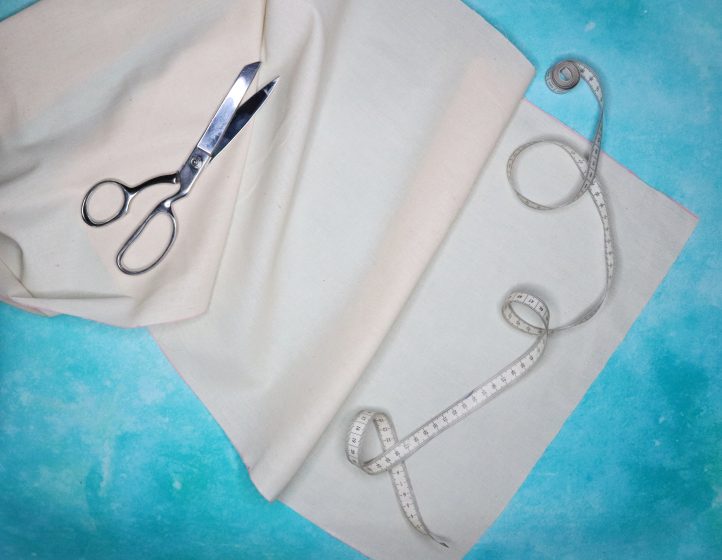
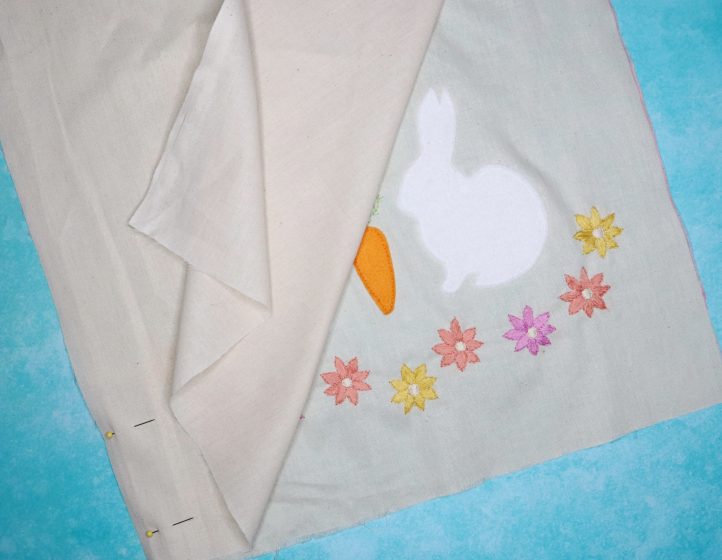
- Begin by measuring out and cutting your Front and Back table runner pieces from plain calico fabric – you’ll need two identical rectangles, cut to size (see the designer notes above for details on determining the size you’ll need). Put the Back piece to one side for now; for the next few steps, you’ll be working on the Front piece only.
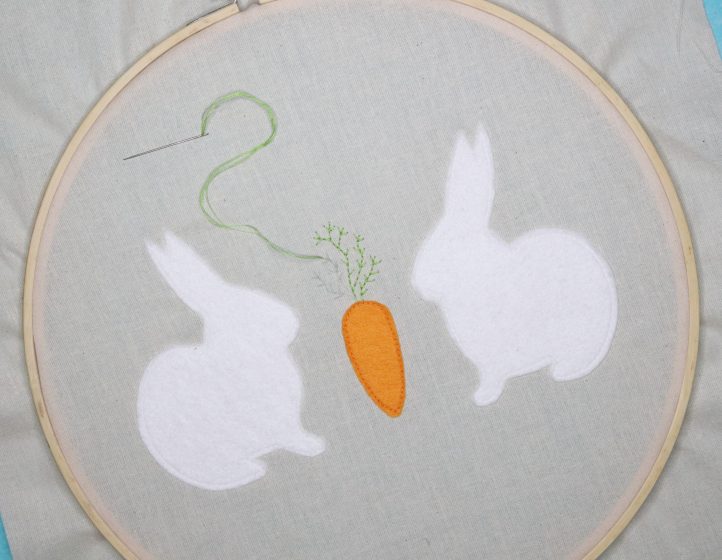
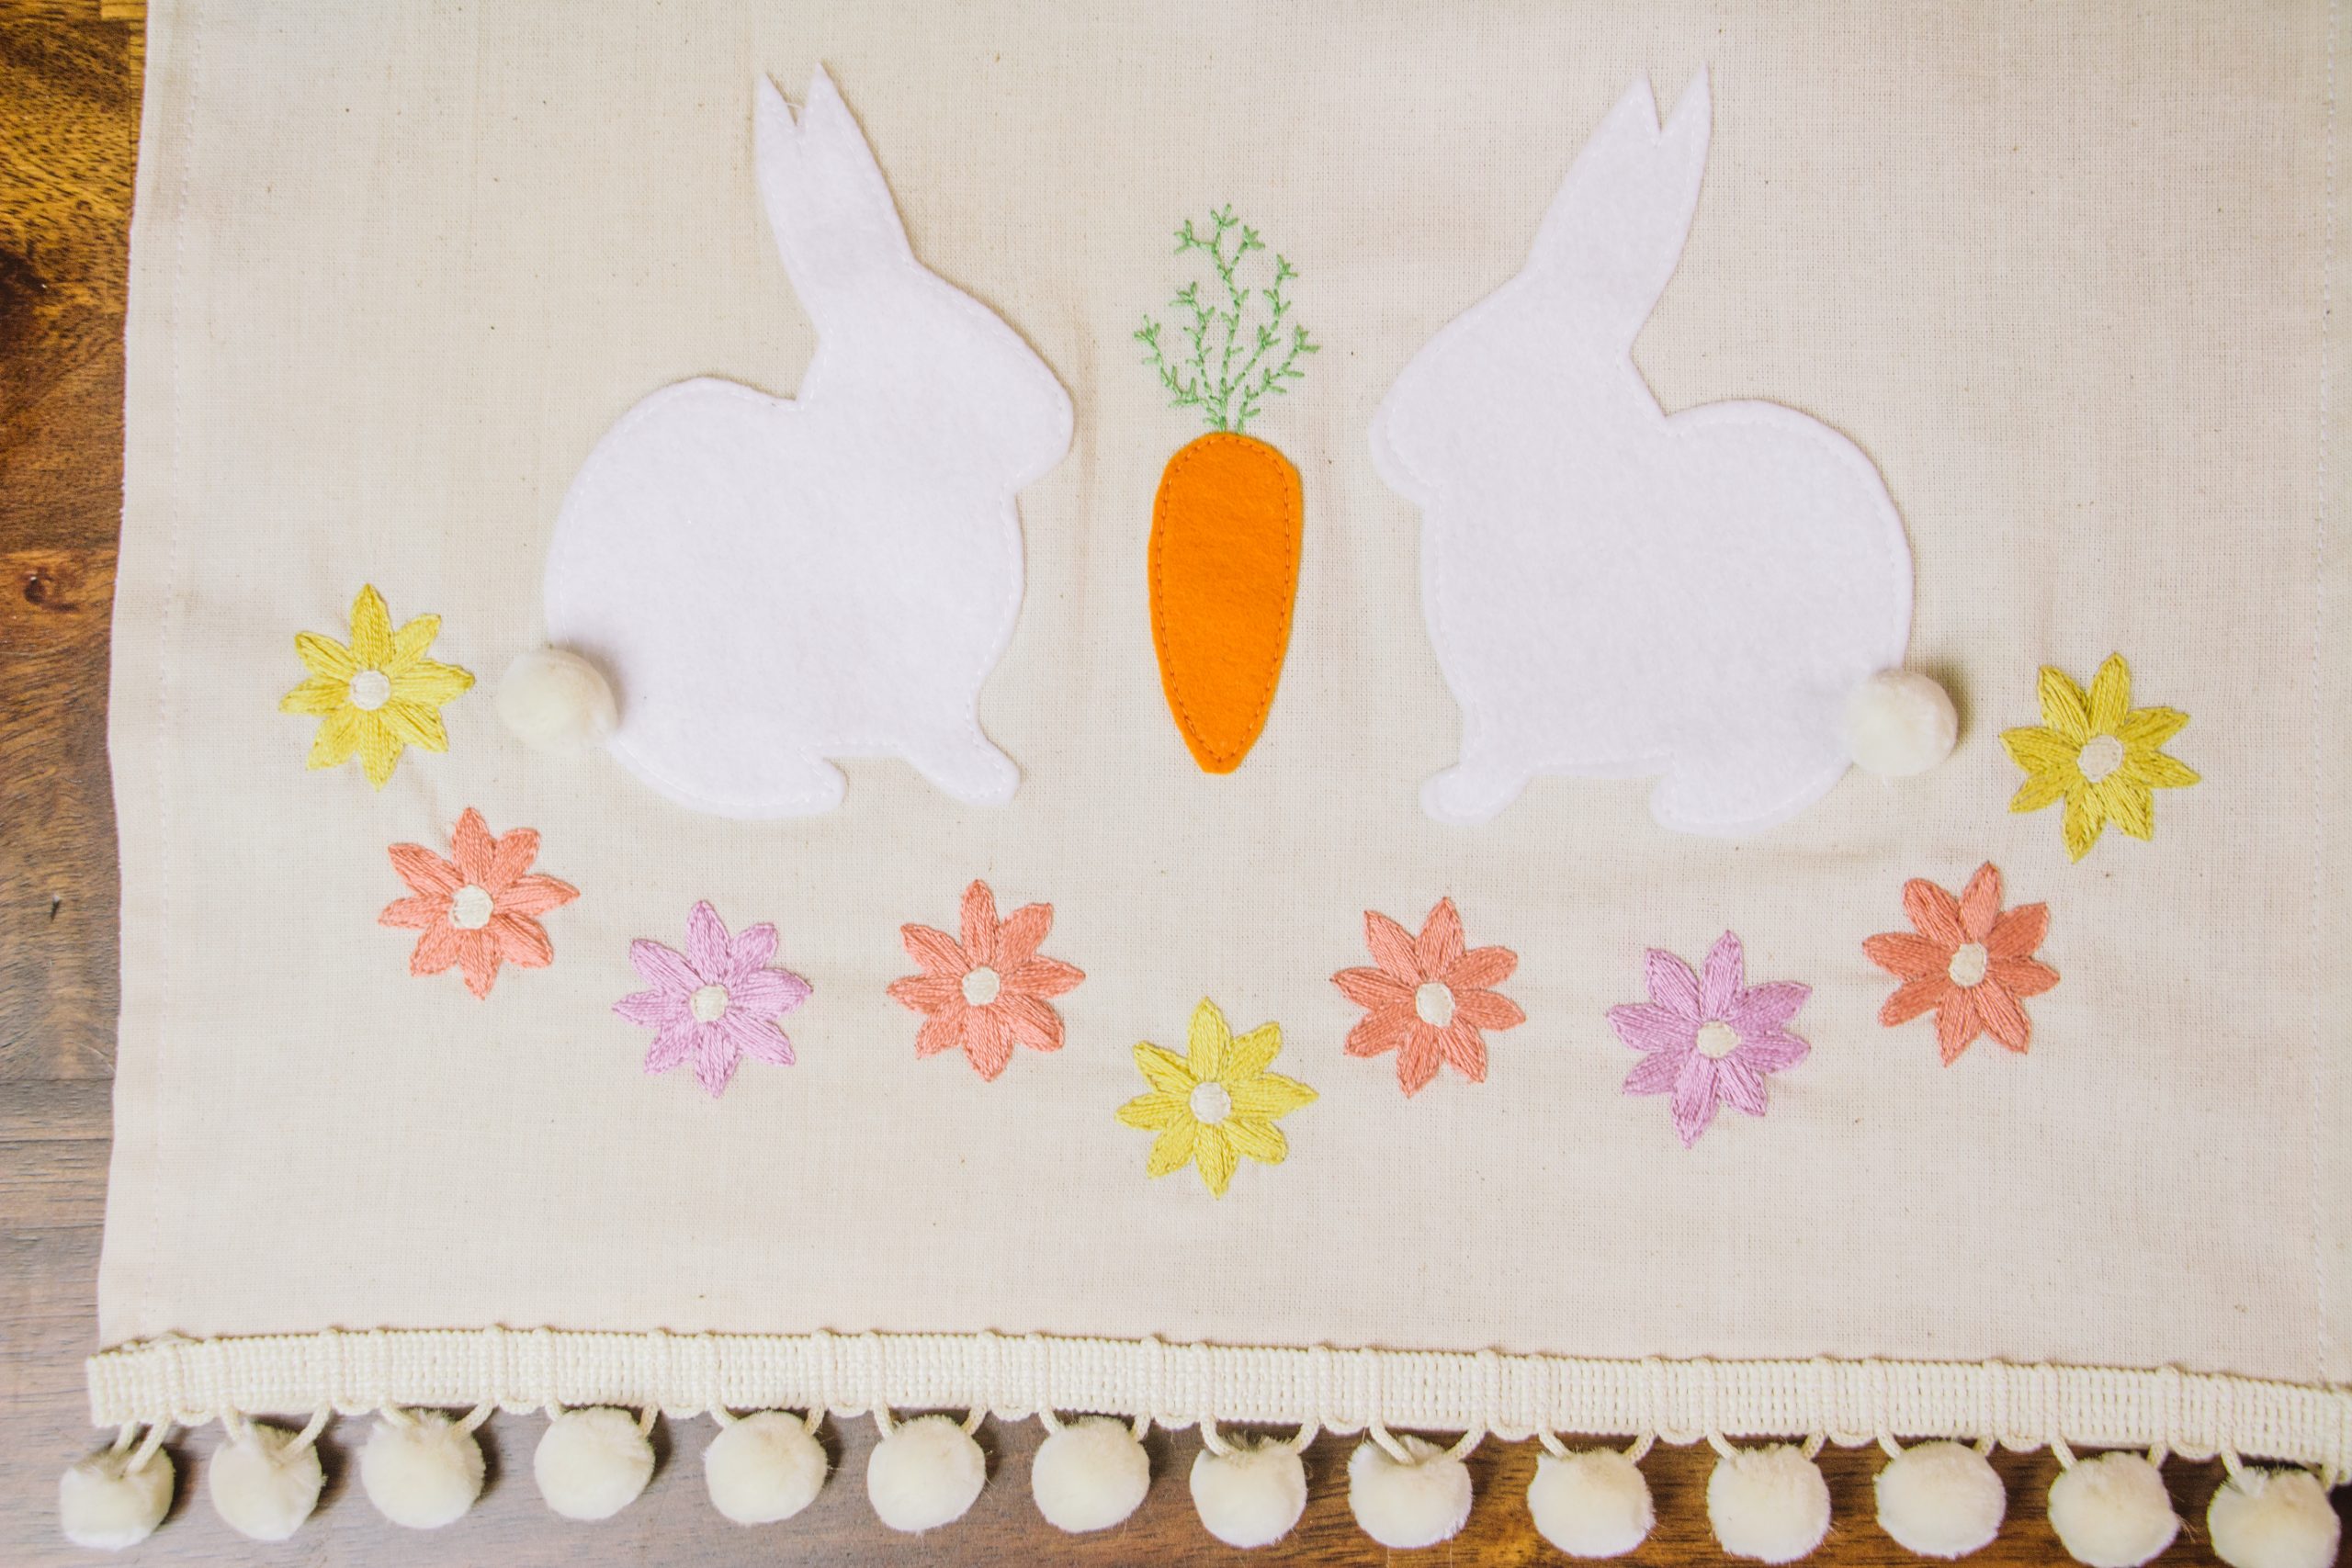
- Take sheets of orange and white felt and back them with fusible webbing, following the manufacturer’s instructions closely and leaving the paper backing in place. Print out the carrot and bunny templates provided, and use them to draw and then cut two carrot shapes from the orange felt, and four bunnies (two reversed) from the white felt.
- Lay your Front piece out flat. Peel the paper backing from one of the felt carrots and place it onto the fabric, positioning it centrally towards one end of the runner. Use a warm iron and a pressing cloth to fuse it into place. Position two bunnies on either side of the carrot, making sure they sit symmetrically, and press to secure in the same way. Work a straight machine top stitch around the edge of the carrot in orange thread, then top stitch around the edge of each bunny in white thread. Repeat to add the other carrot and remaining bunnies to the opposite end of the table runner in the same way.
- Use a pencil or a water-erasable fabric pen to draw a bunch of fronds and leaves coming out from the top of each carrot. Mount the work in a large embroidery hoop, making sure that one of the carrots and its leaves sit centrally within it and the fabric is taut, like a drum. Thread an embroidery needle with two strands of green embroidery floss and work over the design in backstitch. Remove the fabric from the hoop, then repeat with the opposite end of the table runner to embroider over the second set of carrot leaves in the same way.
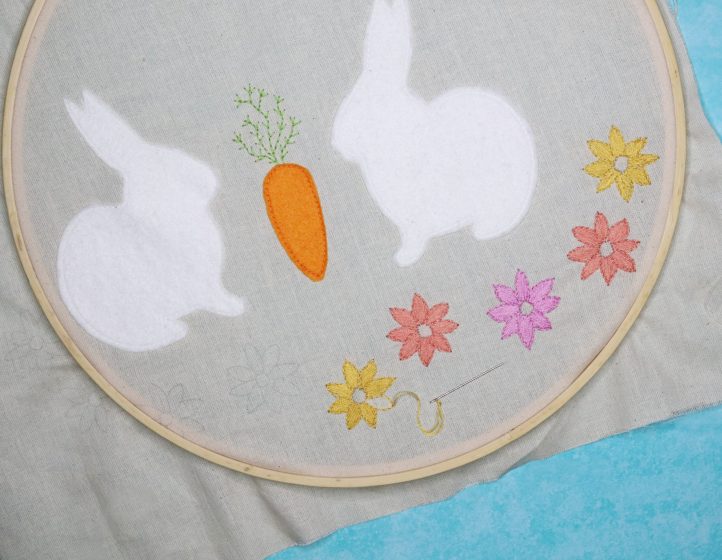
- Transfer the provided flower border template to your fabric using your preferred method, positioning each one underneath your appliqué designs. Mount the work back in a large embroidery hoop and use two strands of yellow, pink, or salmon embroidery thread to work around the edge of each flower in split stitch, before filling in the petals using satin stitch. Use off-white embroidery thread to fill in the middle of each flower, once again using split stitch to border the circle then filling with satin stitch. Repeat to embroider the second set of flowers along the opposite end of the table runner.
- With your main design elements complete, it’s time to construct the table runner. Pin the Front and Back pieces together with right sides facing, then machine stitch along the two long edges and one short edge, leaving a 5/8” seam allowance. Turn the runner out and press, making sure all the corners are turned out neatly. Fold the remaining edge inwards by 5/8”, then press and pin to secure. Work a straight machine top stitch all around the edge of the runner in white thread, to neaten the finished edges and close the remaining open edge.
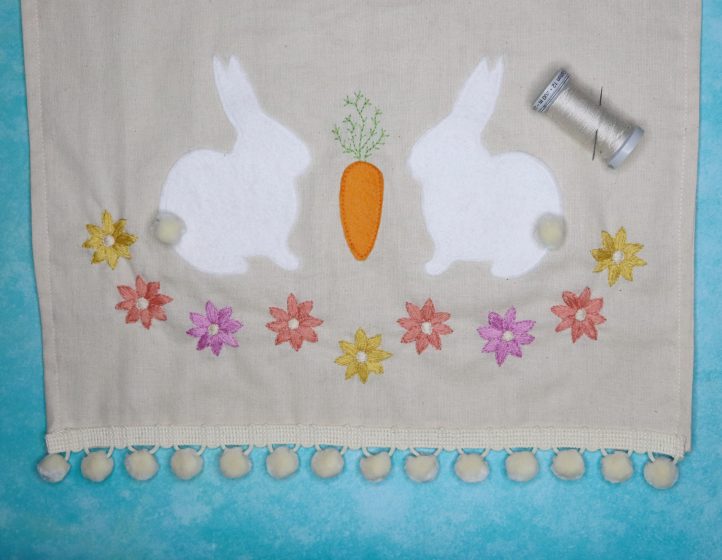
- Cut two lengths of pompom trim, making sure each is 1” longer than the width of your table runner. Lay and then pin each one into position along a short edge of your table runner, folding the raw cut edges of the trim under by 0.5” on each side. Machine top stitch trim, while backstitching at each end to secure in place.

- Finally, trim four pompom balls from an off-cut of trim, and hand sew each one into place on your bunnies, working through them several times to ensure they stay secure.
Hop to It Embroidered Table Runner
Hop to It Embroidered Table Runner
Hop to It Embroidered Table Runner
Hop to It Embroidered Table Runner
I did it, what a fun runner! I have runners for our coffee table as well as our dining room table & on top of the mantle. This runner is really the reason for joining “we like to sew.” I can’t wait to get the magazine & all the stuff that goes along with it. Thank you
Hi Linda! We’re so glad you enjoyed this project! Our April issue will be out in a few days, so keep an eye out for it on our site. Have a great day! – Ashley, WeLikeSewing