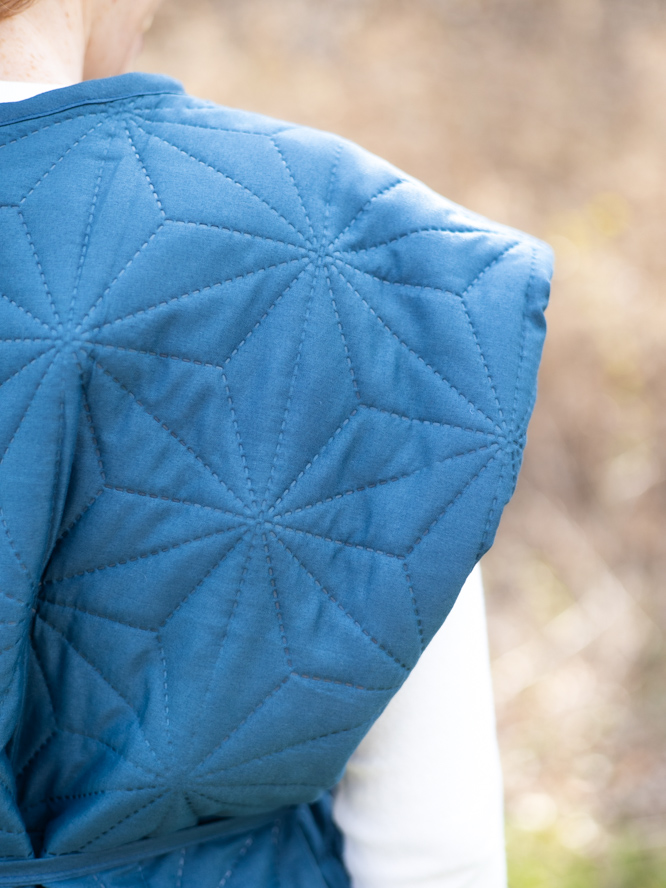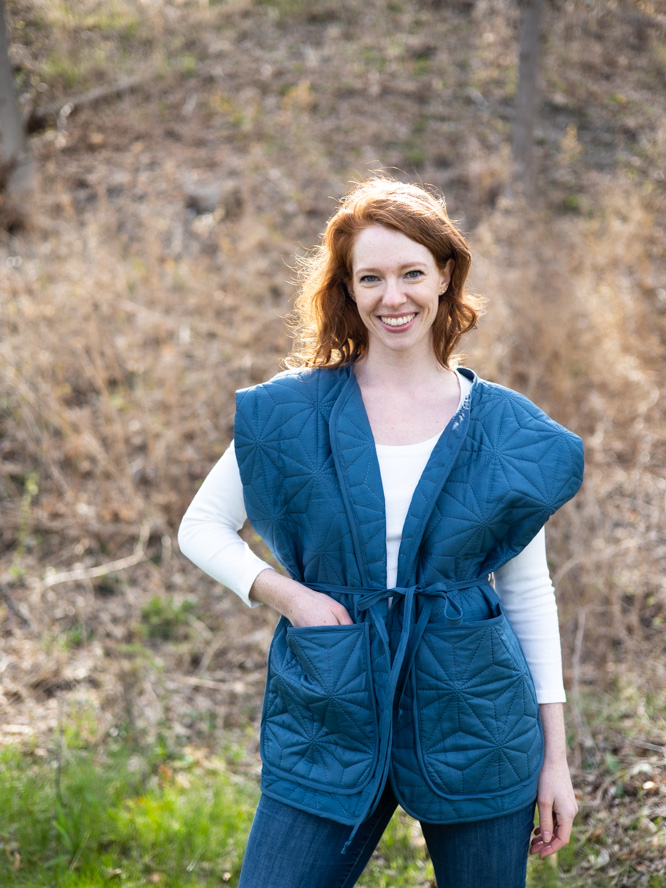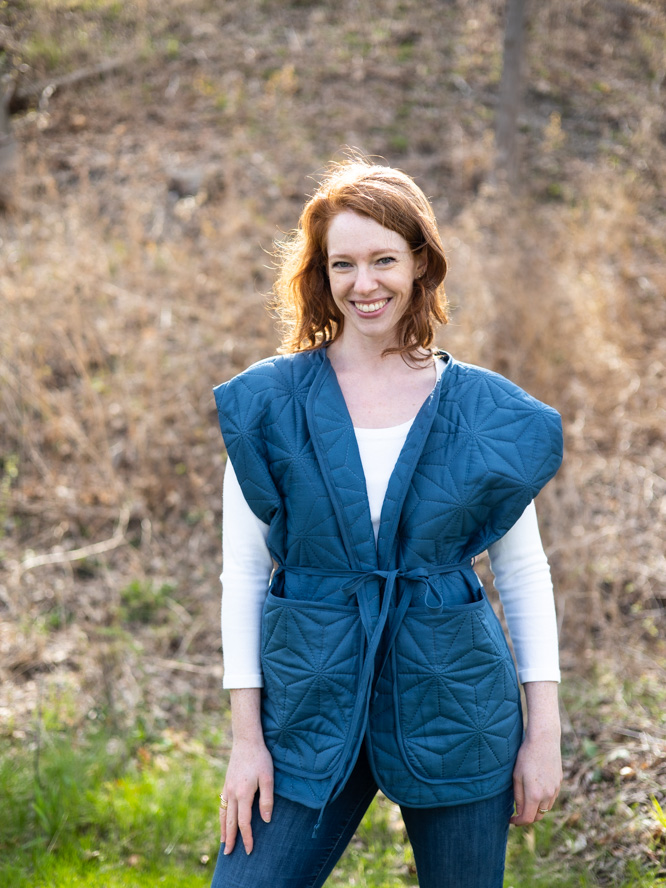
Snuggle up this fall in a sophisticated quilted vest with this project from Meg Healy. Design a comfortable, chic fall vest with deep side pockets and a tie waist in beautiful jewel tones, like the rich cerulean blue pictured. This project is aimed at intermediate sewists and provides multiple opportunities for expanding your sewing skills, like learning pattern drafting and working with thicker fabrics. We love that this project uses quilted fabric, making it a fun potential upcycling project for sewists and quilters alike.
Skill Level: Intermediate
Finished Size: Center back length 26 1/2”, width varies
Seam Allowances: 5/8”
Materials:
- One twin size quilt either handmade, thrifted, or bought (sample sewn from Amazon.com quilt)
- Pattern paper
- Tracing paper
- Straight ruler
- Curved ruler
- Measuring tape
- Pre-pressed bias binding either purchased or handmade (Tip: If your quilt has binding around the edge, try carefully stitch ripping it off to reuse!)
- Sewing pins
- Pencil
- PDF Pocket Pattern – This is located at the bottom of this page. See printing instructions below.
PRINTING INSTRUCTIONS:
To download the PDF pattern, click on the download button at the bottom of the page. We recommend opening your download using Adobe Acrobat.
Instructions:
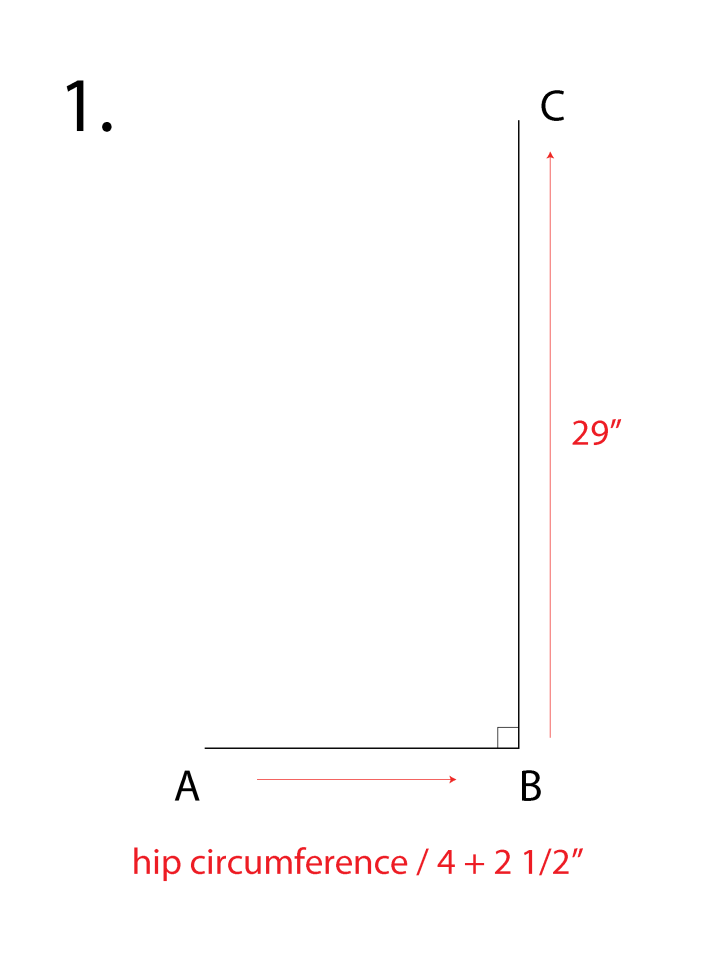
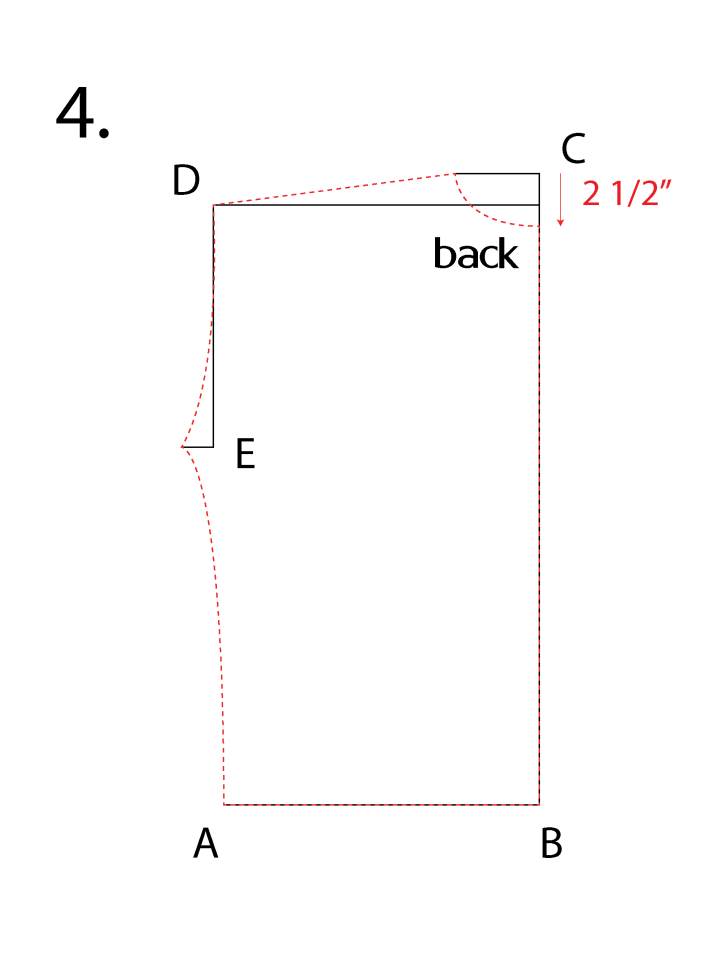
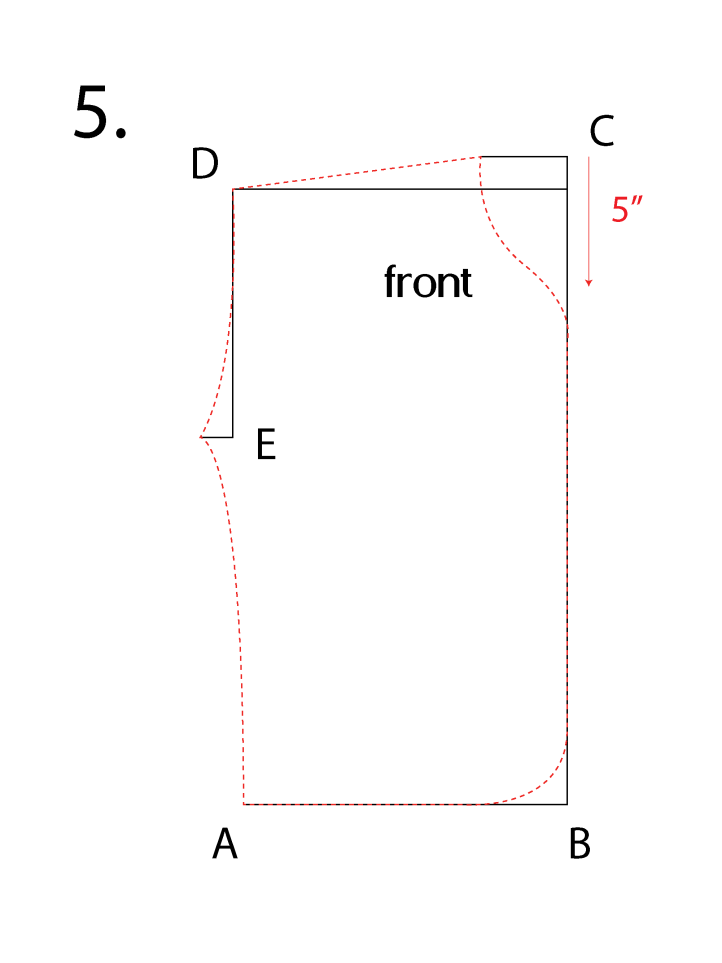
- Roll out a large piece of paper to start your draft. First measure your hip circumference and bust circumference and record. Starting at point A, draw a line the distance of your hip circumference divided by 4, then + 2 1/2”. Label the end of the line B. Square a line up from B 29” long and label C.
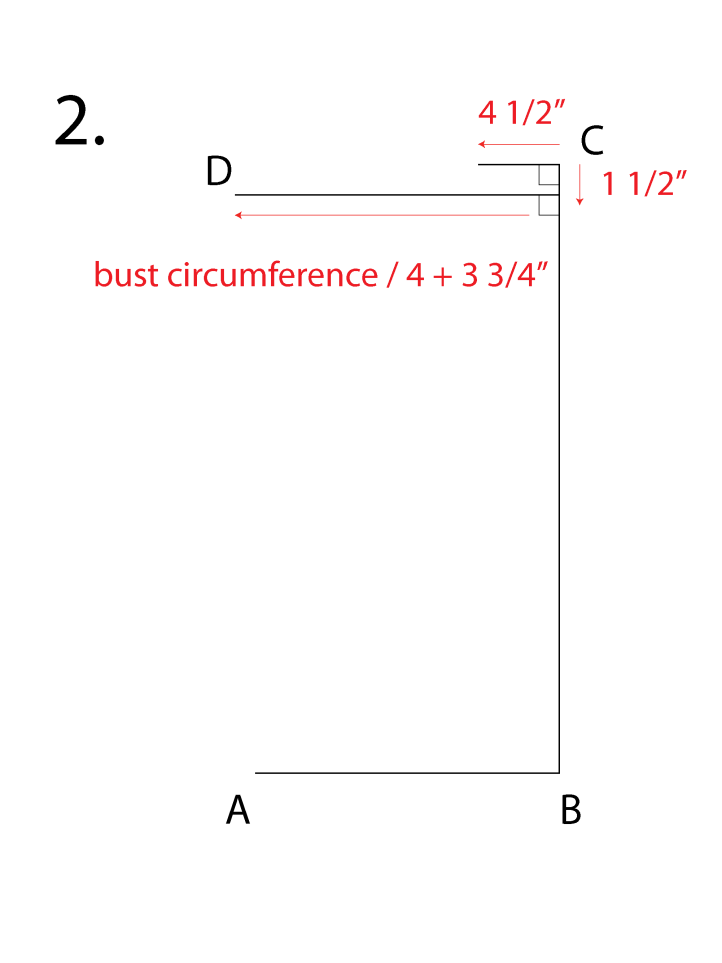
- From C, square out a line 4 1/2” long and then mark a point 1 1/2” down from C towards B. From that point, square out a line the distance of your bust circumference divided by 4, then + 3 1/4”. Label D.
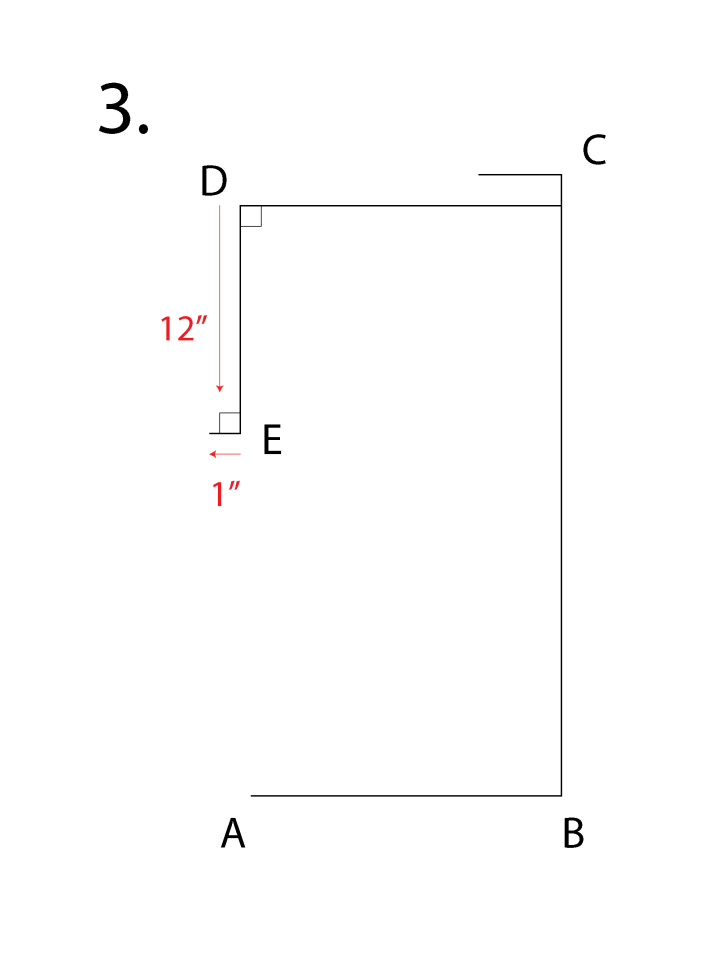
- From D, square down a line 12” and label E. From E, square out a line 1” long.
- Measure a point 2 1/2” below C. This is the base of the back neckline. Blend a curve from this point to the end of the C line, then connect that point to D. From D, blend a curve out towards the end of the E line, then down towards A. You can place a piece of tracing paper over the draft and “extract” the back piece pattern lines.
- The process is the same for the front, except use a guideline of 5” below C for the curved front. Also curve the point of transition at B. If you don’t have curved ruler, you can use the edge of a small plate.
- You’ll need these three pattern pieces. Front (from the draft), back (from the draft), and the curved pocket (from the printed pattern). Cut 2 fronts, 1 back on the fold, and two pocket pieces from the quilt.

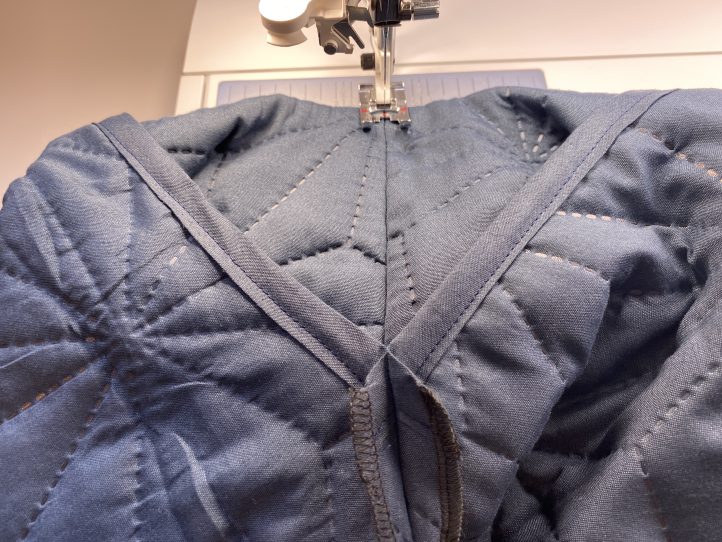
- Sew each shoulder seam raw edges with a serger, zig-zag stitch, or binding. Then join shoulder seams together with a straight stitch. Press seam allowances open.
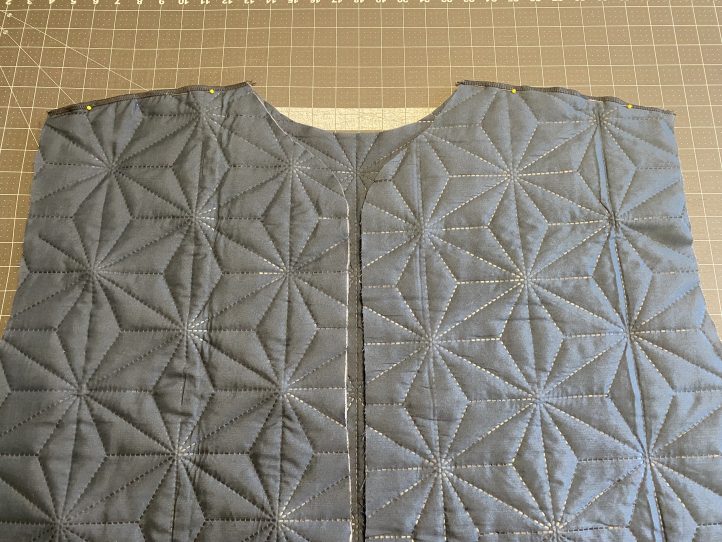
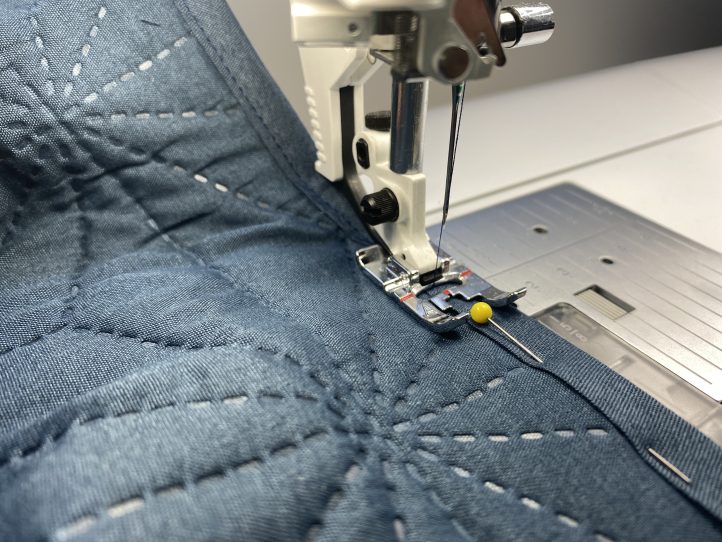
- Lay the armhole flat, right side up, and pin the binding along the armhole from front to back underarm point.
- Stitch the binding approx. 1/8” from the inner binding edge.
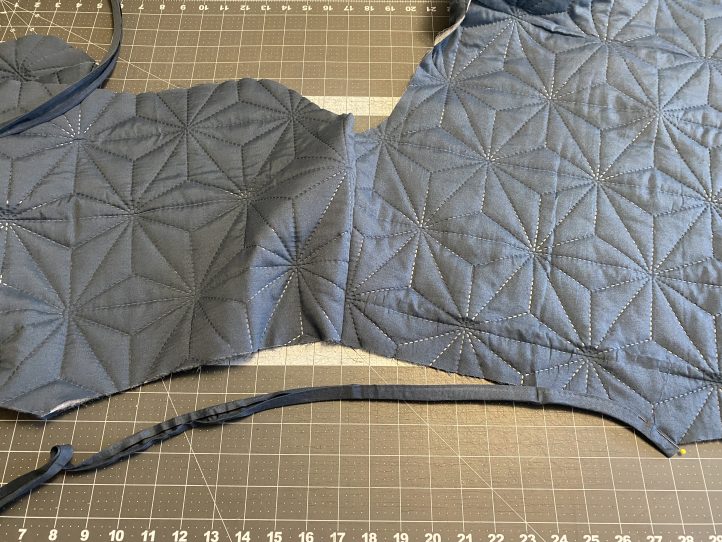
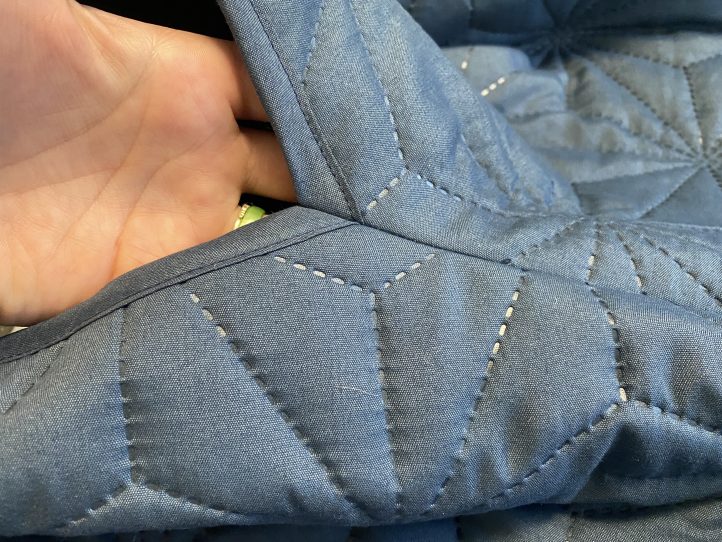
- Finish each side seam raw edge, then pin the front and back right sides together along side seams.

- Make sure the underarm points where bindings join line up with each other. Stitch the side seams together and press seam allowances open.
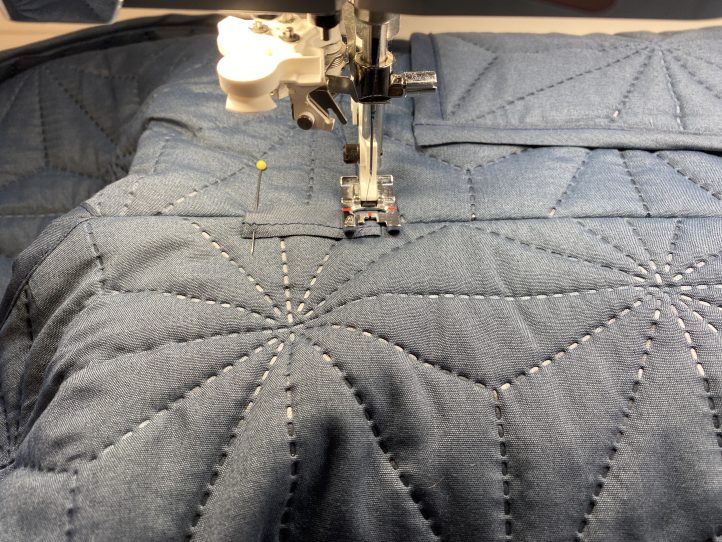
- Starting at the center back neckline, pin binding around the necklines, down center front and along the hem.

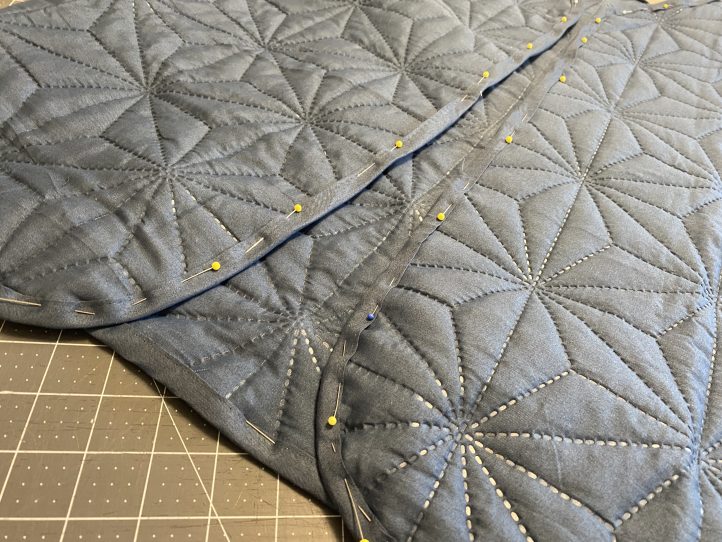
- Then stitch the binding to the vest opening, overlapping binding at the back neck.
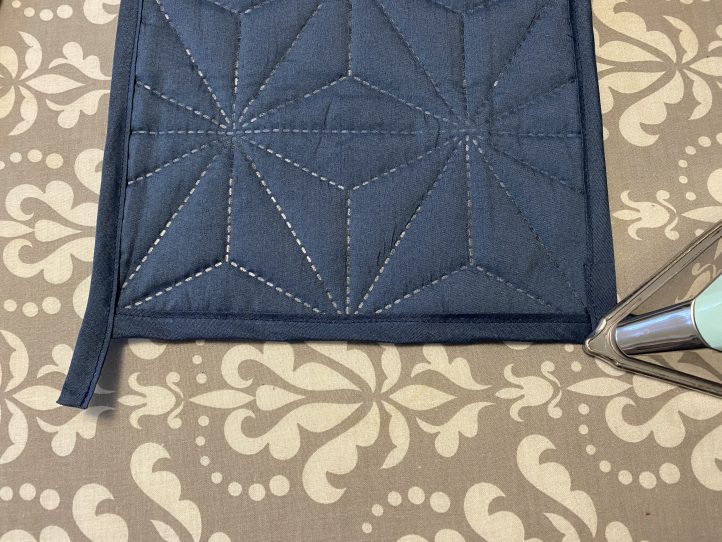
- Bind the top straight edge of the pocket pieces, and pin binding around the side and bottom curved edges, leaving some excess at the top.

- Stitch the binding to the pockets and then press the excess at the top to the wrong side of the pocket.
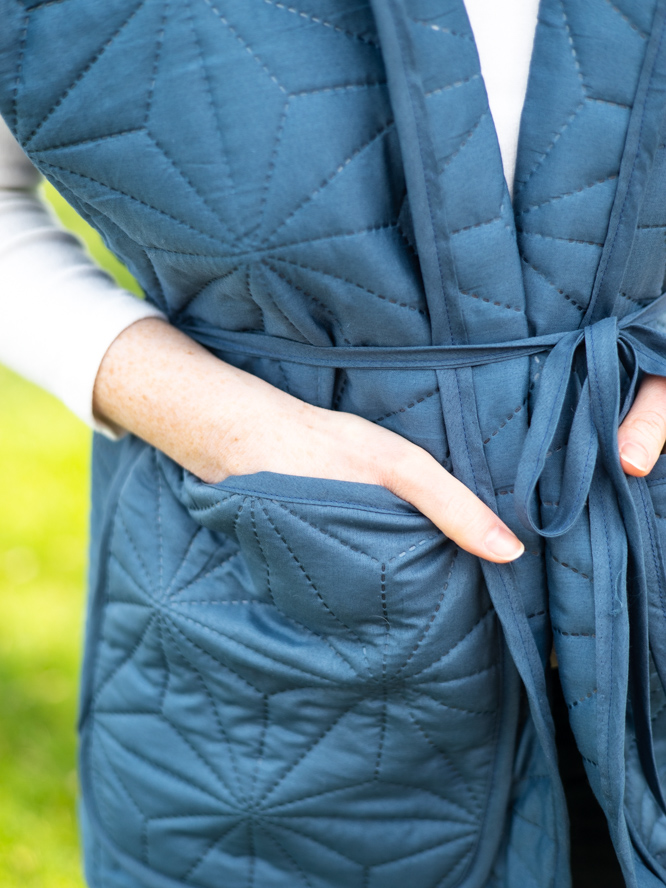
- Center the pockets within the front vest pieces about 1 1/4” from the hem. At this point, you can also try on the vest and place pockets from there.
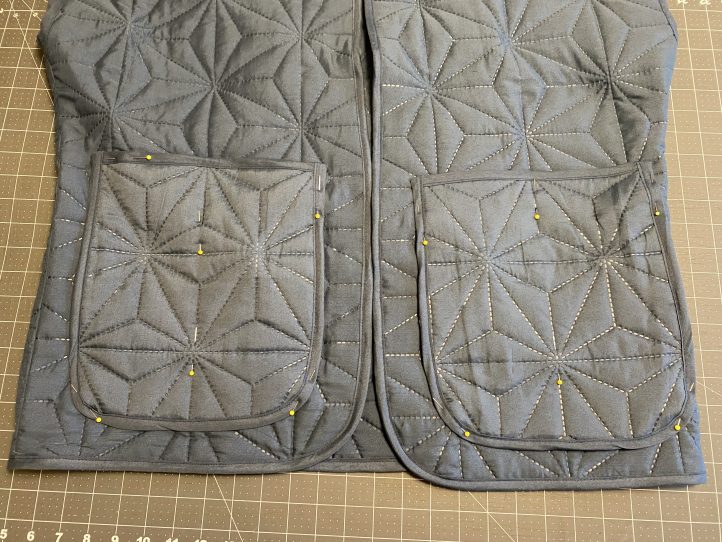
- Stitch the pockets to the vest along the existing binding stitching line.
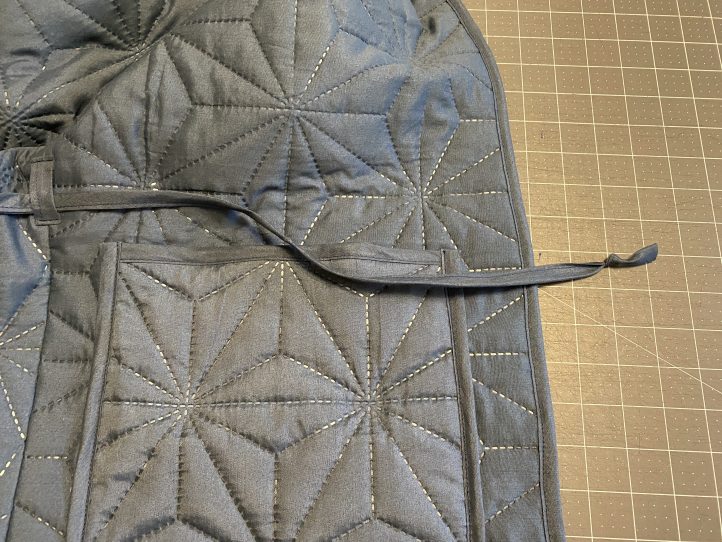
- Using some excess binding, stitch together a long strip and then cut off two 3” long pieces for the belt loops, and set aside the long piece for the belt.
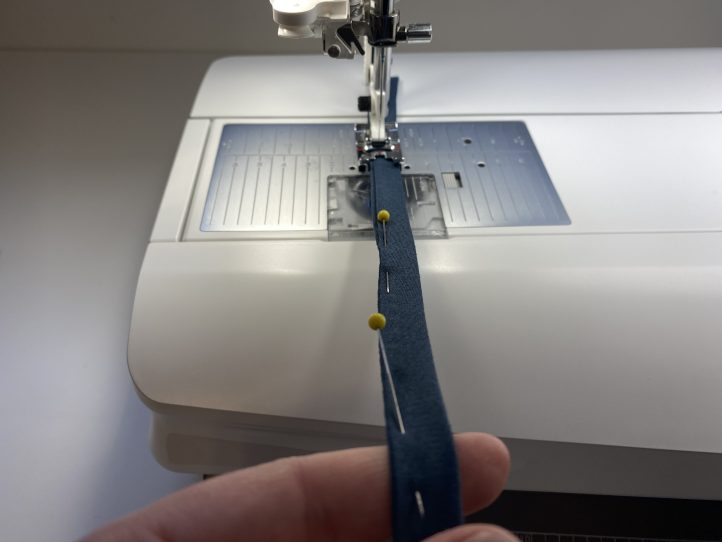
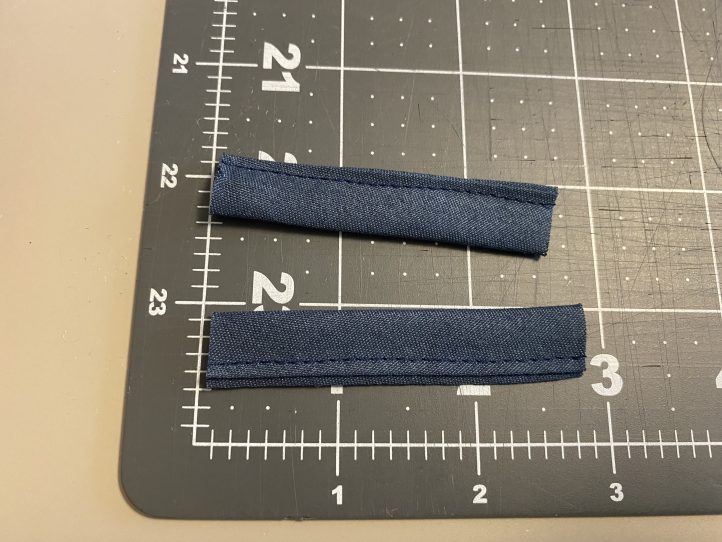
- Press each strip edge in 1/4” to the wrong side.
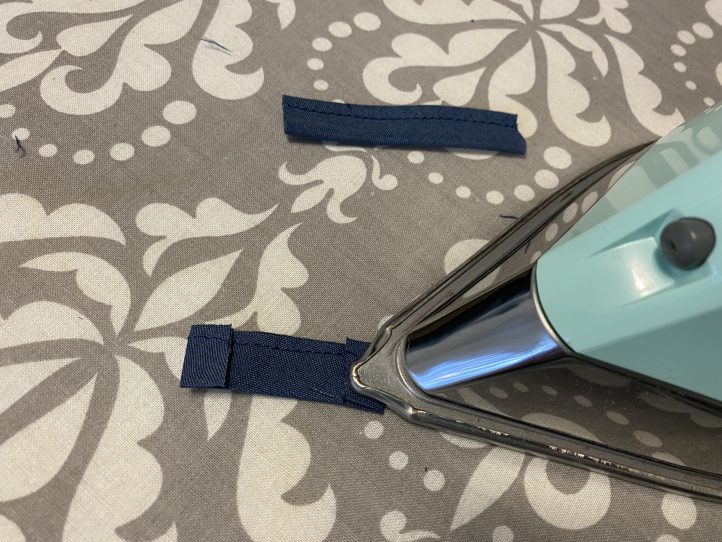
- Pin the pressed belt loops to the side seam starting approx. 3” down from the underarm points and stitch 1/8” from top and bottom folded edges to secure.
- Thread the belt through the belt loops and tie a knot at the ends.
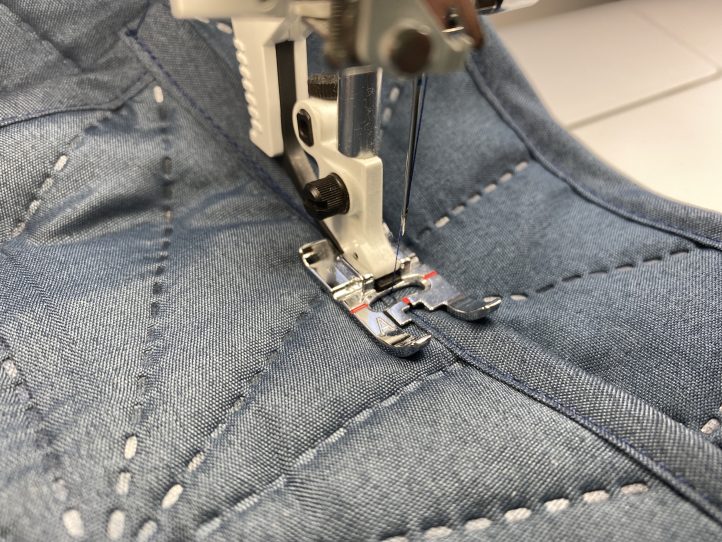
- Measure and pin the armhole edges at the shoulder 1 1/2” to the wrong side.
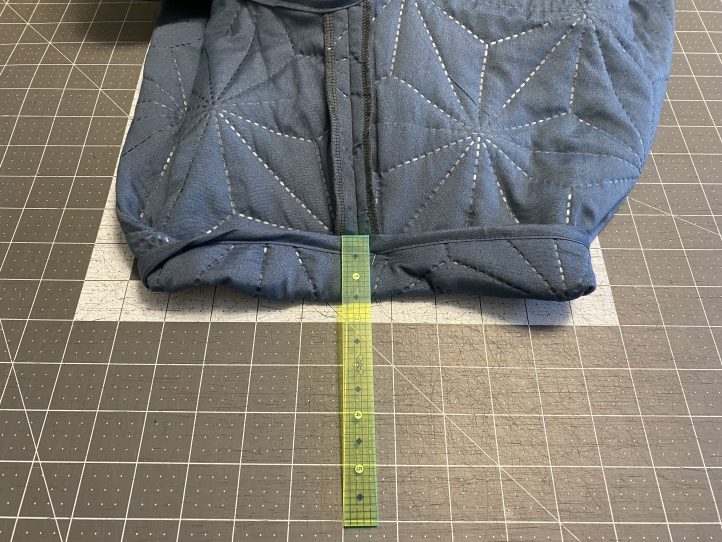
- Stitch in the ditch from the right side along the shoulder seam to secure.