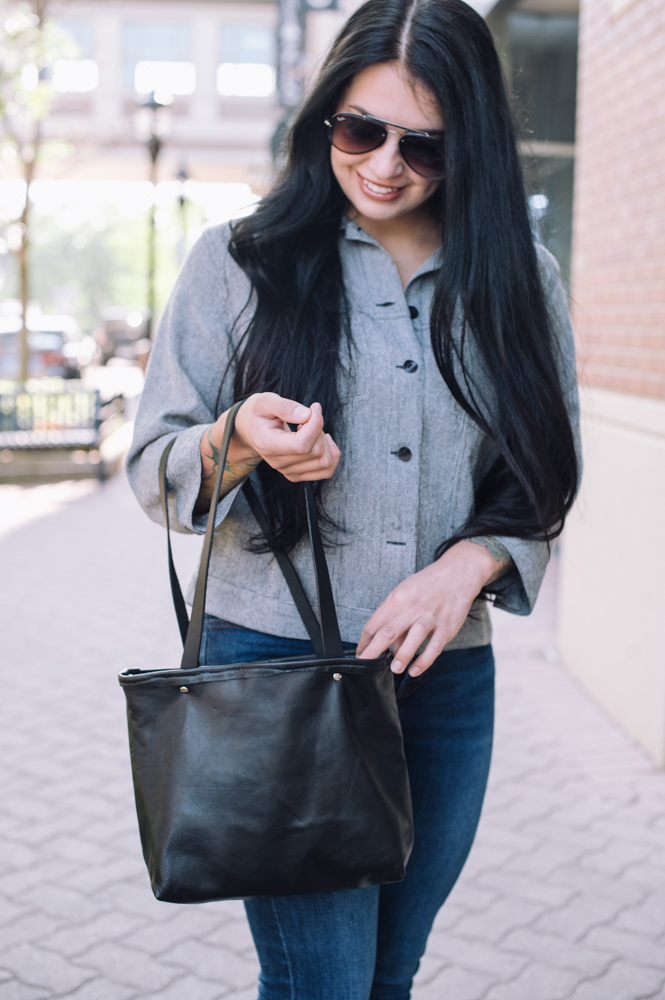
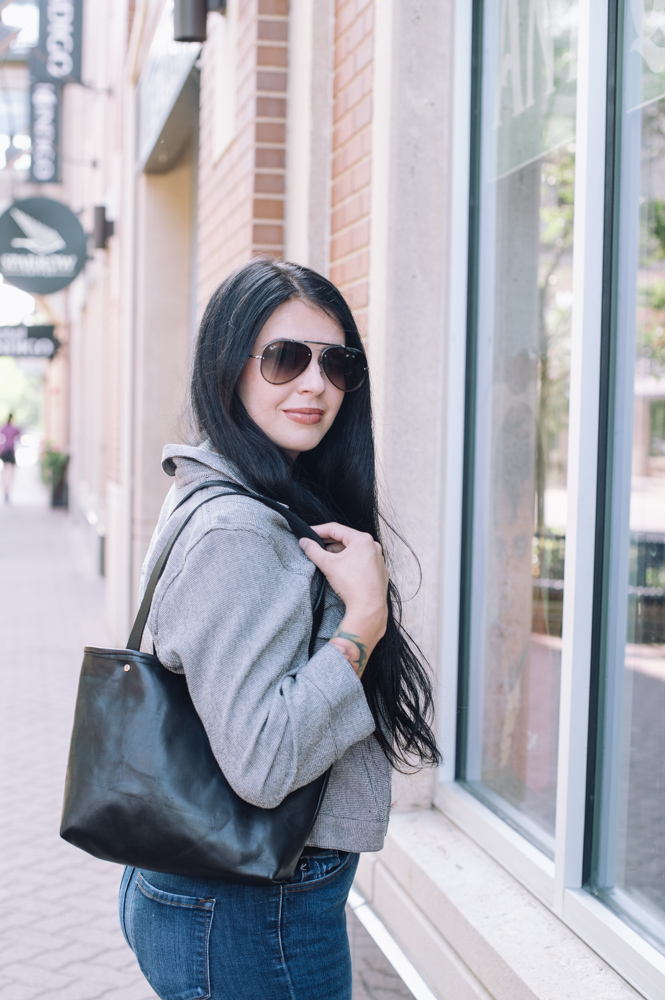
Every woman needs a simple leather bag in their wardrobe! Design a small tote bag to hold your daily necessities with this sewing project. This tutorial is a great way to expand your sewing knowledge by learning how to work with a specialty fabric like leather or vegan leather. You’ll also get excellent practice on inserting rivets, so this is a fantastic project for advanced beginner sewists who are ready to up their stitching game. Stop settling for cheap and trendy purses and design a timeless tote that will match everything in your closet.
Finished size: 10 1/2” wide x 9” tall x 3” deep
Materials:
- 2 skins – we used one glove leather (a soft lightweight leather) and one suede, both in black, but you can choose your styles and colors
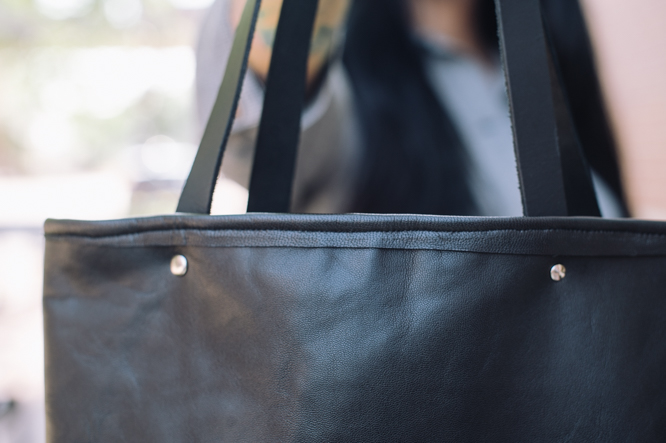
- 1 package black bag strapping – 3/4” x 48”
- One pack silver rivets with setting tool (or you can use screw-in rivets)
- Bag bottom stiffener – we used foam sheets but other options are plastic canvas or even cardboard
- Clips to hold work together while stitching – no pins
- Leather sewing machine needle size 14 or 16
- Optional but recommended – leather awl to pre-punch holes, rotary cutter for leather
Notes:
- 1/4” seam allowance allowed
Bag Instructions:
CUTTING:
- Cut 1 rectangle out of each skin, 14” x 21”.
- Cut approximately 30” of 1” wide strip in the glove leather or skin you want to use for trimming. It does not have to be one continuous piece.
- Cut your stiffener material to 10” x 3”.
SEWING:
- Fold each skin in half so the fold and the top edge is 14”. Sew side seams.
- Orient the fold line on one bottom corner to make an isosceles triangle with the seam running straight up the center to the top point. There will be a fold on each side angle.
- Mark a sewing line 1 1/2” down from top point of triangle. The marked seam will be 3”.
- Repeat on other corner, and on both corners of second skin.
- Clip all corners, turning one skin right side out.
ASSEMBLY:
- On a flat surface, place the skin right side out. Insert your cut bottom stiffener, then insert the second skin with the wrong side facing the wrong side of the first skin. Use clips to secure the top edge.
TRIMMING:
- Fold the 1” strips over the top/open edges of your assembled bag and topstitch into place. You can overlap one strip over another if you don’t have one continuous strip; however, for the sake of your sewing machine, avoid making the overlap right over the side seam. Backstitch at end to secure stitching in place.
Instructions for Straps:
- Cut strap package in half to make 2 24” straps.
- Punch hole 3/4” up from each cut edge of each strap, size to be determined by the rivets you choose.
- Mark and punch holes 3/4” – 1” down from top edge of bag, 3 1/2 ” on either side of center.
- Attach straps to bag, according to manufacturer’s instructions for your rivets.
I like this bag a lot. I would put fabric as the lining to cut down the cost of the bag. I would like a zipper in it too so nothing falls out and it is more secure. Very easy to make and the pattern can be adapted to many fabrics and sizes. The rivets are a nice touch and could be Chicago screws if you don’t have a rivet machine. Great item and article!
Thanks so much for your comment, Carol Ann! I love your ideas about changing up this pattern and customizing it 🙂 Have a great day! – Ashley, WeLikeSewing