Elbow patches aren’t just for tweed jackets and stuffy professors – they’re a brilliant way to give your clothes a stylish upgrade and extend the life of your favorite garments. Whether you’re repairing a worn-out sweater or adding a pop of color to an old jacket, elbow patches are simple to add and totally customizable. Follow this guide and you’ll be patching like a pro in no time!
Materials:
- The garment you want to patch
- Fabric (see below for tips on choosing the perfect material)
- Cardstock
- Fusible webbing (optional)
- Fusible interfacing (optional)
- Sharp scissors or a rotary cutter
- Tailor’s chalk or a water-erasable fabric pen
- Tape measure
- Pins
- Thread
- Hand sewing needle or sewing machine
HOW TO CHOOSE YOUR FABRIC:
One of the best parts of adding elbow patches to a garment is that they help extend its life – so it’s important to choose a fabric that’s up to the job. Try to pick something durable like faux suede, canvas, leather, wool, or felt. These materials can handle regular wear and tear without fraying or thinning too quickly. Ideally, you want a patch that looks great and feels nice to the touch but can stand up to plenty of use.
STYLE IT YOUR WAY:
Elbow patches don’t have to be subtle – in fact, they’re the perfect opportunity to experiment with color! Try adding a Liberty print heart to a denim shirt, wool felt to a knitted jumper, or bright corduroy to a kid’s hoodie. You can even stitch a layer of batting between the patch and your sleeve, to create a cozy quilted look.
Sewing Instructions:
DESIGN YOUR PATCH:
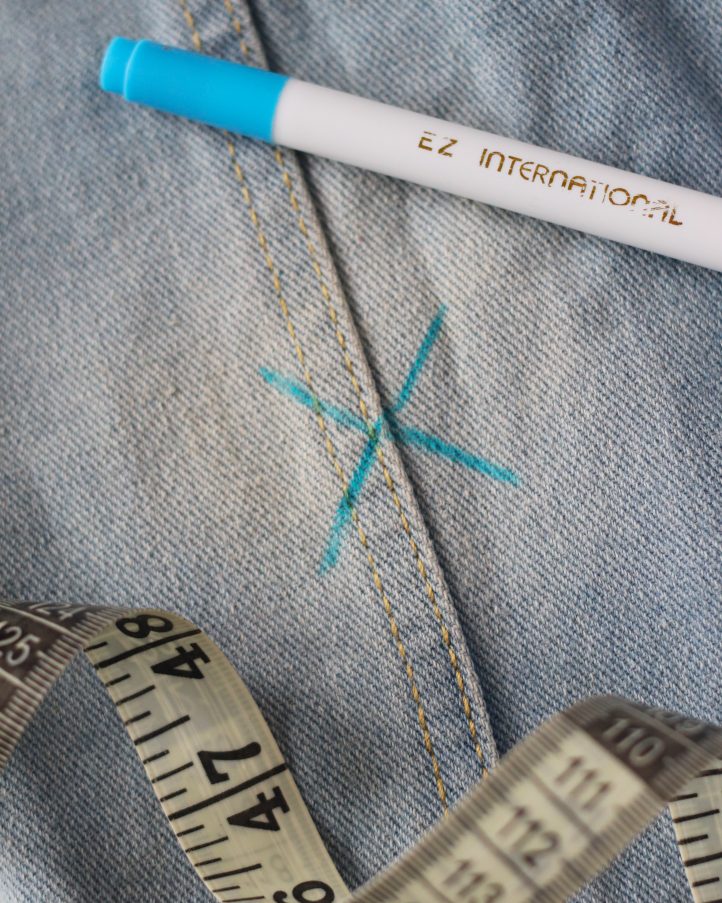
Photo provided by designer
You can probably find ready-made elbow patches at your local sewing shop, but making your own lets you customize the fabric, shape, and size – which is much more fun! An oval is the classic go-to, but don’t be afraid to play around with other shapes like hearts, hexagons, or even stars for a more eye-catching look. Aim for patches that are roughly 4” square, though you can easily tweak the size to suit your garment. Traditional ovals are usually around 4”–5” long and 3”–4” wide.
MAKE YOUR TEMPLATE AND CUT YOUR FABRIC:
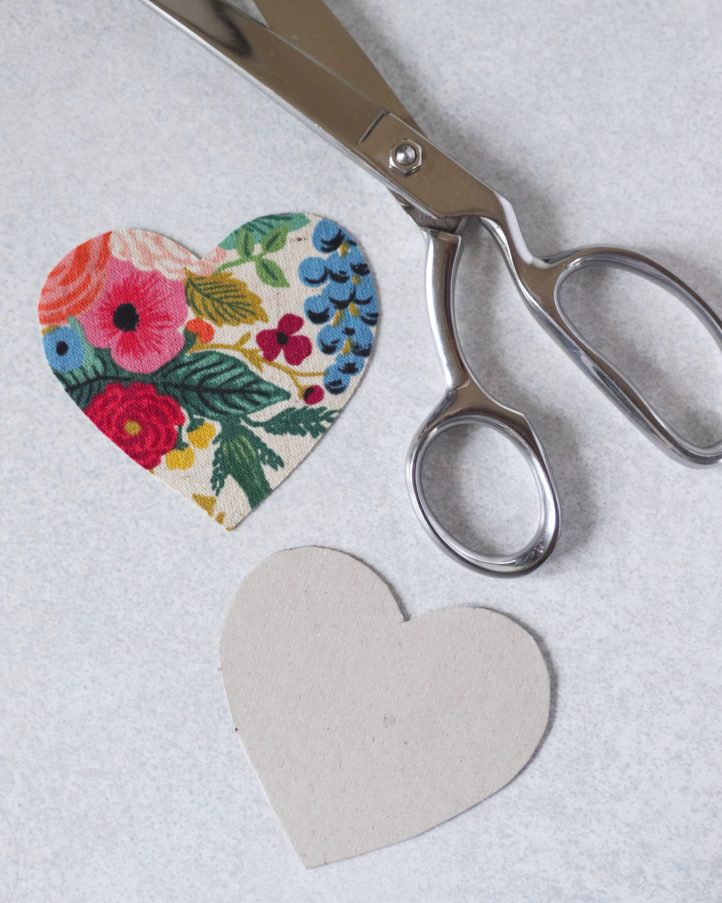
Photo provided by designer
Once you’ve settled on the perfect size and shape for your patch, draw it out onto a piece of cardstock. Cut it out and use it to trim two pieces from your chosen fabric, making sure the right side is facing up. If your fabric is on the thinner side or tends to fray, you can back it with fusible interfacing to add a little extra strength and durability. You might also want to press the edges of thinner fabrics over to the wrong side by 1/4” or so, to protect them even further.
PERFECT PLACEMENT:
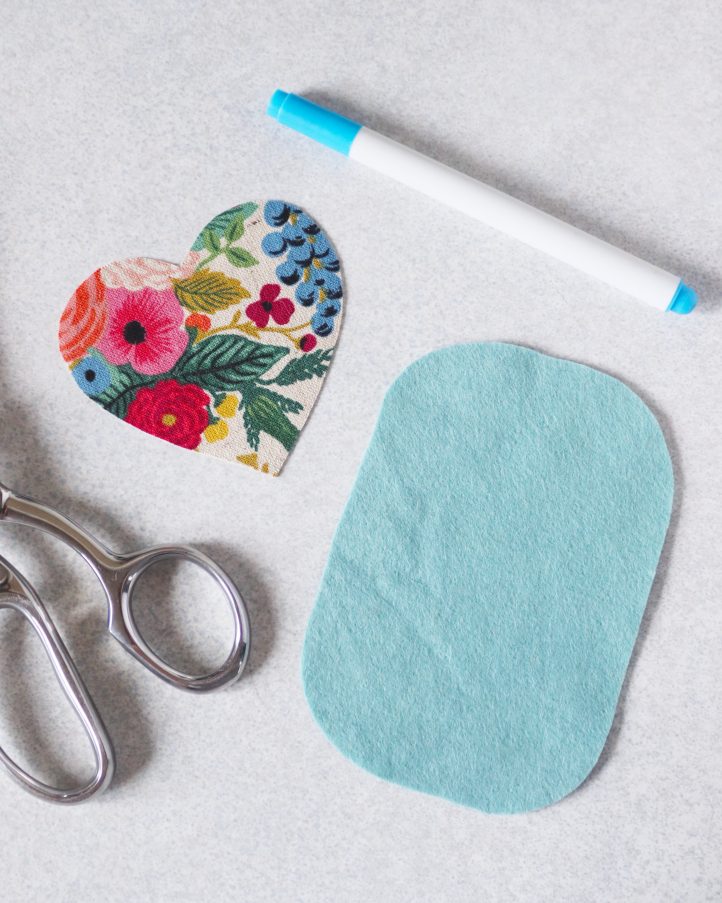
Photo provided by designer
Put your garment on and bend your arm slightly to find the center of your elbow. Lightly mark the spot with tailor’s chalk, or a water-erasable fabric pen. This ensures your patches end up in the right place – even when your arms are bent. Take the garment off and double-check that both elbow marks are evenly placed by measuring each side (from both the elbow and the cuff) with a tape measure.
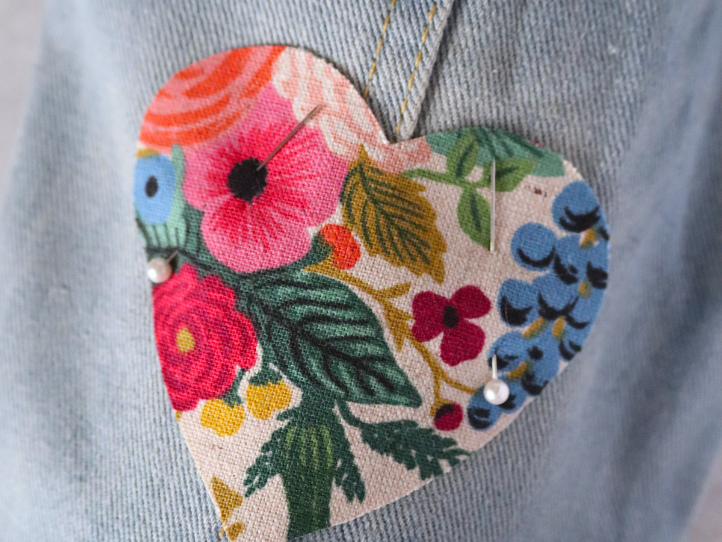
PIN YOUR PATCHES:
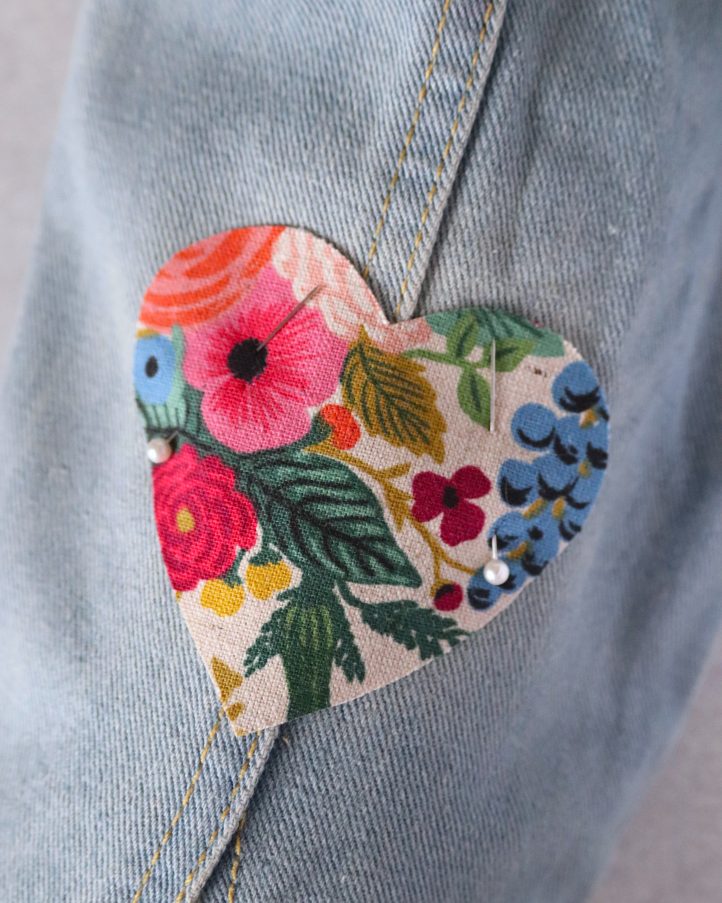
Photo provided by designer
Pin your patches into place. To keep the fabric flat and stable while you work, you can slide a rolled-up towel or a tailor’s roll inside the sleeve – it’ll make this step much easier, we promise! Once the patches are pinned, try the garment on once more to check you’re still happy with the placement.
If you’re using fusible webbing to secure your patches, now is the time to apply it. Follow the manufacturer’s instructions to fuse the webbing and attach each patch before moving on to the next step.
TIME TO STITCH:
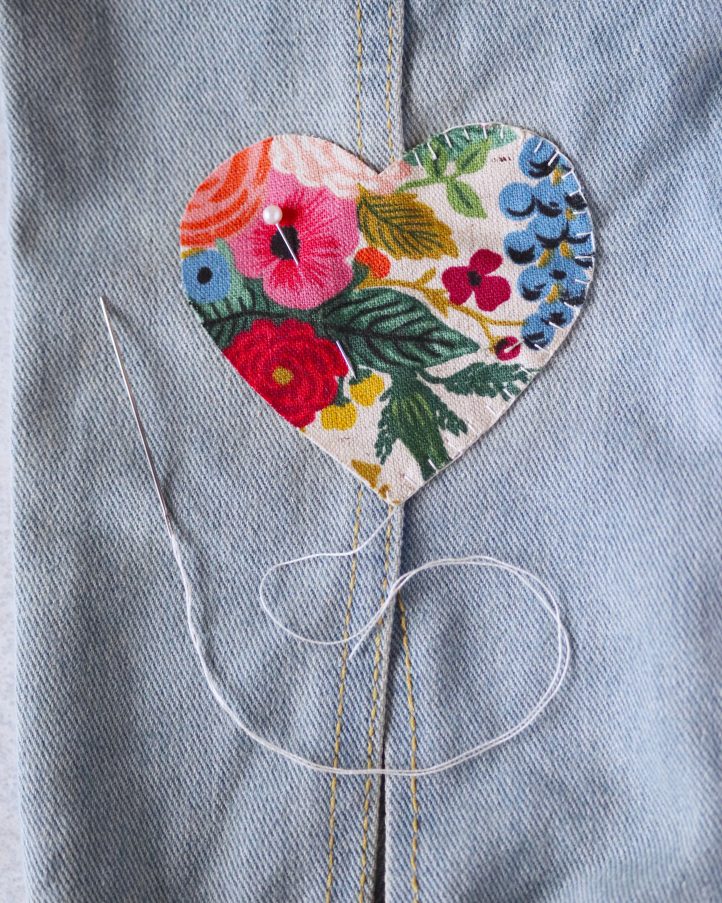
Photo provided by designer
Now comes the main event – stitching your patches into position. You can do this by hand or with a sewing machine – it’s totally down to personal preference, though if your sleeves are narrow or made from thick fabric, you might find working with a machine a little too tricky.
To sew by hand, thread a sturdy needle with a length of strong thread. Stitch around the edge of each patch using a whipstitch, blanket stitch, or running stitch, keeping it close to the edge of the fabric. For a bit of extra flair, try using a contrasting thread color.
To sew by machine, first slide your fabric under the needle, making sure only one layer is in place – if you’ve got a machine with a free arm, this is the time to use it! Use a straight or zigzag stitch and work closely around the edge of each patch. Stitch slowly and carefully, as curves can be tricky on a sleeve and the fabric may bunch up.
PRESSING MATTERS:
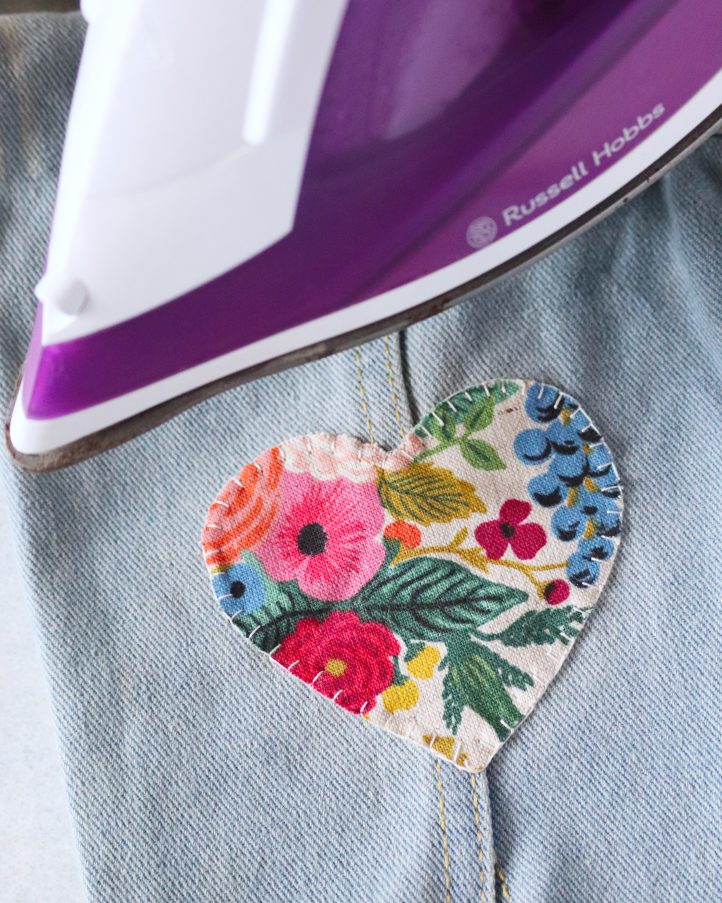
Photo provided by designer
Once your patches are attached, give them a gentle press with an iron to flatten everything out and help the stitches settle in. And that’s it – you’re done!