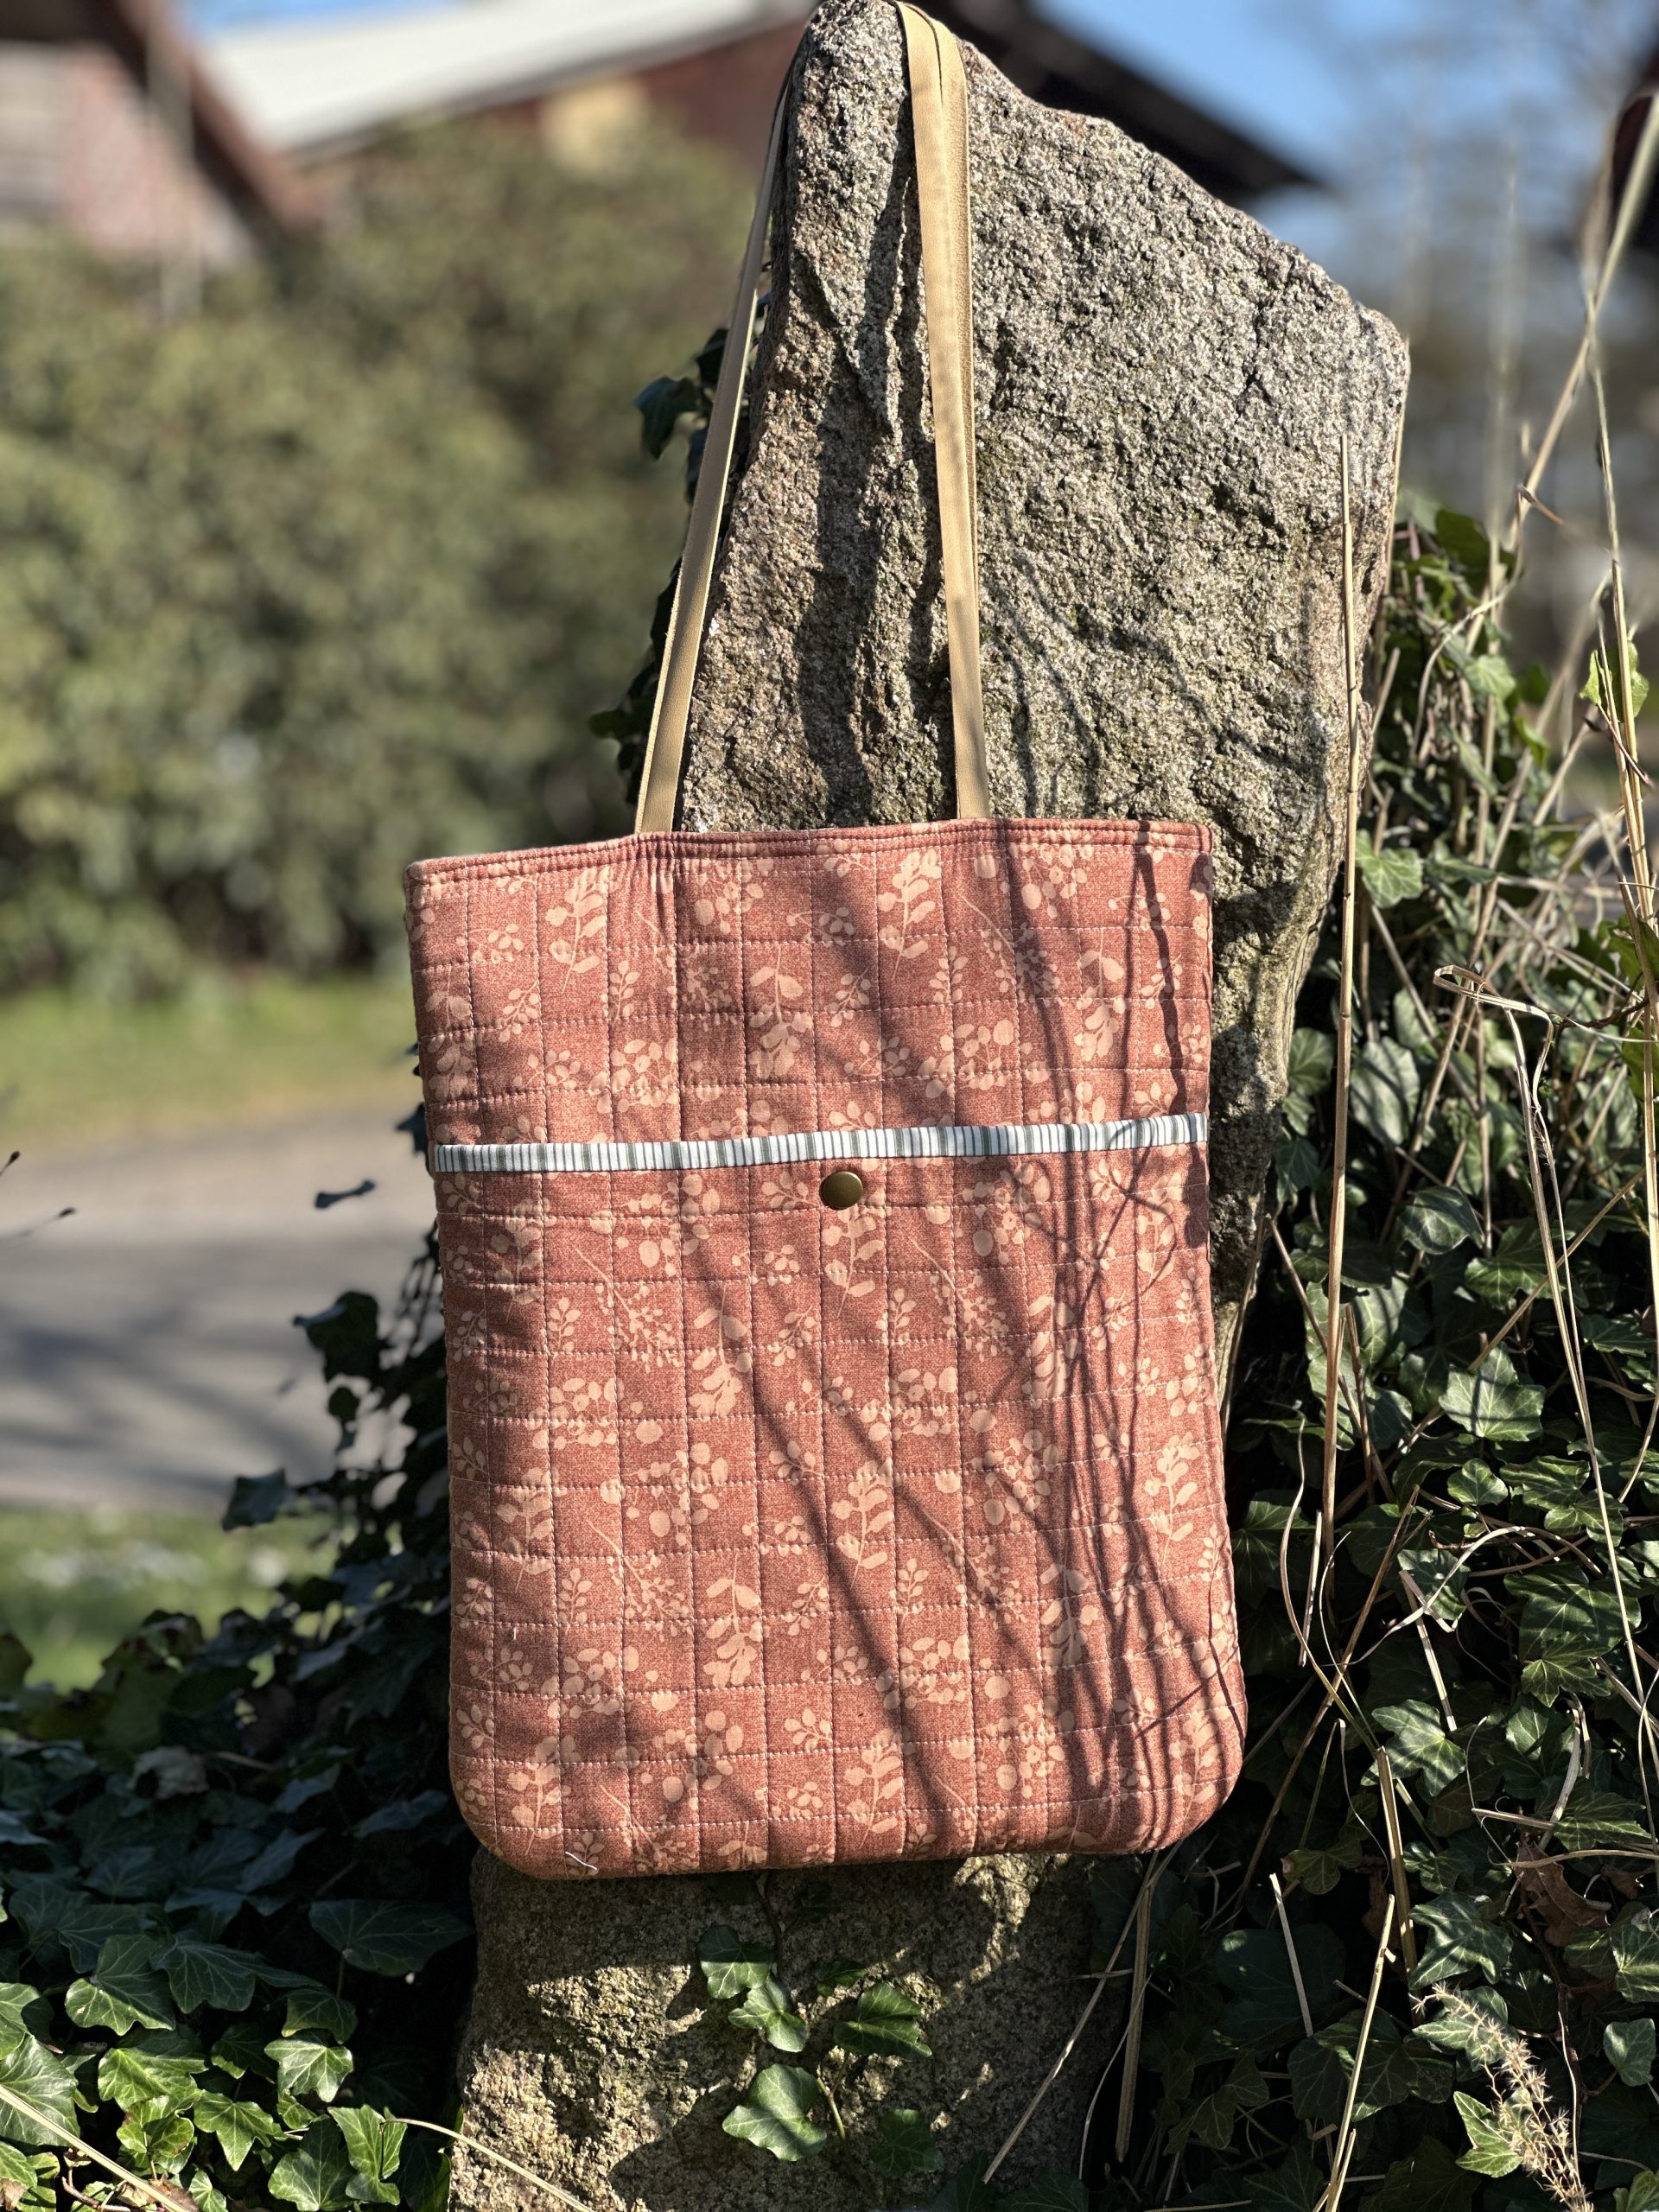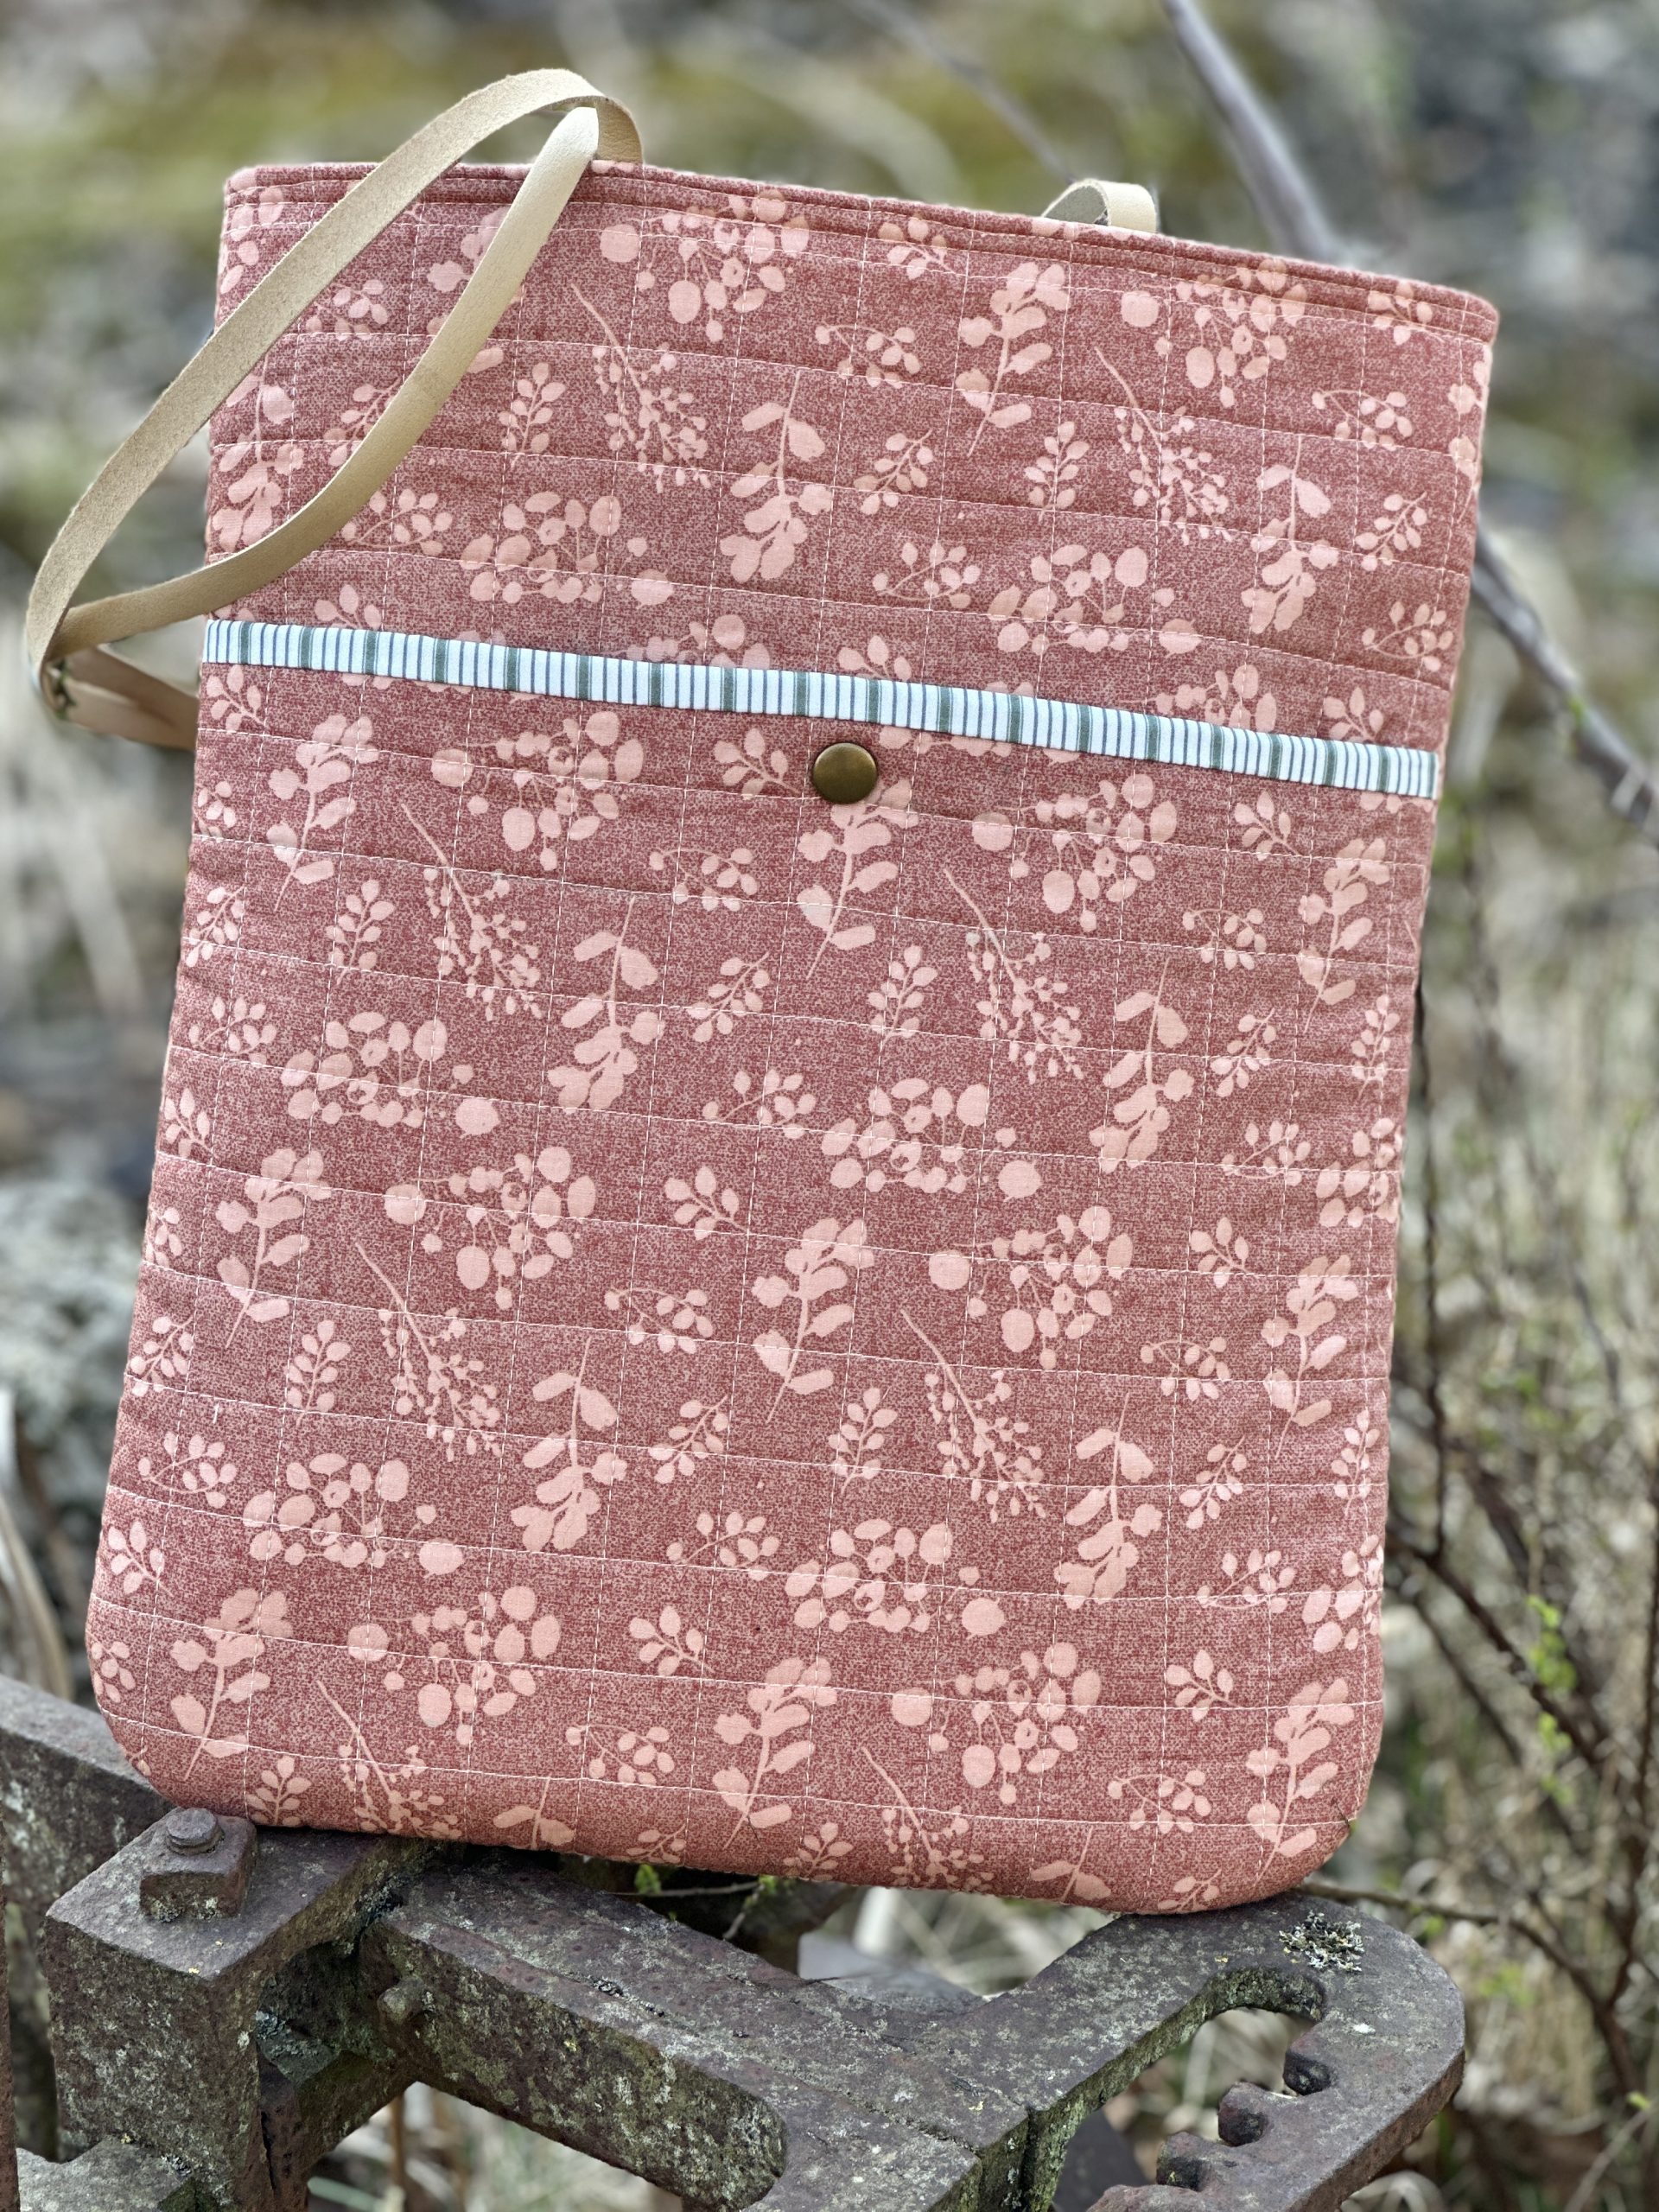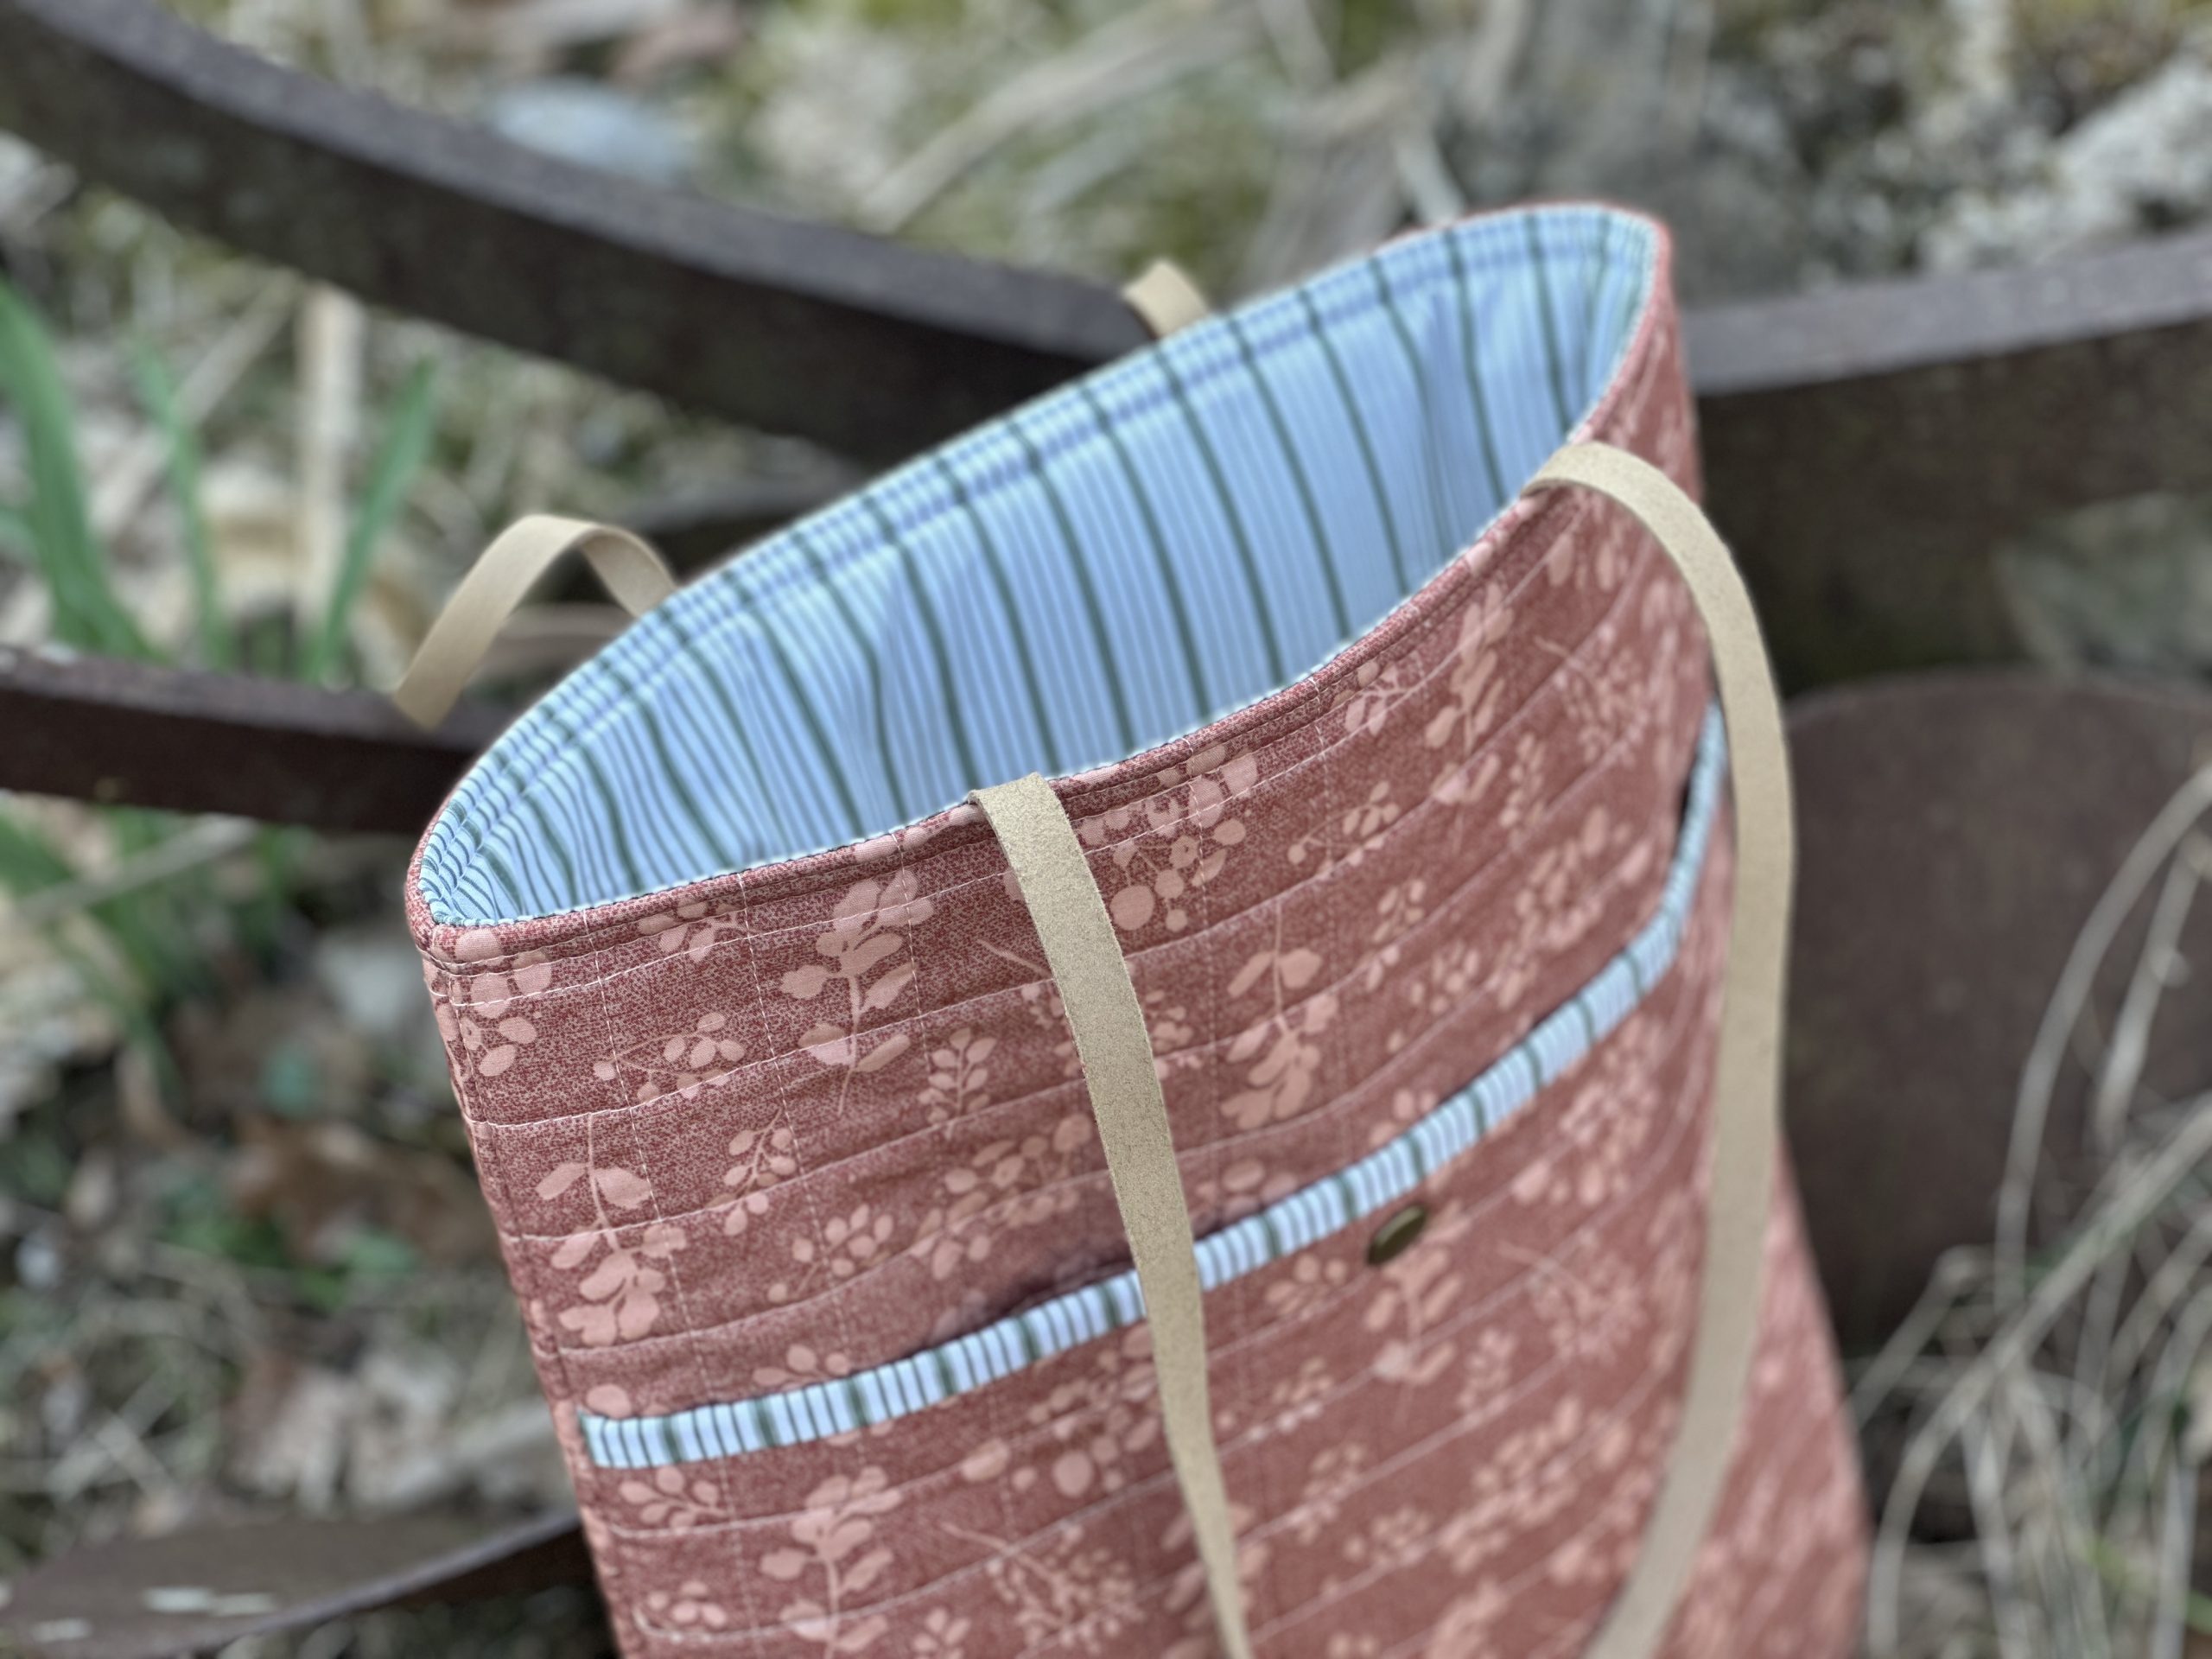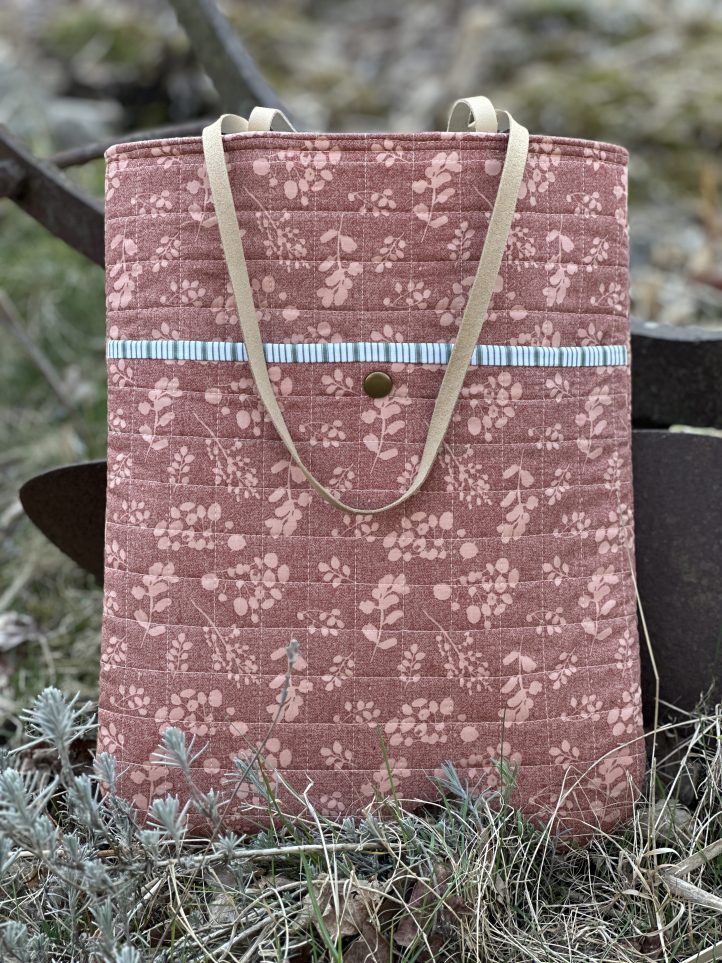
Sew yourself a stylish and sleek bag to hold your daily necessities with this pattern from Debbie von Grabler-Crozier. This quilted tote bag pattern features a roomy interior, front pocket with stud closure, and slim faux leather handles, so that you can pack your essentials without carrying a bulky bag. Design your quilted tote in a vintage-inspired floral like our sample or in a striking geometric print for a fresh, eye-catching look.
Designer Note: Seam allowances are all 1/4” and have already been added.
Materials:
- Fabric: (Note: All fabrics by Art Gallery Fabrics.)
- 1/2 yd. fabric for the bag exterior. Debbie loves Natures Keepsakes from the AbstrArt collection by Katarina Roccella for AGF.
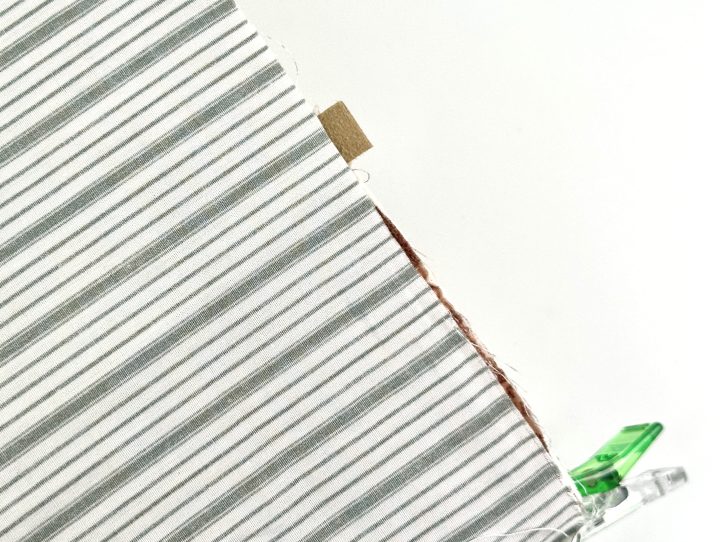
- 1/2 yd. fabric for the lining. The designer’s choice this time is Timeless Ticking from the Juniper collection by Sharon Holland for AGF.
- Interfacing:
- 1/2 yd. #279 80/20 cotton mix batting (Vlieseline)
- 1/2 yd. Style-vil foam interfacing (Vlieseline)
- 1x 1/2” metal stud for the front pocket
- 2 pieces, 1/2” wide x 28” long ready-made faux leather strap for the handles
- TIP: You can make this longer or shorter to suit your personal requirements.
- Coordinating threads for all fabrics and trims
- Double sided tape
- Scissors
- Fabric marking tools
- Extra feet for your sewing machine (walking foot, for example)
Cutting Instructions:
From the exterior fabric:
- 2 pieces 14” wide x 17” tall for the front and back exterior panels
- 1 piece 14” square for the front pocket exterior panel
From the lining fabric:
- 2 pieces 13 1/2” wide x 16 1/2” tall for the front and back lining panels
- 1 piece 14” square for the front pocket lining panel
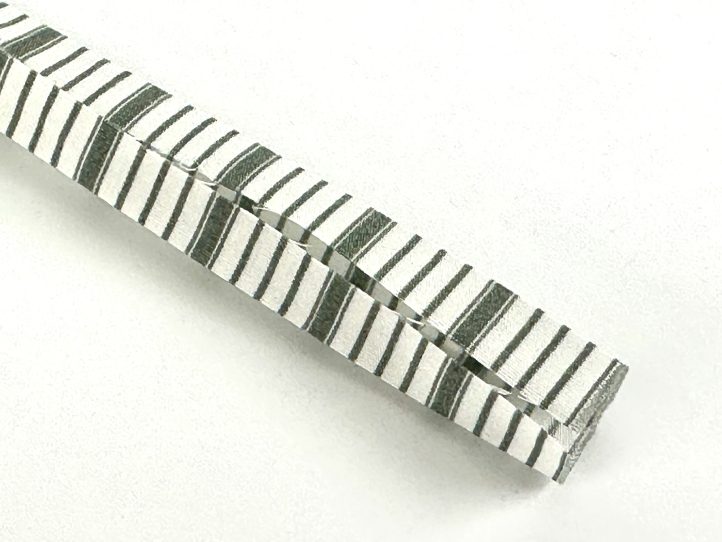
- 1 piece 1 1/2” wide x 14” long, cut on the straight grain for the front pocket binding
From the cotton mix wadding:
- 2 pieces 16” wide x 19” tall for the front and back panel interfacing
- 1 piece 16” square for the front pocket interfacing
TIP: There are no cutting notes for the Style-Vil foam interfacing. Instructions will be given as we go along but the basic idea is to press the piece to be interfaced and then pin to a slightly larger piece of foam interfacing. Use a machine basting stitch to attach the panel to the foam, gently keeping a taut tension on it. Then trim the excess foam away.
Sewing Instructions:
PREPARATION:
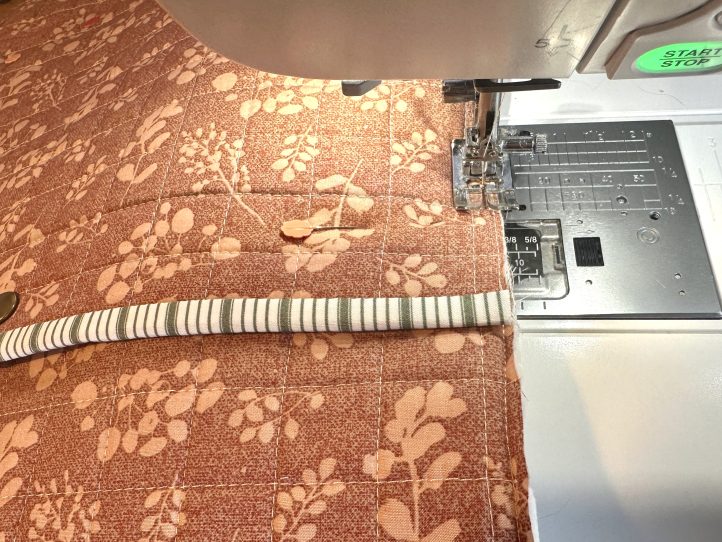
Make the Binding:
- Fold the binding strip in half lengthways, wrong sides together, and press to obtain a center crease.
- Open the strip out and then fold the two long raw edges to the center crease, also to the wrong side, and press again.
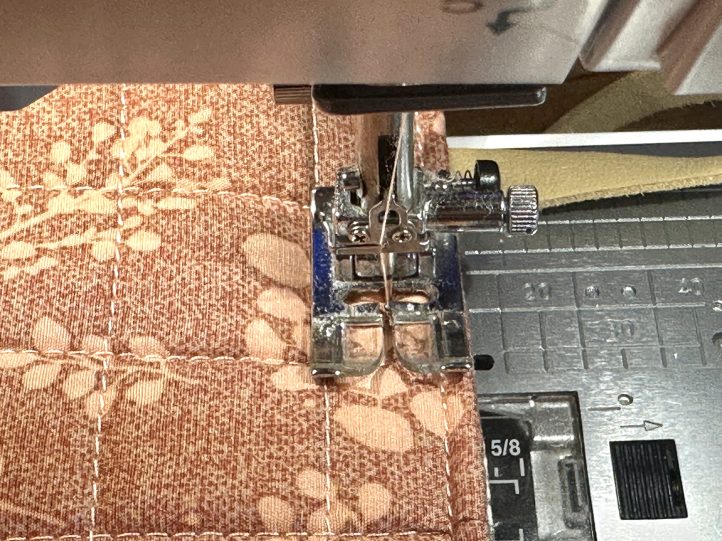
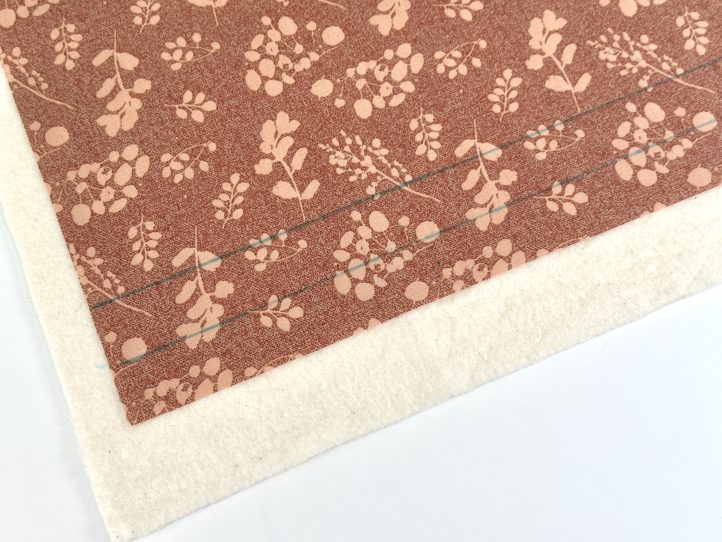
Quilt the Exterior Panels:
- Center the panels to be quilted onto the relevant batting panels and pin.
- The front and back exterior panels and the front pocket exterior panels are all quilted. You will need your walking (dual feed) foot and the spacer bar. To make a classic grid pattern, draw two lines straight across the bottom of the panel, 1” apart.
- Quilt the first line. Then attach the spacer bar and place it onto the first line as you quilt the second.
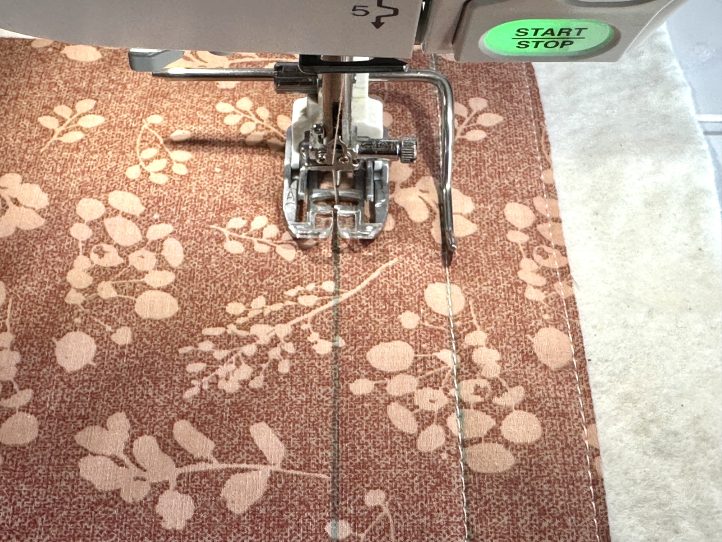
- Keep quilting in one direction using the spacer bar to hit the last quilted line until you have finished the panel. You won’t have to draw any more lines in this direction because the spacer bar will evenly space the lines for you.
- To achieve the grid shape, on the left or right hand side, repeat these steps to come back the other way, intersecting the quilted lines.
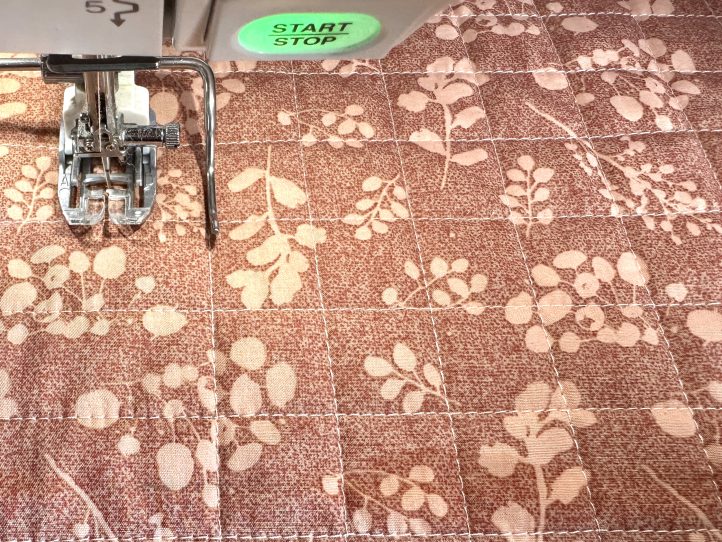
- Repeat for the back panel and the pocket panel and then trim the batting overhang back to the fabric edge on each one.
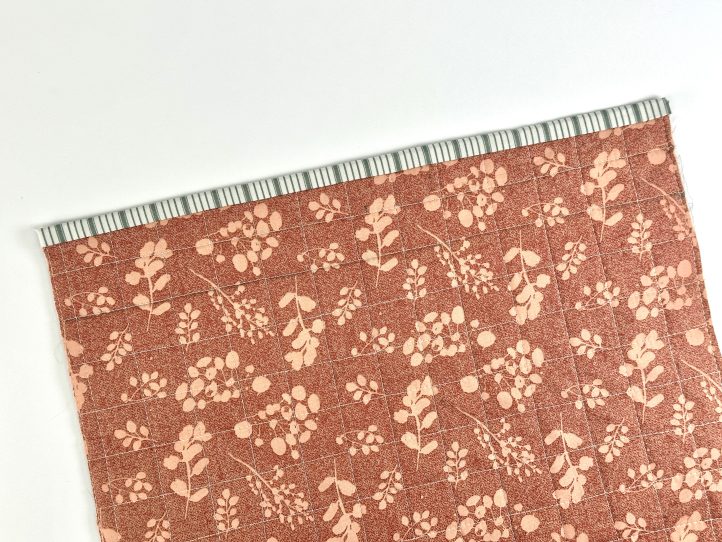
Construct the Front Pocket:
- Place the quilted pocket exterior together with the lining, wrong sides facing and baste all the way around the edge, securing the two pieces together.
- Bind the top edge with the straight binding.
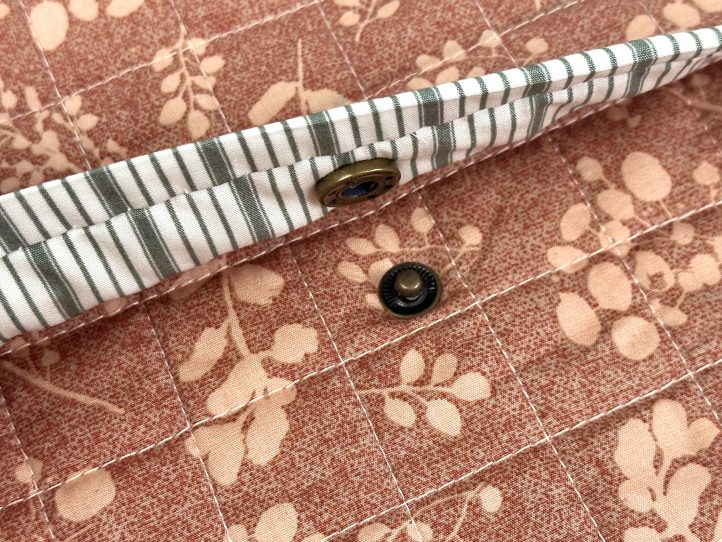
- Find the vertical center of the front pocket and attach the stud (female half only) to the center of the pocket 1” down from the top.
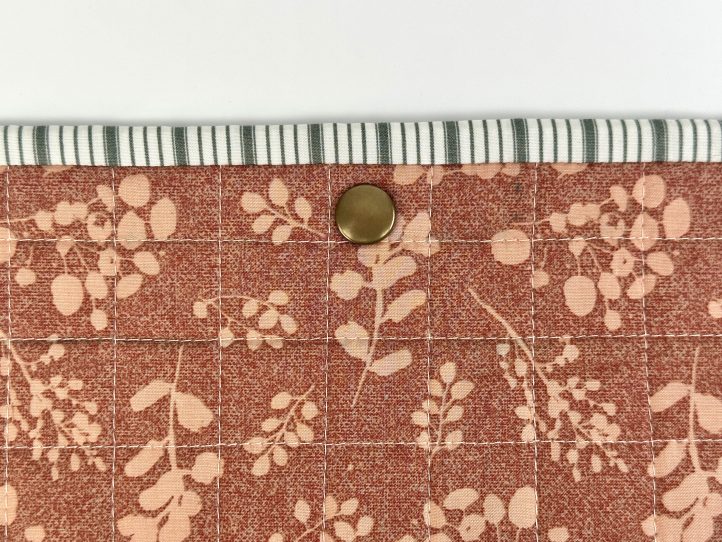
- TIP: The male half will be attached when the pocket is sewn to the front panel.
Interface the Exterior Panels:
- Pin the front panel centrally to a slightly larger piece of foam interfacing allowing about a 3/4” overhang of foam all around. Baste the panel on and then trim the foam back to the fabric edge.

- Repeat for the other panel.
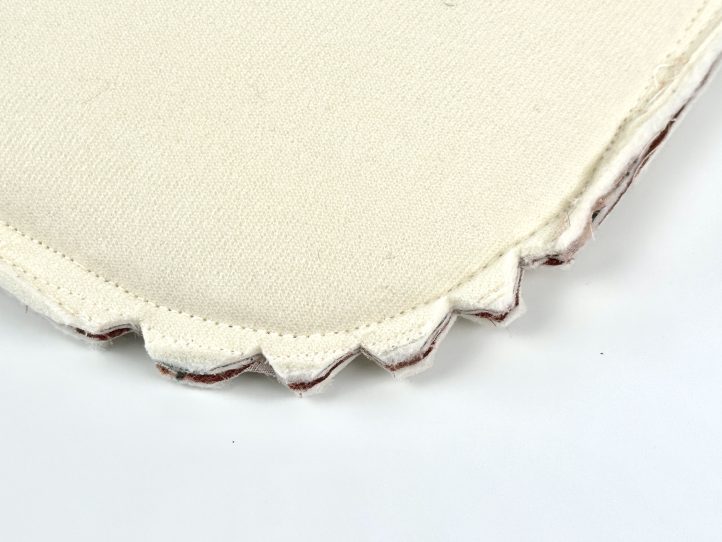
- Round the bottom corners of both panels (draw around something and then cut out).

- Round the two bottom corners of the pocket too. Re-baste the corners as needed.
Construct the Lining:
- Pin or clip the two lining panels right sides together. Round the bottom corners as you did for the exterior panels. Sew the sides and base of the lining leaving a 4” turning gap in the bottom seam of the lining.
MAKING:
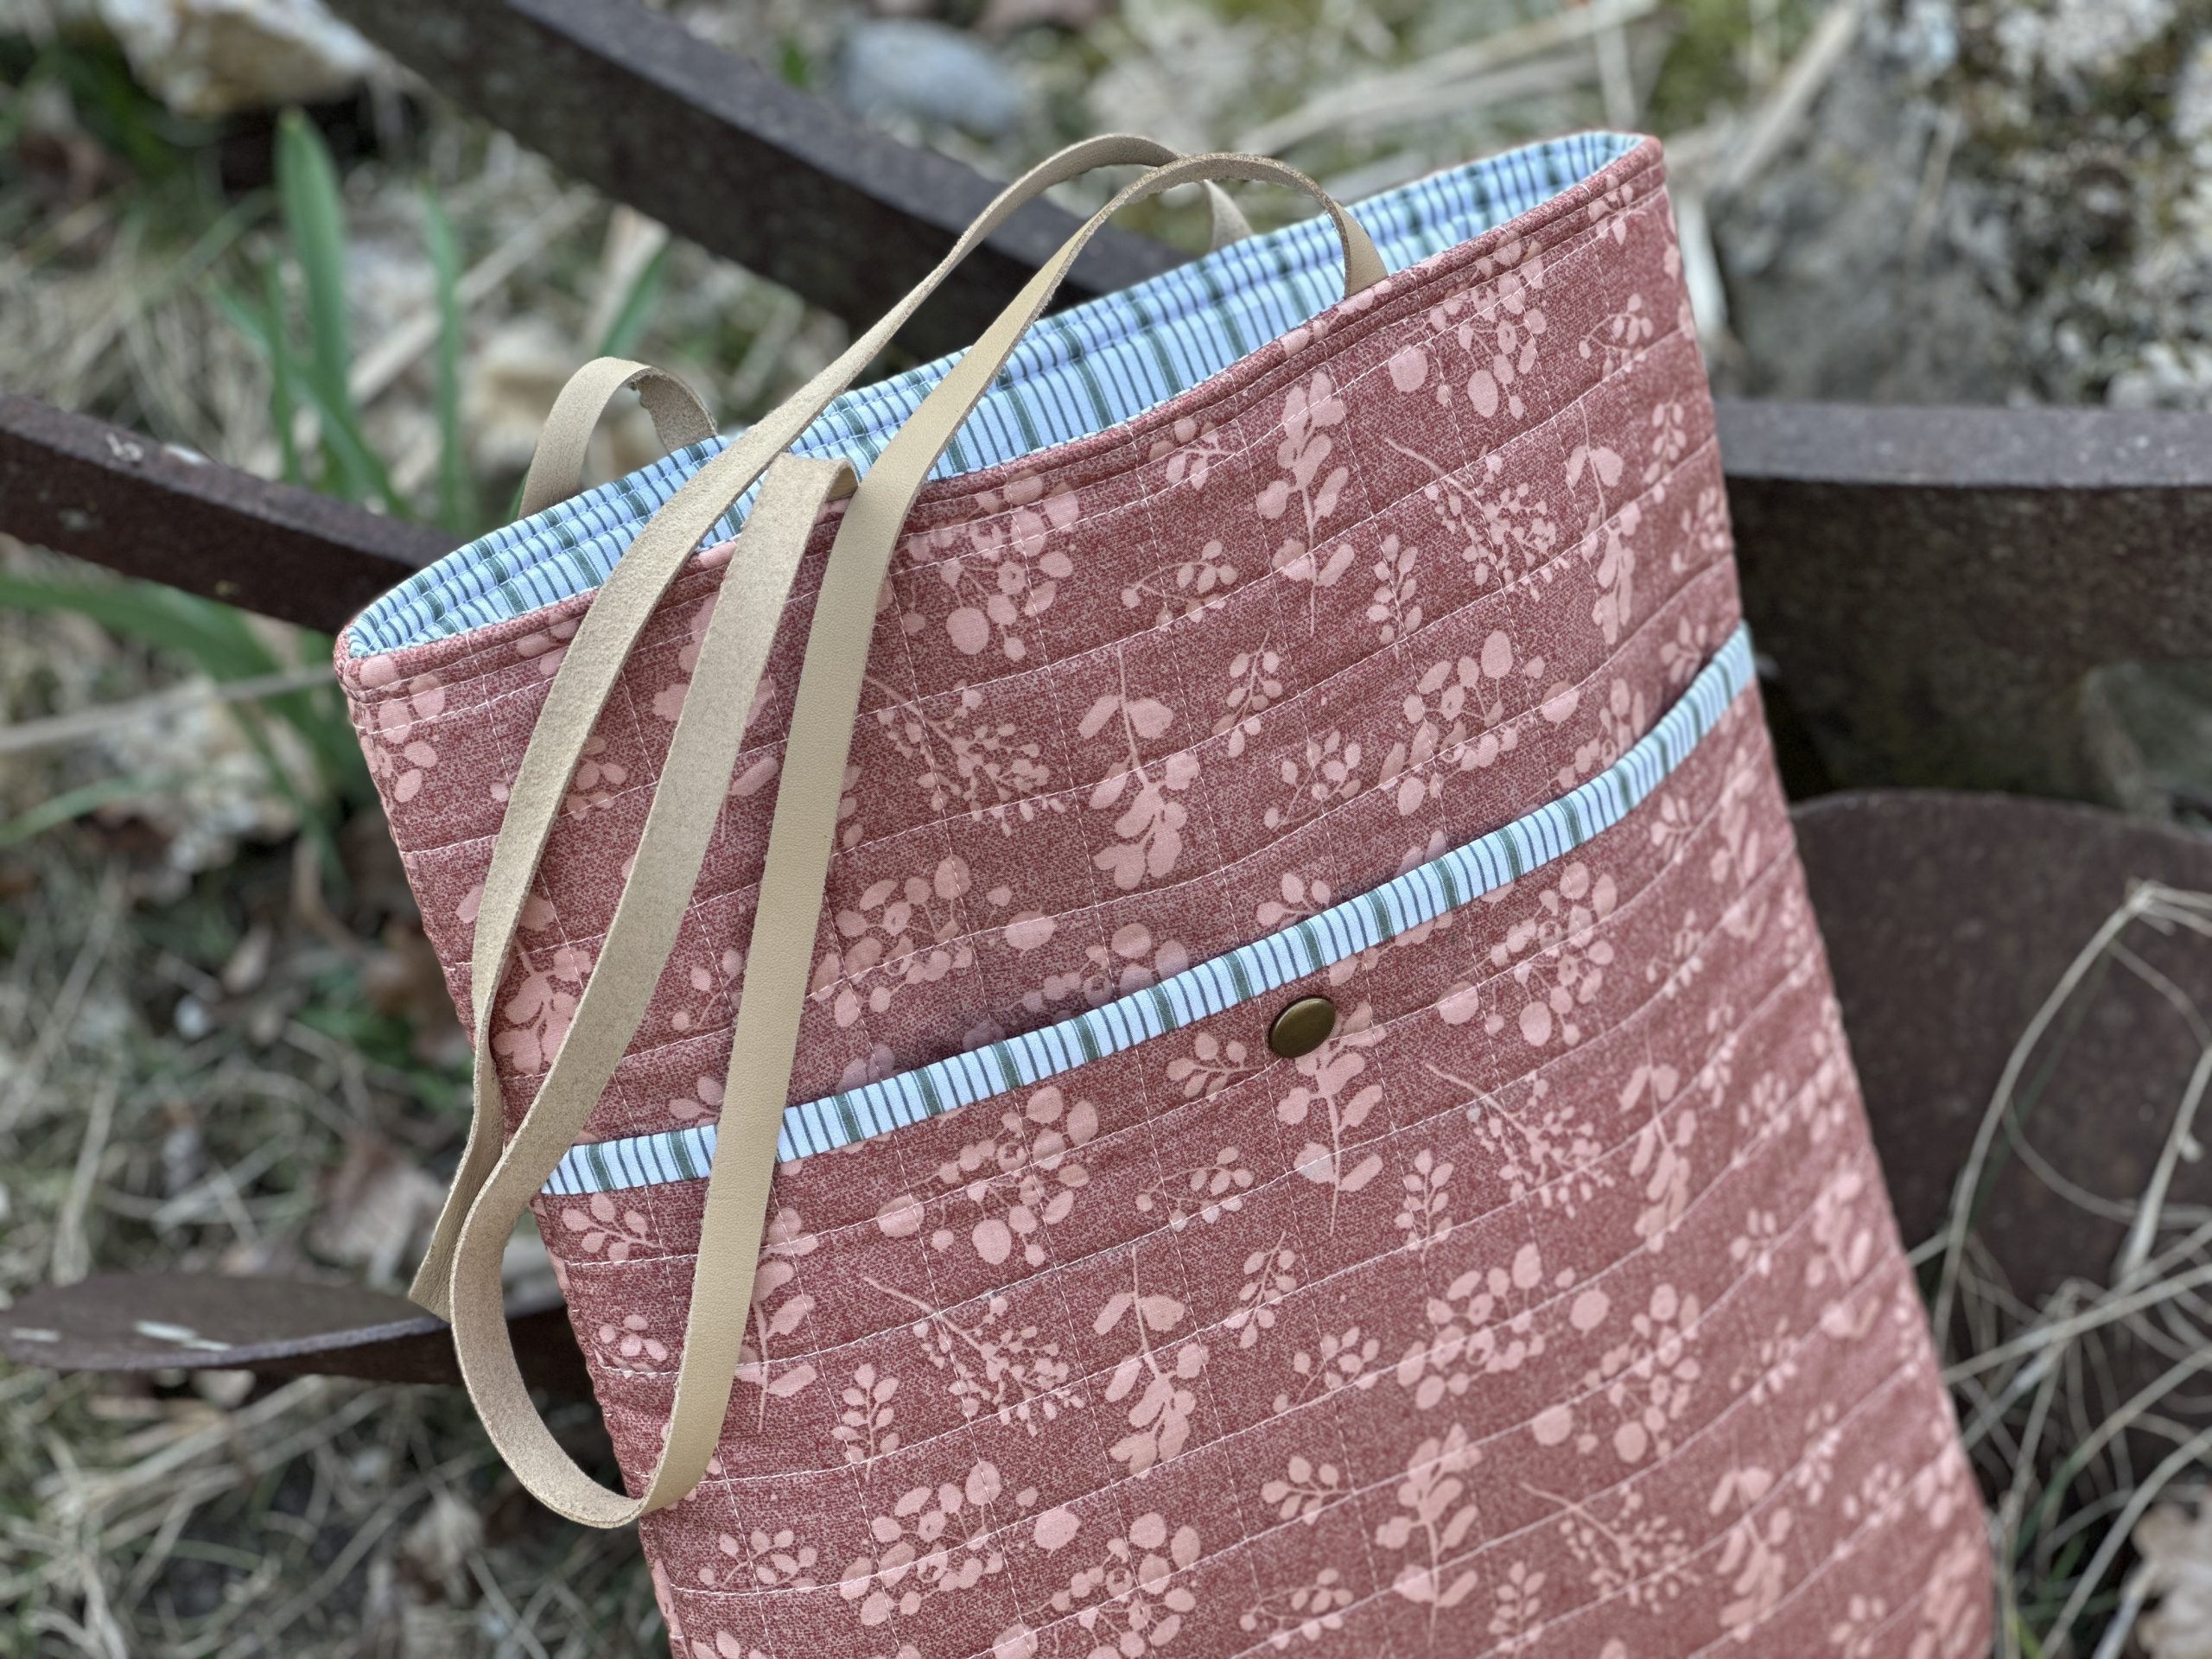
Attach the Handles:
- Measure in 4” from each side and attach a handle onto the top edge.
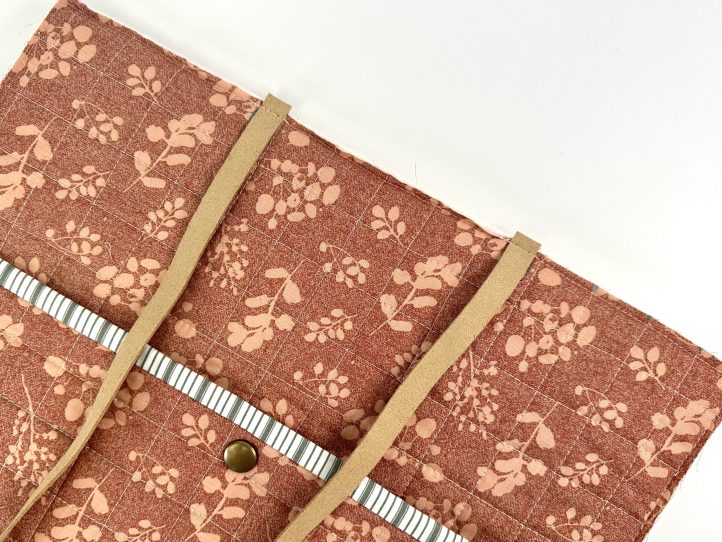
- TIP: Allow 1/2” overhang. This is allowed for in the length and it makes a nice strong handle.
- Repeat for the other handle on the other panel.
Construct the Exterior:
- Lay the front pocket onto the front panel and center everything. Pin or clip and baste the sides and bottom edge.
- Attach the male half of the stud at this point using the female half to see where it sits inside the pocket.
- Pin or clip the front and back panels together and sew the sides and base.
- TIP: There is quite a bit of thickness now so lengthen your stitch and sew slowly.
- Notch the curved corners.
- Turn the exterior the right way out.
Add the Lining:
- With the exterior the right way out and the lining inside out, pull the lining on over the exterior and make sure that the side seams are matched. Pin or clip and sew the top edge.
- TIP: The handles will be down in between the lining and the exterior and only the 1/2” overhang will be visible.
- Turn the bag the right way out through the gap, close the gap and stuff the lining down into the bag. Press the top edge so that it is perfect and topstitch twice right around. The first pass is about 1/8” and the second 1/4” under that.