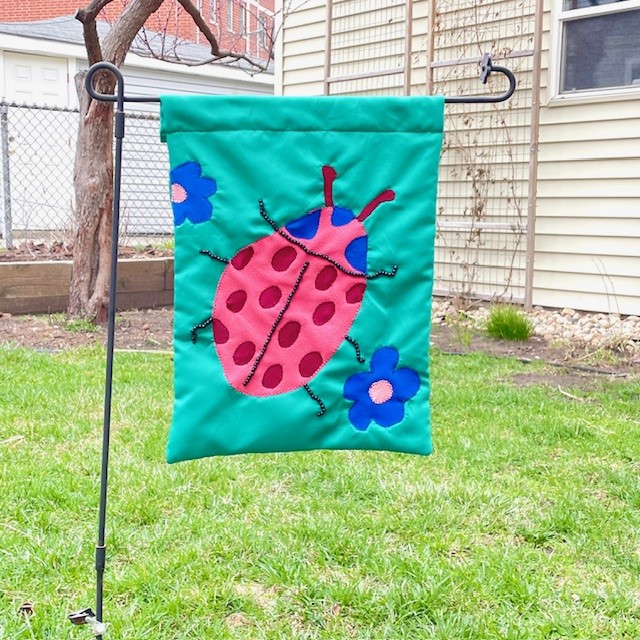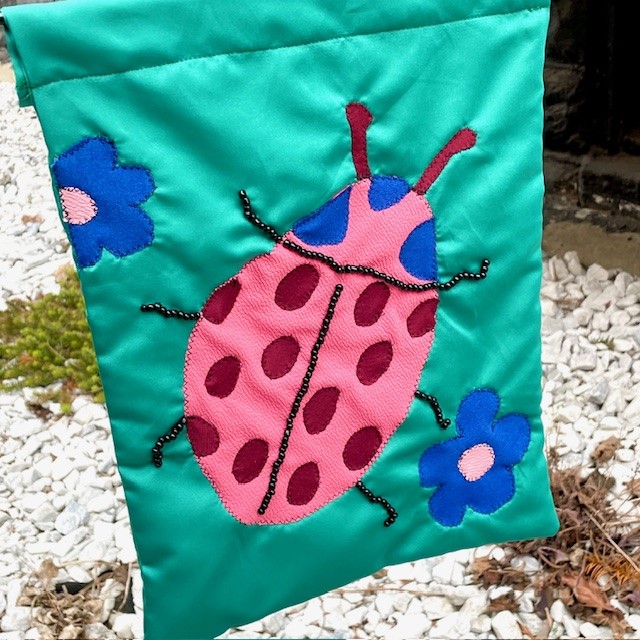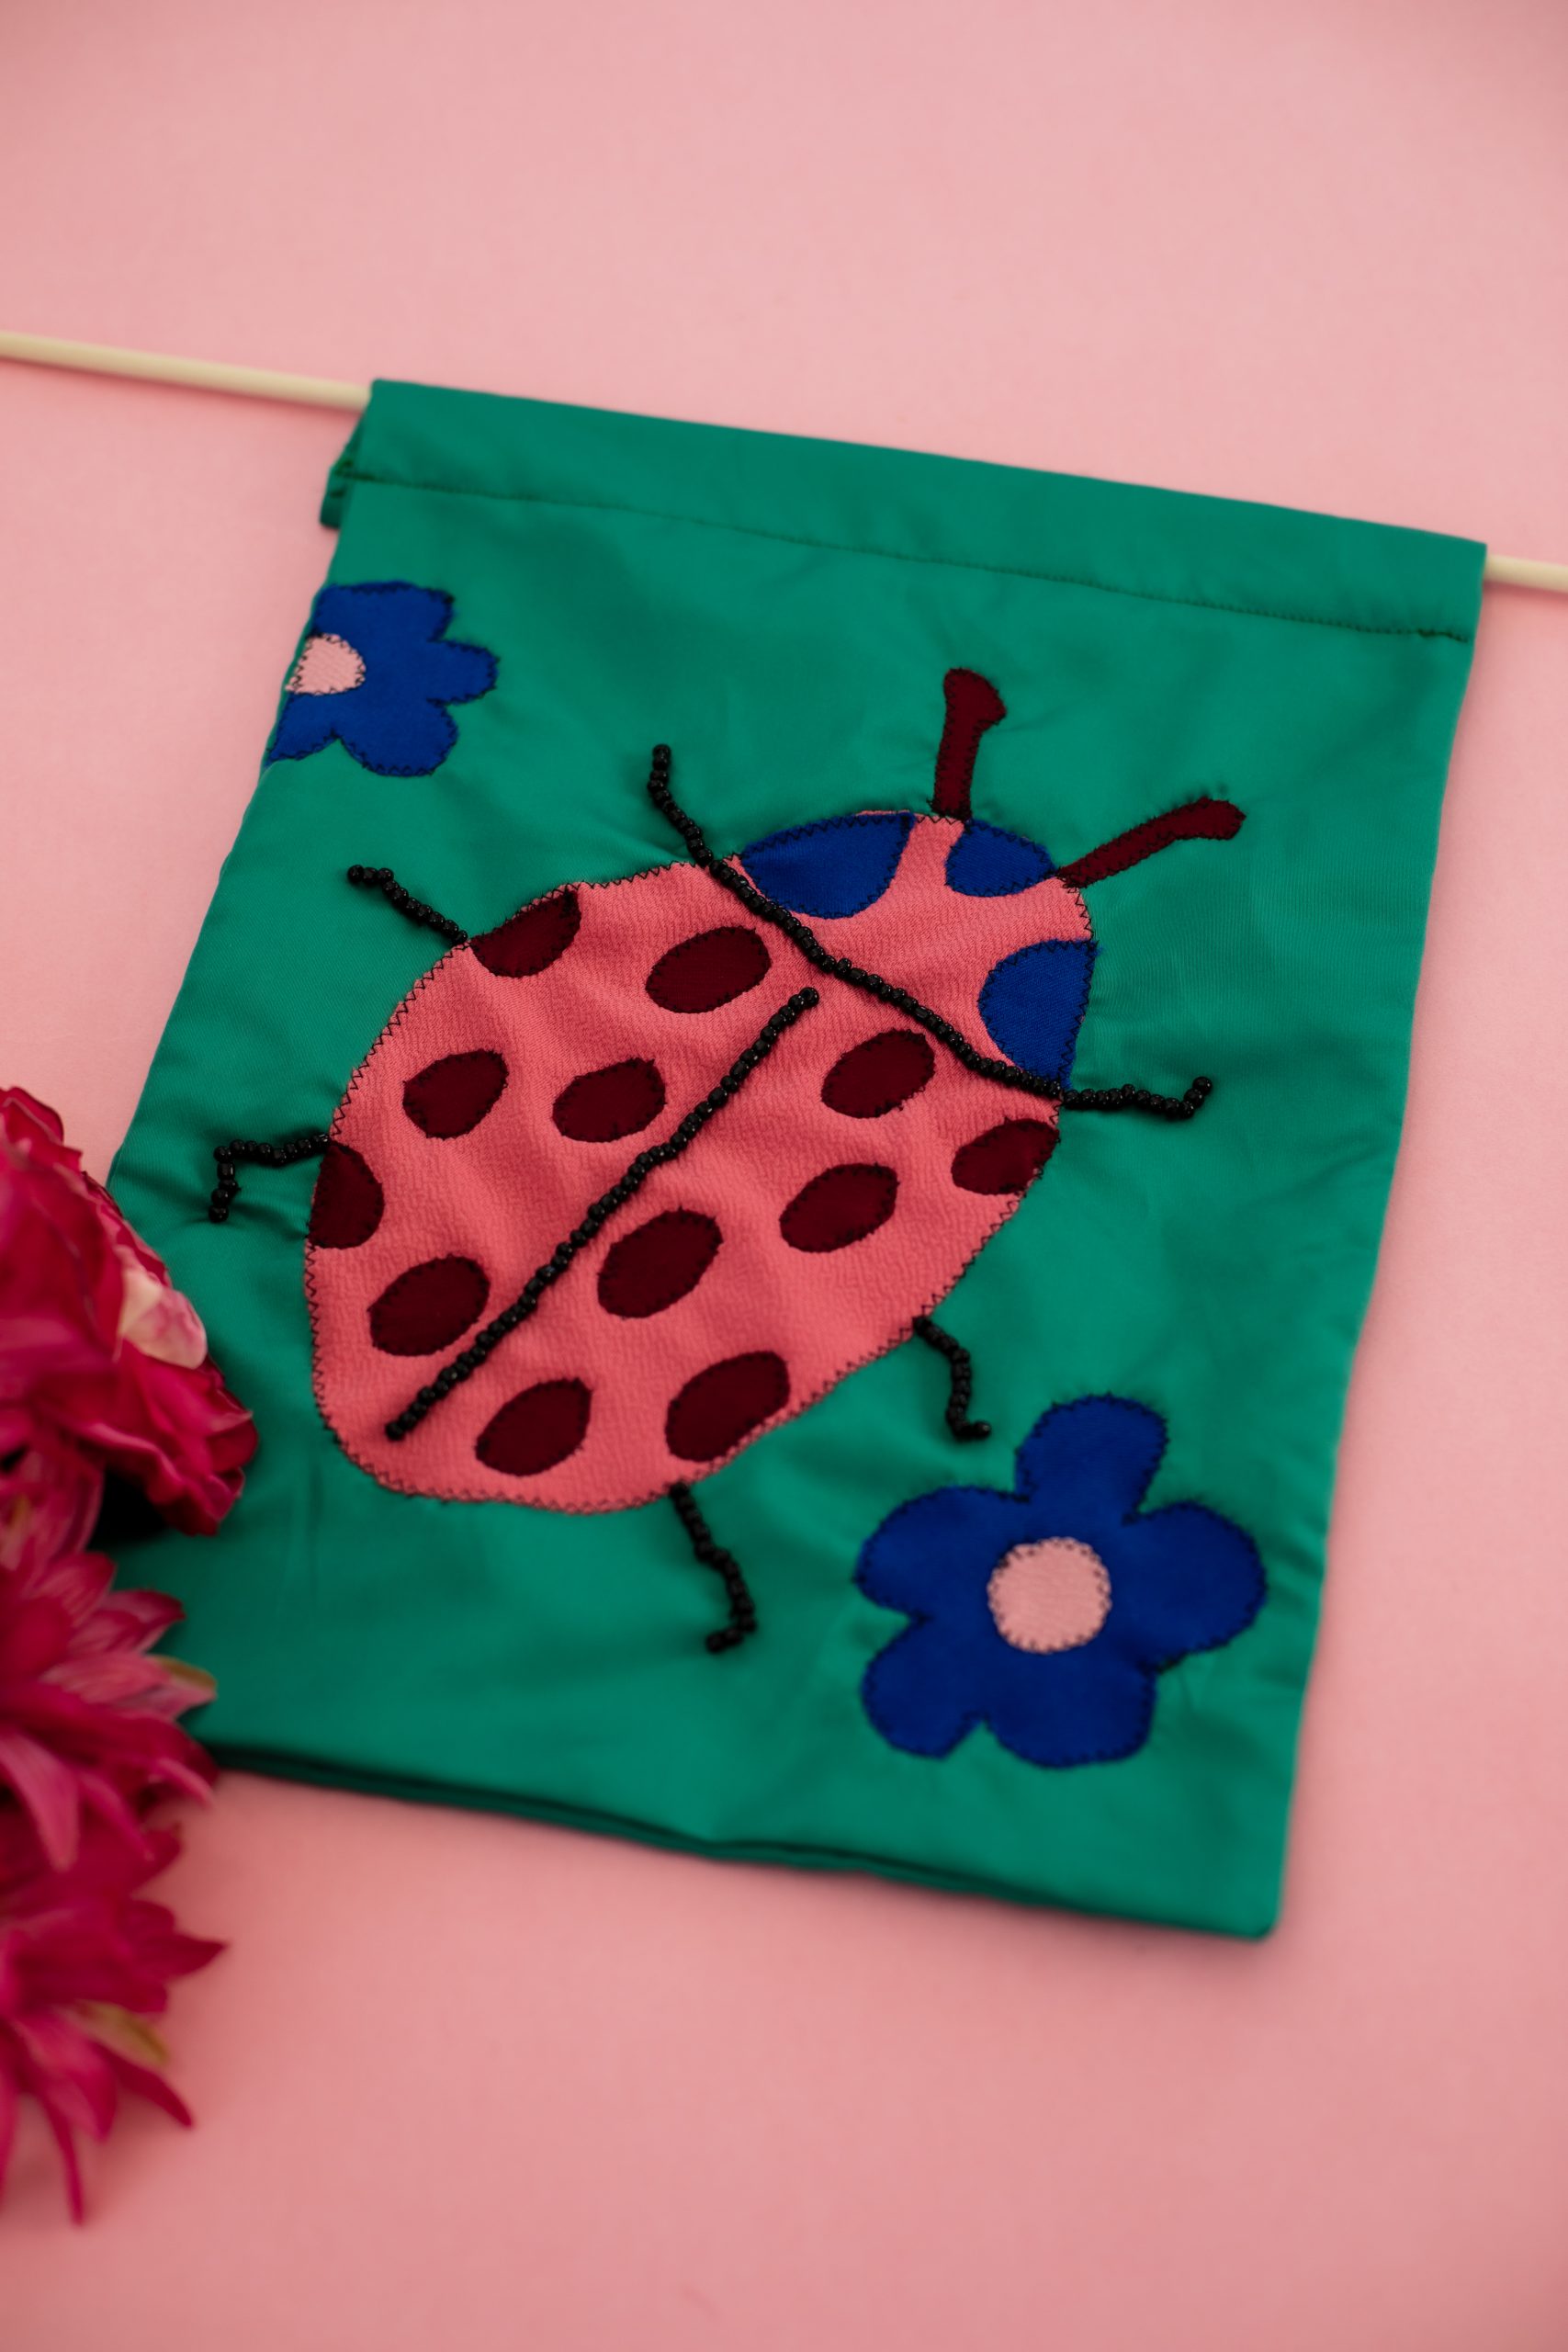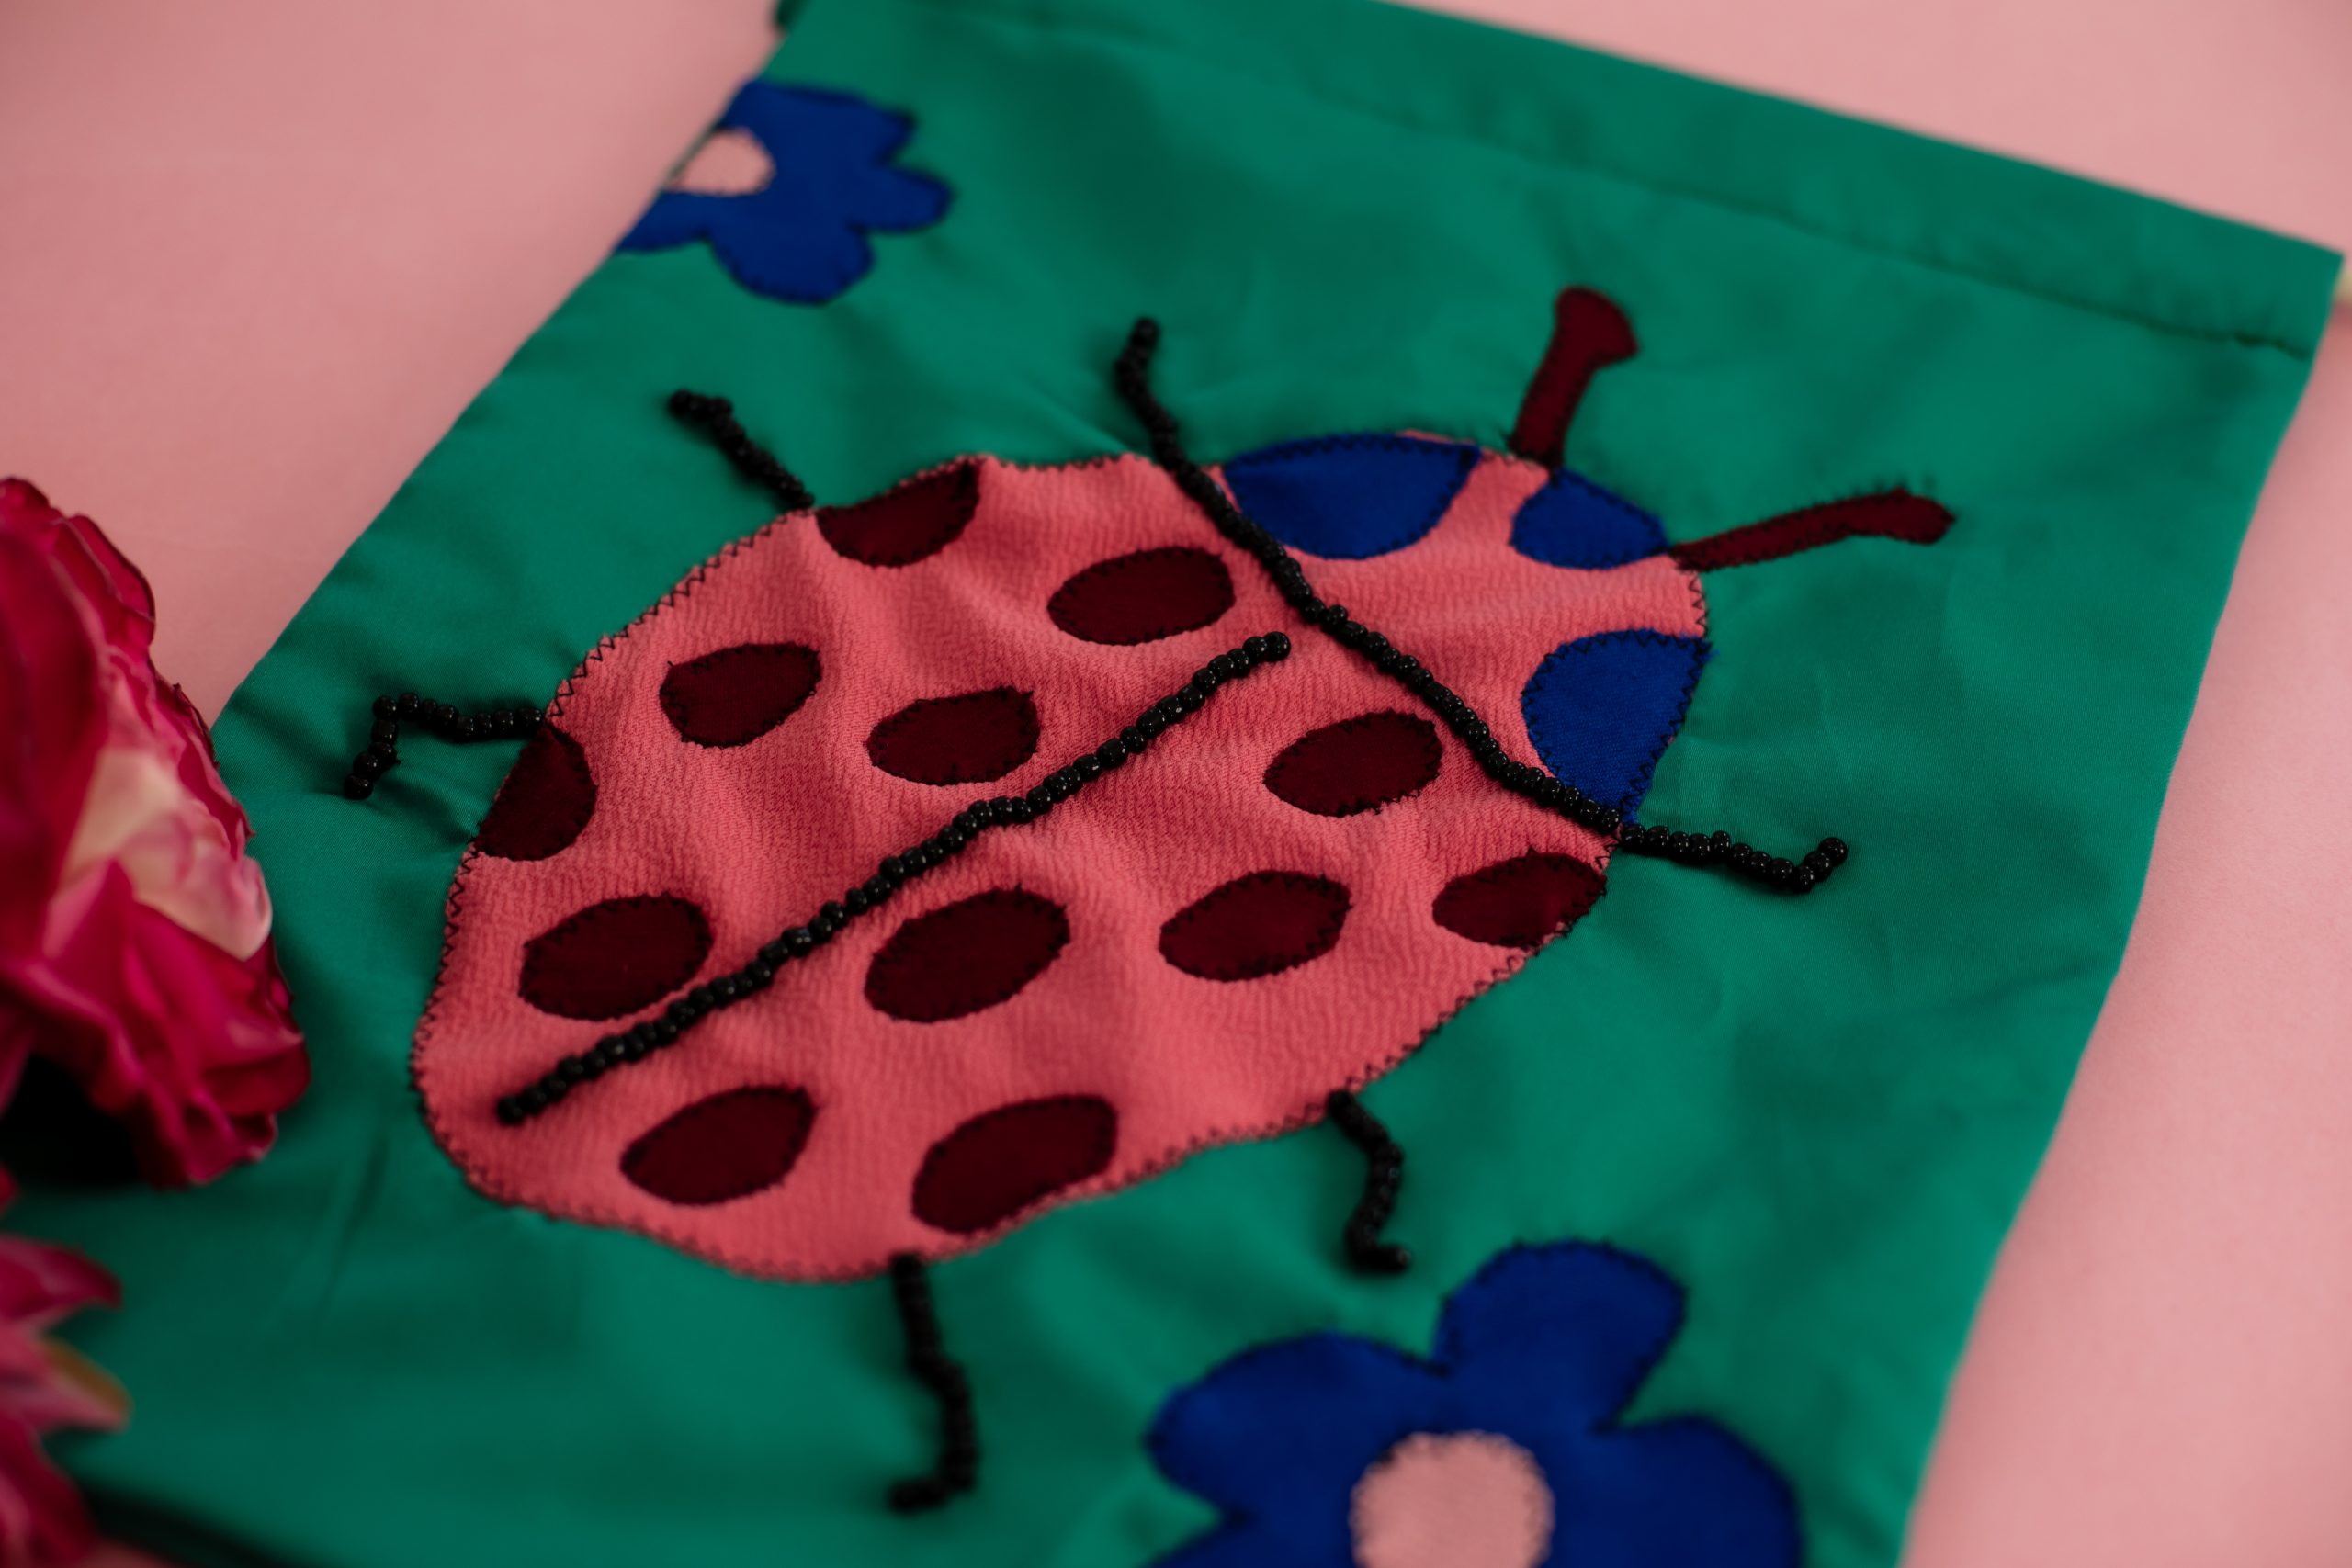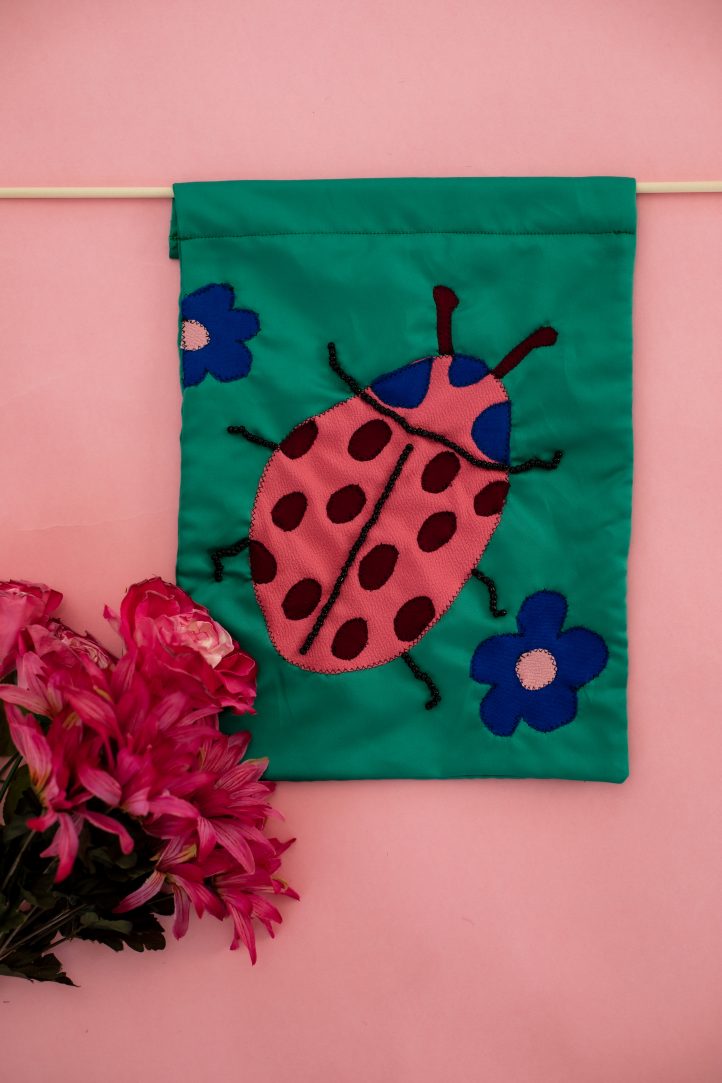
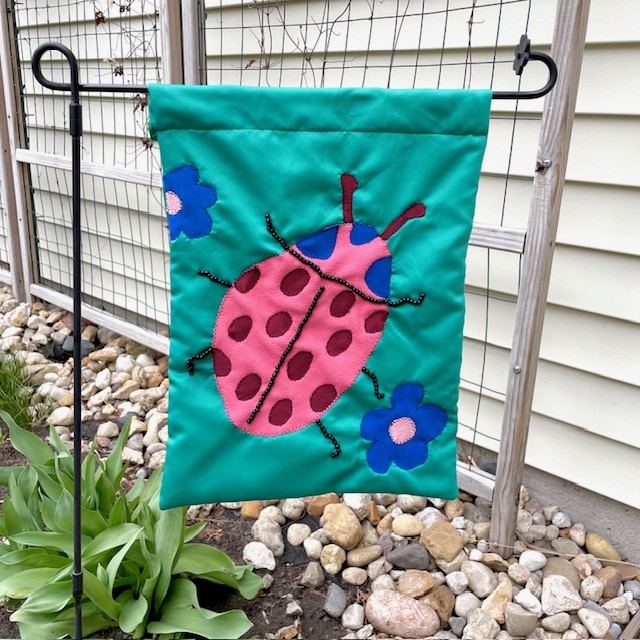
Give your home some serious curb appeal with a beautiful sewn garden flag. Made using polyester fabrics that can handle unpredictable weather, this garden flag pattern can be made using new fabrics or upcycled materials from rain jackets or ponchos. Design a friendly pink ladybug with bead detail surrounded by a field of retro flowers in vibrant summer colors like jade, azure, and watermelon. This garden sewing project is a charming homemade gift idea for the gardener in your life and is a cheerful addition to your flower beds and landscaping.
Finished Size: Approximately 11” by 14” (inches)
Time: Approximately 3-4 hours
Materials:
- Lightweight polyester fabric in colors of your choosing (For this article, the designer used bolt remnants in light pink, medium pink, green, blue, and maroon)
- Polyester or blended all-purpose thread in a color that matches the background fabric (green) and a dark contrasting color that matches the beads as well (black)
- Fabric scissors
- Small sewing scissors
- Rotary fabric cutter
- Rotary cutter mat
- Rotary cutter ruler
- Seam ripper
- Sewing clips, magnets, or pins (Rebecca used all three for different purposes)
- Medium-sized black seed beads (size 6/0)
- Hand sewing needle (medium thickness, for sewing on the beads)
- Sewing machine
- Printer and printer paper
- Paper scissors
- Flag holder or stand to display it (optional but recommended)
- PDF Templates – These are located at the bottom of this page. See printing instructions below.
PRINTING INSTRUCTIONS:
To download the PDF templates, click on the download button at the bottom of the page. We recommend opening your download using Adobe Acrobat.
Sewing Instructions:
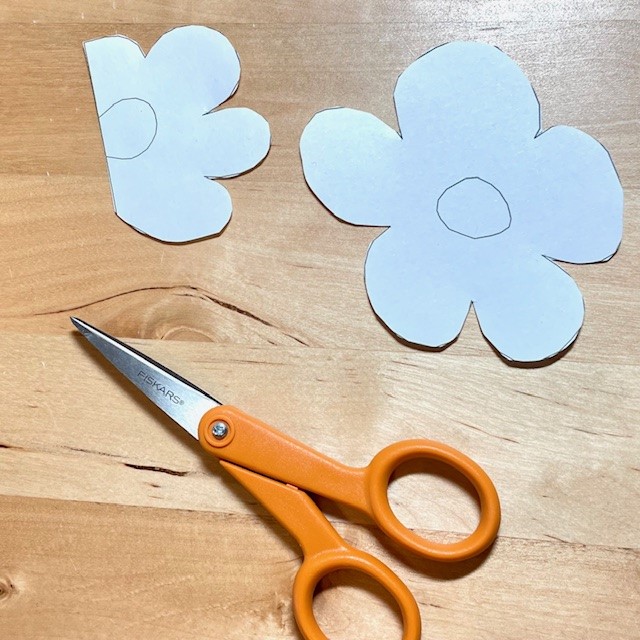
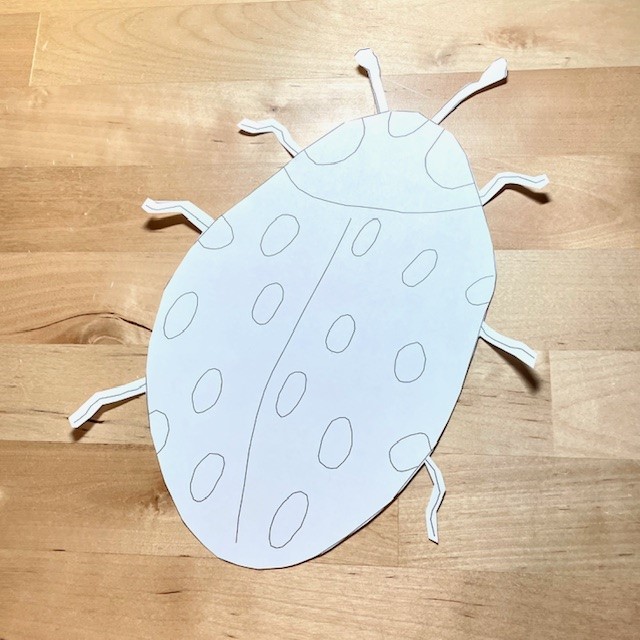
- Begin by printing out the downloadable templates for the flag. The ladybug and flower shapes can be printed out on letter-sized printer paper. Print one copy of the flower page and two copies of the ladybug.
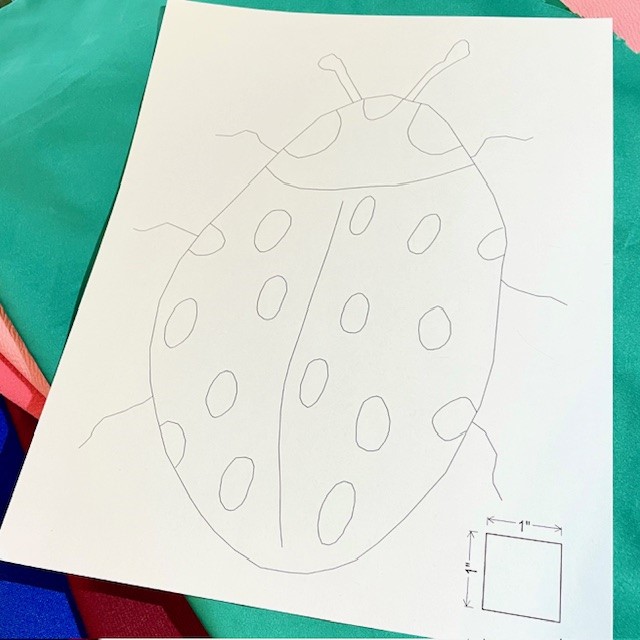
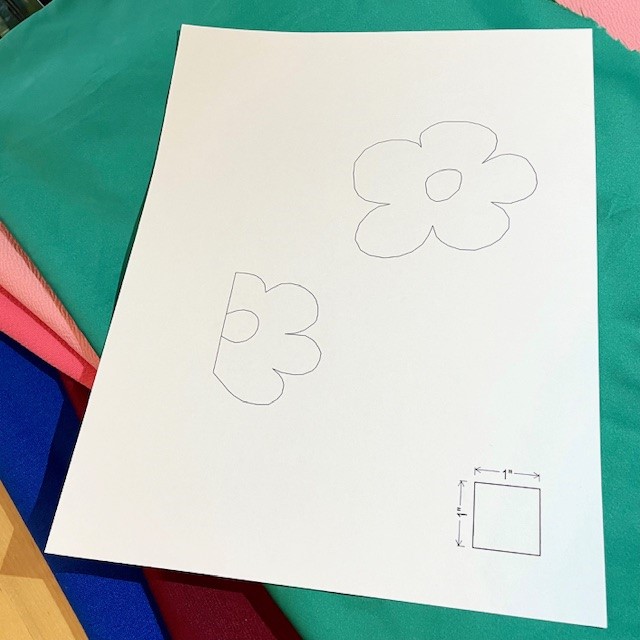
- Next, cut them out with paper scissors. The antennae and leg shapes are going to be stitched on separately, so just cut around the lines on those parts so you’ll know where they go later.
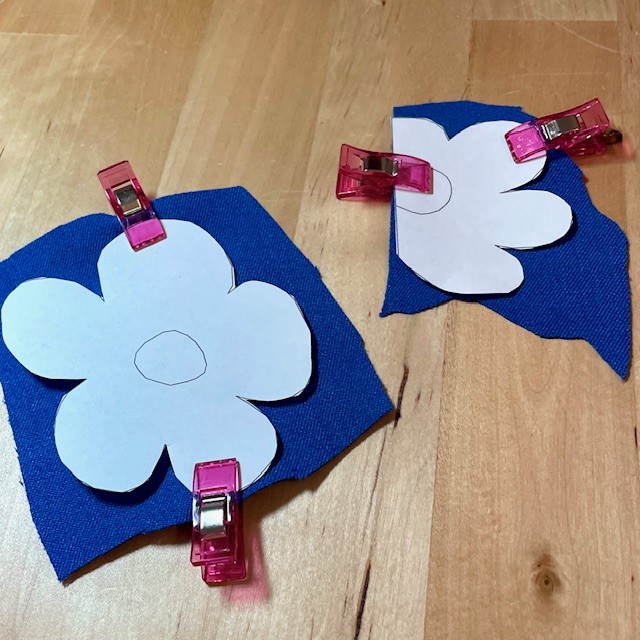
- After the paper templates are ready, it’s time to cut out the fabrics! Pin (or clip) and then cut out:
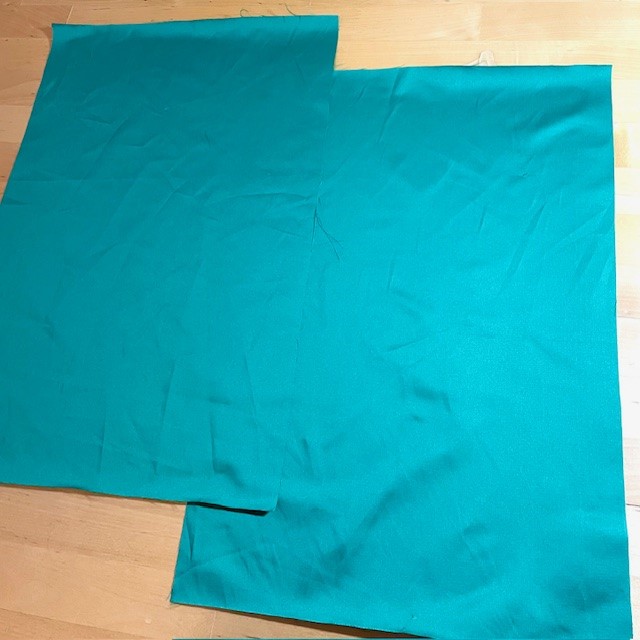
- (2) large rectangle shapes that are 12” by 18” in the green fabric (for the background)
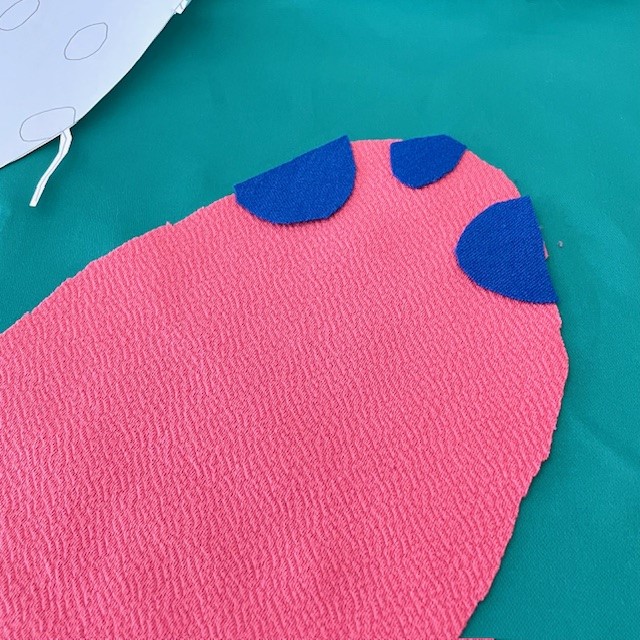
- (1) ladybug shape in the medium pink fabric (hold up the paper antennae and legs so they don’t get trimmed off when cutting fabric)
- (2) antennae shapes (top of ladybug) in the maroon fabric (they don’t have to be exact)
- (3) head spot half-circle shapes in blue fabric (they also don’t have to be exact but use the template as a guide)
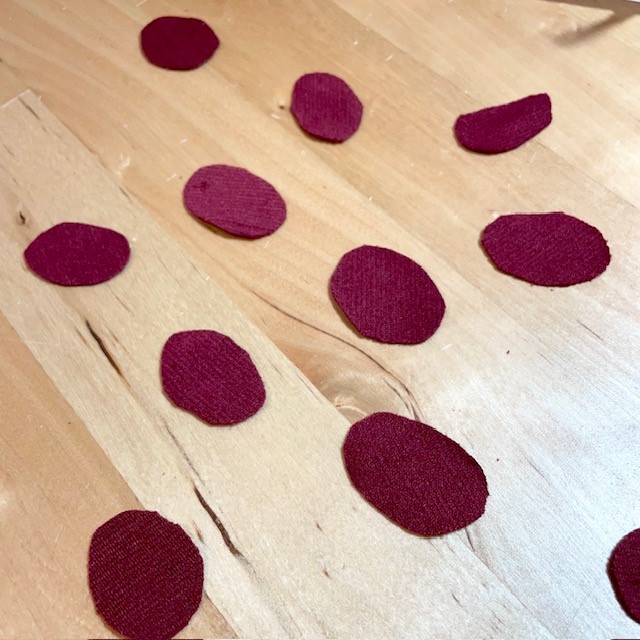
- (12-16) oval ladybug spots in maroon fabric (they should all be a tiny bit different in shape)
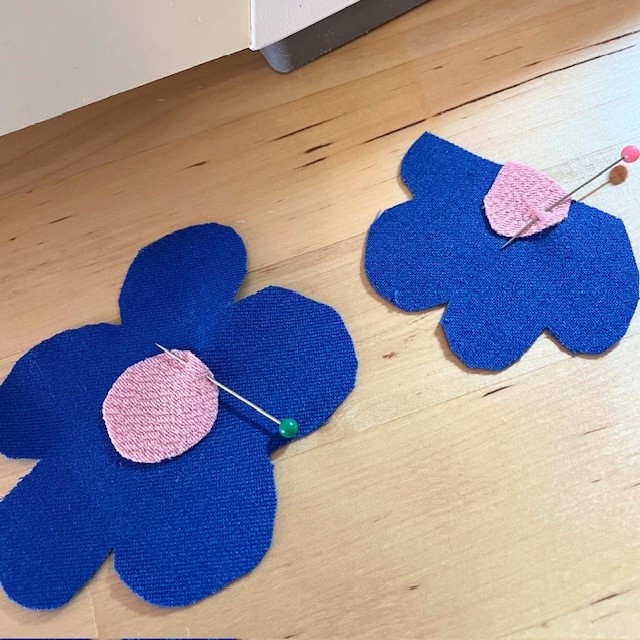
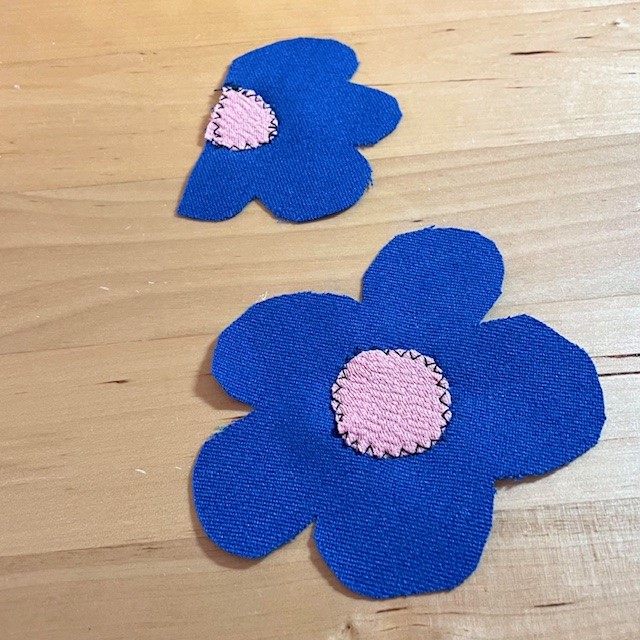
- (1 set) of the two flower designs in blue fabric
- (1 set) of the two flower centers in light pink fabric
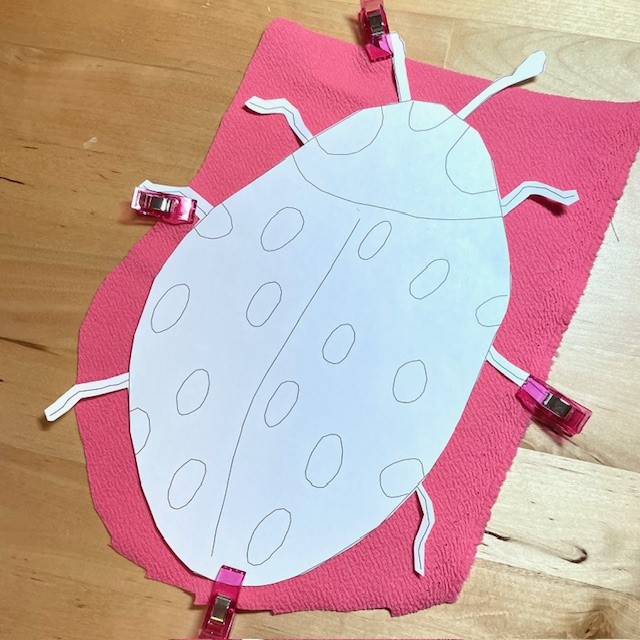
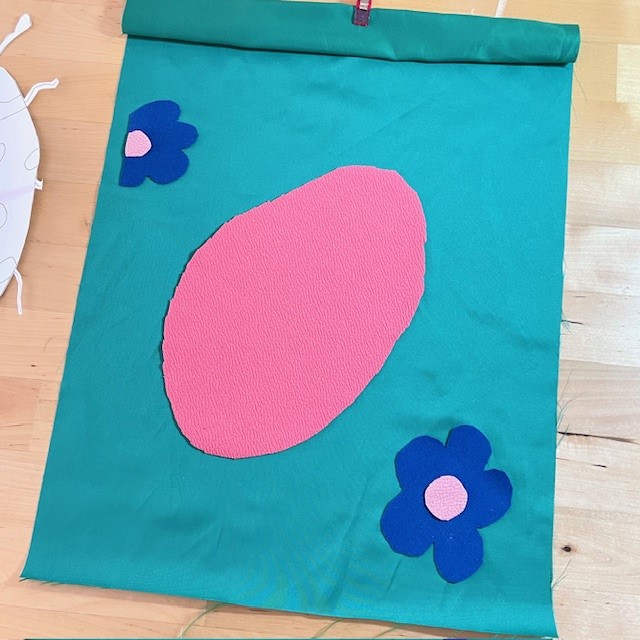
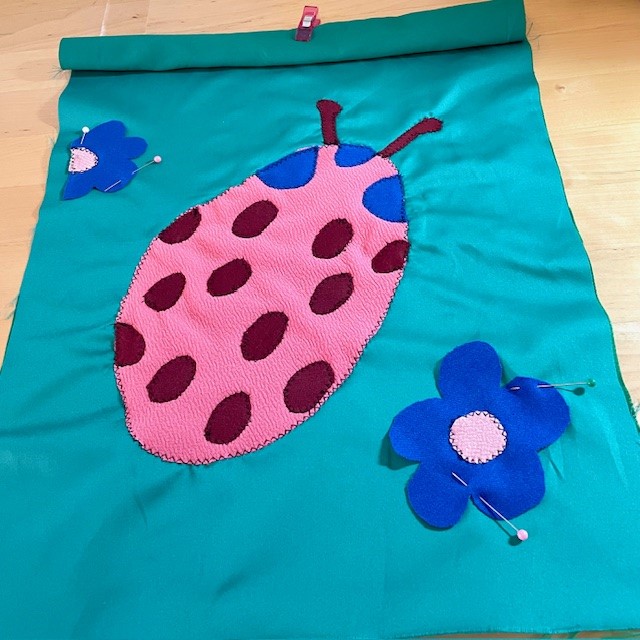
- Now it’s time to assemble the flag! We will do the entire front and then at the end, attach the front to the (plain) back panel to hide the stitching. Lay the green background piece on your work table, right side facing up. Decide on the positioning of the flowers and ladybug, referring to the finished photos for reference. The ladybug will be slightly tilted versus when it is printed out vertically. Pin or clip it onto the background along with the blue head shapes. Try to pin along the outer edges of your cut pieces so there aren’t holes made in the center of the polyester. Make sure there aren’t any lumps or bumps in the fabric and it’s as flat as possible.
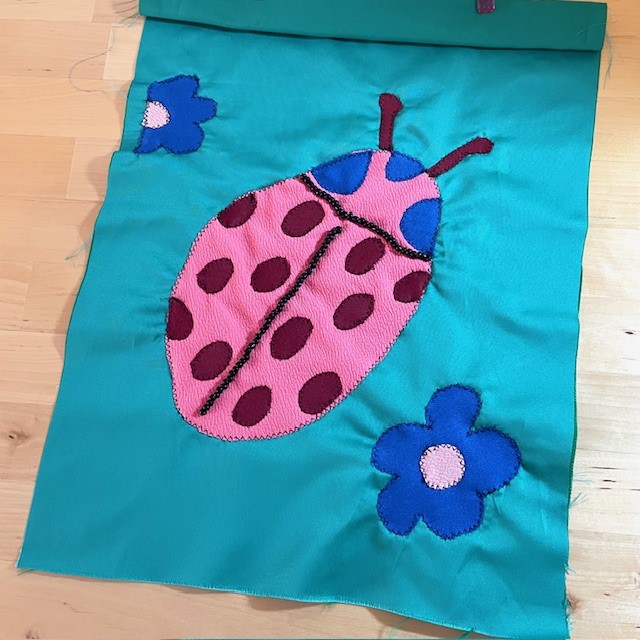
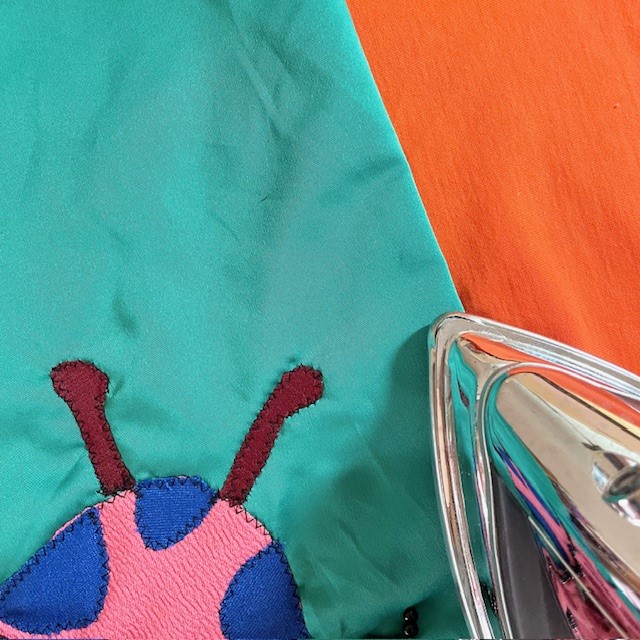
- Time to sew on the ladybug shape! Use a contrasting black thread color (or a matching one if you want it to blend in). Do a test swatch to determine the perfect stitch width and length for the zigzag stitch. Once this is just right, stitch all around the ladybug so it’s secured. Sew slowly so the visible stitches look nice and you have more control. Clean up and trim any long threads from the back after knotting them for strength.
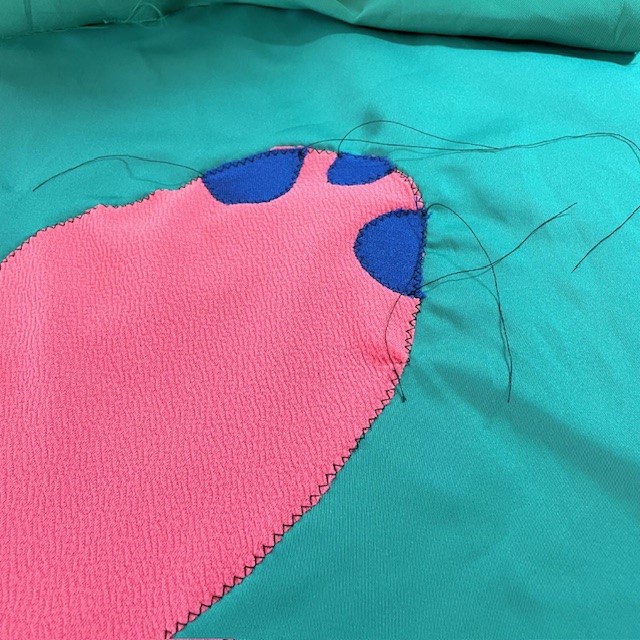
- Now to attach the antennae and spots in the same way we stitched the ladybug. Pin each one down before starting to check the placement. Then sew them on, taking your time around the curves. Lifting the presser foot occasionally can release any tension in the fabric and help around the ovals.
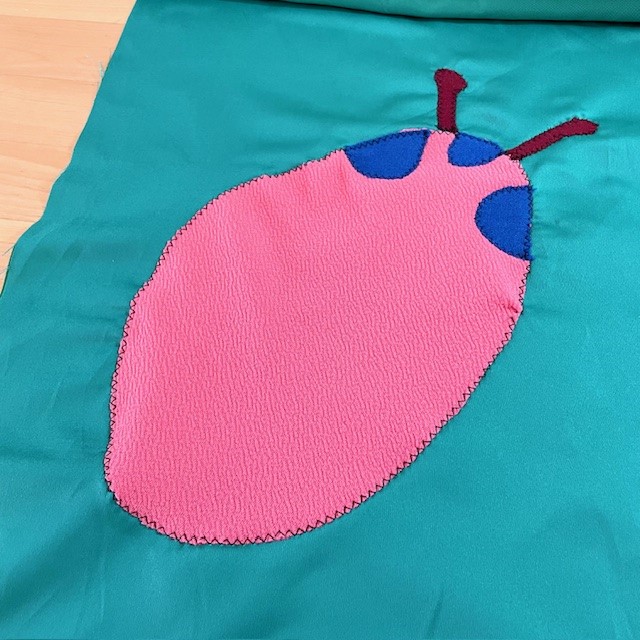
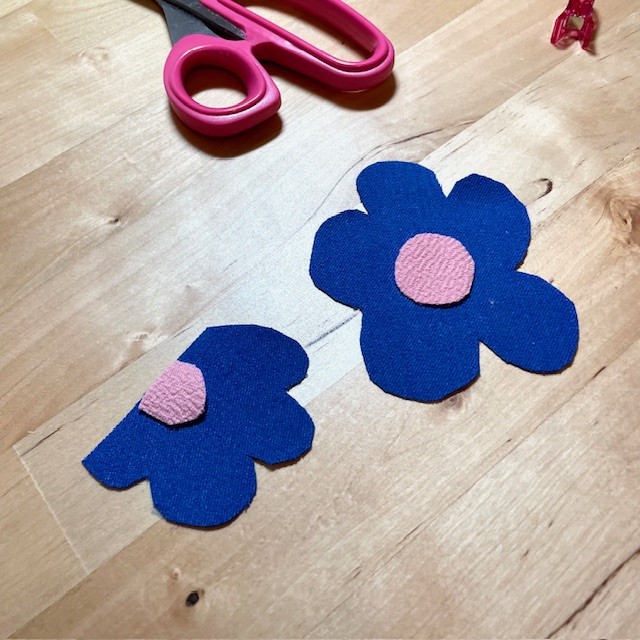
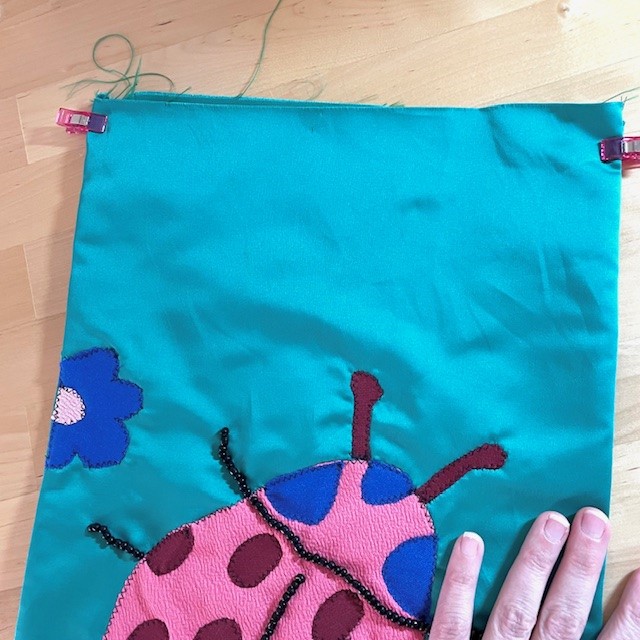
- Repeat Steps 4-6 for the flower shapes (sewing the pink centers on first). The flower that is halved because it goes into the seam should be placed about 1/2” inward from the cut edge of the background piece. When the flag is finished, it will be flush with the side seam.
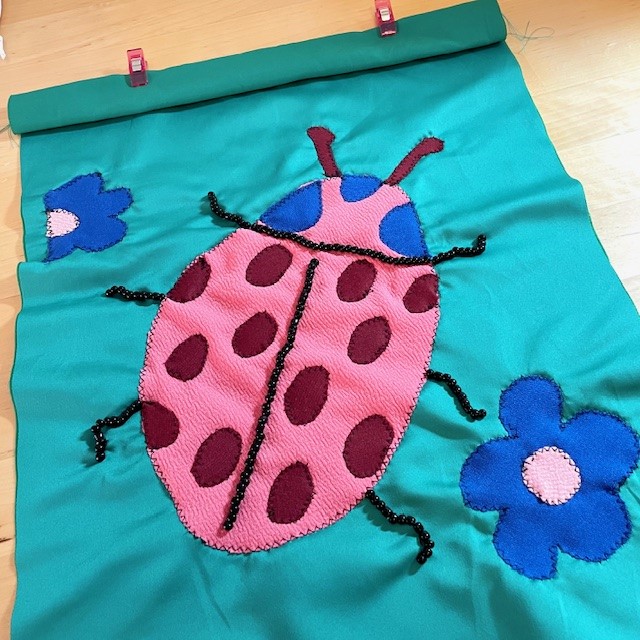
- Time to add the beads! Using a hand-sewing needle and (doubled over) polyester thread, stitch the black seed beads in two slightly-curved lines. One line is behind the blue head shapes, and the other goes all the way down the rest of the ladybug’s body. Refer to the ladybug paper template to know where to start and end the beads. String on 4-6 beads, secure them several times, then come back through the end and string on several more beads. Important- once they are all added in a line go back through the entire row one more time for extra stability. Knot in the back and trim off any long excess threads.
- Finally we can stitch on the beaded legs! Using the paper ladybug template for reference, repeat the same process for sewing on the beads as above. As these are “legs”, they can have more angles and be less streamlined than the lines above. For each leg, about 10-12 beads were used (the lengths of the beads can vary slightly so go with what looks best).
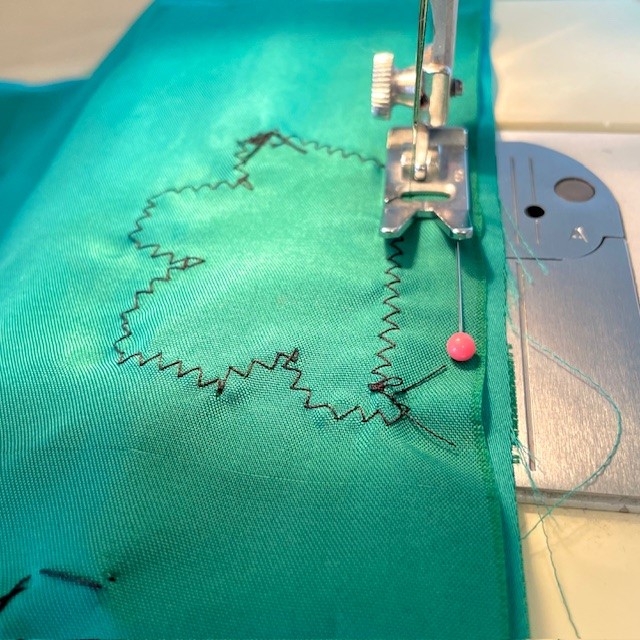
- To finish the flag, pin the two green rectangles together with the right sides facing inward. Switching to the green thread, straight stitch around the sides and bottom (with a 5/8” seam allowance). Leave the top edges open so it can be reversed next.
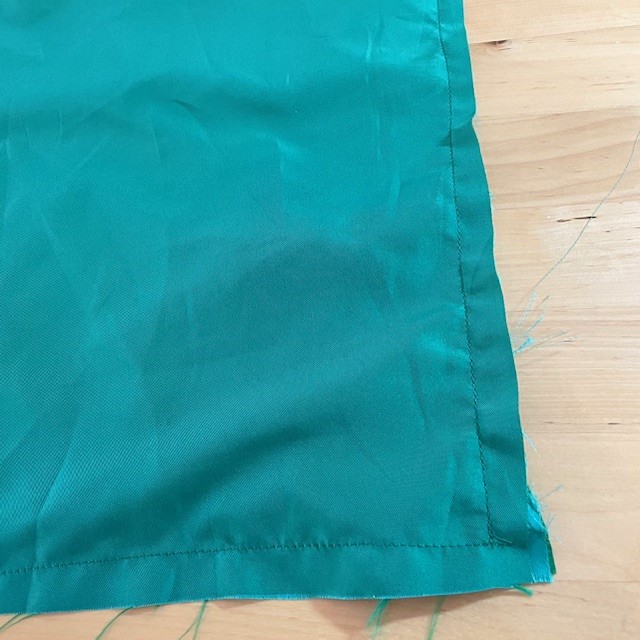
- Flip the flag back outward and press with an iron. The top will still be open.
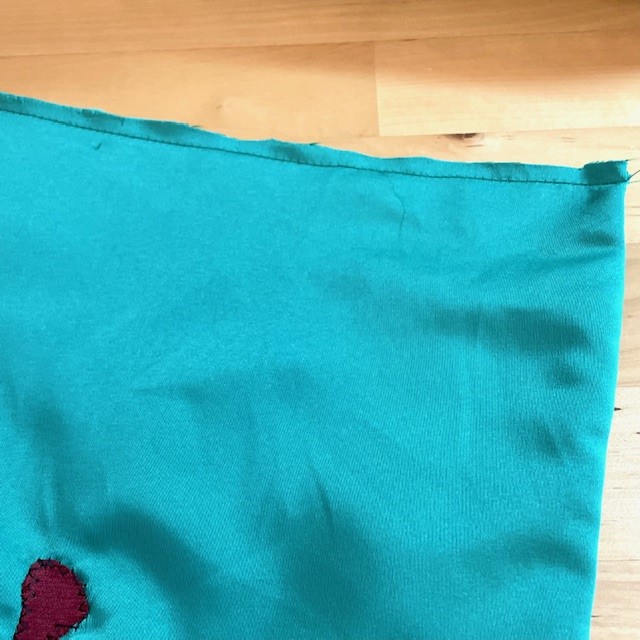
- Pin the top edges together and sew a straight stitch towards the edge. It will now be closed.
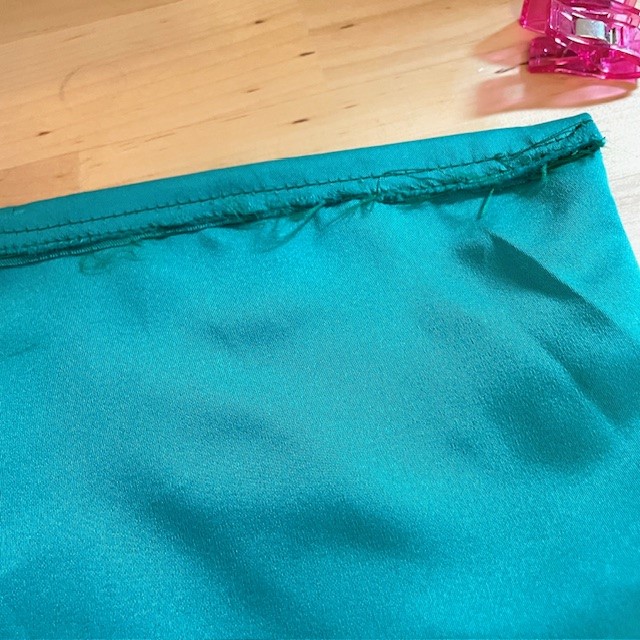
- Fold this edge 1/2” down (towards the back) and pin or clip. Sew another straight line to secure it.
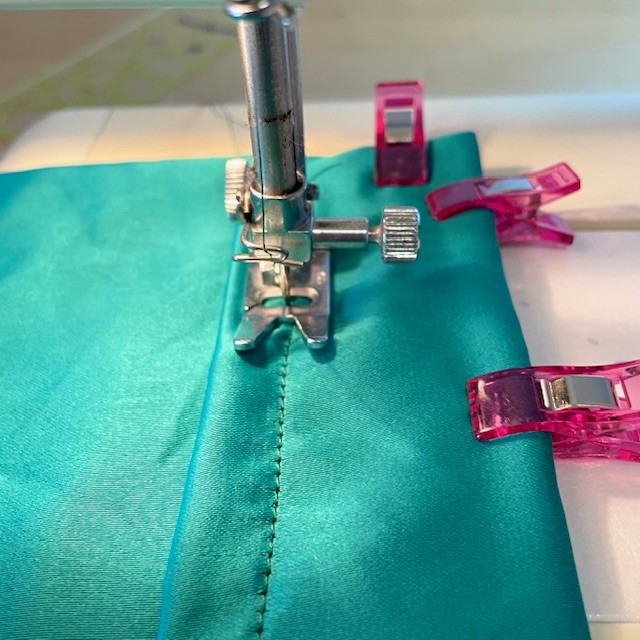
- Finally, fold the top edge 1” down again (towards the back) and add pins/clips on the sides for hold. Straight stitch along the same stitch line from Step 13. Now the flag holder pole can slip right into this little pocket that has been created!
Store the garden flag in a dry place over winter and it will last for years. Spot clean any dirt by hand and do not machine wash it.
Enjoy your beautiful new garden flag!