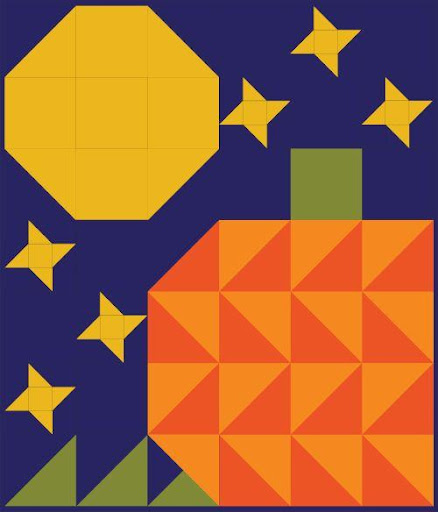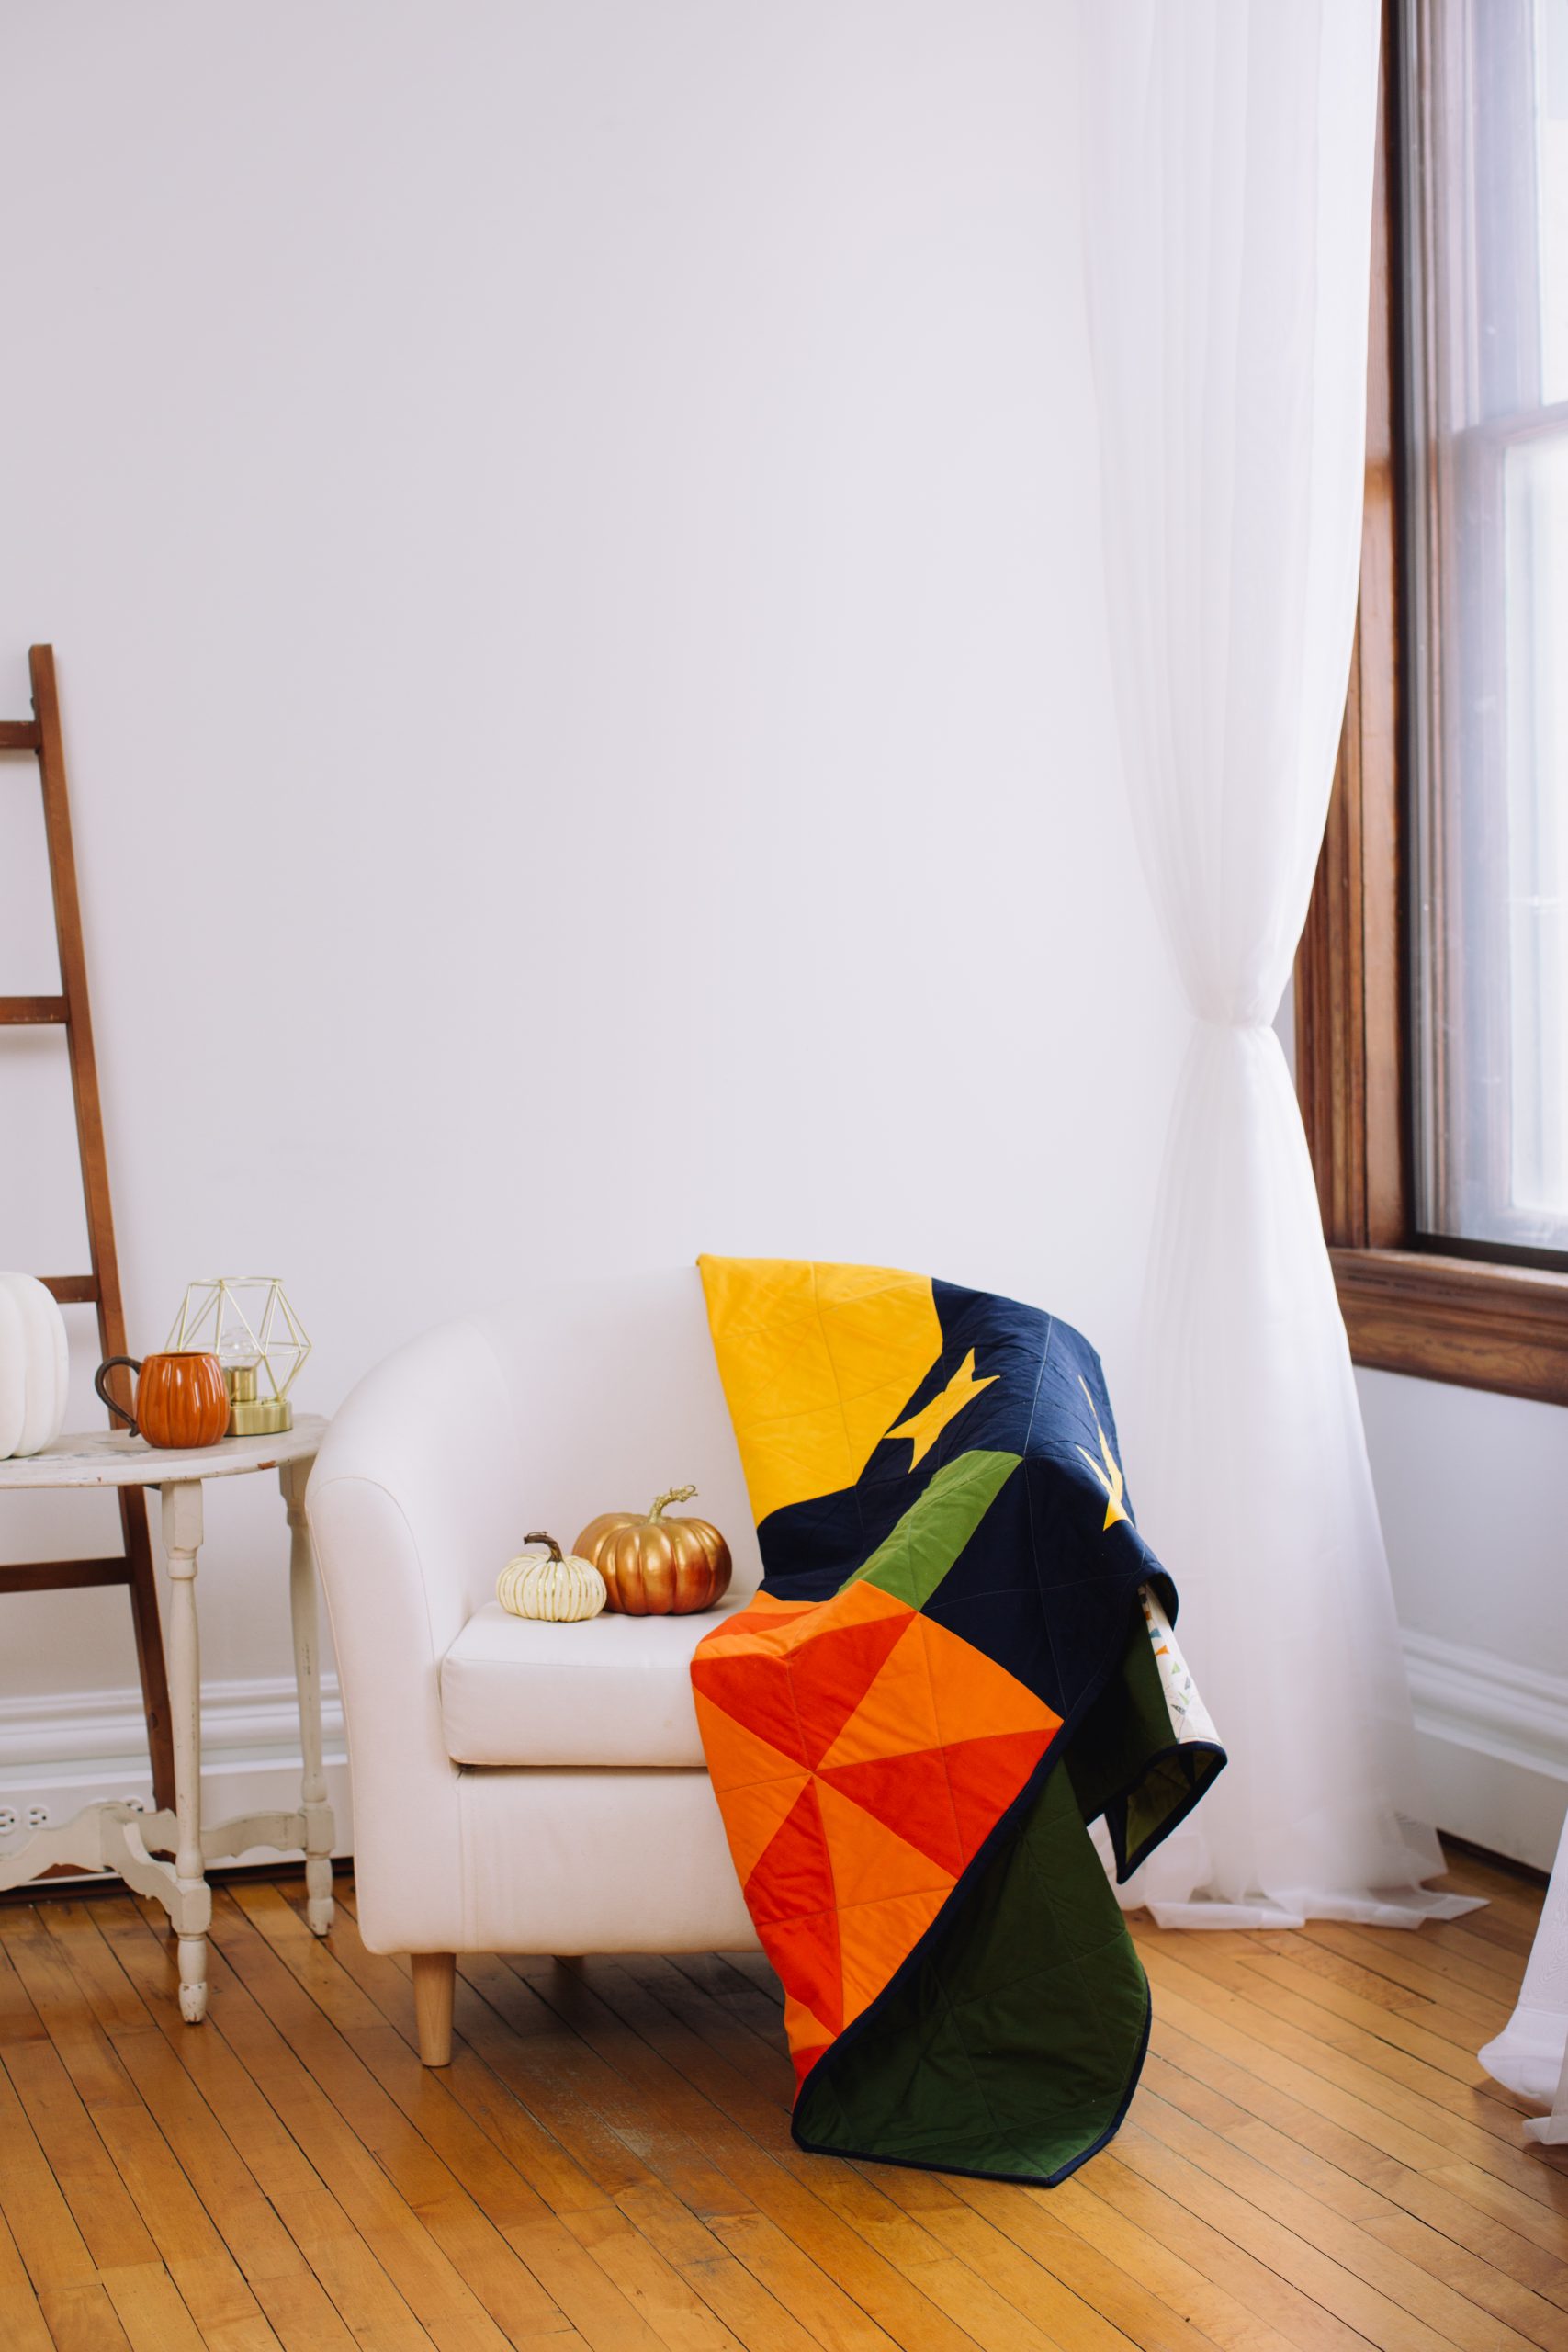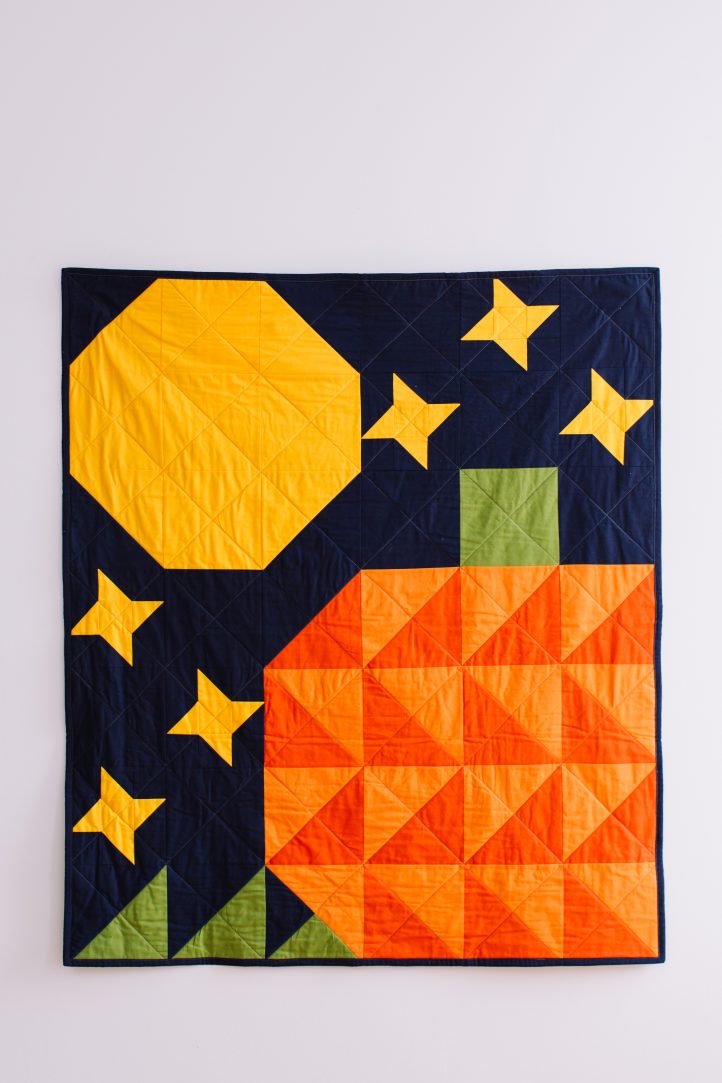
Create a rich and lively fall scene with this throw quilt pattern from Staci Wendland. From our friends at We Like Quilting, the Midnight in the Pumpkin Patch Quilt Pattern depicts an eerie autumn night when the moon is high and the pumpkin patch is full of gorgeous orange pumpkins awaiting the fall harvest. This throw quilt pattern finishes at 45” x 52 1/2” and is fat-quarter friendly. Meet us at midnight in the pumpkin patch…if you dare!
Finished Size: 45″ x 52 1/2″
Seam Allowances: 1/4″
Abbreviations:
- RST = right sides together
- WOF = width of fabric from selvage to selvage
- HST = half square triangles
Materials:
- Cotton Fabric Requirements:
- Yellow: 3 fat quarters
- Green: 1 fat quarter
- Dark orange: 2 fat quarters
- Light orange: 2 fat quarters
- Blue: 4 fat quarters
- Binding: 1/2 yard (40″ wide)
- Backing: 3 yards (40” wide)
Cutting Instructions:
Yellow:
- (6) 3″ x 3″
- (12) 3 3/4″ x 3 3/4″
- (5) 8″ x 8″
- (2) 8 3/4″ x 8 3/4″
Green:
- (1) 8″ x 8″
- (2) 8 3/4″ x 8 3/4″
Dark orange:
- (1) 8″ x 8″
- (7) 8 3/4″ x 8 3/4″
Light orange:
- (1) 8″ x 8″
- (7) 8 3/4″ x 8 3/4″
Blue:
- (24) 3″ x 3″
- (12) 3 3/4″ x 3 3/4″
- (9) 8″ x 8″
- (4) 8 3/4″ x 8 3/4″
Binding:
- (6) 2 1/2″ x WOF
Backing:
- (2) 54″ x WOF
Sewing Instructions:
- Using a fabric marking pen, draw a diagonal line on the wrong side of (12) yellow 3 3/4″ x 3 3/4″.
- Pin (1) yellow 3 3/4″ x 3 3/4″ RST to (1) blue 3 3/4″ x 3 3/4″. Sew 1/4″ from both sides of the drawn line.
- Cut on the drawn line. Press HSTs open with the seam toward the blue. Trim both HSTs to 3″ x 3″.
- Repeat Steps 2-3 with remaining (11) yellow 3 3/4″ x 3 3/4″ and (11) blue 3 3/4″ x 3 3/4″.
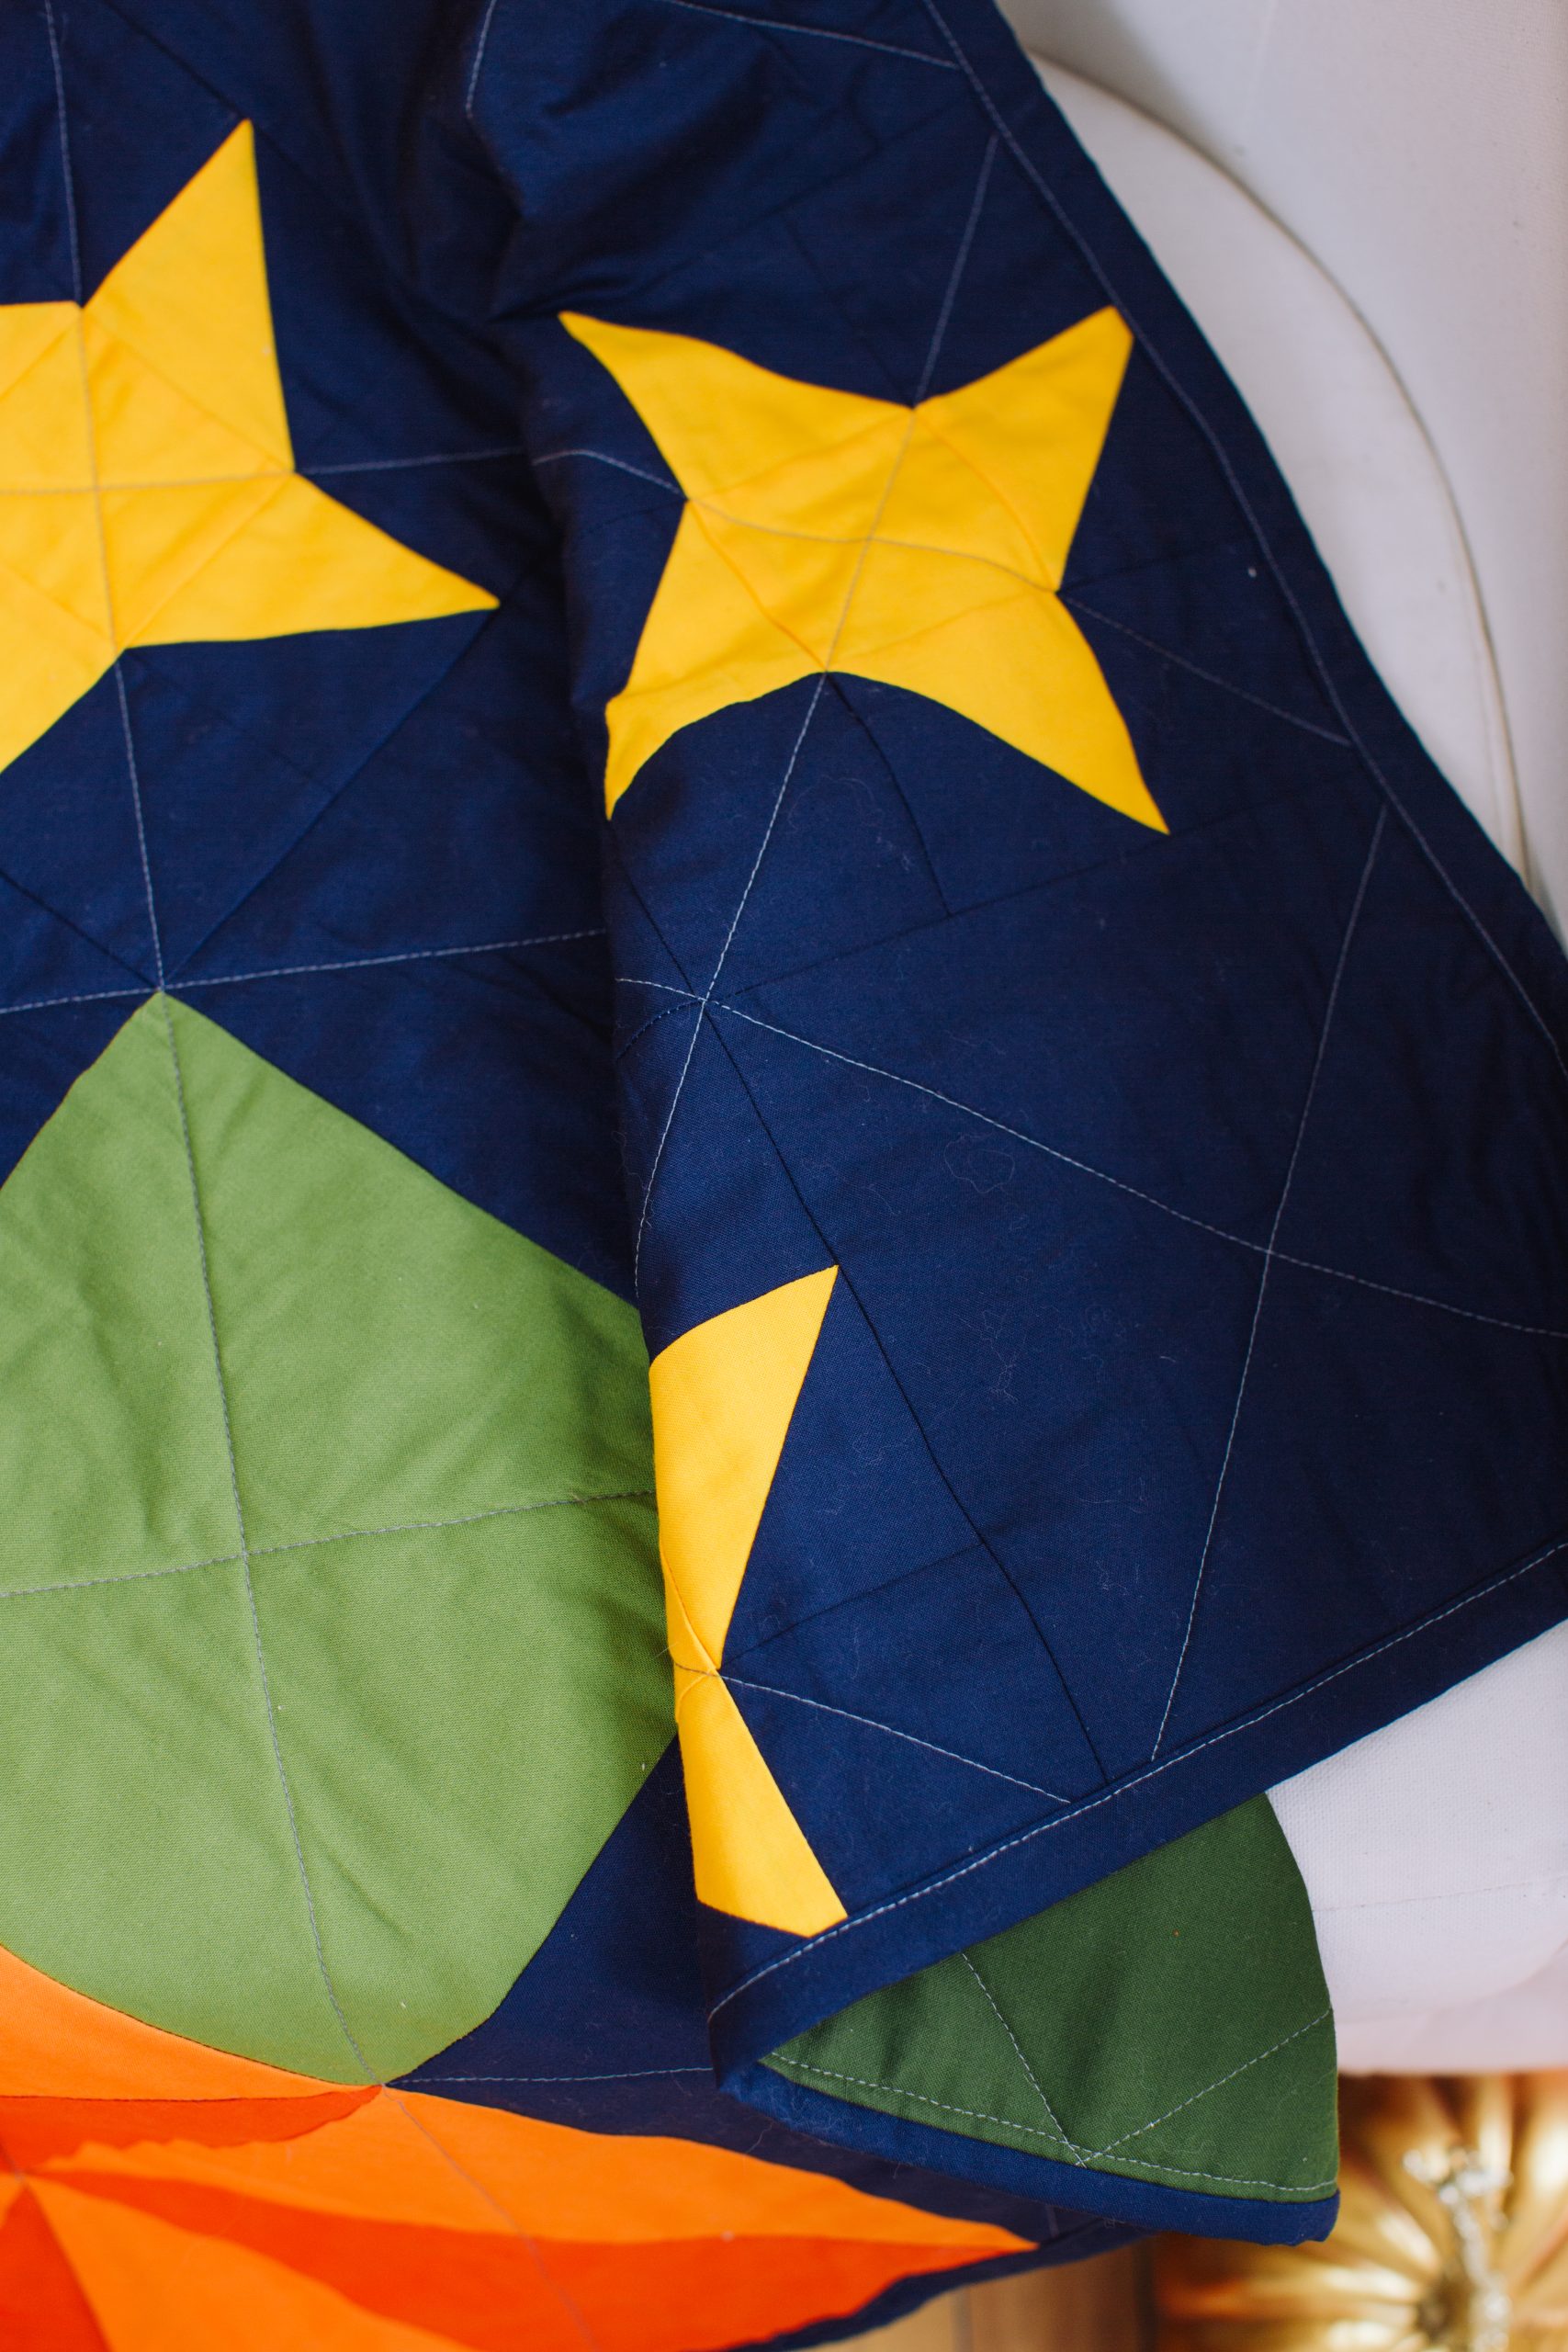
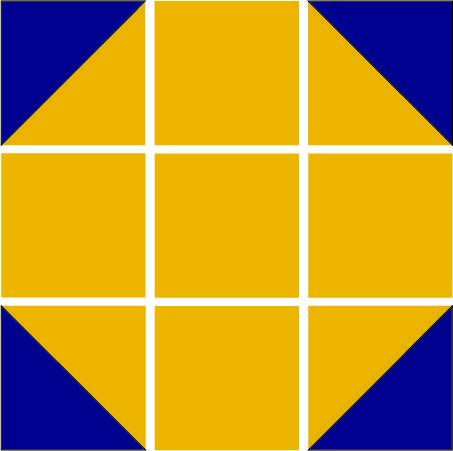
- Arrange (4) yellow/blue 3″ x 3″ HSTs, (4) blue 3″ x 3″, and (1) yellow 3″ x 3″ as shown.

- Sew pieces RST into (3) horizontal rows. Press the seams on the top and bottom rows to the right, and the seams on the middle row to the left.
- Sew the (3) rows RST. Press the seams toward the bottom.
- Repeat Steps 5-7 to make a total of (6) stars. Set those aside.
- Draw a diagonal line on the wrong side of (2) yellow 8 3/4″ x 8 3/4″.
- Pin (1) yellow 8 3/4″ x 8 3/4″ RST to (1) blue 8 3/4″ x 8 3/4″. Sew 1/4″ from both sides of the drawn line.
- Cut on the drawn line. Press HSTs open with the seam toward the blue. Trim both HSTs to 8″ x 8″.
- Repeat Steps 10-11 (3) more times with (3) yellow 8 3/4″ x 8 3/4″ and (3) blue 8 3/4″ x 8 3/4″ to make a total of (8) yellow/blue 8″ x 8″ HSTs.
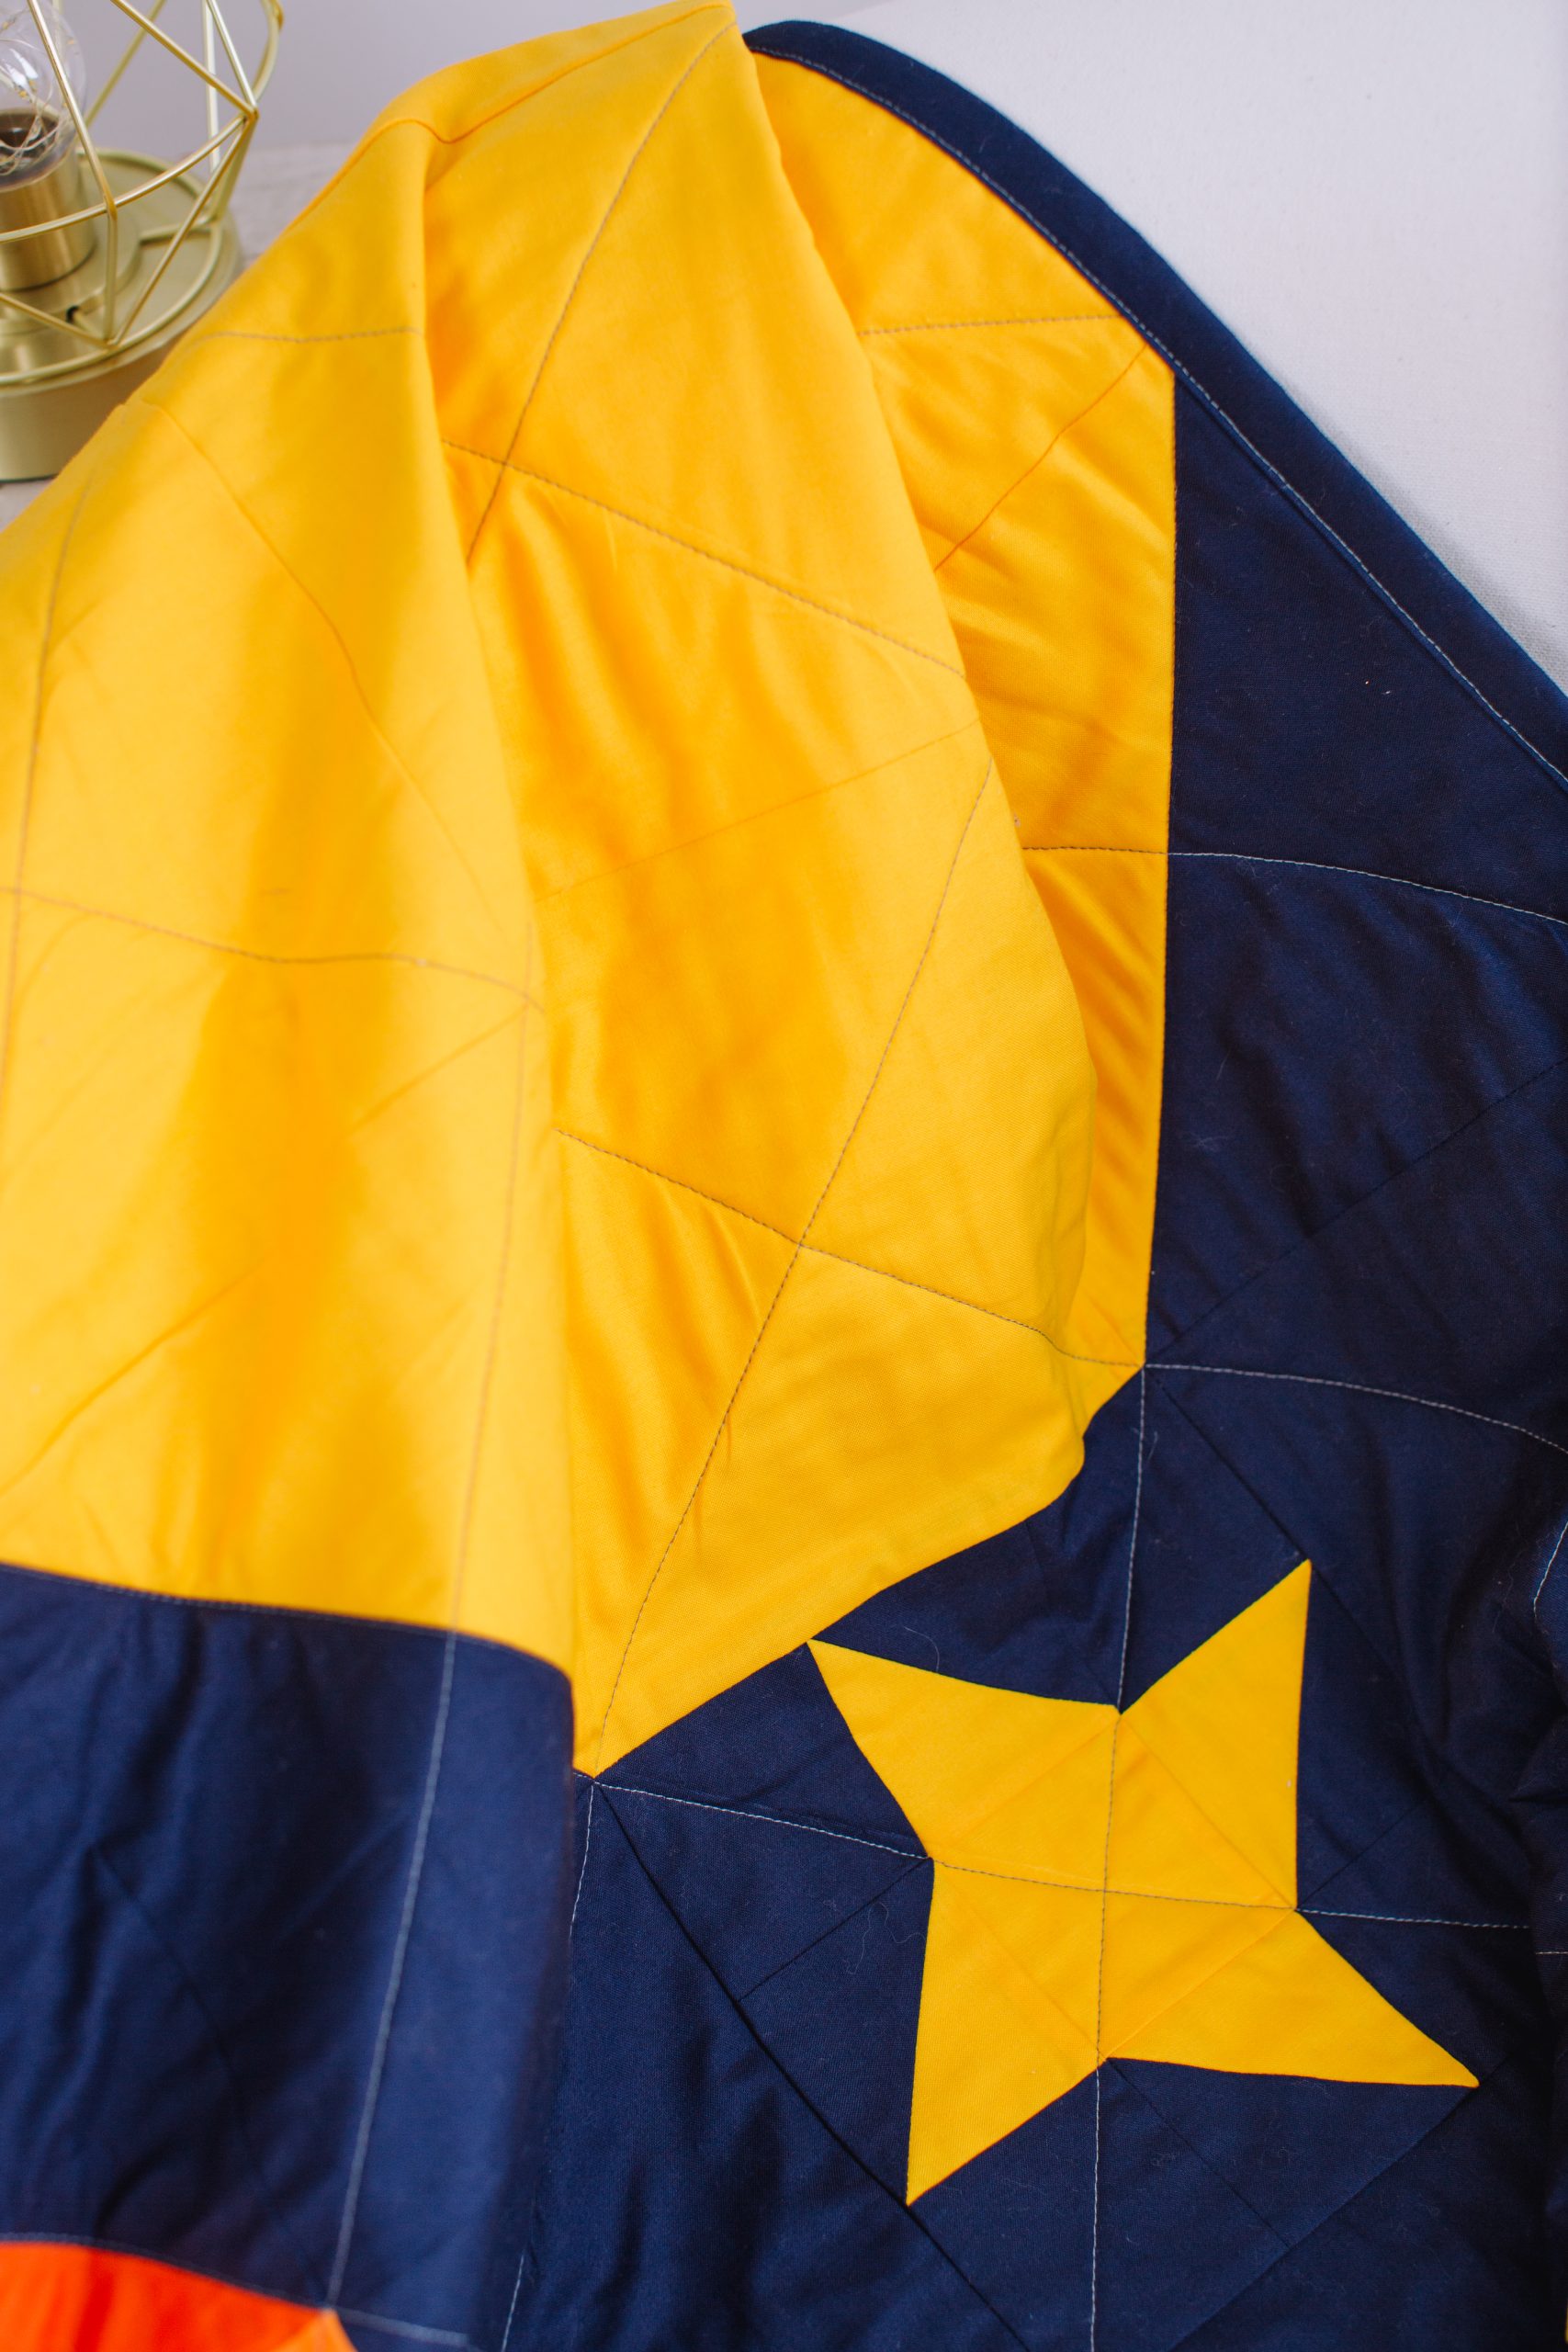
- Arrange (4) yellow/blue 8″ x 8″ HSTs and (5) yellow 8″ x 8″ as shown to create the moon.
- Sew the pieces RST into (3) horizontal rows. Press the seams on the top and bottom rows to the right, and the seams on the middle row to the left.
- Sew the (3) rows RST. Press the seams toward the bottom. Set aside.
- Draw a diagonal line on the wrong side of (7) light orange 8 3/4″ x 8 3/4″.
- Pin (1) light orange 8 3/4″ x 8 3/4″ RST to (1) dark orange 8 3/4″ x 8 3/4″. Sew 1/4″ from both sides of the drawn line.
- Cut on the drawn line. Press HSTs open with the seam toward the dark orange. Trim both HSTs to 8″ x 8″.
- Repeat Steps 17-18 with (6) light orange 8 3/4″ x 8 3/4″ and (6) dark orange 8 3/4″ x 8 3/4″ to make a total of (14) light orange/dark orange 8″ x 8″ HSTs.

- Draw a diagonal line on the wrong side of (2) green 8 3/4″ x 8 3/4″.
- Pin (1) green 8 3/4″ x 8 3/4″ RST to (1) blue 8 3/4″ x 8 3/4″. Sew 1/4″ from both sides of the drawn line.
- Cut on the drawn line. Press HSTs open with the seam toward the blue. Trim both HSTs to 8″ x 8″.
- Repeat Steps 21-22 with (1) green 8 3/4″ x 8 3/4″ and (1) blue 8 3/4″ x 8 3/4″. This will make a total of (4) green/blue 8″ x 8″ HSTs but the quilt only requires (3), so keep the fourth for another project.

- Set (2) green/blue 8″ x 8″ HSTs aside. Keep (1) for the next steps.
- Draw a diagonal line on the wrong side of (1) light orange 8″ x 8″.
- Pin RST to (1) green/blue 8″ x 8″ HST. The drawn line should be perpendicular to the seam on the HST.
- Sew on the drawn line. With the HST laying so the green is at the bottom and the blue is at the top and the light orange is facing up, trim 1/4″ from the seam toward the upper right corner.
- Press open with the seam toward the green/blue.

- Draw a diagonal line on the wrong side of (1) dark orange 8″ x 8″. Pin RST to (1) blue 8″ x 8″.
- Sew on the drawn line. Trim 1/4″ from the seam.
- Press open with the seam toward the blue.

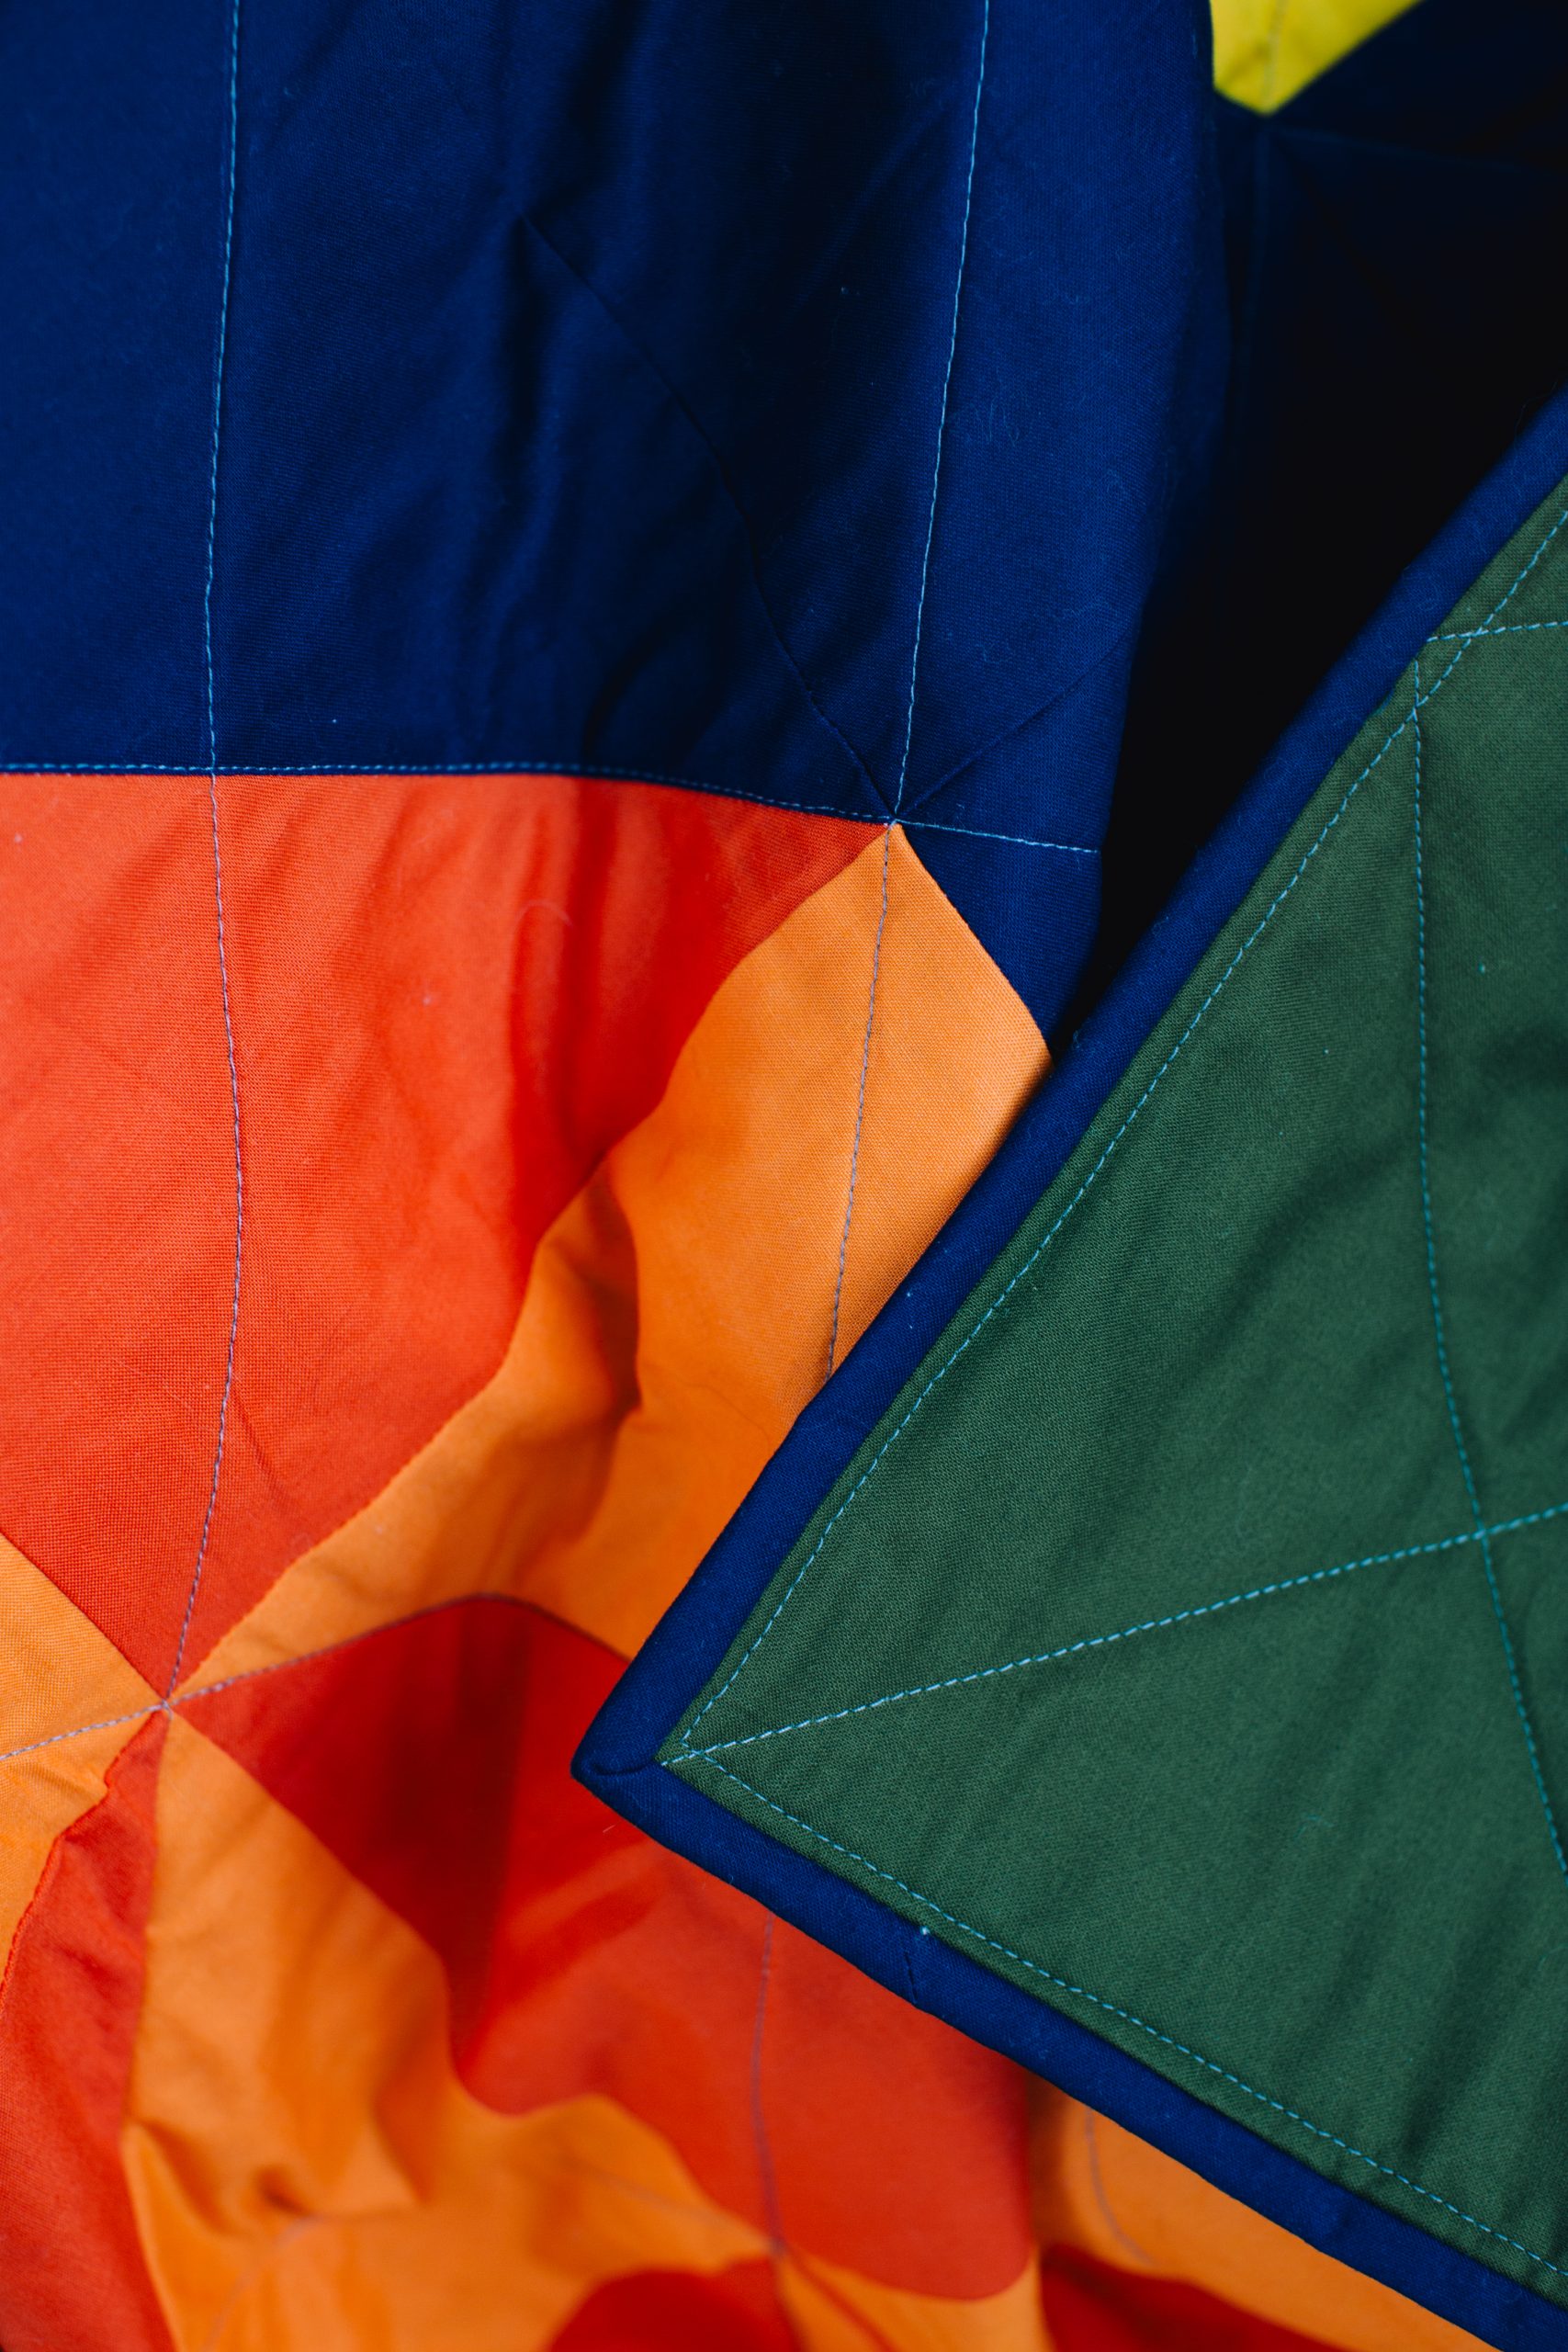
- Lay out (3) 8″ x 8″ star blocks, (5) blue 8″ x 8″, and (1) green 8″ x 8″ as shown.

- Sew the pieces RST into (3) horizontal rows. Press the seams on the top and bottom rows to the right, and the seams on the middle row to the left.
- Sew the (3) rows RST. Press the seams toward the top.
- Pin the star section RST to the right of the moon section. Sew together. Press the seam to the left.

- Lay out (3) 8″ x 8″ star blocks, (3) blue 8″ x 8″, (2) green/blue 8″ x 8″ HSTs, (1) dark orange/blue 8″ x 8″ HST, (2) light orange/dark orange 8″ x 8″ HSTs, and (1) green/blue/light orange 8″ x 8″ split HST as shown.

- Sew the pieces RST into (4) horizontal rows. Press the seams on the top and third rows to the right, and the seams on the second and bottom row to the left.
- Sew the (4) rows RST. Press the seams toward the top. Set aside.
- Lay out (12) light orange/dark orange 8″ x 8″ HSTs as shown.

- Sew the pieces RST into (4) horizontal rows. Press the seams on the top and third rows to the right, and the seams on the second and bottom row to the left.
- Sew the (4) rows RST. Press the seams toward the bottom.
- Pin this section RST to the right of the grass section. Sew together. Press the seam to the right.

- Sew the top section RST to the bottom section to complete the quilt top. Press the seam to the bottom.

- Trim the selvages from the (2) 54″ x WOF backing pieces. Sew RST along the 54″ edges. Press the seam to one side. The finished backing piece should measure approximately 54″ x 80″ (may be larger depending on the usable width of the fabric).
- Trim the selvages from the (6) 2 1/2″ x WOF binding pieces. Sew the ends RST to make (1) continuous strip.
- Layer the backing with the right side down, batting of your choice, and the quilt top with the right side up. Pin or baste.
- Quilt using your preferred method and design. Trim the batting and backing to match the quilt top.
- Sew the binding around the edge using your preferred method.