
If you’ve been searching for a spring pattern that looks fabulous on its own, layered over a tee, or under a cardigan, look no further than the Pasadena Sunrise Jumpsuit. Made using medium weight woven fabric, this jumpsuit pattern features button details at the straps and a separate bow belt to accentuate your waist. We love how easily this project can be dressed up or down, and the fabric weight makes it a wonderful transition piece from spring to summer. Make this jumpsuit the highlight of your spring wardrobe!
Materials:
- Medium weight woven fabric
- 2 – 1″ buttons
- 1/4 yard lightweight interfacing
- Invisible zipper, 7″ in length (a longer zipper can be used but will need to be cut down)
- 3/4″ wide elastic
- PDF pattern – This is located at the bottom of this page.
Finished Garment Measurements:


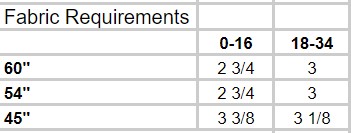
Fabric Requirements:
Designer Notes:
- Seam allowance is 5/8” unless otherwise stated.
- The seams are all finished with either a zig zag stitch or serger.
Instructions:
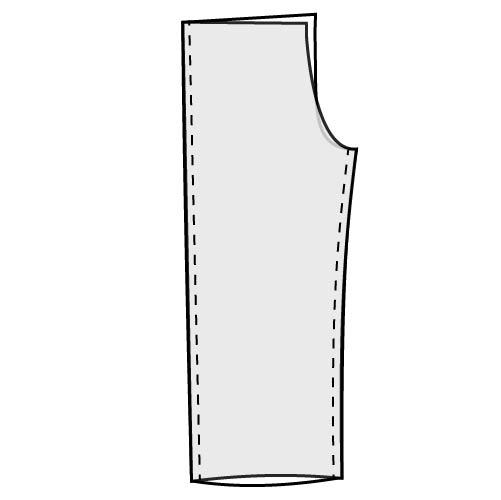
- With right sides together, sew the bodice together along the wearer’s right.
- The zipper will be attached to the other side seam, so finish the raw edges separately with either a zig zag stitch or serger.
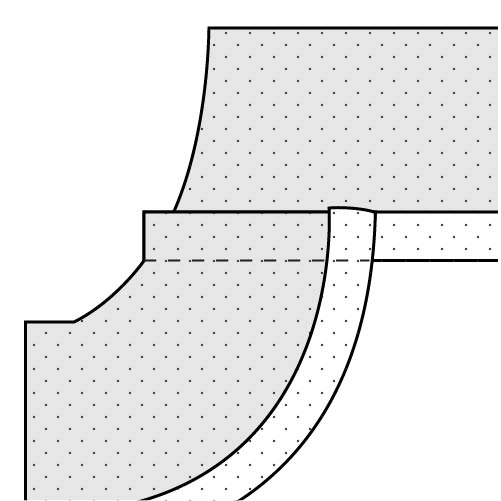
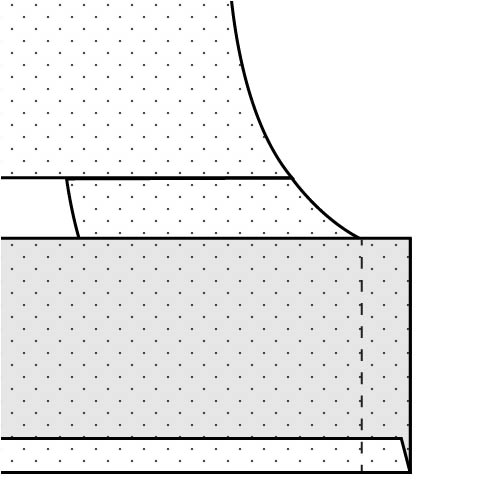
- Remove the zipper from the package and press the zipper tape. With the bodice right sides up, place the open zipper facing down on the bodice front, lining up the edge of the zipper tape with the side seam. The zipper stop should be 3/4” from the top edge. Sew the zipper in place up to the bottom zipper stop.
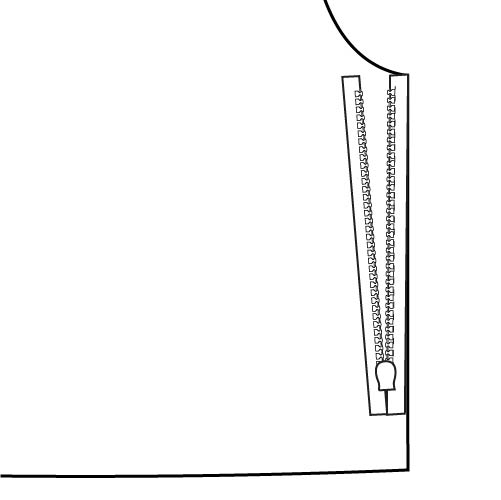
- Repeat with the other side of the zipper and bodice back, making sure the zipper isn’t twisted.
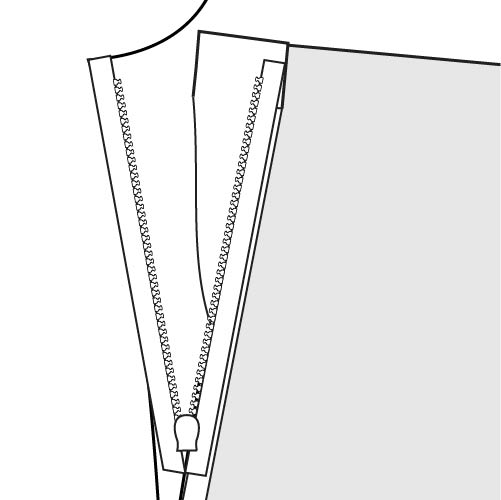
- With the rest of the side seam right sides together, pull the zipper tape out of the way. Start sewing as close to the bottom zipper stop as possible. Sew all the way down.
- With right sides together, match up the side seam and inseam of the front and back pant pieces, and sew together.
- Repeat with second set of pant legs.
- Turn one pant leg right sides out and insert into the other pant leg. Match up with center back, center front, and crotch point. Sew the pant legs together along the crotch curve.
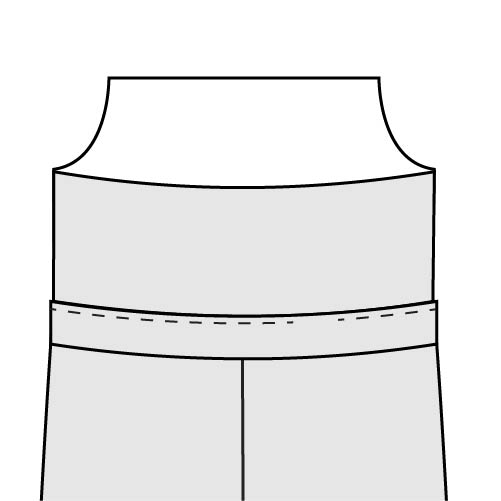
- With the pants turned wrong sides out and the bodice right sides out, slip the bodice into the pants. Match up the side seams, center front, and center back. Sew together with a 1” seam allowance and finish the raw edges of the bodice and pants together with either a zig zag stitch or serger.
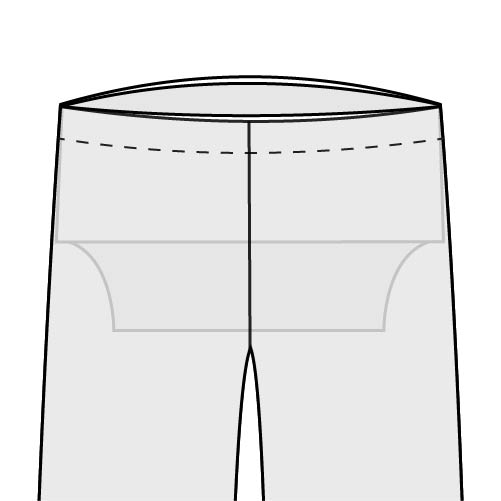
- Pull the bodice out of the pants and press the seam allowance from the previous step towards the bodice. Sew the seam allowance to the bodice 1/8” from the top finished edge. Leave a 2” opening to insert the elastic.
- Cut a piece of elastic 1″ smaller than the wearer’s waist (Refer to Finished Garment Measurement Chart above for waist measurements). Thread the elastic through the opening and around the casing. Check that the elastic is not twisted and overlap the two ends of the elastic by 1/2” and sew together. Sew the opening in the elastic casing closed.
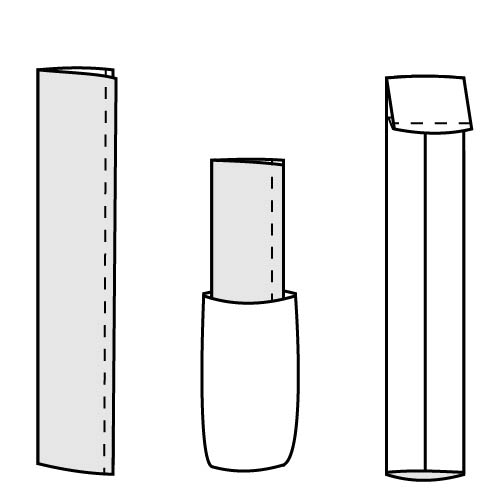
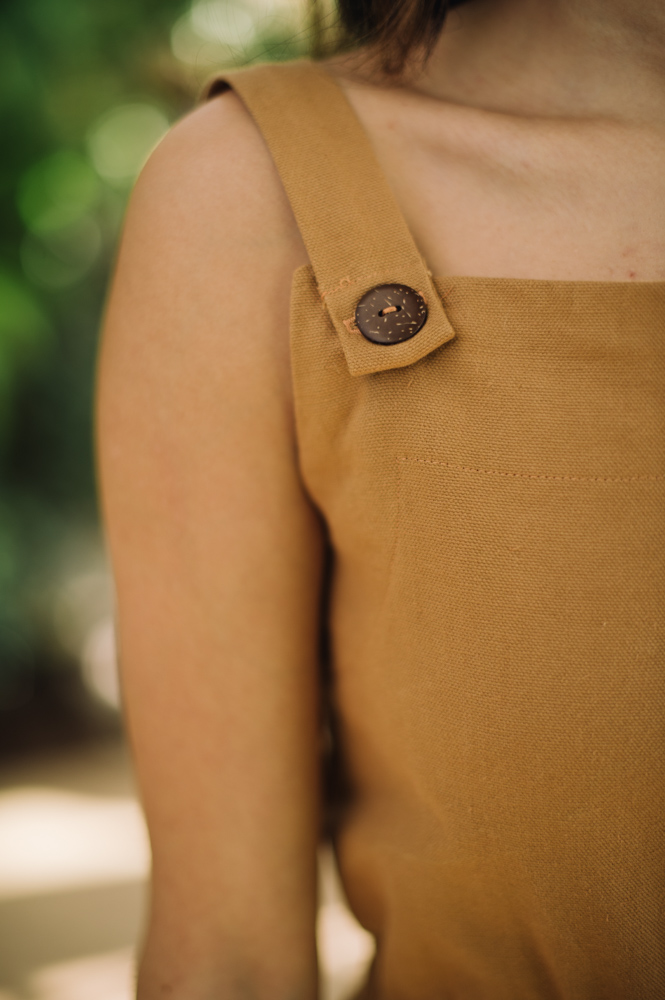
- Fold one strap piece right sides together along the length of the strap. Sew the two long raw edges together with 1/4” seam allowance. Trim the seam allowance to 1/8”. Turn the strap right sides out and press with the seam down the center of the strap; this is now the wrong side of the strap. Fold one end of the strap 1/4” towards the wrong side and press well. Fold the strap another 1” and press. Sew the fold down 1/8” from the inside folded edge.
- Repeat with second strap.
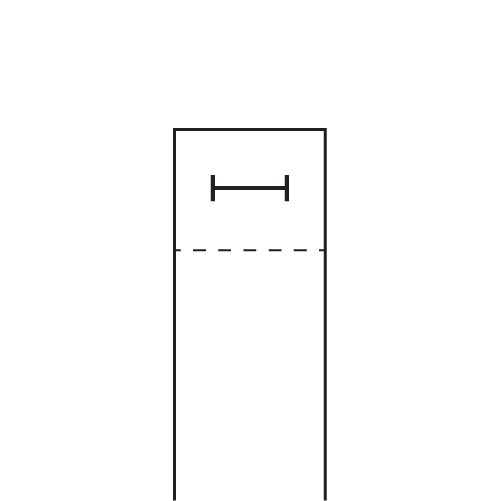
- Sew a horizontal buttonhole on the folded end of the straps.
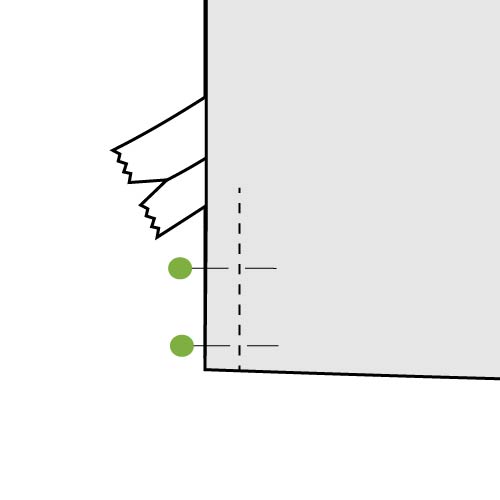
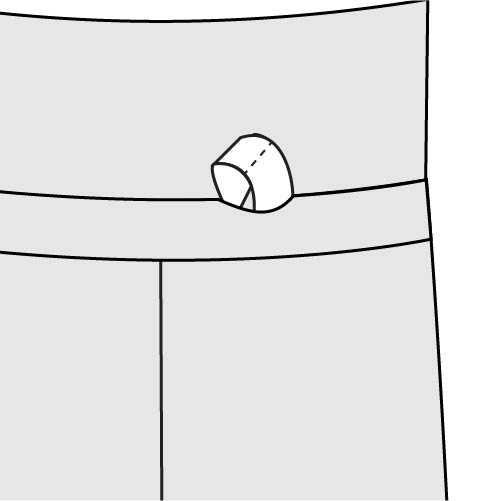
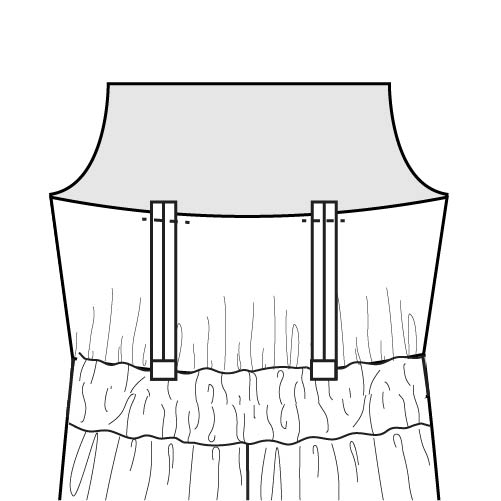
- With the jumpsuit right sides out, place the straps right sides down and line up the raw end of the straps with the notches marked on the back bodice. Have the straps extend the top edge of the bodice by 1/4”. Baste the straps in place.
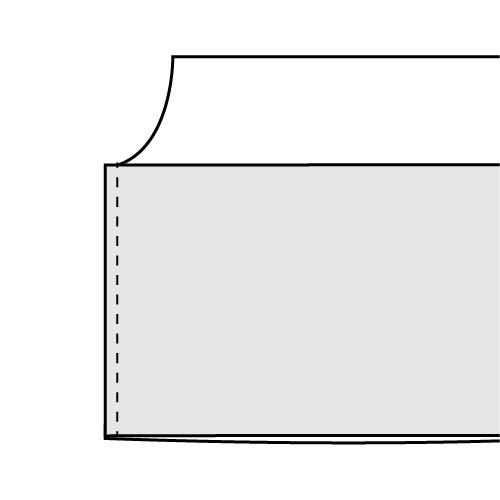
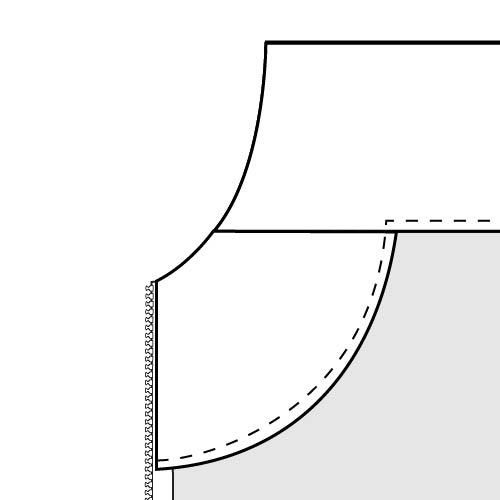
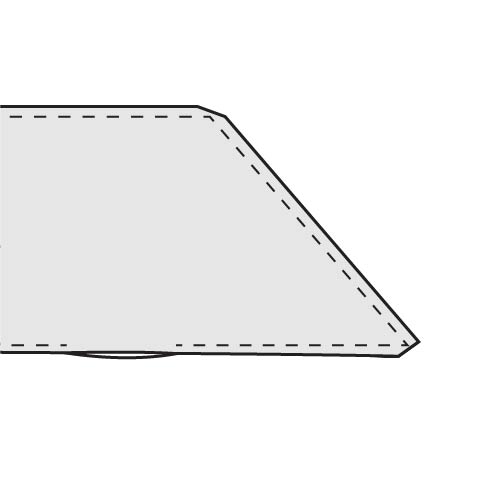
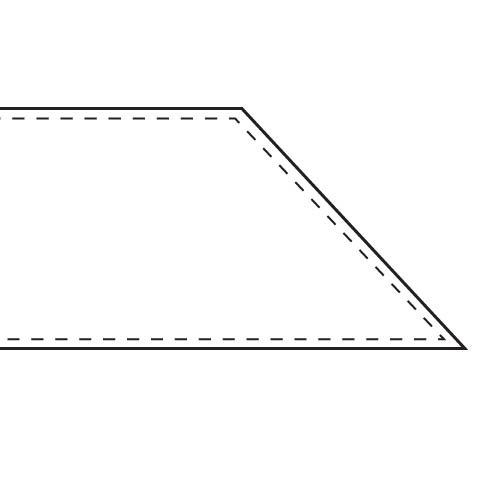
- Fold the curved edge of the front side facing piece towards the wrong side 1/4” and press well. Repeat with second front side facing piece and bottom edge of the back bodice facing piece.
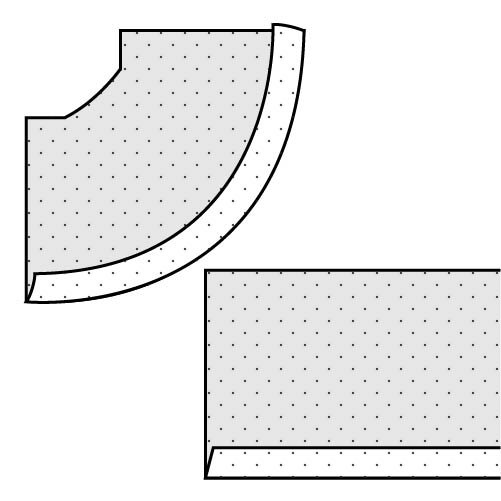
- With the fold along the curved edge of the front side facing piece intact, line up the top edge with the bottom edge of the front facing piece. Sew together the length of the front side facing piece. Repeat with the other front side facing piece.
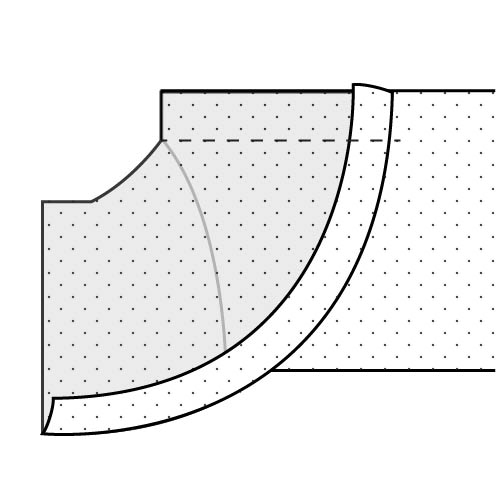
- Press the seam allowance up towards the front facing piece including the seam allowance between both front side facing pieces.
- Place the front facing piece right sides up. With the bottom edge fold intact, place the back facing piece right sides together with the front facing piece. Line up the side seam of the wearer’s right and sew together. Press the seam allowance open.
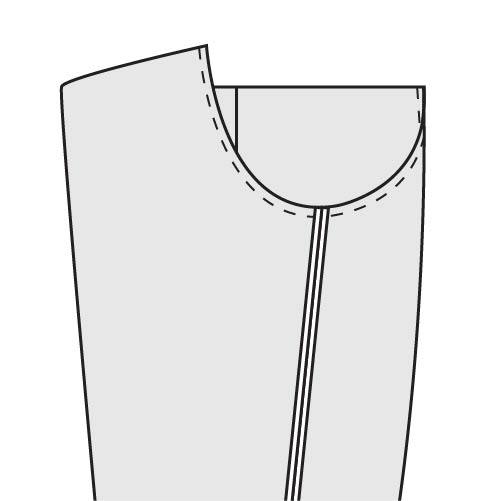
- With right sides together, match up the facings with the top edges of the bodice and side seams. When reaching the zipper edge, make sure the zipper is still wrong side down with the zipper teeth towards the bodice. Sandwich the zipper between the bodice and facing. Starting just below the bottom folded edge of the back facing, sew up and around the top edge of the bodice and facing.
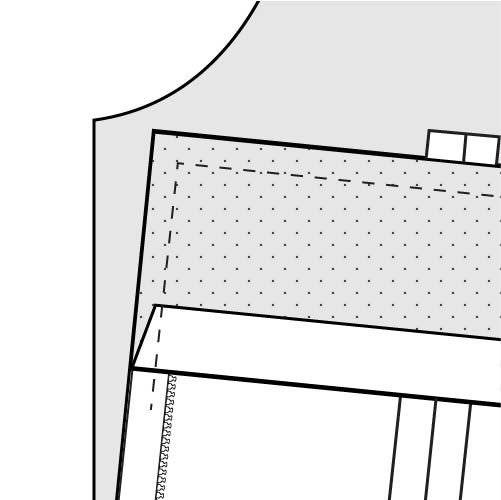
- Clip all corners and notch into the curves; this with allow the facing to lay smooth along the curve.
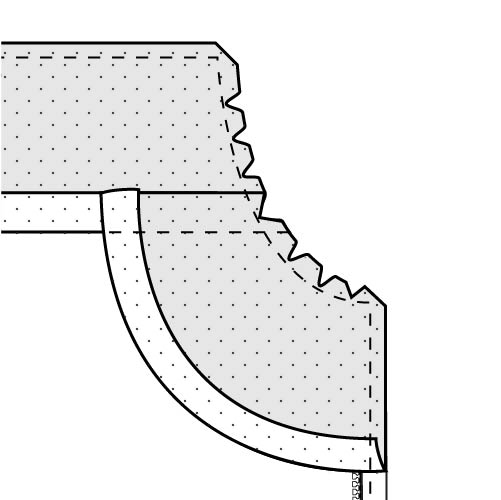
- Fold the facing towards the wrong side of the bodice and press well. Sew the facing to the bodice 1/8” from the inside folded edge.
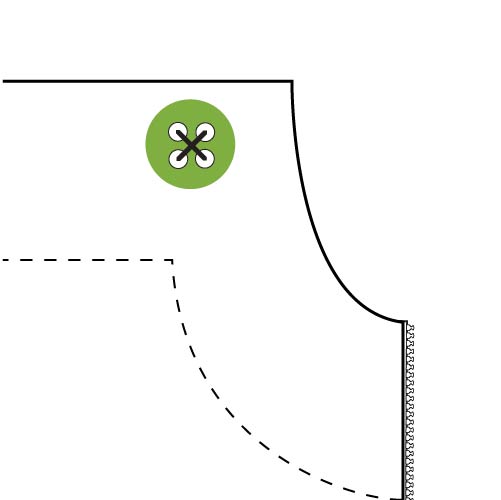
- Sew a button on the front bodice 1/2” in from the top and side edge. Repeat with second button.
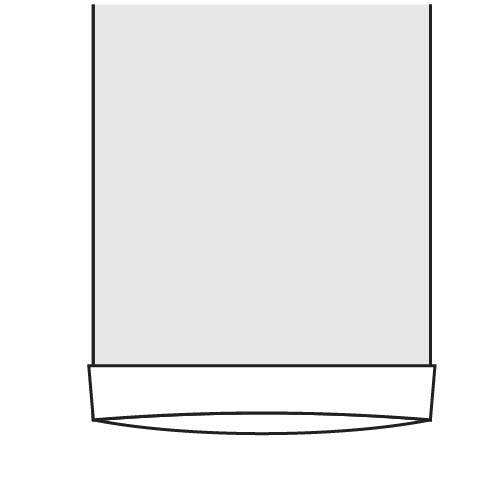
- Turn the bottom edge of the pant leg towards the wrong side 1/4” and press. Turn another 1” and press well. Sew the hem 1/8” from the inside folded edge. Repeat with second pant leg.
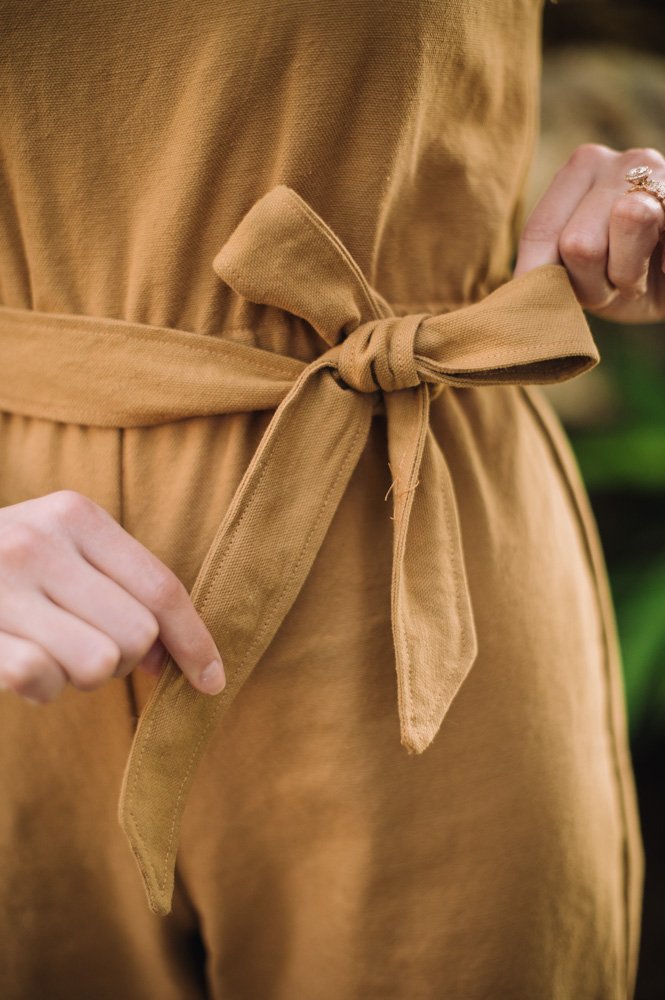
- To sew the waist tie, place the tie pieces right sides together. Sew around the outside edge leaving a 2” opening along the bottom.
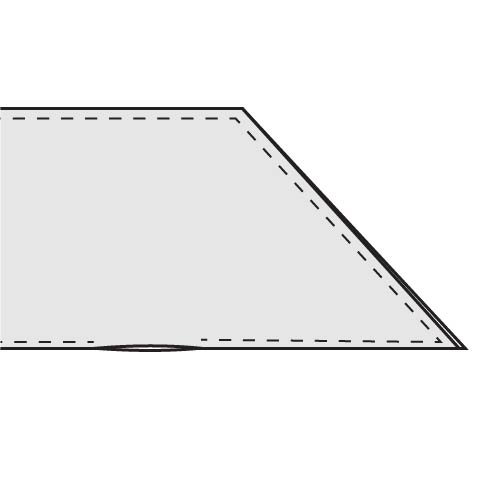
- Clip the corners.
- Turn the waist tie right sides out. Topstitch around the outside edge.

Where is the Man’s cloths
Hi Robert! At this time, we do not have any men’s clothing patterns on our site. We are hoping to expand to men’s clothing patterns in the future 🙂 Thanks! – Ashley, We Like Sewing
All of my measurements are different. How am I supposed to get an accurate fit?
Hi Rhonda! If you fall between size measurements listed on the pattern, you can grade the pattern. If you need to do a FBA (full bust adjustment) for a larger cup size, I would recommend watching a few videos on the topic; Vintage on Tap is a great Youtube channel with tips for altering patterns. Please let us know if you have any other questions! – Ashley, WeLikeSewing
I have joined and paid a subscription but my membership doesn’t seem to be validated
Hi Marlene! I’m so sorry to hear that you are having issues with the membership. If you scroll to the bottom of our homepage, you’ll see a section that says “Contact Us”. This form will let you contact our customer service to figure out this issue. Thank you for your patience. Have a great day! – Ashley, WeLikeSewing