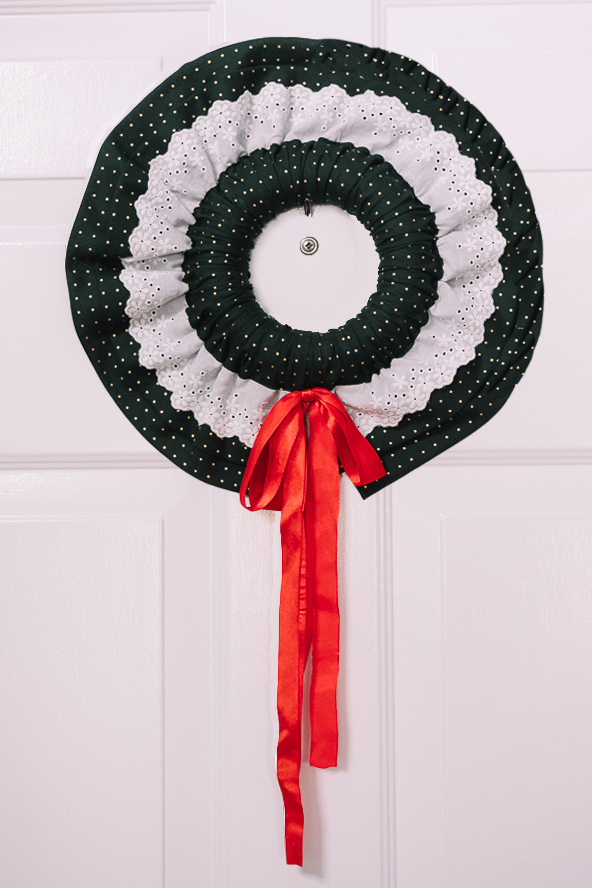
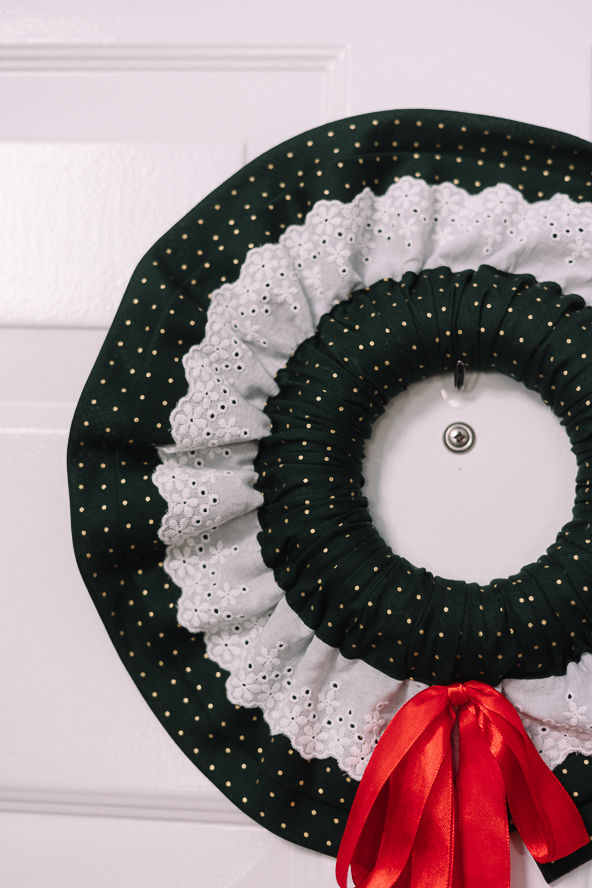
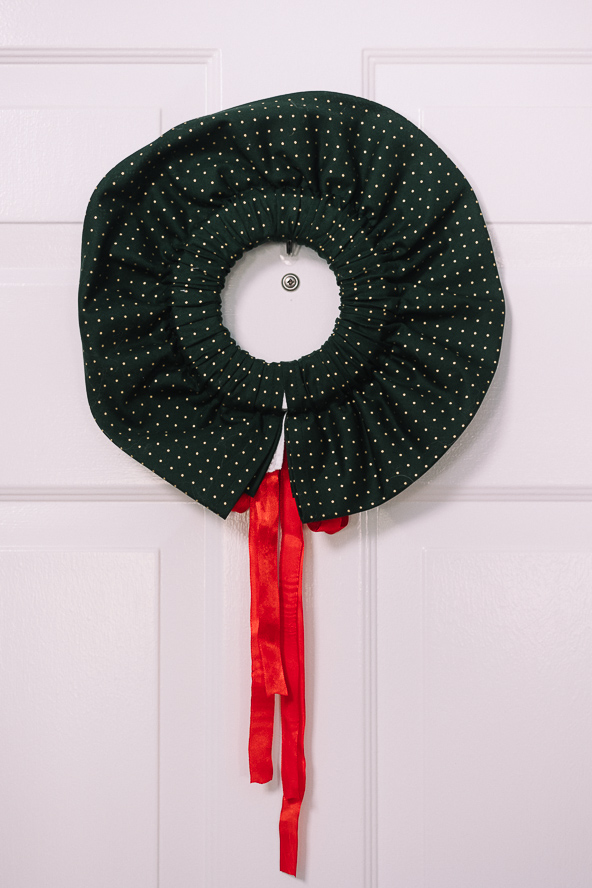
Greet your guests with a beautiful homemade wreath this holiday season. This traditional Christmas wreath features a base of hunter green, gold-dotted fabric, white eyelet trim and a red satin ribbon for the perfect finishing touch. One key detail of this holiday wreath is the rod pocket, which is used to insert a polystyrene wreath form to fill out your creation. Make a delightful first impression by hanging this cheerful DIY Christmas wreath on your door.
DESIGNER NOTE: Please note that the specific measurement examples below were used by the designer when creating their sample. Depending on your fabric choice, it may vary from the designer’s measurements. Our designer has provided general measurement instructions that can be applied to a variety of fabric choices.
Materials:
- Approximately 1 yd of cotton fabric, 54” wide
- Approximately 2 yds of eyelet border trim, 2” wide
- Approximately 1 1/2 yds of satin ribbon, 1” wide
- 1 polystyrene ring
- 1 spool of color-matched all-purpose thread
- Basic sewing notions
Instructions:
MEASURE AND CUT THE FABRIC:
There is no pattern required per se, as all that is needed is a rectangle of cloth and a wreath form.
- To determine the size to cut your fabric, take the dimensions of the polystyrene ring form and add 1” for hems. To figure out what total dimensions your fabric panel should be, multiply the circumference of the circular ring by 2.5 or 3, depending on how full you want the wreath to look. For instance, for a polystyrene form that is 6 1/2” in diameter (B), its circumference equals 21” (C). For a medium-weight fashion fabric, the gathering ratio is 2.5: 1. Therefore, the length of fabric needed is 1” + (21” x 2.5) = 53.5” long. Use the total width of your fashion fabric for the length of the rectangle.
- The width of the rectangle will make up the pocket channel and the self-lined portion of the wreath so that it may be hung in a window. The width of the fabric rectangle for the wreath equals the thickness of the form plus 1.5 x diameter. For the example above, the polystyrene ring has a flat back and is 4 1/2” all-round (A) and its diameter is 6 1/2” (B). Therefore, the width of the panel is 4 1/2” + (1.5 x 6 1/2”) + 3/4” for seam allowances = 15” wide. The rectangle of cloth panel needed for a 6 1/2” diameter circular form is 54” x 15” (length x width).
DESIGNER NOTES:
- If you wish the fabric to follow the shape of the circular ring, cut the rectangle on bias grain. You may need to join two lengths together to get the required length for gathering.
- Transparent and light-weight fabrics may need a gathering ratio greater than 3.
SEW THE SIDES OF THE PANEL:
- First, hem the 2 short sides of the fabric panel. Fold the edge over 1/4” and press. Then fold it over another 1/4” and iron it again.
- Sew down the short side from the edge of the fabric. Back stitch at the beginning and end to secure the stitches. Repeat this for the other side of the panel.
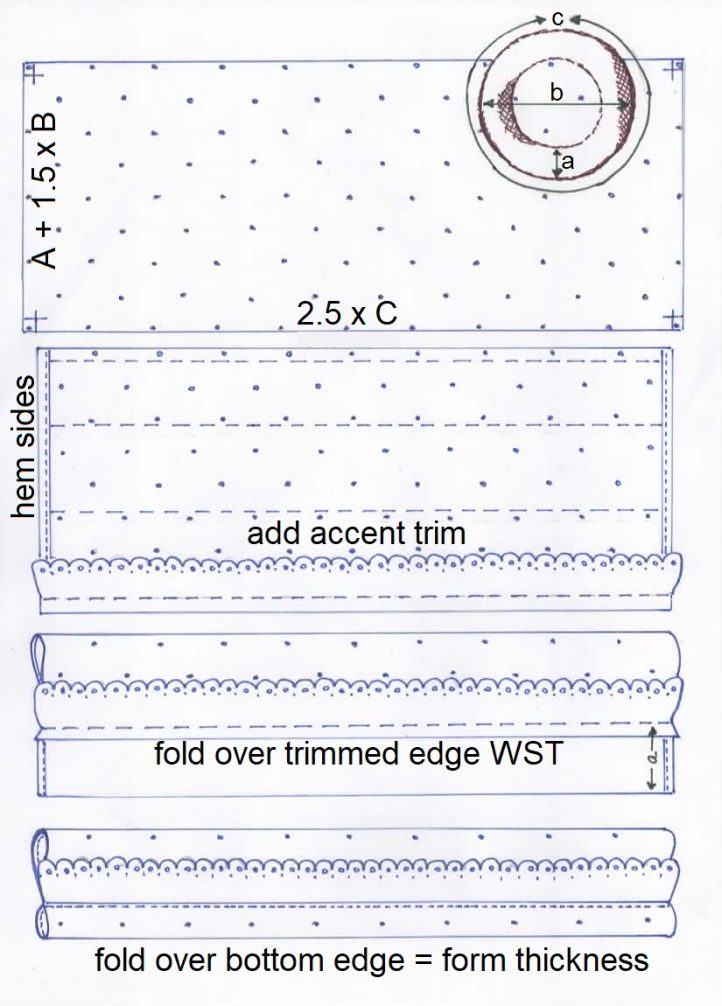
ADD AN ACCENT TRIM:
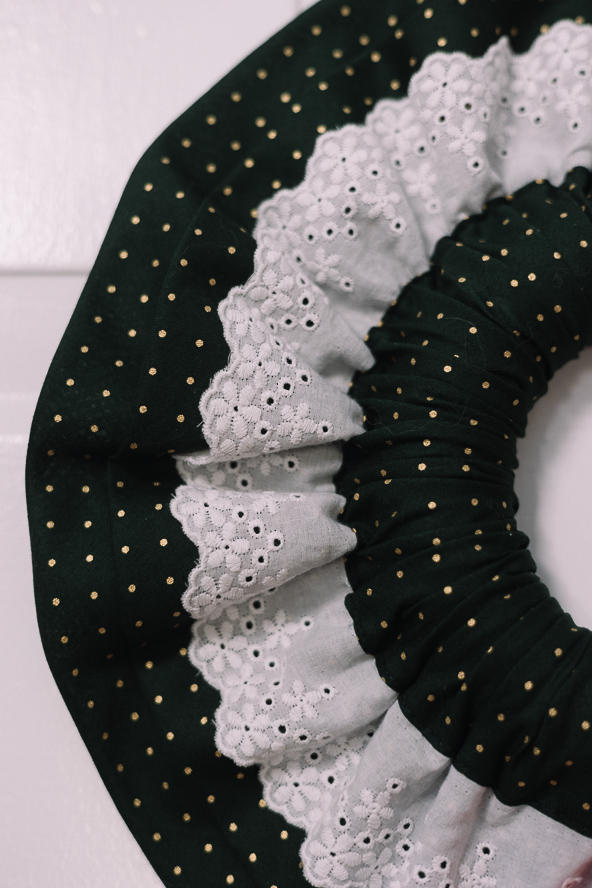
- Along one long edge of the rectangle, apply a decorative trim or contrasting fabric layer to create a gradient tiered effect.
- Superimpose the accent trim on the face side of the rectangle and pin/baste it to the long edge.
SEW THE ROD POCKET:
The rod pocket is equal to the thickness of the polystyrene ring and is threaded onto the ring.
For this example, the thickness of the ring is 4 ½” around.
- Turn under 1/4” hem along remaining long edge of rectangle. From that folded edge, measure 4 1/2” and mark a chalk line parallel to the turned edge.
- Fold the trimmed edge of the rectangle to align with the chalk line, with wrong sides together, to produce a self-lined portion of the wreath. Extend the raw edge about 3/8” beyond the chalk line.
- Fold the opposite side of the rectangle, with wrong sides together, to form the pocket casing. The turned edge will lap over the trimmed edge of the wider portion of the wreath.
- With fabric face up, edge-stitch the prepared edge to encase the trimmed edge and sew through all the layers.
INSERT POCKET CASING ONTO RING FORM:
- Carefully slice through the polystyrene form with a serrated knife.
- Thread the smaller casing of fabric onto the ring form and gather up the fabric until all the fabric in the length is taken up.
- Tape the opening in the polystyrene closed with masking tape and butt fabric edges together.
- Distribute the gathers evenly and fan out the outer edges.
- Hand stitch the fabric opening closed and add desired embellishment or ribbon bows at base of wreath to hide the seam.
This would be a great prize