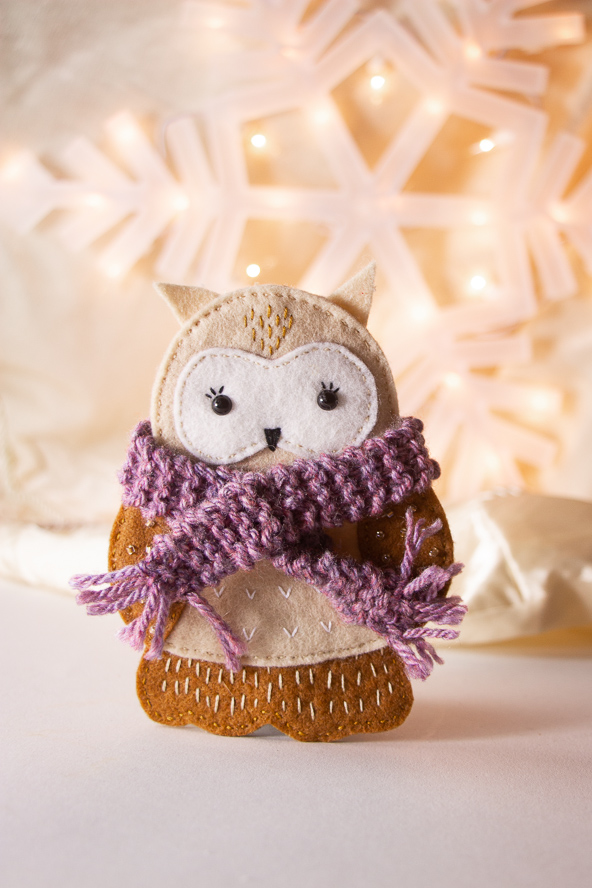
Adorn your Christmas tree with a sweet, handmade ornament that lets you show off your hand sewing skills. This charming owl ornament pattern is made using budget friendly felt and can be completed in a single afternoon! Featuring a tiny knitted scarf, this easy holiday sewing pattern also has embroidery details and seed beads to add a golden shimmer to your owl’s wings. Create an enchanted woodland scene for your Christmas tree with this ornament pattern.
Skill Level: Easy
Finished Size: 4” x 5”
Materials:
- Fabric: felt, cream, brown, white, one 12” square of each
- Embroidery floss: cream, brown, white, black
- Seed beads: gold
- Safety toy eyes
- Red and white twine
- Worsted yarn
- PDF Template – This is located at the bottom of this page. See printing instructions below.
Tools:
- Pencil
- Scissors
- Pins
- Embroidery needle
- Knitting needles: 3.75mm
PRINTING INSTRUCTIONS:
To download the PDF template, click on the download button at the bottom of the page. We recommend opening your download using Adobe Acrobat.
DESIGNER NOTE: If you don’t have any toy eyes in your stash, you can stitch a pair of eyes onto your owl’s face using black embroidery floss instead.
Instructions:
- Begin by cutting out your felt pieces. Print out the owl templates provided (these are located at the bottom of this page), and use them to draw and then cut each of the shapes from sheets of colored felt as indicated, using sharp scissors or dressmaker’s shears.

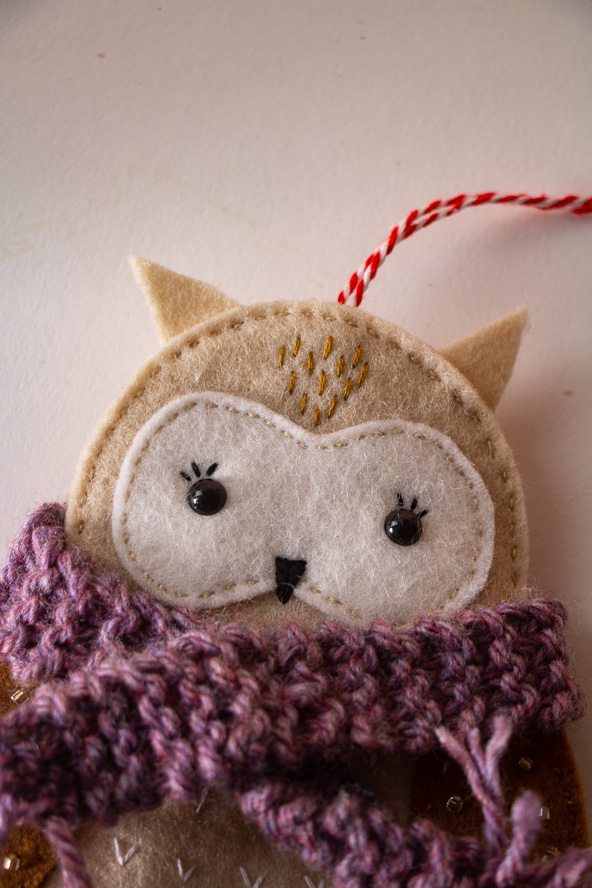
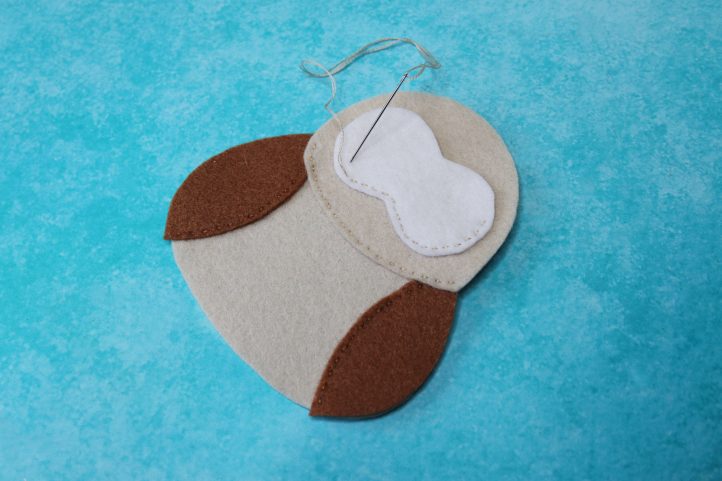
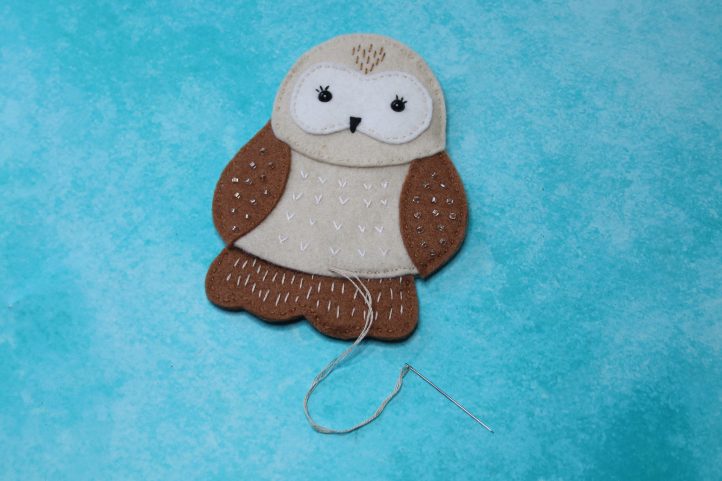
- Layer the two brown wing pieces on the body piece, aligning at the top and side edges (you can also use the photo as a placement guide). Thread a needle with two strands of brown embroidery floss and work a straight hand stitch along the inner edge of each wing to hold the layers together. Repeat to add the cream head piece and then the white face piece, using cream thread, as pictured.
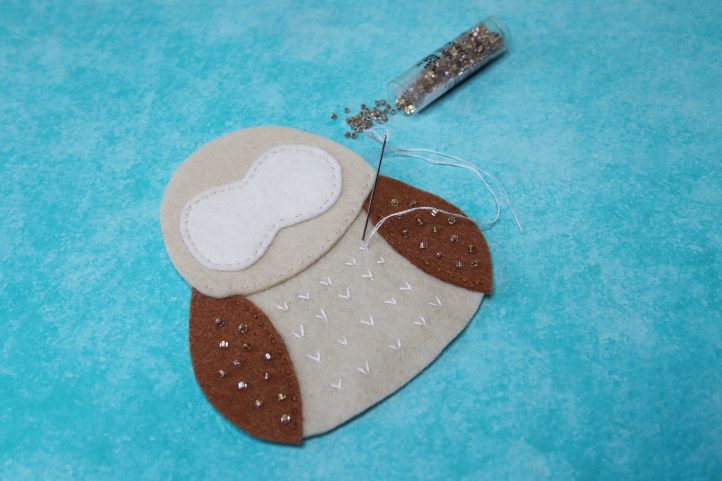
- Sew a scattering of gold seed beads to each wing, then thread your needle with two strands of white embroidery floss and work a series of small V-shaped stitches across the owl’s belly to decorate.
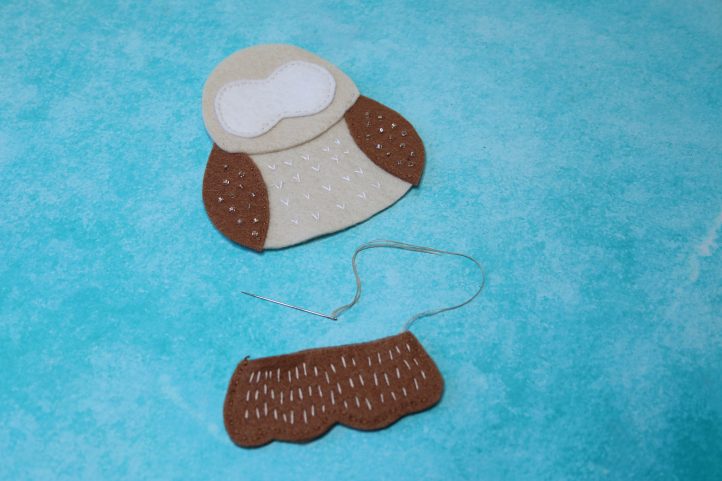
- Make the tail. Place the two tail pieces together and work a straight hand stitch around the curved bottom edge using two strands of brown floss to hold the layers together. Next, use two strands of cream floss to work a series of straight hand stitches across the tail to decorate.
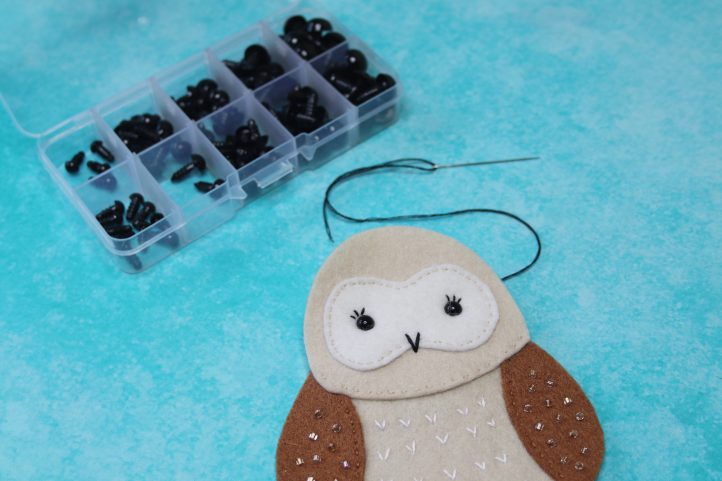
- Secure two safety toy eyes onto the white face piece, then use two strands of black embroidery floss to add eyelashes and a beak. Next, use two strands of brown floss to add a series of straight stitch feathers above the white face.
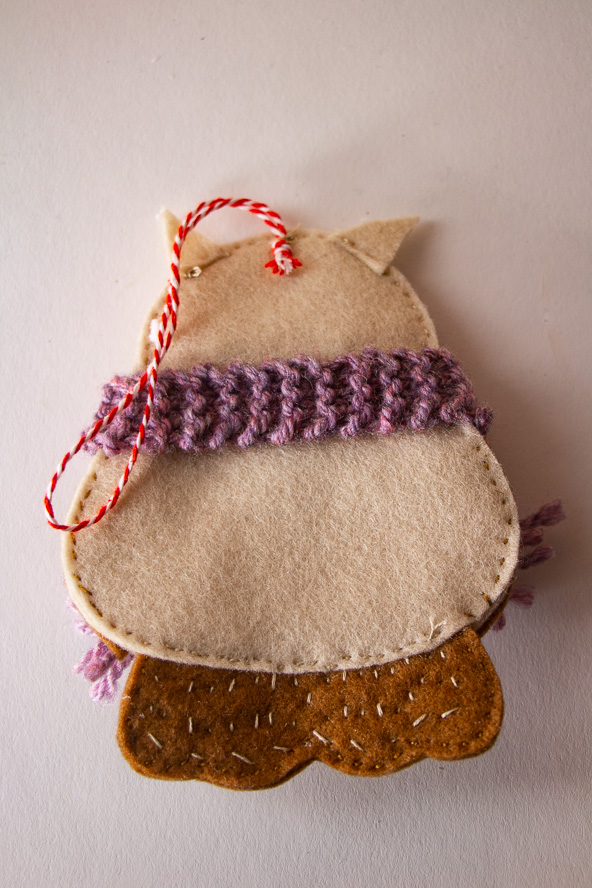
- Assemble the owl. Place the two body pieces together with right sides facing outwards, sandwiching the ear tufts along the top edge (as shown in Step 7 below) and the tail feathers along the bottom edge. Pin, then stitch across the bottom edge using two strands of cream thread to secure. Continue to stitch all the way around the outside of the body and head (securing the ear tufts as you go past), swapping between cream and brown floss as needed to match the color of felt.
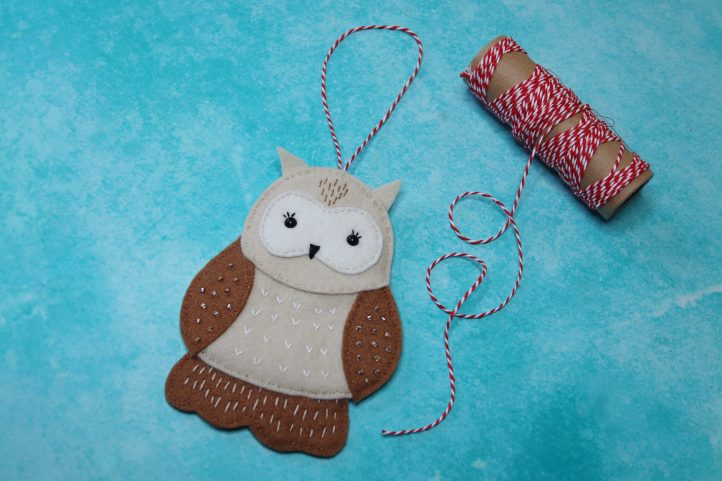
- Cut a 25cm (9 7/8″) length of red and white twine and knot it into a loop. Secure the knot at the top of the owl’s head, positioning it at the back, to allow for hanging.
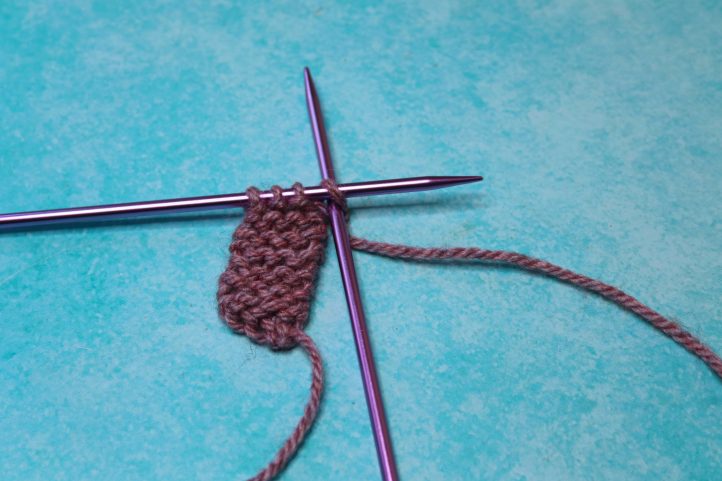
- Finish your owl by giving him a cute festive scarf. Using a small ball of worsted yarn and 3.75mm needles, cast on four stitches, and work in garter stitch (knit every row) until your scarf wraps nicely around your owl’s neck. Cast off, then cut and tie small off-cuts of yarn to each end and trim to create tassels. Wrap your finished scarf around your owl’s neck, and use one small hand stitch to secure at the front and hold it in place.