English Paper Piecing (or EPP as you will sometimes see it written) is a very old technique which is currently enjoying a big revival in the modern world of quilters and sewists. It is cheap to get started (which speaks to its humble origins) and because it is traditionally hand sewn, very satisfying in a slow-work, zen kind of way. Yes, you can get the same ‘look’ with a sewing machine but why would you? Hone your hand sewing skills and learn to do the most portable quilting in the world. I have done this on planes, which tend to be less forgiving about sewists lugging huge sewing machines into the cabin and asking for the nearest power outlet!
So what do you need to get started with EPP? A hand sewing needle, thread and a thimble, some junk mail or copier paper and a cereal box will get the job done. You need some fabric scraps too, and these only need to be large enough to cover the template, plus about 1/2” to 3/4” all round. We will get to that in a second. (Note: Printable EPP templates and a candle mat layout are located at the bottom of this page. Please see printing instructions below.)
Let’s talk about templates first. You need paper templates for EPP and yes, you can buy them but you can make your own too, and in the interest of showing you this technique from scratch, I am going to show you how it was done back in the day.
The paper templates or just, papers, are used to wrap and shape the fabric. They are then removed and you make your EPP project up as the pattern suggests.
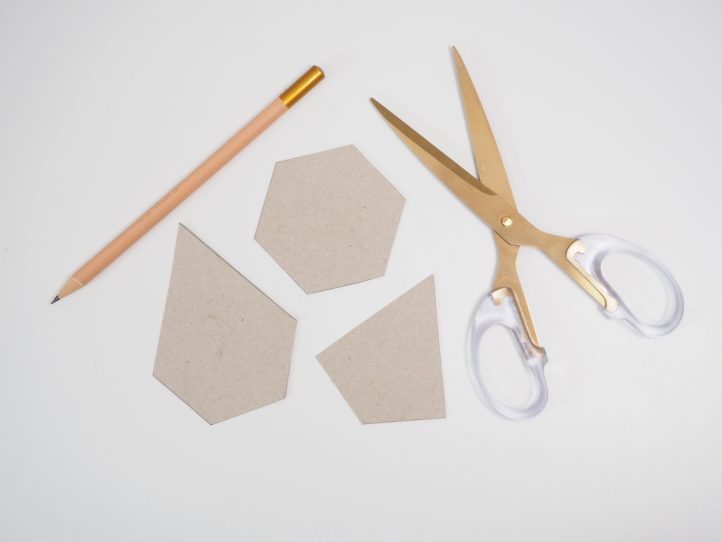
Because the shape of the templates comes to you as printable templates, we are going to make a copy from cardboard/paperboard (hence the cereal box) and then you can just trace around this onto the paper. This is really useful if you have to repeat a shape. And you can keep that paperboard template copy in case you need it again.
To begin with, at the bottom of this page, you will see the templates that we are using for the little candle mat. Let’s start with those. Trace around them onto your cereal box (or any other thin paperboard) and cut them out exactly.
Next, we need some paper. You can use any paper for this, except newspaper! Steer well clear of that because the print will transfer to your fabric. You will hear from time to time not to use glossy paper like magazines. Ignore it. You do not have to spend squillions on special papers to do something that was once done by poor people for free! Save the money- or better yet, spend what you save on fabric!
Okay, we have the paperboard template copies. Draw around them onto your chosen paper (I am using copier paper because it is better for photography on the fabrics) and then cut the paper shapes out.
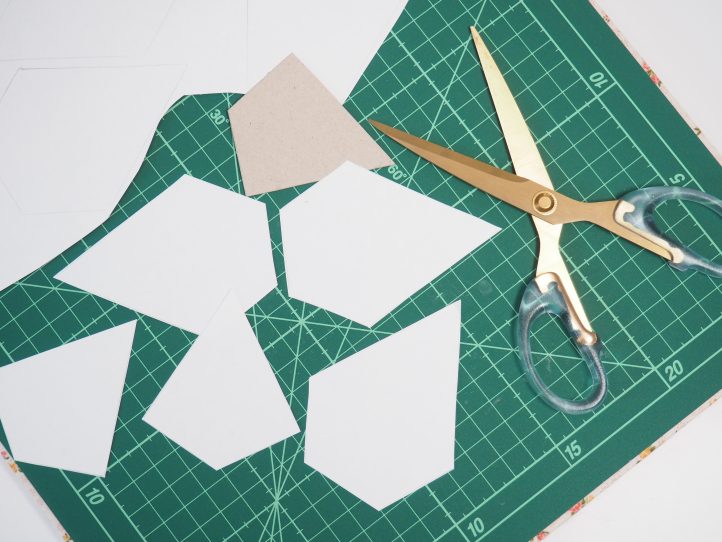
You only need to cut out enough paper shapes for the pattern that you happen to be following. This time, we need one hexie for the center, six diamonds and six kite shapes.
The next step is to choose and press your fabrics. Press the fabric scraps and lay the template onto the fabric and see if it fits (let’s not overcomplicate this!). For example, the first image below is not going to work but the second image is perfect. We need enough fabric to wrap over the sides of the paper by about 1/2”.
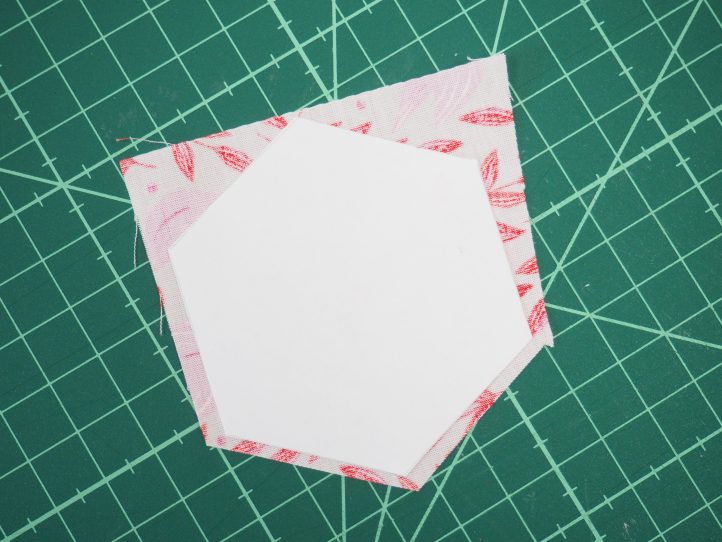
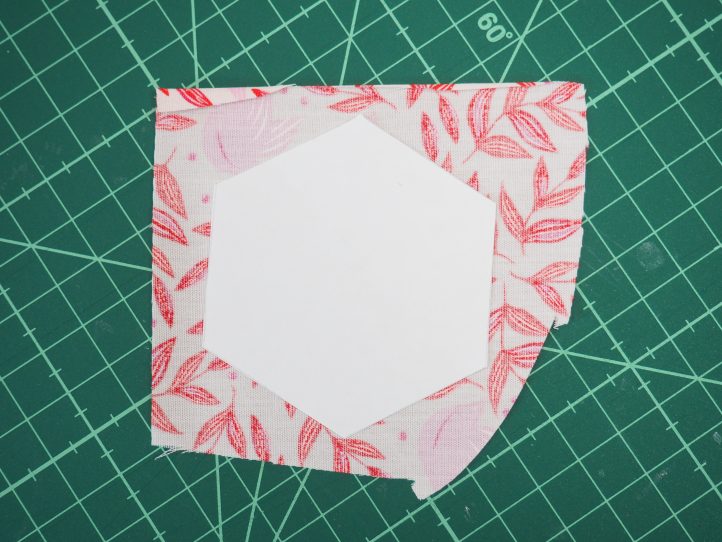
Pin one of your papers to your fabric centrally.
Cut it out roughly.
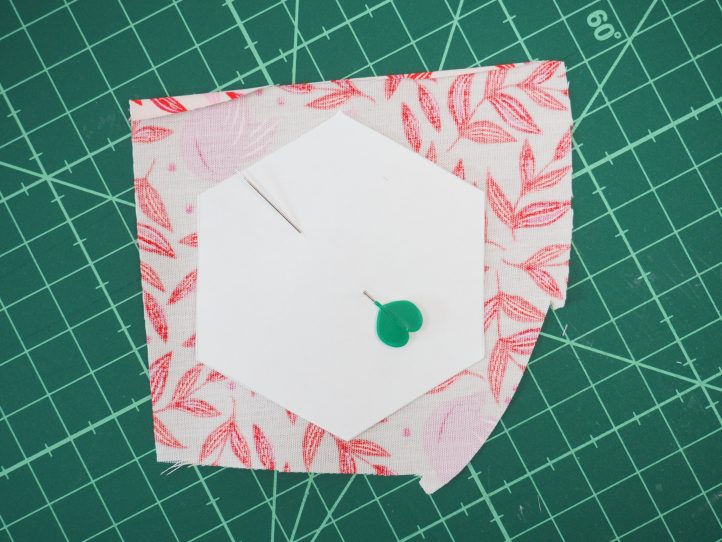
Now fold the edges over following the edge of the paper and finger press.
As you work around the shape, fold the fabric in so that the points are sharp.
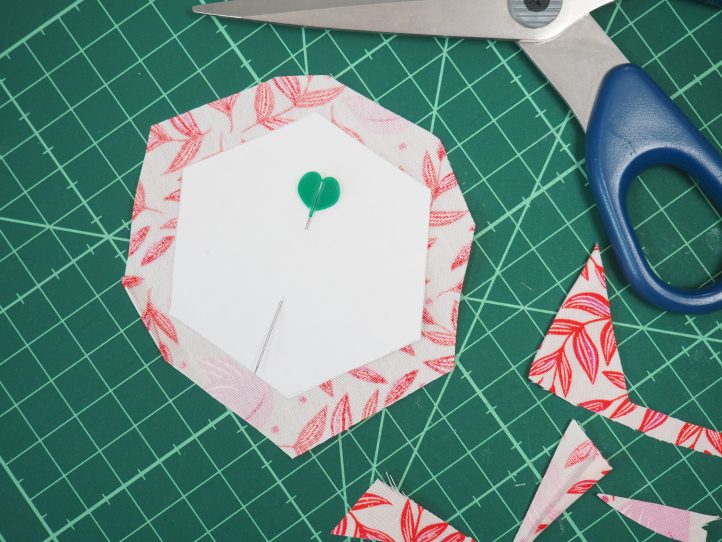
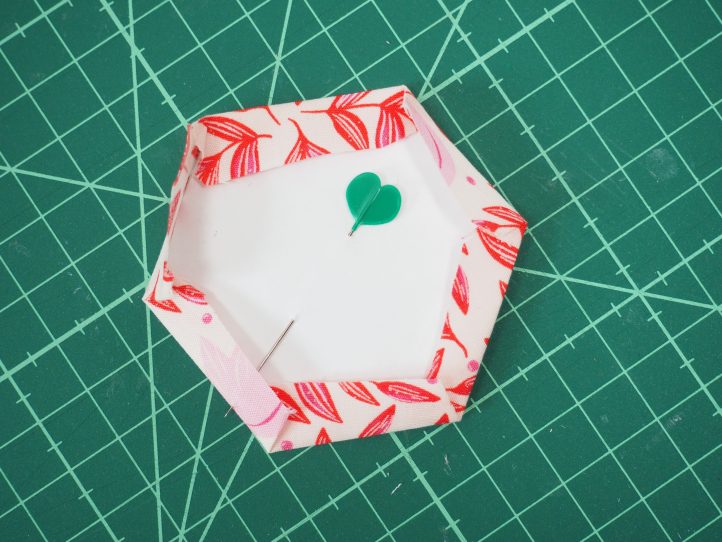
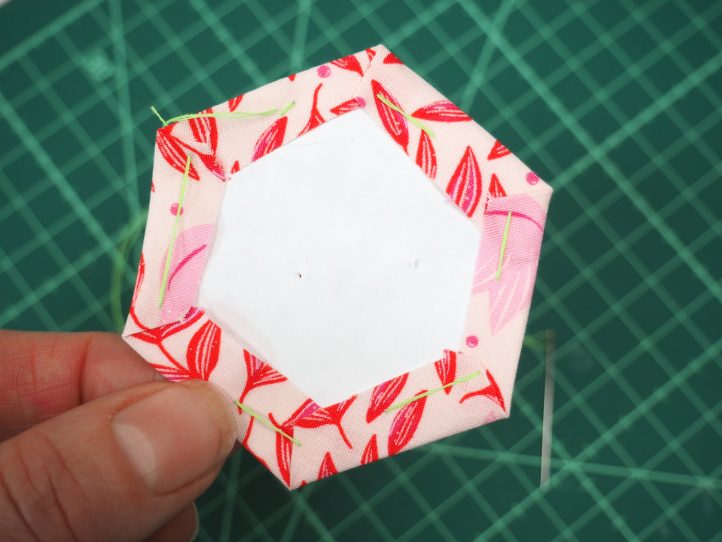
Thread your hand sewing needle and secure the fabric to the paper with large tacking stitches. I have deliberately chosen a bright color for my tacking stitches that is very easily seen for unpicking.
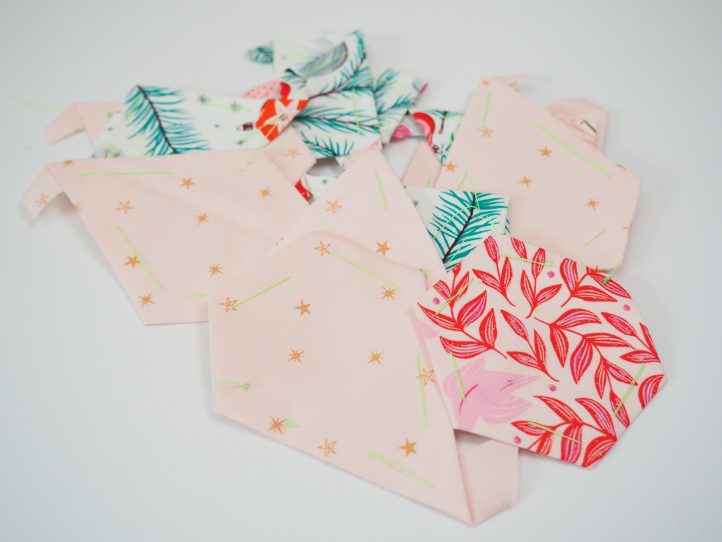
Do this with all of the paper pieces so that you have what you need for the pattern.
Time to sew them together! Use a tiny stitch to sew the pieces together. I like a ladder or whip stitch worked on the wrong side of the project (see image below) and I use either a neutral or matching thread where possible to further hide the stitching.
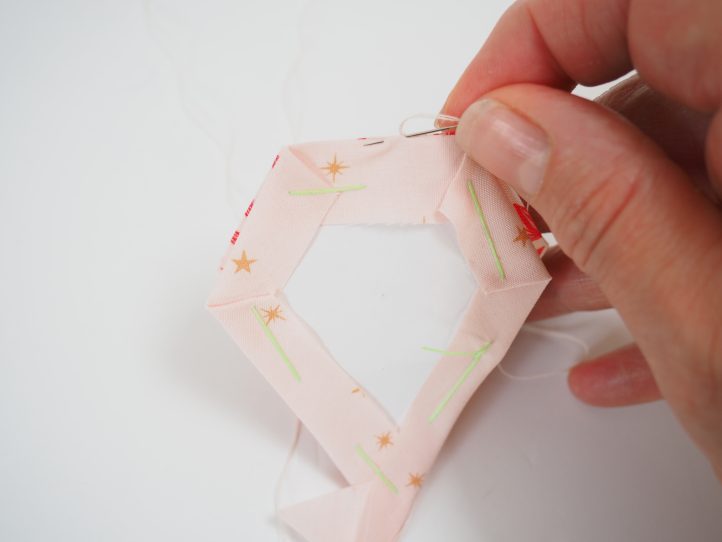
Pay particular attention to lining the corners and points up as you piece. This attention to detail means that your finished project will look so much better.
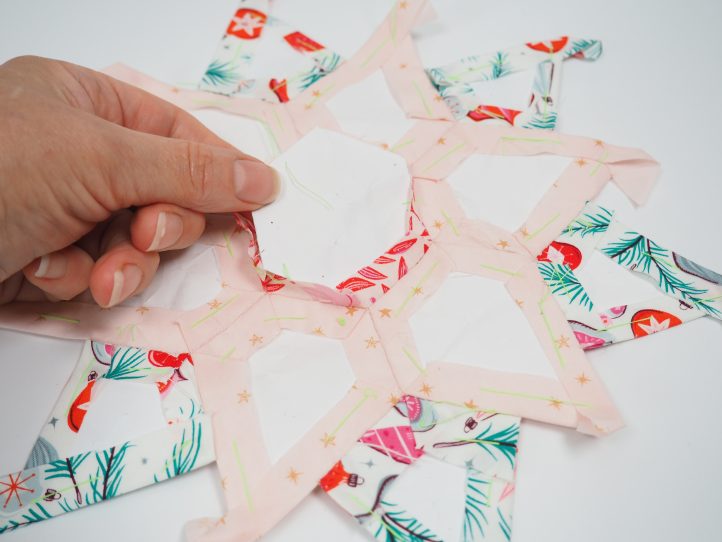
When you have surrounded a shape, you can remove the tacking stitches and take the paper out (big moment alert). You can reuse papers too, so don’t discard them unless they are in really bad shape.
Keep going like this (that is honestly all there is to it) until you have the size and shape that you need.
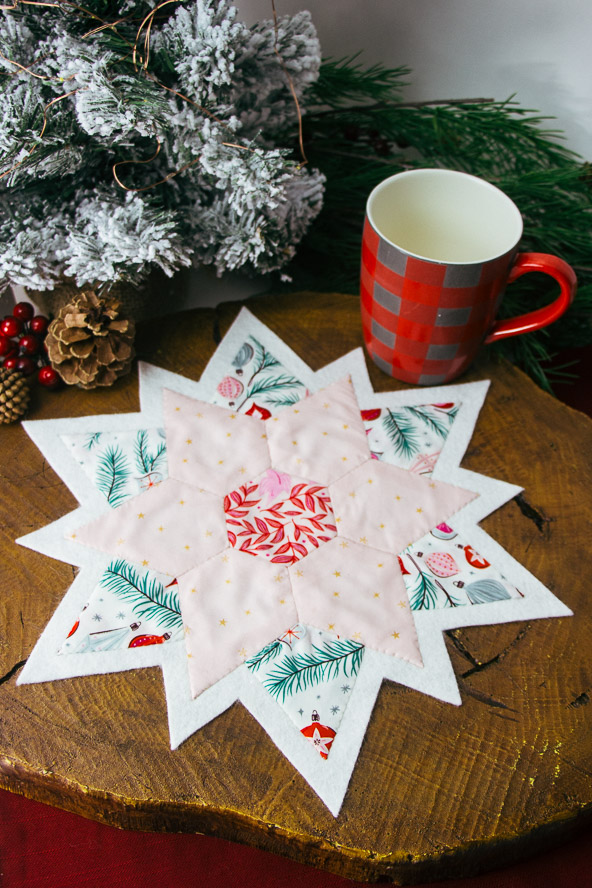
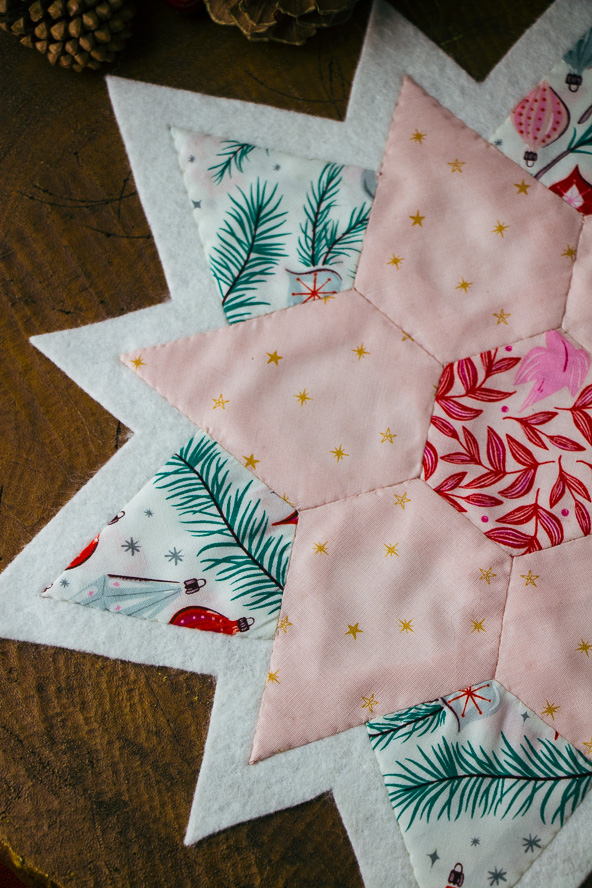
Just to give you something to aim for, let’s turn our pieces into a candle mat!
Materials:
- Fabric:
- Scraps of fabric in Christmas colors for the EPP. You will need three patterns: one for the middle hexie, one for the diamonds and another for the kite shapes. I am using three fabrics from the Christmas in the City collection by Art Gallery Fabrics.
- 1 fat quarter wool felt for the backing
- Thread to match your fabrics
- Hand sewing needle
- Iron
- Thimble
- PDF EPP Templates – These are located at the bottom of this page. See printing instructions below.
- PDF Candle Mat Layout – This is located at the bottom of this page. See printing instructions below.
PRINTING INSTRUCTIONS:
To download the PDF templates/layout, click on the download button at the bottom of the page. We recommend opening your download using Adobe Acrobat.
Instructions:
- Begin by preparing your papers (the EPP templates are located at the bottom of this page) and wrapping the papers as described in the tutorial above.
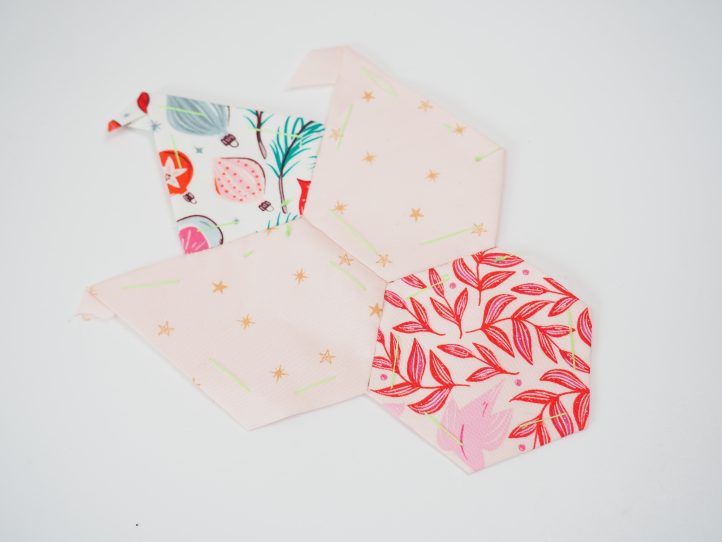
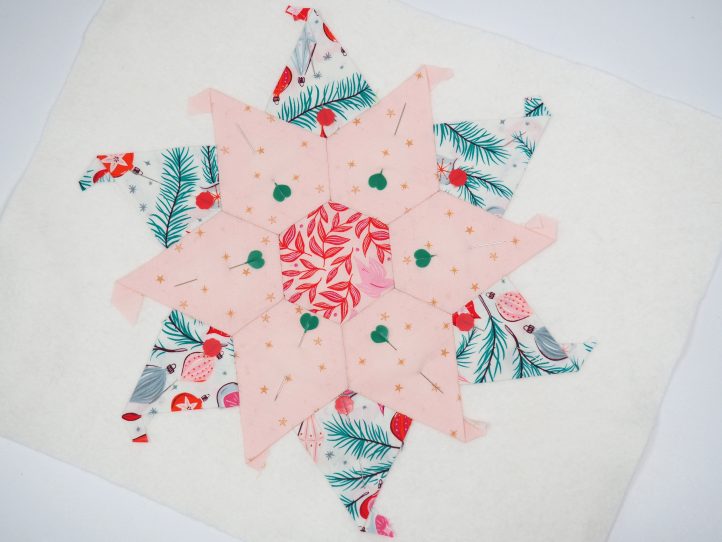
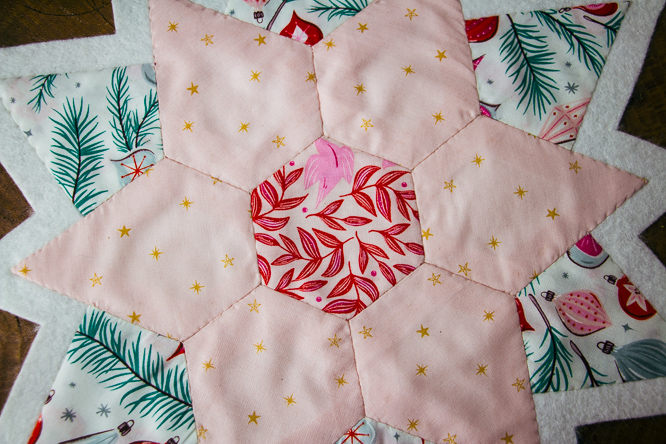
- Surround the center hexie with diamonds.
- Add the kite pieces around this. Note: EPP allows you to get the precise points and angles usually only achieved by Foundation Paper Piecing.

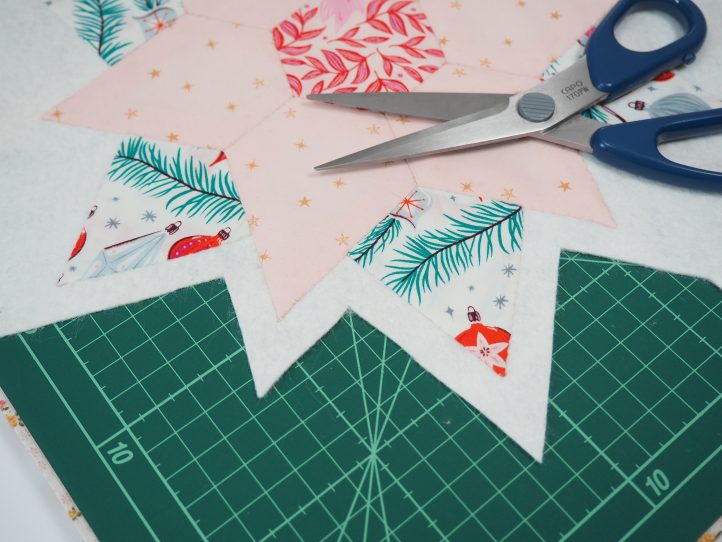
- Carefully remove all of the tacking stitches and take the papers out. Tip: The tutorial tells you to do this once each shape is surrounded by another but on the edges, this will not be possible, of course. Press the mat first with the papers still in (no steam) and this will ensure nice strong creases so you can keep the shape of the mat.
- Take the papers out and press again. Keep the outer edges as precise as you can.
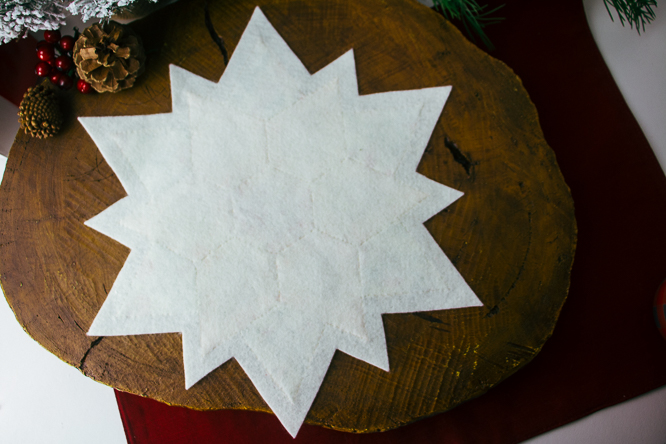
- Lay the completed top right side up onto the piece of wool felt and pin well. Tip: You can either machine stitch or hand stitch the next bit. I prefer to hand stitch to keep the theme going.
- Hand stitch-in-the-ditch around each shape beginning in the center.
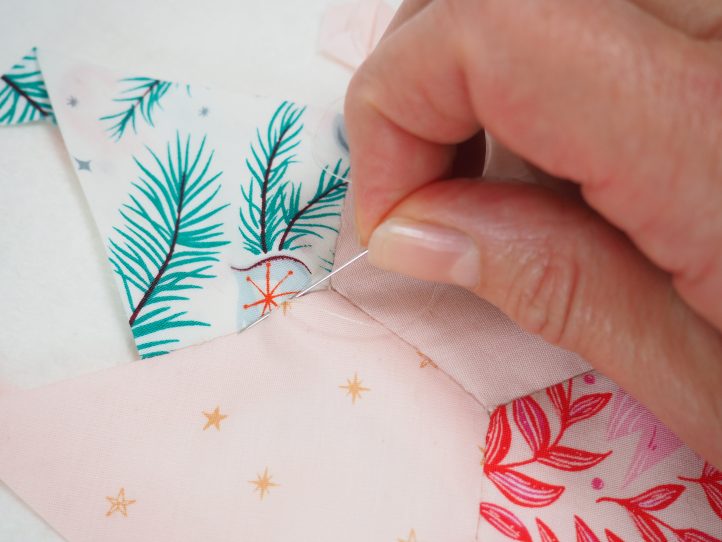
- Keep the top evenly taut as you work and use plenty of pins.
- When you get to the outer edge, stitch the edge down just like needle turn appliqué.
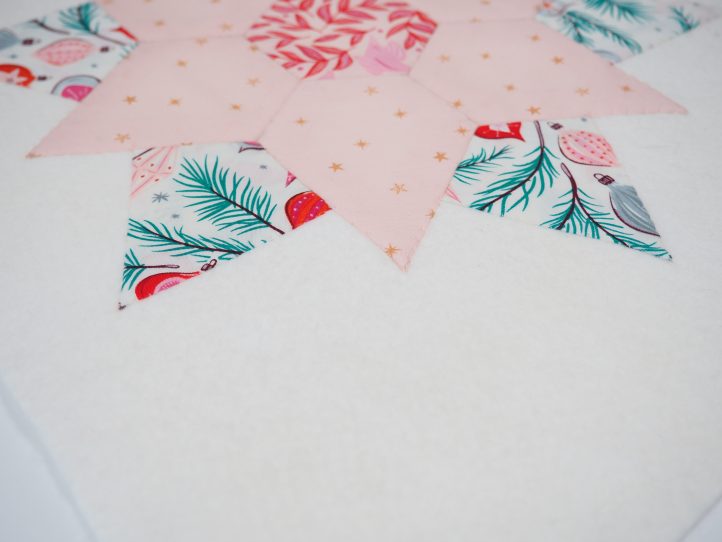
- There are some things to take care of on those outer points. When you fold the paper around a triangular point, there is some overhang. This is not something that you have done wrong; this is normal. They have to be trimmed a bit. Not too much though because you will leave yourself nothing to stitch into.
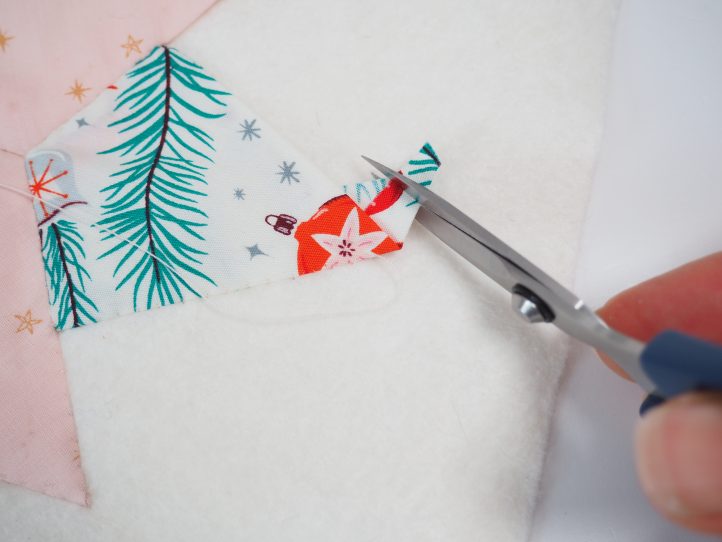
- Then fold the trimmed bit under the point and stitch with small stitches.
- Finally, measure 1/2” all around on the felt and trim the felt back to this line. Tip: If you have not allowed quite enough felt in some areas, you can make this less than 1/2”; it will still work beautifully.
When do I get my magazine?
Hi Heidi! We Like Sewing is a digital-only magazine, meaning it is accessed by logging into your account on our site. From there, you can explore the patterns in our most recent issue, as well as all of our previous issues. Please let us know if you have any questions. Have a great day! – Ashley, We Like Sewing