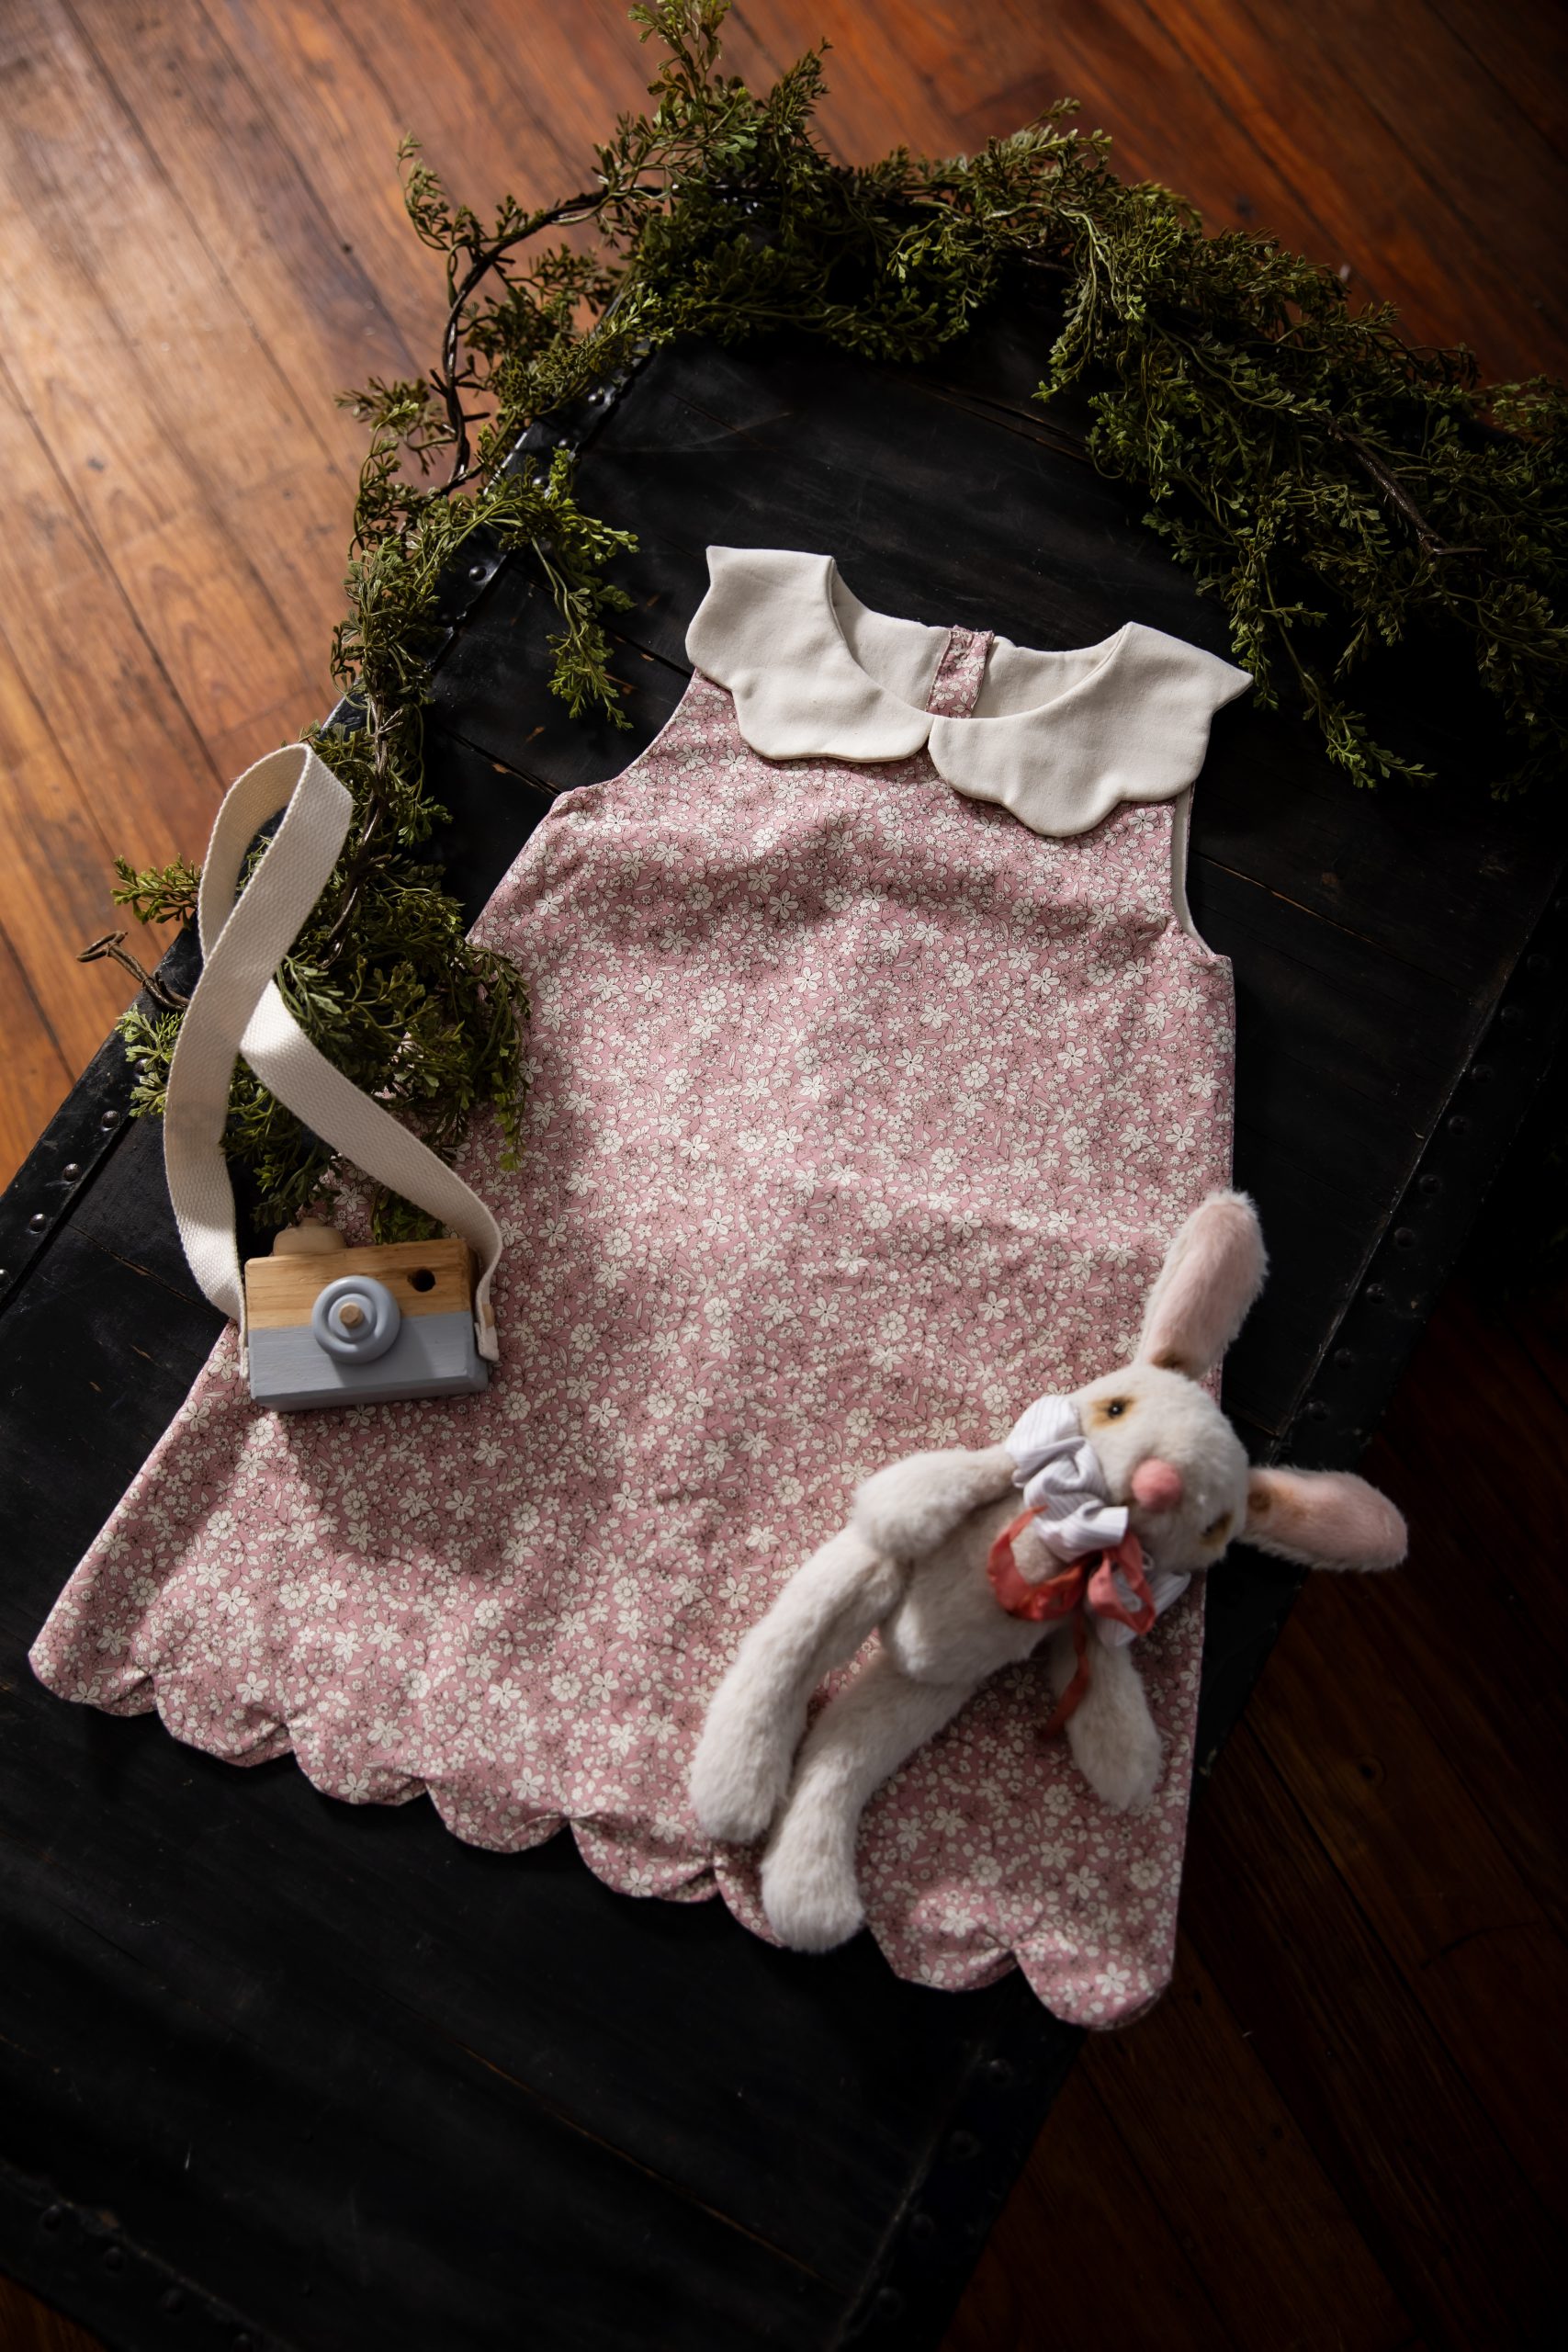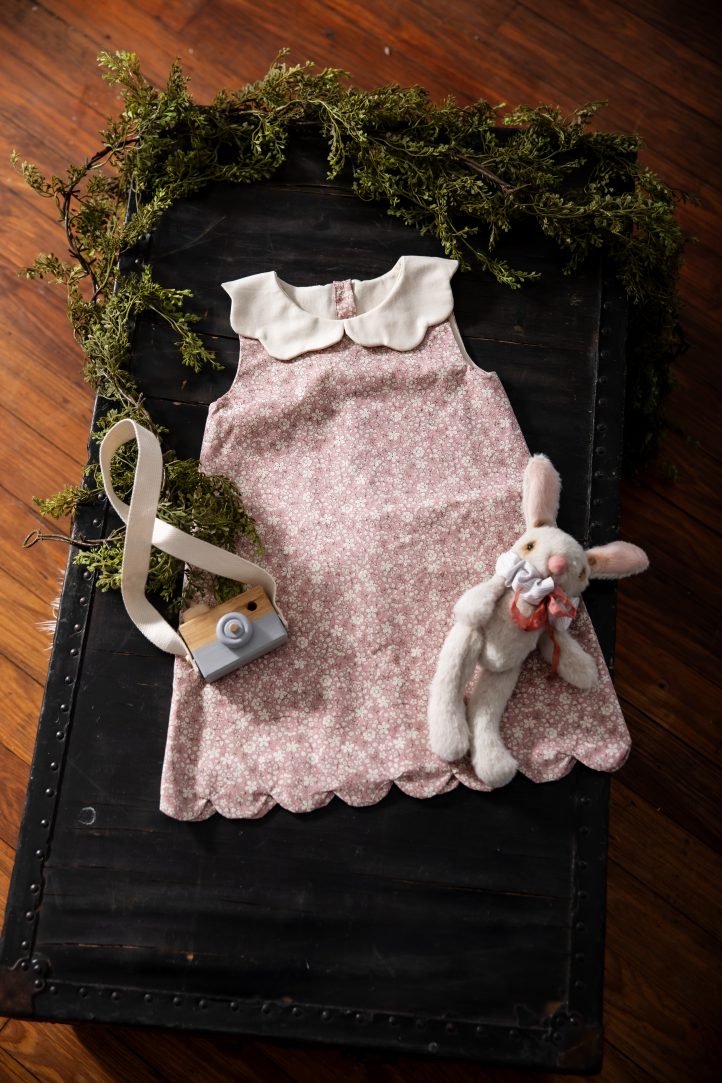
Sew your daughter a darling spring dress to proudly wear on Easter with this girls’ dress pattern from Lauren Merciris. Featuring three different pattern variations, this sweet dress pattern for girls is available in sizes 2T to a girls’ size 8 and can be made with either a Peter Pan or cloud collar. Sew your dress pattern in a gorgeous vintage-inspired floral print like our sample, and add a scalloped hem for a delicate finish.
Designer Notes: All the seam allowances are included: 1 cm/0.4 in (3/8’’) and 3 cm/1 1/8 in. for the hems.
3 versions:
- Pan collar with scalloped hem
- Cloud collar with scalloped hem
- Pan or cloud collar with classic hem and pearls
Materials:
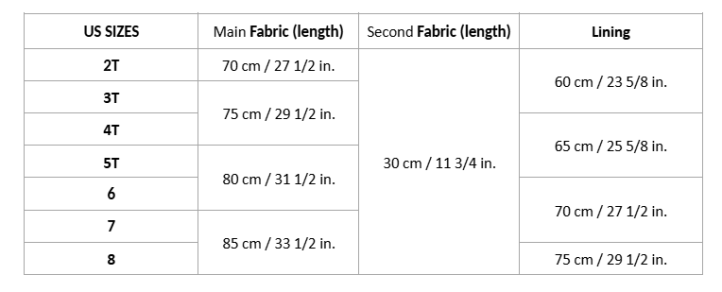
- Fabric and material requirements (fabric width 150 cm/59 in.)
- Main and second fabric: cotton, linen, Liberty, soft woven fabric.
- Lining fabric: Light cotton or batiste fabric.
- 8 buttons 10 mm/0.4 in. (3/8’’) diameter or 10 snap buttons
- A piece of cardboard (23 cm/9 in. x 33 cm/13 in.) for the versions 1 and 2 with a scalloped hem
- Small pearls to sew for the version 3 with pearls
- Optional: A piece of interfacing for the collar (30 cm/11 3/4 in. x 35 cm/13 3/4 in.)
- PDF Pattern – This is located at the bottom of this page. Please see printing instructions below.
PRINTING INSTRUCTIONS:
To download the PDF pattern, click on the download button at the bottom of the page. We recommend opening your download using Adobe Acrobat.
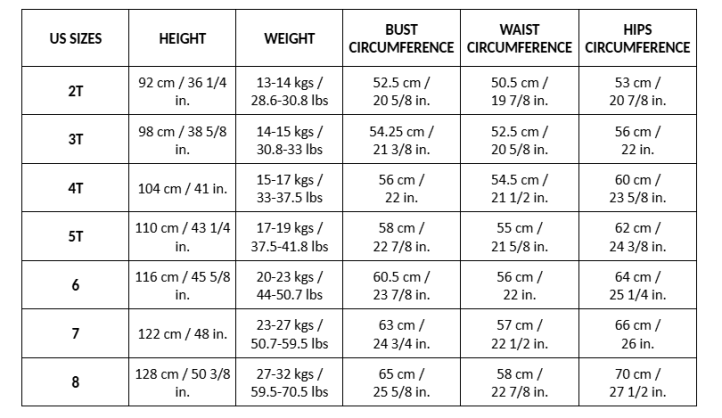
SIZE CHART (cm=centimeters/in=inches):
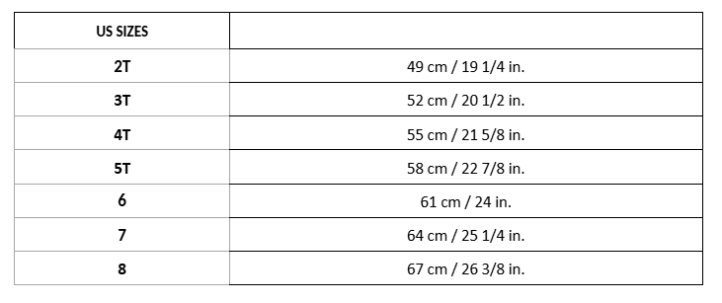
FINISHED GARMENT LENGTH (FROM SHOULDERS TO HEMS IN CM/INCHES):
PATTERN PIECES:
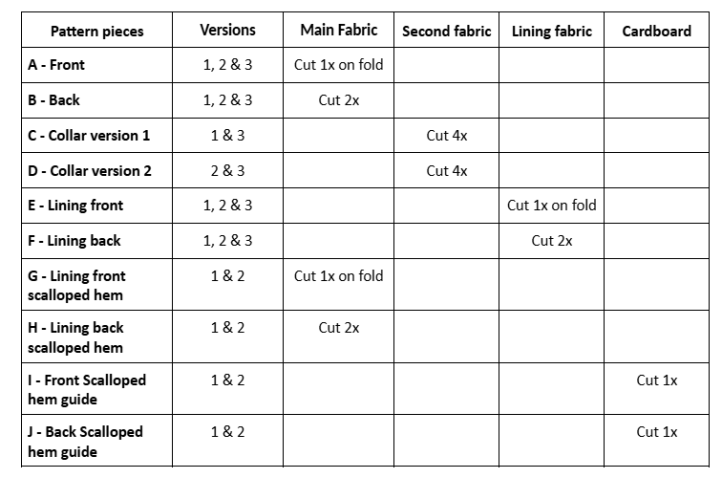
Cutting Instructions:
- Lay the fabric.
- Main and Lining fabric for all sizes: Fold the two selvage edges back to the middle of the fabric, and adjust the width to obtain 1 fold on the left and 1 fold on the right (right sides together).
- Second fabric (for the collar): Fold the fabric right sides together.
- Optional: Interfacing: Fold the fabric right sides together.
- Lay the pieces on the fabric.
- Lay out the pattern pieces on the different fabrics, respecting the grainline, and cut out each piece as many times as the pattern indicates.
- Mark all the markers on the reverse side of the parts.
Sewing Instructions:
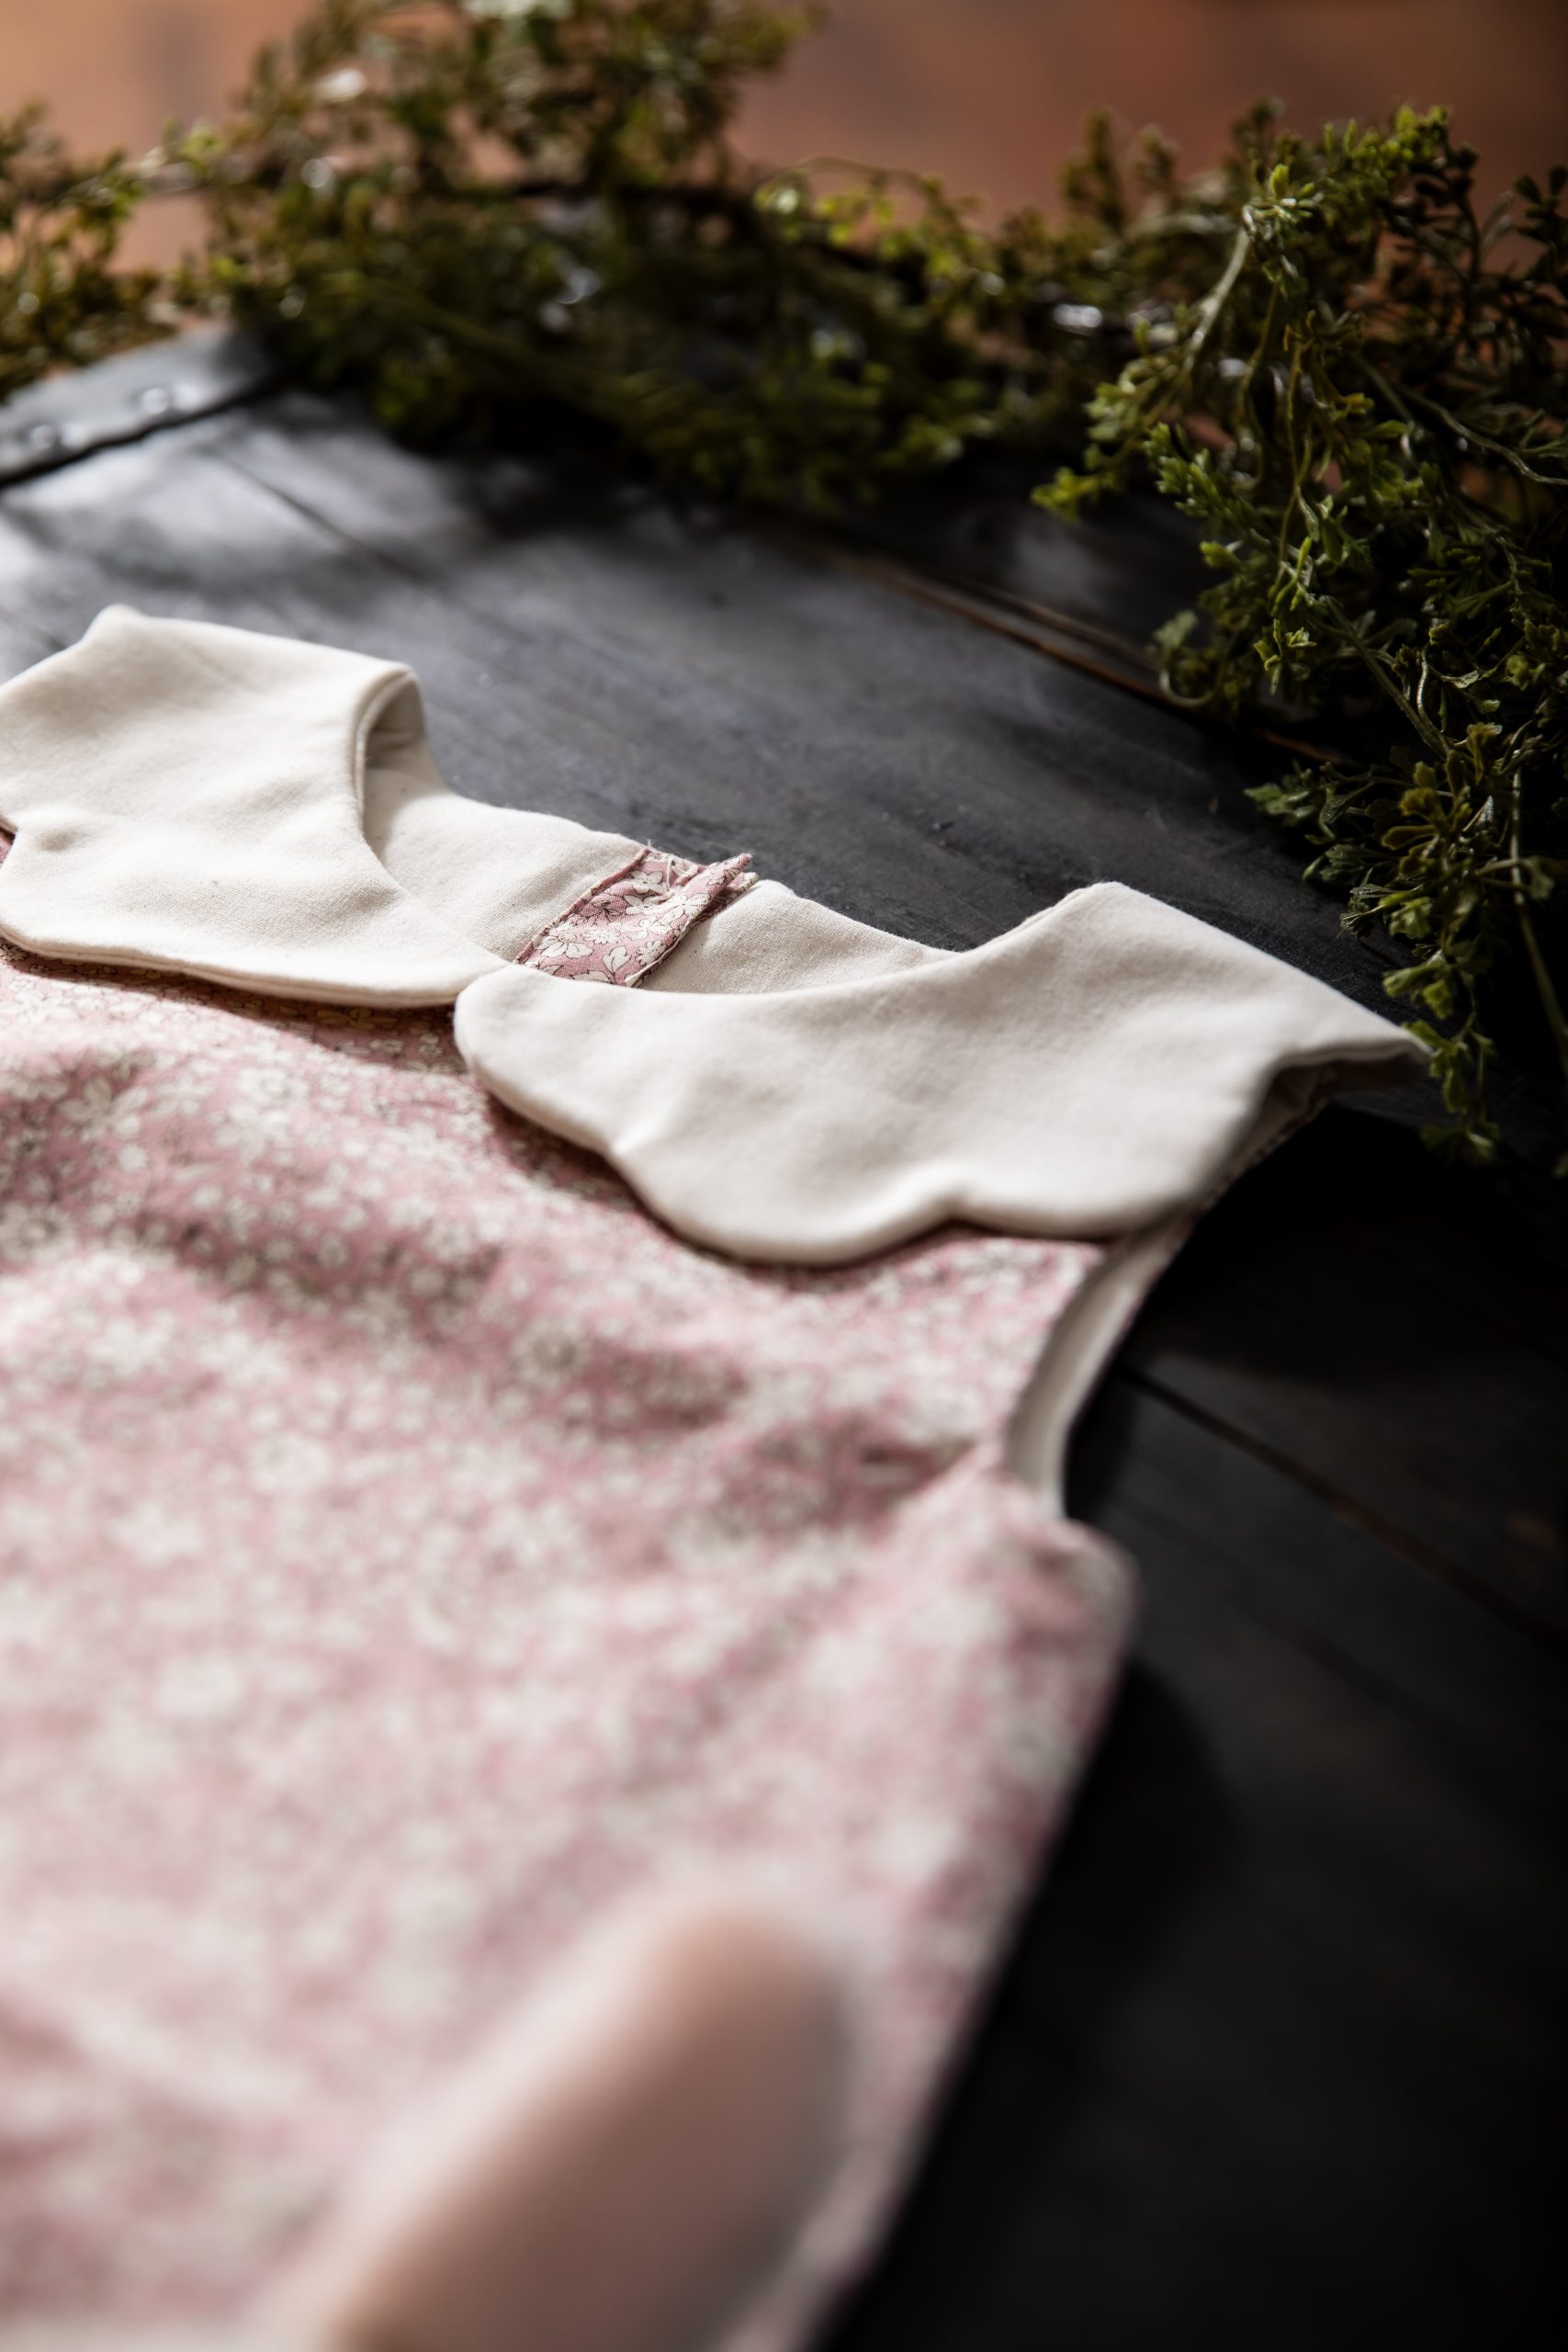
ASSEMBLING THE COLLAR:
- Place two collar pieces (C or D) right sides together. If using interfacing, position it on top. From top to bottom, you should have the interfacing, then the two collar pieces with right sides facing. If using fusible interfacing, first use it on the wrong side of one collar piece, following the manufacturer’s instructions.
- Pin around the outer edges and stitch with a 1 cm/0.4 in (3/8’’) seam allowance.
- Notch the curves as needed and trim the seam allowances.
- Turn the collar right side out, carefully in the curves. (If used, the interfacing will now be enclosed between the two collar pieces).
- Repeat these steps for the second collar piece.
- Press to flatten.
ASSEMBLING THE FRONT AND THE BACK OF THE DRESS:
Version 1 and 2:
- Place the A-Front and the two B-Back pattern pieces right sides together and pin the shoulders and the side seams.
- Sew at 1 cm/0.4 in (3/8’’).
- Press the seams open to flatten.
Version 3: With Pearls:
- Transfer the pearl placement markings to the front of the dress using tailor’s chalk or an erasable fabric pen. Alternatively, you may create your own placement design and mark it directly on the fabric.
- Hand-sew the pearls securely at each marked position. All thread ends on the wrong side will be concealed by the lining.
- Place the A-Front and the two B-Back pattern pieces right sides together and pin the shoulders and the side seams.
- Sew at 1 cm/0.4 in (3/8’’).
- Press the seams open to flatten.
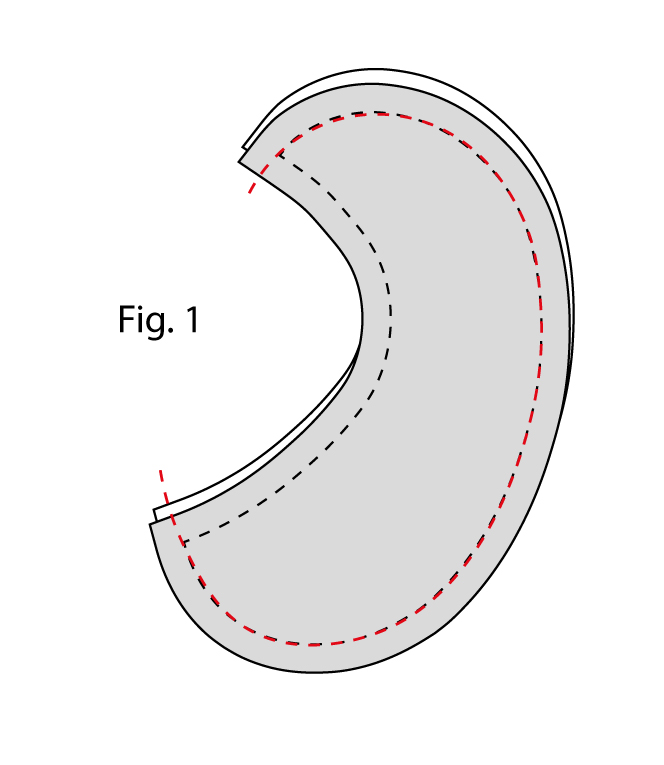
ASSEMBLING THE COLLAR ON THE DRESS:
- Place the two collar pieces on the right side of the front dress neckline, matching the shoulder seams. The collar pieces should meet at the center front.
- Pin in place and stitch with a 0.5 cm/0.2 in. (1/4’’) seam allowance to secure the collar along the neckline.
ASSEMBLING THE FRONT AND THE BACK OF THE LINING DRESS:
- Place the E-Lining Front and the two F-Lining Back pieces right sides together and pin the shoulders and the side seams.
- Sew at 1 cm/0.4 in (3/8’’).
- Press the seams open to flatten.
- Leave the bottom and the open back raw.
ASSEMBLING THE DRESS:
- Place the lining dress on the front dress, right sides together, matching the shoulder seams. The collar should be sandwiched between the dress and the lining.
- Pin around the entire neckline and stitch with a 1 cm/0.4 in. (3/8’’) seam allowance.
- Notch around the neckline as needed, and trim the seam allowances.
- Turn the lining to the inside of the dress. Carefully press the neckline and collar.

THE ARMHOLES:
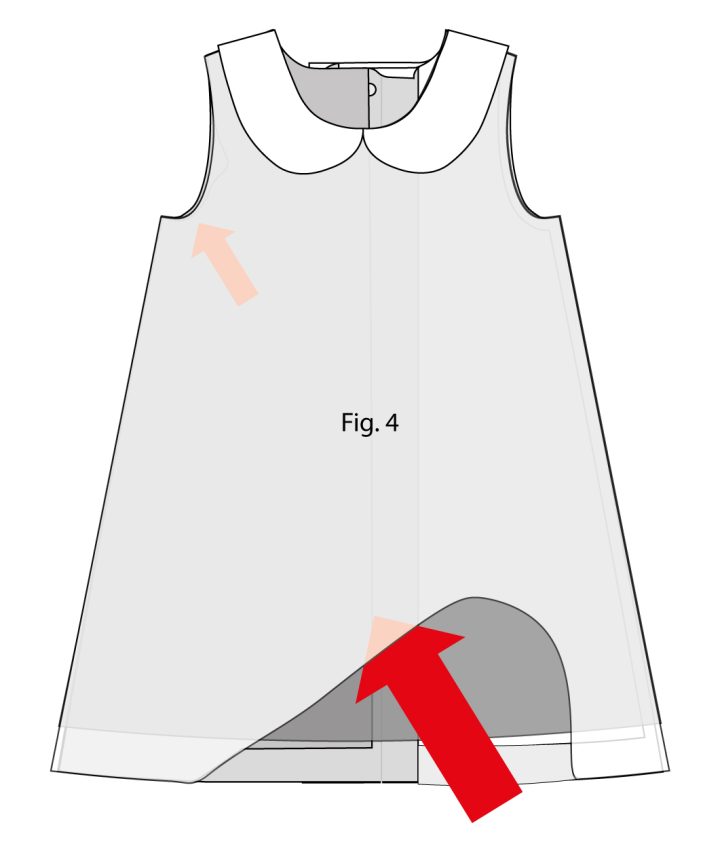
- Pick up the lining and the bottom of the dress at the armhole. To finish the armholes, reach inside the dress between the outer fabric and the lining and locate one armhole. Grasp the lining armhole edge and the dress armhole edge together.
- Carefully pull them out through the dress opening to access the armhole.
- Align the lining and dress armhole edges, matching the seams, and pin around the armhole as far as possible. (You may need to sew the armhole in two sections.)
- Sew at 1 cm/0.4 in. (3/8’’) from the edge.
- Trim the seam allowance.
- Repeat for the second armhole.
- Turn the dress right side out and press around the armholes.
THE HEM:
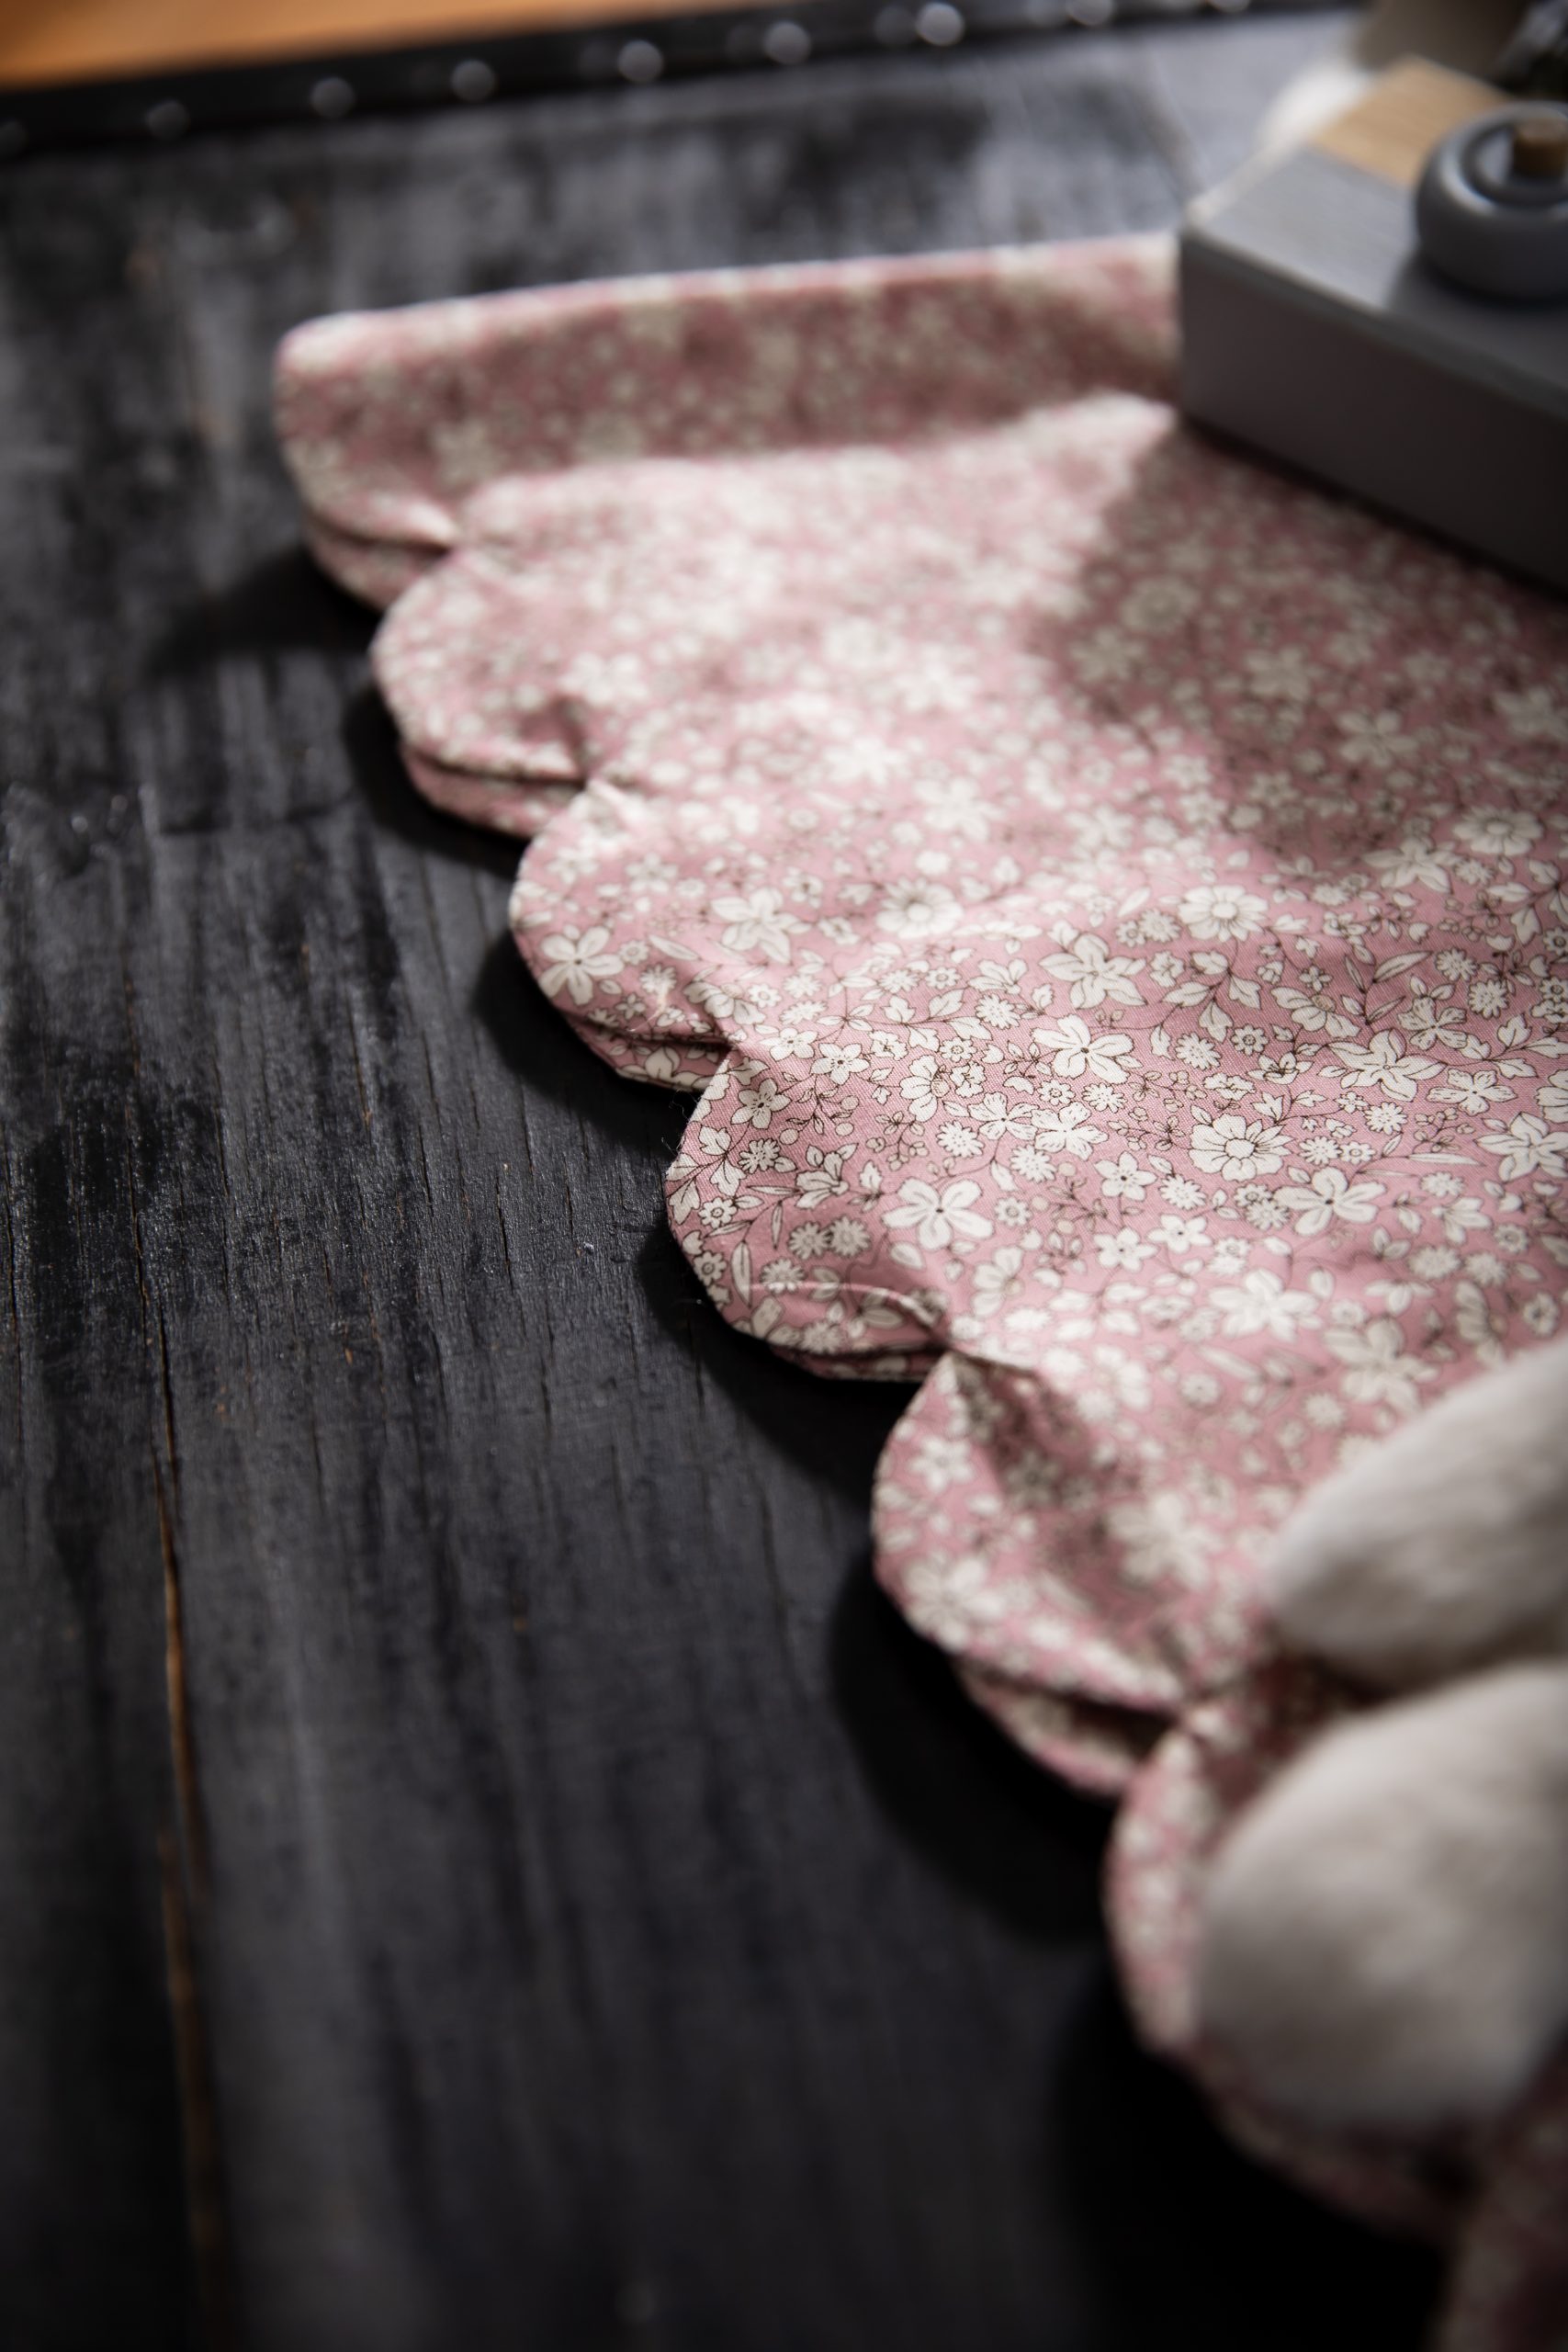
Version 1 and 2: Scalloped Hems:
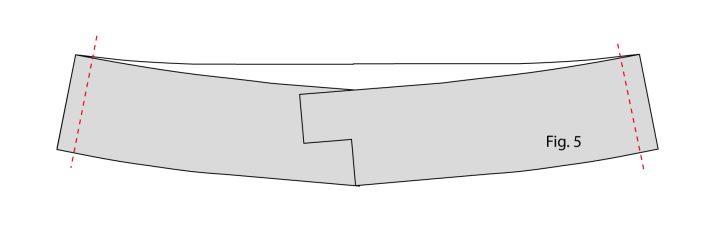
- Assemble the scalloped hems pieces G-Lining Front scalloped Hem and H-Lining Back scalloped Hem with right sides together. Sew the sides at 1 cm/0.4 in. (3/8’’) in the seam allowance, then press the seams open.
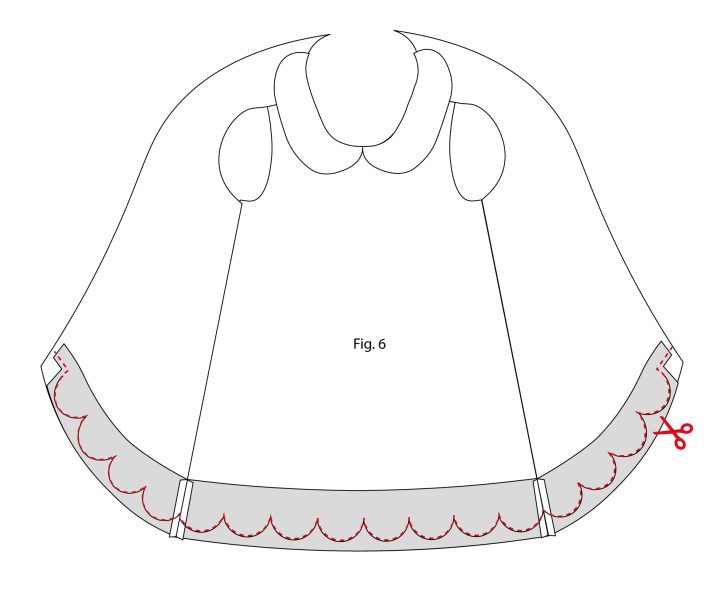
- Place the hem onto the front of the dress, right sides together, matching the sides seams. Pin in place.
- Position the cardboard guides on the hem (pieces I-Front scalloped hem guide and J-Back scalloped hem guide), aligning them with the top edge of the hem, and trace the scallops along the hemline.
- Once traced, pin along the scalloped line and sew carefully following the marked curves.
- Trim the seam allowances, clip or notch along the curves, and cut away the excess fabric.
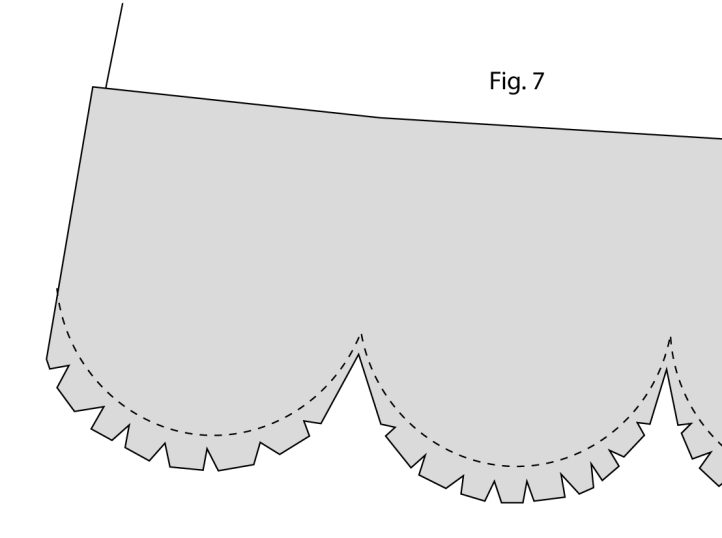
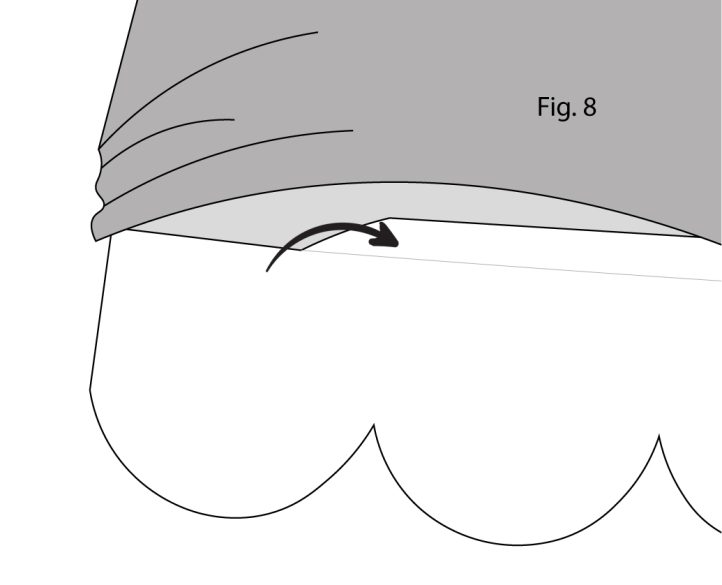
- Turn the hem to the wrong side of the dress. Carefully shape the scallops from the right side, then press flat.
- At the top edge of the hem on the inside, fold the seam allowance of 1 cm/0.4 in. (3/8’’) toward the inside. Iron to flatten.
Version 3: Classic Hem:
- Fold 1 cm/0.4 in. (3/8’’) to the wrong side of the dress. Iron to flatten. Fold again 2 cm/0.8 in. (3/4’’) and press.
THE BUTTON PLACKET AT THE BACK:
- At the back of the dress, fold the top edge of the button placket 1 cm/0.4 in. (3/8’’) toward the inside and press. Then fold the seam allowance of 1 cm/0.4 in. (3/8’’) along the entire opening toward the inside and press.
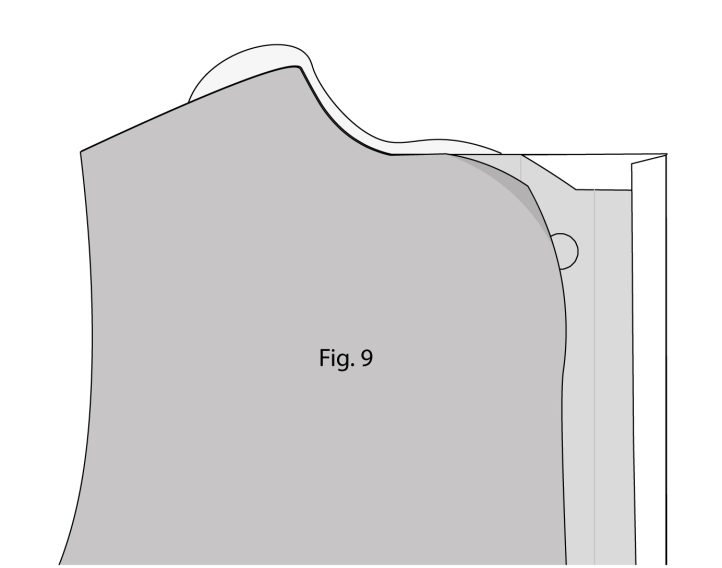
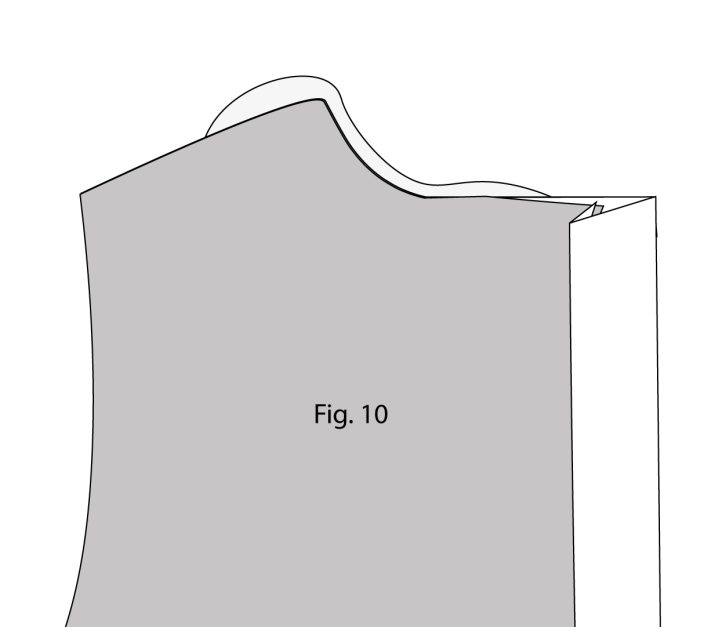
- Fold the button placket again 2 cm/0.8 in. (3/4’’) toward the inside and press. The button placket will cover the raw edge of the lining.
- At the bottom of the dress, on the wrong side, the lining will be covered by the scalloped hem (Versions 1 and 2) or by the classic hem (Version 3), then the button placket will cover the sides of the hems.
- Pin to maintain all around the hem and the button placket, dress, and lining together.
ASSEMBLING THE TWO DRESSES TOGETHER:
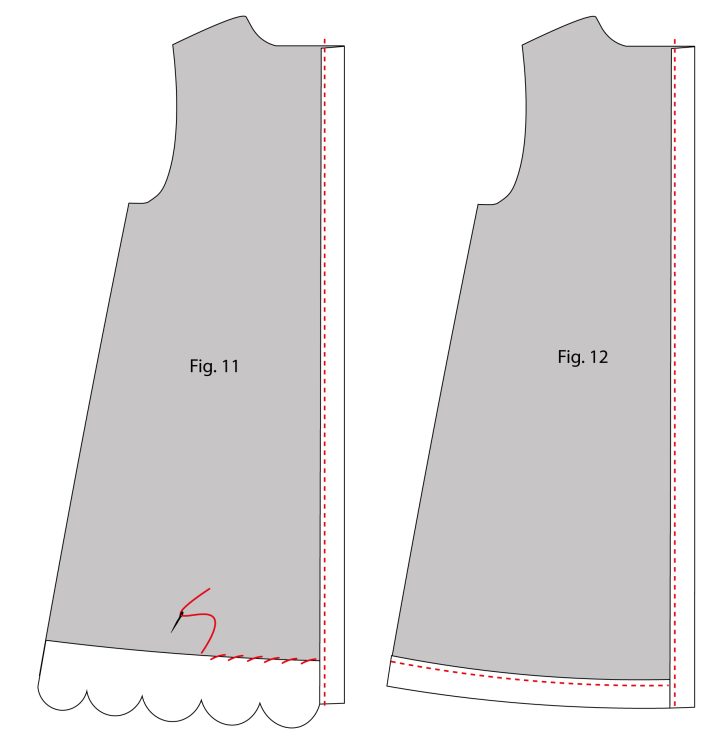
Version 1 and 2: Scalloped Hems:
- Sew along the button placket at 1.8 cm/0.71 in. (3.4’’). Repeat on the opposite side of the dress.
- Finish the hem by hand-stitching the lining to the scalloped hem on the inside, using small stitches to secure it in place. Now the dress is fully lined.
Version 3: Classic Hem:
- With the button placket unfolded at the hem, align the hem and lining edges, matching the side seams.
- Stitch the hem with a 1.8 cm/0.71 in. (3/4’’) seam allowance, enclosing the lining along the bottom edge of the dress.
- Then sew along the button placket with a 1.8 cm/0.71 in (3/4’’), starting at the top of the desk, and sewing down to the hem, enclosing the lining sides. Now the dress is fully lined.
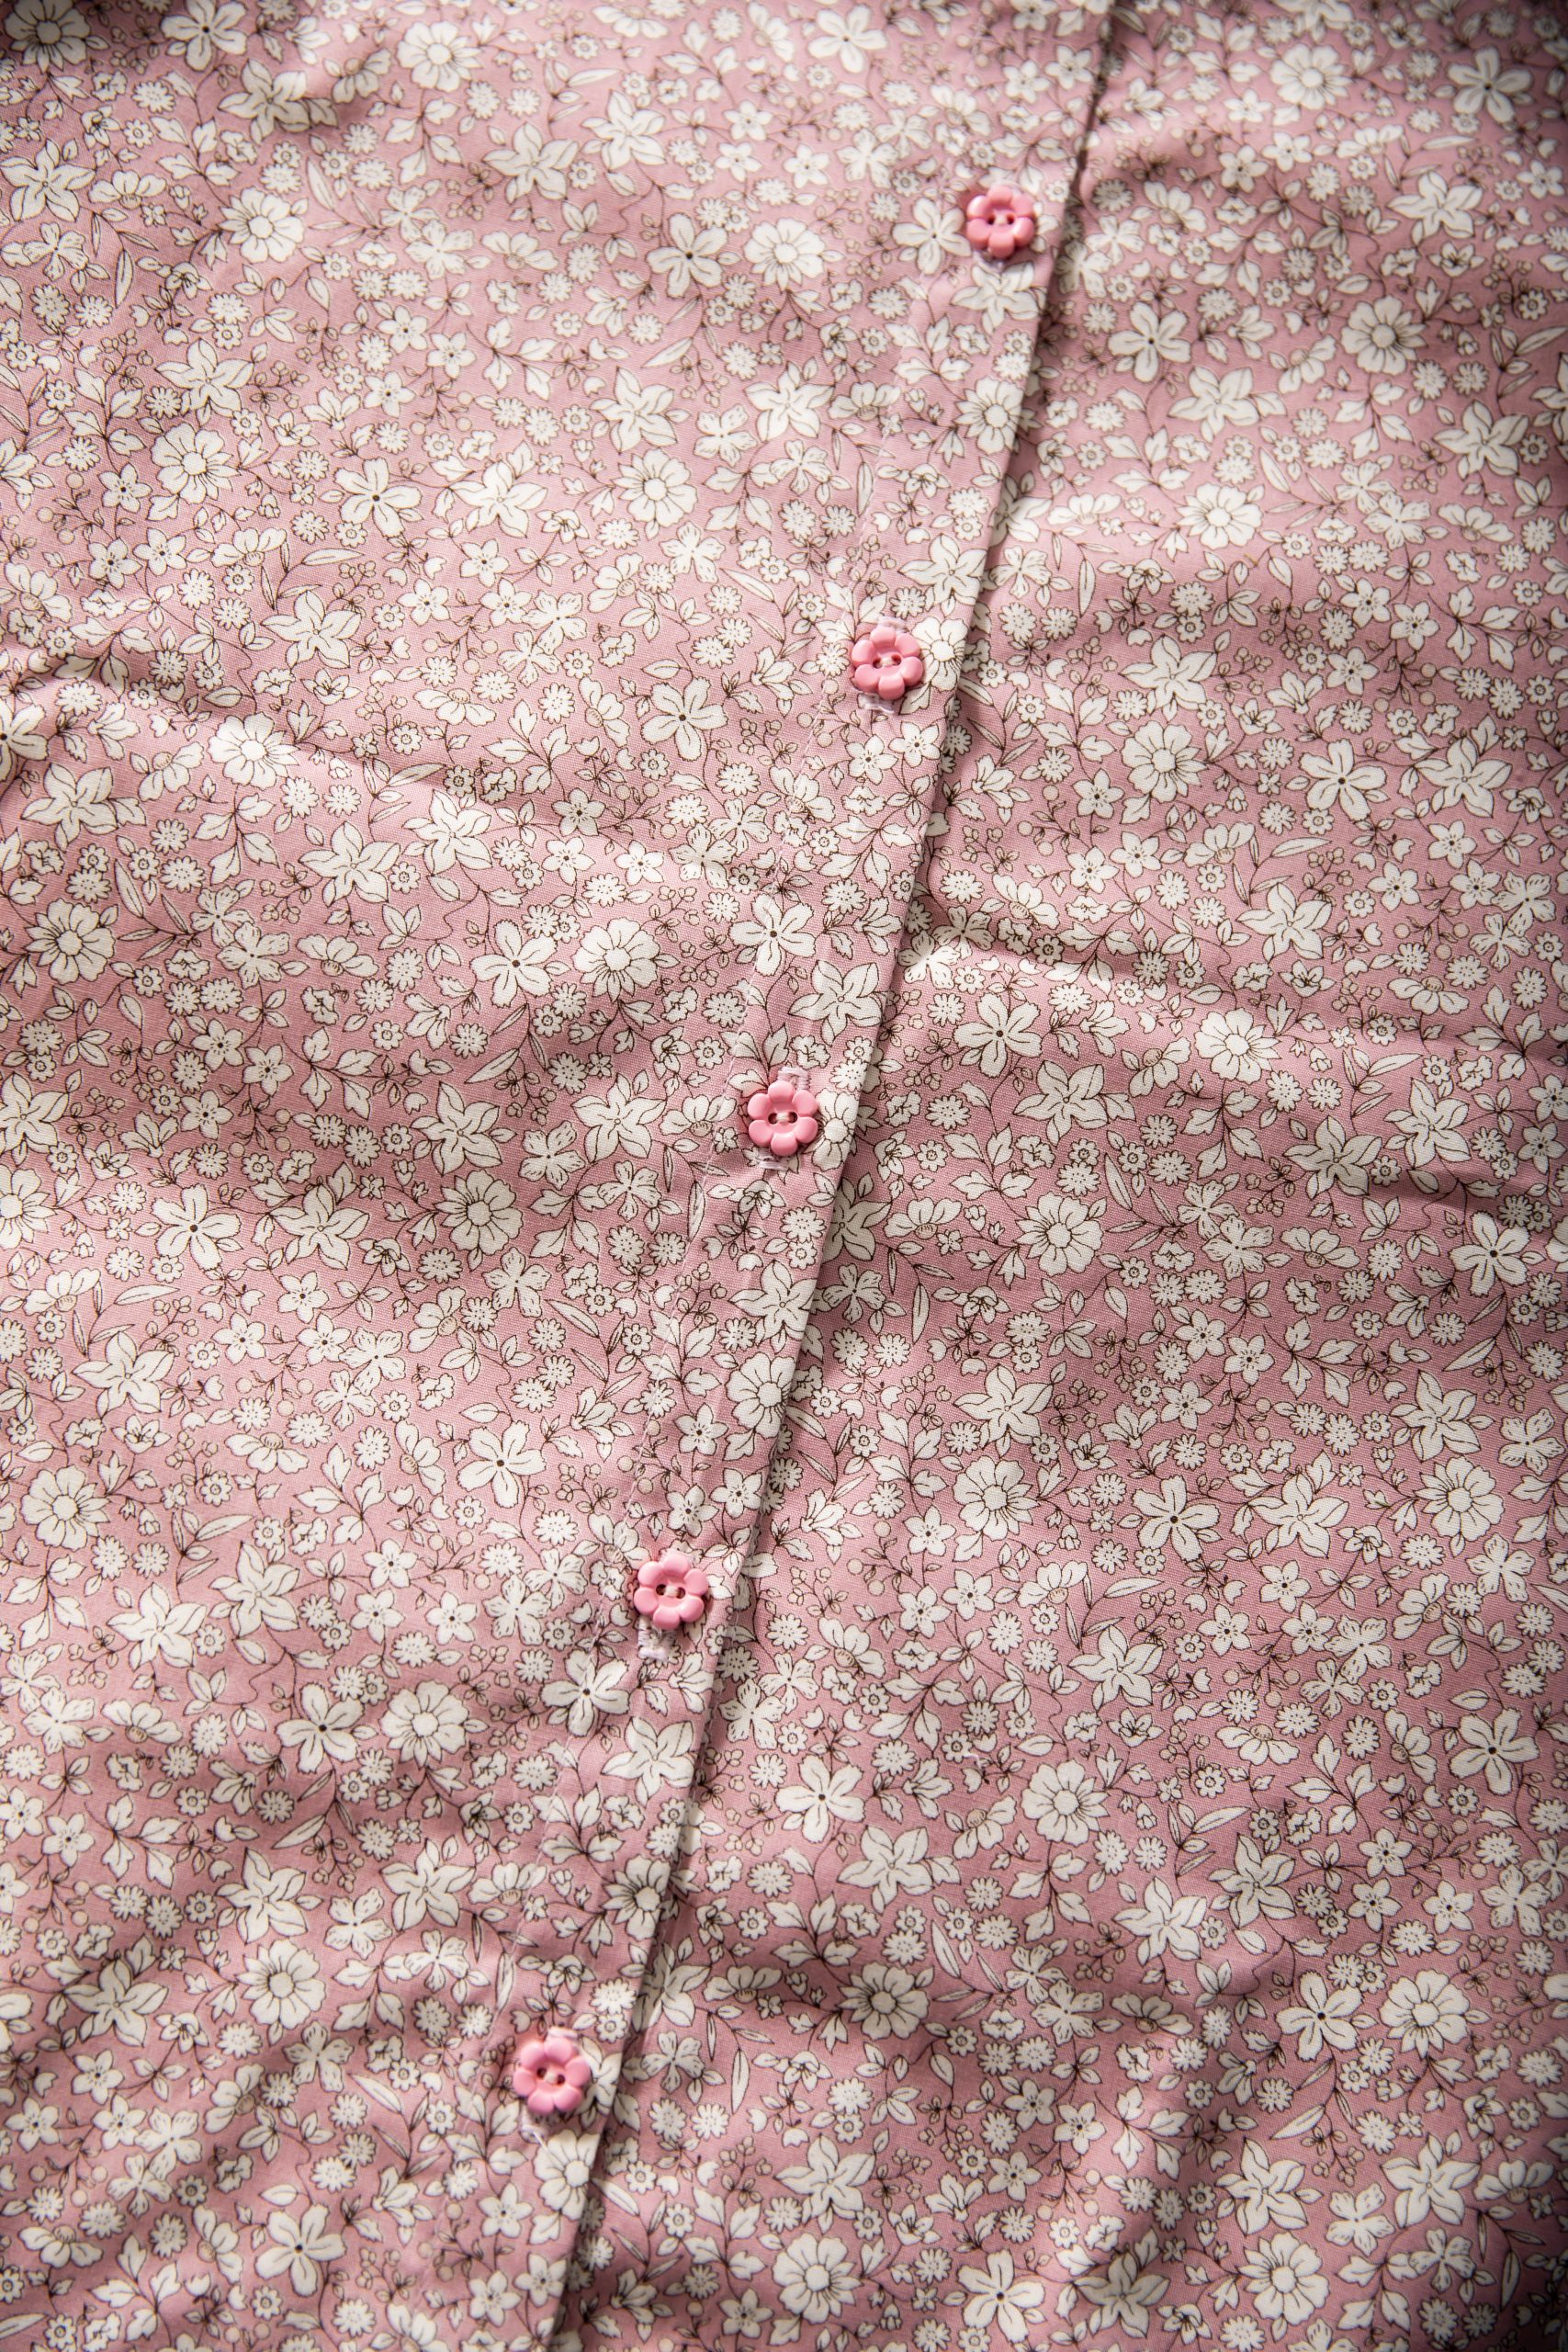
BUTTONS AND BUTTONHOLES:
- Using an erasable fabric pen or tailor’s chalk, mark the button positions on the left placket and the buttonhole positions on the right placket.
- The right placket overlaps the left placket when the dress is worn.
- Pin the plackets together along the center back, aligning the neckline and hem. Mark the button and buttonhole positions through both layers at the same time to ensure perfect alignment when the dress is closed.
- Buttons are spaced 8 cm/3 1/8 in. apart. Always begin marking from the top button, then work downward to maintain even spacing and a clean finish.
- Sew the buttonholes on the right placket using your sewing machine’s buttonhole foot, following your manufacturer’s instructions.
- Sew the top buttonhole first, then close the placket and check alignment before sewing the remaining buttonholes.
- Attach the corresponding buttons to the left placket, stitching them securely at the marked positions.