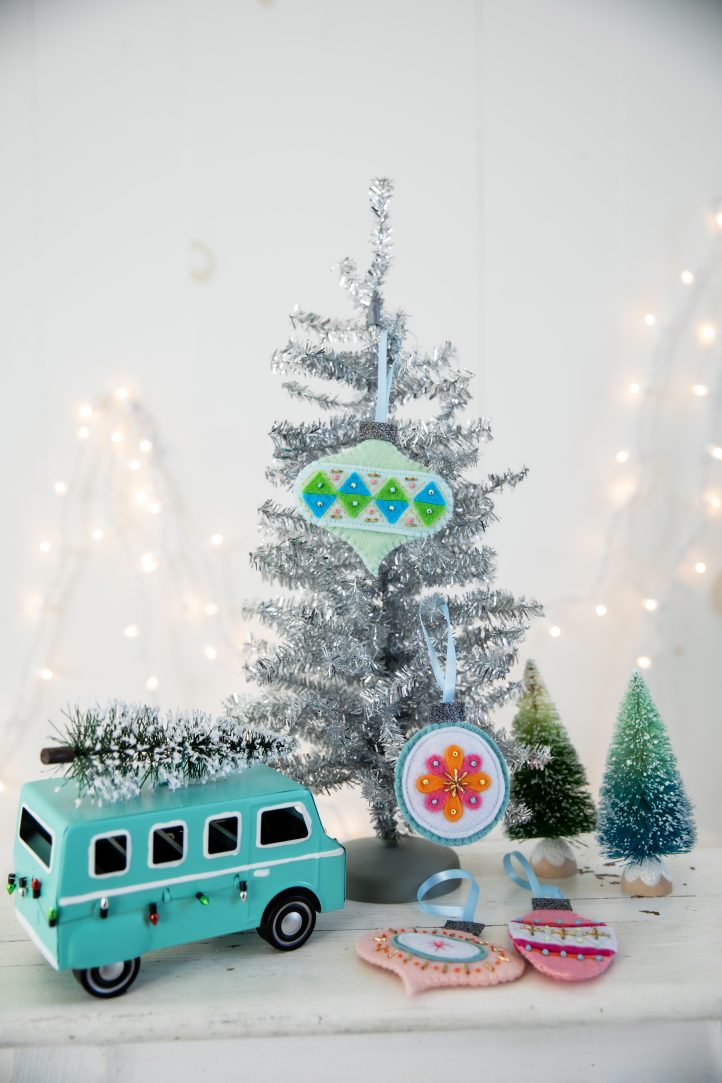
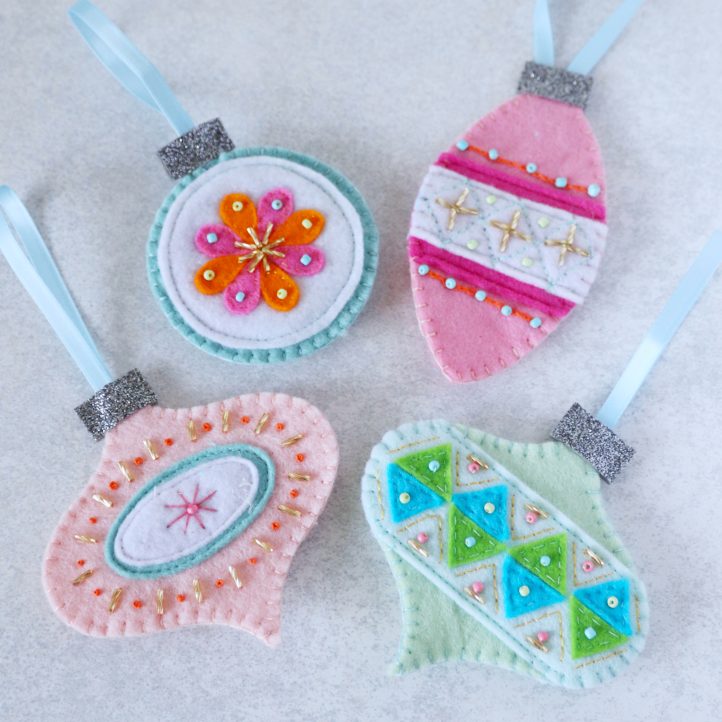
If traditional red and green isn’t your thing, don’t miss this set of playful, colorful ornaments from Sophie Tarrant. Inspired by Mid-Century Christmas décor, this set of 4 sewn ornaments is made from felt in an array of cheerful pastels and is completed with delicate seed and bugle beads and ribbon loops. Who needs boring, store-bought ornaments when you can add some major personality to your Christmas tree with these ornament sewing patterns.
Skill Level: Beginner
Designer Notes:
- Take your time with hand stitching, especially when adding beads – working slowly ensures neat, even placement and a polished finish.
- Always tie off your thread securely between beads or embellishments. This way, if one bead comes loose, the rest will stay in place.
Materials:
- Fabric: Felt, 12 inch sheets in various colors, plus one sheet of gray glitter felt
- Embroidery floss to match fabric colors
- Seed beads in various colors
- Gold bugle beads
- Ribbon
- Fabric glue
- PDF Template – This is located at the bottom of this page. See printing instructions below.
Tools:
- Scissors
- Water-erasable fabric pen
- Sewing machine
- Embroidery needle
- Beading needle
PRINTING INSTRUCTIONS:
To download the PDF template, click on the download button at the bottom of the page. We recommend opening your download using Adobe Acrobat.
Sewing Instructions:
- Begin by printing out the PDF templates provided and using them to cut the various patterns from colorful sheets of felt. You can follow our pictures for guidance on which shades to use for each piece – or choose your own color scheme instead.

- Using the templates and our photos as a reference, start layering your main felt pieces. Stitch each piece into place around the edge using a straight machine stitch, working carefully and slowly to achieve a neat finish. Don’t add the triangles to Design Two or the petal details to Design Three yet – you’ll do that in later steps.

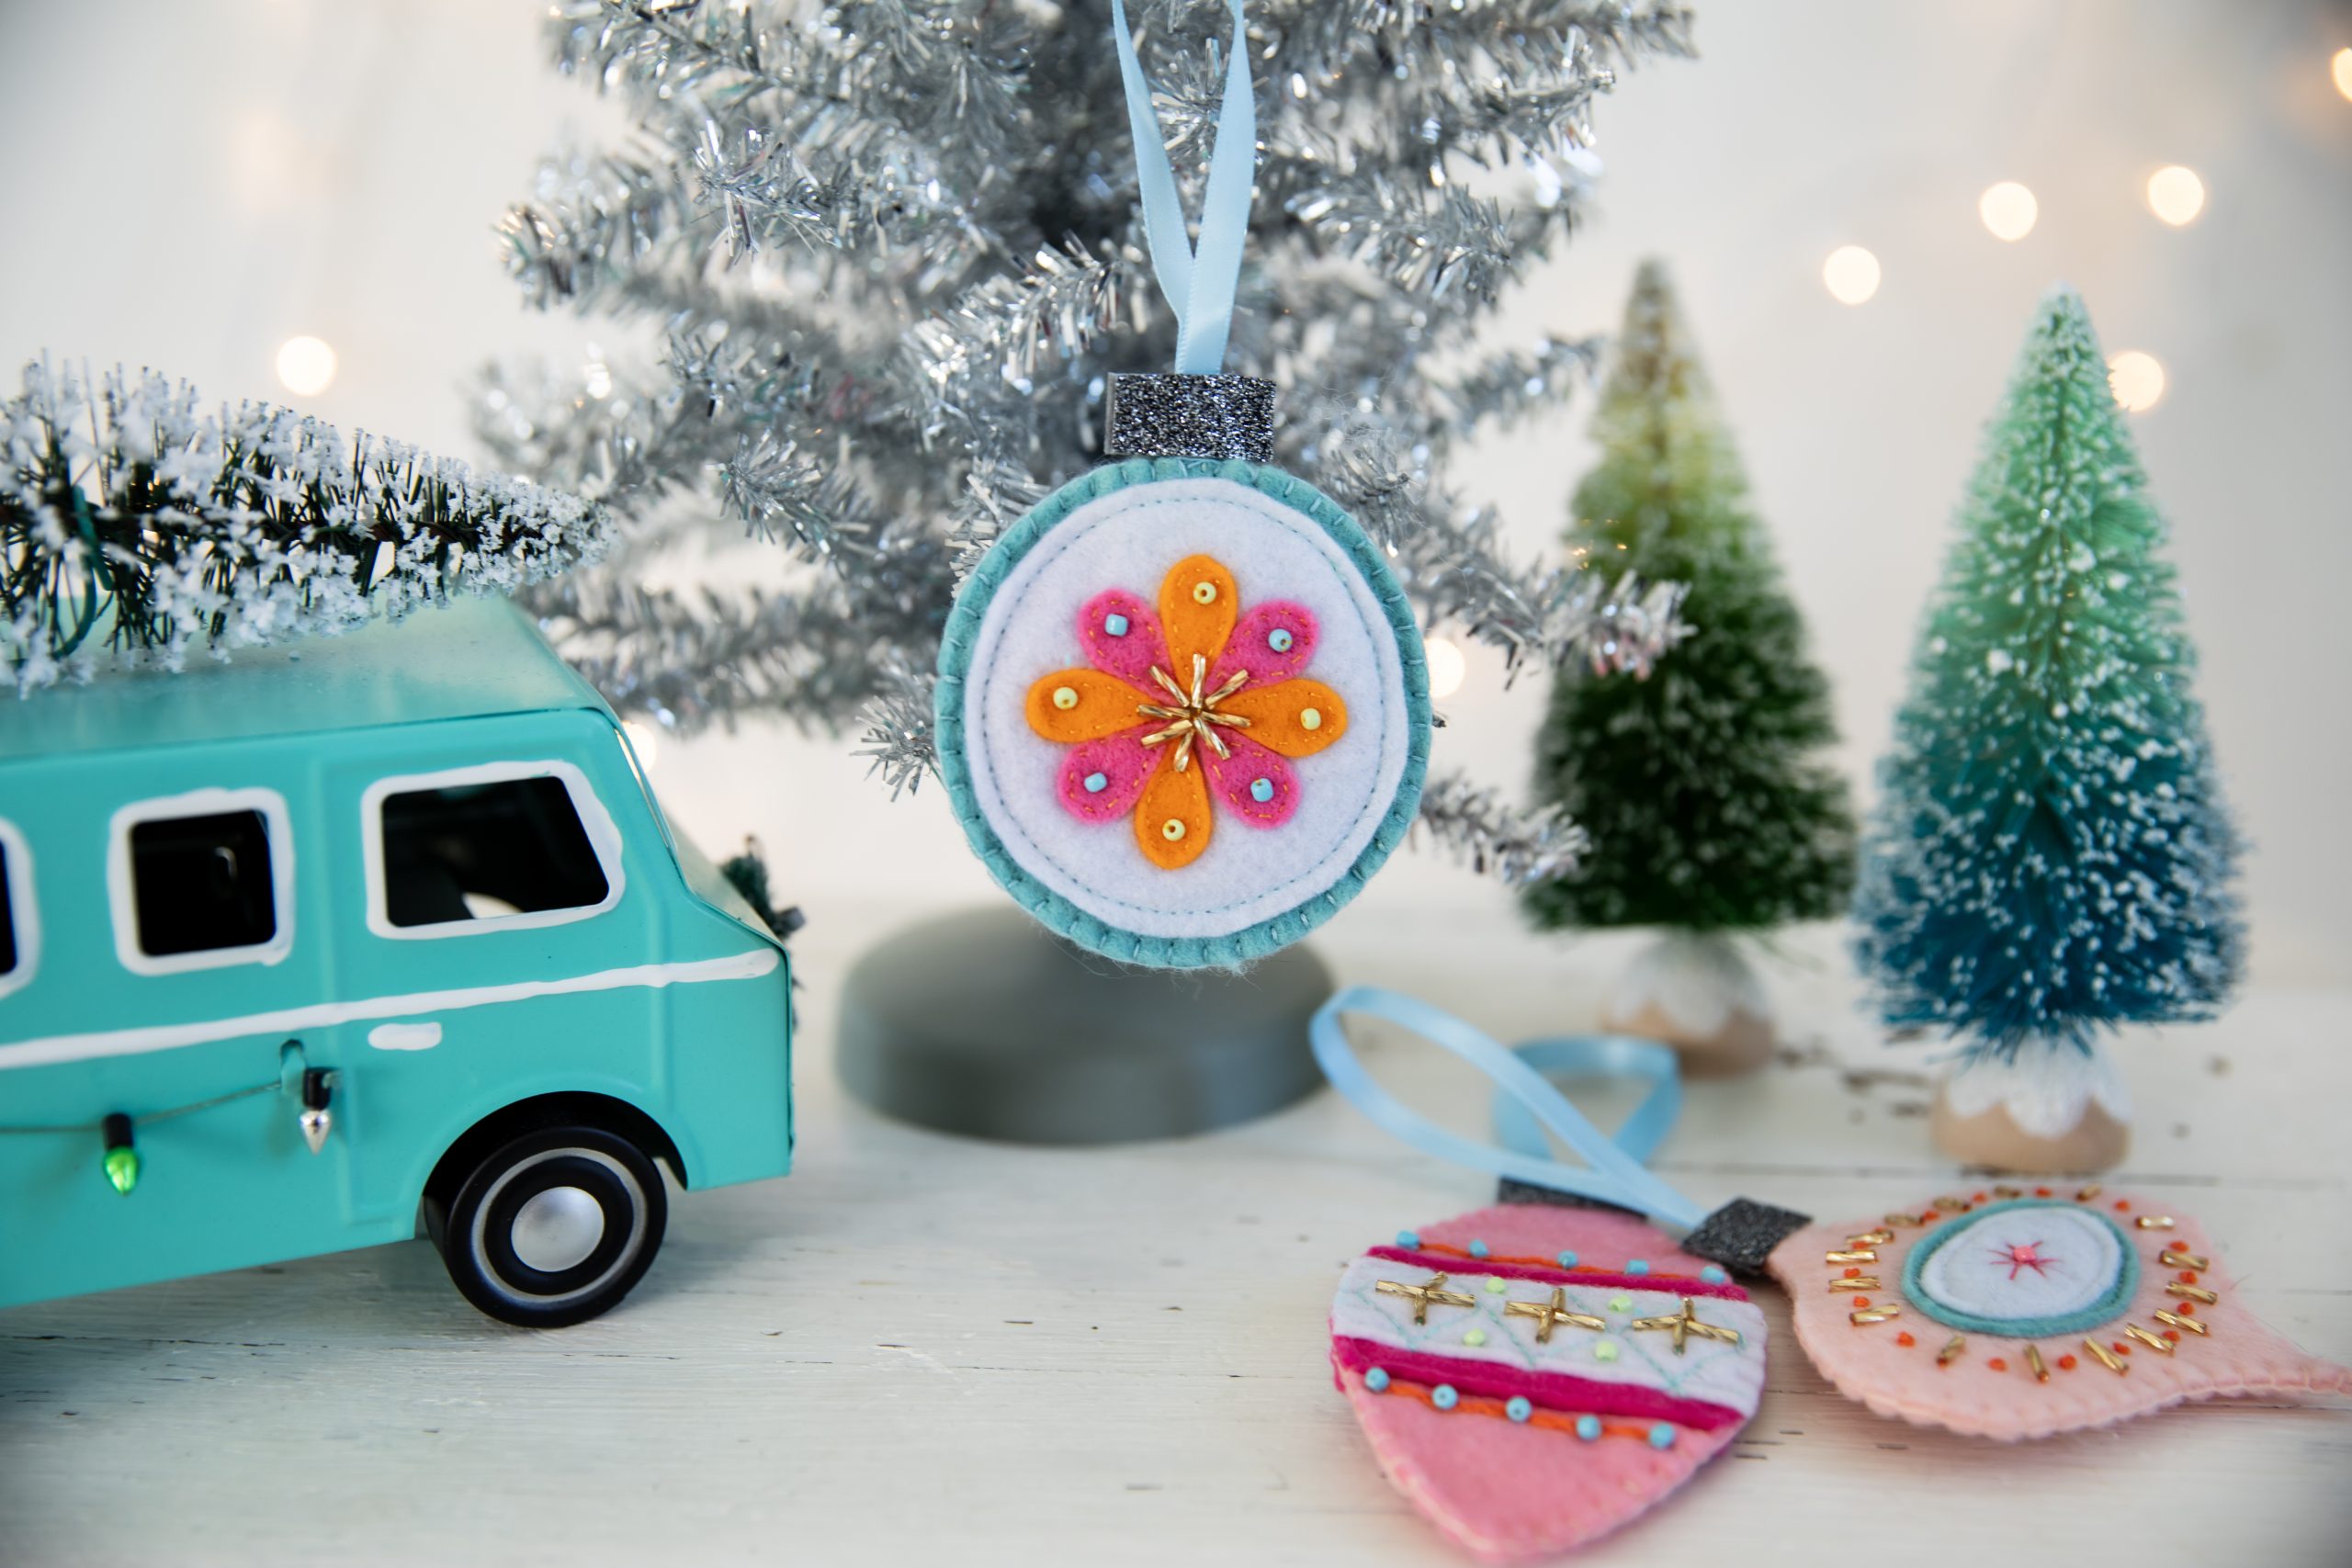
- Start adding the details to each ornament. Thread a fine beading needle with strong thread, then hand-stitch golden bugle beads around the outer edge of each Design One piece. Be sure to tie off the thread at the back after each bead – this way, if one comes loose, the others will stay securely in place. Repeat to add the bugle beads to the matching second Design One piece.

- Thread an embroidery needle with two strands of bright orange floss and work a French knot in between each of the bugle beads you just added. Then, use long straight stitches to embroider a star at the center of each piece. Finally, return to your beading needle and add a hot pink seed bead to the center of each star. Design One is now fully decorated.

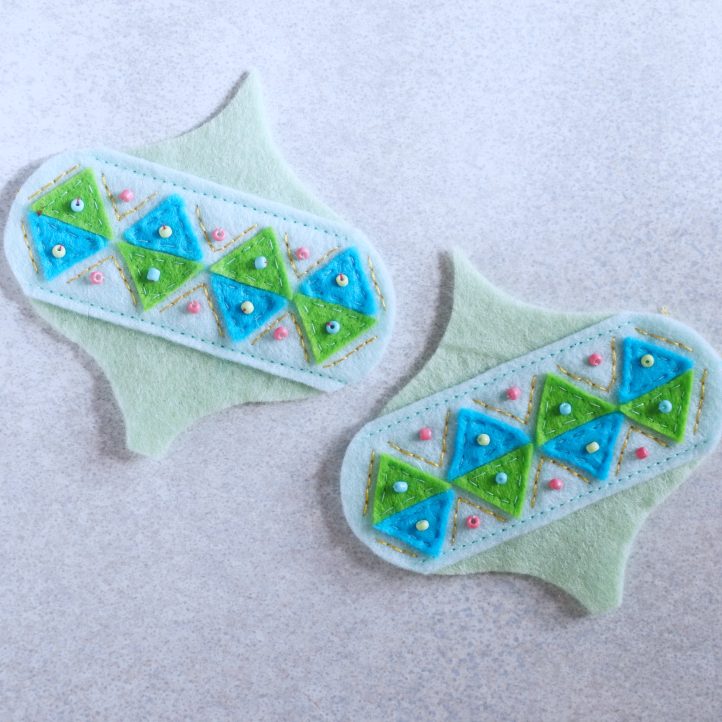
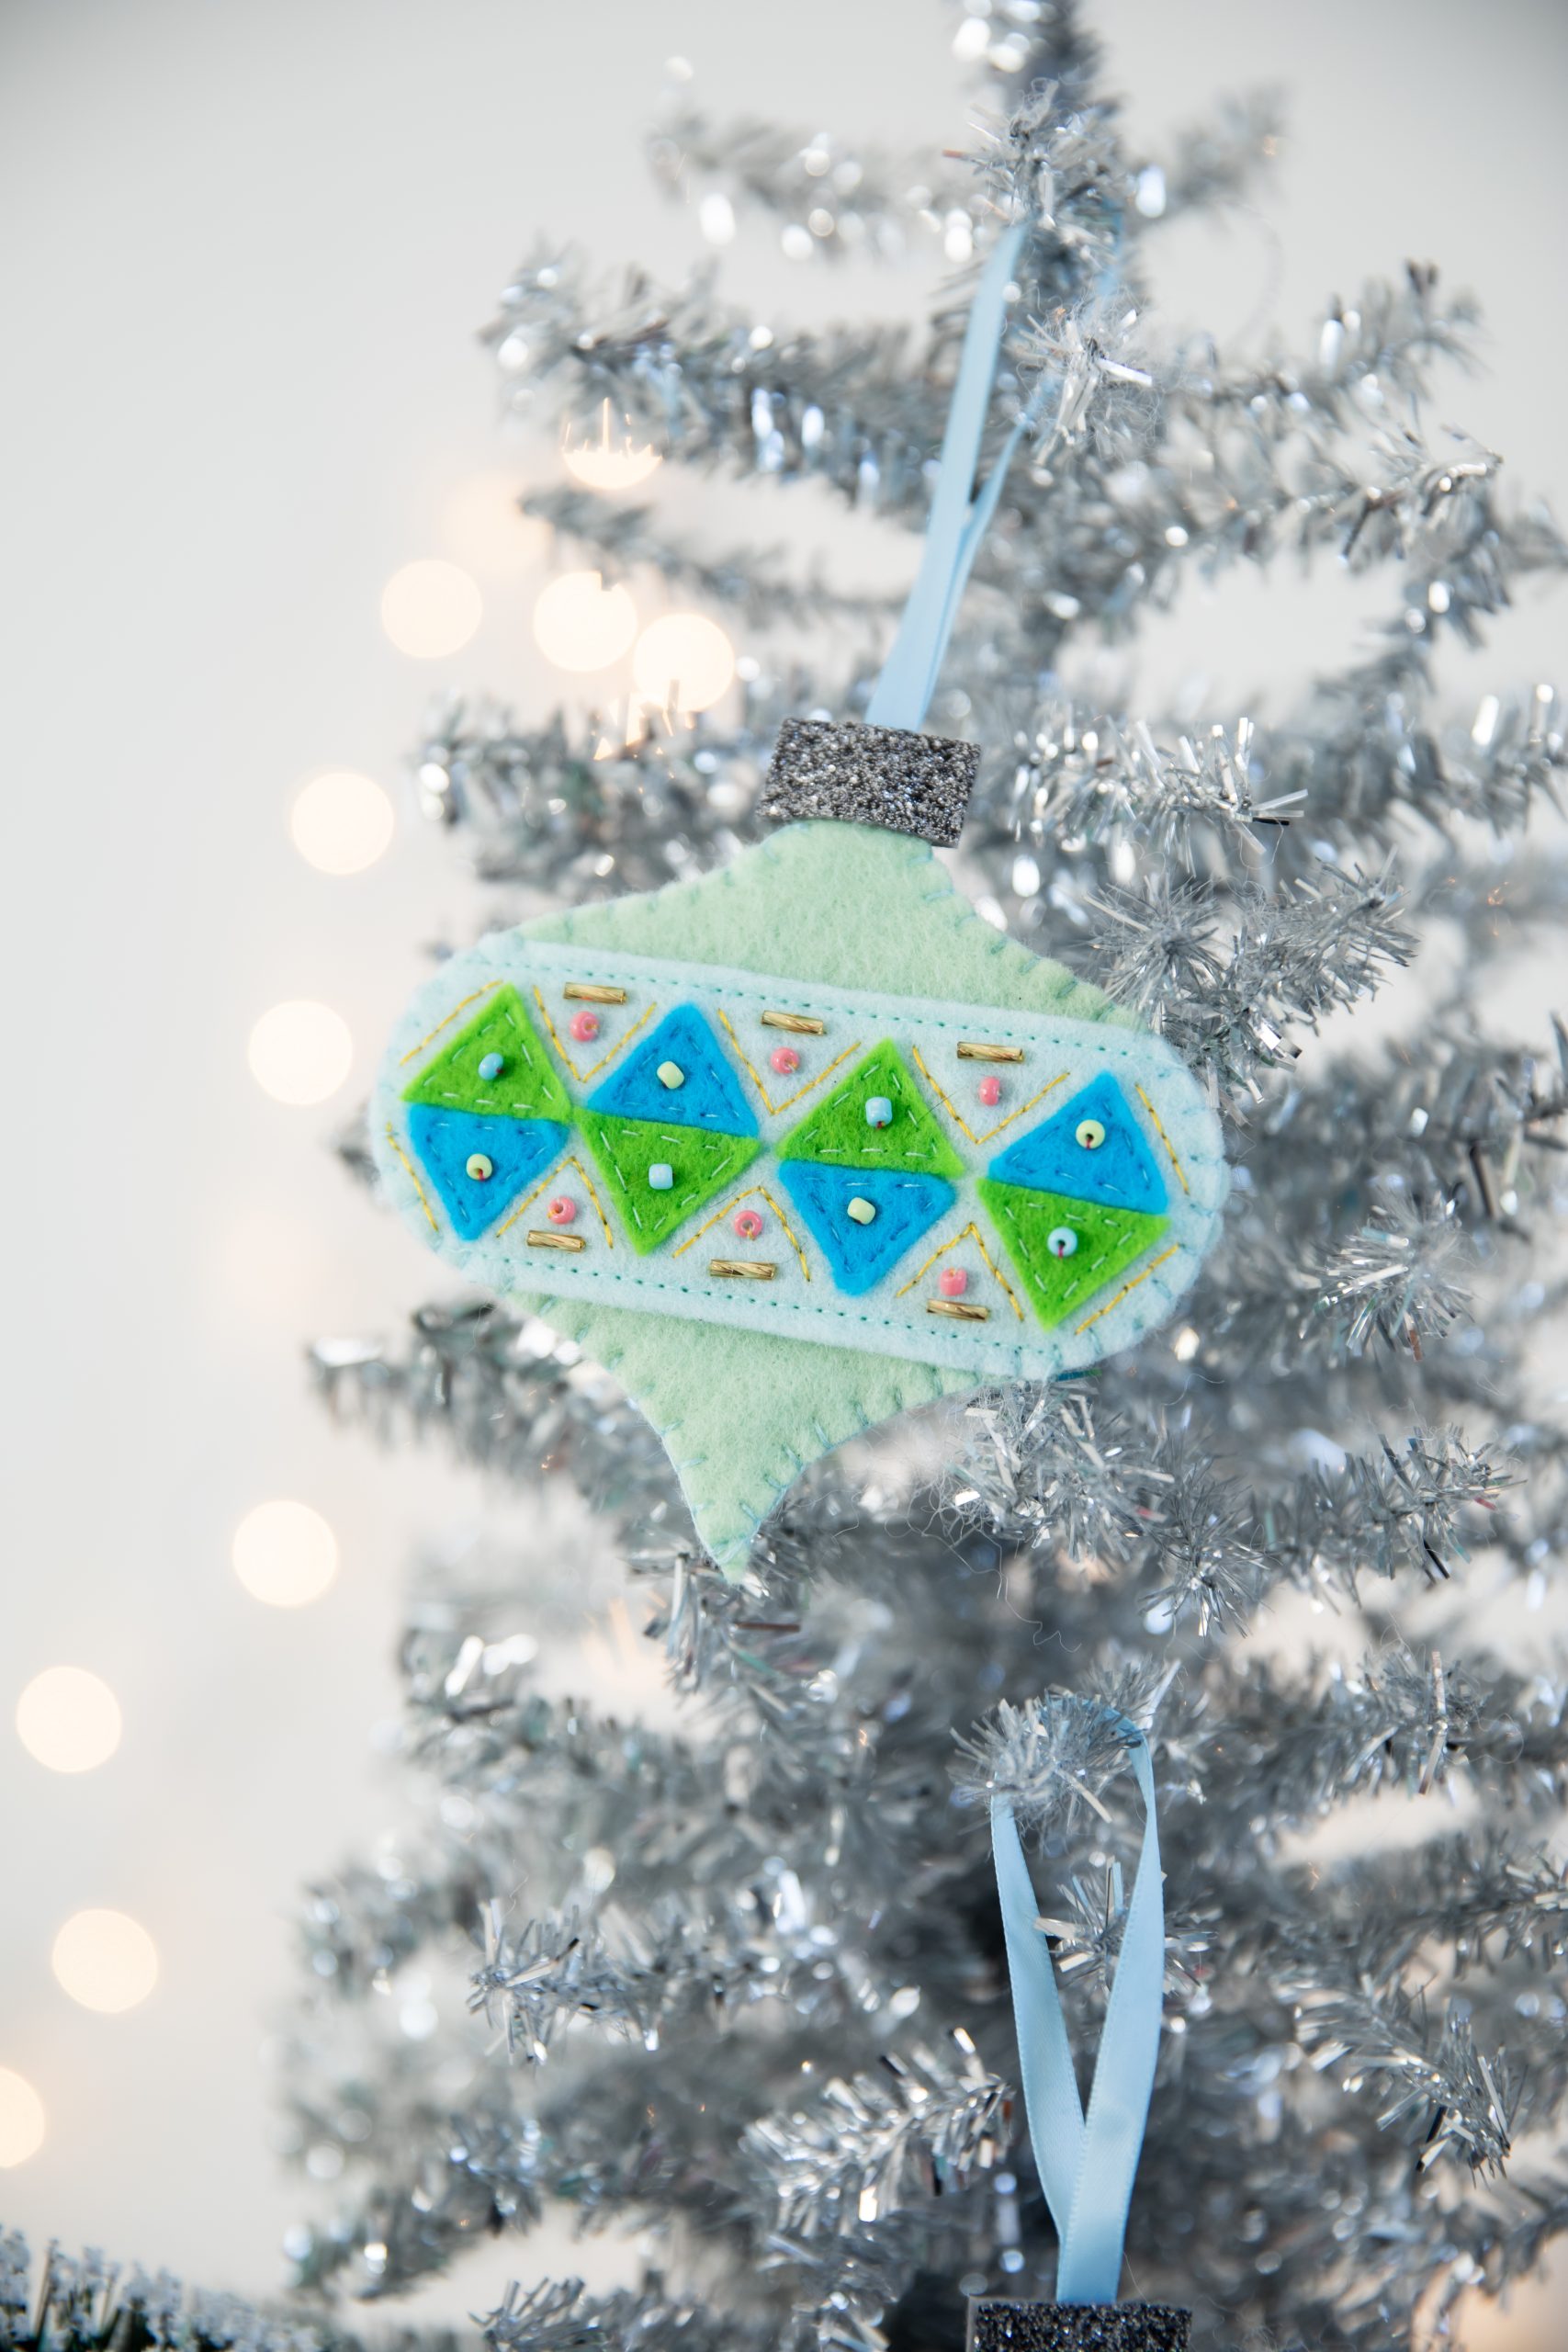
- Next, add the triangles to Design Two. Line them up across the center of each piece, alternating between green and blue as pictured. Hand-stitch each triangle into place using matching thread.

- Add the extra details to both Design Two pieces. Begin by stitching lines of gold backstitch around the edges of each triangle. Then, attach a green seed bead to each blue triangle, and a blue seed bead to each green triangle. Stitch a pink bead into each space between the triangles, then finish with a gold bugle bead above each pink one. Your Design Two pieces are now complete.
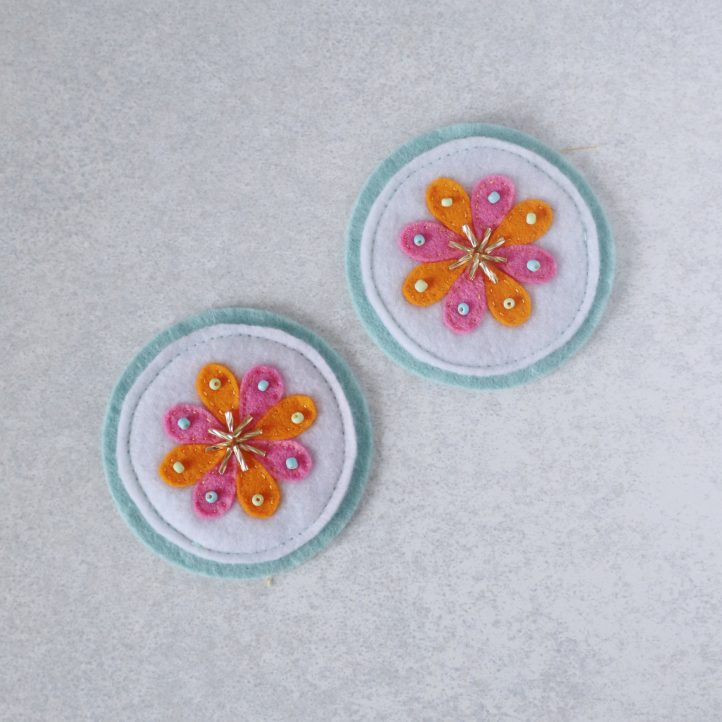
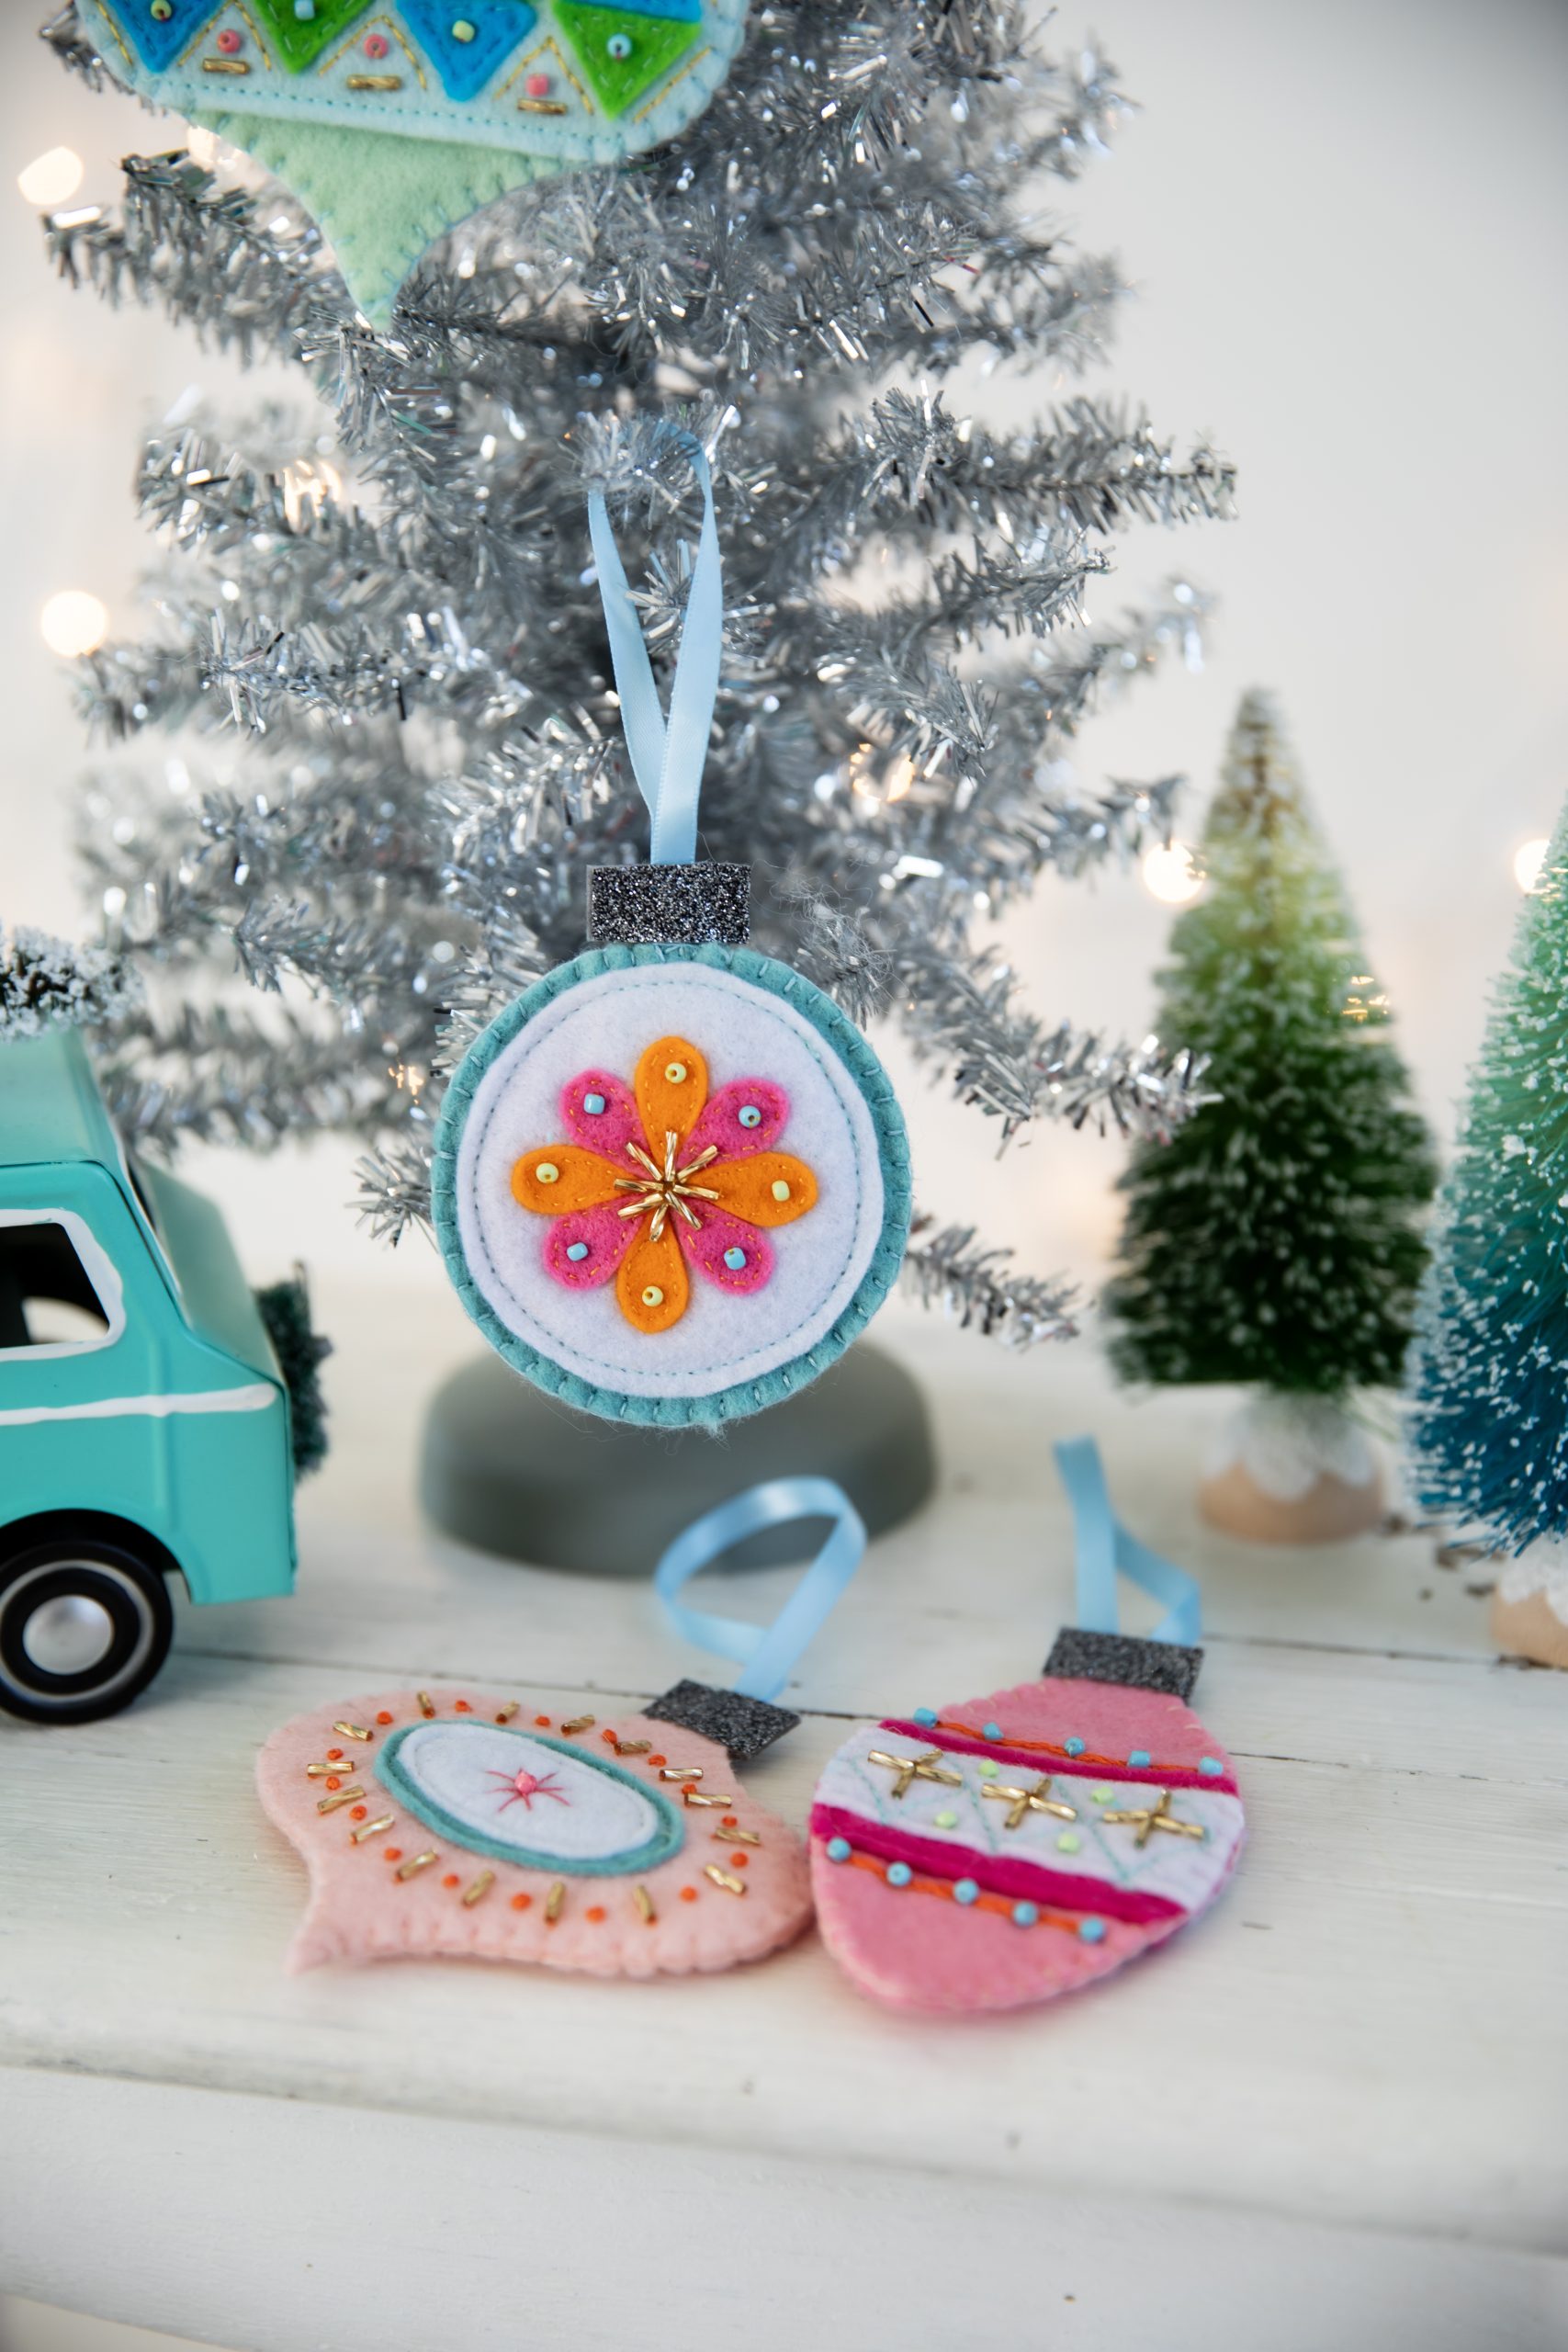
- Now, add the petals to Design Three. Arrange four orange and four pink petals in the center of each piece to create a flower shape, then hand-stitch them into place using golden thread.

- Add beads to your Design Three pieces. Secure eight bugle beads in the center of each to form a star shape. Then, stitch a green seed bead onto each orange petal and a blue seed bead onto each pink petal. Your Design Three pieces are now complete.
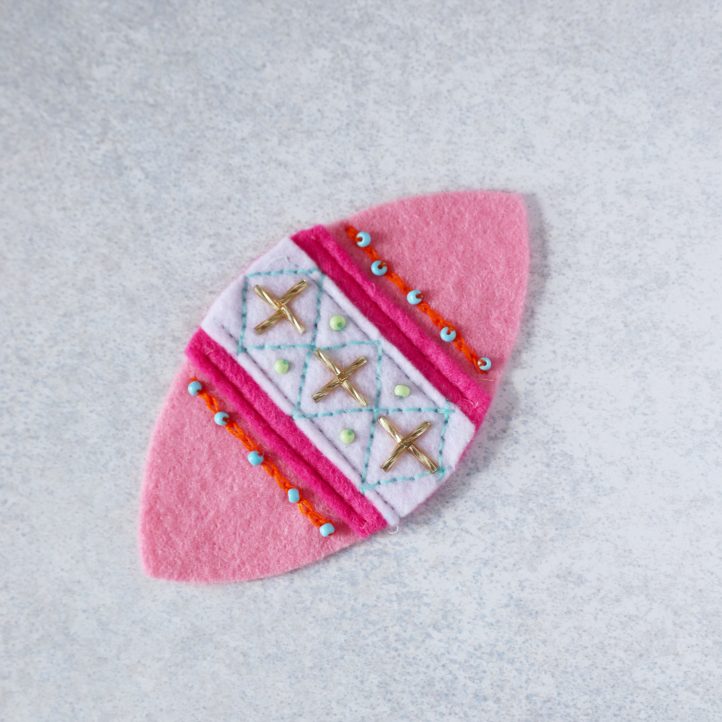
- Finally, decorate Design Four. Backstitch a diamond-shaped design across the center of each piece using two strands of pale blue thread. Attach four green seed beads to the outer sections of the design, and 12 golden bugle beads to the centers, as pictured. Using two strands of bright orange floss, work lines of chain stitch above and below the hot pink sections, then add five blue seed beads to each line. Your Design Four pieces are now complete – it’s time to assemble your ornaments!
- Place each design together in its matching pair, with the right sides facing out and the edges aligned. Work a blanket stitch around the outside of each pair using two strands of a matching colored thread. Make sure to leave the very top of each one open by about 1/4 inch. Cut four 8 inch lengths of ribbon and fold each in half. Insert the raw ends of each ribbon into the gap at the top of one of the ornaments, then stitch across to close the hole and secure the ribbon. Finally, cut eight 3/4 inch × 1/4 inch pieces of gray glitter felt and place them in pairs around the top of each ornament, to cover the ribbon insertion points. Glue these into position to finish.


These are so cute and just what I want for a small tree! Thank you for sharing.
We’re so happy that you enjoyed this pattern. Thank you for your comment 🙂 – Ashley, We Like Sewing