All photos provided by the designer.
Editor Note: Rebecca used a contrasting thread color to make the stitches more visible in photos.
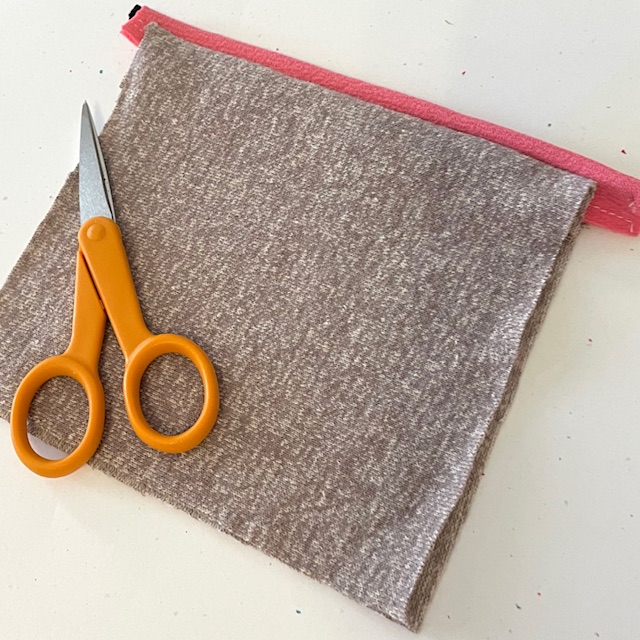
Piping is a beautiful decorative element that adds interest and dimension to many sewing projects! It is often found on home décor and clothing as a trimming in a contrasting color to the main fabric. There are several kinds of materials that can even be used for making piping, including regular cording. Follow along to learn about the types of piping, how to sew it into garments and furnishings, and much more!
What Is Piping?
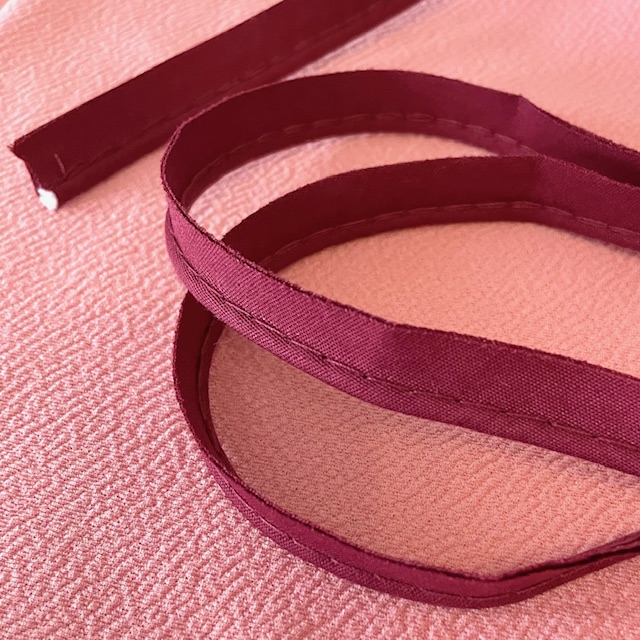
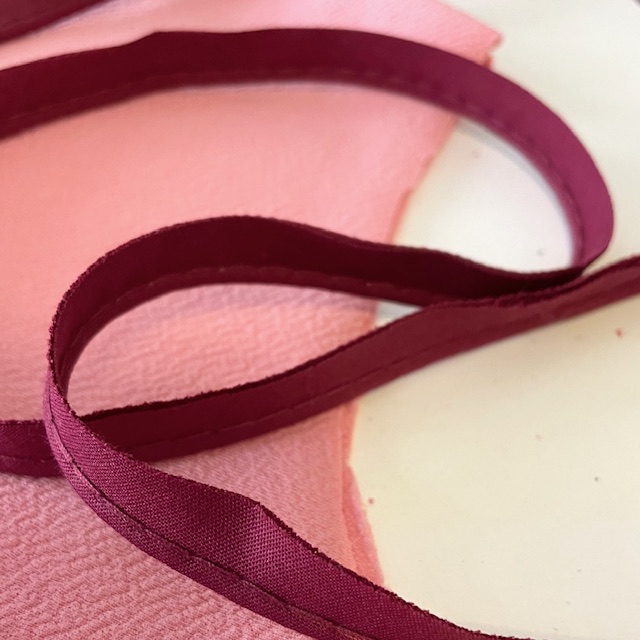
So what exactly is piping in sewing? Piping is a rounded, visible cording wrapped in a fabric edge that is then sewn on. It is usually inserted between two layers of fabric at the seam or along a hem or hole. Sometimes it is braided and twisted, and other times it is smooth in texture. As for material, piping is typically made from polyester or a cotton/polyester blend, though it can consist of foam, leather, fleece, and other more niche fabrics. It can be made from the same fabric as the main part of the project, or a totally different kind. Piping is also occasionally called “cording tape,” piping tape,” or “welting” (for upholstery).
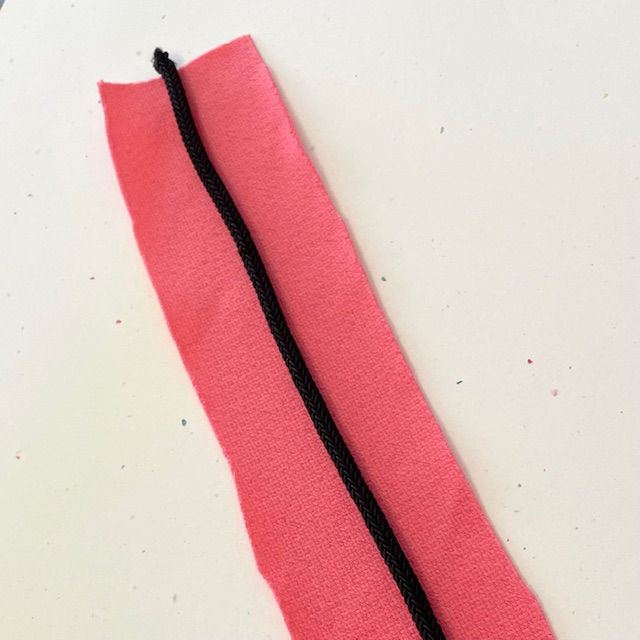
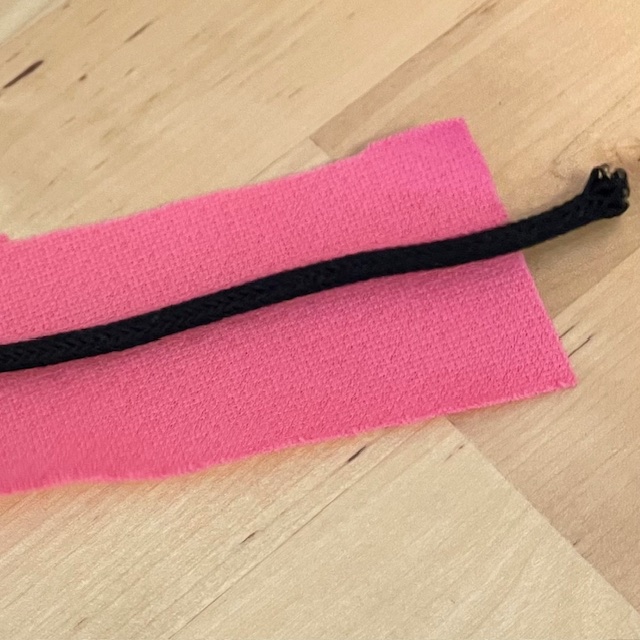
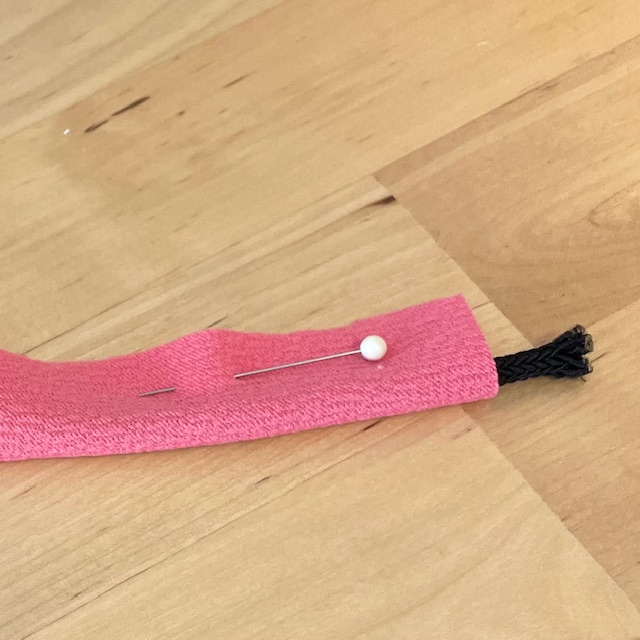
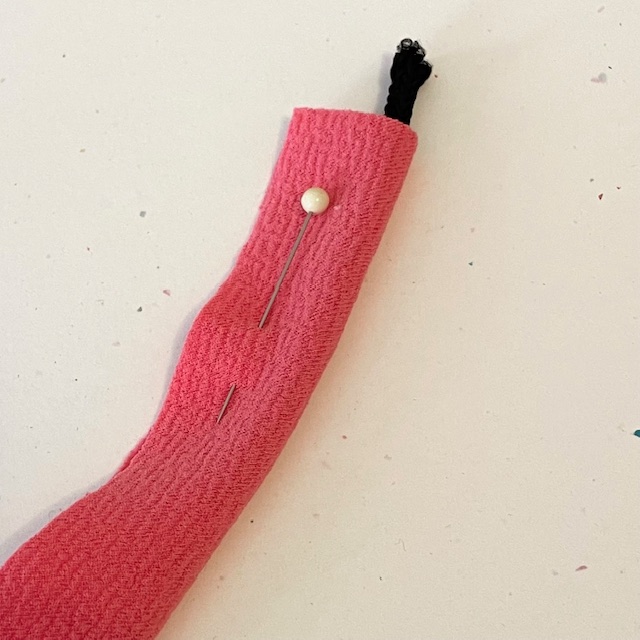
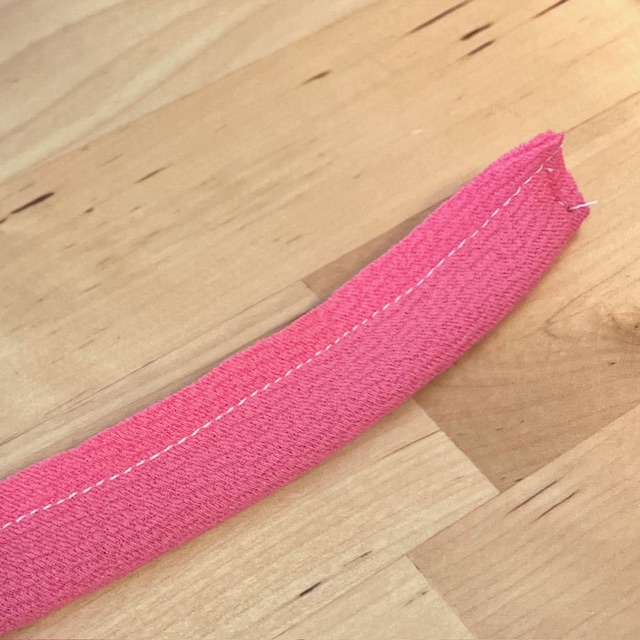
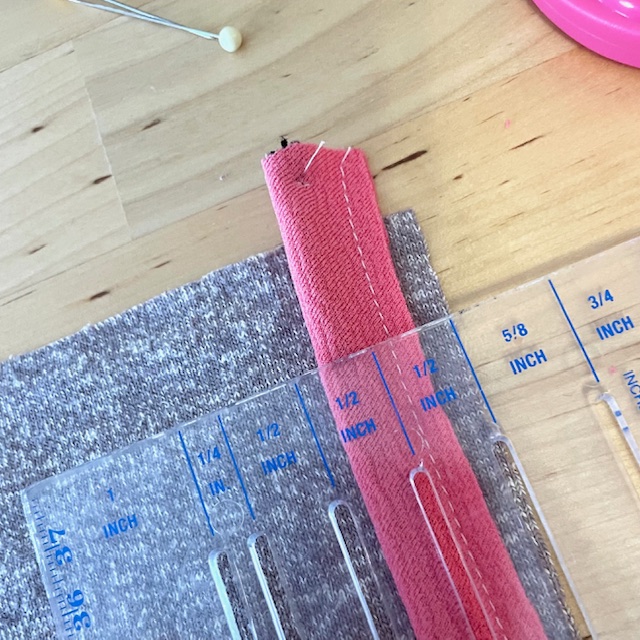
A few sewing supplies that don’t have an attached edge can be used as piping as well, including twisted cording or rope. If needed, take a length of cording or thin rope and encase it within a strip of fabric, sewing along the edge to secure it. This creates the “pipe” and a flat edge (or “tab”) and can now be inserted just like the pre-made types! The stitch line should be close to the pipe but not so close that it will show through the other side. A bias-cut fabric strip should be used when the piping needs a little bit of stretch, while straight-across cuts are fine if no stretch is needed.

When to Use Piping
Piping can commonly be found on clothing (like shirts, pants, and skirts), home décor (pillows and upholstery), and fashion accessories (purses and gloves). It is usually seen as more of a decorative element that is attached to a sewing project, but it often does serve a functional purpose! For example, piping surrounding the edges of a pillow will prevent the fraying of the main fabric at the corners, and it is much easier to redo the piping than to replace or patch the cloth. Piping can also edge pockets, being both beautiful and useful by helping to stop wear and stretching. It can also add a needed pop of color to projects!
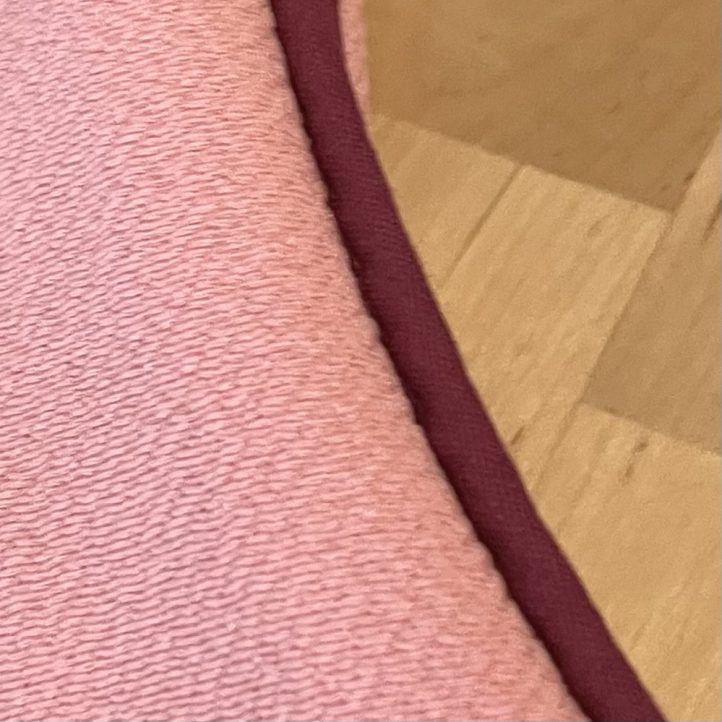
On garments, piping is typically placed along necklines and even arm holes to prevent stretching. It can also be used as trim on dresses and pants to accentuate long lines, or even as a waistband trim. Piping is slightly three-dimensional and raised, adding definition to an item of clothing or furnishing by drawing the eye along these contrasting lines. In fine couture fashion, it can even be used in swirling, detailed, and geometric patterns for maximum effect.

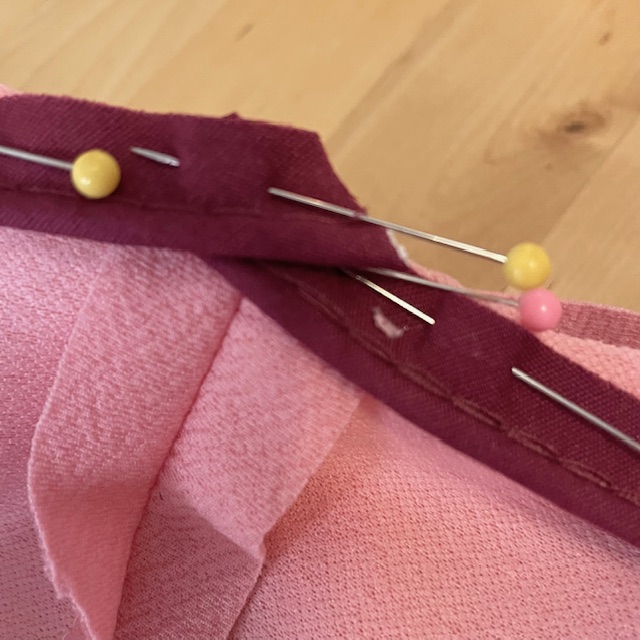
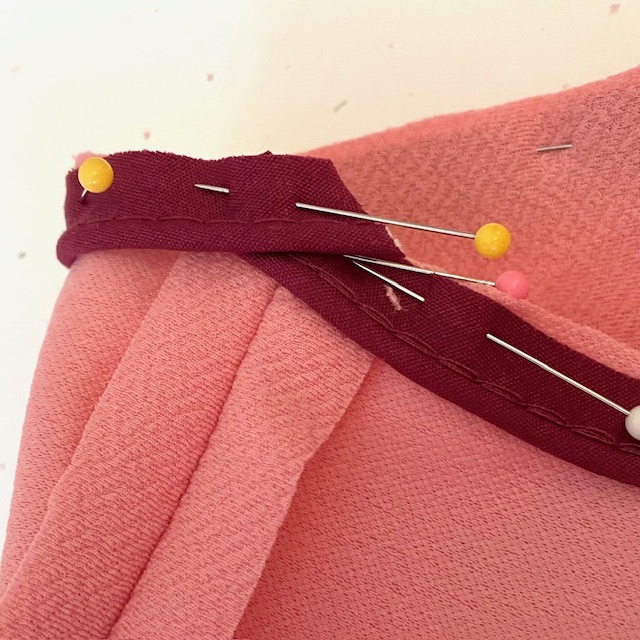
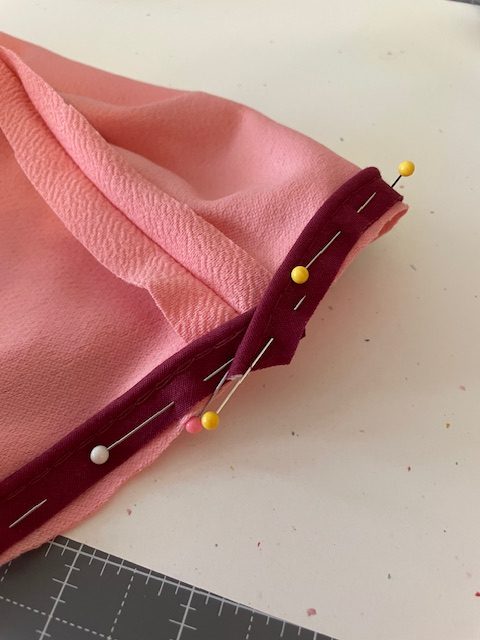


Pinning Piping On
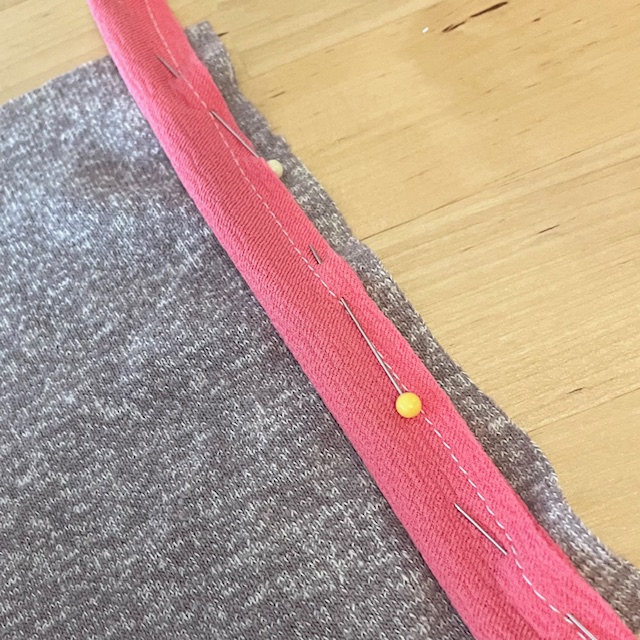
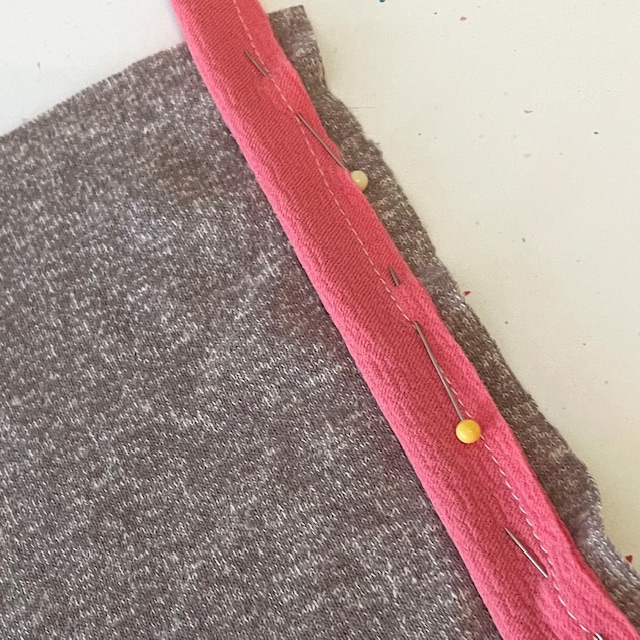
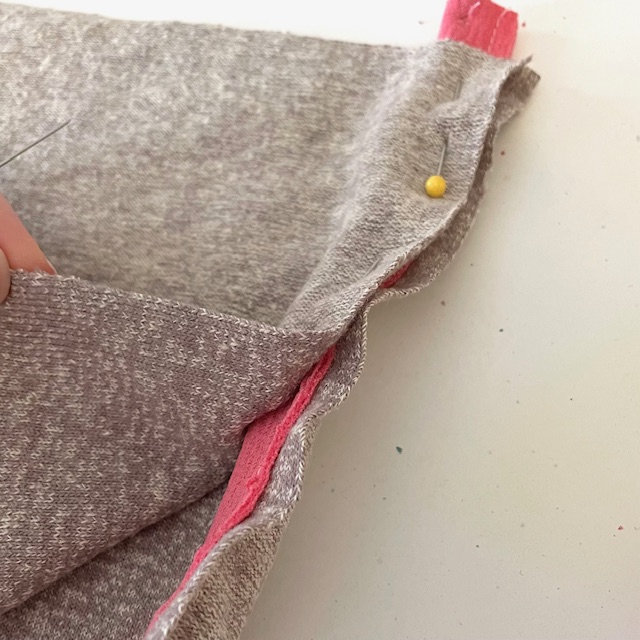
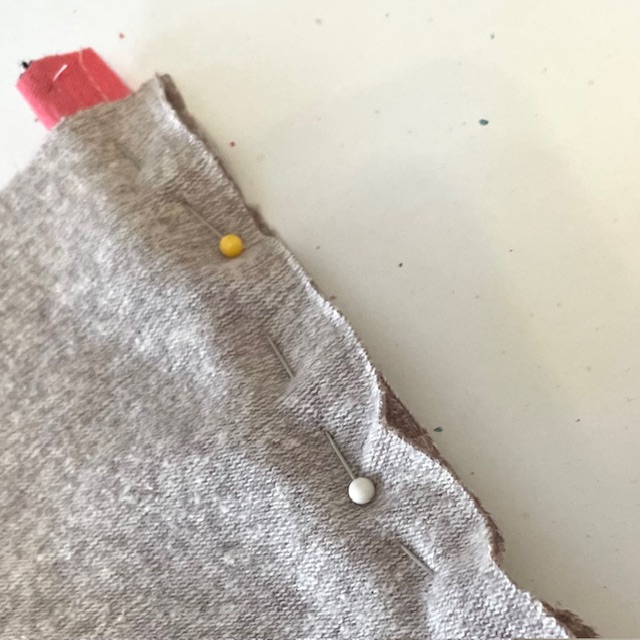
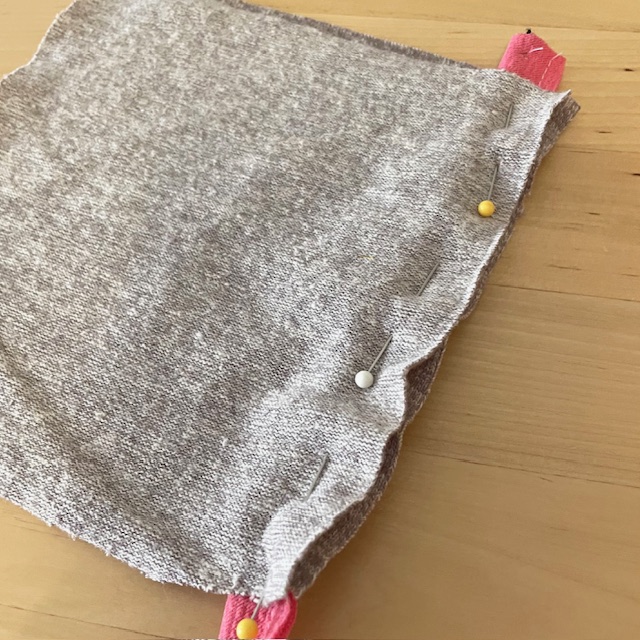
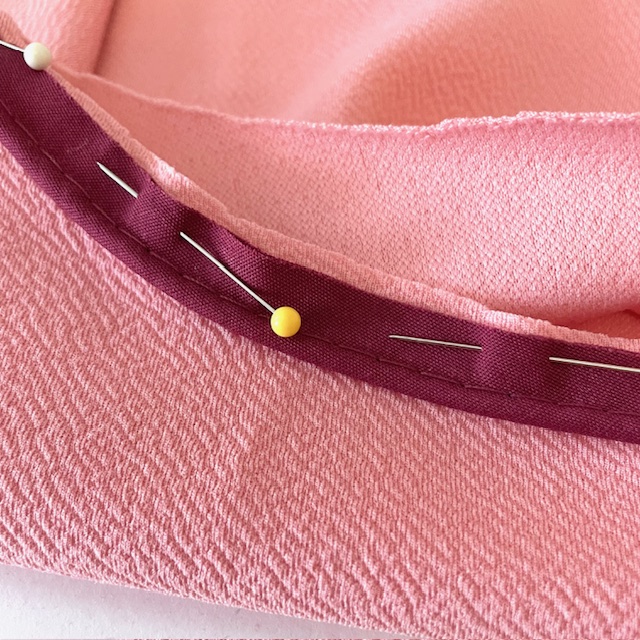
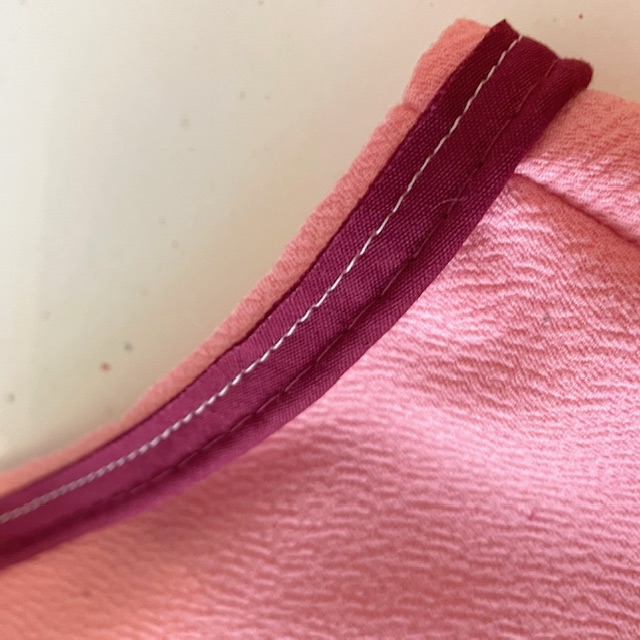
Securing the piping to the right side of the fabric before sewing is essential. This can be done with pins or clips that are kept within the seam allowance area (so the piping isn’t sewn and damaged). The piping’s rounded edge should be placed on the right side of the fabric, facing towards the inside. The piping’s flat tab side should run parallel to the cut fabric’s raw outer edge.
When pinning piping on, always be sure that it’s going the correct way as it can have a top and a bottom. Pick one direction and stay consistent within the whole project. Also, remember to double-check the seam allowances before sewing. Sometimes the piping is thinner and there is excess fabric in the seam allowance. In this case, the main fabric can be trimmed off (but this is personal preference). The piping should stick out just enough to be visible from the right side, but not so much that the stitch lines show from the front.
Sewing Piping by Machine
In almost all situations, piping should be sewn by machine rather than by hand. This will create a more uniform, even look and prevent the piping from becoming wavy or distorted. It also saves time, as piping is often adorning at least a few feet of a sewing project.
Working with piping is similar to working with other kinds of trim, including lace and fringe. As for supplies needed, a piping sewing foot (with a groove that the piping can feed through) can be very helpful, but is not essential in most cases. A zipper foot can also be used if the piping is narrow or the space under the sewing machine is limited.
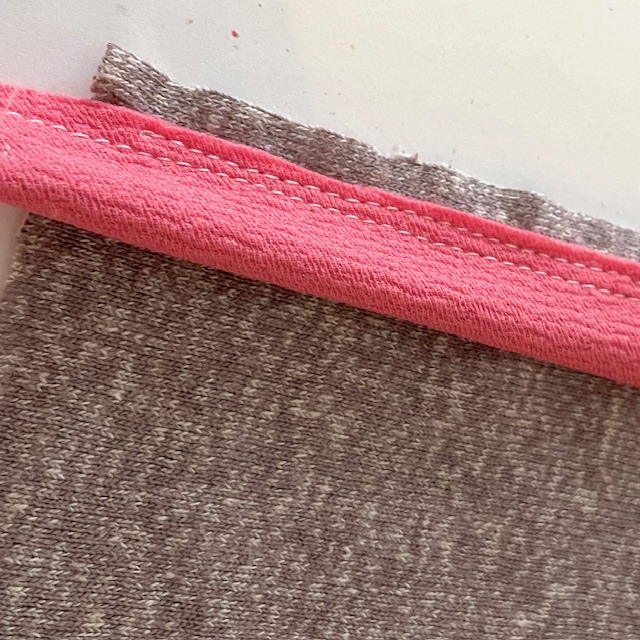
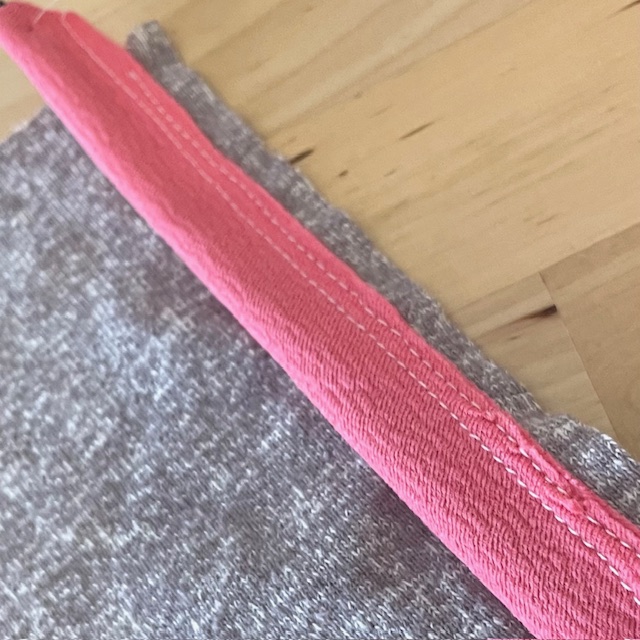
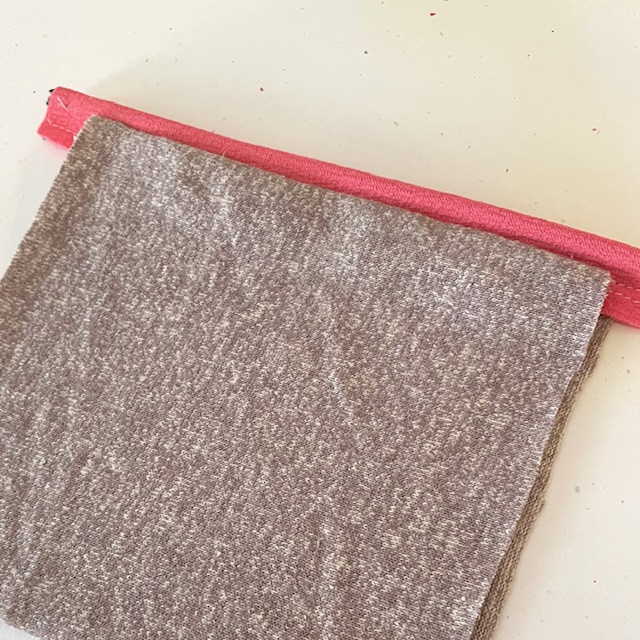
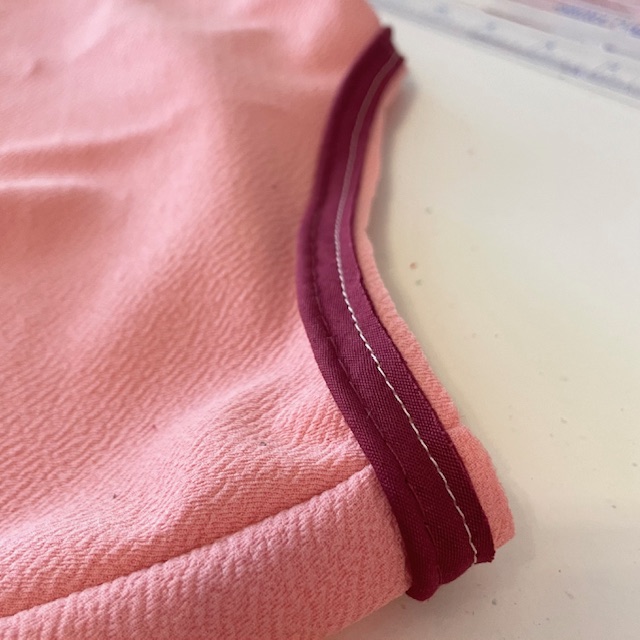
Start by basting the piping’s fabric edge onto one side of the fabric (with the right side or front of the fabric facing upwards). Basting should be done with a long, simple straight stitch that stays well within the seam allowance’s margins. Its main function is to hold the piping in place for sewing. After basting, check the measurements and make sure the piping is even and smooth. Next, add the other fabric piece (with the right side down) and sew with a standard (non-basting) stitch along the seam line. This process will sandwich the piping between the two layers of cloth. It will now only be visible when the item is turned so the right side is outwards.
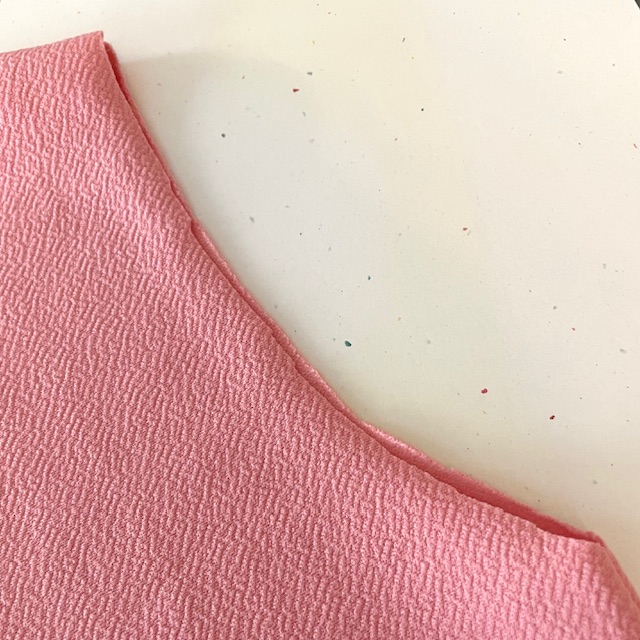
When attaching piping, sew close to the edge but not so far inward that it catches the piping or is visible from the front. Sew evenly, slowly, and carefully to keep the piping neat and tidy. If the project involves a curve, small notches can be cut slightly into the seam allowance to provide some ease.
Sewing Piping by Hand
Most prefer to insert piping by machine for the reasons mentioned above, but it can definitely be done by hand. The process is the same as sewing by machine, starting with basting the piping on (this time by hand). Attaching piping this way will take longer, and it can be more difficult to get an even application. Being precise and careful when stitching on piping by hand can produce the best result. Always use a new hand-sewing needle and the correct thread when working with piping.
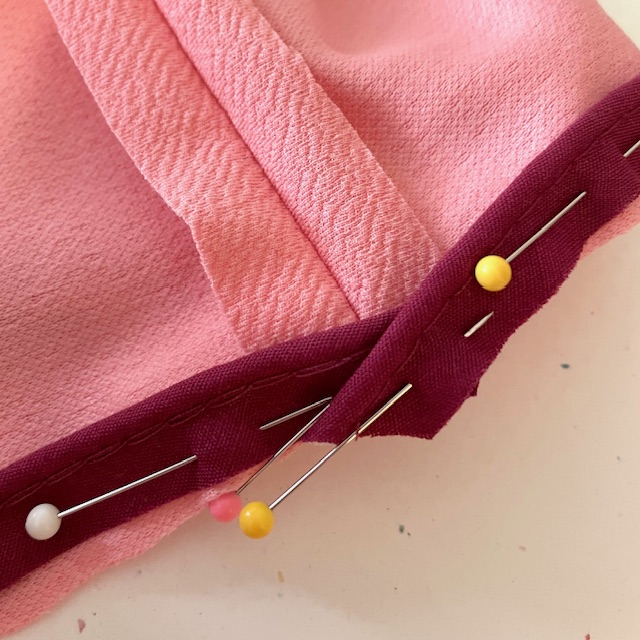
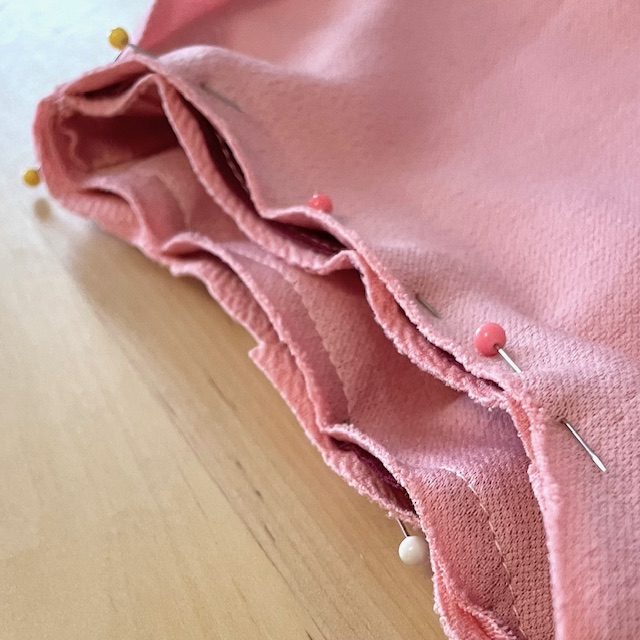
Joining Piping Ends Together
The most challenging part of adding piping is closing the overlapping ends (if they meet). This applies specifically to rounded areas and curves that are piped. Try to keep this join in an inconspicuous place, starting (and ending) the piping at the least obvious spot on the garment or other item.
Angle overlapping piping ends towards the cut edge or seam so they are less noticeable. This can be hidden in areas like a side seam or the bottom of an armhole. Another option is to snip the fabric on the piping open slightly and then overlap it with the other end. The interior cording might also need to be trimmed as well for a smooth look.
Piping Cleaning and Care
As it can be delicate, items with piping should be handled and washed with care. Too much repeated machine washing and drying can noticeably warp or twist the piping. Hand washing and air drying is recommended for this reason. If the piping itself needs to be washed, spot-clean it if possible. For piping that is very frayed or damaged, it might be best to remove and replace it completely.
Use these tips next time you’re adding piping to a sewing project!