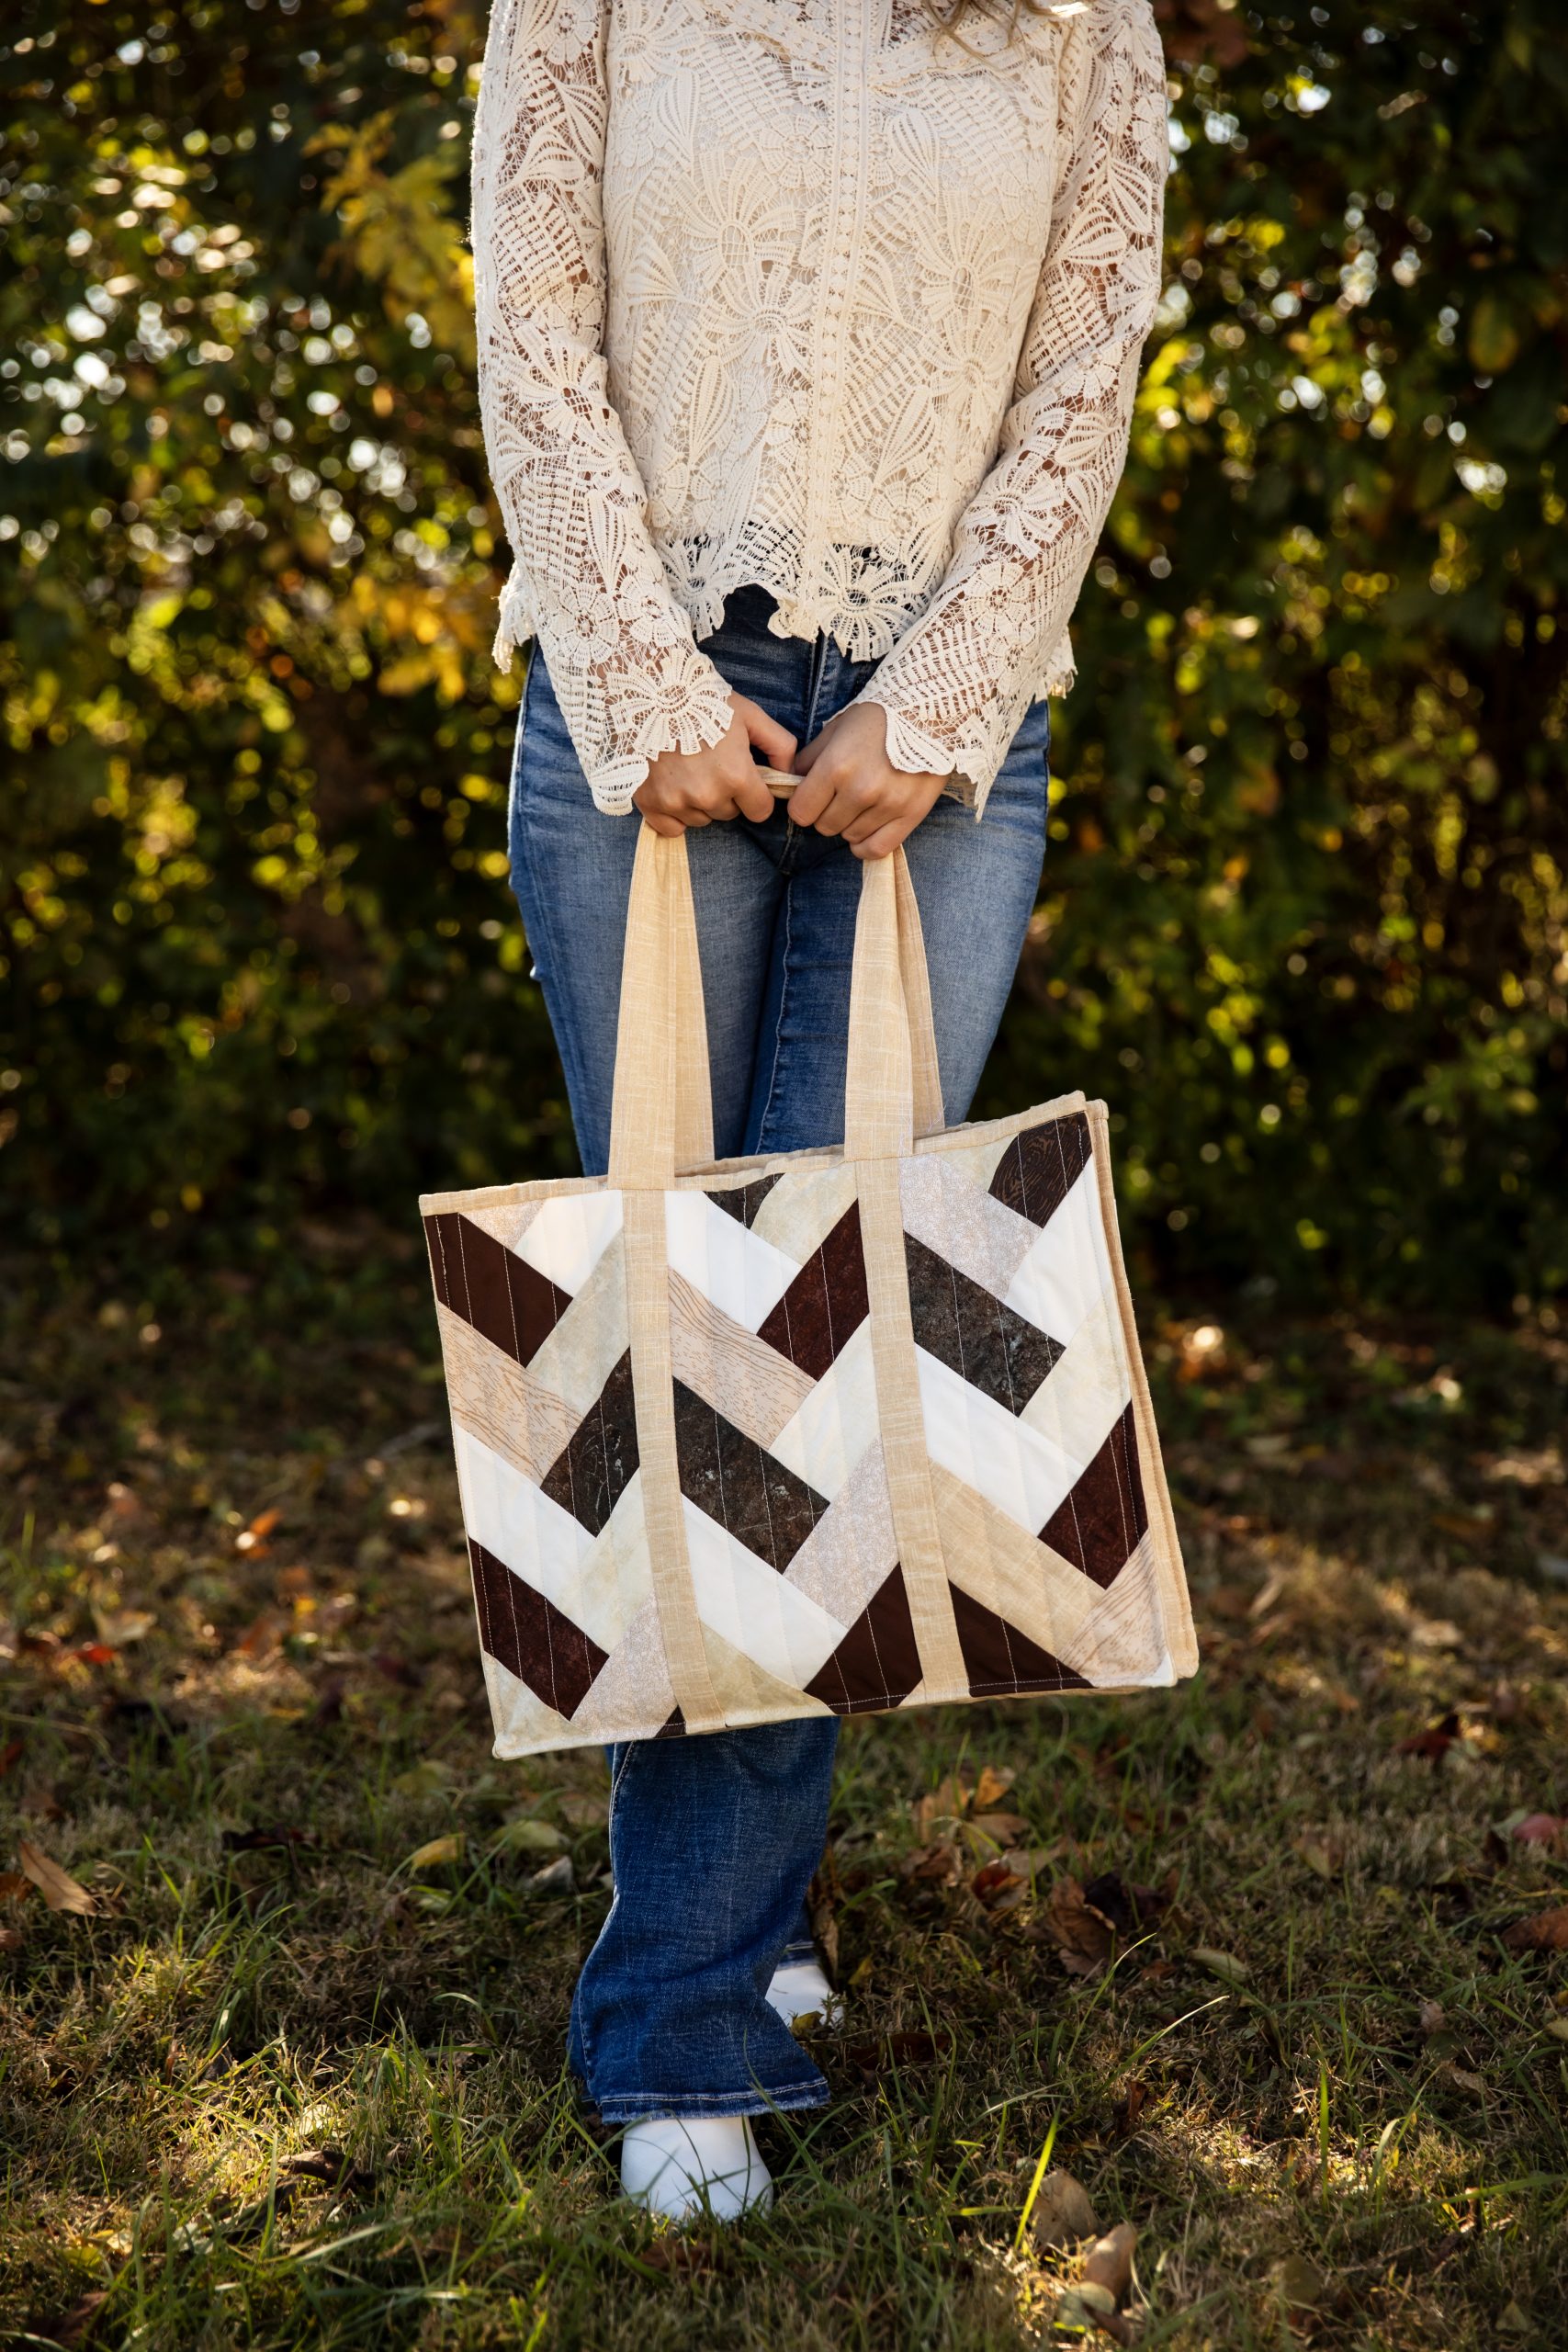
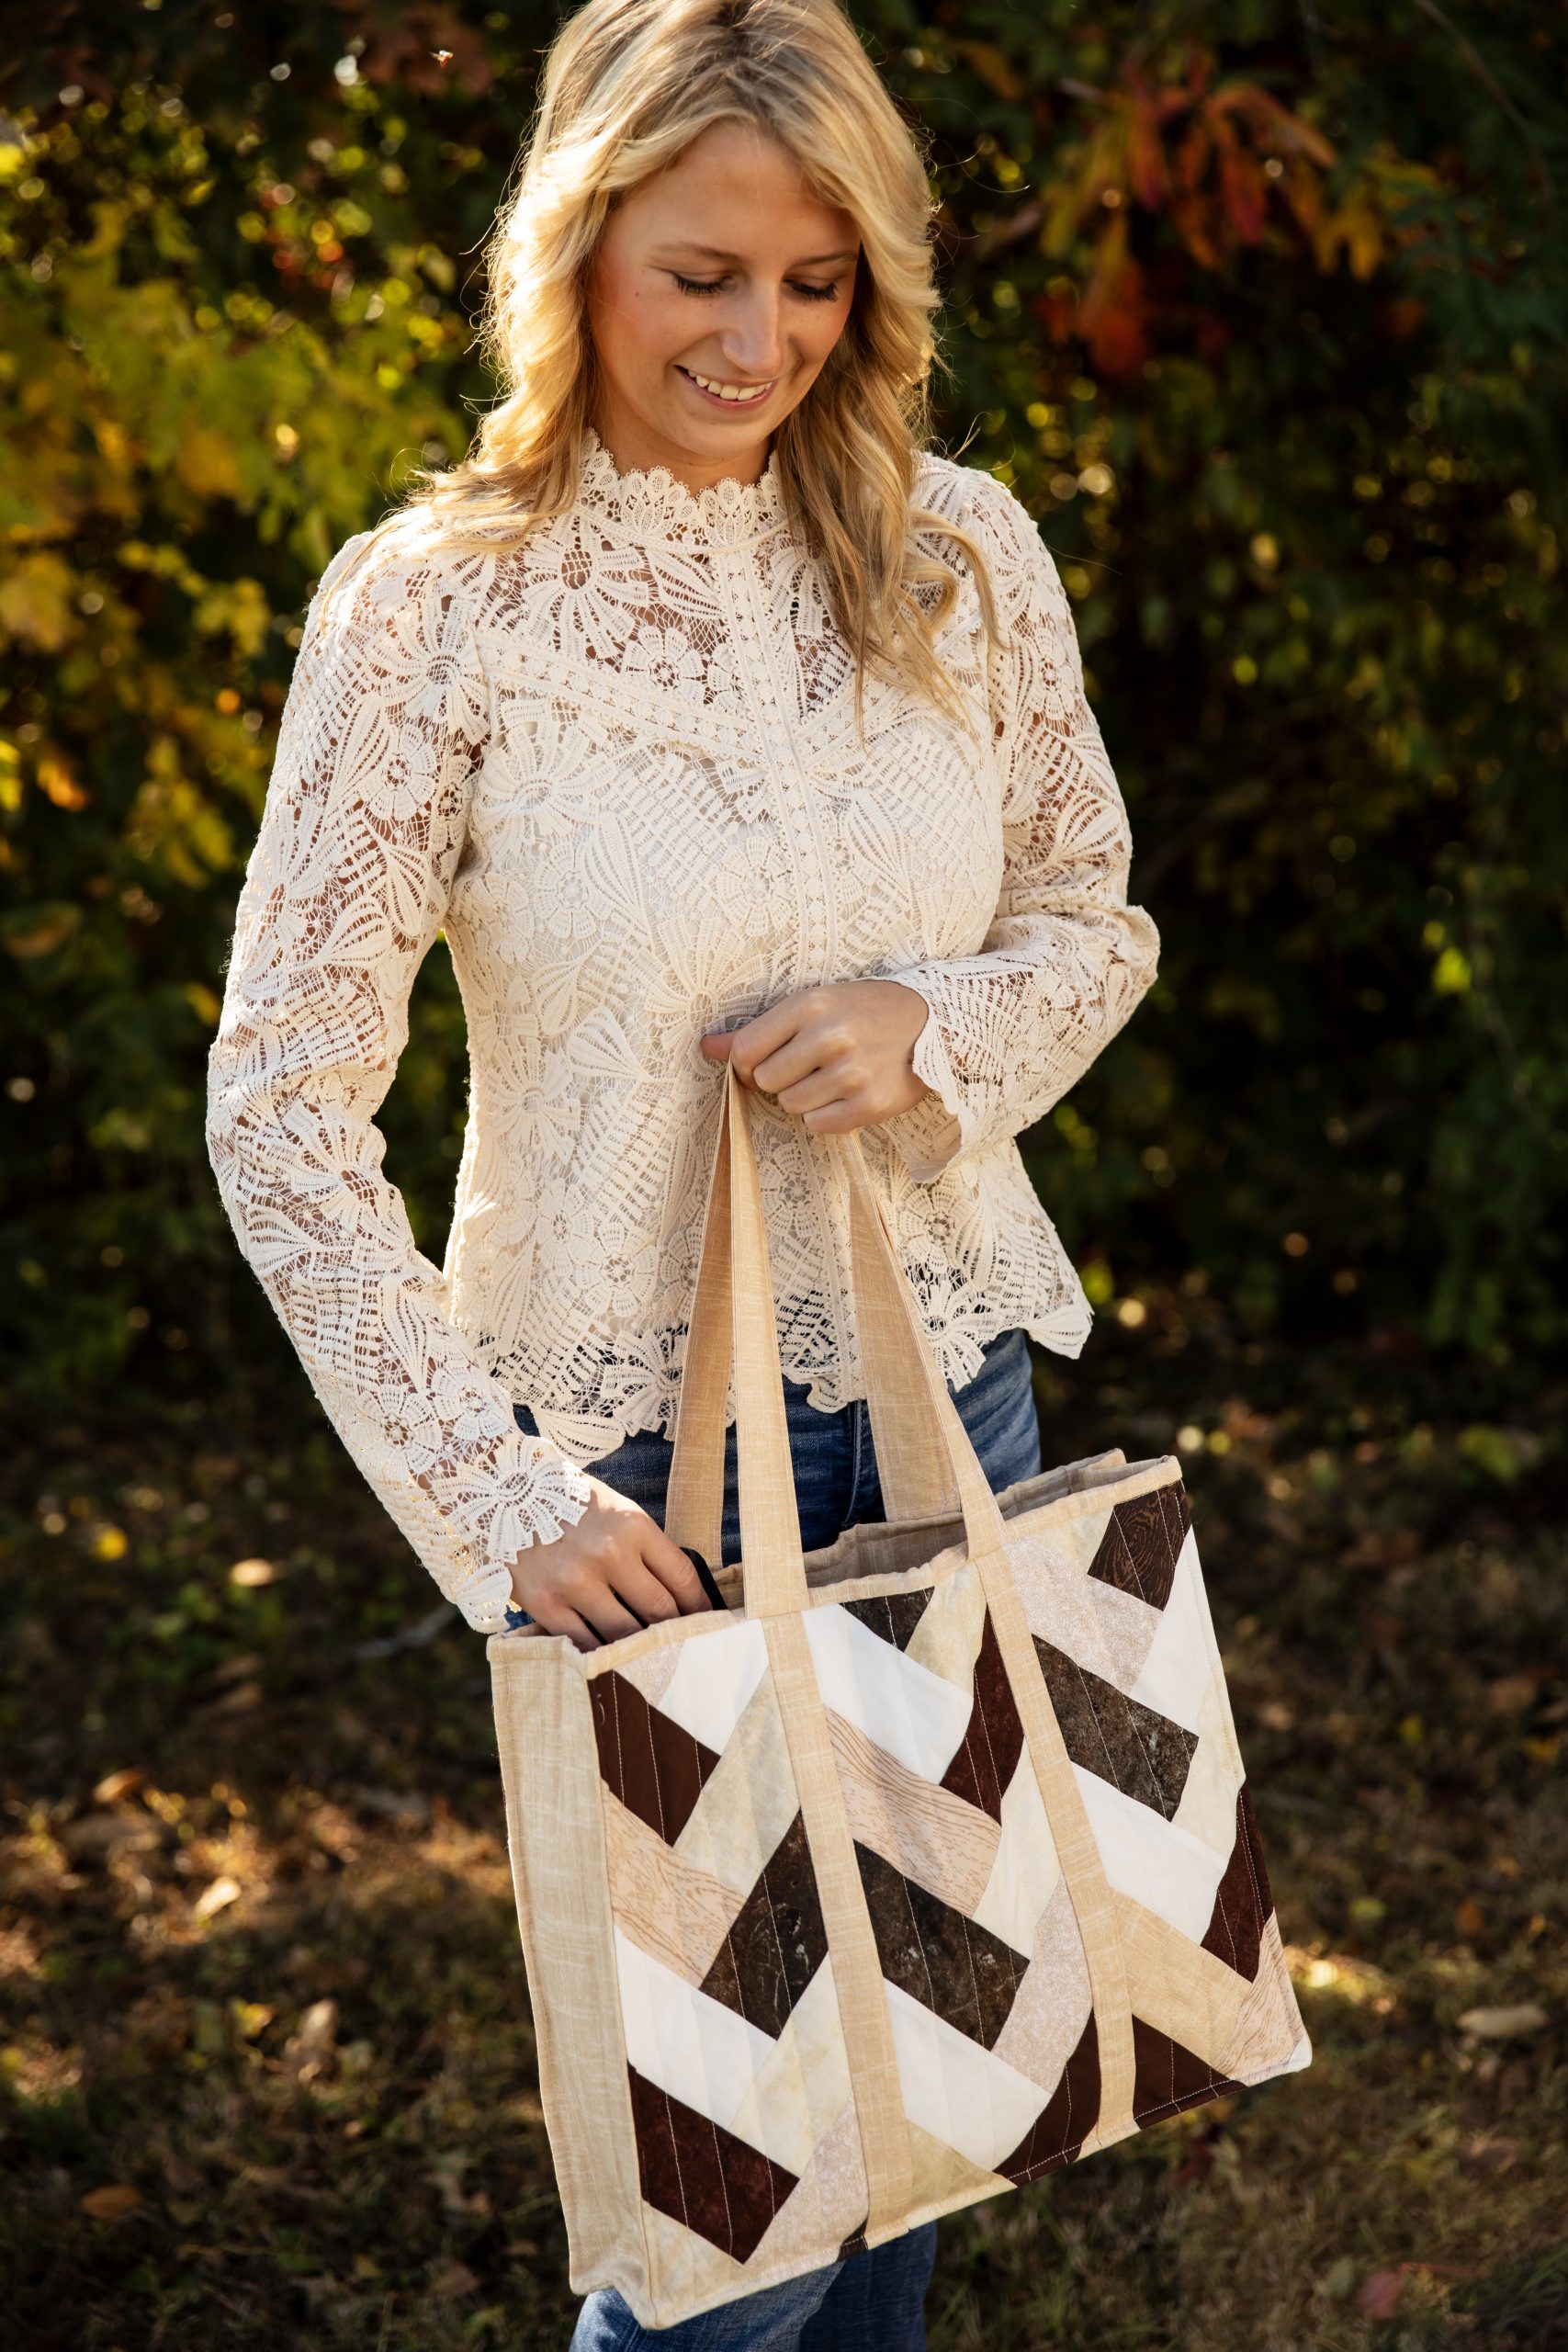
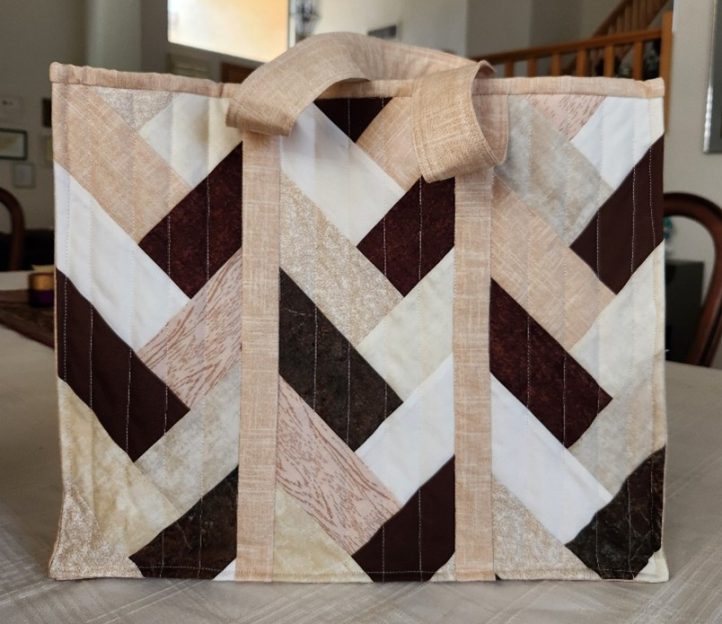
On the hunt for a bag that goes with everything in your closet? Look no further than this roomy tote bag pattern from Sujata Ryan! Made in trendy neutrals like beige and mocha, this quilted bag pattern features a pioneer braid design and is large enough to hold groceries, library books, and any necessities you need on your daily travels. We love the idea of gifting this bag to the new mom in your life as a chic and spacious diaper bag or for the college student who wants a stylish alternative to bulky backpacks.
Designer Note: WOF = width of fabric
Materials:
Note: in. = inches, yd. = yards
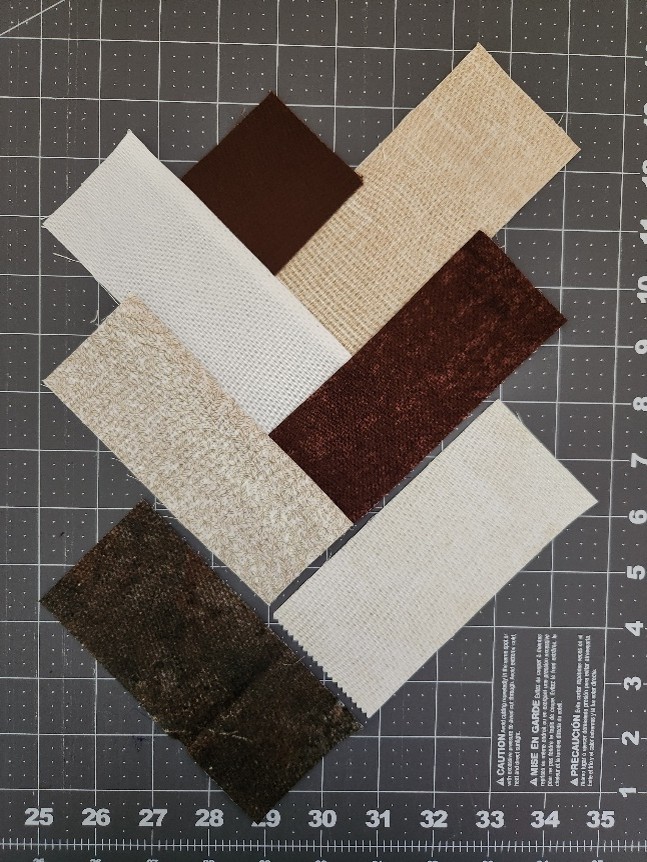
- 1/4 yd. each of 6 neutral fabrics (cream, beige, gold, taupe, brown, espresso, etc.), either solid or subtly printed
- OR Use scraps of neutral fabrics, needing a total of 72 pieces measuring 2-1/2 in. x 5-1.2 in. each
- 1-1/4 yd. gold or beige fabric
- 3/4 yd. lightweight neutral cloth (like muslin)
- Pieces of batting cut to the following sizes: Two 17-1/2 in. x 14 in., two 4 in. x 14 in., two 22 in. x 2 in.
Tools:
- Water soluble marker
- Disappearing ink marker
- Walking foot for machine quilting (optional)
Sewing Instructions:
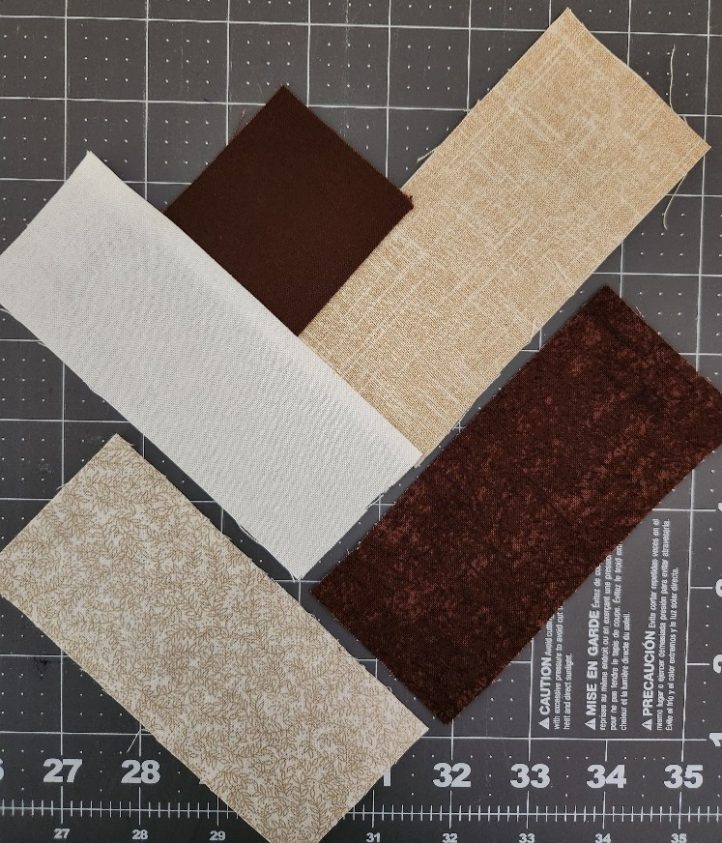
- Cut strips for braided sections: If using yardage, cut 2 strips each 2-1/2 in. wide from each of the six neutral fabrics. Cut each strip into pieces measuring 2-1/2 in. x 5-1/2 in. Cut a total of 12 pieces of each color.
- Cut 6 squares each 2-1/2 in. x 2-1/2 in.

- Cut 6 squares each 2-1/2 in. x 2-1/2 in.
- Cut the gold or beige fabric as shown in the diagram below.
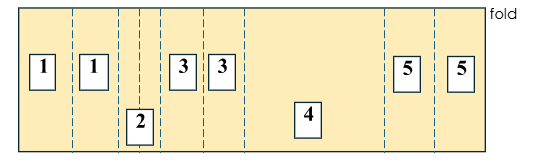
- Cut 2 strips 4-1/2 in. x WOF, then cut each to 4-1/2 in. x 22 in. for shoulder straps.
- Cut 2 strips 1-1/2 in. x WOF, then cut each to make 4 pieces 1-1/2 in. x 14 in. for insets between braided sections.
- Cut 2 strips 4 in. x WOF, then cut each to make 4 pieces 4 in. x 14 in. for the side panels of the bag and the lining.
- Cut 1 strip 14 in. x WOF, then cut it to make 2 pieces 14 in. x 17-1/2 in. for the front and back lining.
- Cut 2 strips 4-1/2 in. x WOF then cut to make 2 pieces 17-1/2 in. x 4-1/2 in. for the bottom of the bag and for the bottom of the lining.
- Cut the lightweight neutral muslin as shown in the diagram below.
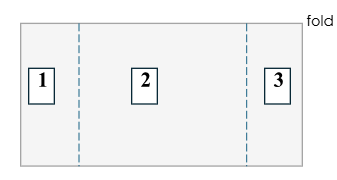
- Cut 1 strip 4 in. x WOF, then cut the strip to make 2 pieces 4 in. x 14 in., as the backing for quilting the side panels.
- Cut 1 strip 14 in. x WOF, then cut it to make 2 pieces 14 in. x 17-1/2 in. for the backing for quilting the front and back of the bag.
- Cut 1 strip 4-1/2 in. x WOF, then cut it to make a piece 17-1/2 in x 4-1/2 in. for the backing for quilting the bottom of the bag.
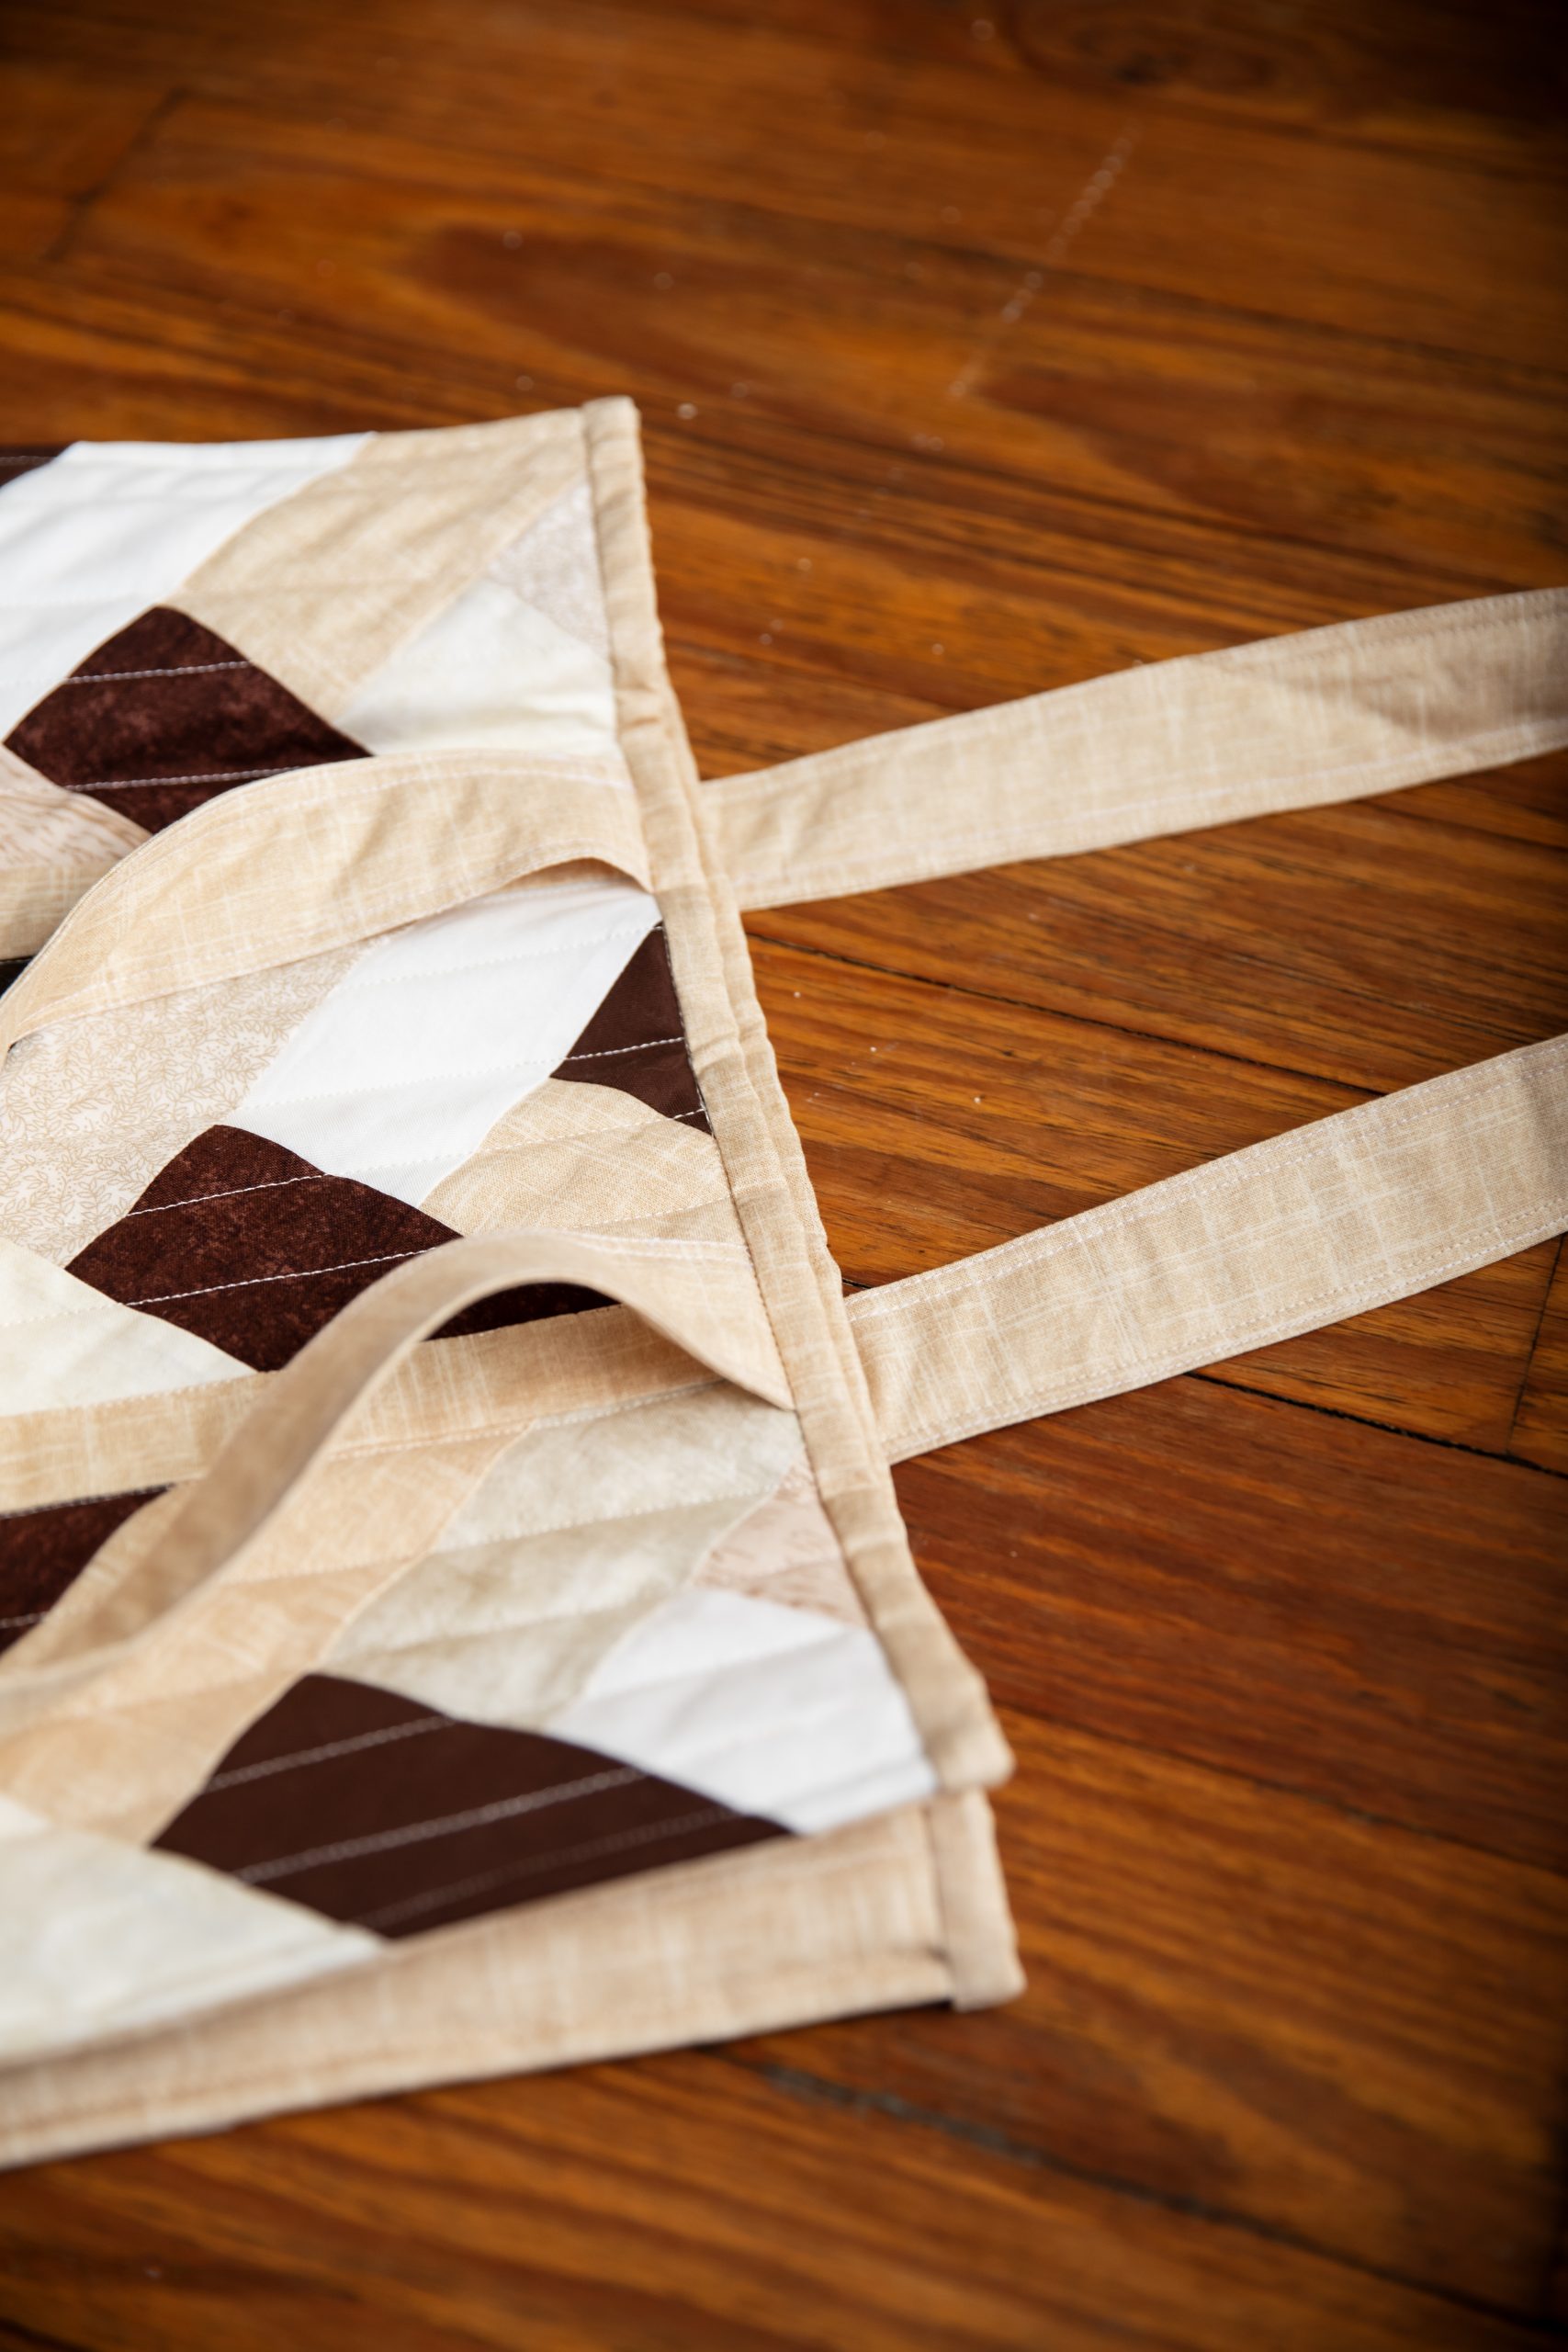
- Sew the shoulder straps.
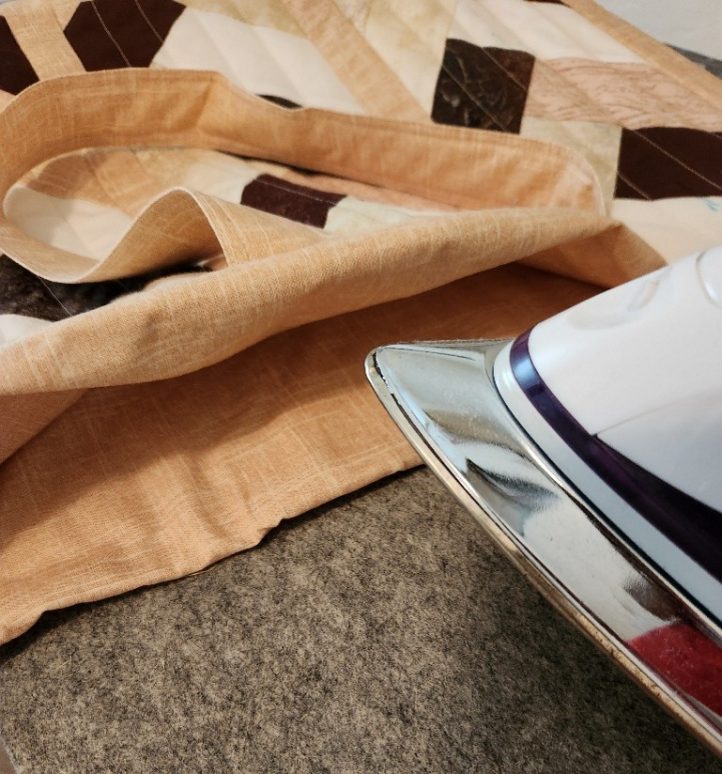
- Press under 1/4 in. on the long edges of each 22 in. x 4-1/2 in. strip.
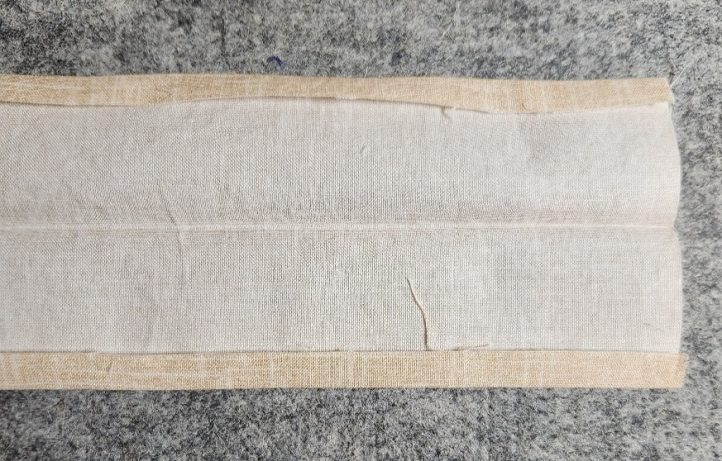
- Press each strap in half lengthwise. Open out and place a strip of batting along the fold. Overlap the 1/4 in. turned under edge over the batting.
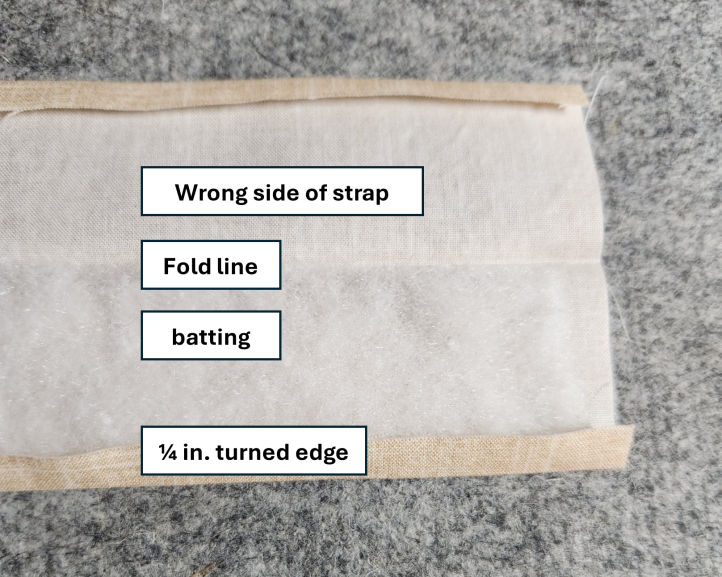
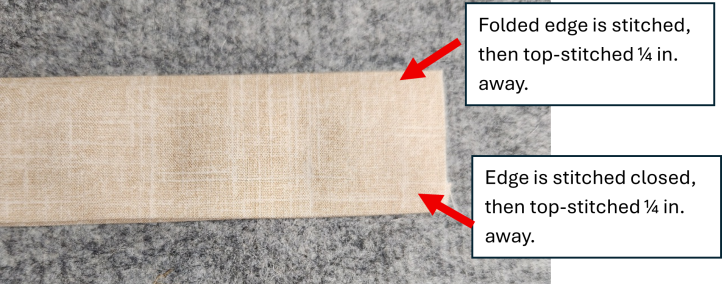
- Fold the top half of the strap over the batting. Pin the edges closed. Stitch close to the edge, then stitch again 1/4 in. from first stitching. Repeat on the other side of each strap.
- Press under 1/4 in. on the long edges of each 22 in. x 4-1/2 in. strip.
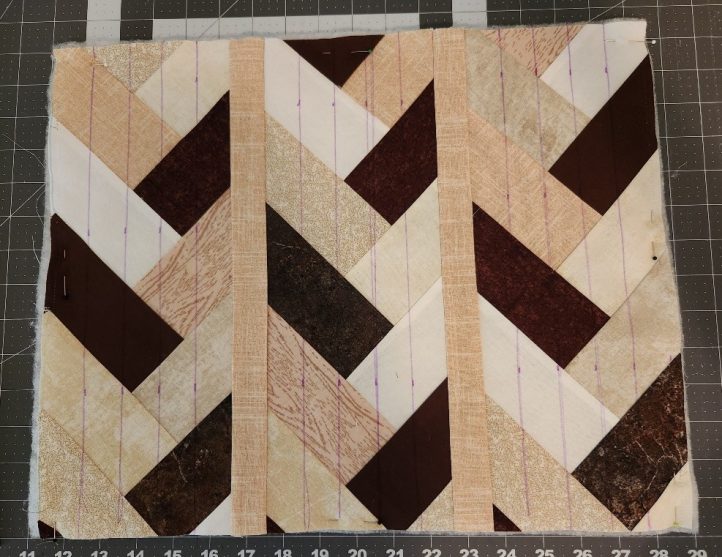
- Sew the 6 braided sections for the bag front and back. For each section:
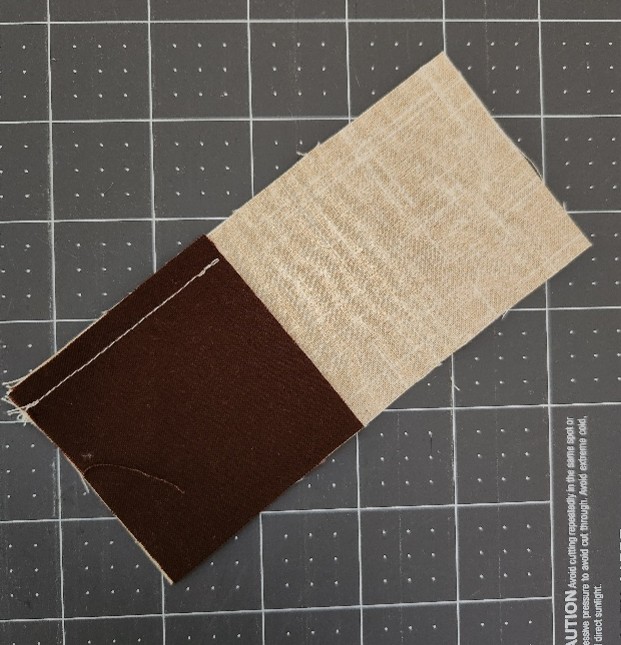
- Start with a 2-1/2 in. x 2-1/2 in. square and 2 strips 2-1/2 in. x 5-1/2 in.

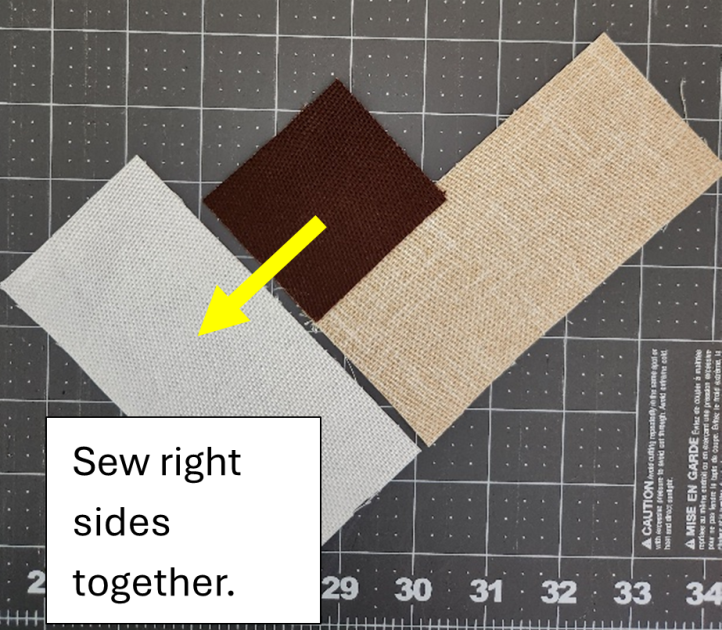
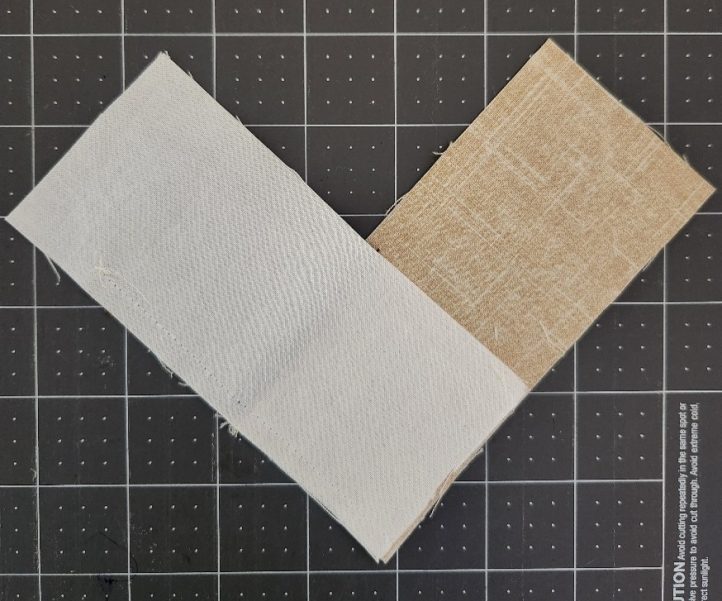
- Sew the top edge of the right strip to the bottom right edge of the square, right sides together.
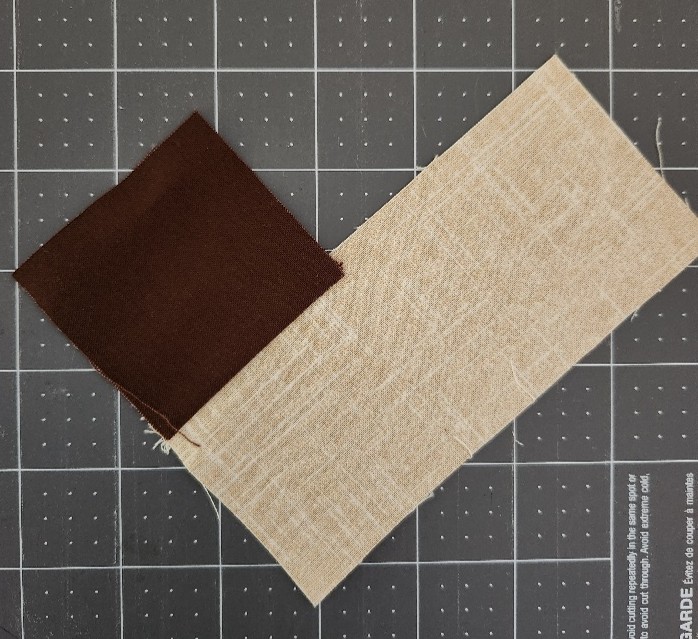
- Sew the top edge of the left strip to the bottom left edge of the square/rectangle unit. Sew with right sides together. Press seams down.
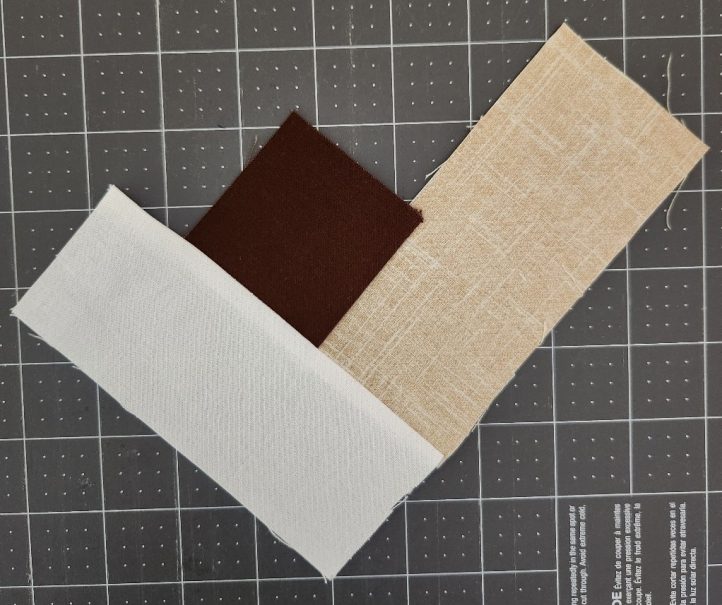
- Continue to add strips in this manner until there are 6 on each side, with every third strip being a darker brown to add variety and balance to the layout. Press seams downward.
- Start with a 2-1/2 in. x 2-1/2 in. square and 2 strips 2-1/2 in. x 5-1/2 in.
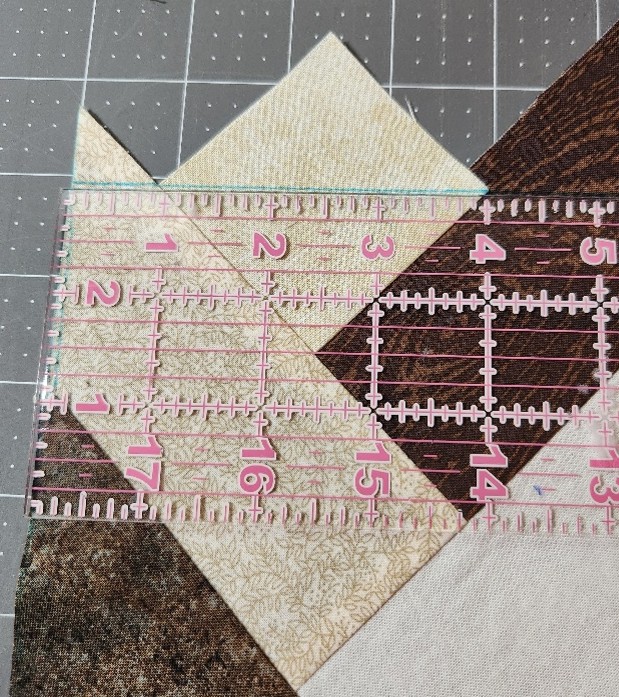
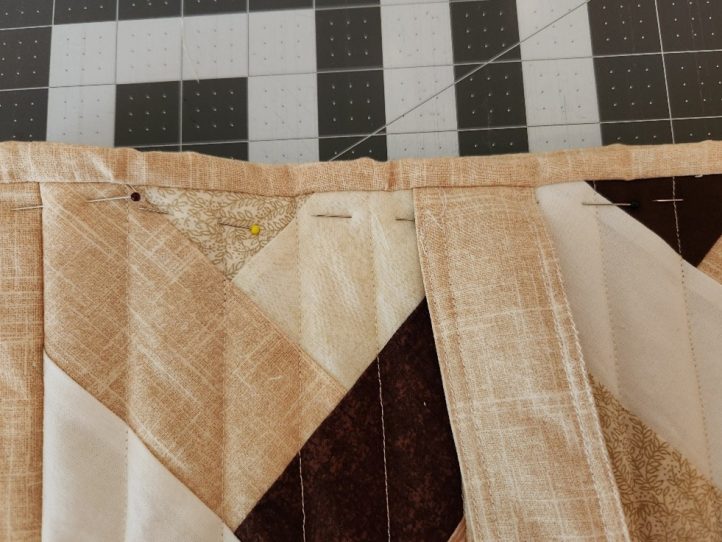
- Trim the braided sections so each measures 5-1/2 in. wide. Mark a line connecting the inside points along the top and trim on this line. Measure 14 in. down from this line and trim the bottom of the strip evenly on this line.
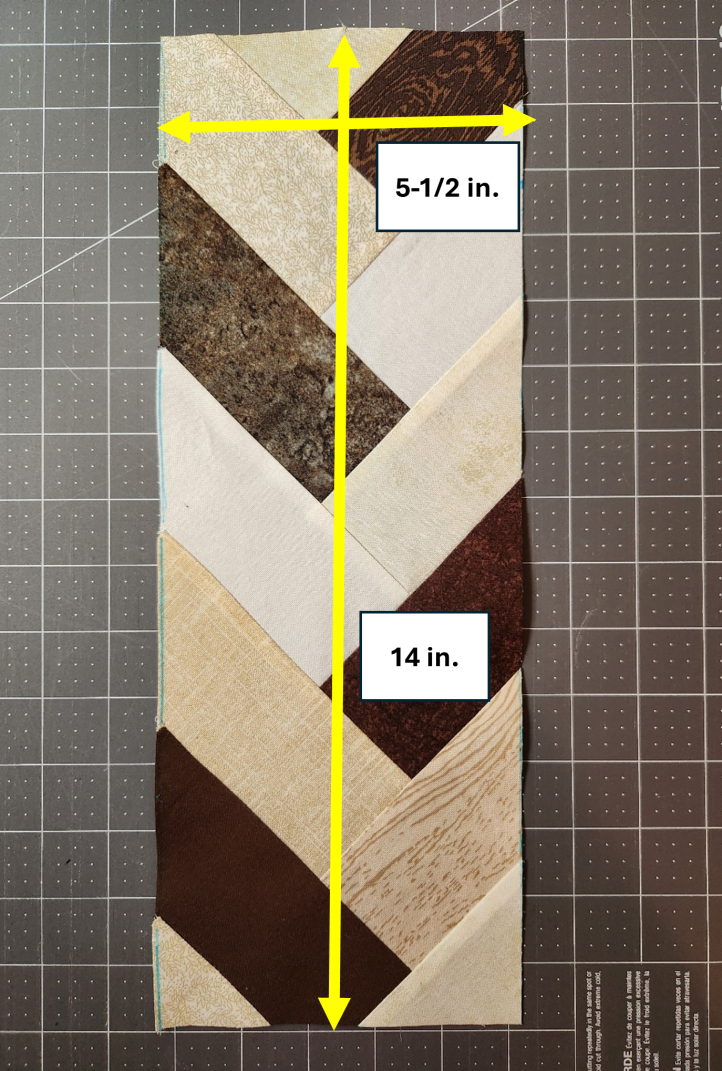
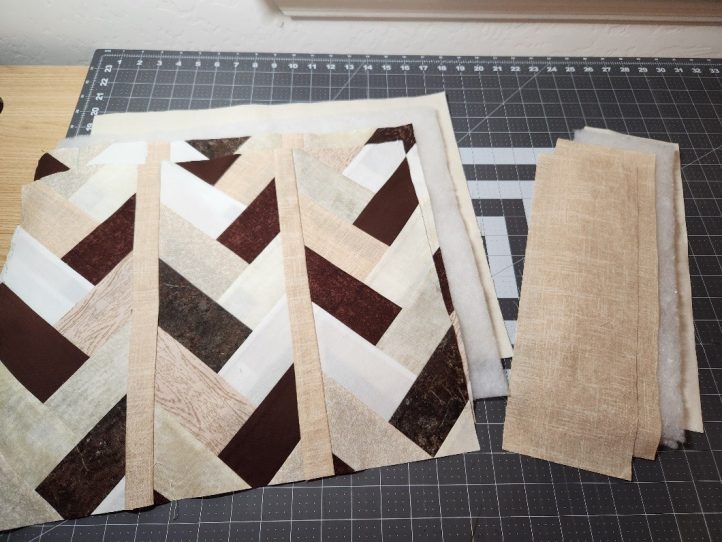
- There should be 6 braided sections in all, 3 for the front and 3 for the back.
- Construct the front and back of the bag.
- Sew braided sections to 1-1/2 in. gold strips as shown in the diagram below:

- Sew braided sections to 1-1/2 in. gold strips as shown in the diagram below:
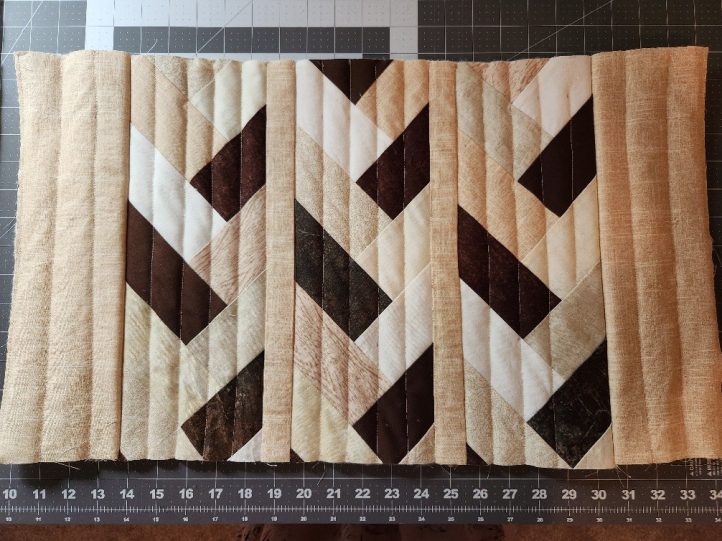
- Quilt the front, back, side and bag bottom panels.
- Layer each piece as follows:
- Front and back of purse – 17-1/2 in. x 14 in. piece of muslin at the bottom, matching size batting in the middle, and braided section on top.
- Side panels – 14 in. x 4 in. piece of muslin at the bottom, matching size batting in the middle and gold side panel fabric at the top.
- Bottom of bag – 17-1/2 in. x 4-1/2 in. piece of muslin at the bottom, matching size batting in the middle, gold bottom of bag fabric at the top.
- Front and back of purse – 17-1/2 in. x 14 in. piece of muslin at the bottom, matching size batting in the middle, and braided section on top.
- Draw vertical lines 1 in. apart with a disappearing marker on each bag section.
- Change the sewing machine foot to the walking foot if one is available, or use the original foot, stitching slowly and carefully. Stitch through all layers to quilt each part of the bag (front, back, 2 side panels and bottom of bag).
- Layer each piece as follows:
- Stitch the bag sections together.
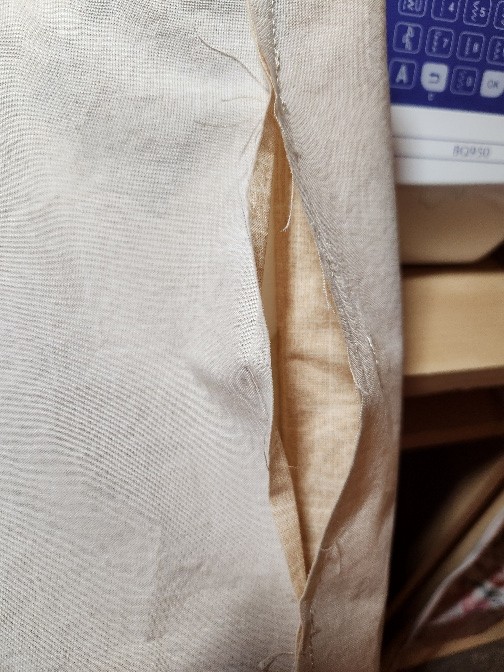
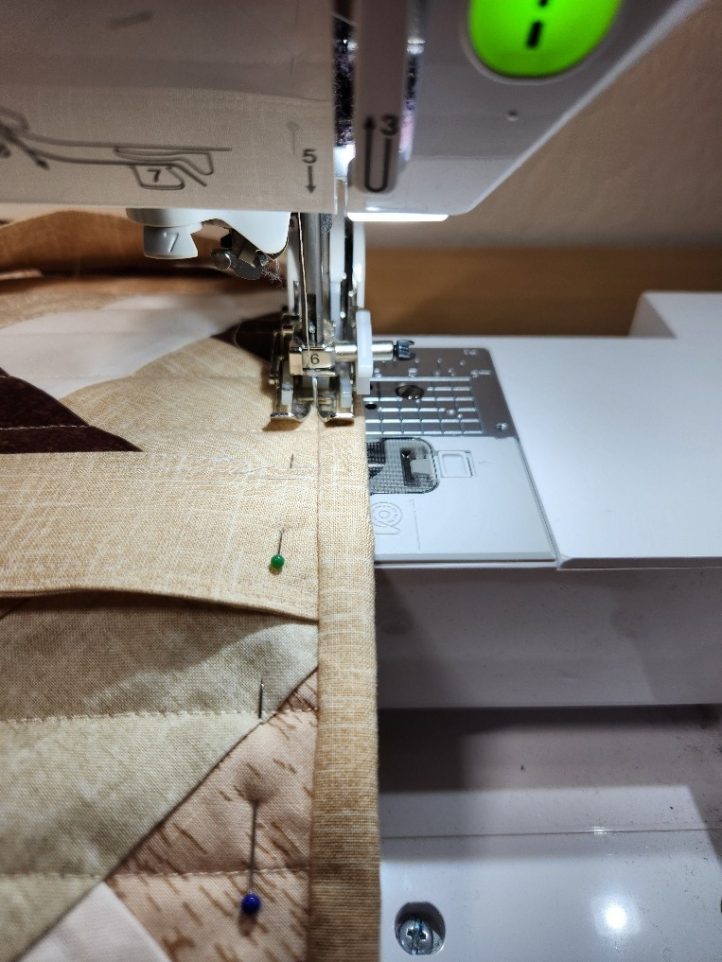
- Sew a side panel to each side of the bag front using a 1/2 in. seam, stitching through all layers carefully.
- Sew the bag back to the other sides of the side panels.
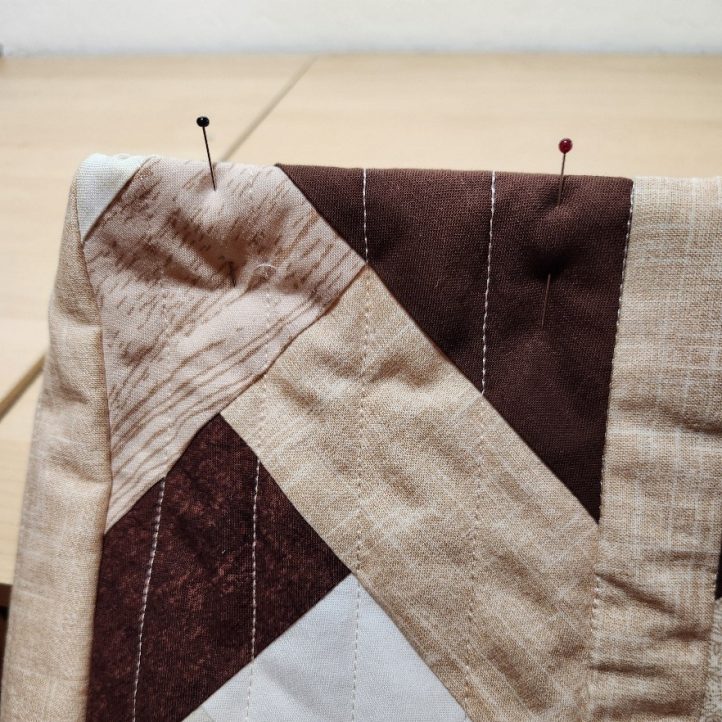
- Pin the bottom of the bag to the edges at the bottom of the sewn sections, matching the corners. Stitch using a 1/2 in. seam allowance, pivoting at the corners. To reinforce the seams, it is recommended to zigzag stitch the edge.

- Turn the bag right side out. Gently press the seams to help form the shape of the bag.
- Sew a side panel to each side of the bag front using a 1/2 in. seam, stitching through all layers carefully.
- Stitch the bag lining.
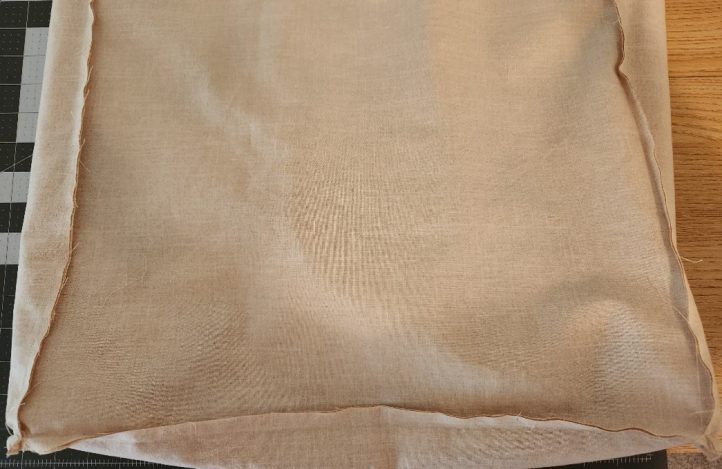
- Sew the lining front and back to the side panels as done in Step #9 for the bag, LEAVING A 4 INCH OPENING IN ONE OF THE SIDE SEAMS.
- Pin and sew the lining bottom to the bag, as done in Step #9 also.
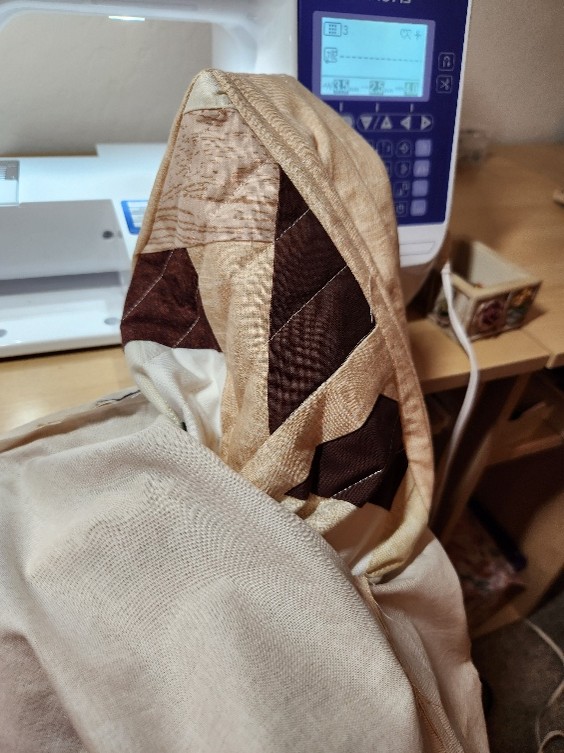
- Stitch the bag handles to the bag and stitch the lining to the bag.
- Center each strap around a gold strip on the front and back of the bag. Stitch with a 1/4 in. seam.
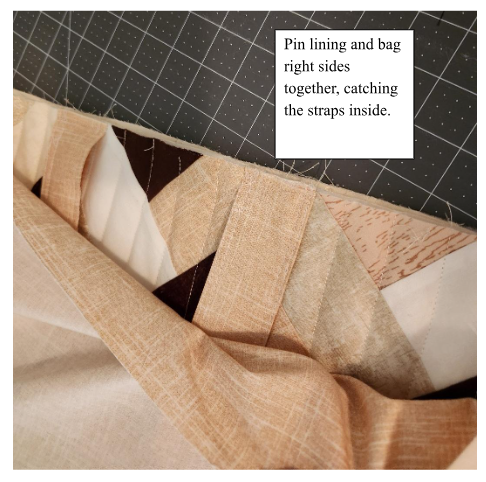
- Turn the lining INSIDE OUT.
- Place the bag inside the lining. They will now be RIGHT SIDES TOGETHER, with the straps inside.

- Pin the top edge of the bag and lining together, matching the side seams and catching the straps in the seam. Stitch using a 1/2 in. seam allowance.
- Reach through the opening left in one side seam.
- Gently pull the bag through until it is completely separated from the lining.
- Pin the side opening closed and stitch close to the edge.

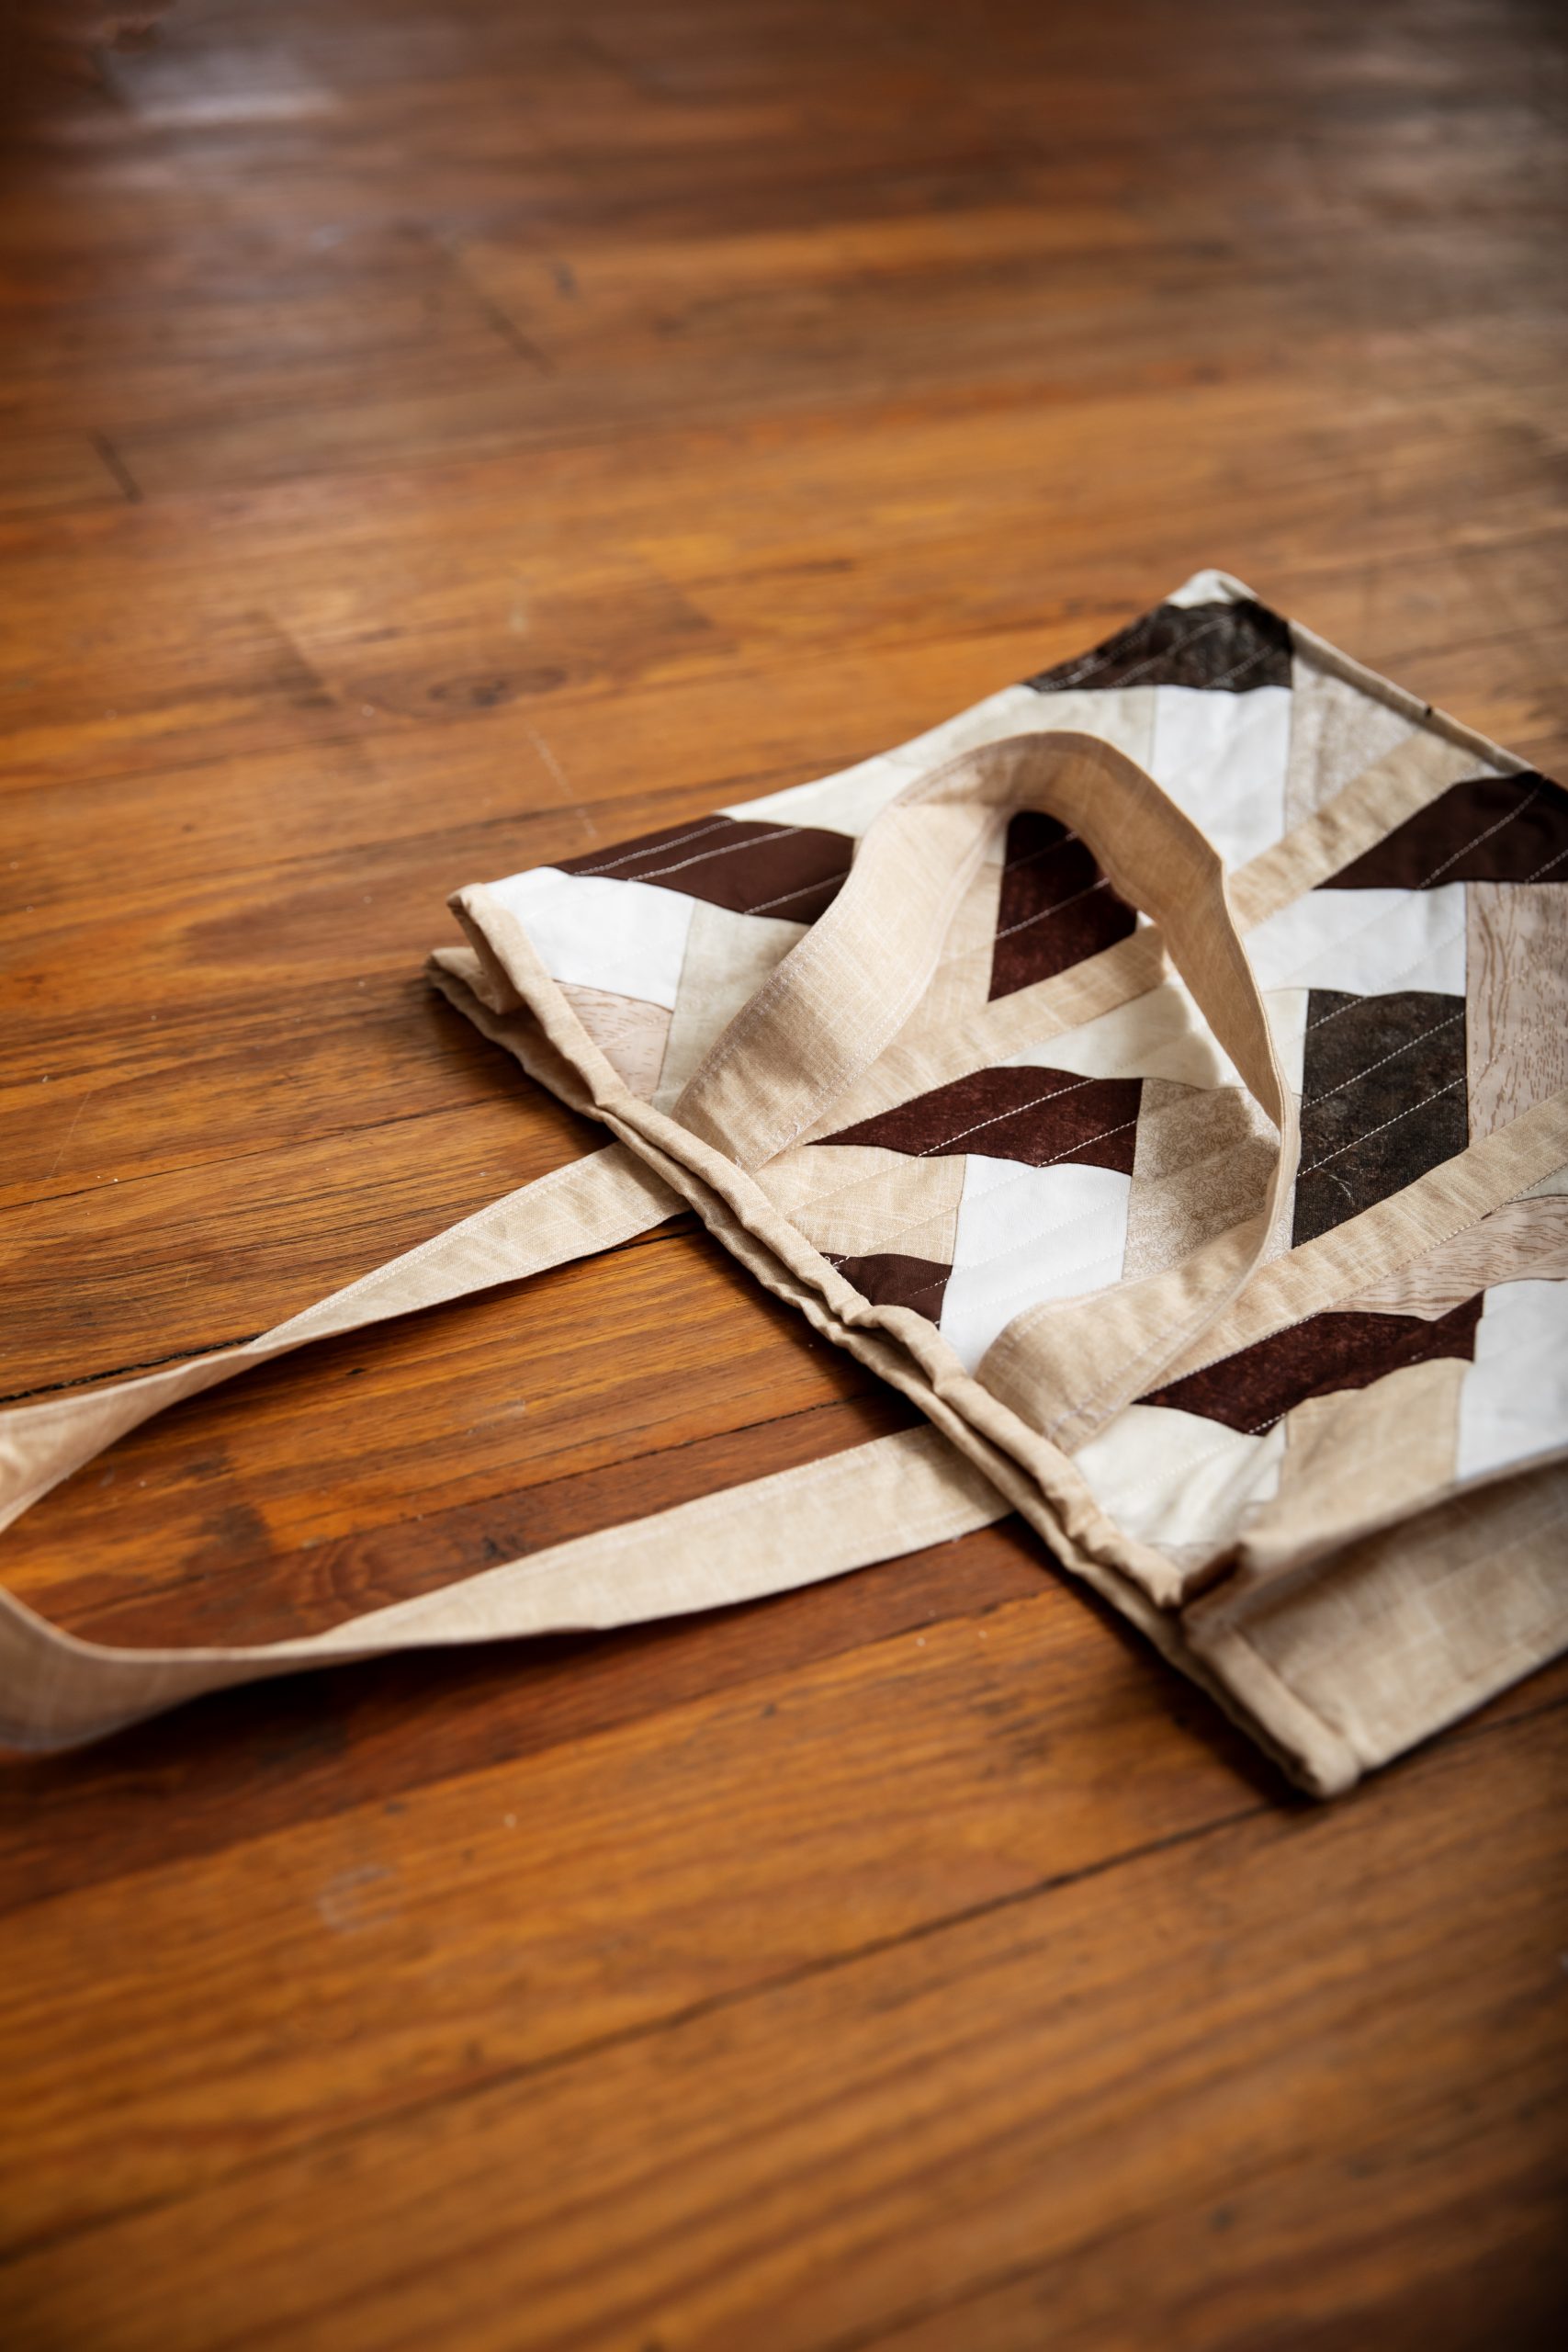
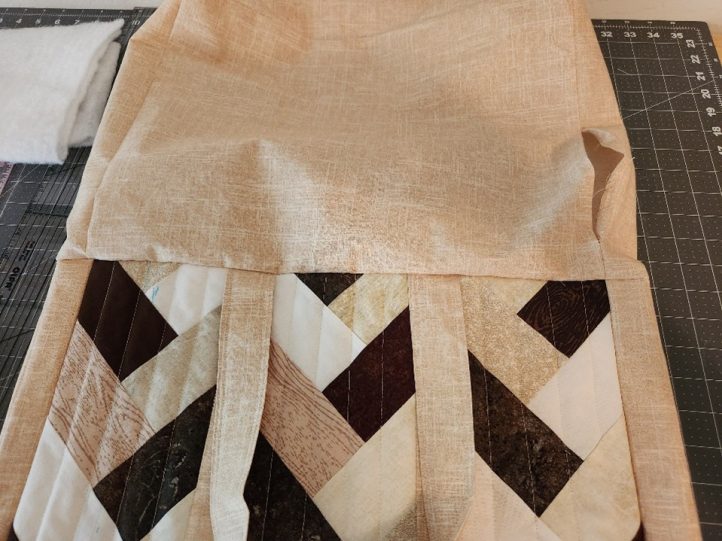
- Finish the top edge of the bag.
- Push the lining to the inside. Press the lining along the top edge, leaving a 1/2 in. edge visible from the front of the bag.
- Pin along this edge.
- Stitch in the ditch to obtain a finished edge that looks like binding.
- Push the lining to the inside. Press the lining along the top edge, leaving a 1/2 in. edge visible from the front of the bag.
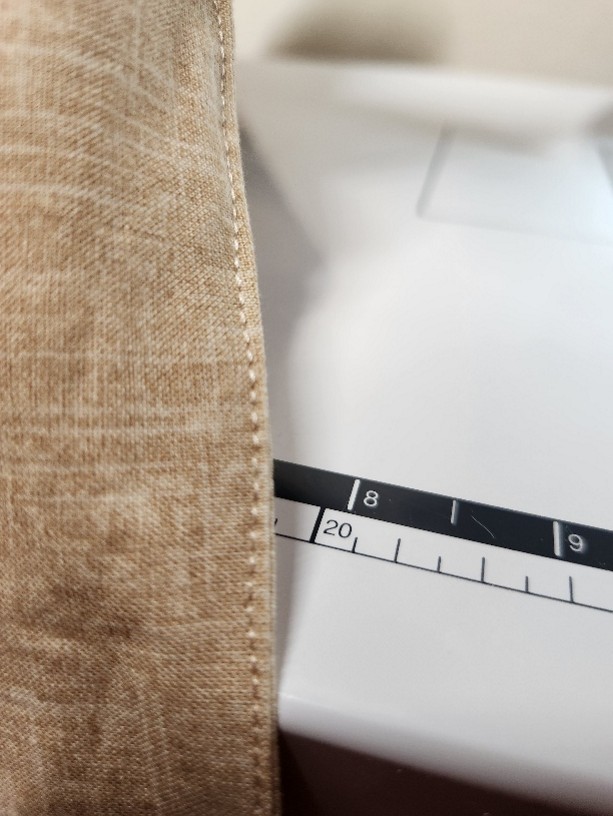
- Optional edge-stitching along bottom and side seams:
- To create a defined edge to the bottom and sides of the bag to help it maintain its shape, pin along each edge then stitch through all thicknesses using a 1/4 in. seam.
- Stitch as close as possible to where seams meet, leaving a short space at the end if not possible to stitch all the way.
Edge-stitching will help the bag hold its shape better.
The tote bag is now finished and ready for use!