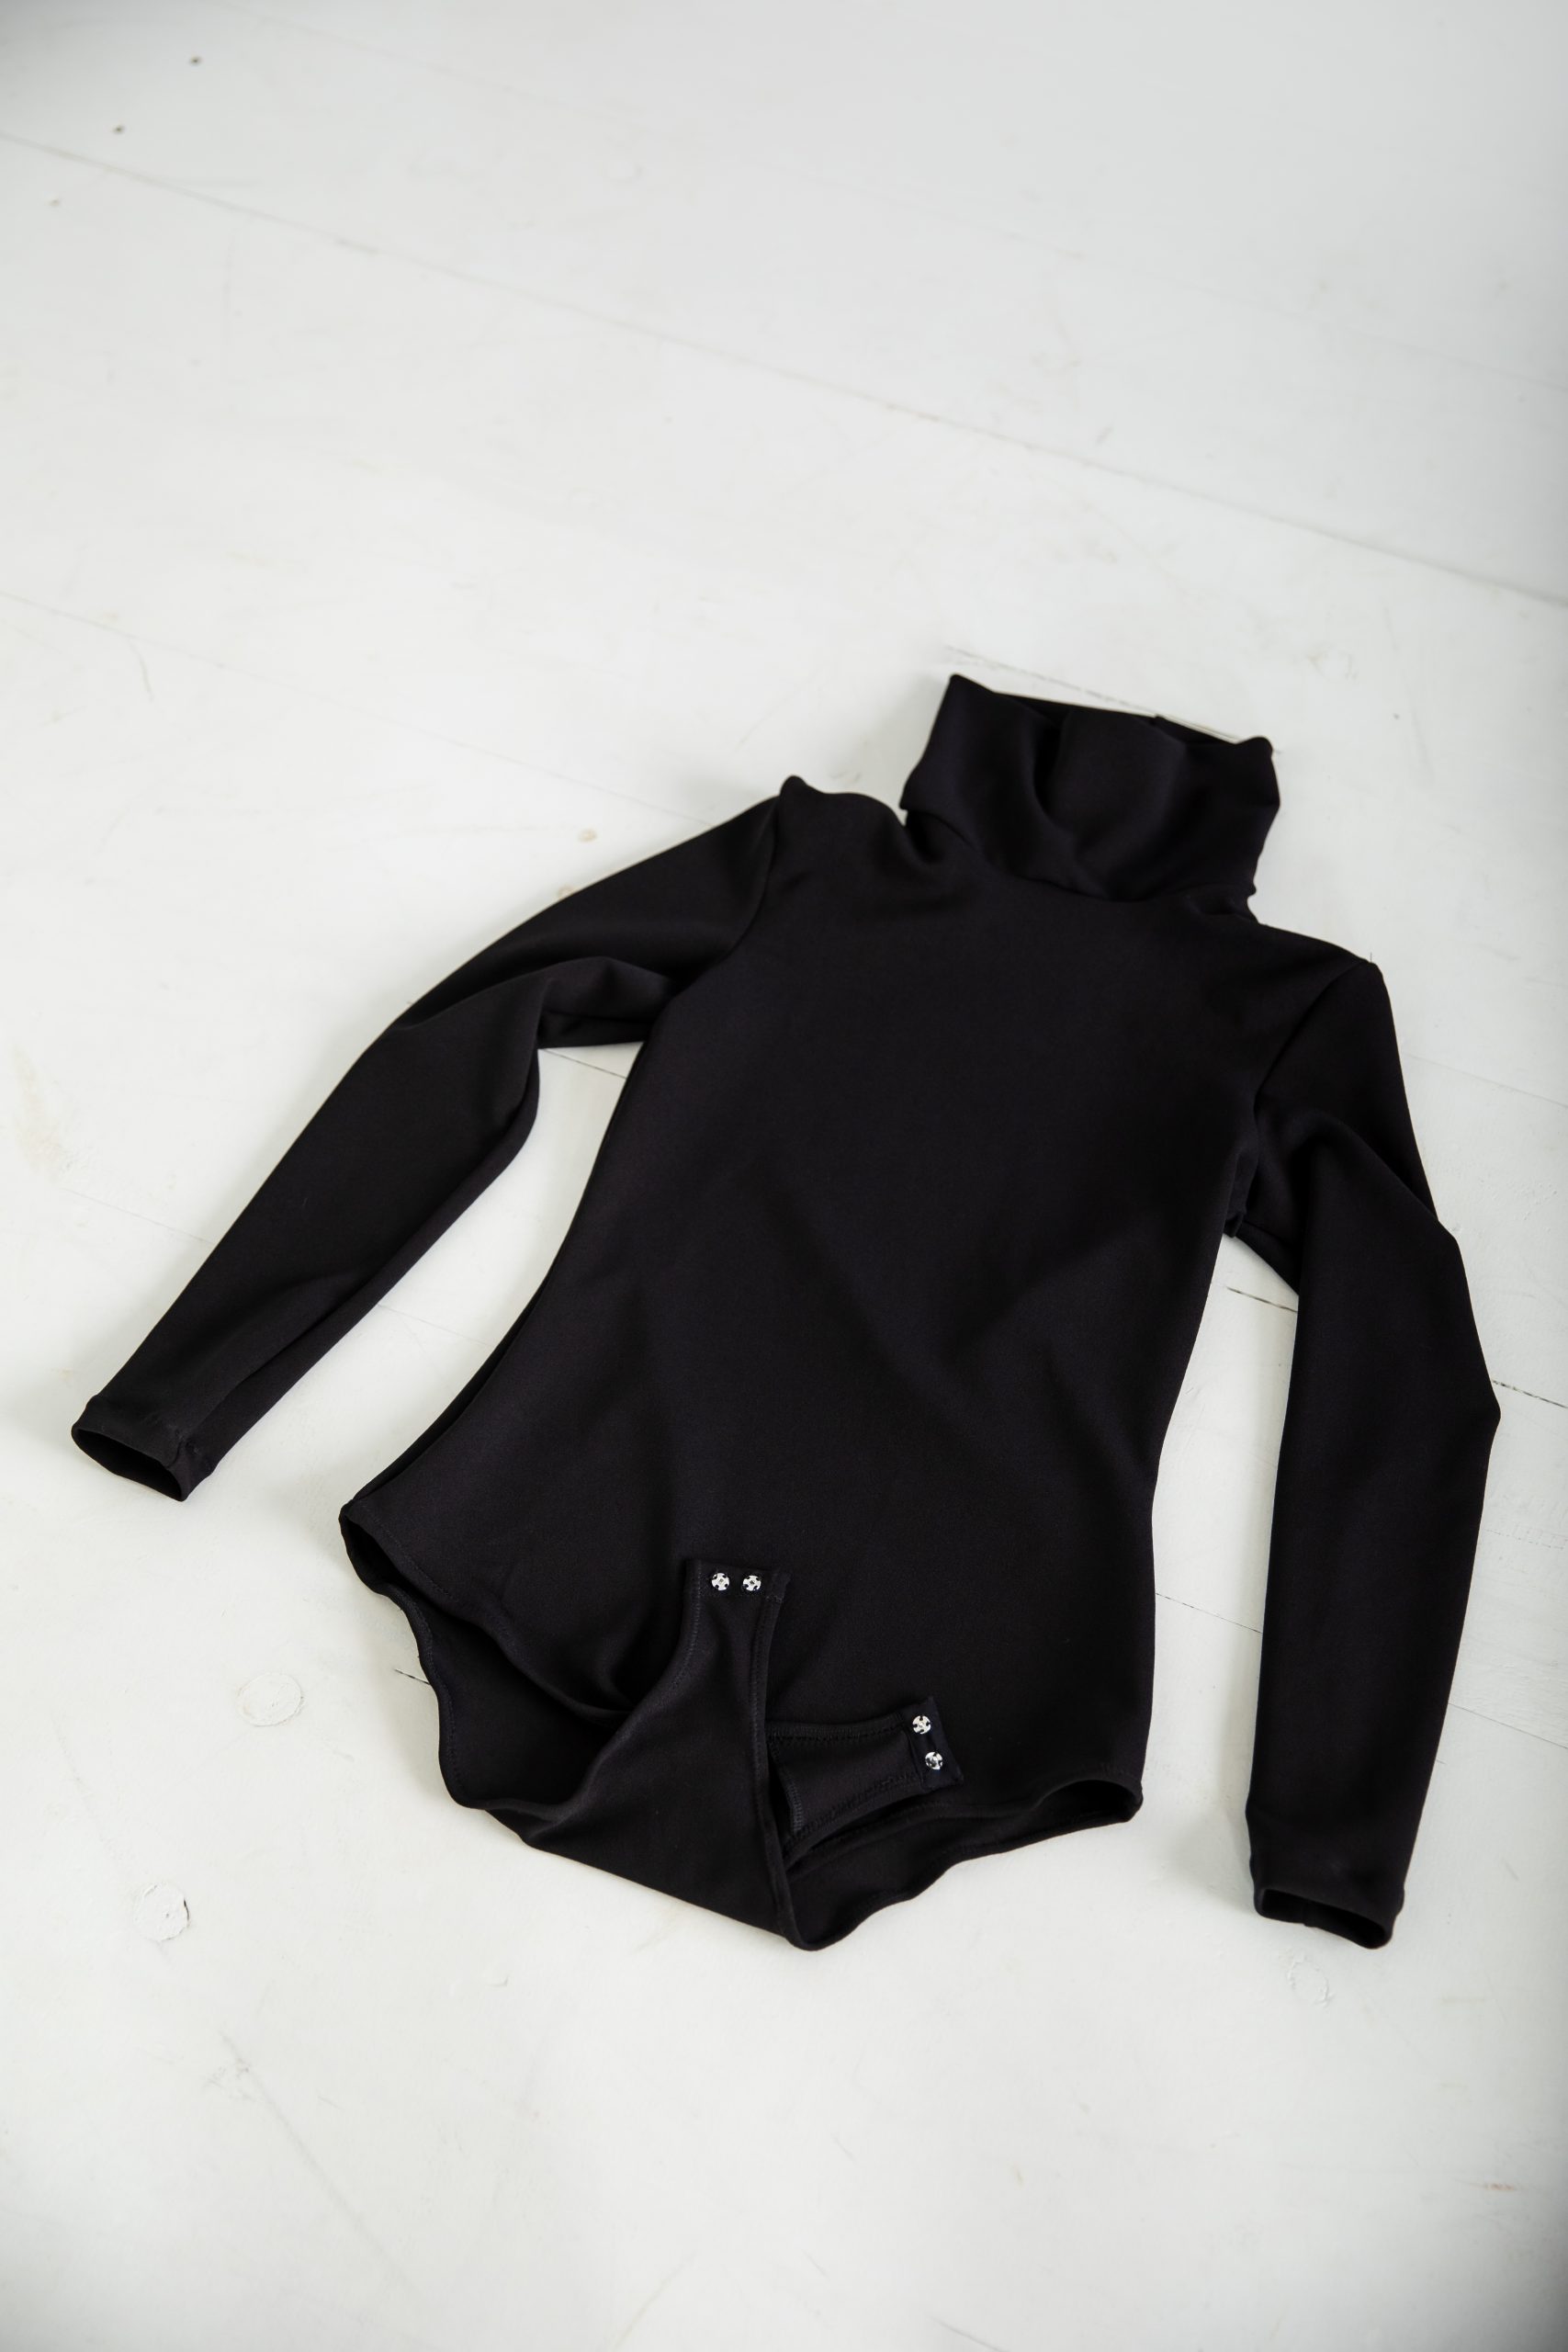
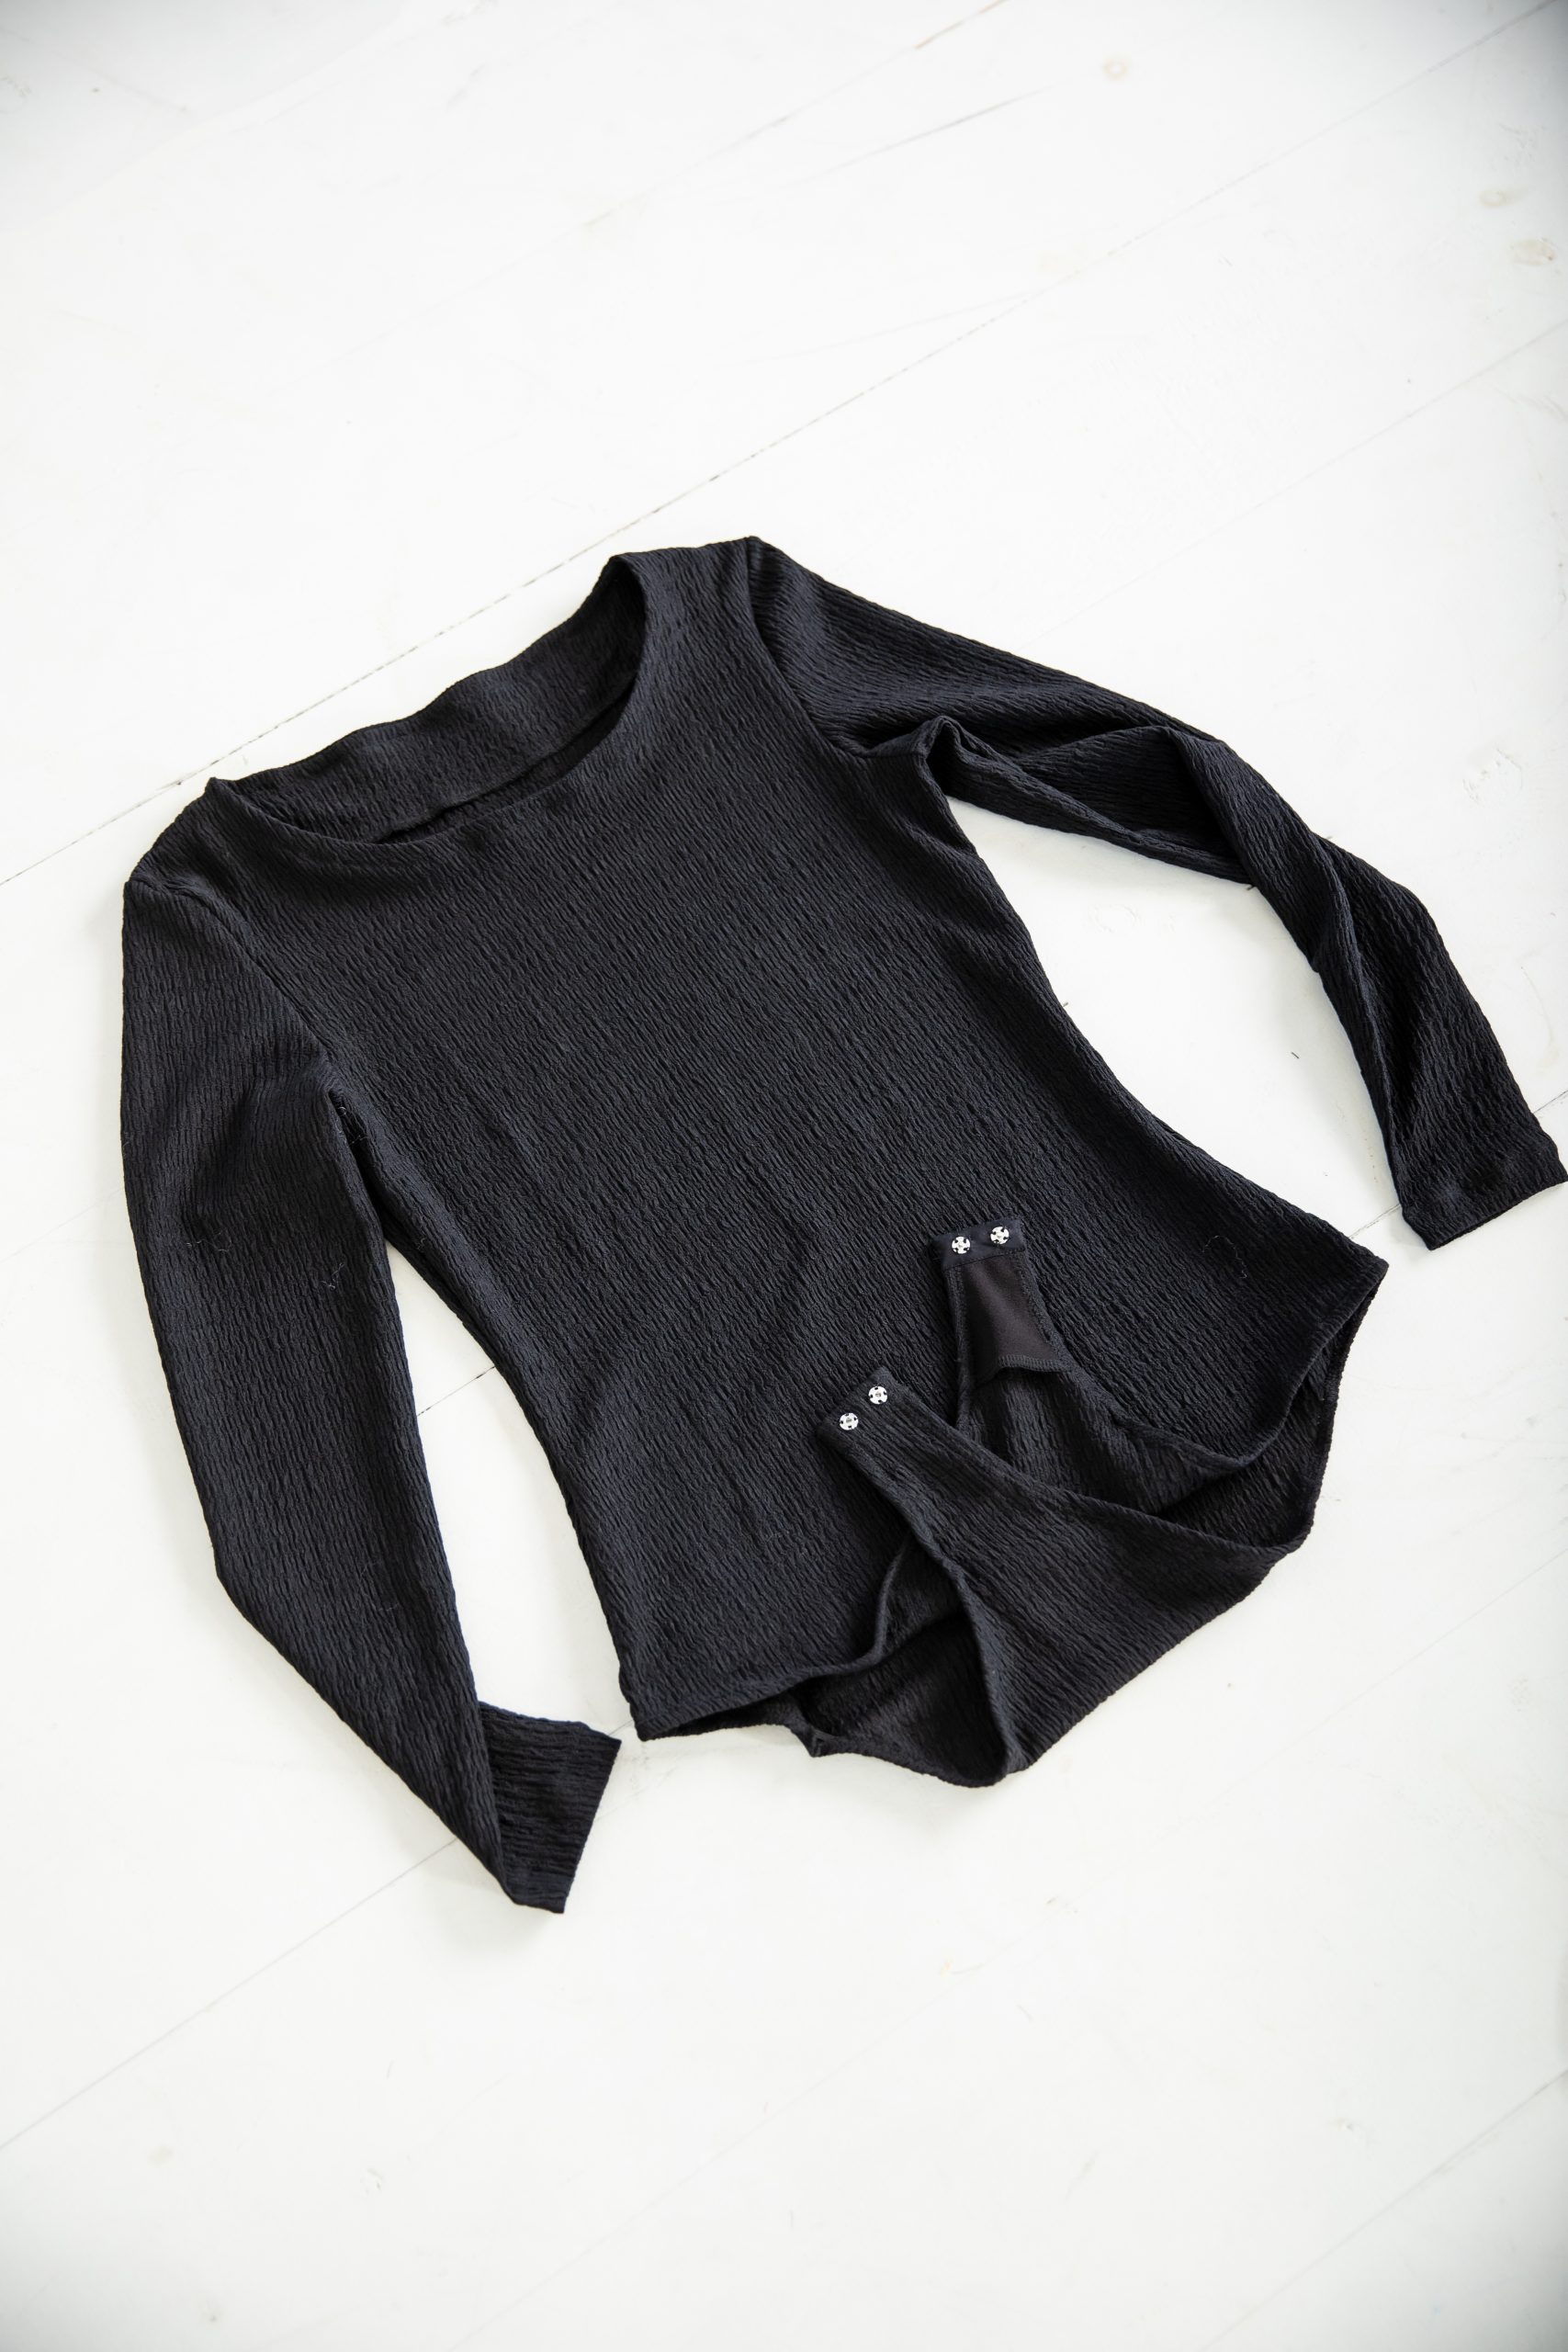
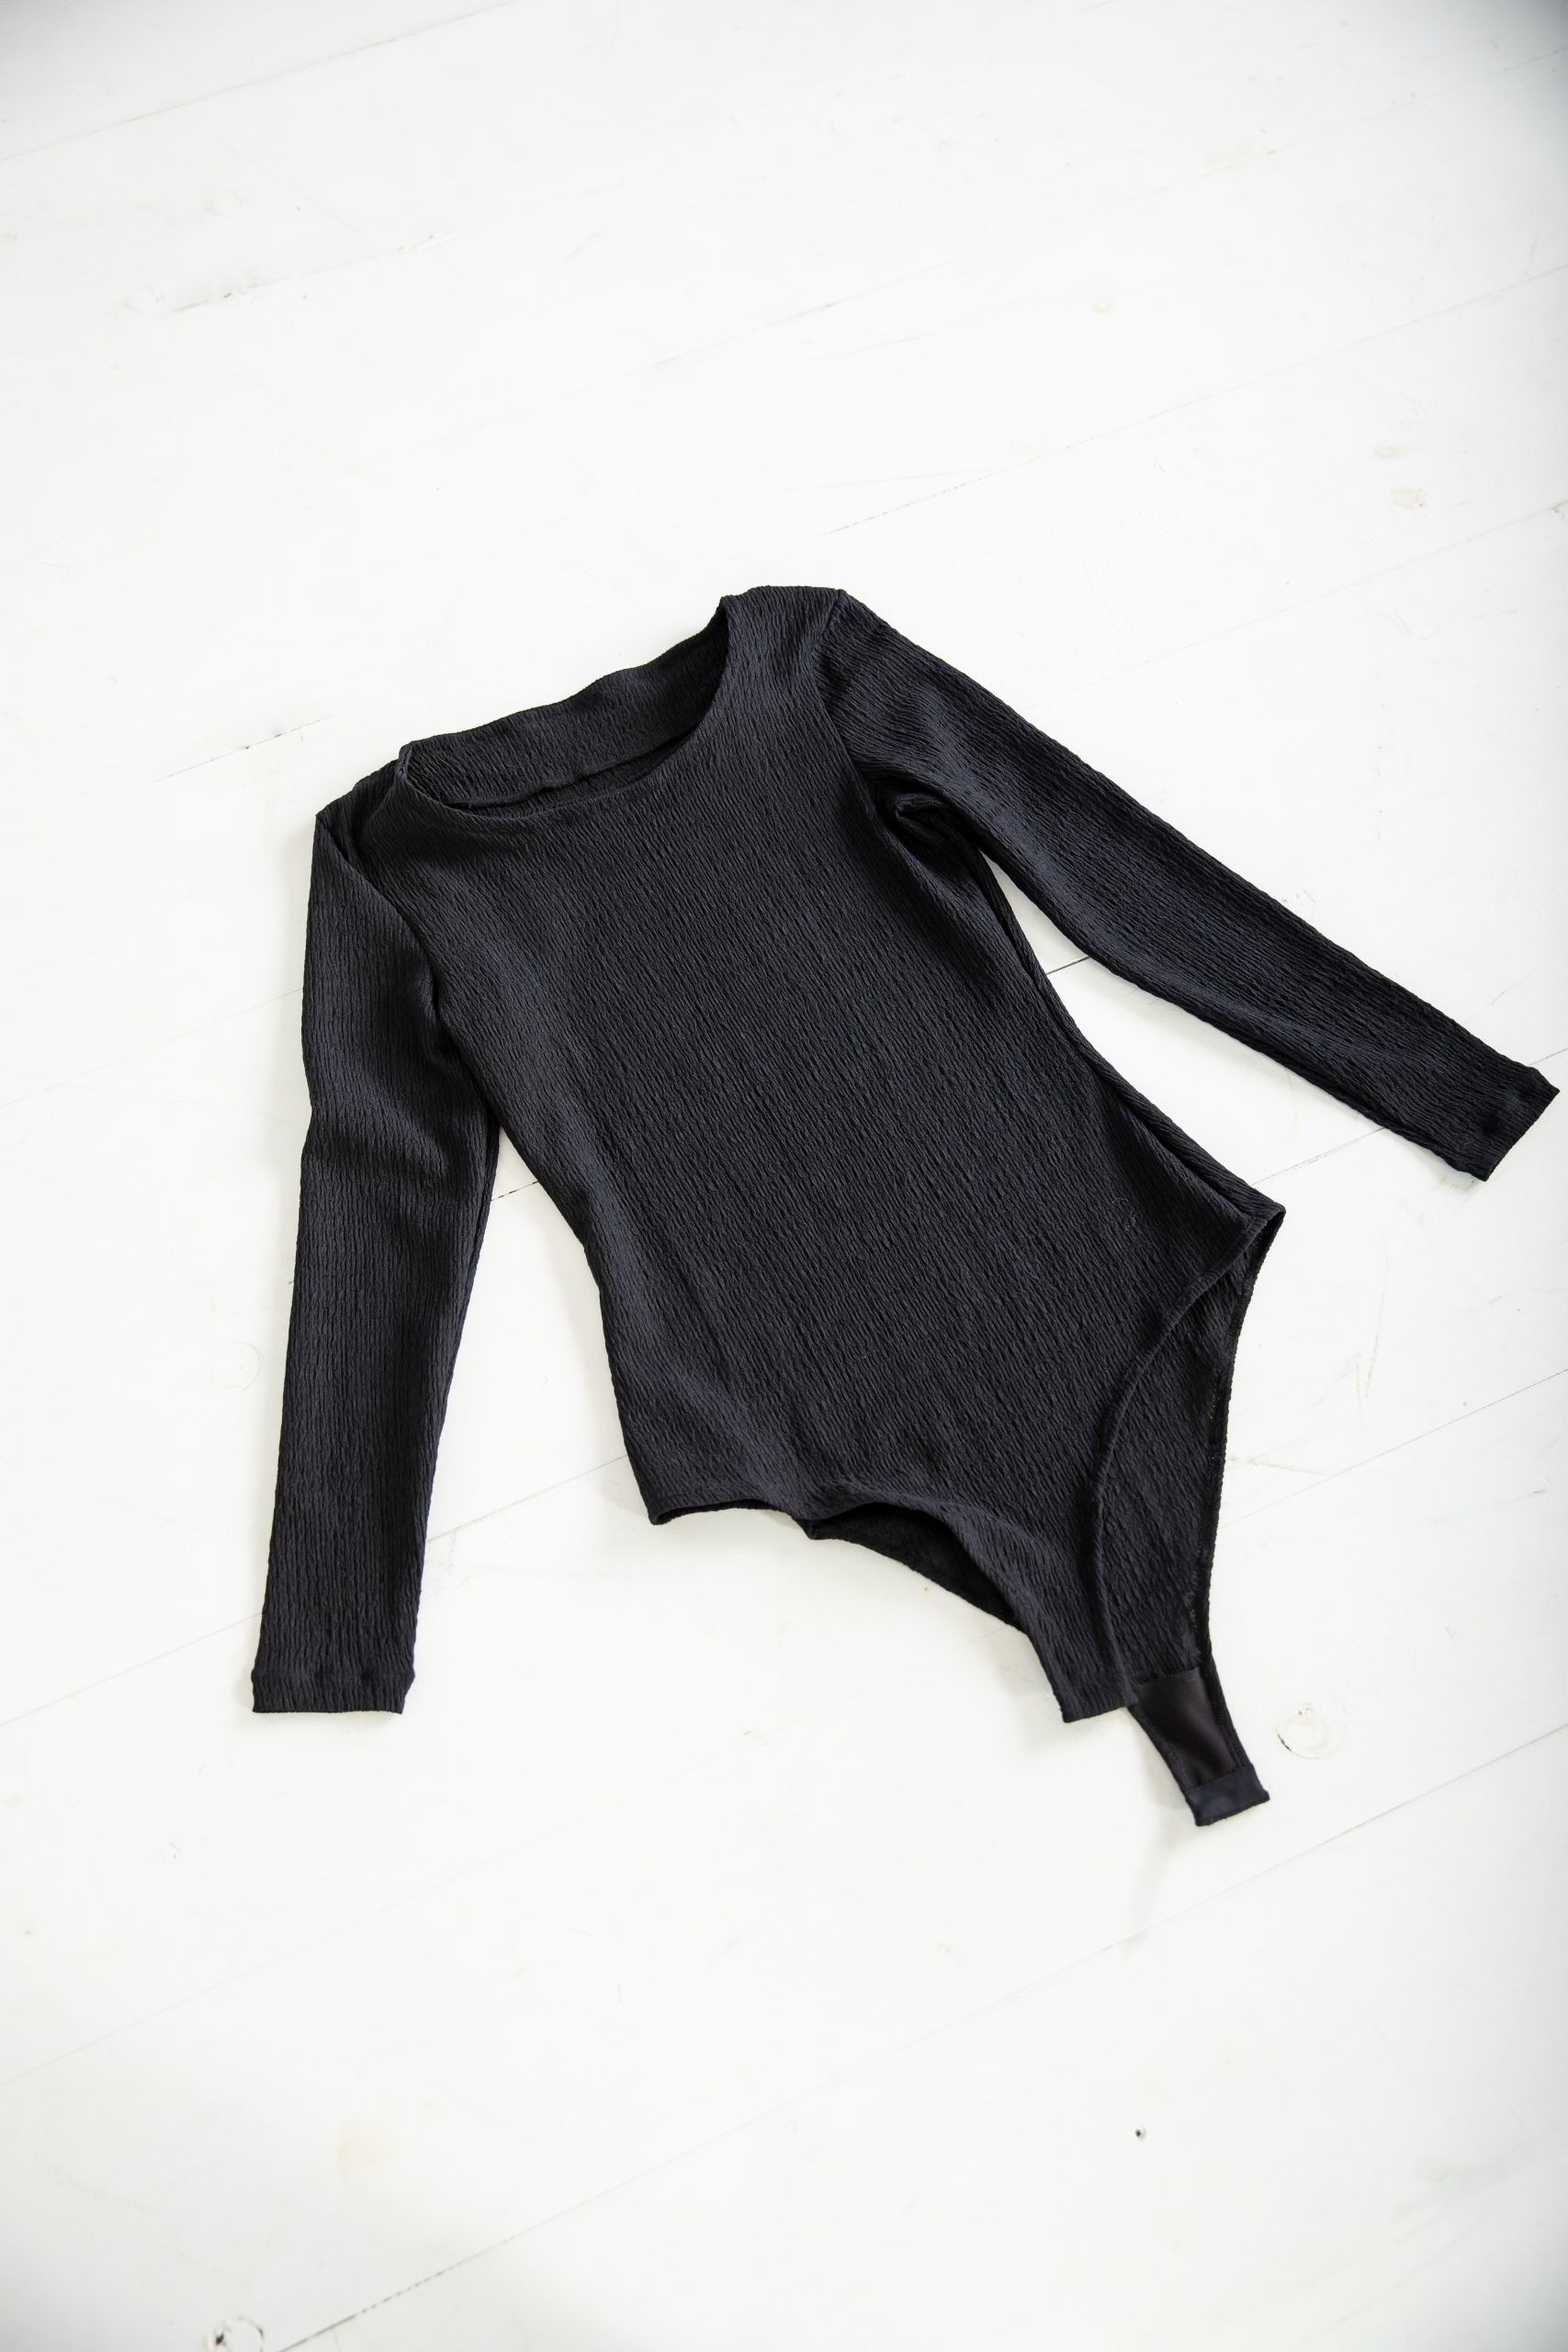
A great wardrobe starts with a set of beautifully-made basics, which is why we can’t wait for you to see this classic bodysuit pattern from Lauren Merciris. Perfect for pairing with jeans, trousers, or skirts, this simple bodysuit pattern is available in a scoop neck or turtleneck version and features snap closures in the bodysuit’s crotch. We love the versatility of this garment, and its layering abilities combined with its sleek yet comfortable fit make it a pattern you’ve got to start today!
Designer Note: All the seam allowances are included: 1 cm/0.4 in (3/8’’) and 2 cm/0.8 in (3/4’’) for the sleeves’ hems.
Materials:
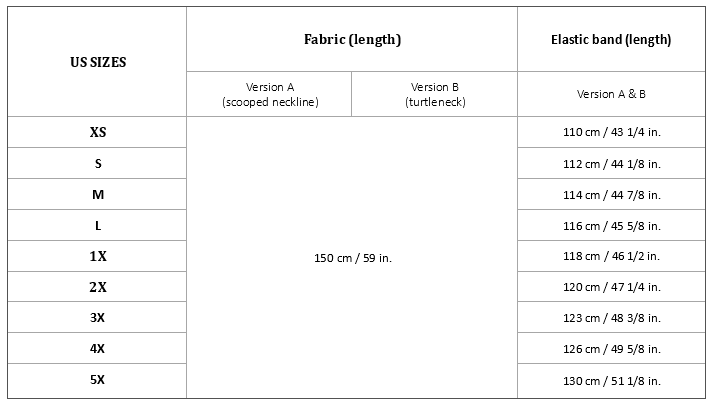
- Fabric and material requirements (fabric width 150 cm / 59 in.)
- Fabric: Jersey bi-stretch, polyester, stretch velvet, neoprene fabric
- A piece of jersey for the crotches and the scooped neckline facings
- 50 cm/19 3/4 in. x 40 cm/15 3/4 in. for the Version A (crotches + facing front + facing back)
- 40 cm/15 3/4 in. x 30 cm/11 3/4 in. for the Version B (crotches only)
- A piece of iron-on interfacing fabric for the scooped neckline facing (Version A only)
- 50 cm/19 3/4 in. x 30 cm/11 3/4 in.
- Elastic band 3 mm/0.12 in (1/8’’) wide (length in the tab below)
- 2 small snap buttons to sew 5 mm /0.2 in (3/16’’) diameter
- PDF Pattern – This is located at the bottom of this page. Please see printing instructions below.
PRINTING INSTRUCTIONS:
Note: To download the pattern, click on the pattern download button at the bottom of the page. We recommend opening your pattern download using Adobe Acrobat.
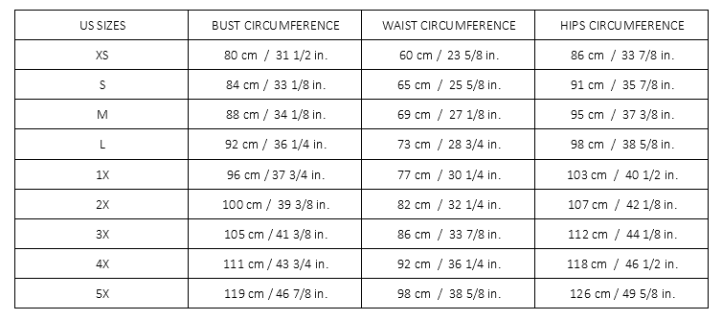
SIZE CHART (cm=centimeters/in=inches):
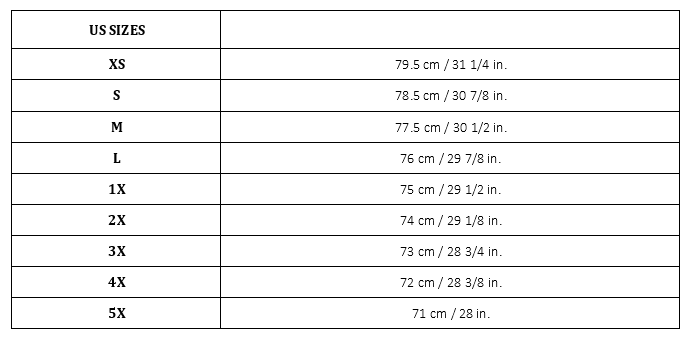
FINISHED GARMENT LENGTH (FROM SHOULDERS TO CROTCH IN CM/INCHES):
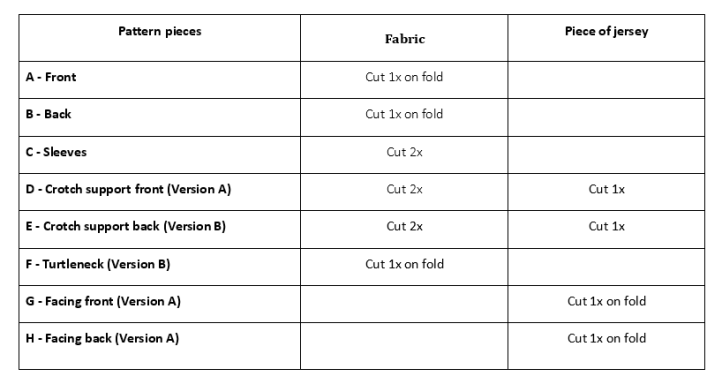
PATTERN PIECES:
Cutting Instructions:
- Lay the fabric.
- Main fabric for all sizes: Fold the two selvage edges back to the middle of the fabric, and adjust the width to obtain 1 fold on the left and 1 fold on the right (right sides together).
- Once the Front and Back are cut, fold your fabric one, wrong sides together for the sleeves.
- Piece of jersey: No need to fold for the crotches. Need to fold the fabric right sides together for Version A with facings.
- Iron-on interfacing: Fold the fabric right sides together for Version A with facings.
- Main fabric for all sizes: Fold the two selvage edges back to the middle of the fabric, and adjust the width to obtain 1 fold on the left and 1 fold on the right (right sides together).
- Lay the pieces on the fabric.
- Lay out the pattern pieces on the different fabrics, respecting the grainline, and cut out each piece as many times as the pattern indicates.
- Mark all the markers on the reverse side of the parts.
Sewing Instructions:
ASSEMBLING THE FRONT AND THE BACK:
- Place the Front (A – Front) and the Back (B – Back) right sides together.
- Pin the entire sides and along the shoulders.
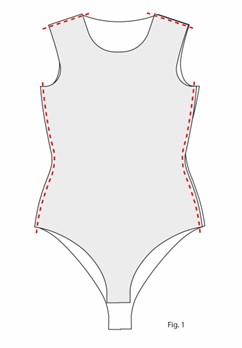
- Sew with an overlock (serger) at 1 cm/0.4 in (3/8’’). If you don’t have an overlock machine, you can stitch with the stretch stitch of your sewing machine and use a zig-zag stitch to enclose the seam allowances.
- Iron to flatten the seams towards the back.
ASSEMBLING THE SLEEVES:
- Join each side of the sleeve (C – Sleeves) right sides together and pin.
- Sew with an overlock at 1 cm/0.4 in (3/8’’).
- Iron to flatten the seams to the front.
- Turn the body inside out.
- Insert the sleeves right side in through the sleeve openings and match the seams and markings.
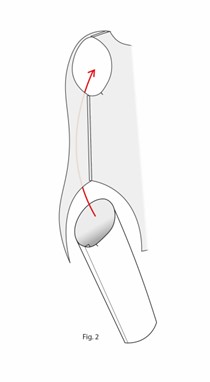
- Pin all around the armhole, distributing the ease evenly.
- Sew with an overlock at 1 cm/0.4 in (3/8’’).
- For the hems of the sleeves, overlock all around the bottom of the sleeves.
- Fold up 2 cm/0.8 in (3/4’’) on the wrong side and pin.
- Sew with a stretch stitch or use a small zig zag stitch all around the sleeves at 2 cm/0.8 in (3/4’’) from the edge.
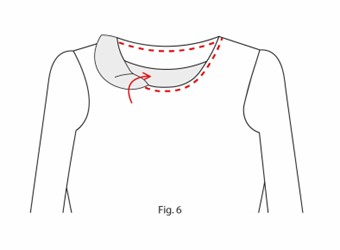
THE NECKLINE:
Version 1: Scooped Neckline:
- Apply the iron-on facing on the wrong side of the Facing front (G – Facing Front) and Facing back (H – Facing Back).
- Now join the facing back with the facing front right sides together and pin the shoulders.
- Sew with an overlock at 1 cm/0.4 in (3/8’’).
- Iron to flatten the seams to the front.
- Overlock all around the outside edge to avoid fraying and iron to flatten.
- Turn over the facing and place the facing right sides together on the front neckline and pin all around the neckline.

- Sew 1 cm/0.4 in (3/8’’) from the edge.
- Edge and trim the seam allowance, especially in the curves.
- Turn right side out.
- Iron to flatten.
- Pin to maintain all around the neckline.
- Sew with a stretch stitch or with a small zig zag stitch all around the neckline, at 1 cm/0.4 in (3/8’’) from the edge.
- Iron to flatten again.
- Hand-stitch the facing to the shoulders’ seam allowances to maintain the facing.
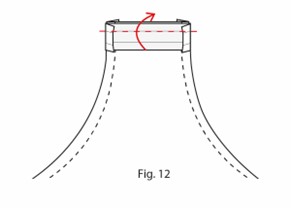
Version 2: Turtleneck:
- Mark the middle front of the turtleneck and the middle front and middle back of the body with an erasable pen on the wrong side.
- Fold the turtleneck right sides together and pin the edges to close the turtleneck.
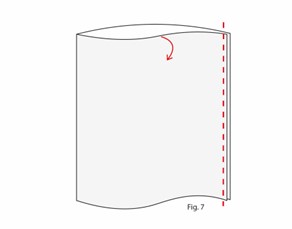
- Sew with an overlock at 1 cm/0.4 in (3/8’’).
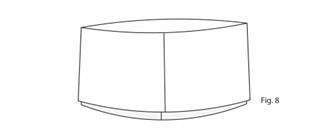
- Fold the top of the turtleneck down, wrong sides together.
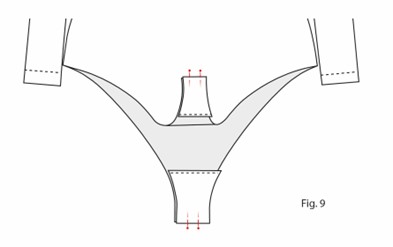
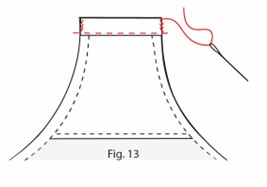
- Insert the turtleneck inside the body neckline, right sides together, and pin all around the neckline (2 layers of turtleneck + layer of body neckline), matching all the marks, by gently stretching the fabric. The seam allowance of the turtleneck needs to match the middle back marks on the body.
- Sew with an overlock at 1 cm/0.4 in (3/8’’), the 3 layers of fabric together.
- Iron to flatten.
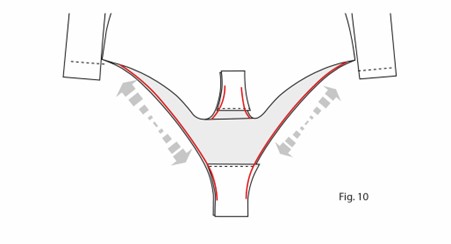
THE CROTCHES AND LEG OPENINGS:
Crotches:
- Overlock the top of the 2 crotches.
- Place the crotches wrong sides together on the bottom of the body, front and back.
- Pin to maintain.
- Overlock the leg opening including the side of the crotch front and the side of the crotch back at 0.5 cm/0.2 in (1/4’’) from the edge.
- Do the same on the other side of the bodysuit.
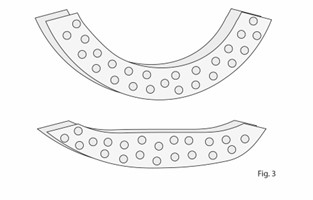
Elastic Around the Leg Opening:
- Cut the elastic band into two equal parts.
- Take one of the two elastic bands and position it on the edge of one side of the leg opening, keeping it 2 cm/0.8 in (3/4’’) from each front and back edge of the crotch, and 0.5 cm/0.2 in (1/4’’) from the edge.
- Distribute the elastic along the opening with pins, with a gentle stretch.
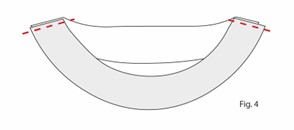
- Now fold over 0.5 cm/0.2 in (1/4’’) on the wrong side to cover the elastic.
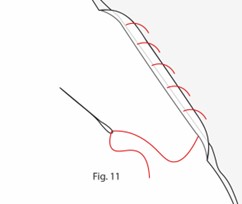
- Baste by hand, stretching the elastic slightly to hold everything in place before sewing.
- Sew over with a small zigzag stitch all along the opening, 0.5 cm/0.2 in (1/4’’) from the edge (It will maintain the seam and the elastic).
- Remove the basting threads by pulling them gently.
- Repeat for the other side.
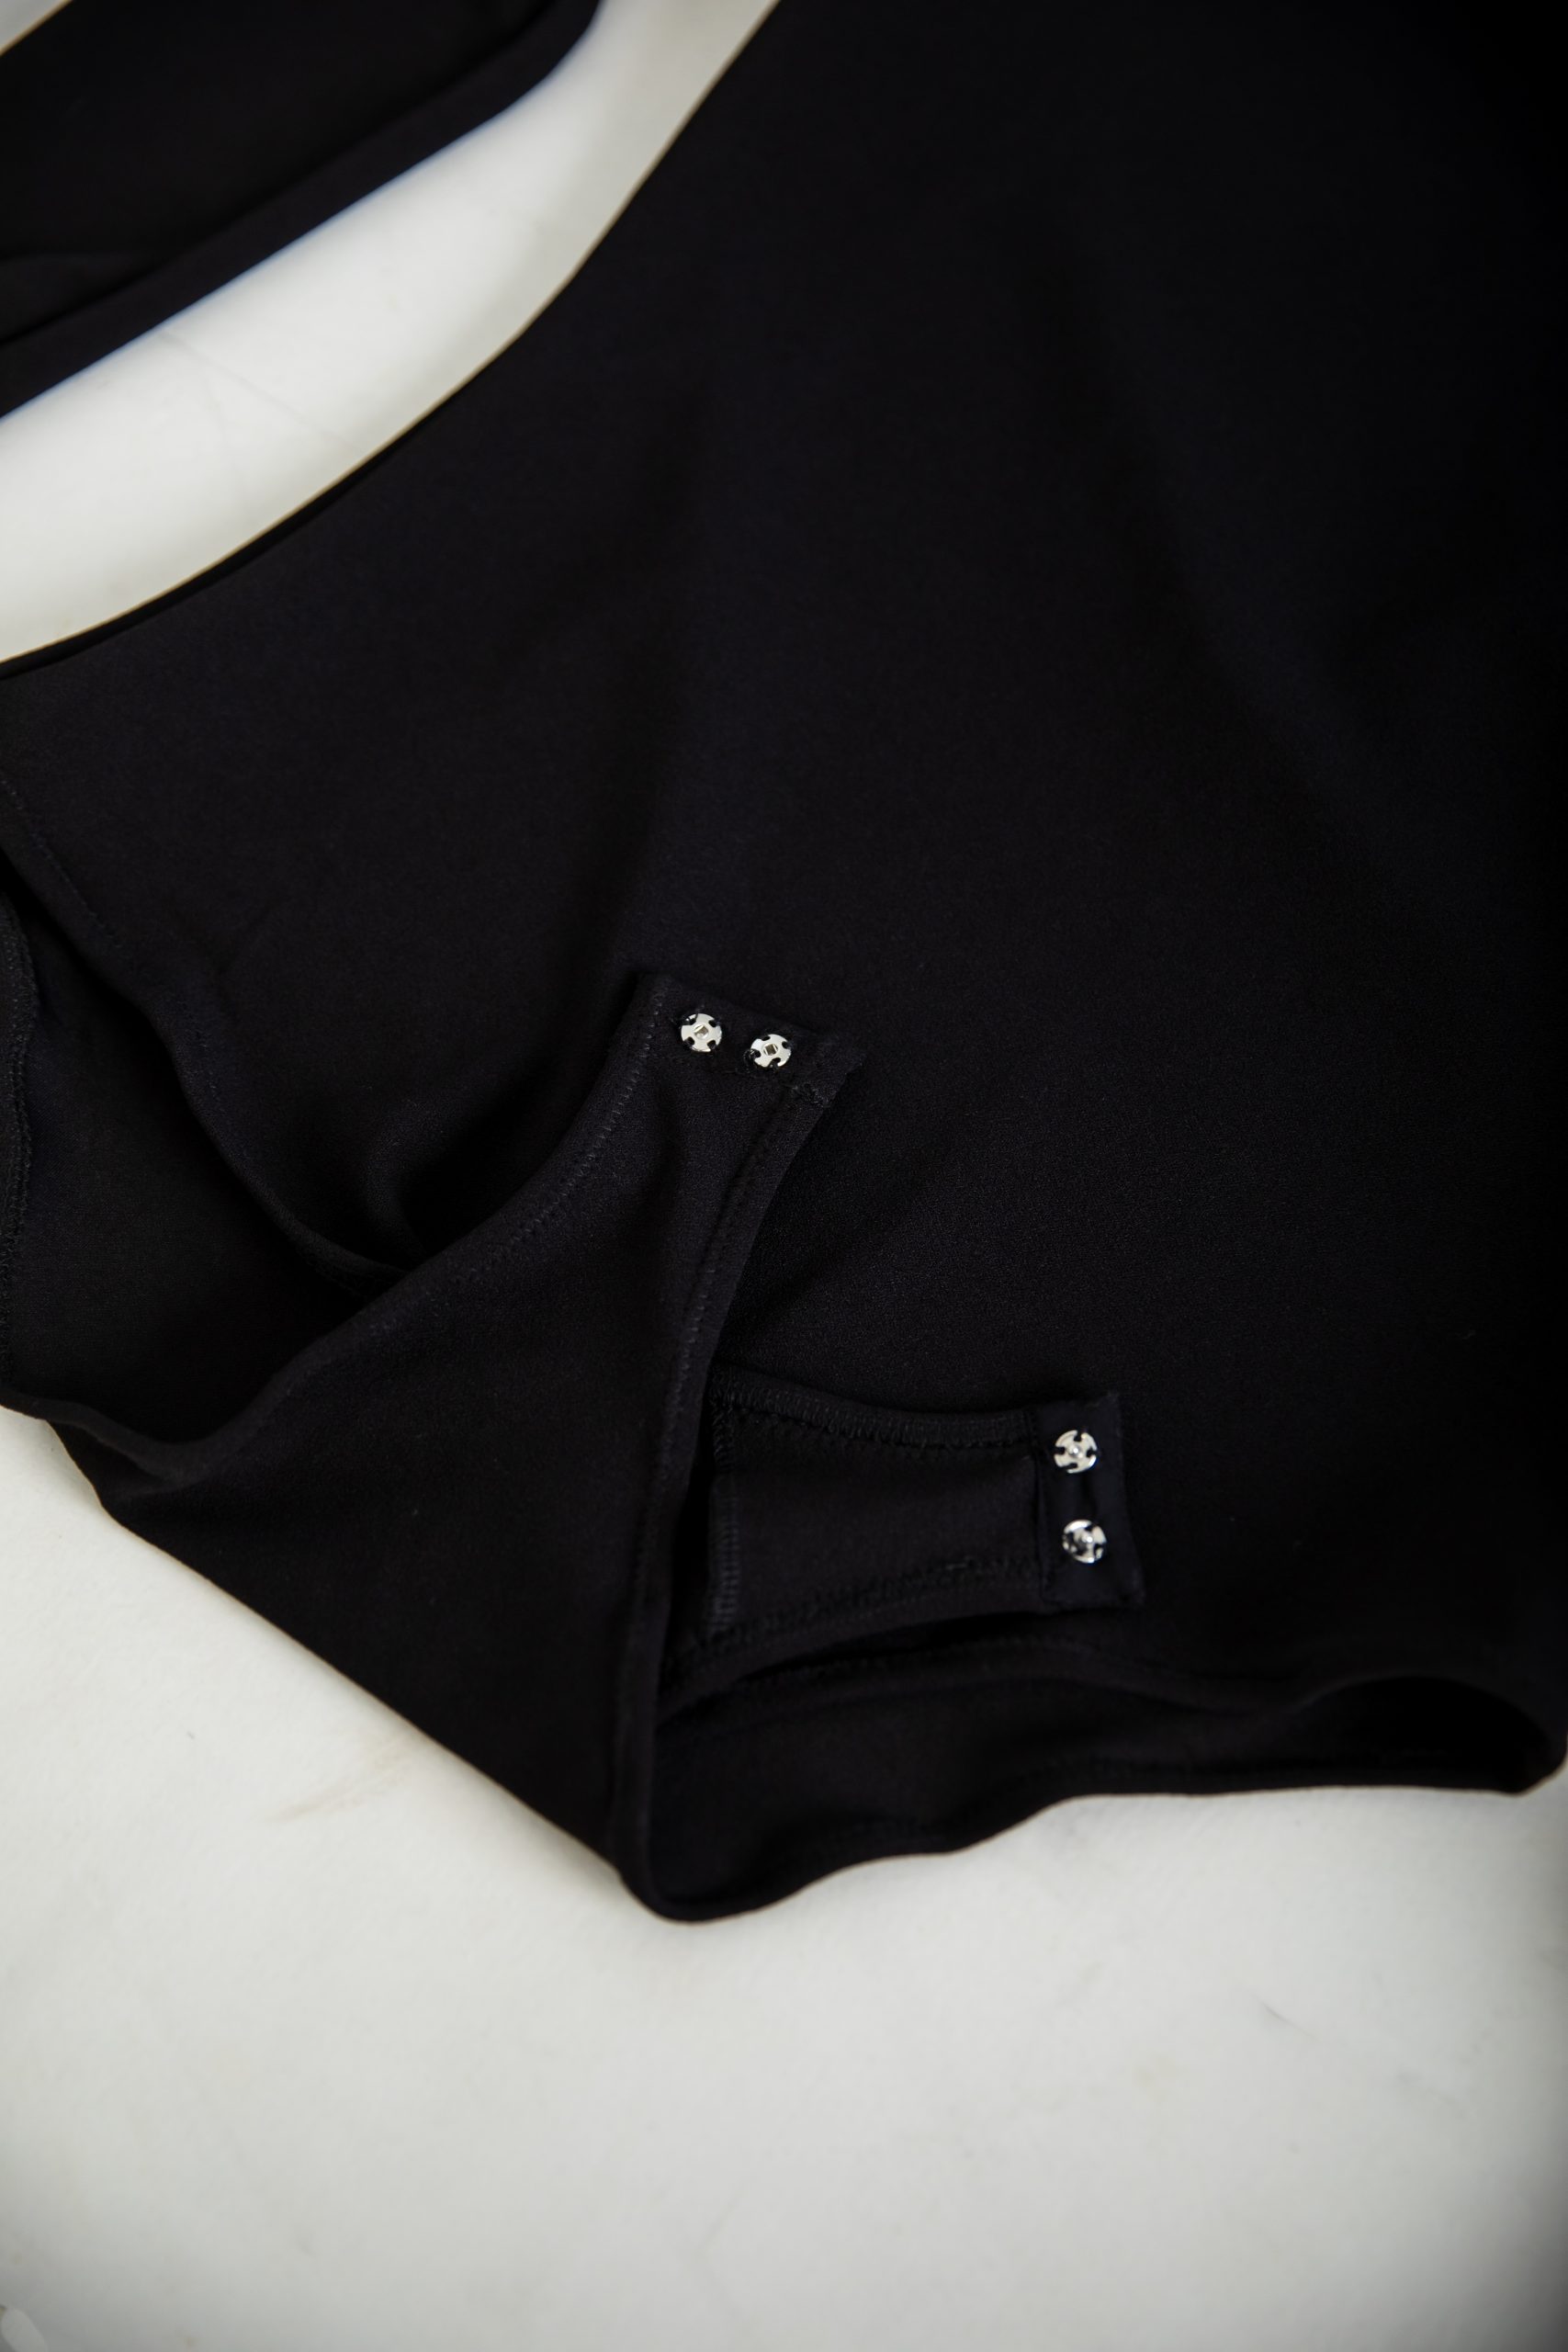
SNAP BUTTONS AND FINISHING:
- For each crotch, use a bias piece to end the bottom of the crotch.
- Position the bias unfolded on the right side of the crotch.
- Fold each side so that the edge of the bias tape matches the width of each crotch.
- Sew along the fold of the bias tape.
- Trim the corners of the folds and turn the bias tape completely inside out.
- Pin and sew along the edge of the bias tape.
- Use small stitches by hand to close the sides of the bias tape.
- On each snap button, there are two parts:
- A socket: This is the female part that holds the stud.
- A stud: This is the male part with a ball or shape that fits into the socket.
- Separate those parts and position two sockets on the right side of the back body on the crotch part (on the other side of the bias).
- Hand sew the two parts of the buttons.
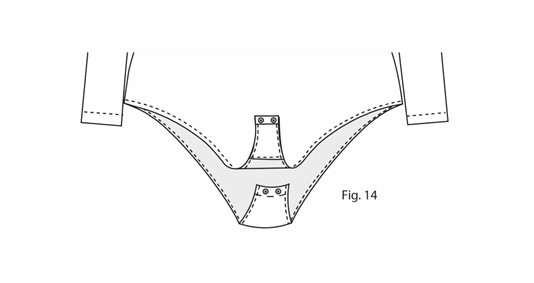
- Position two studs on the wrong side of the front body on the crotch part(on the bias).
- Before sewing, check that the spacing between the buttons is the same.
- Hand sew the two parts of the buttons.