Photo provided by designer.
A scalloped hem adds a touch of elegance and whimsy to any sewing project, transforming an ordinary garment or home décor item into something truly special. Whether you’re finishing a skirt, a dress, or even a set of curtains, this technique elevates your design with its wave-like curves. In this guide, we’ll walk you through sewing a flawless scalloped hem, ensuring a professional and stylish finish every time.
Before we begin, let’s talk about fabric.
Choosing Your Fabric:
The fabric you choose is key to achieving clean, well-defined scallops. Medium-weight fabrics like cotton, linen, or twill work best, offering enough structure to hold the scalloped shape while allowing smooth edges.
When working with patterned fabrics, consider how the design interacts with the scallops. Large prints may overwhelm the effect, while small patterns or solid colors often enhance the elegant curves.
Preparing Your Fabric:
Before you begin sewing, it’s essential to prepare your fabric properly:
- Always wash your fabric before cutting and sewing to prevent shrinkage after your project is complete.
- Use a steam iron to ensure your fabric is smooth and ready for precise stitching. Any creases or folds can distort your scalloped edges.
Ok, now let’s dive in!
Materials:
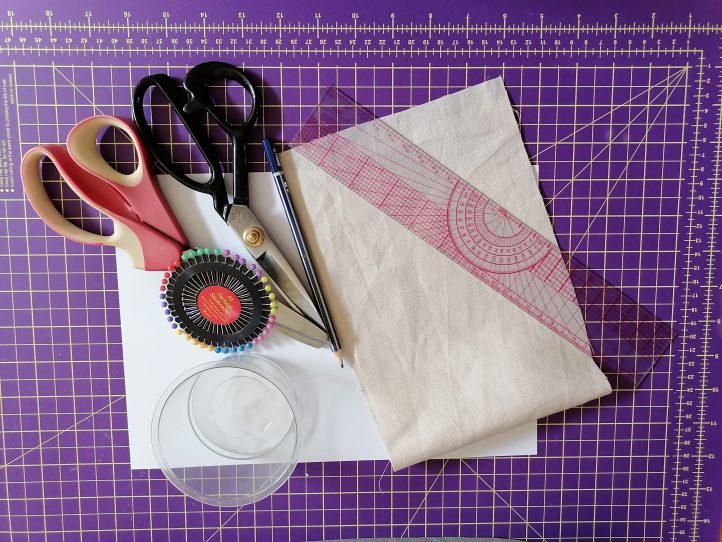
Photo provided by designer.
- Fabric or a garment/project that you want to add scallops to
- Scissors or rotary cutter and cutting mat
- Tailor’s chalk or fabric marker
- Paper and pencil (for the stencil)
- Ruler
- Plastic cup (or any round object for tracing those curves!)
- Pins
Sewing Instructions:
PLANNING YOUR SCALLOPS:
To ensure a consistent and polished look, carefully plan the size and spacing of your scallops:
- Smaller scallops are daintier and work well on delicate items, while larger scallops make a bold statement on skirts or home décor.
- The scallops should be evenly spaced. Using a template ensures that your curves are symmetrical and consistent.
- Draw two parallel lines on a piece of paper, spaced apart to match the desired depth of your scallops. Use a round object to draw half-circles between the lines, connecting them seamlessly. Cut out your stencil to use as a guide.
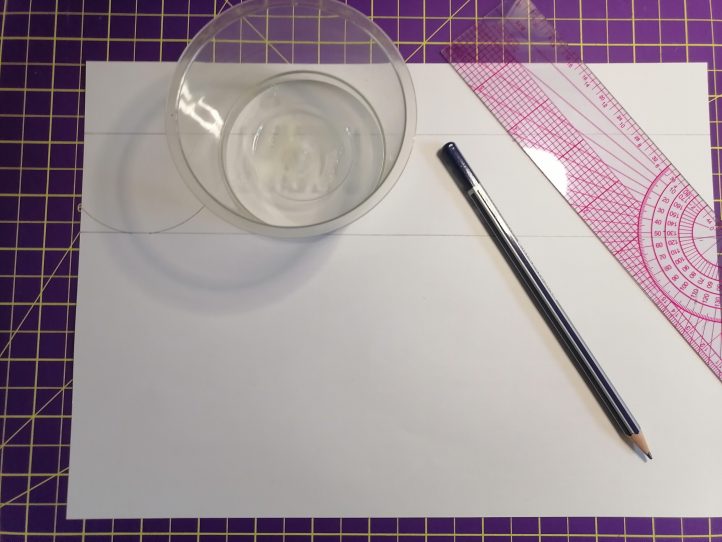
Photo provided by designer.
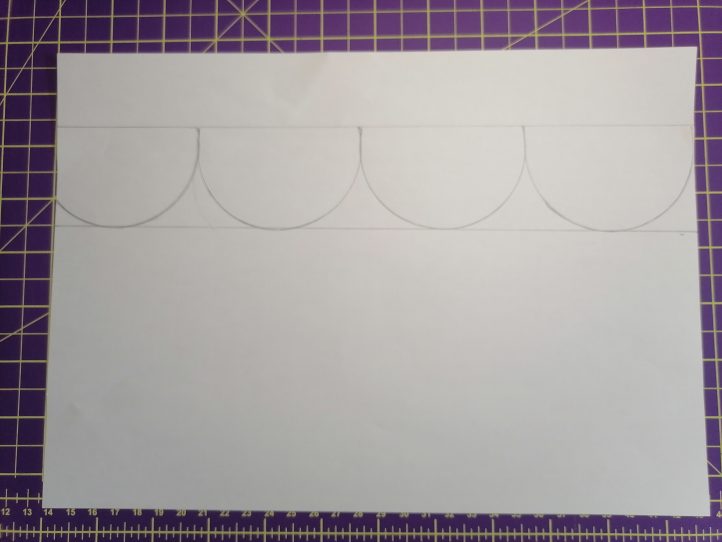
Photo provided by designer.
SEWING THE SCALLOPS:
- Take your garment/project and start by folding and pressing about a 1/2”-1” hem towards the inside. Then, sew.
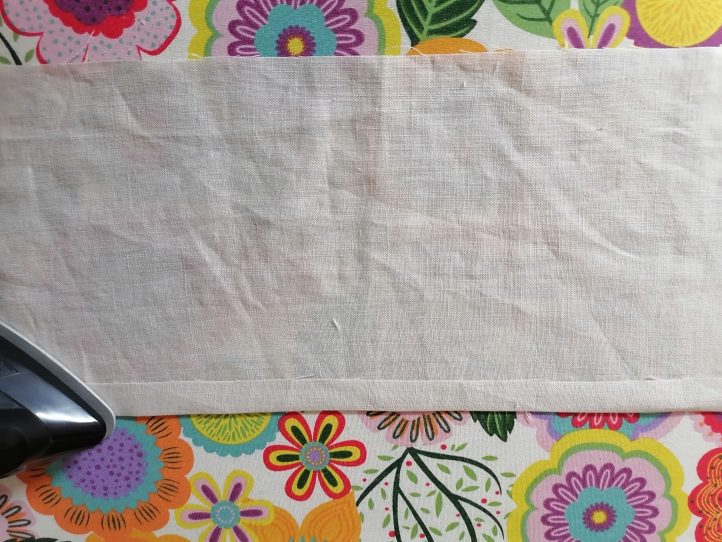
Photo provided by designer.
- Next, fold the hem (right sides together) again, a couple of inches or so, depending on how deep your scallops are.
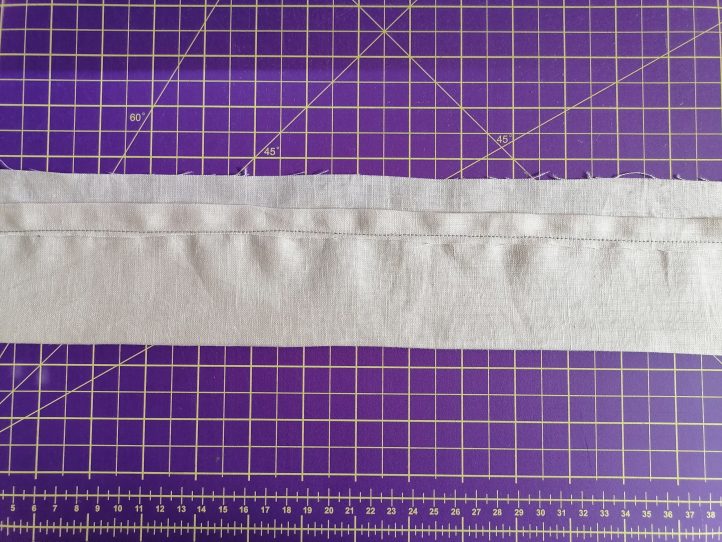
Photo provided by designer.
- Place your stencil on your hem so that the drawn line at the top of your scallop lines up with your previously sewn hem.
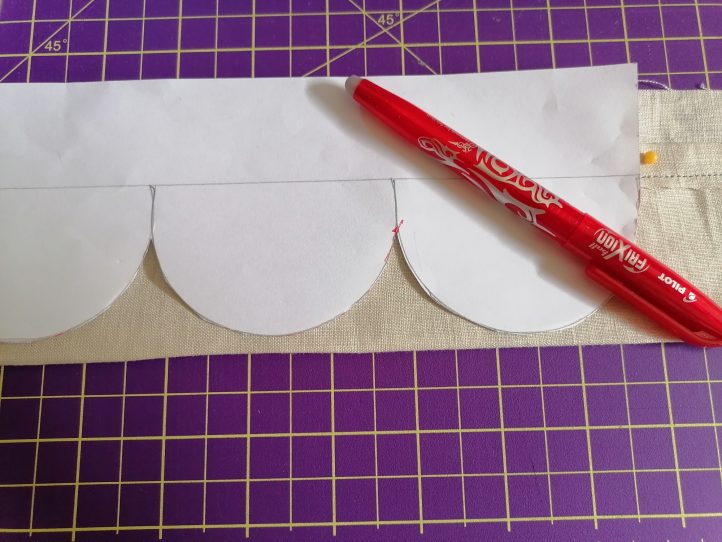
Photo provided by designer.
- Pin your stencil in place and trace around it with your marking tool. Ensure the markings are clear, as they’ll guide your stitching.
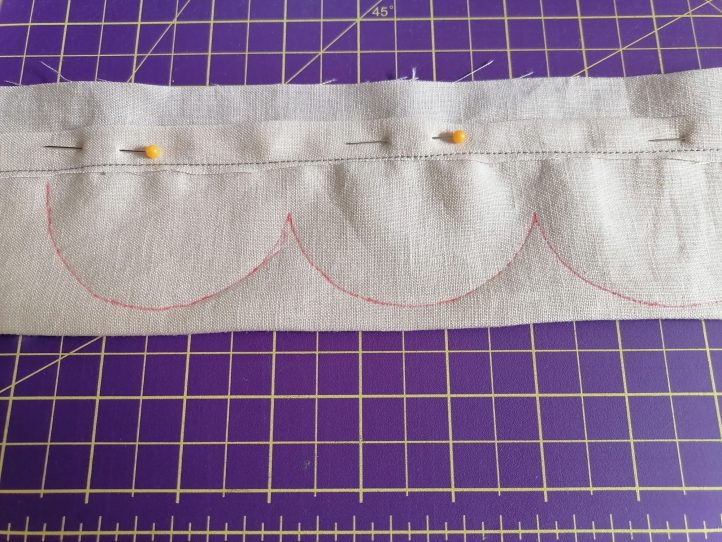
Photo provided by designer.
- With the fabric’s right side facing you, carefully follow your markings, sewing in a smooth, continuous motion. Take your time on the curves, adjusting the fabric to keep the stitches even.
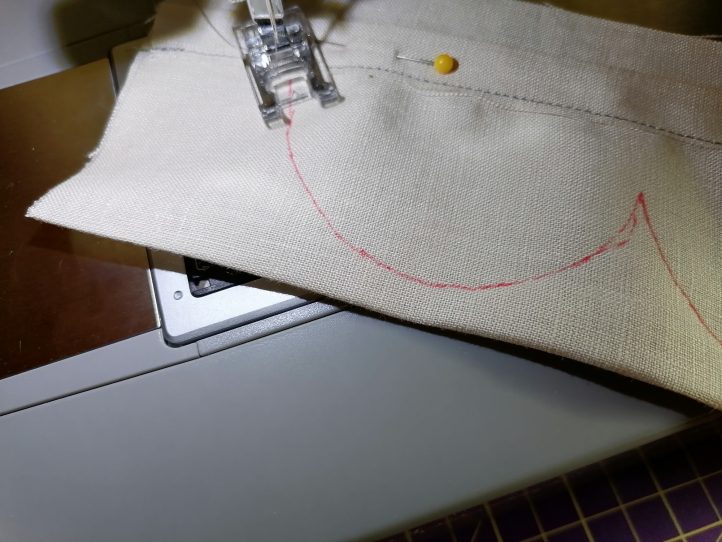
Photo provided by designer.
TURNING, PRESSING, AND FINISHING:
- Clip in between each scallop close to the stitches without cutting through them. Trim off the excess fabric around the scallops close to the stitching. You can use pinking shears for this. This step is crucial to achieving the perfect curve when turning the hem right side out.
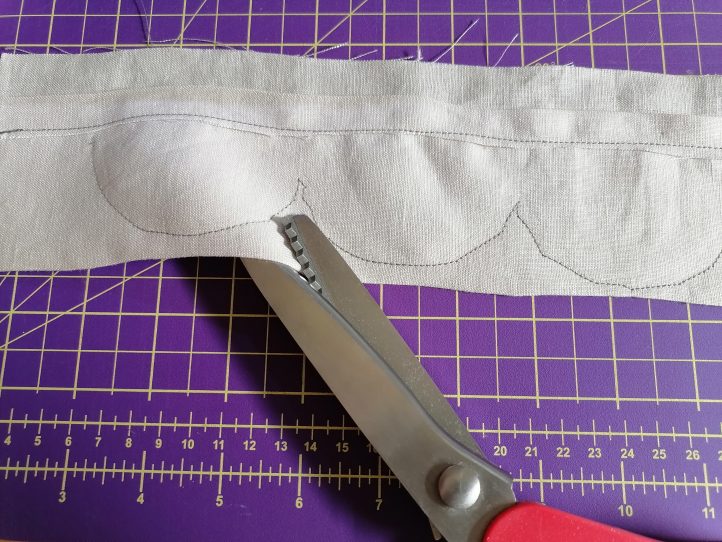
Photo provided by designer.
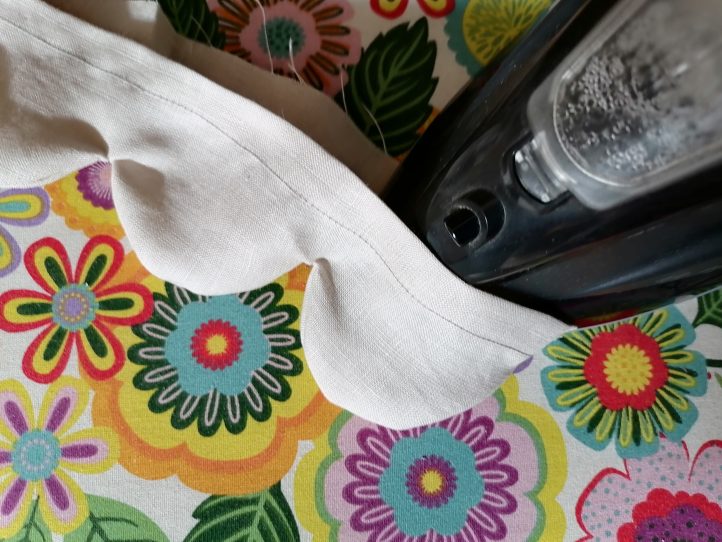
- Pressing is essential for getting the perfect rounded shape. Stick your iron between each scallop and press with your hem right sides together. Then, turn your hem right side out and do the same. This will really help you get the perfect rounded shape.
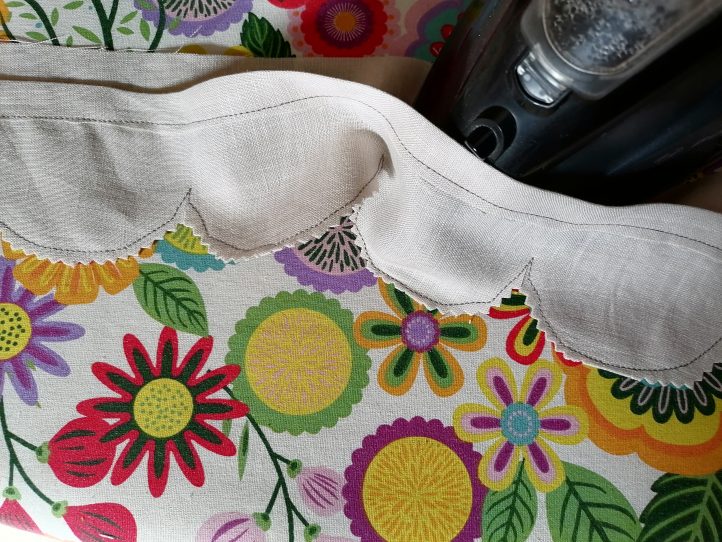
Photo provided by designer.
Photo provided by designer.
- Finally, press your hem flat and finish the inside with an invisible stitch.
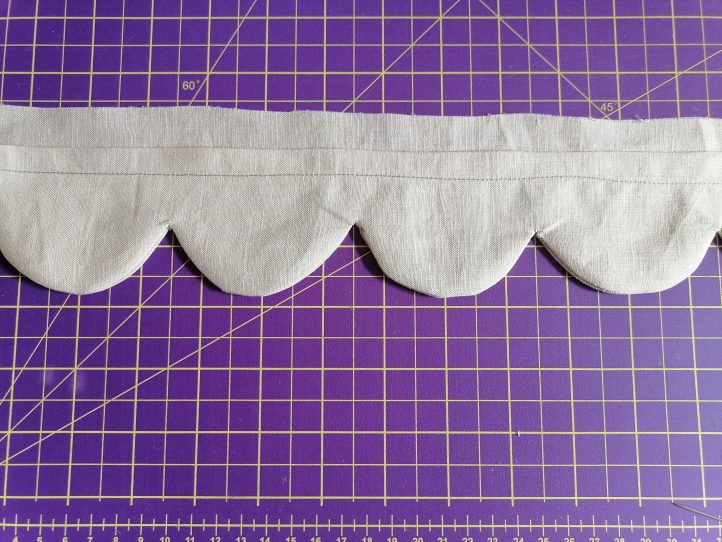
Photo provided by designer.
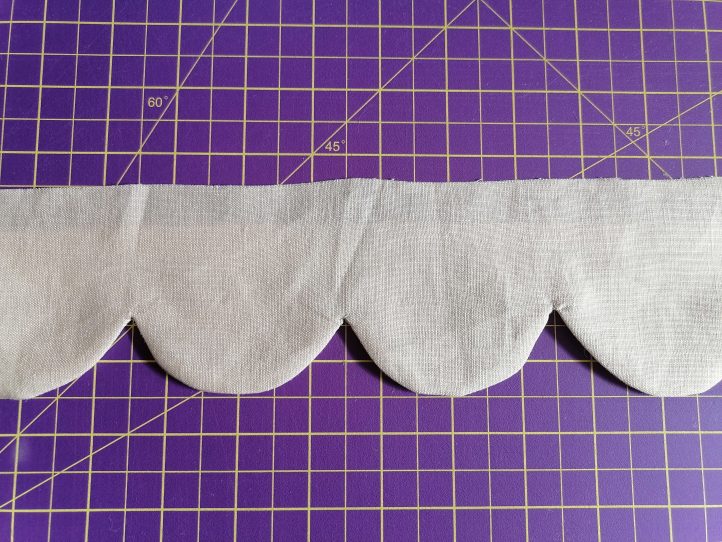
Photo provided by designer.
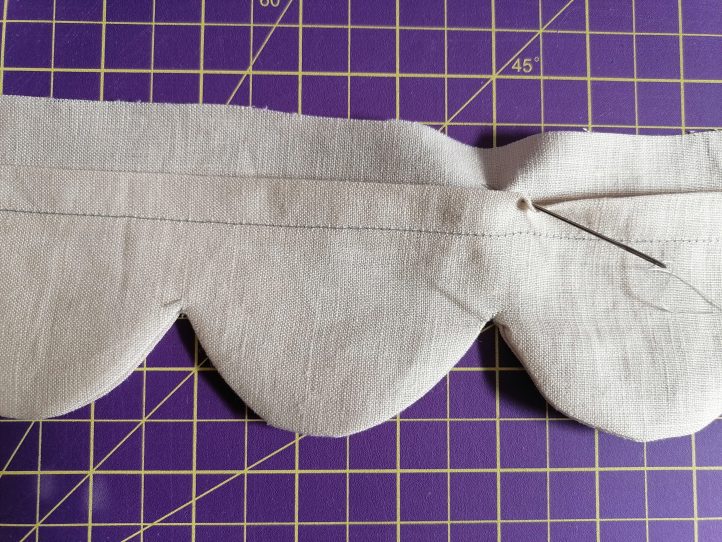
Photo provided by designer.
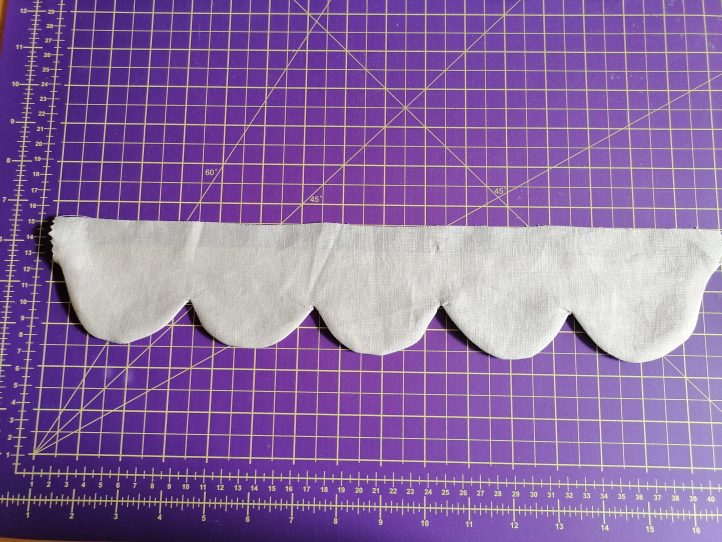
Photo provided by designer.
CREATIVE IDEAS FOR USING A SCALLOPED HEM:
Scalloped hems can be applied to various projects, from clothing to home décor and accessories. Here are a few ideas to inspire you:
- Clothing: Add a scalloped hem to a summer dress or a flirty skirt for a feminine, playful touch. For extra detailing, you can even incorporate scallops on the sleeves or neckline of a blouse.
- Home Décor: Create soft, romantic scalloped edges on curtains, or design custom scalloped table runners and placemats for a unique, handcrafted feel. Scalloped edges on pillows or bedding also bring a luxurious, decorative element to your home.
- Accessories: Add a scalloped edge to tote bags or pouches for a fun, stylish twist. This small detail can make a simple accessory stand out.
Sewing a scalloped hem is a rewarding technique that brings a touch of elegance and uniqueness to any project. While it requires patience and precision, the final result is well worth the effort. As you practice, don’t hesitate to experiment with different fabrics, scallop sizes, and placements. Each project will boost your confidence and creativity, helping you master the art of crafting curves!
Great article and easy to understand instructions.
Thanks so much for your kind comment, Amanda! Have a great day 🙂 – Ashley, We Like Sewing