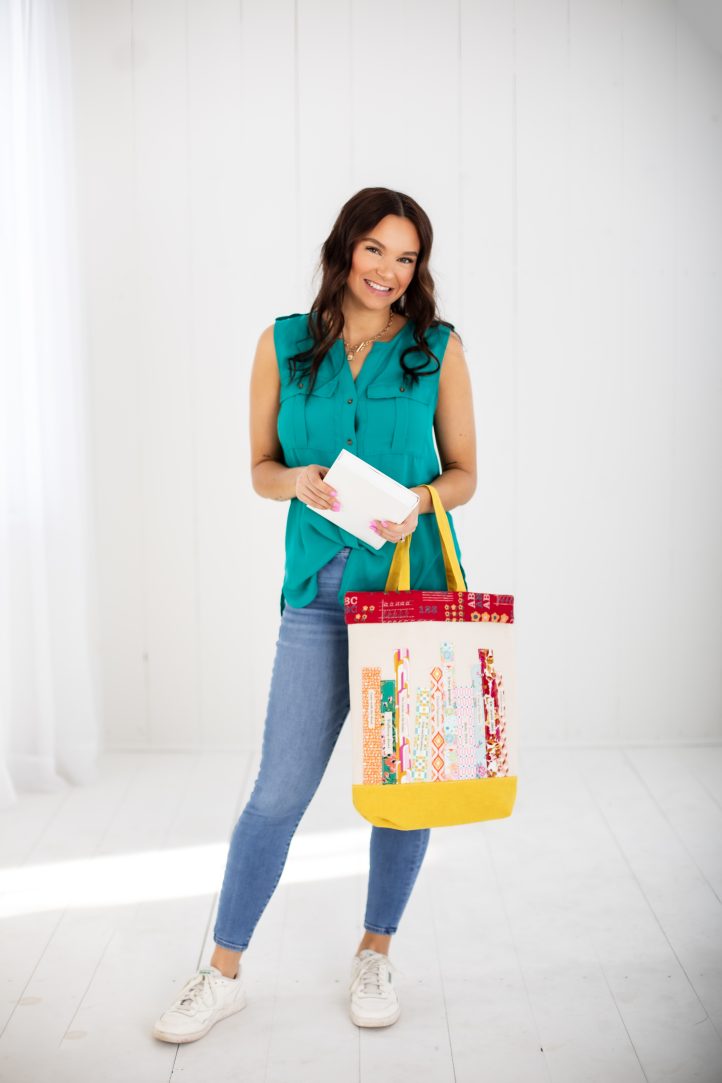
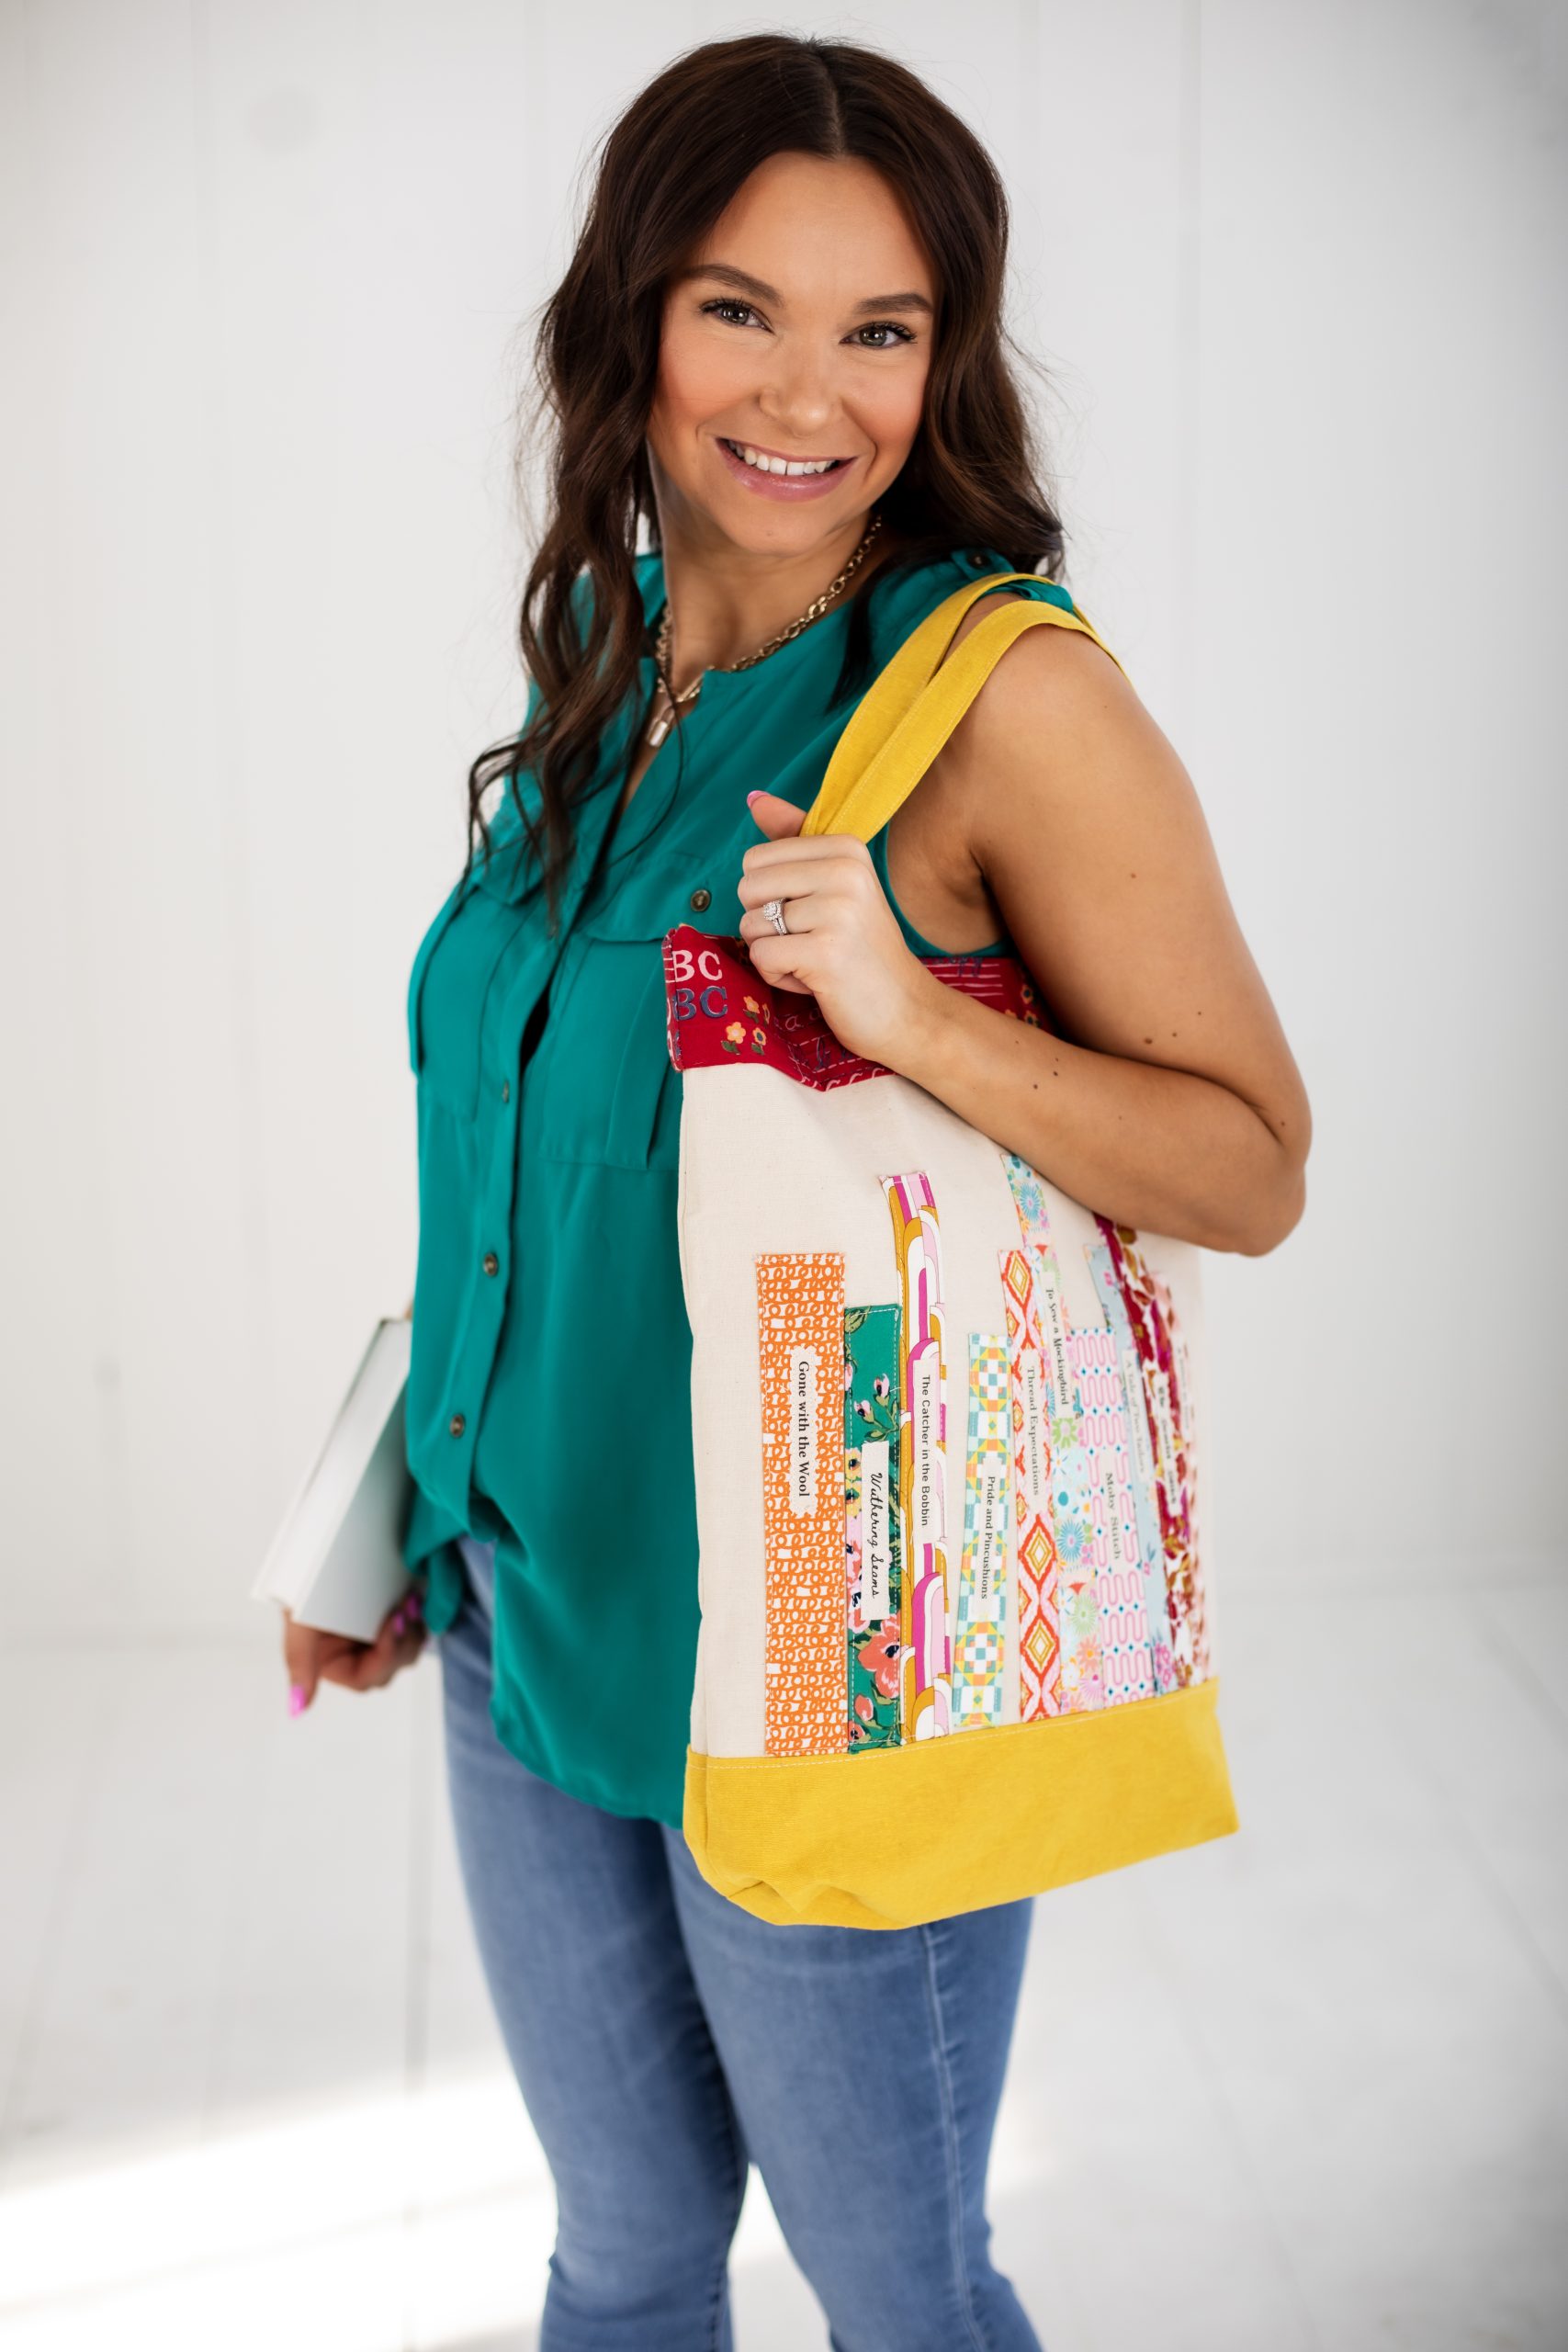
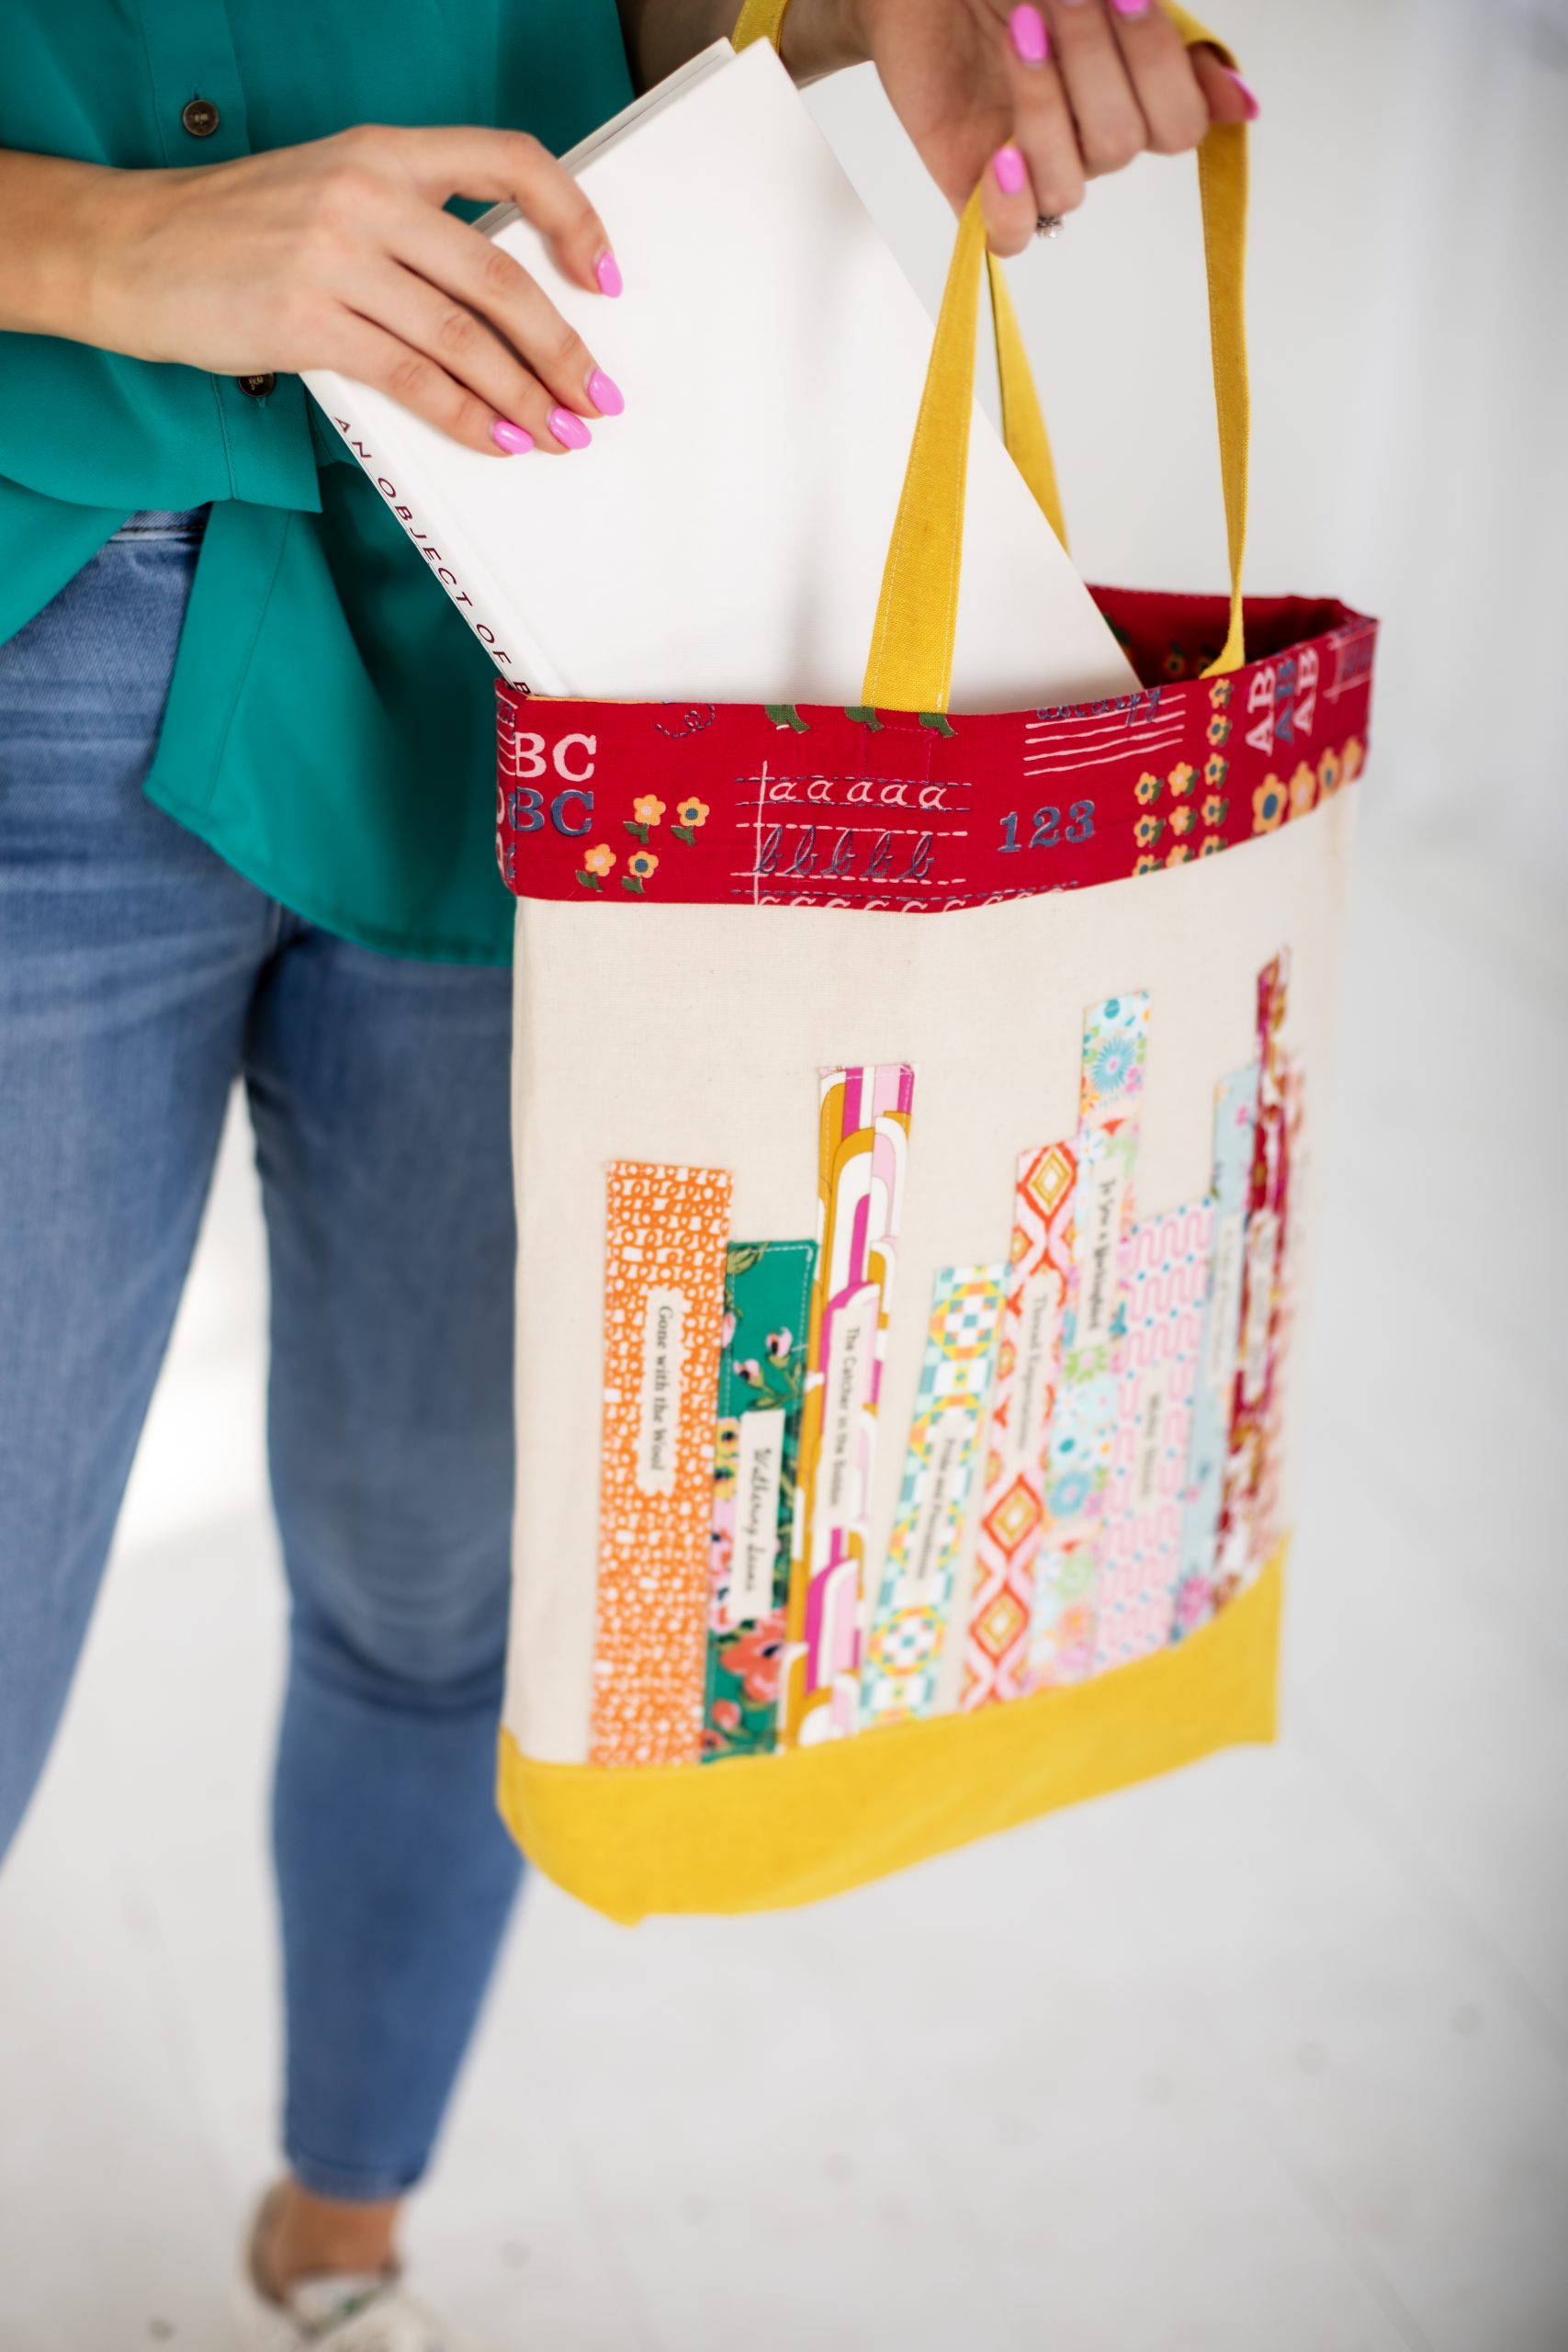
Summer break means more trips to the library, so if you’re book nerds like us, you’re going to want to make this whimsical book bag as soon as possible. From designer Sophie Tarrant, this sturdy tote bag pattern features a shelf of fabric books with delightful sewing and literature puns that are easy to customize to the recipient. This DIY tote bag is a wonderful end-of-year gift for teachers and is a thoughtful way to show your appreciation.
Skill Level: Beginner
Finished Size: 17” x 10” x 2”
Designer Notes: All About Printable Fabric: Printable fabric is a specially treated material designed to work with inkjet printers, allowing you to print designs, photos, or text directly onto fabric. It typically comes in sheets with a paper backing for stability during printing. To use it, load the fabric sheet into your printer, ensuring it’s oriented correctly, and print your design. Once printed, let the ink dry completely before peeling off the backing. Depending on the brand, you may need to set the ink with heat using an iron. Printable fabric is great for personalizing projects like quilt labels, patches, or custom decorations.
Materials:
- Fabric: Muslin, 1 yard; yellow cotton, 1/2 yard; lining fabric, 1 yard; plus, 10 scraps of printed cotton in various colors, each at least 2” wide and between 8” and 11” long
- Medium-weight fusible interfacing: 1 yard
- Thread: Yellow, white, pink
- Printable muslin fabric
- PDF Templates – These are located at the bottom of this page. Please see printing instructions below.
Tools:
- Pencil
- Scissors
- Iron
- Sewing machine
- Computer and printer
PRINTING INSTRUCTIONS:
Note: To download the templates, click on the pattern download button at the bottom of the page. We recommend opening your pattern download using Adobe Acrobat.
Sewing Instructions:
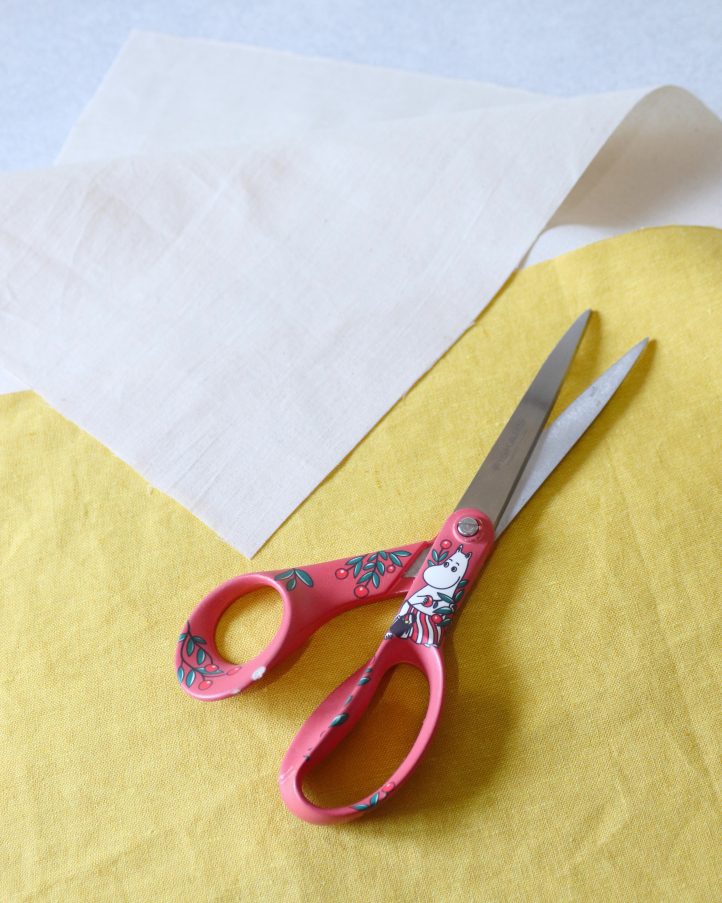
- Begin by cutting your outer fabrics to size. You’ll need two 15” x 16-1/2” pieces of muslin, and one 15” x 9-1/2” piece of yellow cotton. Back each one with medium-weight fusible interfacing using a warm iron.
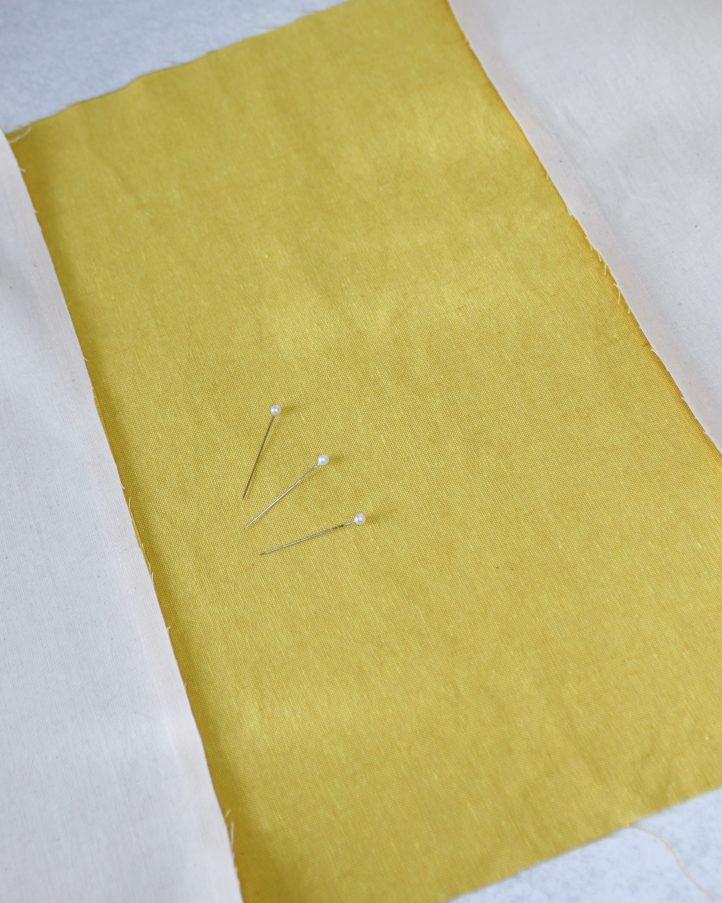
- Place one of the muslin pieces right sides together with the yellow rectangle, aligning them both along one 15” edge. Pin and then machine stitch into place, leaving a 1/2” seam allowance. Repeat to add the second muslin piece along the opposite 15” edge of the yellow cotton in the same way. Press each seam allowance inwards, towards the yellow fabric.
- Download, print, and cut out the book templates. Take the first one (labeled ‘1’) and use it to cut a rectangle from fusible interfacing. Fix the interfacing onto the wrong side of a piece of printed cotton fabric using a warm iron, then trim around the edge of the shape, leaving a 1/2” border of fabric on all sides. Number the back of the interfacing so you can keep track of which book is which.
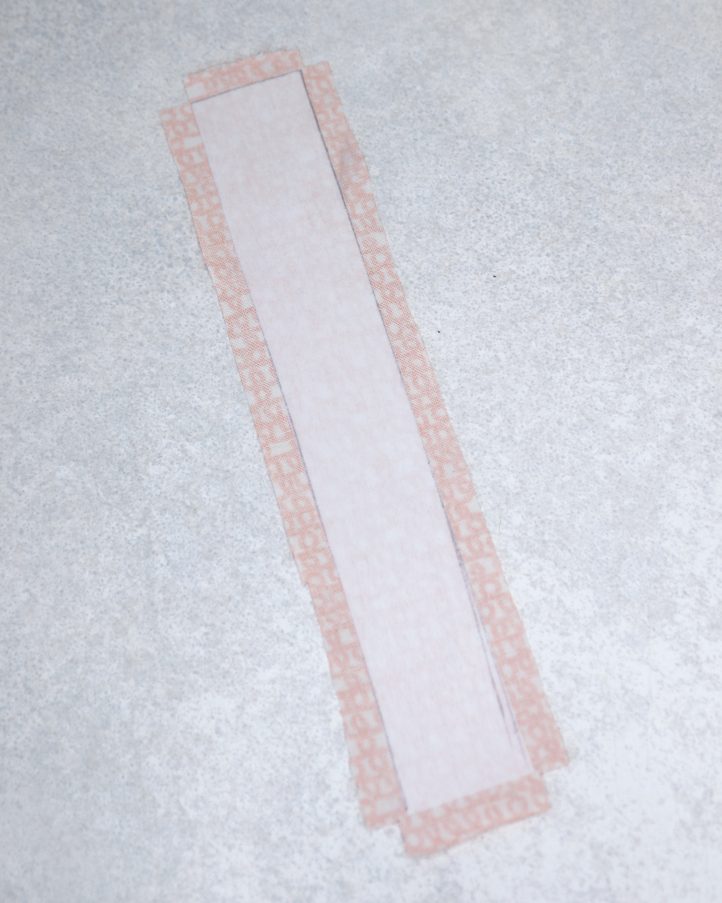
- Fold the fabric border over the interfacing and carefully press it into place, so the edges are wrapped in material. This is your first book. Place it aside for now.
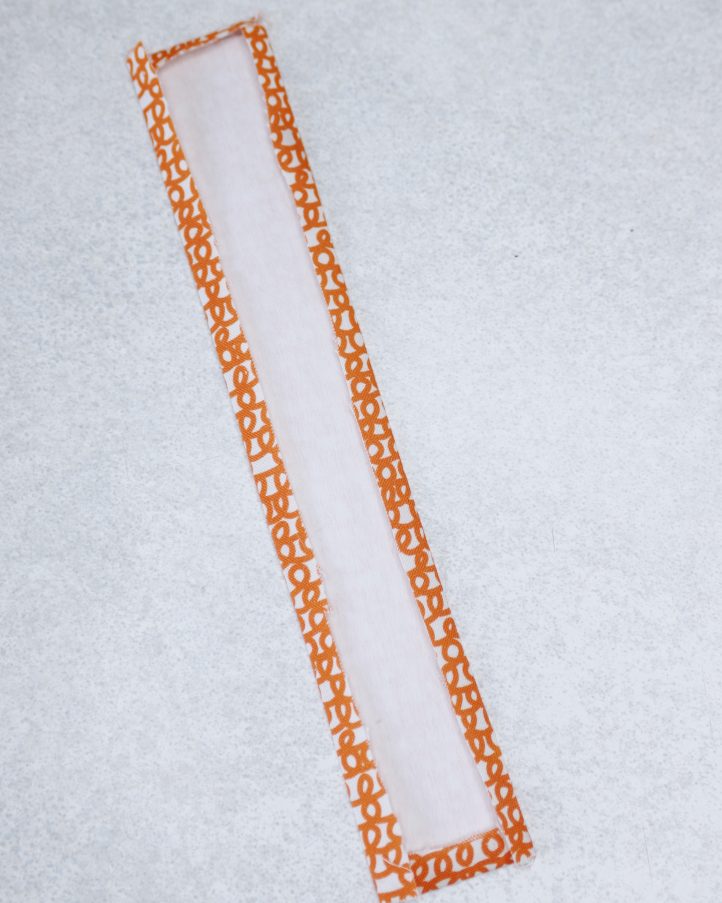
- Repeat Steps 3-4 to cut and wrap each book template piece from interfacing and fabric in the same way. Remember to number them as you go!

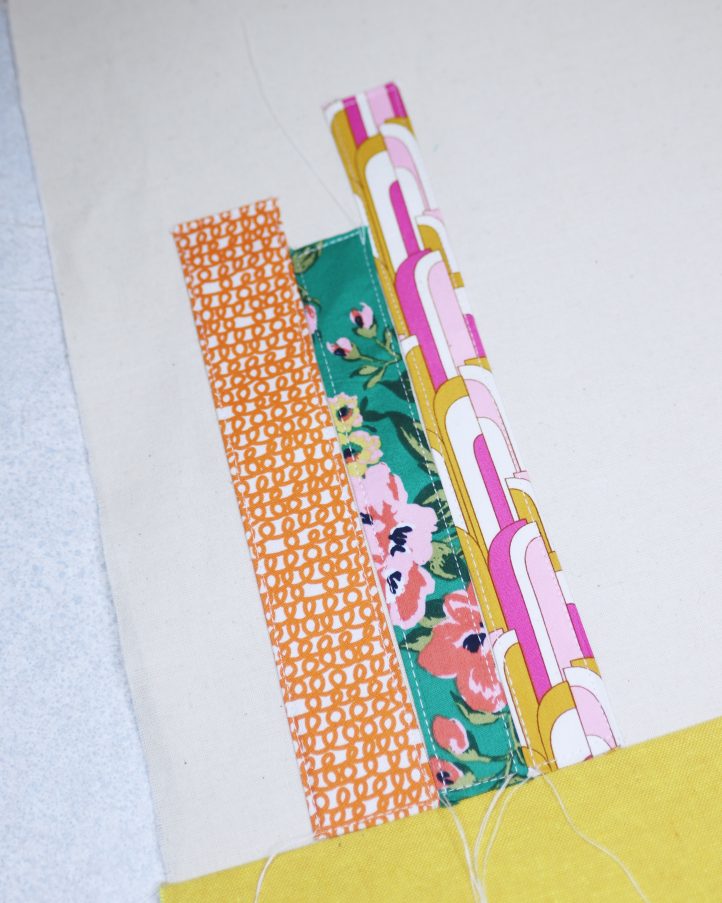
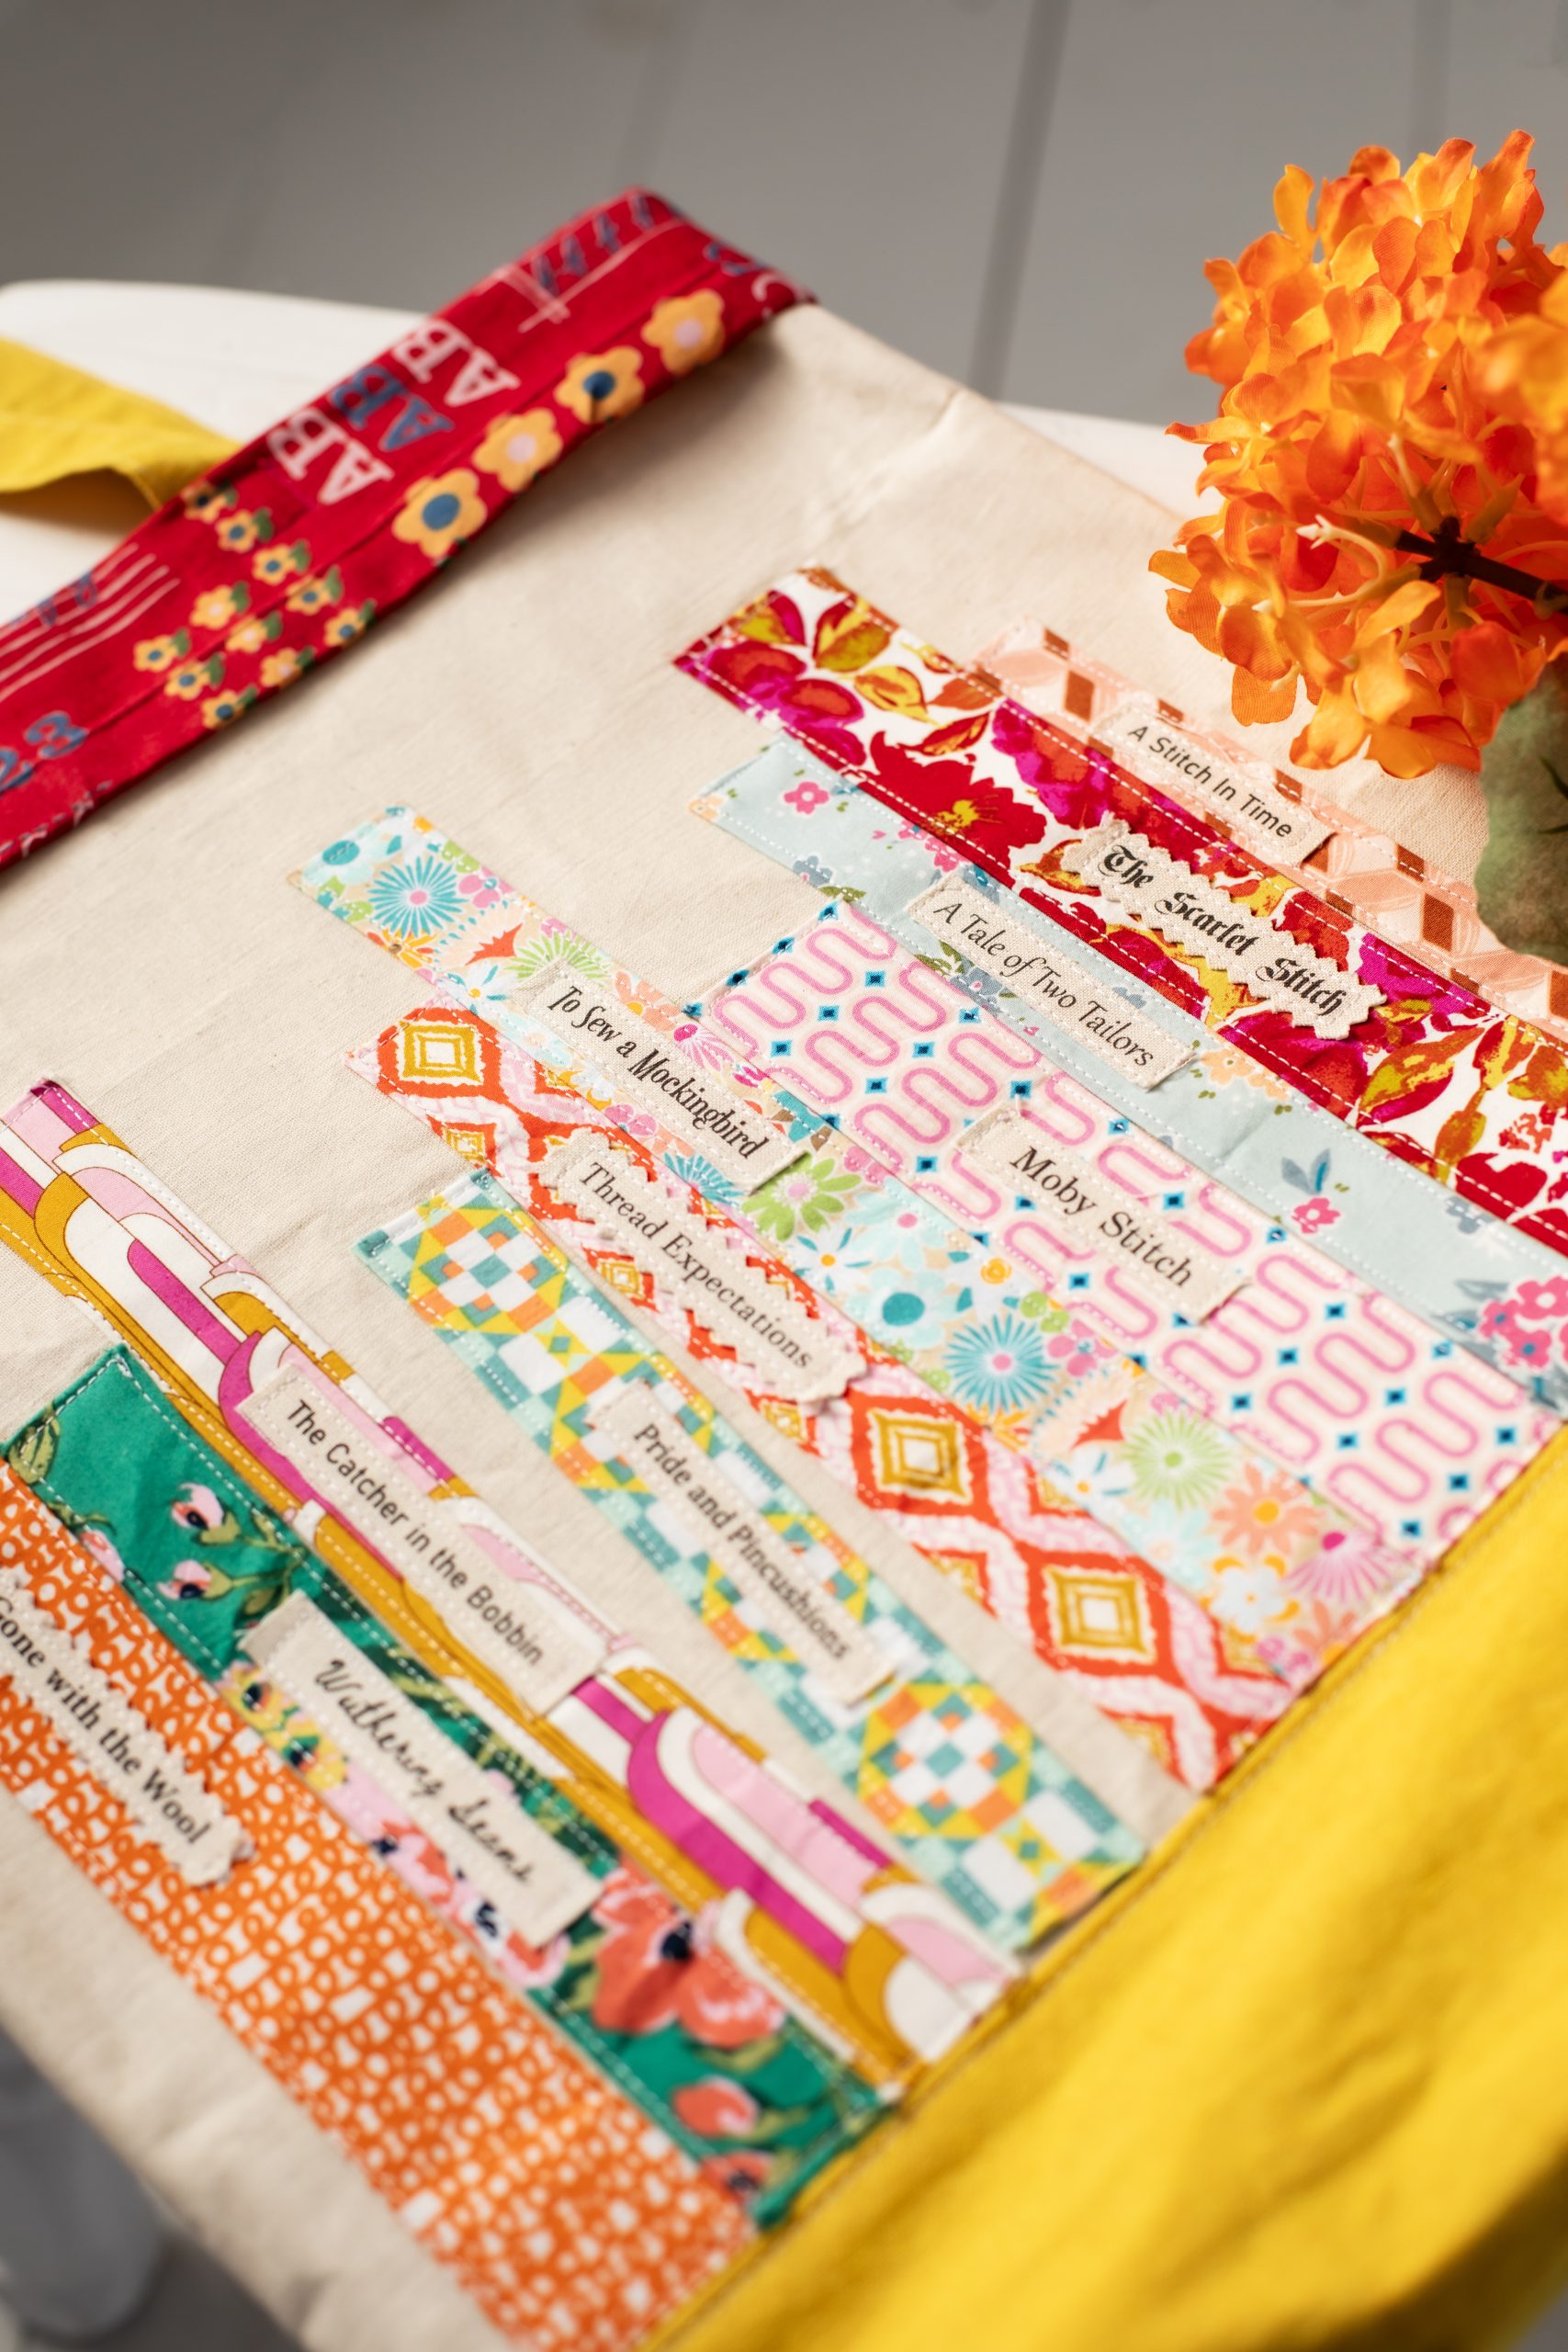
- Lay your outer fabric piece out flat, with the right side facing up. Place the books onto one of the muslin sides, aligning the bottom edge of each one with the join between the muslin and the yellow cotton. Position them so they look like they are sitting on a shelf (you can use our pictures for guidance), then pin them into place.
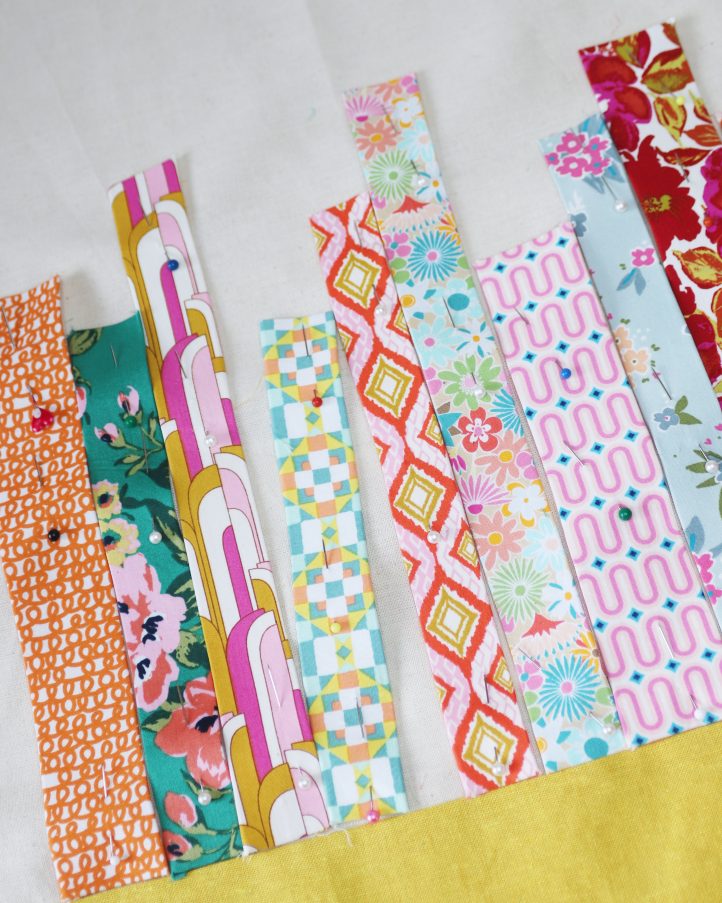
- Use a straight machine top stitch with white thread to sew each book into position, working just inside the folded edge of each one. Work slowly and carefully, ensuring the bottom of each book lines up neatly with the join between the muslin and yellow fabric.
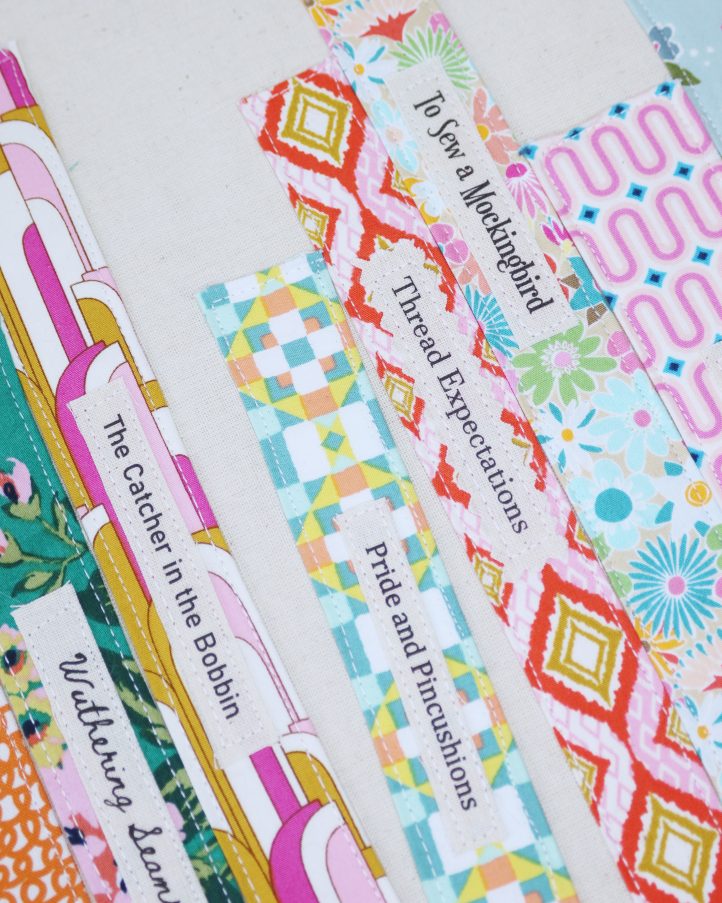
- It’s now time to make your labels. Using your PC, type a list of 10 book titles onto a Word document, making sure to space them out across the page. You can use the names of your favorite books, or come up with pun-based sewing titles, as we’ve done in our example. Carefully print the designs onto a sheet of printable fabric, then back it with fusible interfacing. Cut each one out using pinking shears, then topstitch them into place along the spines of each book.
- Next, it’s time to make your lining. From your lining fabric, cut two 15” x 20-3/4” pieces. Place them right sides together and stitch along the side and bottom edges with a 1/2” seam allowance, leaving a 4” gap in the middle of the bottom seam. This will be used for turning the work out later on.
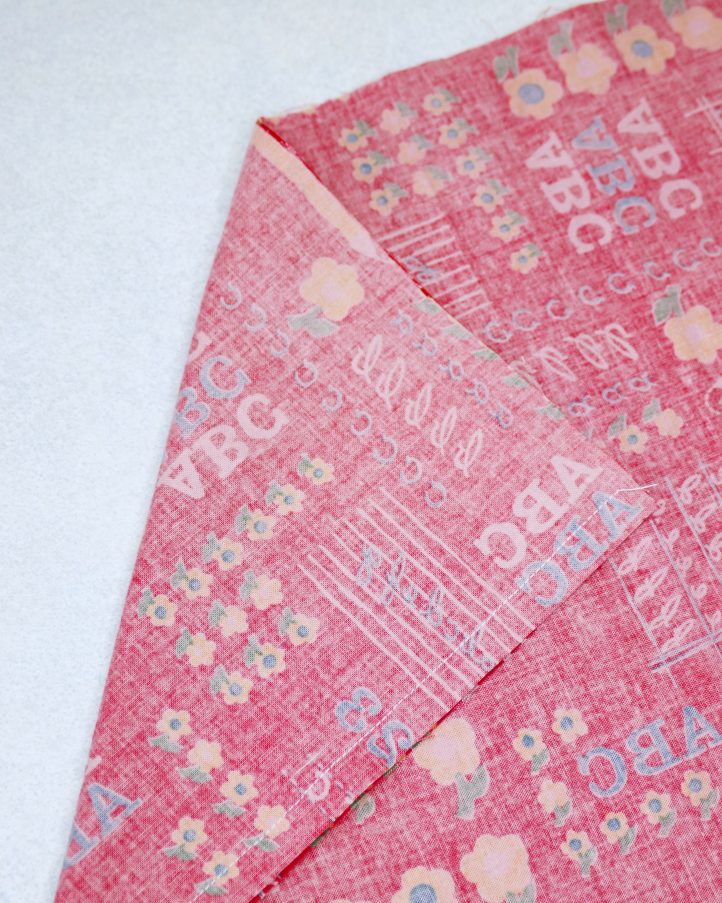
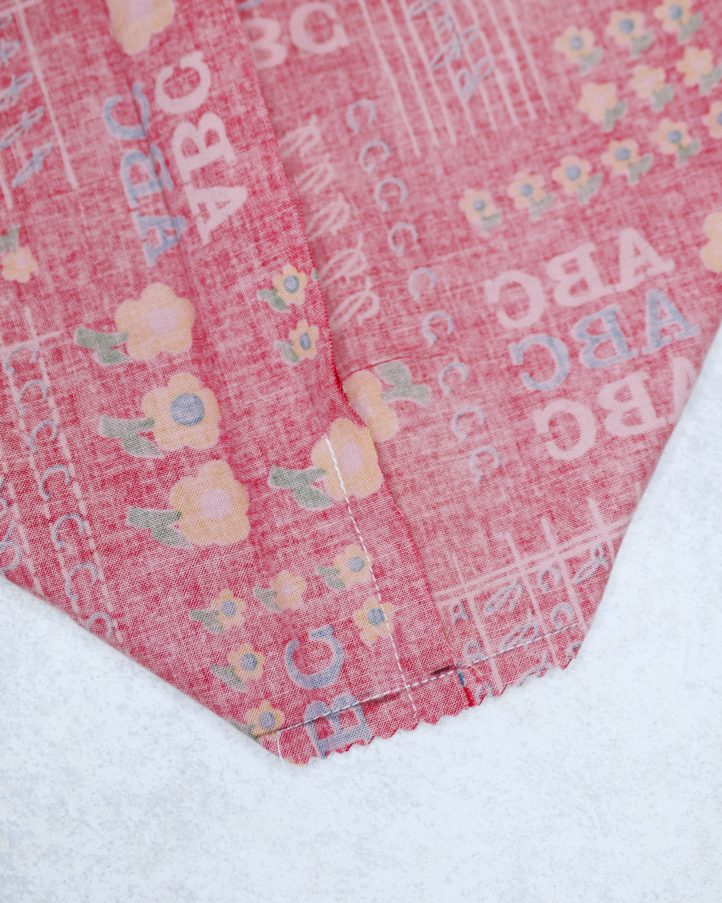
- Stitch a gusset in the bottom of your lining bag. To do this, pinch one bottom corner so the side seam and bottom seam align, forming a triangle with the corner point. Use a ruler to measure and mark a straight line across the triangle, 1” from the tip. The line should be 2” wide. Sew along the marked line, then trim off the excess fabric, leaving a small seam allowance. Repeat for the opposite bottom corner, then place the lining bag aside for now.
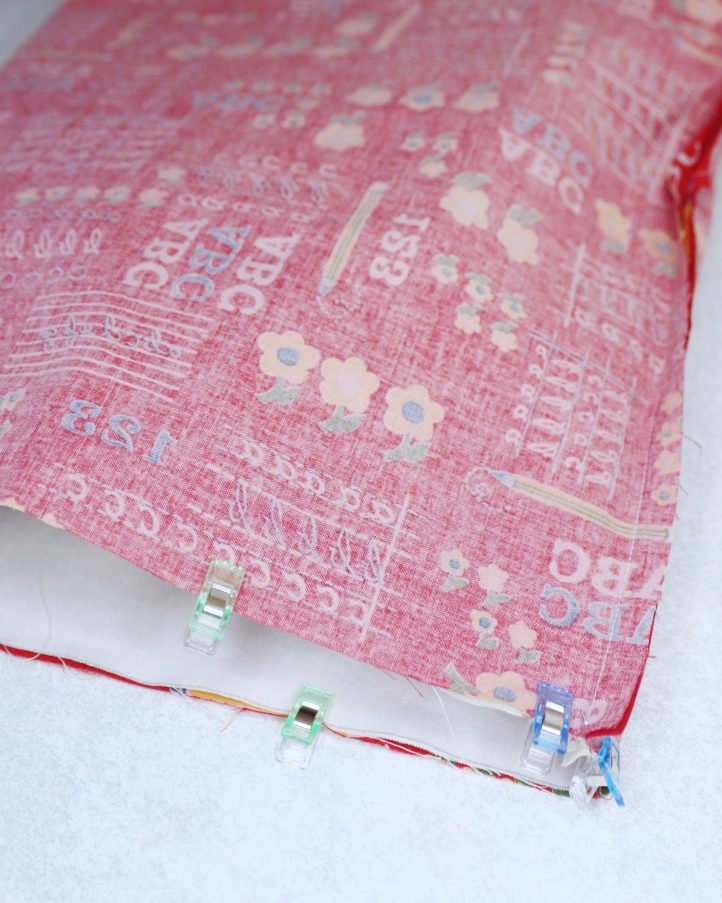
- Take your outer bag and fold it in half with the right sides facing. Stitch along both side edges, then repeat Step 10 to stitch a gusset in the same way as you did for the lining. Slide the lining bag over the outer bag, with the right sides facing. Align them along the top edges and clip, then stitch all around with a 1/2” seam allowance.
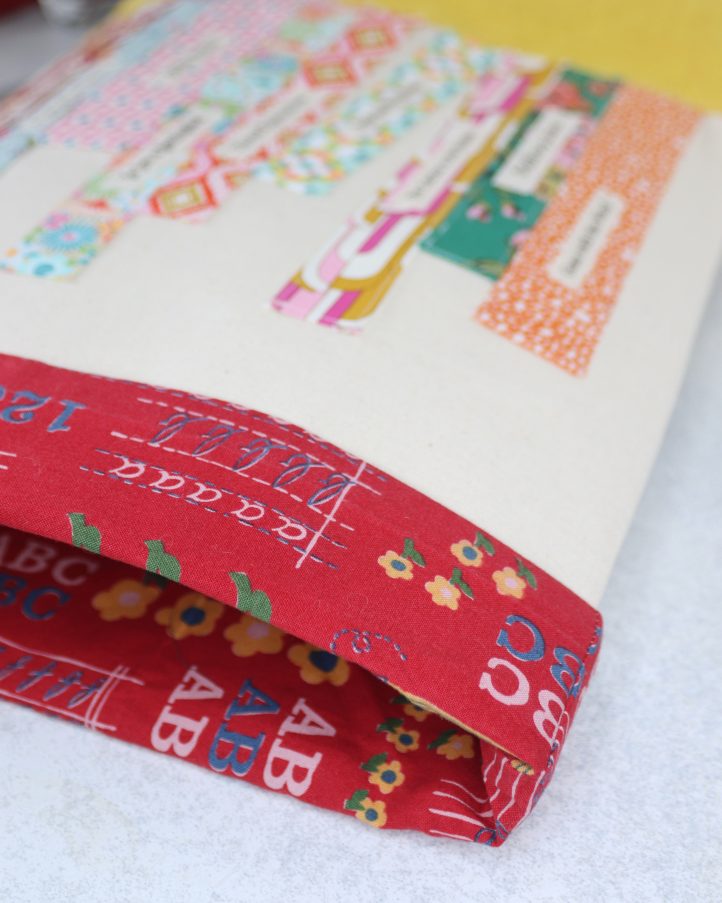
- Turn the bag out through the gap in the bottom of the lining, then stitch the gap closed. Turn the bag right sides out and push the bottom corners out neatly. Fold the top edge of the bag over by 3”, then hold it in place with a few small stitches.
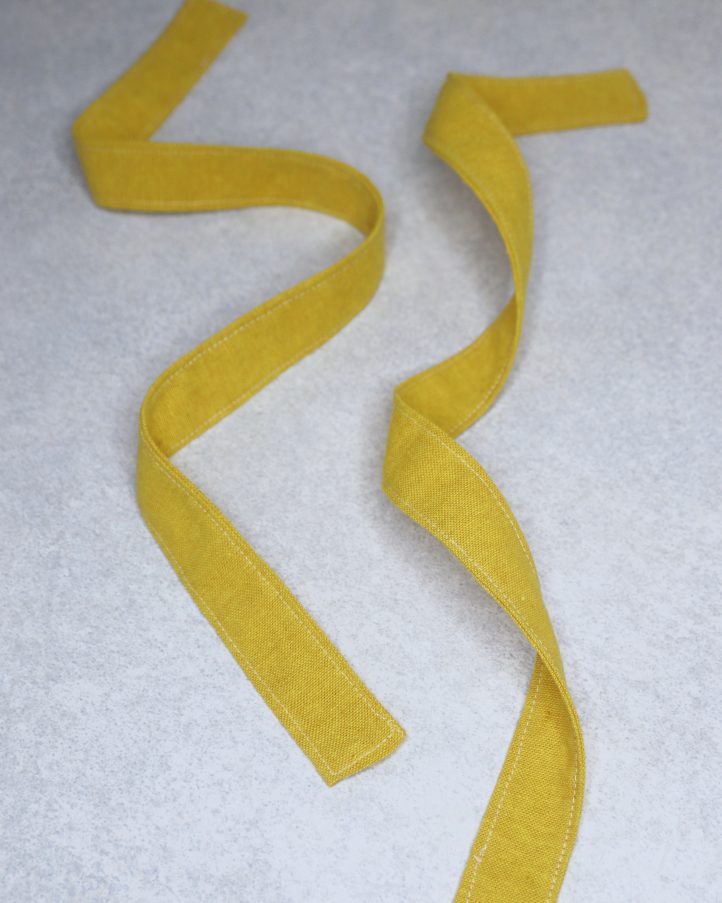
- Make two straps. Cut two 2-1/2” x 20” pieces of yellow cotton and fold each one in half lengthways with the right sides facing. Stitch them each along the long edge, leaving a 1/8” seam allowance. Turn the straps right sides out and fold the short edges in by 1/8”, then press flat. Work an edgestitch all around each strap in white thread to set the shape.
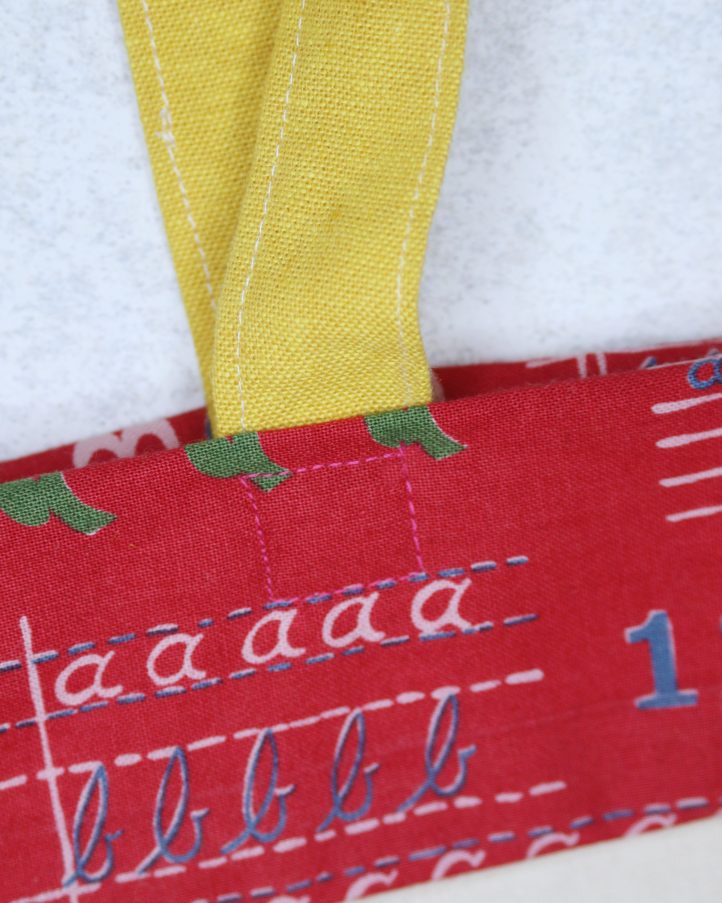
- Finally, add your straps. Pin the short edges of each strap to the inside top edge of the bag, placing one strap on each side and making sure they are equal and centered. Work a square of top stitching to hold each strap end in place, using thread in a color to match your lining fabric.
Love this idea….my grand daughter is a kindergarten teacher and I think I will try making her one with appropiate book titles.
Thanks so much for sharing your idea, Joyce! Have a great day 🙂 – Ashley, We Like Sewing