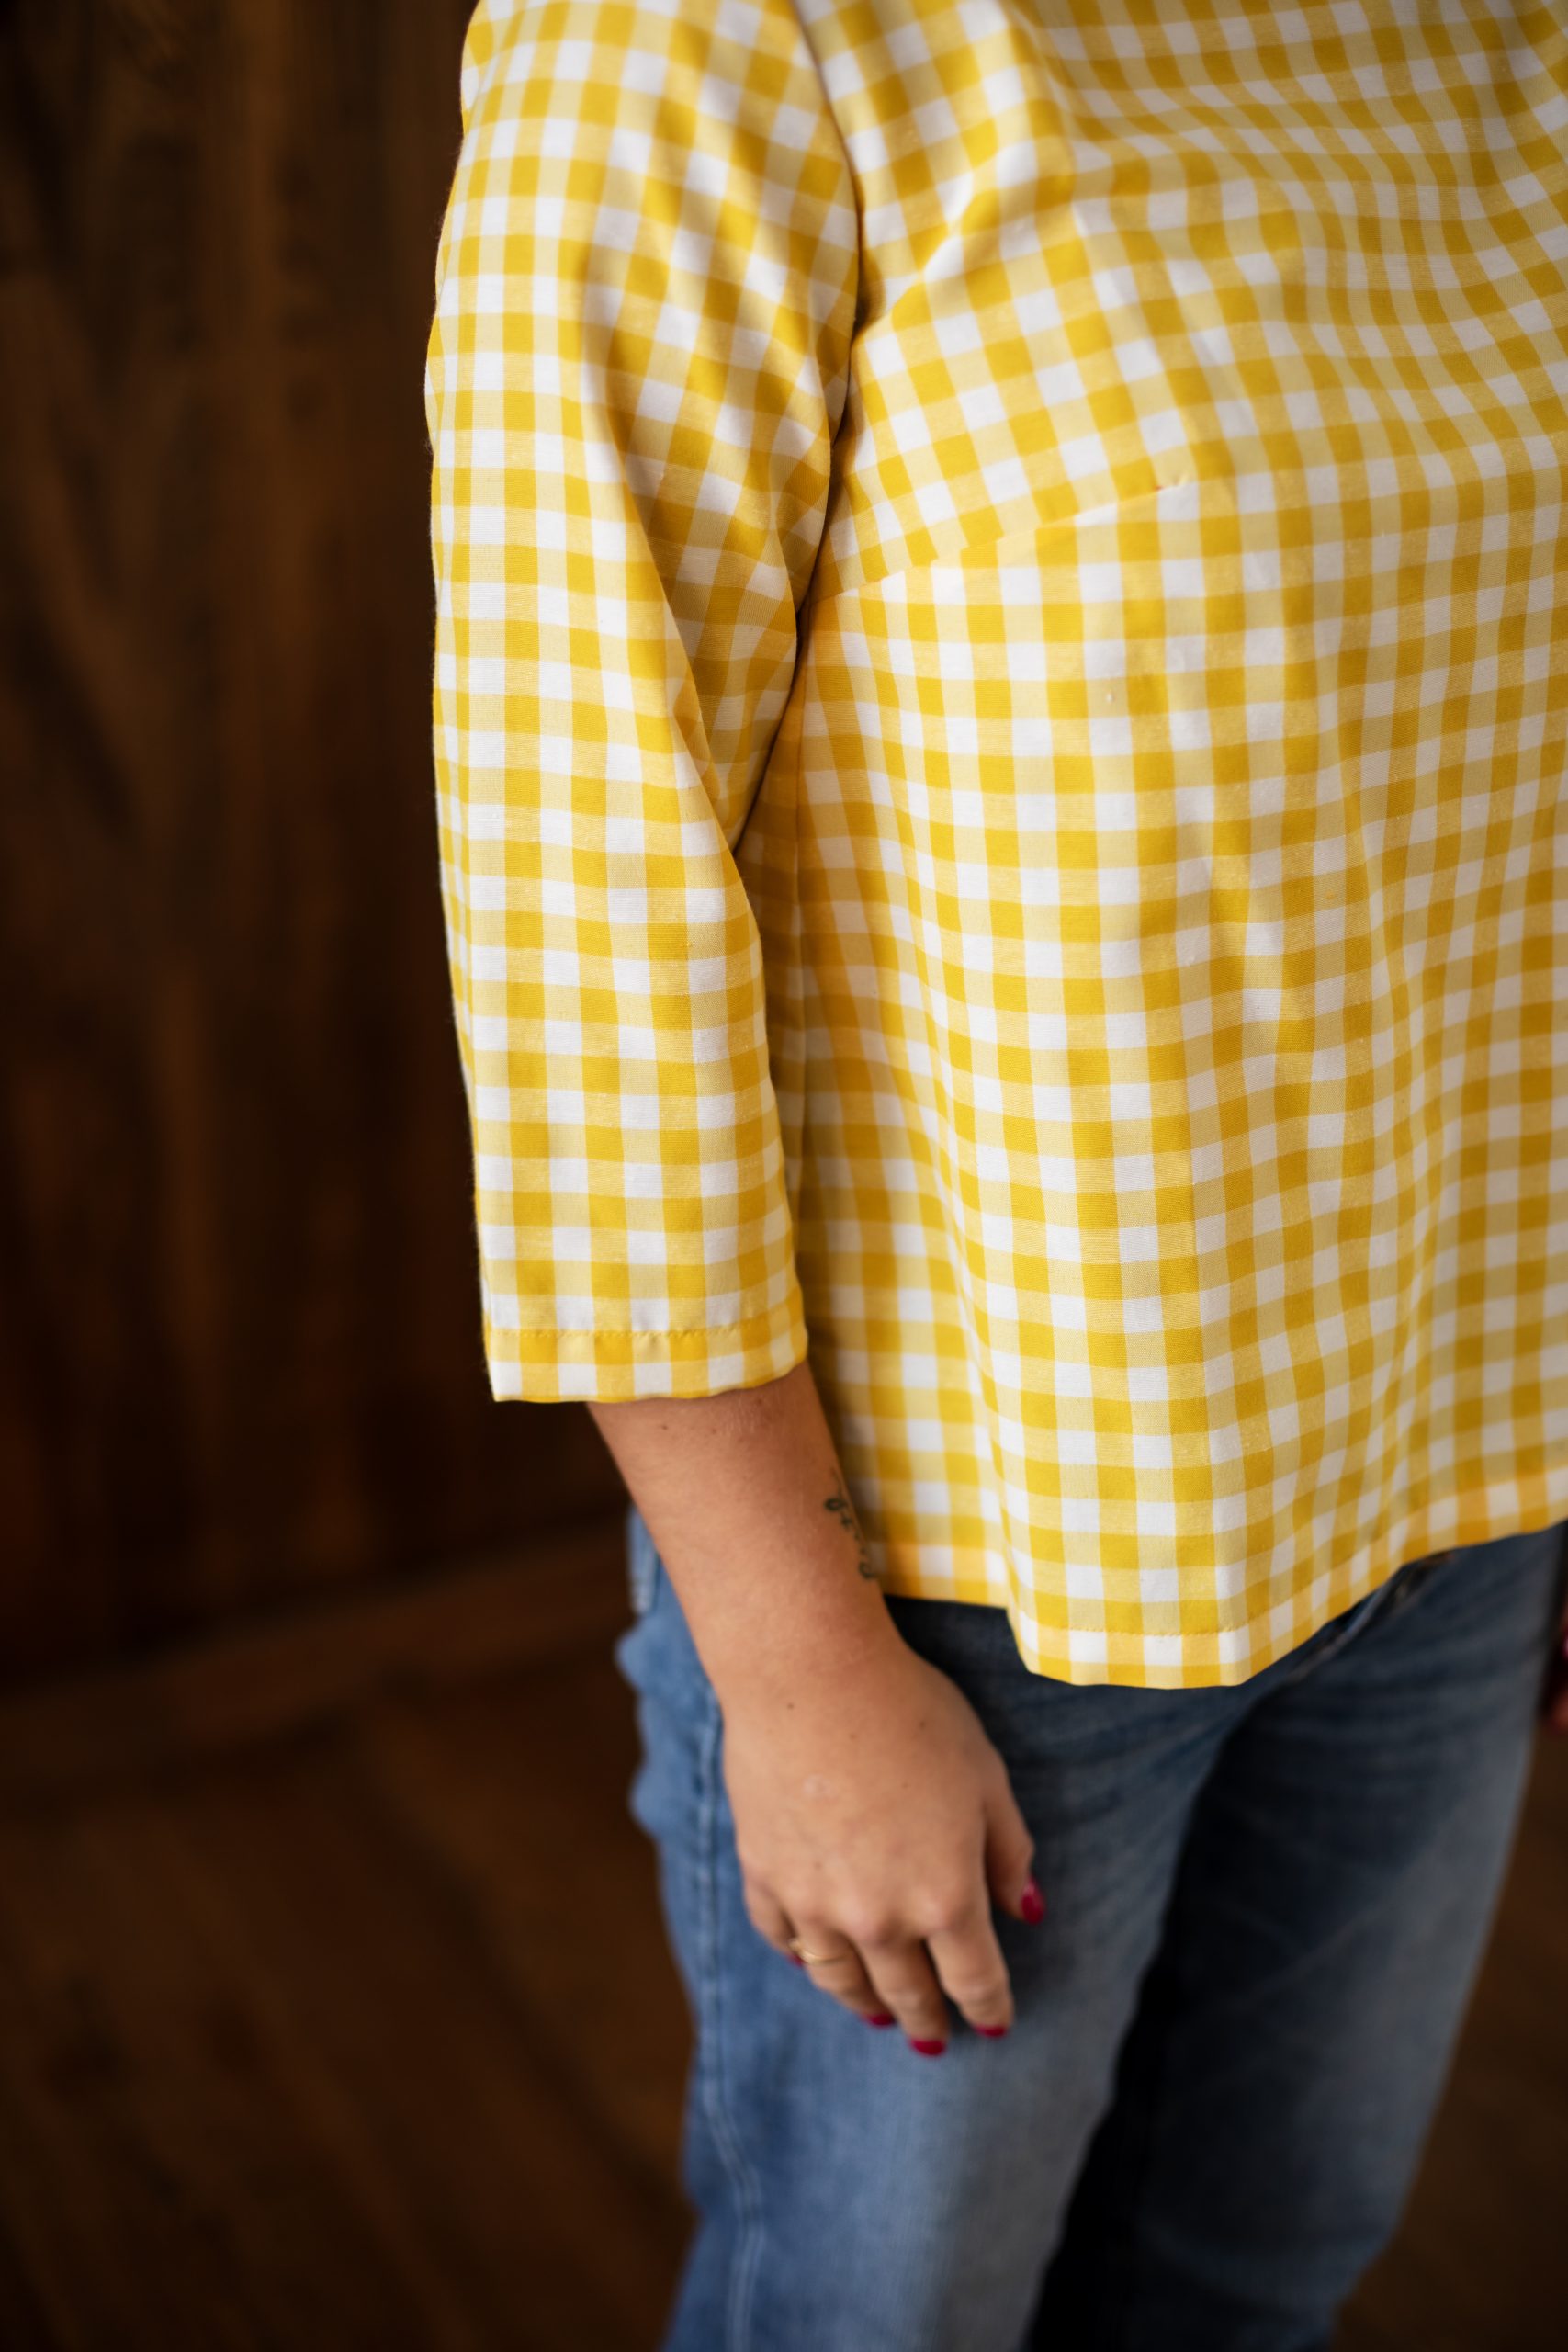
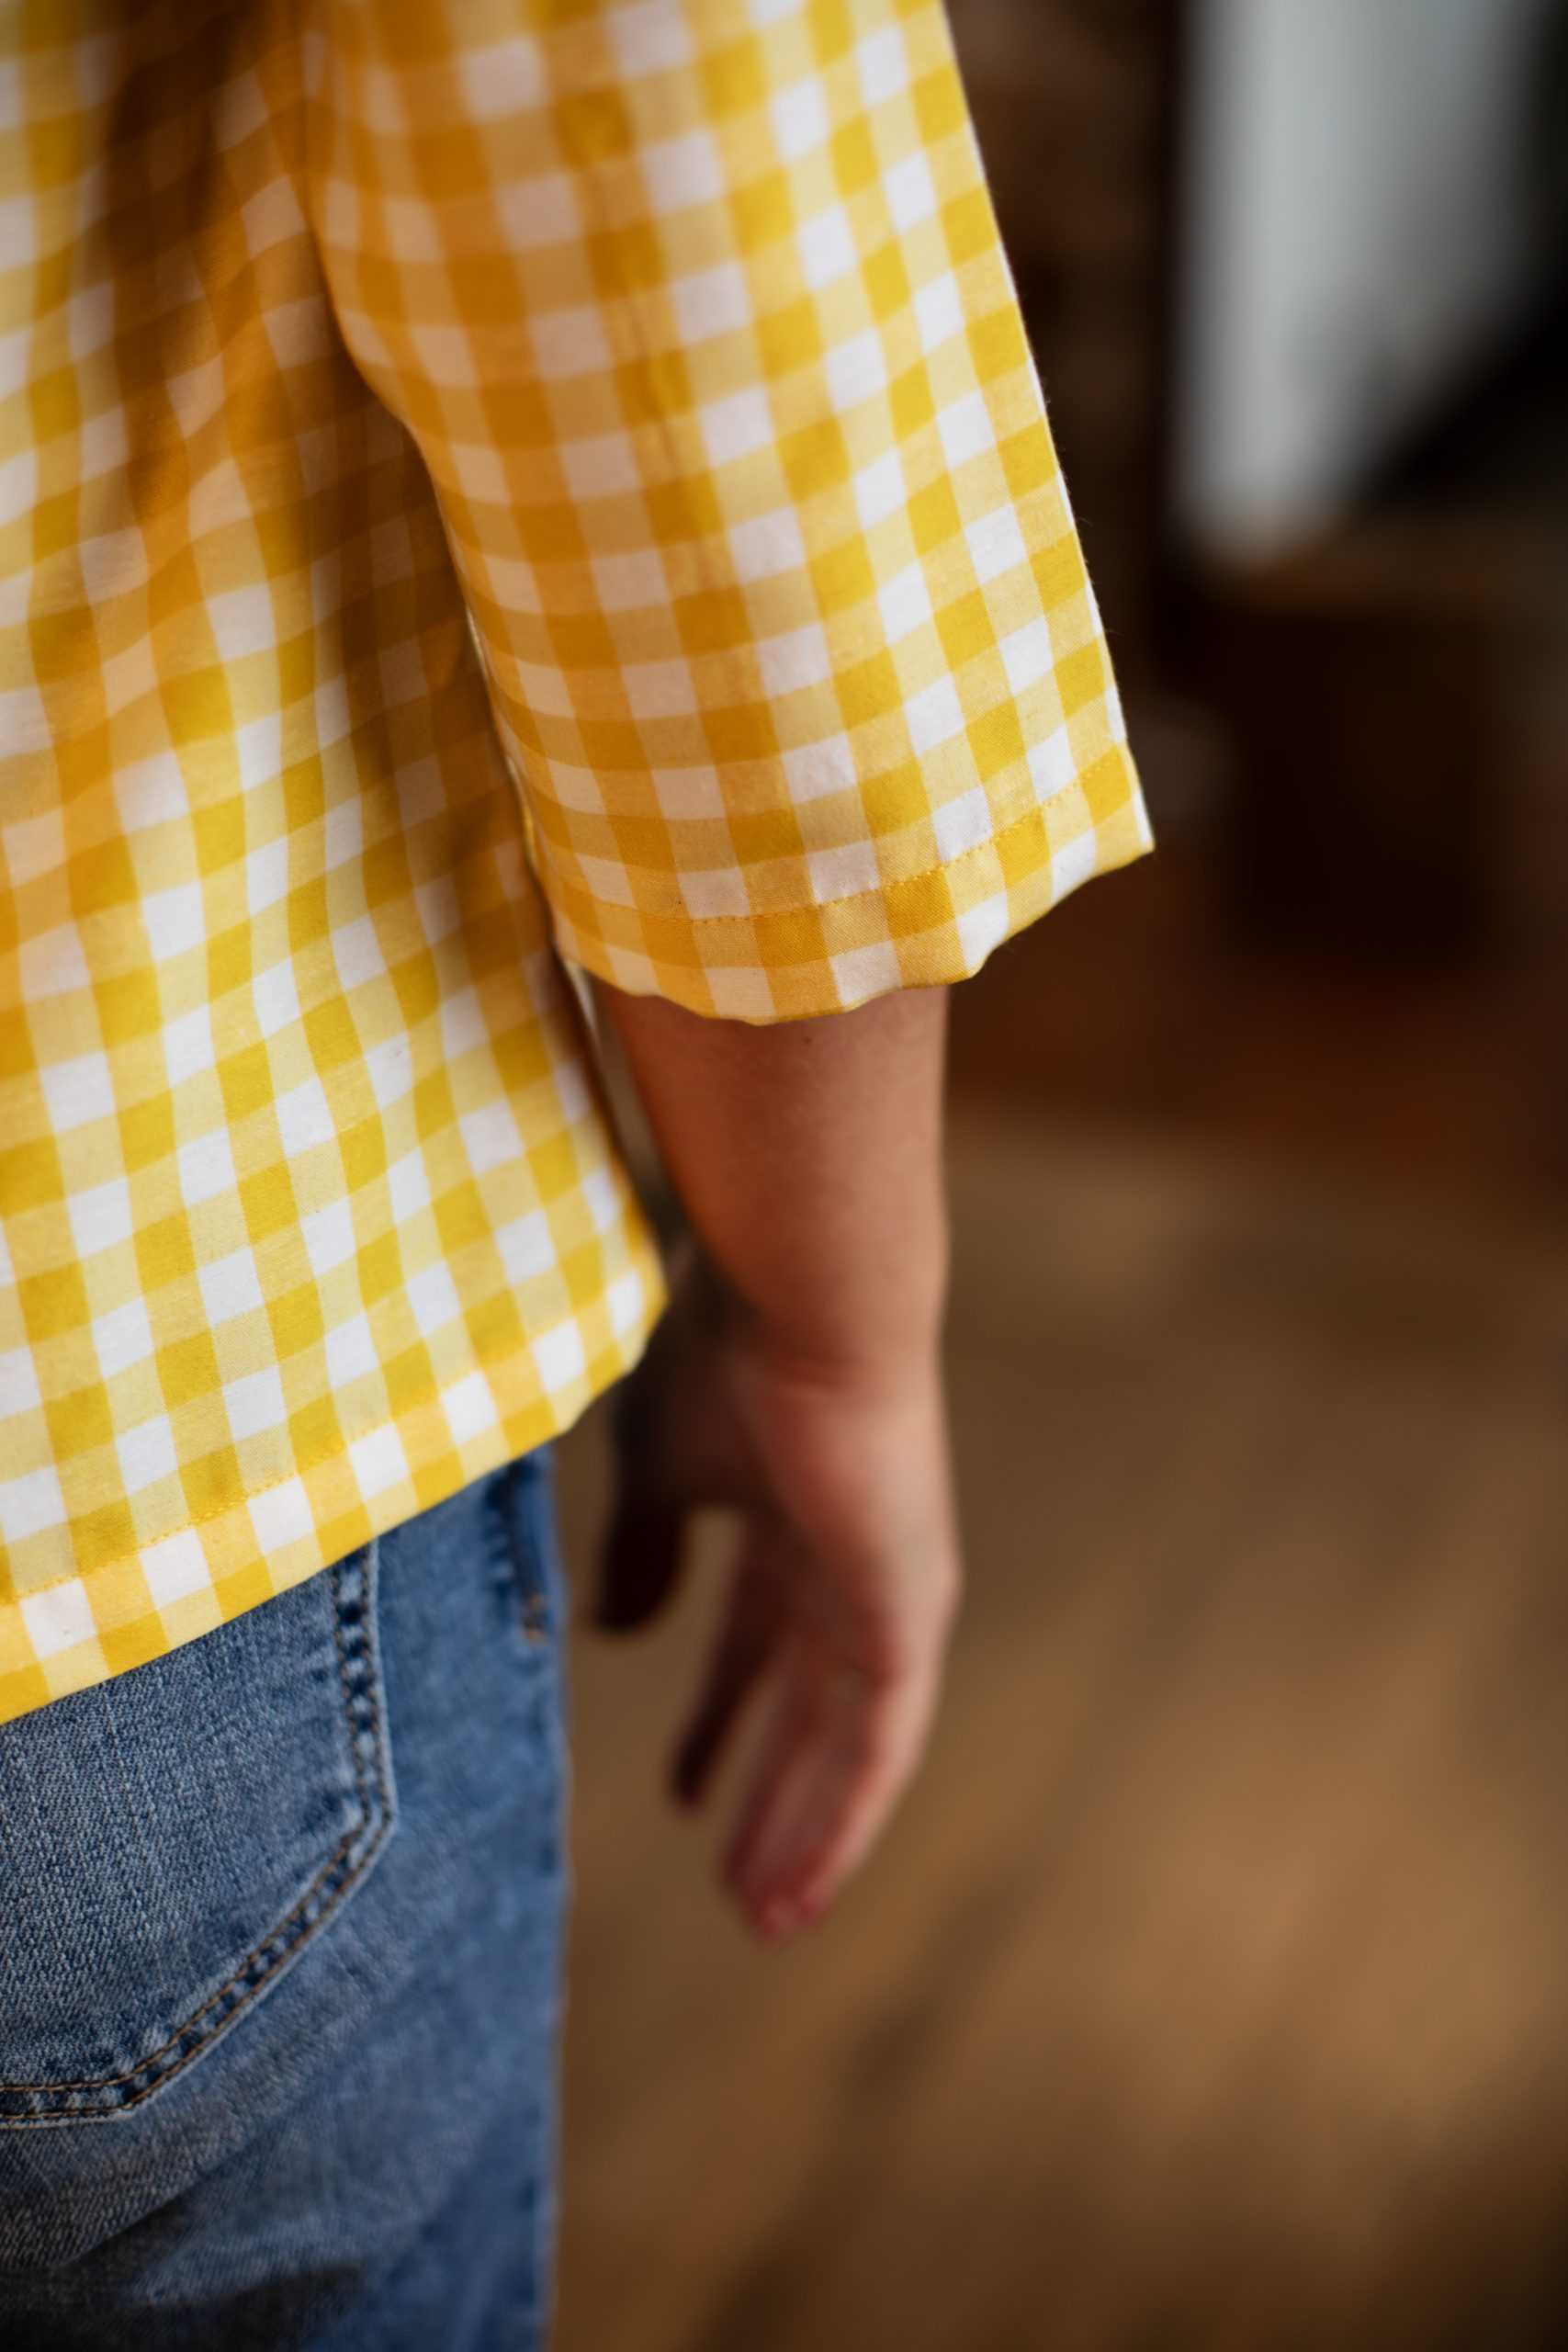
Treat your wardrobe to a classic, stylish spring top with this gorgeous pattern from Lauren Merciris. Made in sunshine yellow gingham, this top sewing pattern features 3/4 length sleeves and a boat neckline, as well as darts at the bust. This boat neck top pattern is comfortable and timelessly chic, and pairs perfectly with your go-to jeans and favorite pair of flats or sandals.
Designer Notes: All the seam allowances are included: 1 cm / 0.4 in, and all the hems are 3 cm / 1.20 in.
Materials:
- Fabric and material requirements (fabric width 150 cm / 59 in.)
- Cotton, chambray, baptiste, broderie anglaise fabric, crêpe… (no stretch)
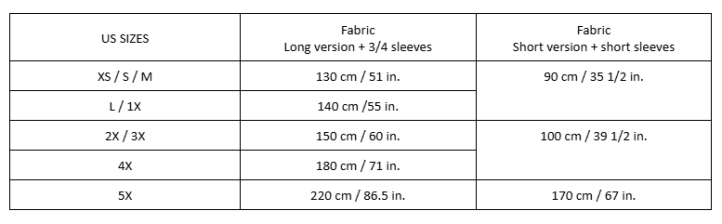
- Cotton, chambray, baptiste, broderie anglaise fabric, crêpe… (no stretch)
- Optional: Light woven interfacing (for the collar facings) – about 50 cm / 20 in. width x 25 cm / 10 in. in length.
- PDF Pattern – This is located at the bottom of this page. Please see printing instructions below.
PRINTING INSTRUCTIONS:
Note: To download the pattern, click on the pattern download button at the bottom of the page. We recommend opening your pattern download using Adobe Acrobat.
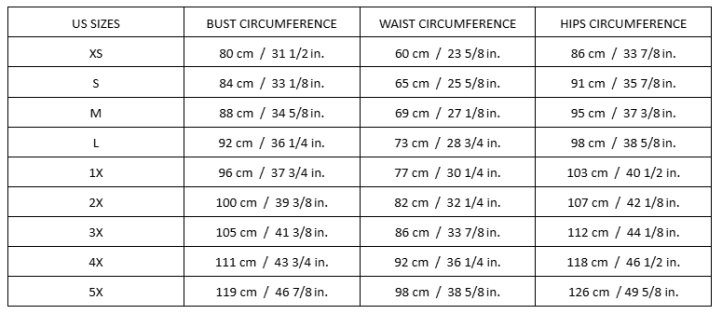
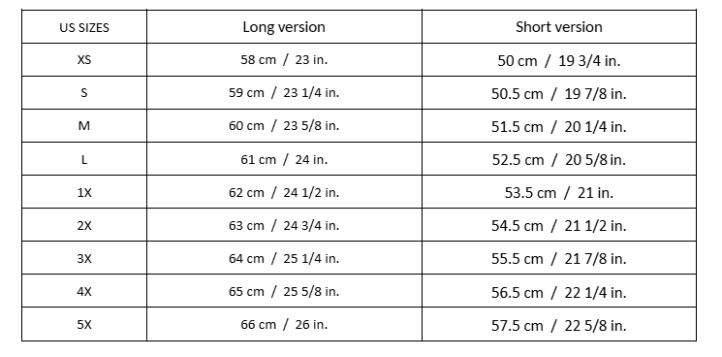
SIZE CHART (CMS/INCHES):
FINISHED GARMENT LENGTH (FROM SHOULDERS TO HEMLINE IN CM/INCHES):
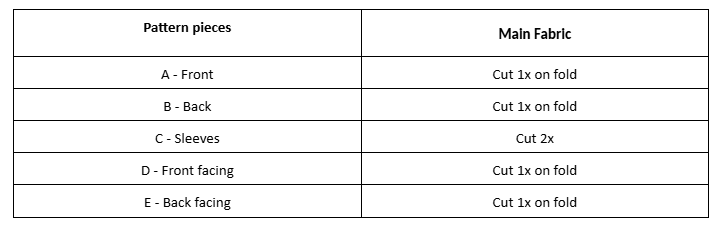
PATTERN PIECES:
Cutting Instructions:
- Lay the main fabric.
- From sizes XS to 3X: Lay the fabric out and fold the two selvage edges back to the middle of the fabric, edge to edge, to obtain one fold on the left and one fold on the right (right sides together).
- From sizes 4X and 5X: Lay out and fold the fabric along the selvage edges (rights sides together).
- Lay out the pattern pieces on the fabric, respecting the grainline, and cut out each piece as many times as the pattern indicates.
- Mark all the markings (notches and bust darts) on the reverse side of the parts.
Sewing Instructions:
BUST DARTS:
- On the Front top (piece A), for each bust dart, match the two exterior lines that form the darts, one on top of the other, right sides together.
- Pin the darts together.
- Sew each dart, starting from the side and ending at the stop mark (where the lines meet).
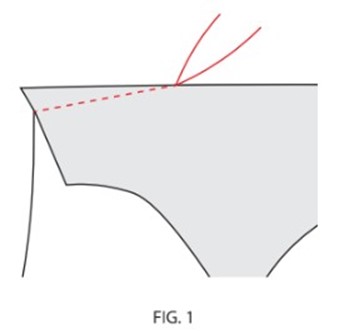
- To avoid marking the dart, close the dart by making a double hand knot with the remaining threads on the wrong side.
- Place the formed dart wrong side down and iron to flatten.
JOINING THE FRONT AND THE BACK:
- Place the right side of the Front top (Piece A) on the right side of the Back top (Piece B) together.
- Join, pin, and sew the shoulders and side seams at 1 cm / 0.4 in.
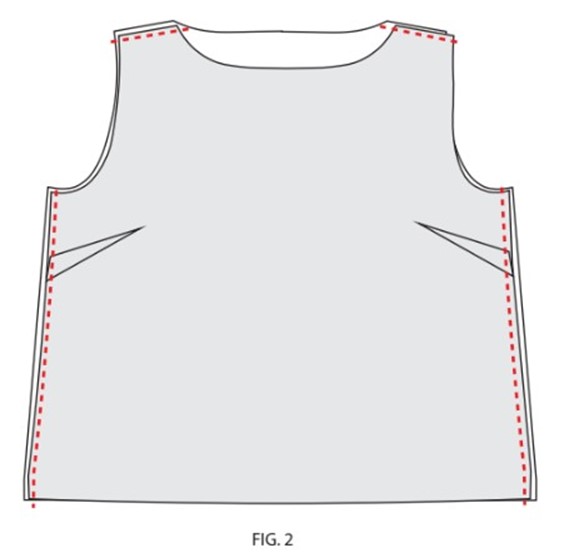
- Overlock the seam allowances. If you don’t have an overlock machine, you can use a zig-zag stitch to enclose the seam allowances.
- Iron the seam allowances backwards.
SLEEVES:
- Close the sleeves (Piece C) by sewing each sleeve, right sides together, 1 cm / 0.4 in. from the edge.
- Overlock the seam allowances or use a zigzag stitch to enclose the seam allowances.
- Iron the seams forward.
- Turn the sleeve’s right side out and the top inside out.
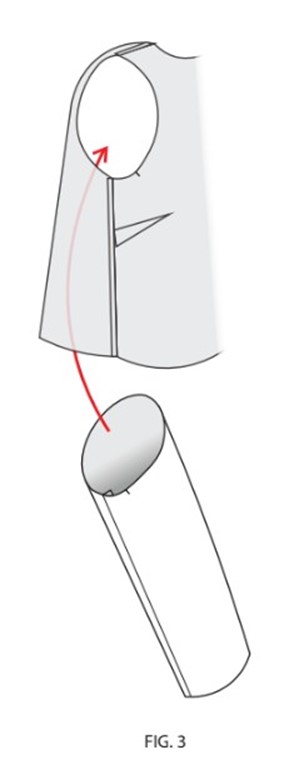
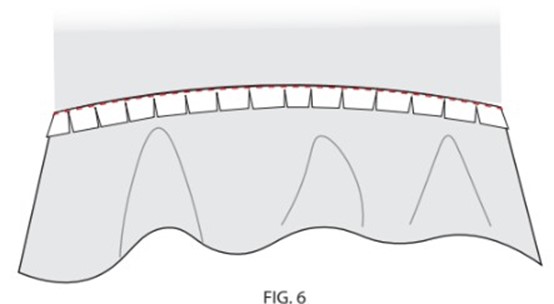
- Insert sleeves into their respective armholes (respecting the markings) and pin all the way around the armhole (aligning the seams and notches).
- Overlock the seam allowances together or use a zigzag stitch to enclose the seam allowances.
THE NECKLINE:
Optional: Iron the interfacing on the wrong side of the front facing (Piece D) and the back facing (Piece E). You now have 2 pieces of reinforced facing.
- Place the right side of the Front facing (Piece D) on the right side of the Back facing (Piece E) together.
- Join, pin, and sew the shoulders at 1 cm / 0.4 in.
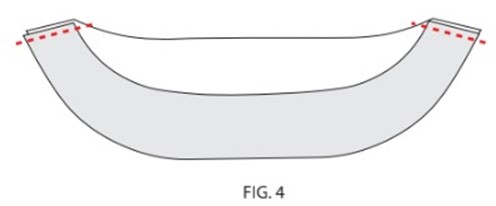
- Overlock the seam allowances, or use a zig-zag stitch to enclose the seam allowances.
- Iron the seam allowances forward.
- Overlock or zig-zag stitch the entire outer contour/raw edge of the facing.
- Place the right side of the facing on the right side of the top around neckline together.
- Join, pin, and sew all around the neckline at 1cm / 0.4 in, aligning the seams at the shoulder seams.
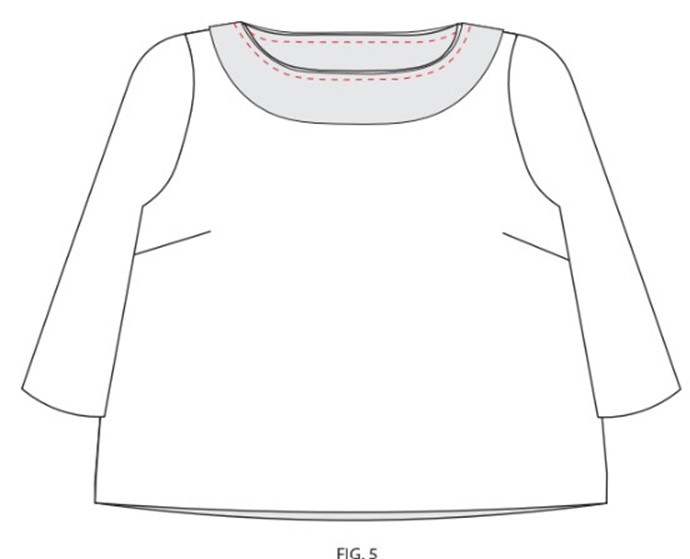
- Before trimming the seam allowance, sew a seam on the wrong side of your facing, 2 mm / 0.08 inches in from the previous seam join, sandwiching the seam allowance in the seam. This step ensures that the facing stays right in place and doesn’t roll down the neckline.
- Trim the seam and iron to flatten.
THE HEMS:
- Turn the top inside out, and on the base of the top fold 1 cm / 0.4 in. on the reverse side, iron to flatten. Then, another 2 cm / 0.8 in. Iron a second time to flatten.
- Pin and sew at 2 mm / 0.08 in. from the reverse fold, all around the base of the top.
- Do the same for the two bottoms of the sleeves.
FINISHING:
- On the reverse side of the top, make two small hand stitches in the shoulder seam allowances to hold the facing in place.