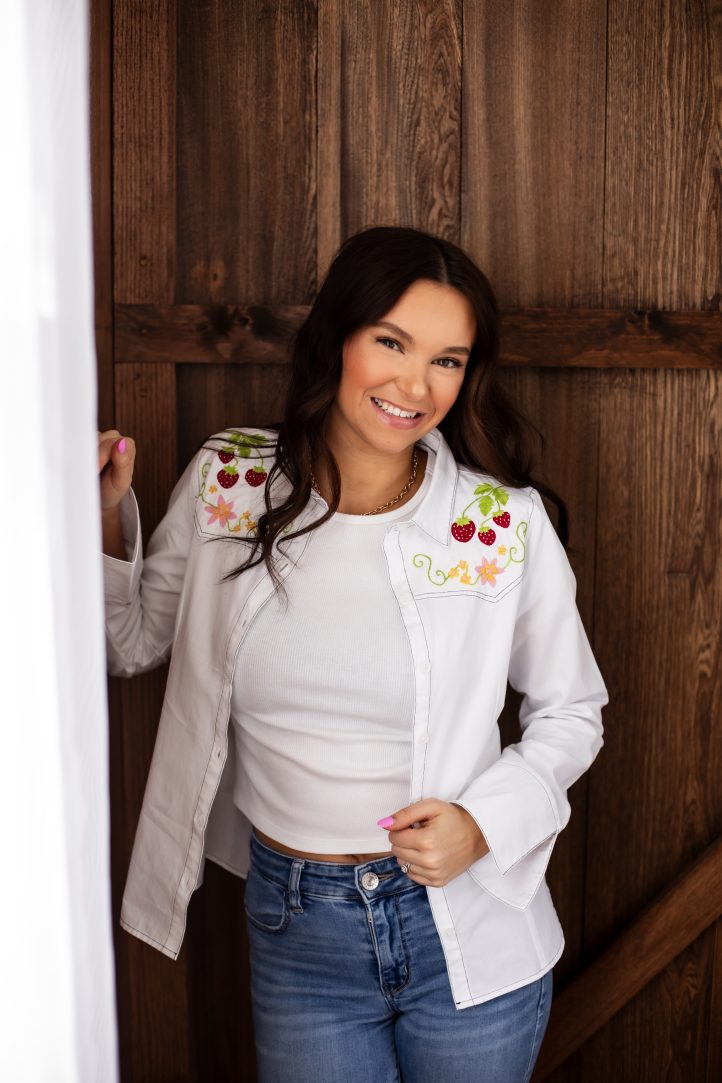
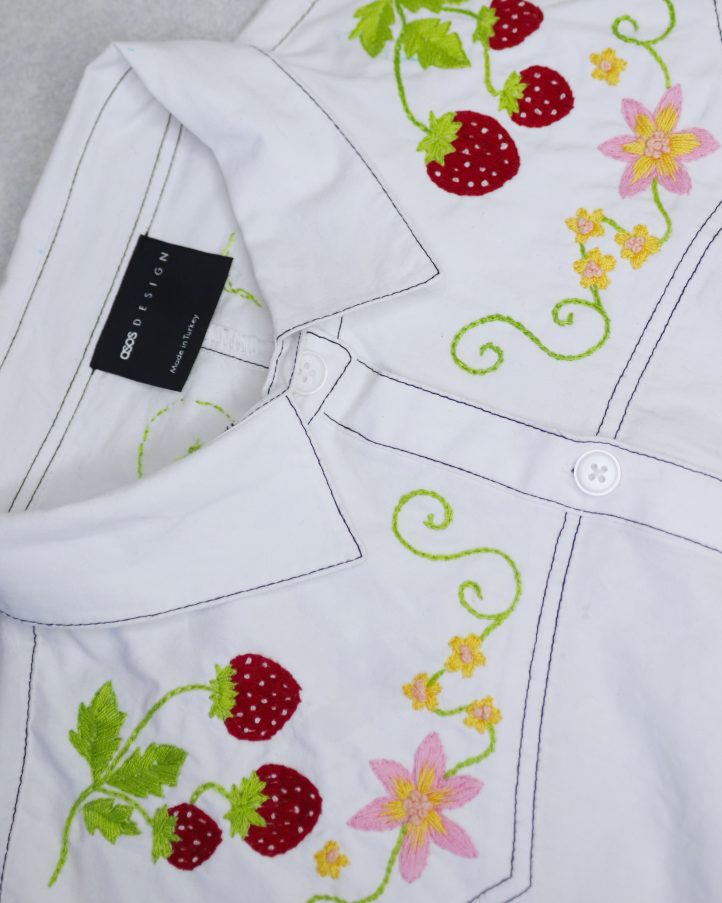
Get inspired by classic country style with this colorful embroidery tutorial from Sophie Tarrant. Taking style notes from vintage Western embroidery, this floral embroidery tutorial shows readers how to give a simple button-down shirt beautiful flower and strawberry details. Run to your nearest thrift store because this playful embroidery pattern is ideal for giving a thrifted shirt a major style makeover.
Skill Level: Beginner
Finished Size: Custom
Materials:
- Shirt: Of your choice
- Light-weight fusible tear away interfacing
- Embroidery floss: Bubblegum pink, mid pink, pale pink, yellow, lime green, red, white, pale green
- PDF Templates – These are located at the bottom of this page. Please see printing instructions below.
Tools:
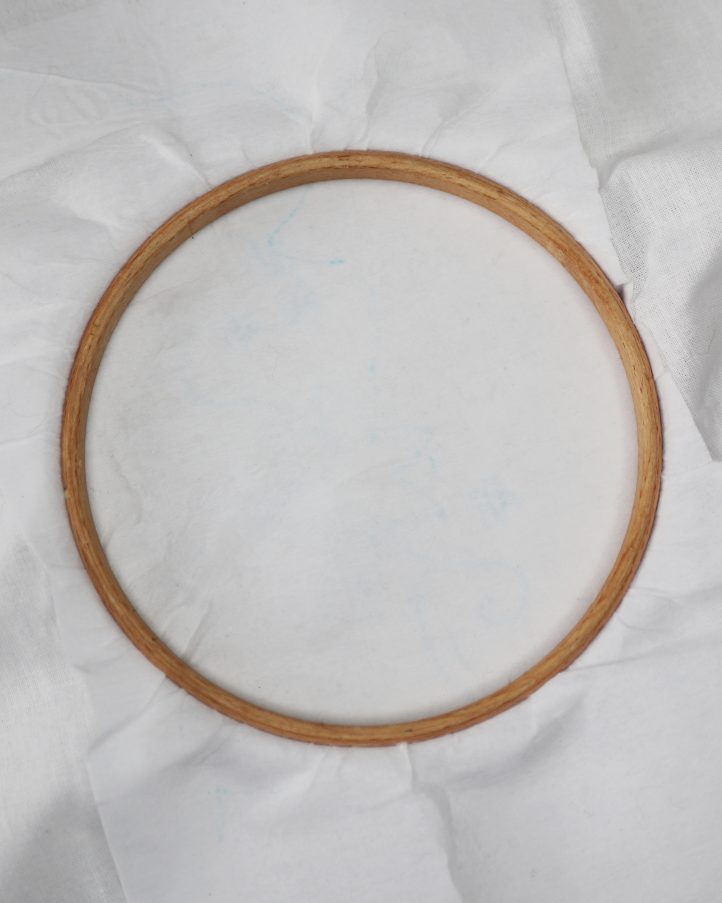
- Embroidery hoop
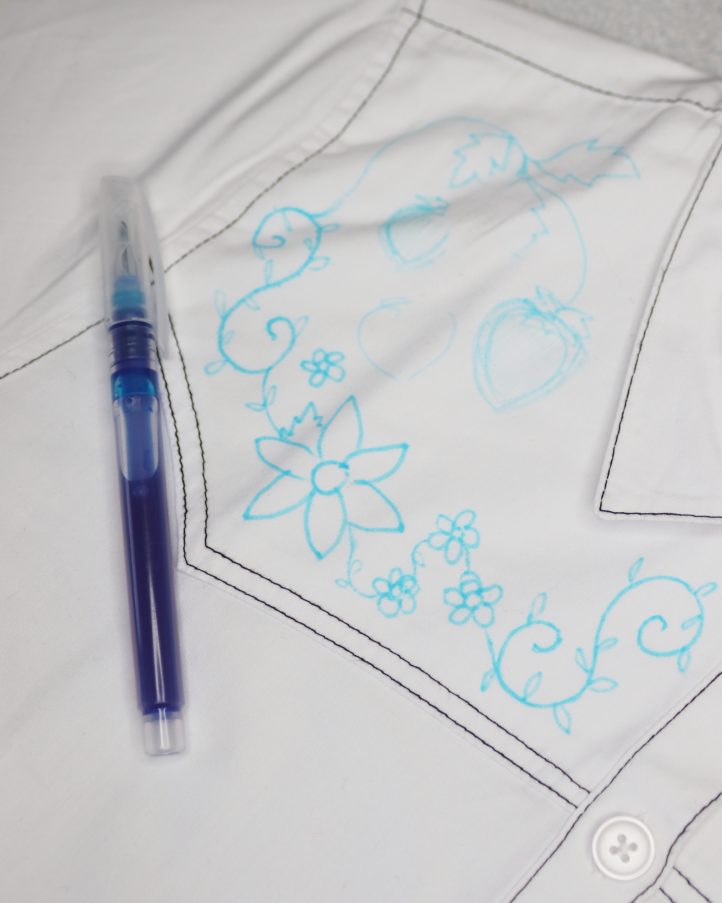
- Water-erasable fabric pen
- Scissors
- Embroidery needle
PRINTING INSTRUCTIONS:
Note: To download the templates, click on the pattern download button at the bottom of the page. We recommend opening your pattern download using Adobe Acrobat.
Sewing Instructions:
Note: Throughout this project, we’ve used several different embroidery techniques to create our motifs. Scroll down to find our guides to working each one at the bottom of the page.
- Begin by using a water-erasable fabric pen to draw a selection of designs out onto your shirt. The exact motifs you add, and where you place them, is entirely up to you – you can use the templates we’ve provided as a guide, or you can go freestyle and sketch your own designs. While it’s good to mirror the elements on each side, you don’t need to make them completely symmetrical. We changed ours up slightly to give a more natural, botanical look.
- Once you’re happy with your designs, it’s time to start embroidering – we’re beginning with the left-hand side of the shirt front. Cut a piece of fusible interfacing that’s slightly larger than your motif and place it against the wrong side of your fabric, underneath the design. Make sure that the fusible surface faces the back of the fabric, then mount the two together in your embroidery hoop. Pull the fabric taut, like the surface of a drum. You’ll need to repeat this step for each motif you add.
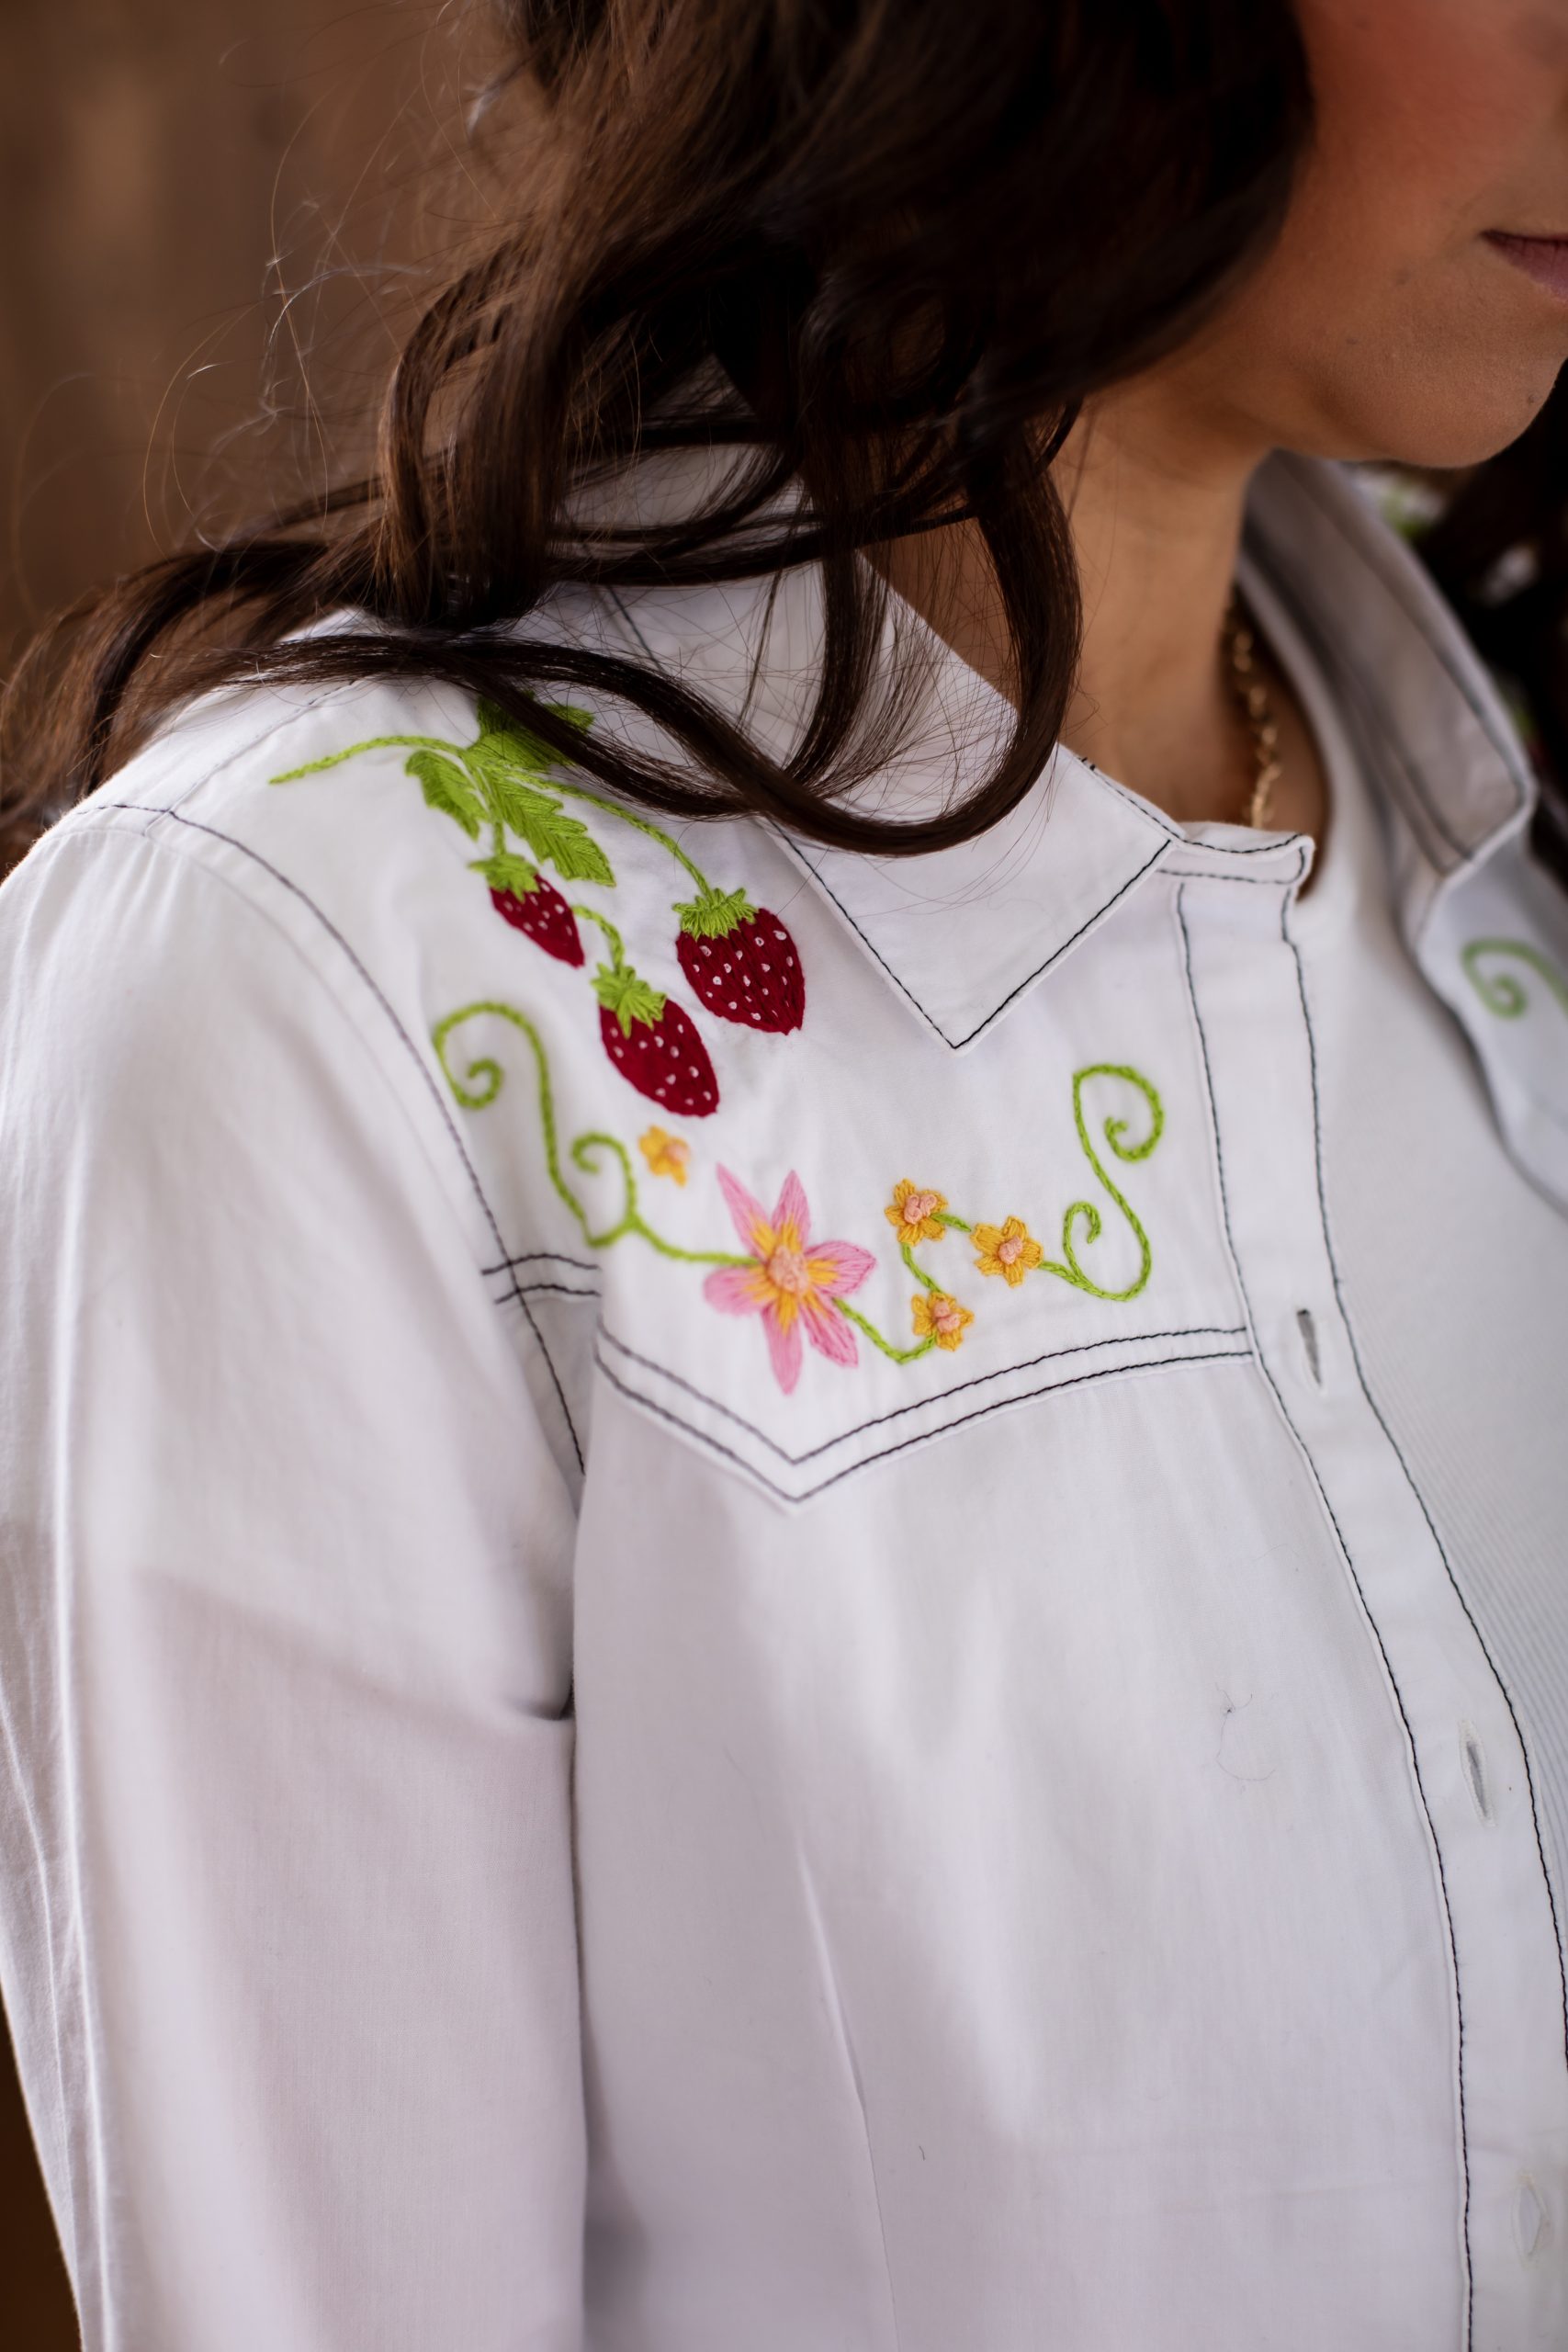
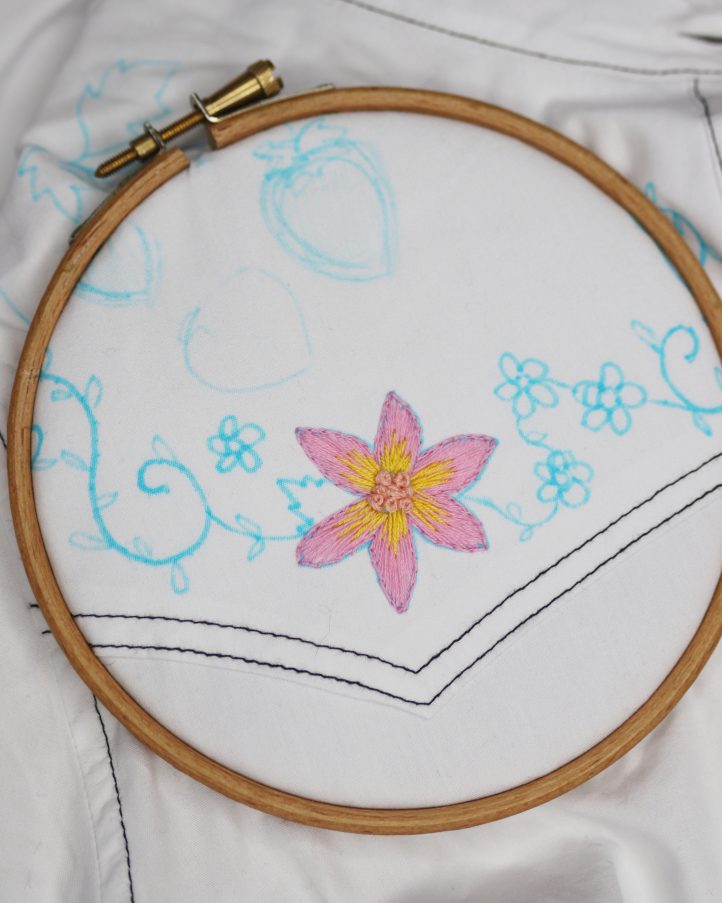
- Thread two strands of bubblegum pink floss onto your needle and tie a knot at one end. Work around the outer edge of the largest flower using a split stitch. Next, fill in each petal using long and short stitches. Use two strands of yellow floss to add extra color and detail to the base of each petal in long and short stitches, as pictured. Finally, use two strands of pale pink floss to work a collection of French knots in the middle of the bloom. Once your large flower is complete, use the same techniques to embroider each of the smaller flowers that surround it. Then, work along the vines that extend out from the largest flower using two strands of lime green floss and a chain stitch.
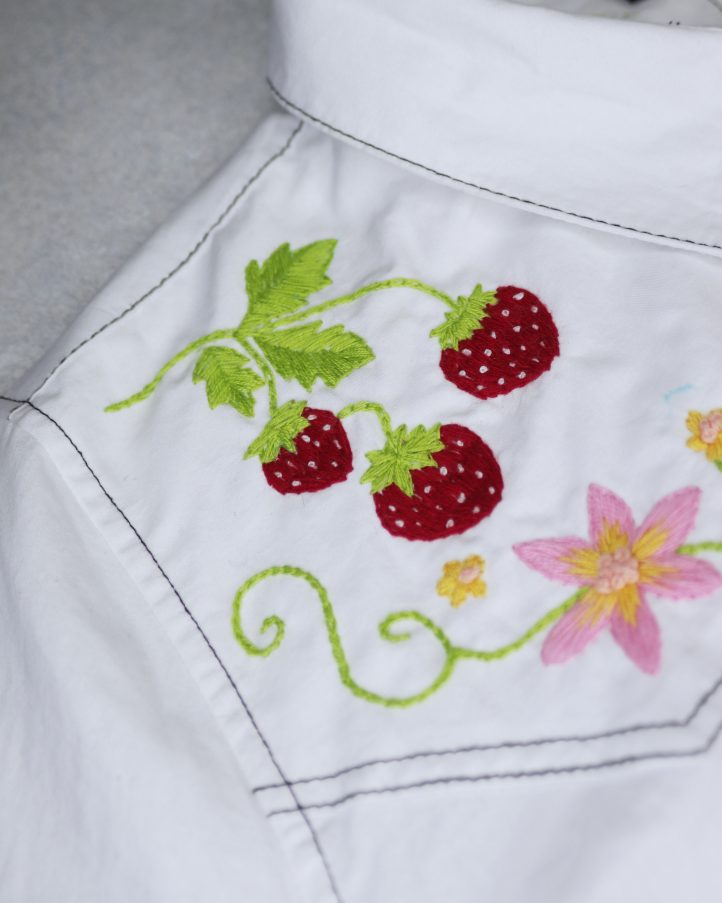
- With the first part of your design complete, it’s time to move on to the next! We’ll now add the strawberries that sit above the flower. As before, work the vines using two strands of lime green floss and a chain stitch, then outline each leaf using split stitch. Use a series of parallel straight stitches (a variation on satin stitch) to color each leaf, angling each side to create a natural, veined look. Do the same to outline and fill the strawberry leaves, radiating the stitches outwards from one central point. Use two strands of red floss to outline each strawberry in split stitch, then fill them in using long and short stitches. Finally, use one strand of white floss to make tiny French knots across the surface of each one, to create seeds.
- You’ve now completed the first side of your shirt front. Repeat Steps 1-4 to work a mirrored version of the same design on the opposite side of the shirt front. Once you’re finished, use a clean damp cloth to dab away the water-erasable pen, leaving just the stitched designs behind.
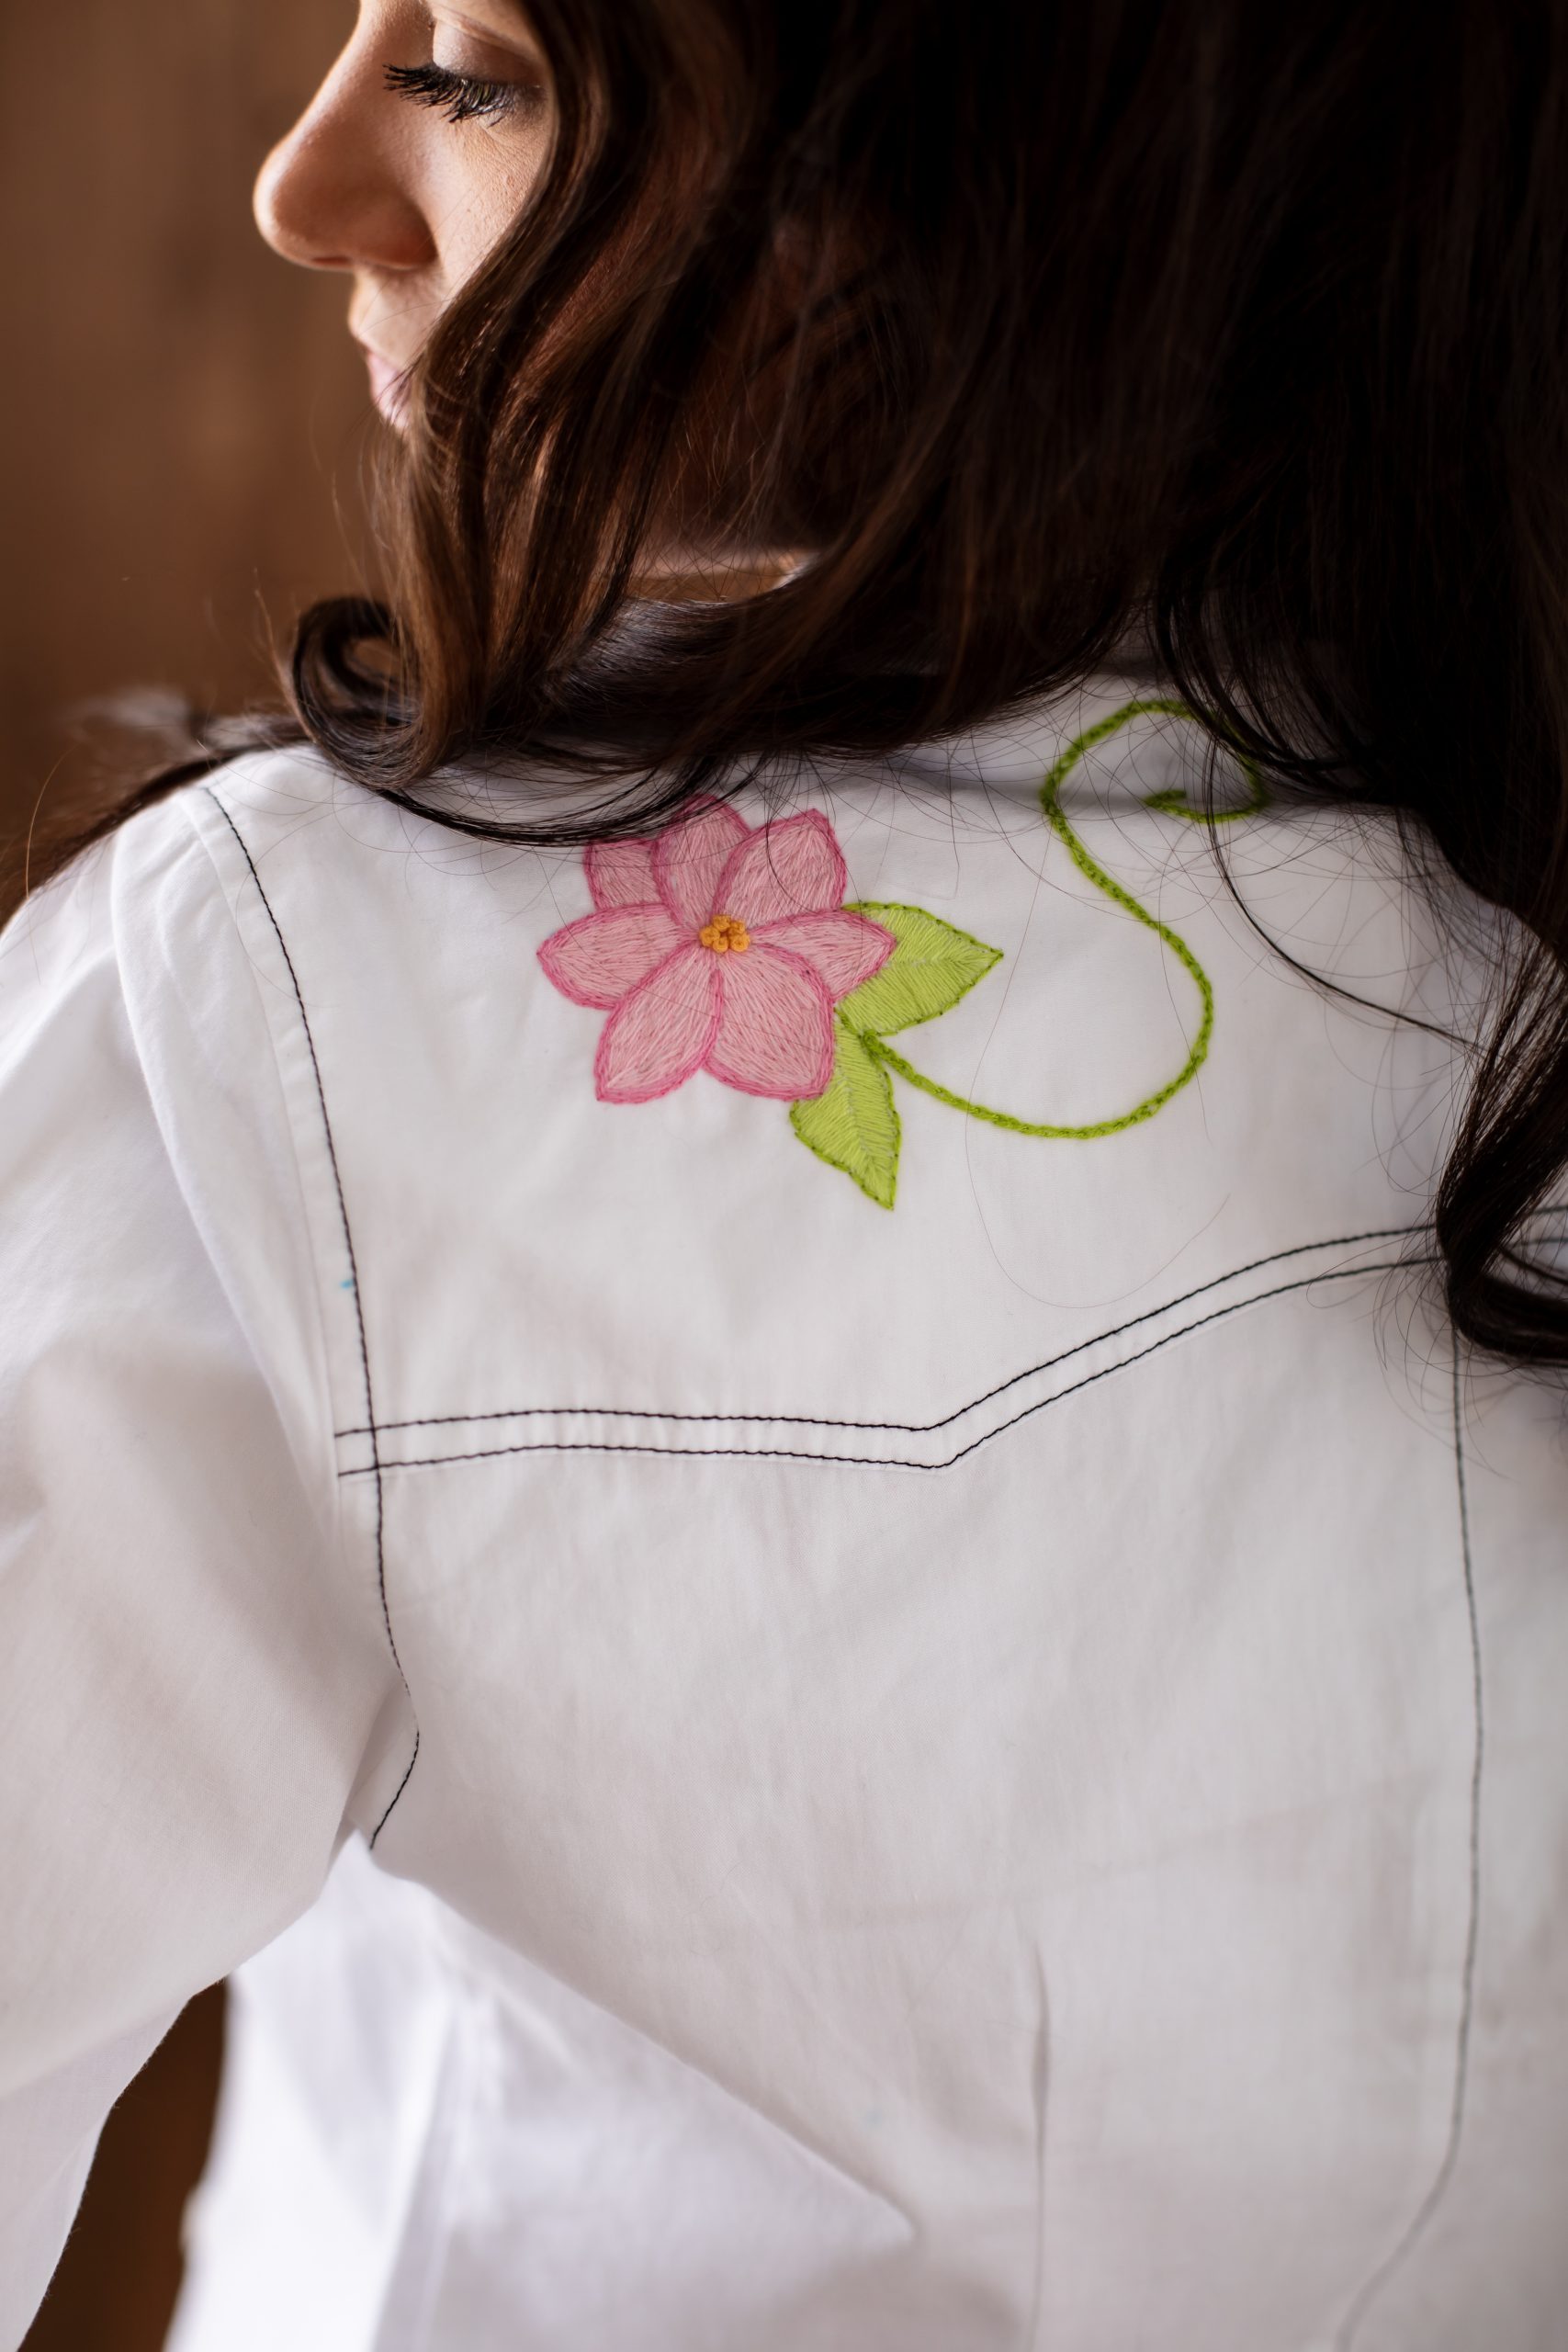
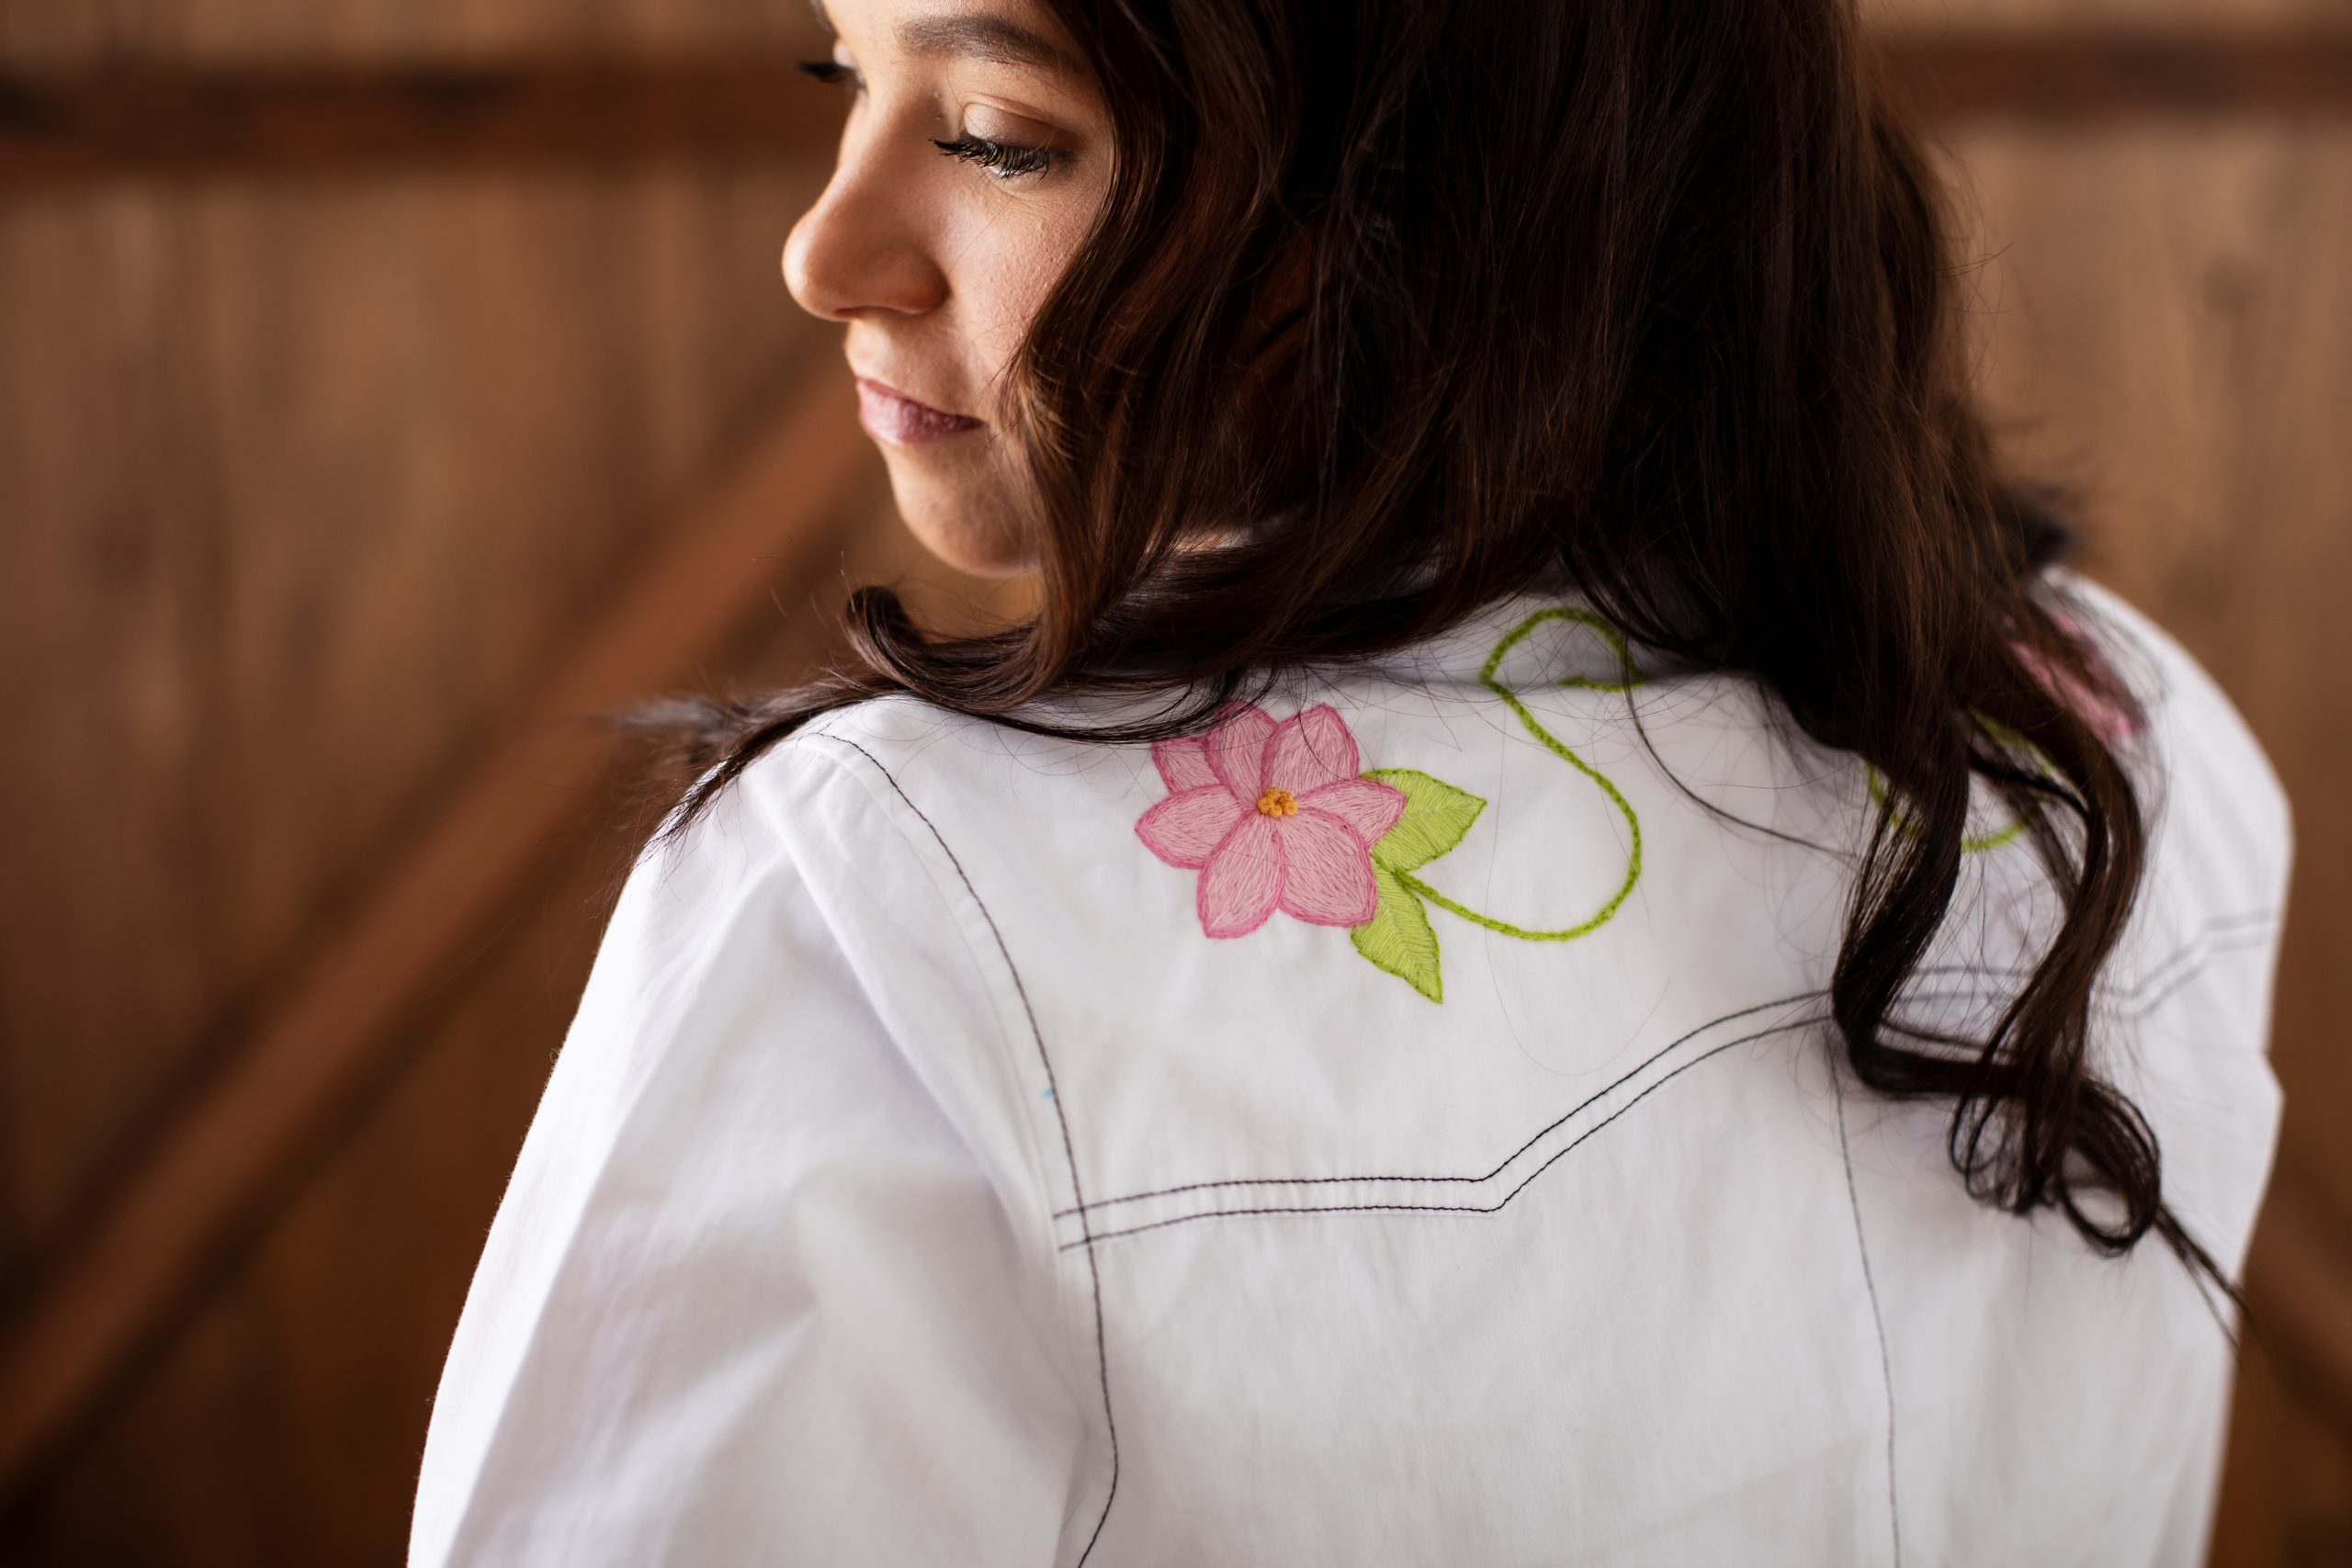
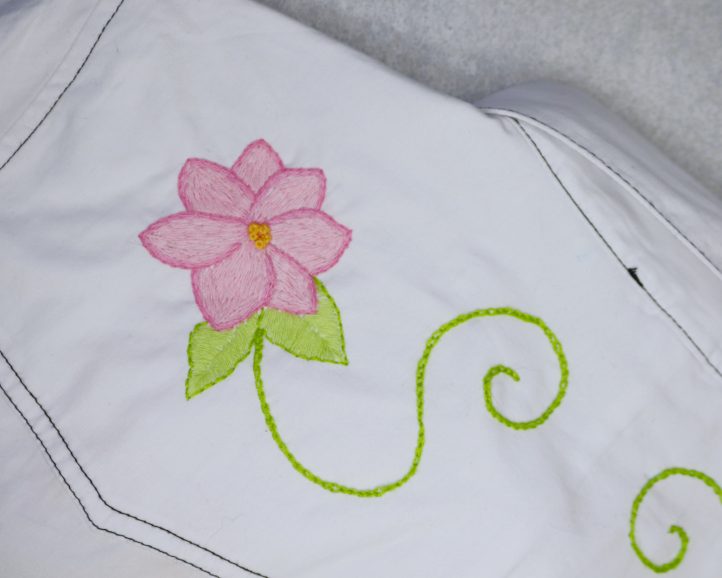
- With the front of your shirt complete, it’s time to move on to the back! As before, we’ll start on the left-hand side. Use two strands of lime green floss and a chain stitch to work along the vine, then sew around the outline of each leaf using a backstitch. Use two strands of pale green floss and long, straight stitches to fill in each leaf with the same variant of satin stitch you used in Step 4. Next, outline the flower head using split stitch. Go around each petal once using two strands of mid pink, then twice more, using two strands of bubblegum pink. Finally, fill in each petal using two strands of pale pink and long and short stitches. Finish the center of the flower with five French knots, each worked using two strands of yellow floss. Repeat this step to create a mirrored design on the opposite side of the shirt back, then use a clean damp cloth to remove any remaining pen marks. Your shirt is now complete. Take care when pressing and launder by hand to keep your designs looking fresh.
Embroidery Instructions:
HOW TO SPLIT STITCH:
To work a split stitch, bring your needle up through the fabric at the start of the line you want to work, then take it back down a small distance later, to make a short stitch. Bring the needle up again, piercing through the center of the previous stitch, then pull the thread through, splitting the stitch and creating a solid, slightly textured line. Repeat this process, splitting each preceding stitch as you work along the line. Once you get to the end of the line, tie the thread off at the back of the work.
HOW TO LONG AND SHORT STITCH:
The long and short stitch technique is used to create smooth shading and gradient effects in your designs. It involves alternating long and short stitches to fill an area, blending colors seamlessly by overlapping threads. This technique is ideal for adding depth and dimension to elements like petals, leaves, and feathers, making them look more realistic and textured.
HOW TO FRENCH KNOT:
To work a French knot, bring your needle up through the fabric where you want the knot to be, and hold the thread taut with your non-dominant hand. Wrap the thread around the needle three times, then gently insert it back into the fabric, very close to where it came out (but not in the same hole, to prevent the knot from pulling through). While doing this, keep the thread taut but not too tight to avoid tangling. Pull the needle and thread through to the back of the fabric, and a small, neat knot will form on the surface.
HOW TO CHAIN STITCH:
To work a chain stitch, bring your needle up through the fabric at your starting point. Make a small loop with the thread, then hold it in place with your thumb. Insert the needle back into the same hole (or close to it) and bring it up a short distance along the line you’re working, catching the loop with the needle as you go. Pull the thread through gently to form the first chain link. Repeat this process, keeping the loops even in size, until your design is complete. Secure the final loop with a small stitch outside the chain.
HOW TO SATIN STITCH:
This project uses some variations of satin stitch to fill in larger areas of color. To work a satin stitch, bring the needle up at the edge of the area you want to fill, then insert it back down directly across from that point, to make a single stitch. Repeat to cover the space you’re filling in long, straight stitches, keeping them close together and parallel to each other. Continue stitching back and forth across the shape, filling it in neatly to cover the entire area.
HOW TO BACKSTITCH:
To work a backstitch, bring your needle up through the fabric at the point you want to start sewing, then move it a little way along the line you’re working on and bring it back down, to make your first stitch. Bring the needle back up a little further along the line, then pass it back down through the same spot you just went into. Bring it back up through the fabric once more, again moving along the line by the same amount. Repeat, working up and down through the fabric in this way, to create a neat, solid line.