
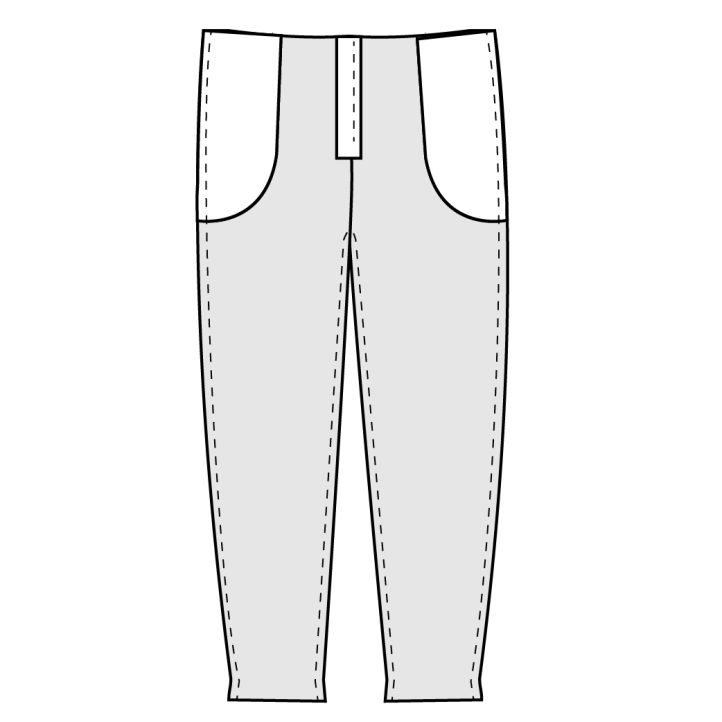
Goodbye skinny jeans! If you’re loving the current loose-leg pants trend, then you’ll love this classic trousers pattern. Featuring double buttons on the waistband, this pants pattern also has chic front pleats and side and back pockets. We love the old Hollywood feel of these trousers and they bring to mind the style of starlets like Marlene Dietrich and Katharine Hepburn. These loose-leg trousers are sleek and versatile and can be paired with flats, boots or heels for every season.
Materials:
- Fabric (see requirements below)
- 9-12″ zipper (Note: A 12″ zipper works for all sizes and a 9″ zipper works for sizes 0-16.)
- Lightweight interfacing
- 2 – 7/8″ button
- 2″ elastic
- Hook and eye
- PDF Pattern – This is located at the bottom of this page. See printing instructions below.
Finished Garment Measurements:


Fabric Requirements:

PRINTING INSTRUCTIONS:
To download the PDF pattern, click on the download button at the bottom of the page. We recommend opening your download using Adobe Acrobat.
DESIGNER NOTES:
- 5/8” seam allowance included.
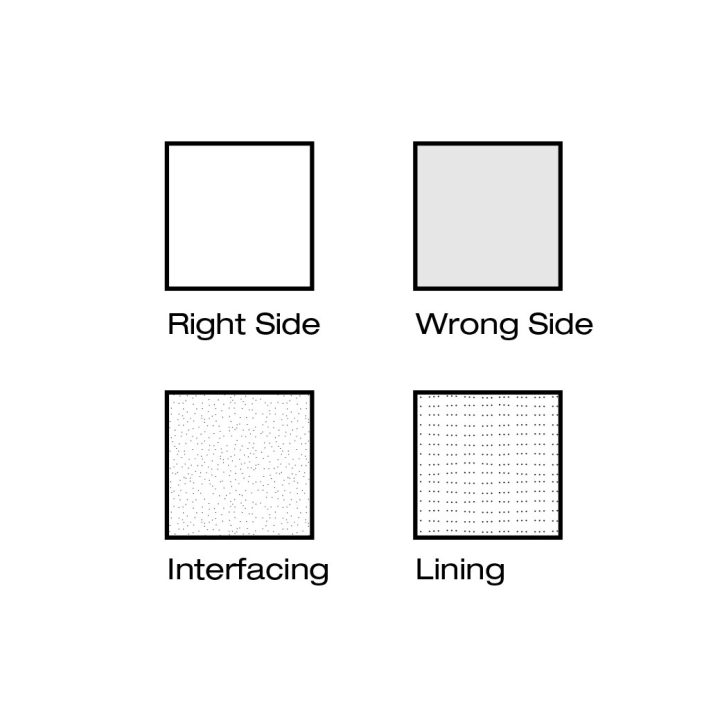
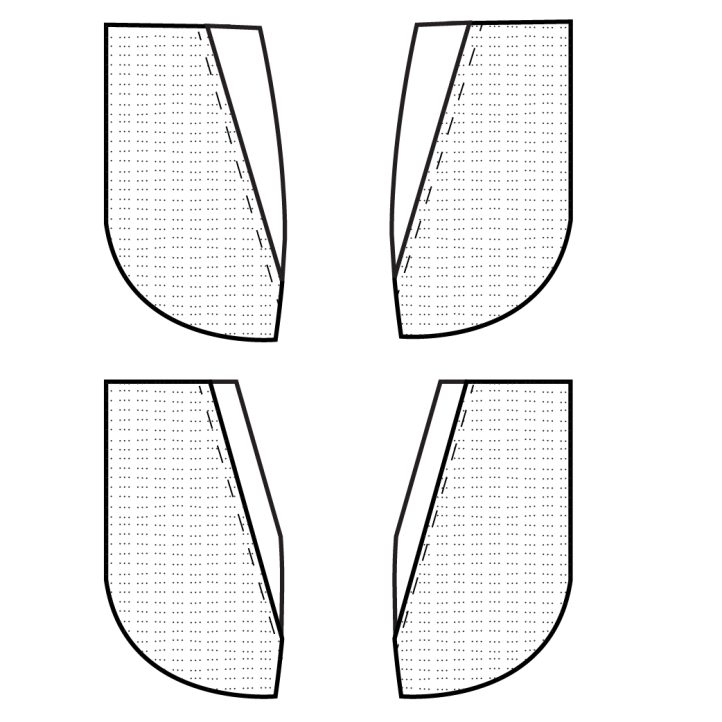
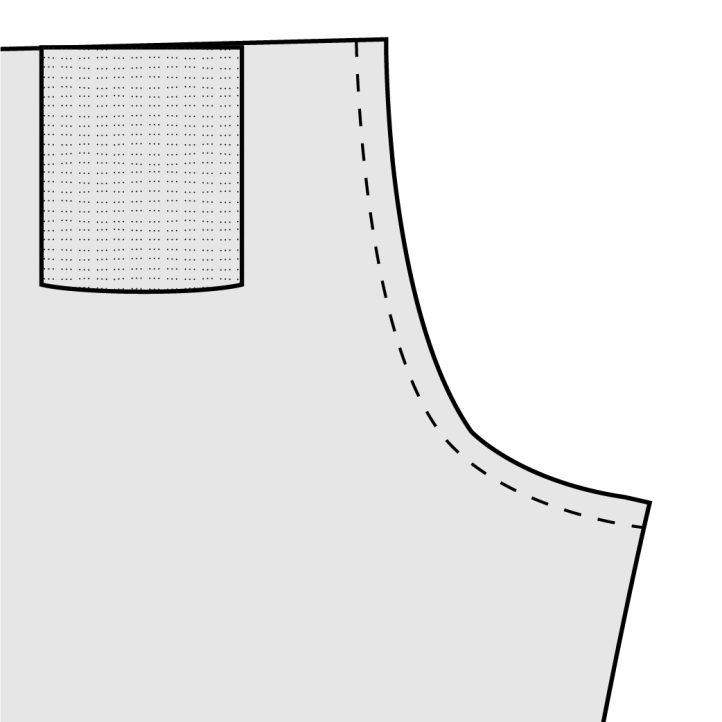
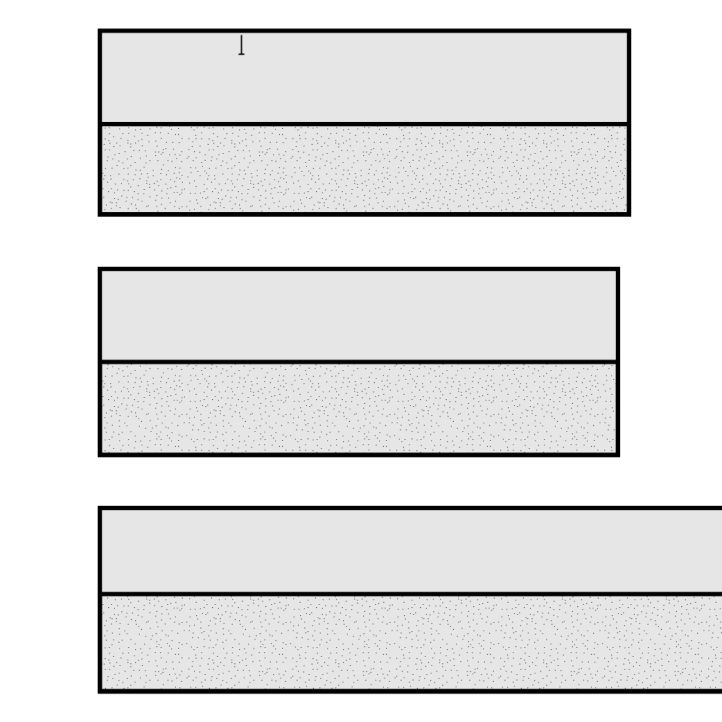
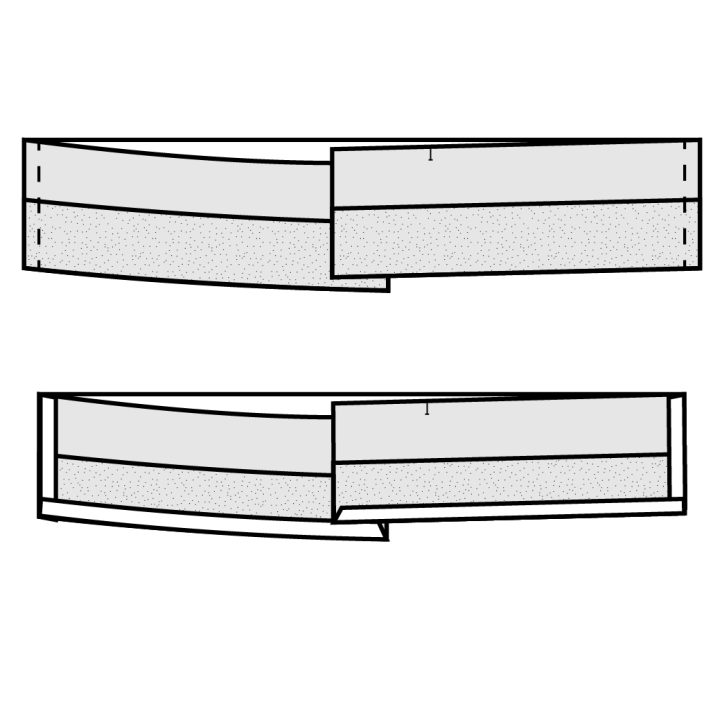
- Fabric Key:
Instructions:
- Using a serger or zig zag stitch, finish the raw edges of both front pieces along the side seams, inseam, and center front.
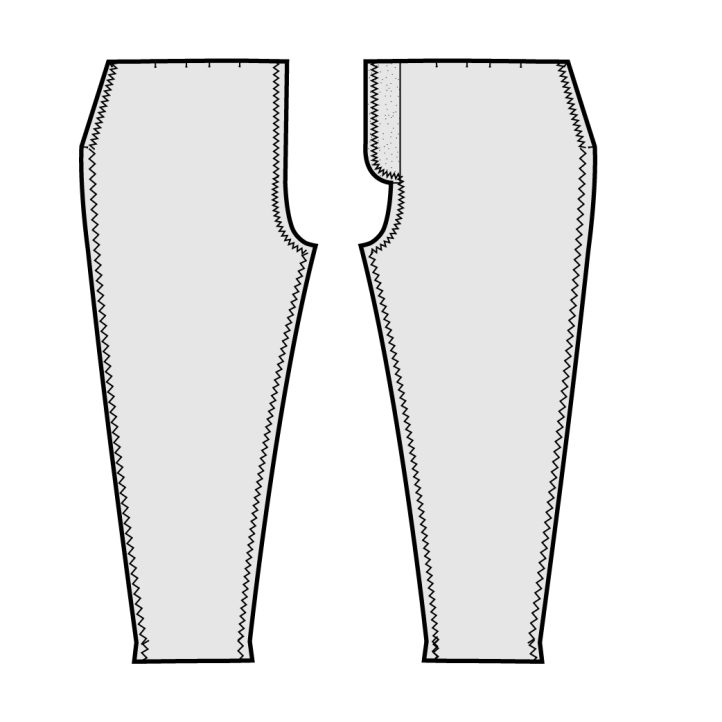
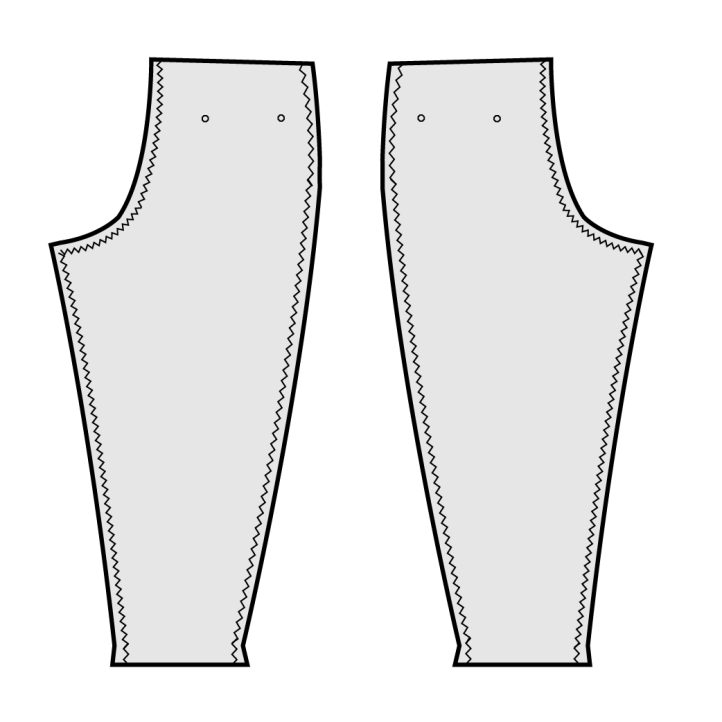
- Finish the side seams, inseam, and center back of the back leg pieces. Apply interfacing to the fly shield, fly extension, and welt pocket top.
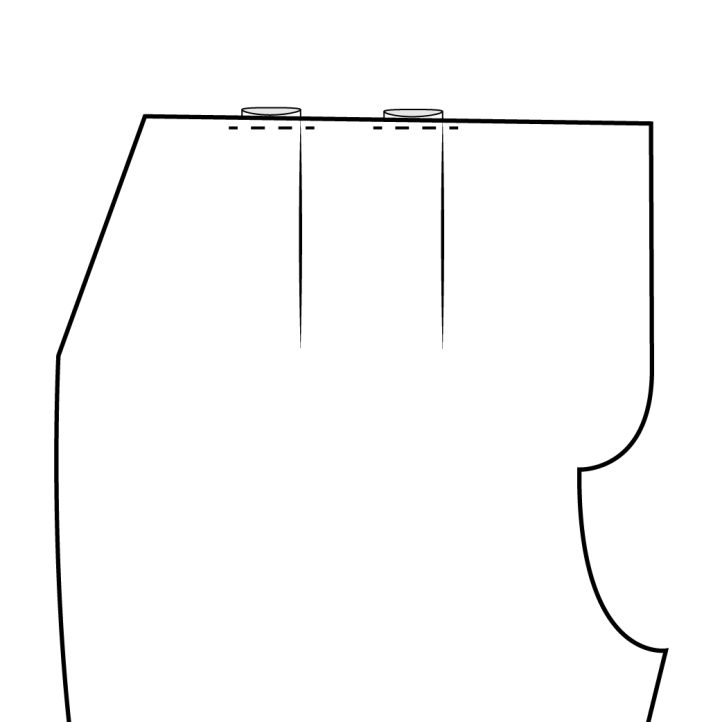
- Working with the wearer’s right front piece, match the first two pleat notches and fold the excess fabric towards the side seam. Repeat with the second two pleat notches. With both pleats folded towards the side seam, use a basting stitch 1/4″ from the top raw edge to secure the top of each pleat. Repeat with the second front piece.
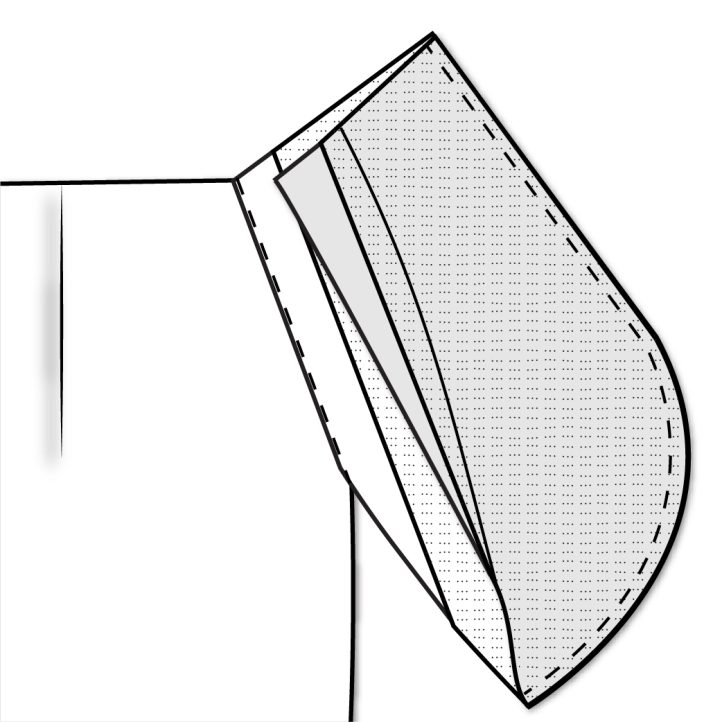
- Take one pocket lining and the corresponding pocket backing and place the right sides together, aligning the notches along the diagonal edge. Sew the two pieces together and finish the raw edge with either a zig-zag stitch or serger. Press the seam allowance towards the pocket lining and topstitch in place, securing the seam allowance.

- Repeat this step with the remaining pocket pieces, resulting in two mirror pairs of each pocket.
- With the right sides together, match up the outside curved edge of one set of pocket facing and pocket backing pieces. Sew the two pieces together along the curved raw edge.

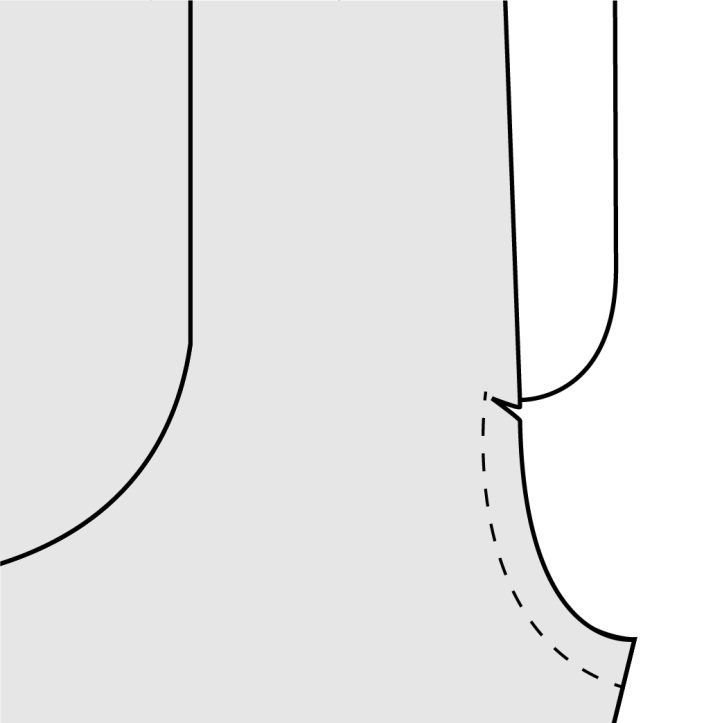
- Working with the left front pant leg, place the pocket facing along the front diagonal edge of the front pant. With the pocket backing pulled out of the way, sew the facing to the diagonal edge.
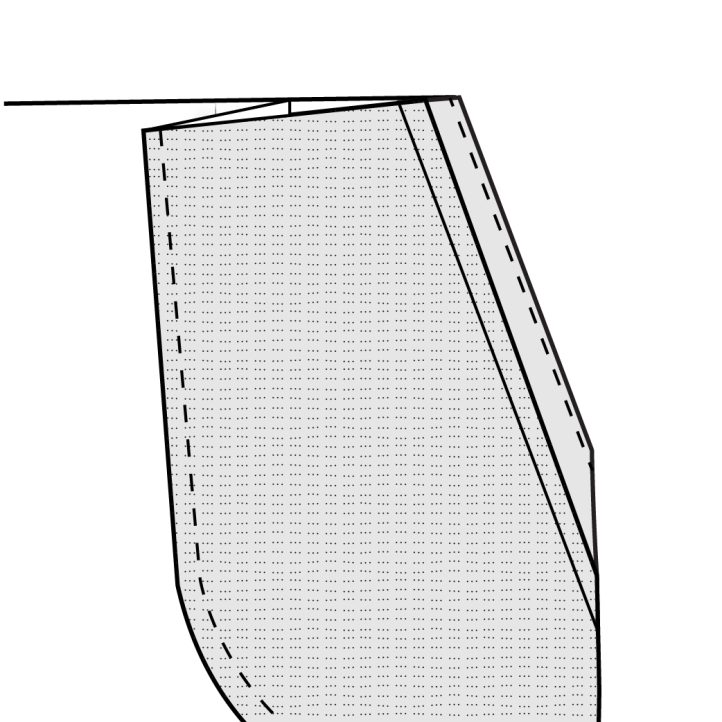
- Fold the seam allowance and pocket pieces away from the pant leg and press well. Topstitch the pocket facing 1/8” from the inside diagonal edge securing the seam allowance.
- Fold the pocket towards the wrong side of the pant leg and line up the notches on the side seam and top edge. Baste the pocket to the front pant along the top raw edge and side seam.
- Repeat Steps 6-9 with the remaining pocket pieces and the wearer’s right front pant leg. With right sides together, sew the welt pocket top and bottom together.
- Fold the welt pocket top and seam allowance away from the pocket lining and press well. Topstitch the seam allowance to the top piece layer only. Repeat with the second welt pocket.
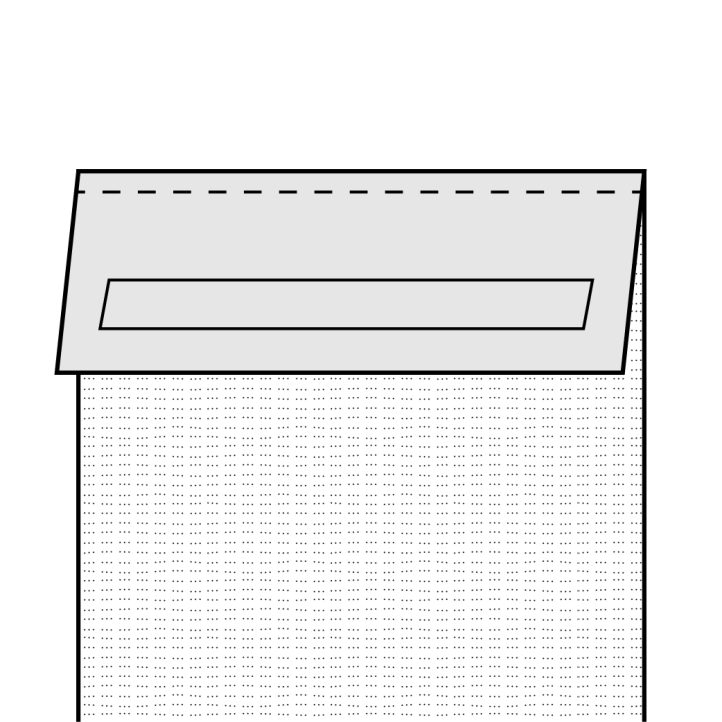
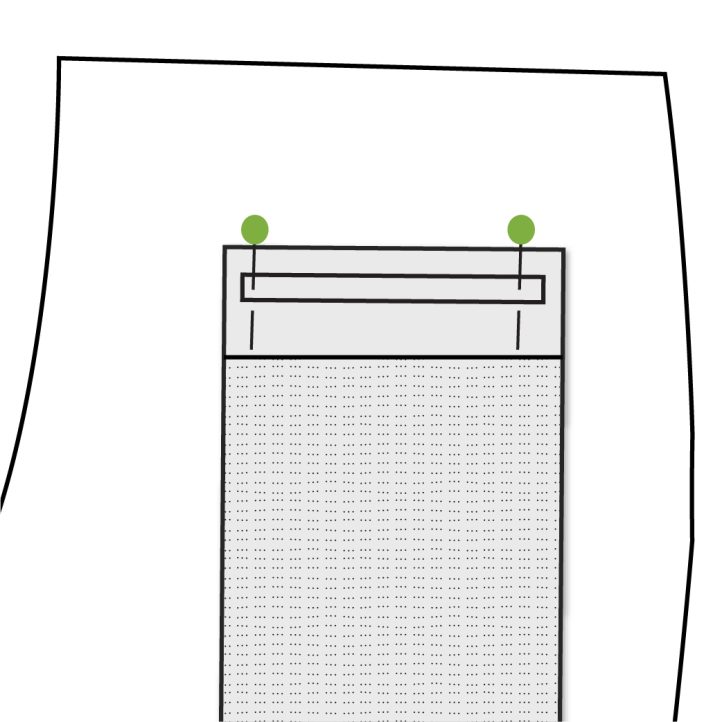
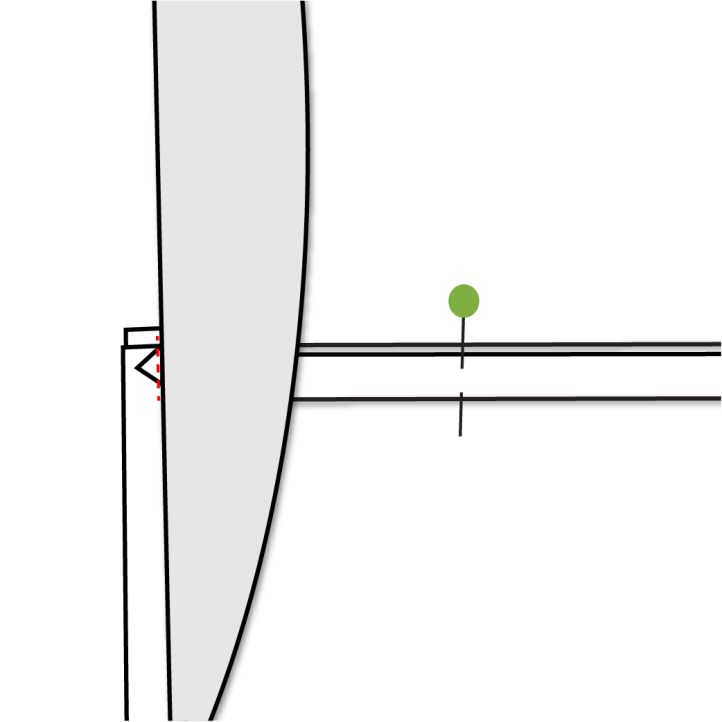
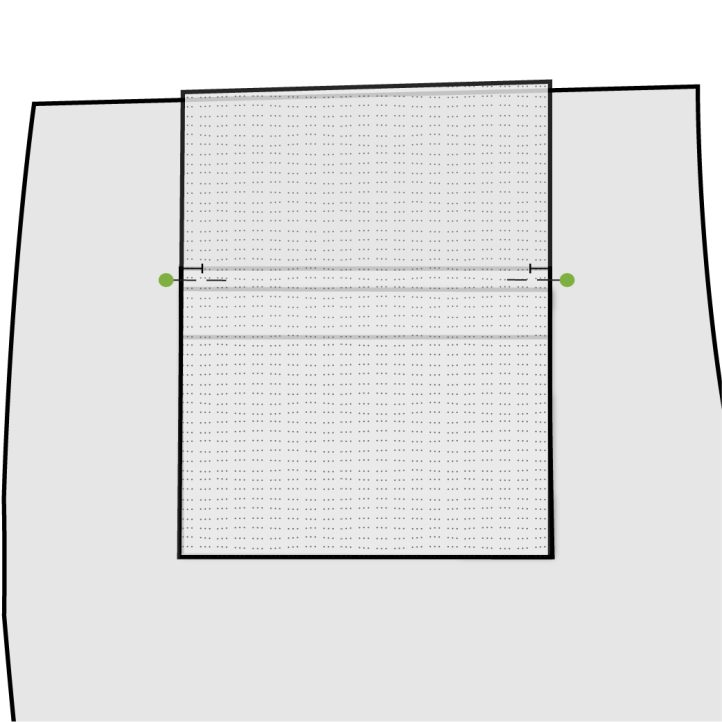
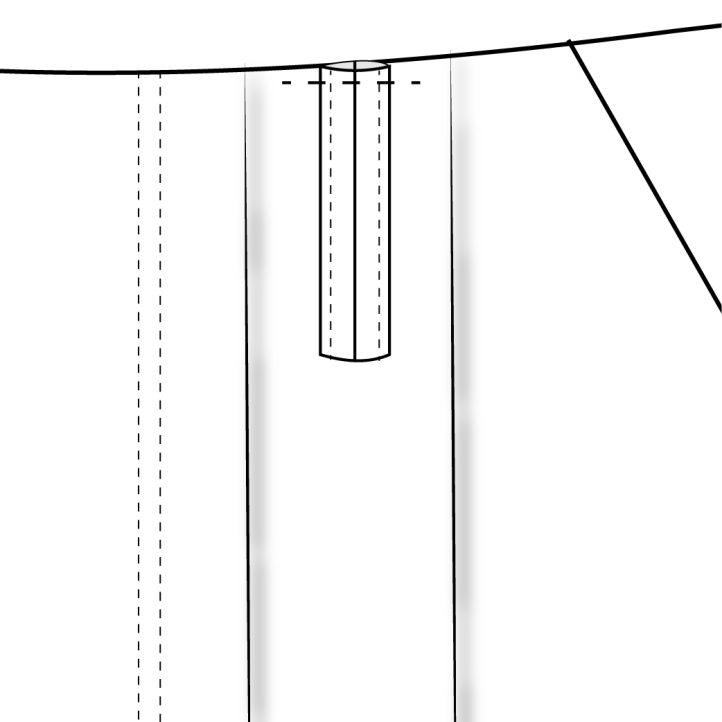
- To sew the welt pockets, place the right side of the pocket piece towards the right side of the back pant. Pin the pocket in place, making sure the rectangle welt opening ends on the pocket line up with the circle markings on the back pant.
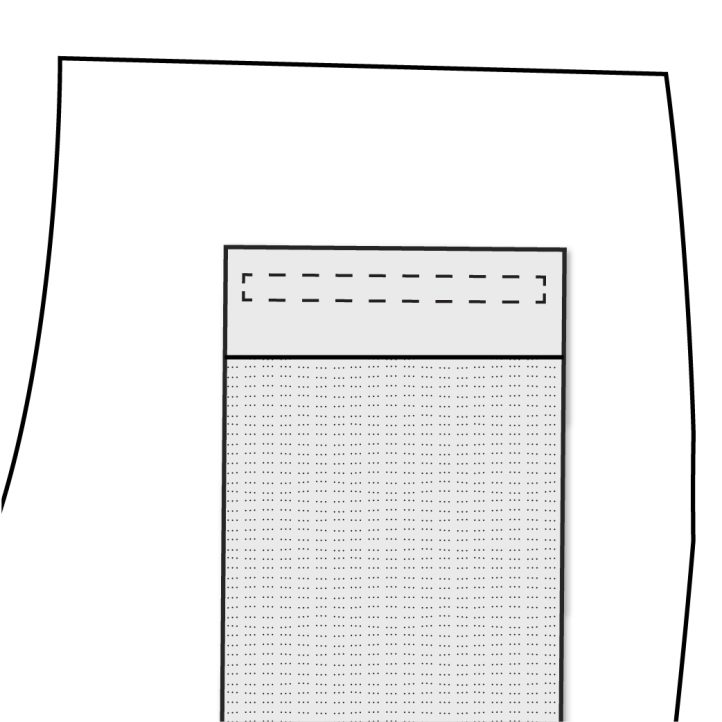
- Sew the pocket to the back pant along the rectangle welt opening.
- Carefully cut through both layers parallel to the two long stitched sides. Stop 1/2” from both ends and clip an angled cut towards the end of the sewn lines corners but not through.
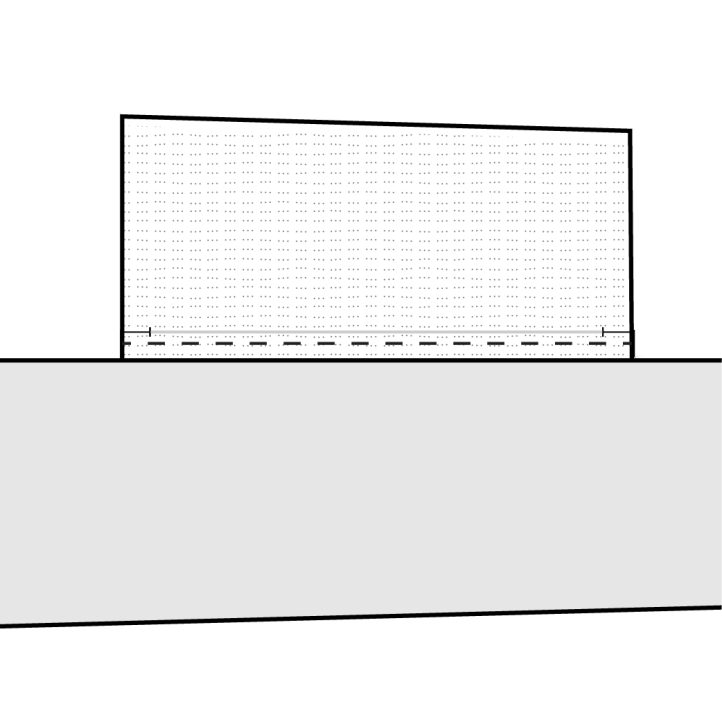
- Push the pocket through the welt opening towards the wrong side of the back pant. Press the opening well.
- Fold the pocket piece up towards the opening so that it lines up with the top edge of the opening. Press well.
- From the right side of the back pant, pin the fold in place.
- Fold the pant leg towards the right side along the end of the welt opening. Sew the triangle created in Step 14 to the two layers of the pocket as close to the folded edge of the pant leg. Repeat with the other side of the welt opening.
- Working from the wrong side, fold the bottom edge of the pocket up towards the top edge of the pant leg, lining up the notches on the pocket lining with the top raw edge of the welt opening.
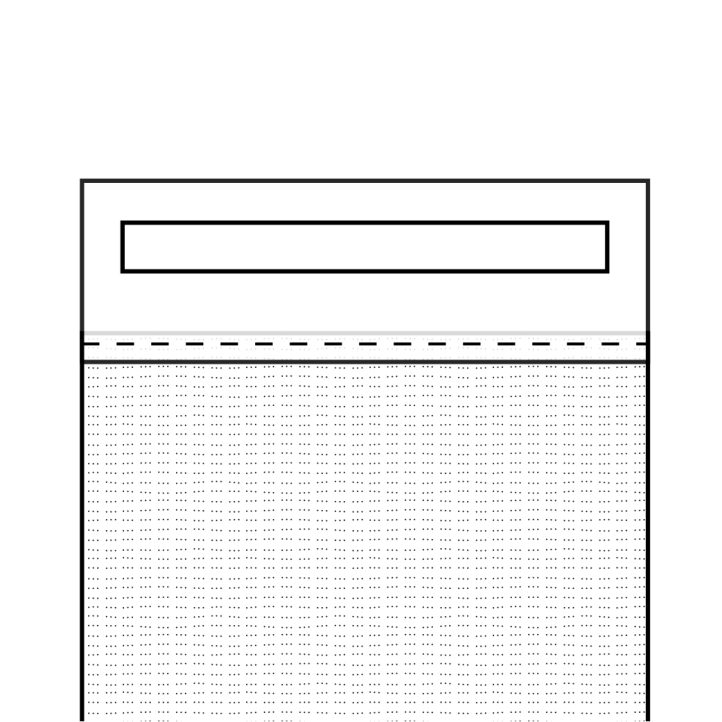
- Fold the pant leg above the welt pocket down, exposing the pocket lining. Sew the pocket pieces together along the top of the welt.
- Sew the pocket pieces together along both sides, making sure not to catch the pant leg in the stitches. Finish the raw edges.
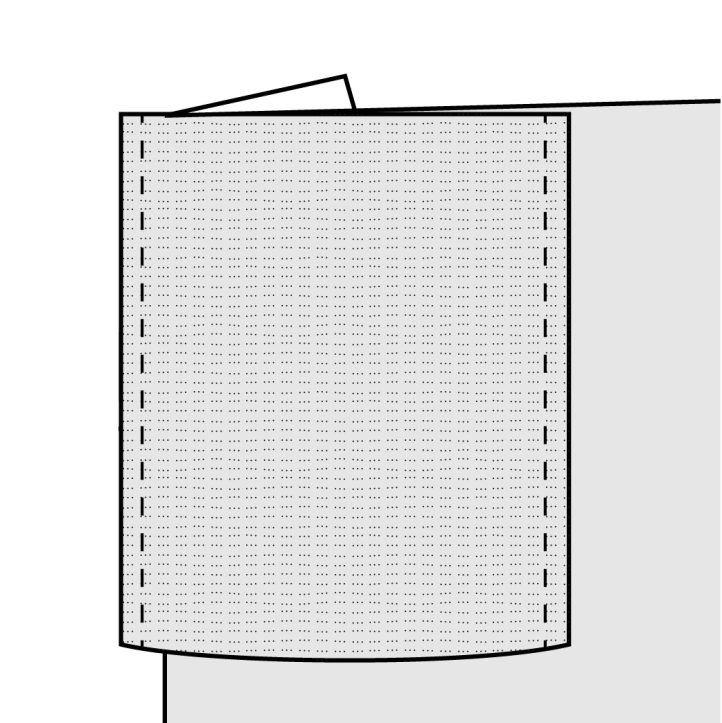
- Baste the pocket to the back pant along the top raw edge.
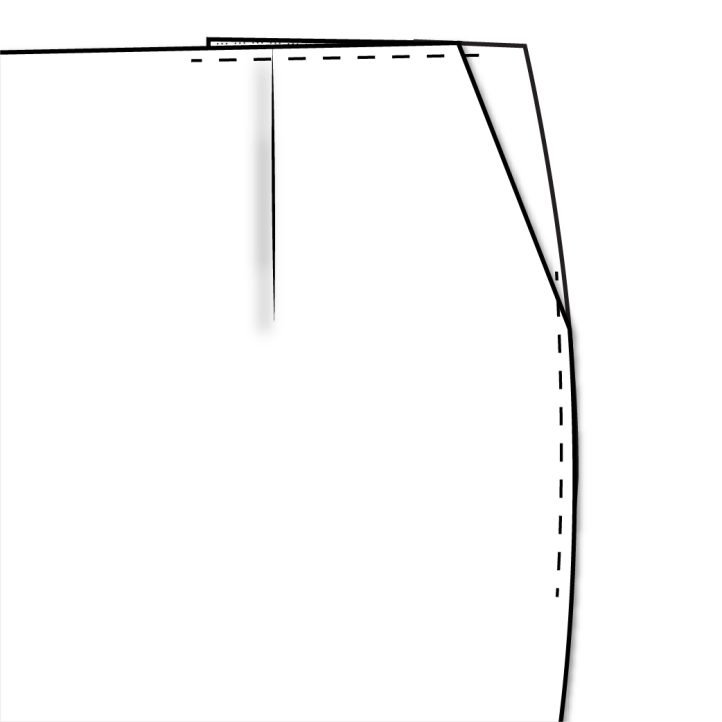
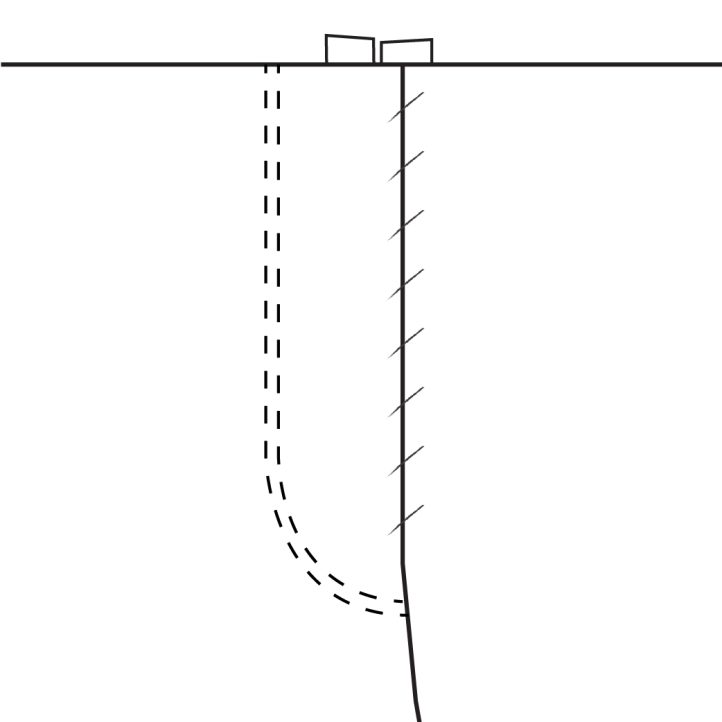
- Repeat Steps 12-22 with the other welt pocket. With right sides together, sew the two front pant legs from the notch in the center front to the crotch curve.
- Clip into both pieces at the notch up to but not through the stitching.
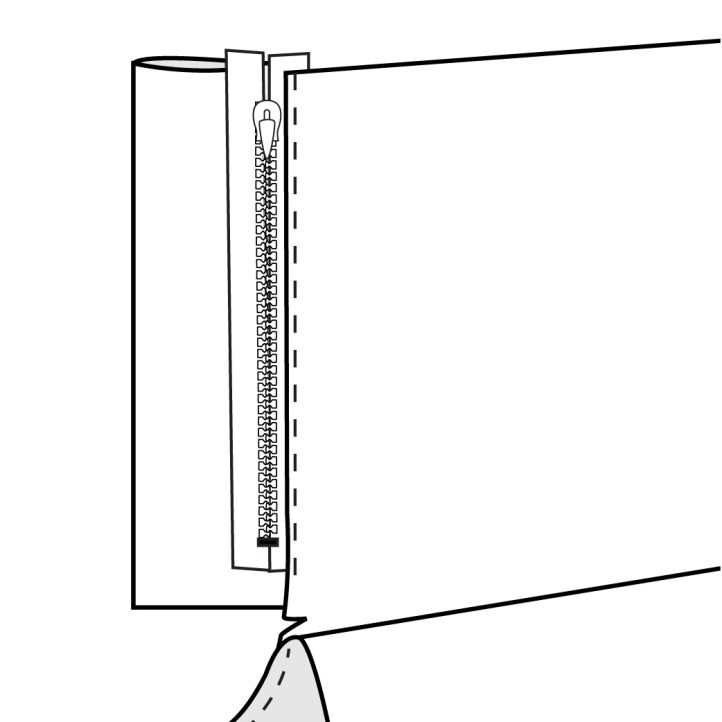
- With the wrong sides together, sew the two long edges of the fly shield together and finish the raw edge. Repeat with bottom short edge. Place the zipper right side up with the zipper tape along the finished edge of the fly shield. The top of the zipper tape will extend above the top of the shield by 1/8” and will extend beyond the bottom notch. Sew one line of stitching 1/8” from the edge and then another line of stitches 1/8” along the zipper teeth with both lines of stitching stopping at the notch. Trim excess zipper below the notch.
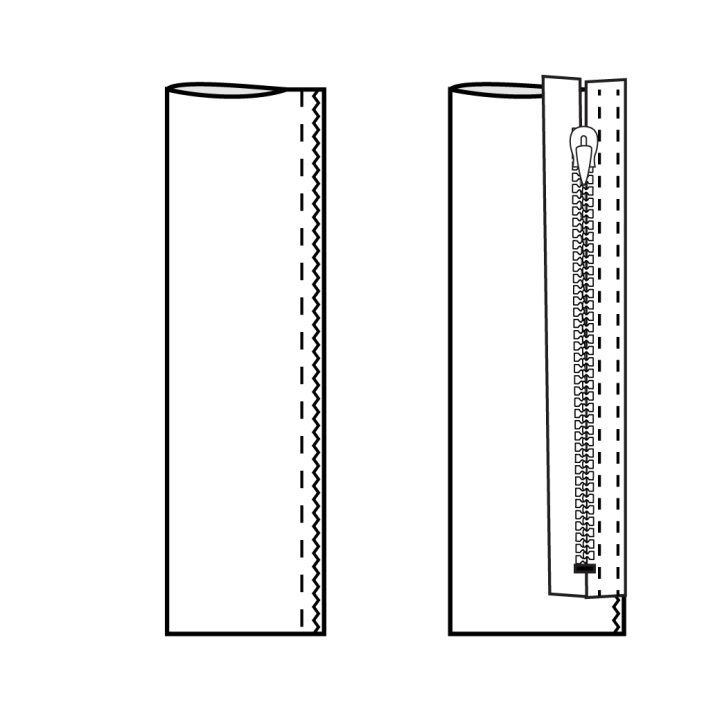
- With the zipper and shield right sides up, place the wearer’s left front pant right sides down. The zipper is now sandwiched between the pant leg and fly shield. Sew through all 3 layers 1/4” from the edge until the end of the zipper tape.
- Fold the zipper and fly shield away from the pant leg and press. Topstitch the seam allowance to the pant front.
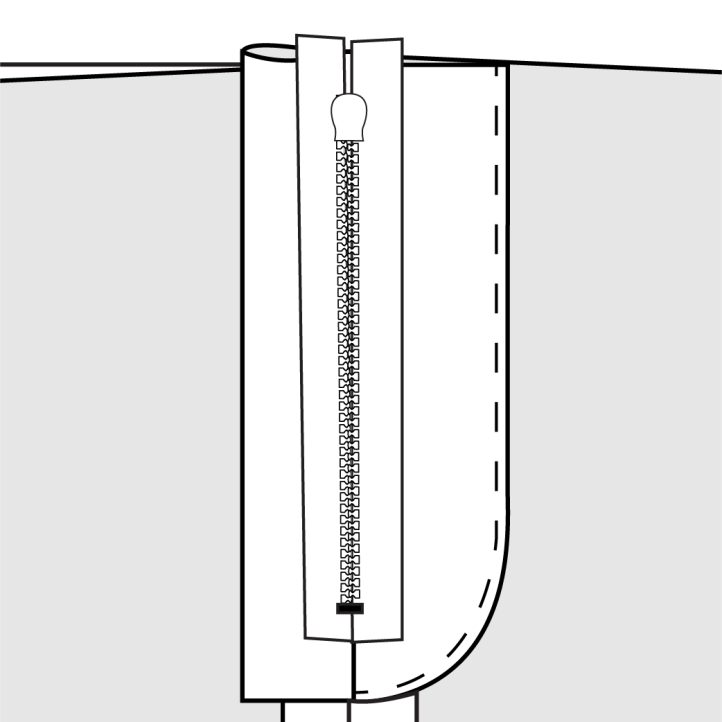
- Place the fold of the wearer’s right front leg at the center front notch of the left pant. Baste the two pant legs together.

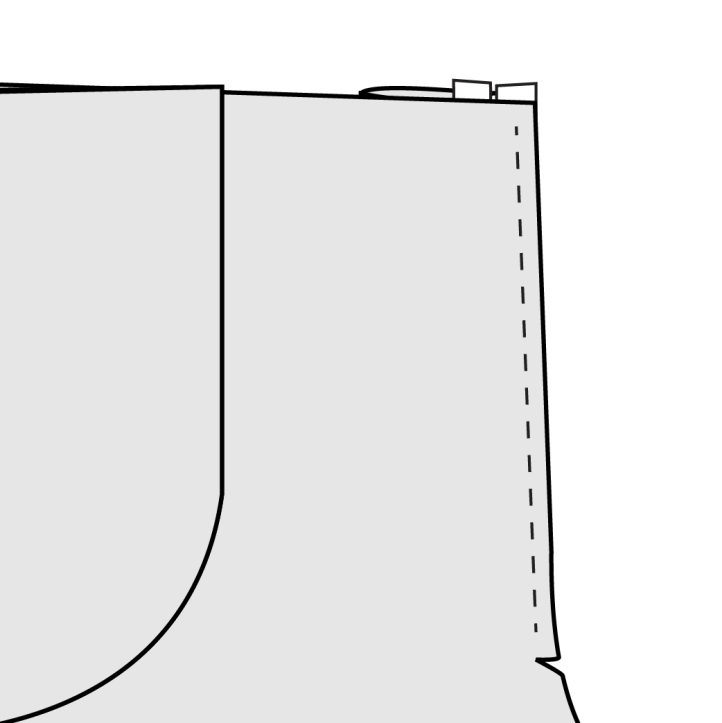
- Bring the right front pant leg towards the left leg, leaving the fly extension and seam allowance towards the right. Sew the zipper to the fly extension 1/8” from the outside edge of the zipper tape and then 1/8” from the zipper tape.
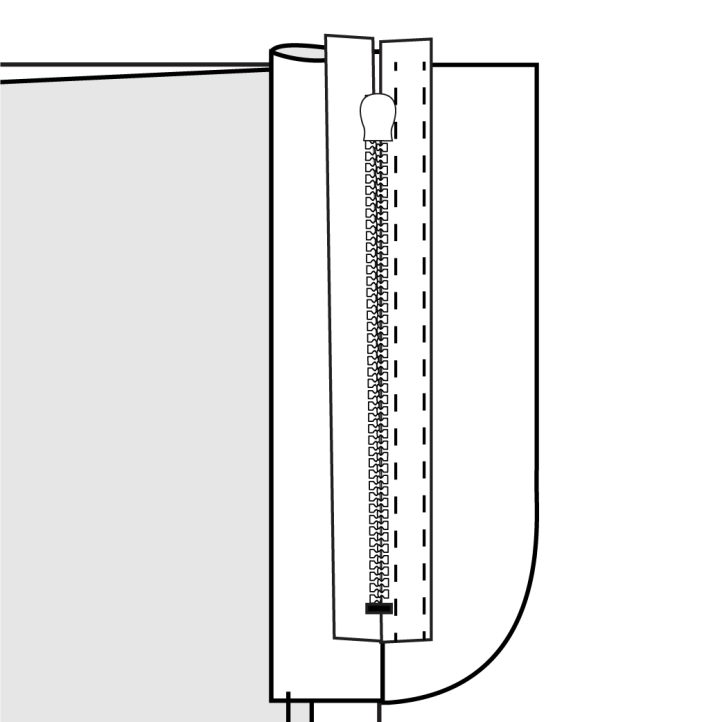
- Unfold the right pant leg and baste the fly extension to the right front pant along the outside edge of the fly extension. This line of stitching is used as a guide and will be removed later. Working from the right side of the pants, sew a line of topstitching 1/4” in from the basting line. Sew a second line 1/4” in from the first line of stitching. Remove the basting stitch from the previous step.
- An optional step is to sew two bar tacks along the stitching lines from the previous step. The first bar tack is sewn at the bottom of the straight line of stitches just before it starts to curve. The second bar tack can be sewn just inside from the center front of the pants. These bar tacks are to secure the fly shield to the left front pant.

- With the right sides together, sew the left and right back pants together along the back crotch curve.
- Place the front and back pants right sides together and sew along both side seams. Sew the inseams together starting at one bottom hem up towards the crotch point and then back down the other inseam.
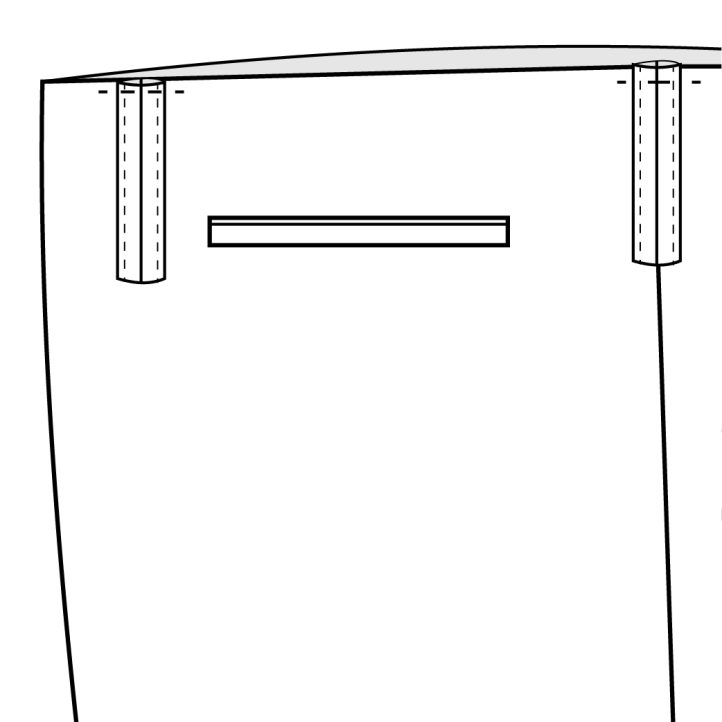
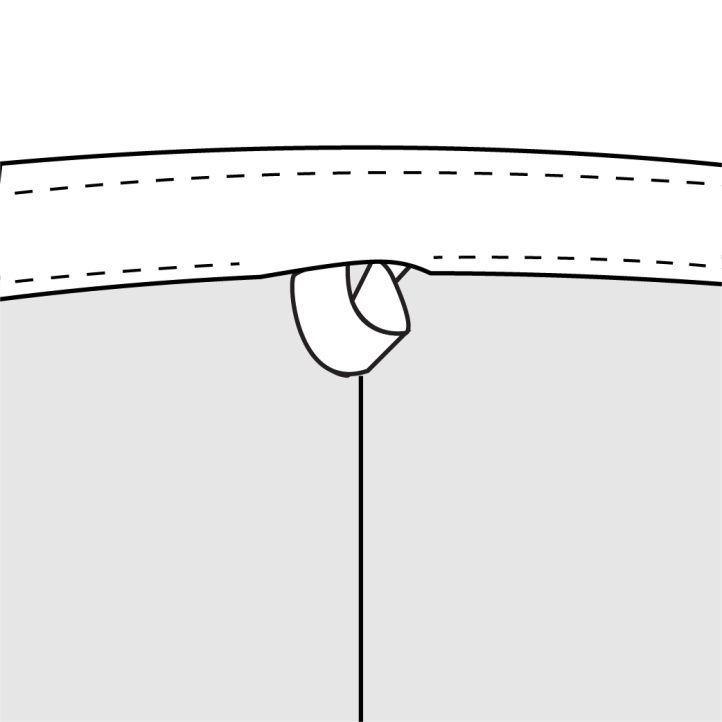
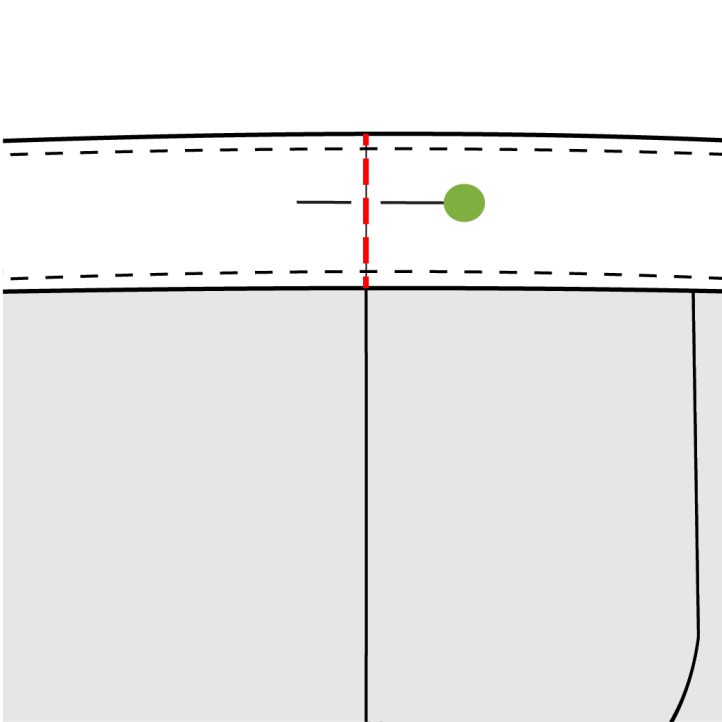
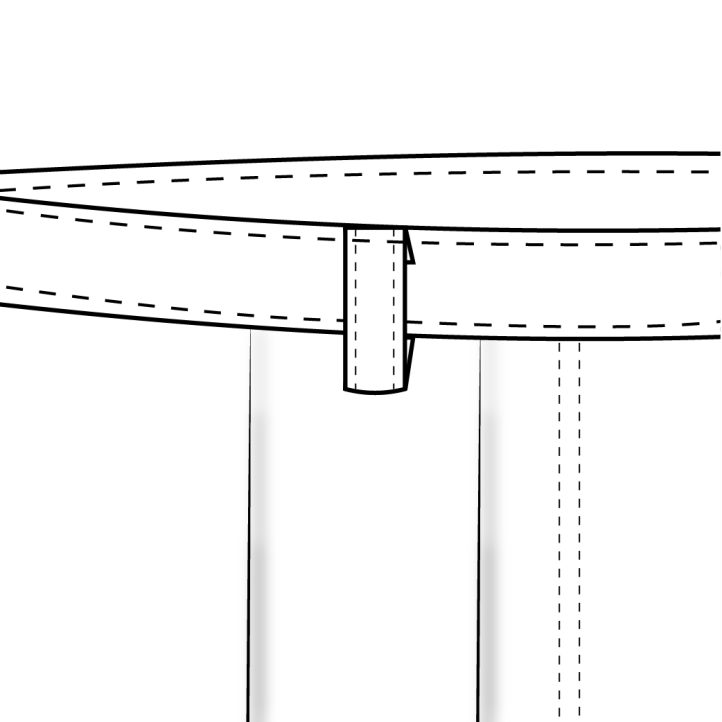
- Fold the belt loop right sides together and sew the two long sides together 1/8” from the edge. Turn the belt loop right sides out and press so that the seam is centered on the belt loop. Topstitch 1/8” along both long sides and then cut into 5 pieces of 3 1/2” length.

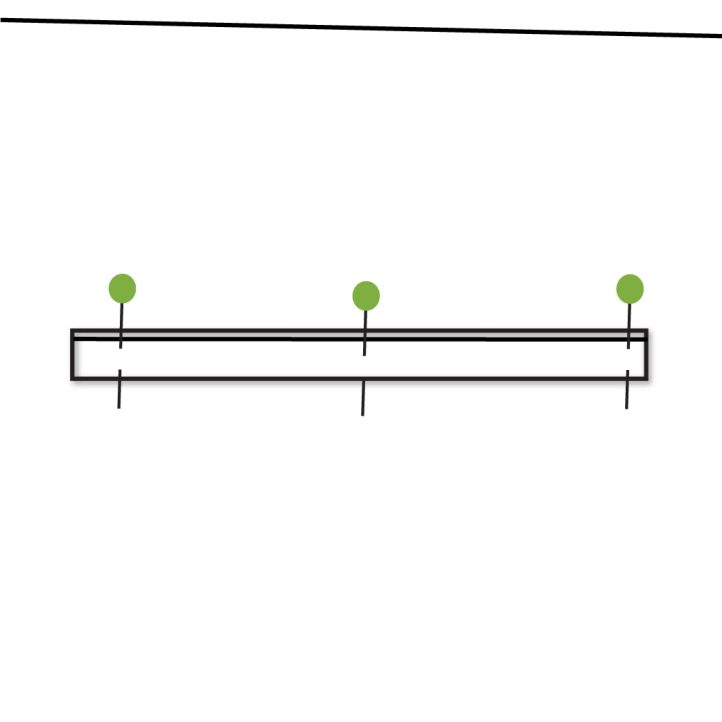
- Pin the belt loop right sides together with one raw edge of the belt loop lined up with the top edge of the pants. On the front of the pants, there is a belt loop between the two pleats. Baste the belt loop in place 1/4” from the top edge making sure to lock the stitches on both ends.
- Repeat the process for the 3 back belt loops located at the center back seam and 2” in from the side seam.
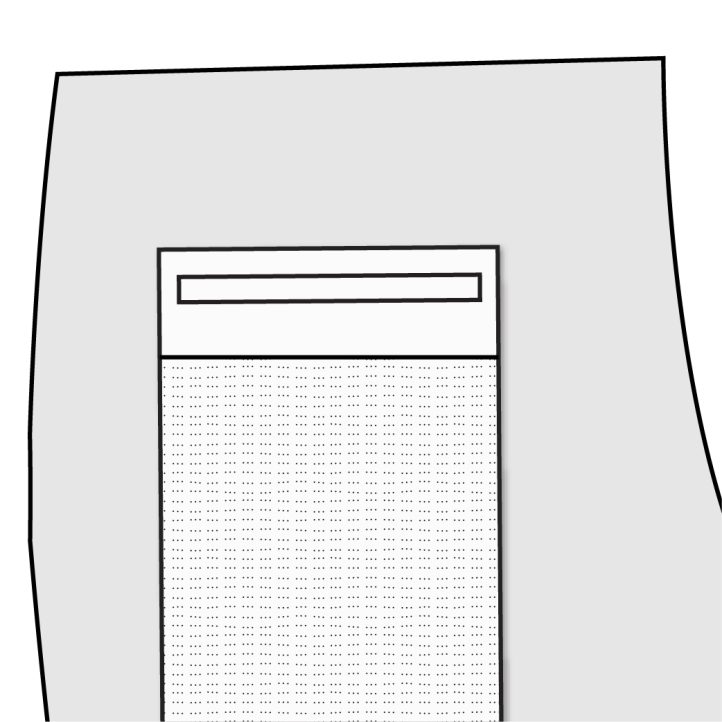
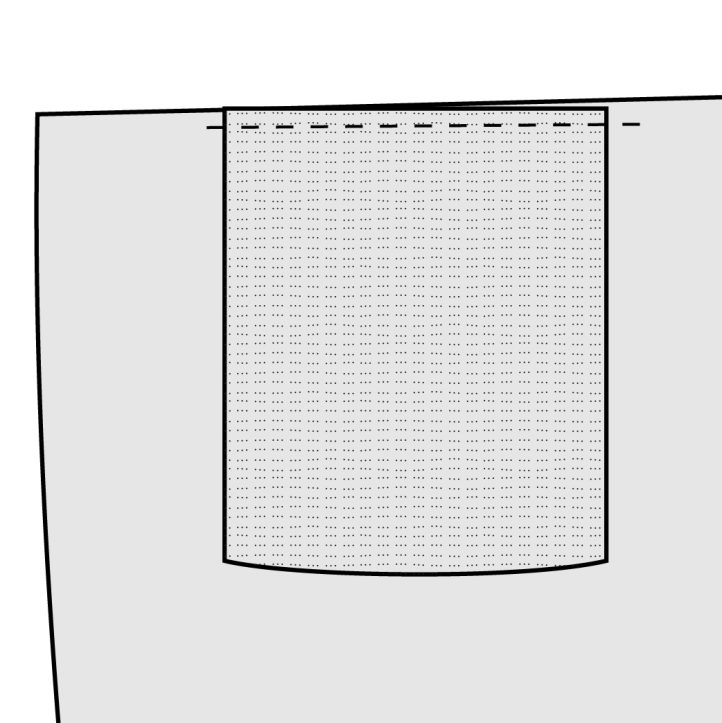
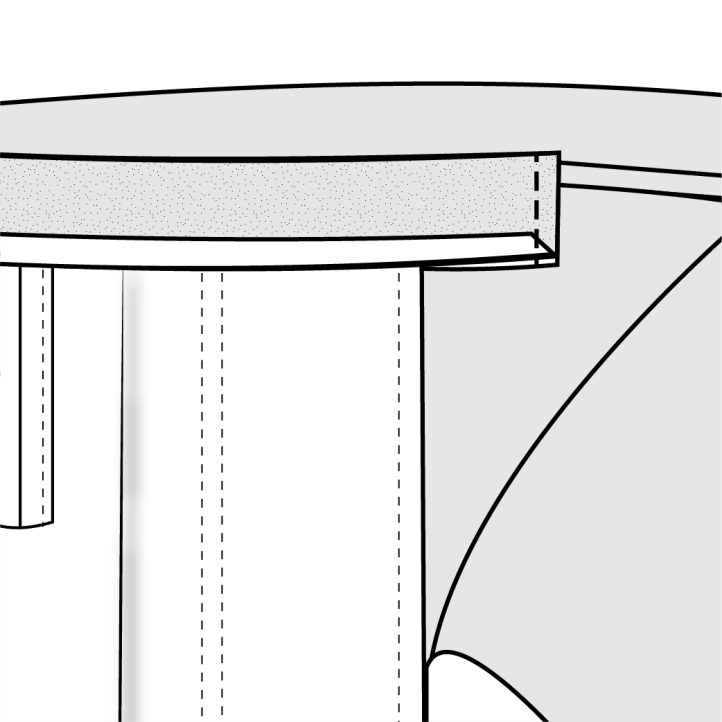
- Cut interfacing for each waistband piece along the line marked on the pattern piece. Iron interfacing to the bottom half of the wrong side of each waistband piece; this is now the waistband facing.
- With right sides together, sew the wearer’s right waistband to the left short edge of the back waistband. The wearer’s left waistband is sewn to the right side of the back waistband, making sure the end with the notch is on the unsewn side. Press the seam allowance open along the side seams of the waistband and press the bottom edge towards the wrong side by 1/4”.
- Starting at the center front, pin the notch on the wearer’s right waistband to the edge of the right front piece. Continue pinning around the waistband matching up the side seams and center back. When reaching the other side of the waistband, it will extend 5/8” beyond the front zipper extension. Sew the waistband to the pants 5/8” from the top edge.
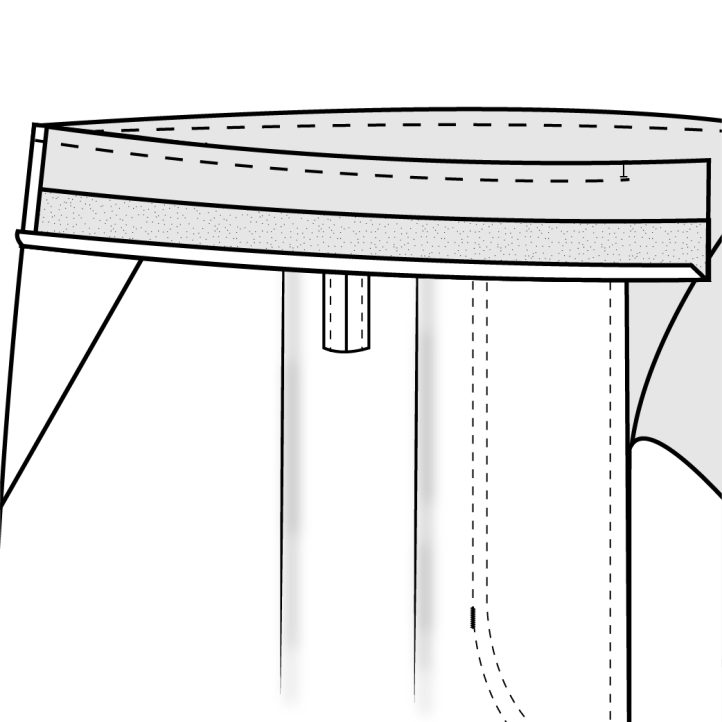
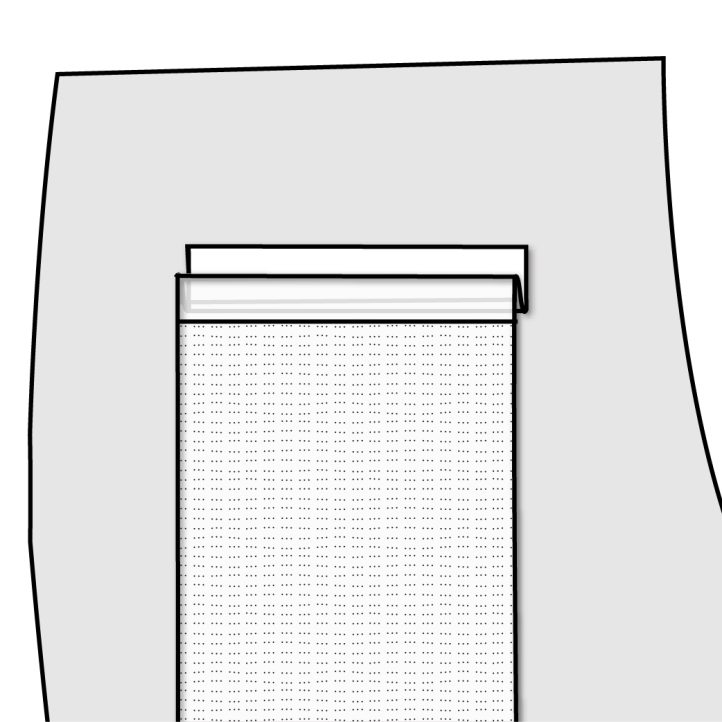
- Trim seam allowance and press the waistband and seam allowance away from the pants.
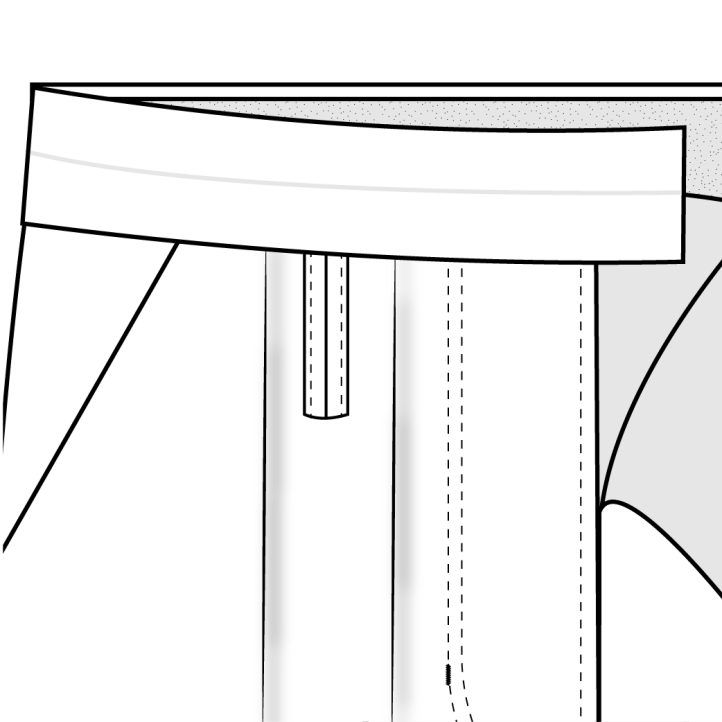
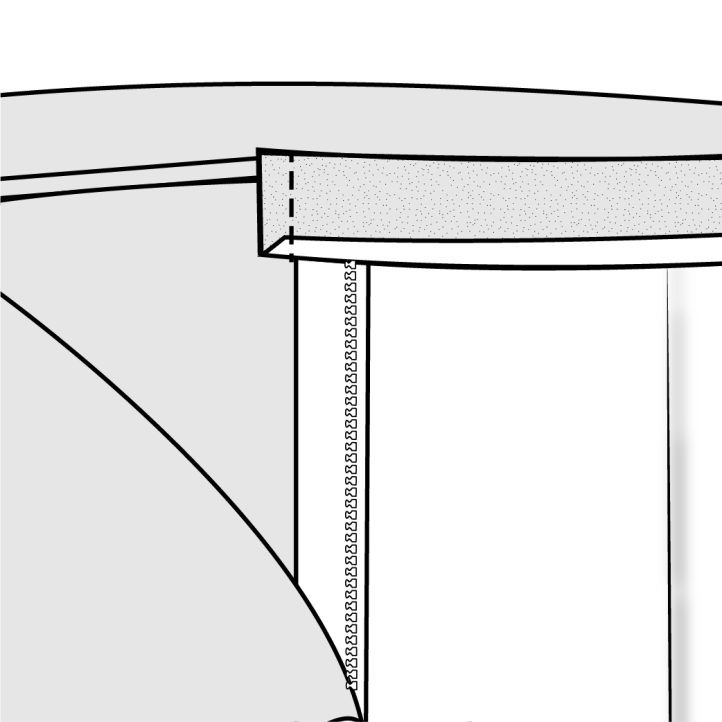
- Fold the waistband facing towards the right side of the pants lining up the folded edge from Step 37 with the seam created in Step 38. With the folds intact, sew the short end of the left waistband together with a 5/8” seam allowance.
- The process to finish the right waistband at the center front is the same, except it will only extend 5/8” beyond the center front. Make sure not to catch the pants in the stitch line.
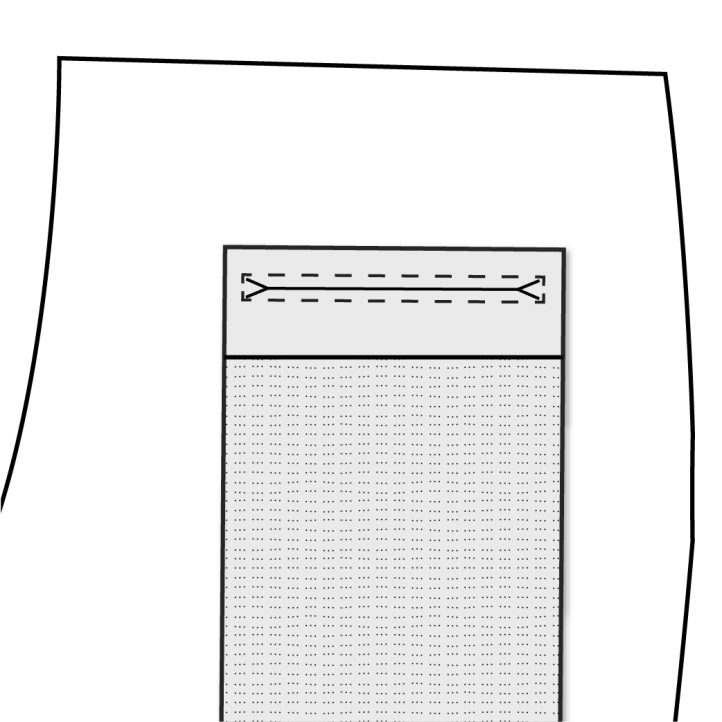
- Trim the corners at both waistband ends and turn the waistband right sides out with the interfaced side towards the inside of the pants. Line up the folded edge of the waistband inner folded edge just covering the sewing line from Step 39. Starting on the wearer’s right front waistband, topstitch 1/8” from the edge of the waistband along the bottom. Leave a 2” opening at the center back to insert the elastic. Continue sewing around the entire waistband.
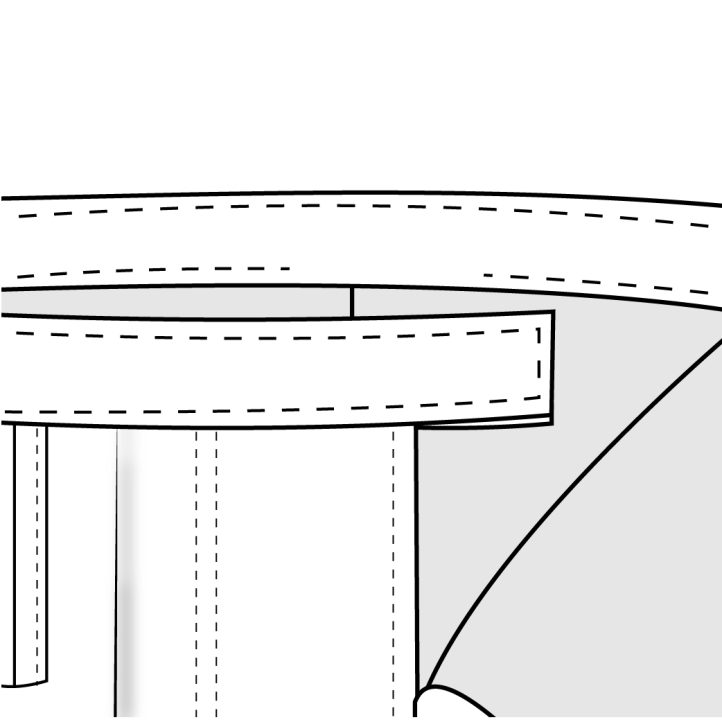
- Cut a piece of elastic that is 1” less than half your waist measurement. Insert elastic into the back waistband opening and pin the ends at both side seams.
- Sew the elastic ends into each waistband side seam by sewing along the seam.
- Fold the raw edge of the belt loop towards the wrong side 1/4” and press well. Bring the belt loop up towards the waistband and line up the folded edge with the topstitched line along the top of the waistband. Sew the belt loop to the waistband along the topstitching line with a bar tack.
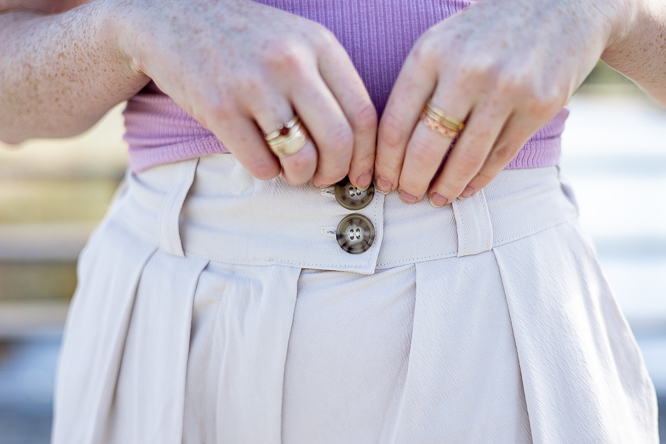
- Along the top edge of the wearer’s left waistband, sew one part of a hook and eye to the waistband near the top.
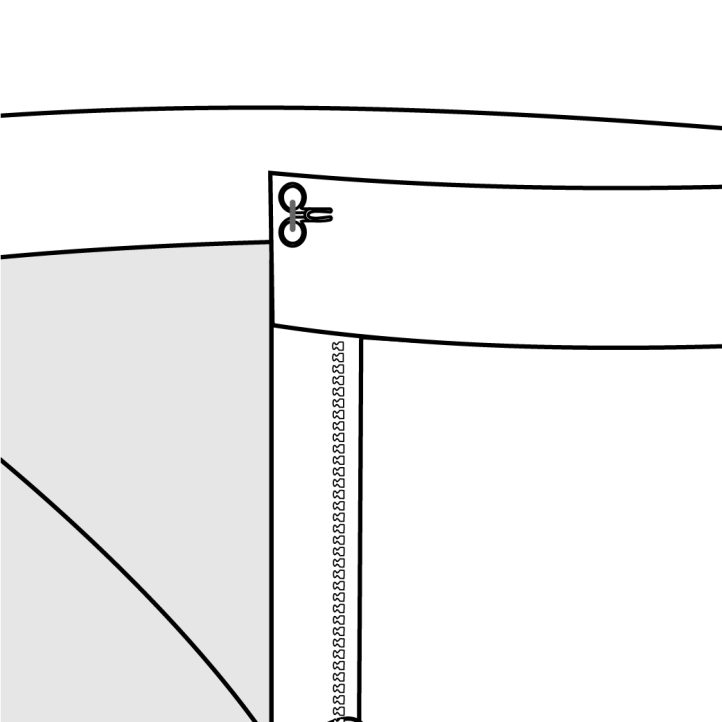
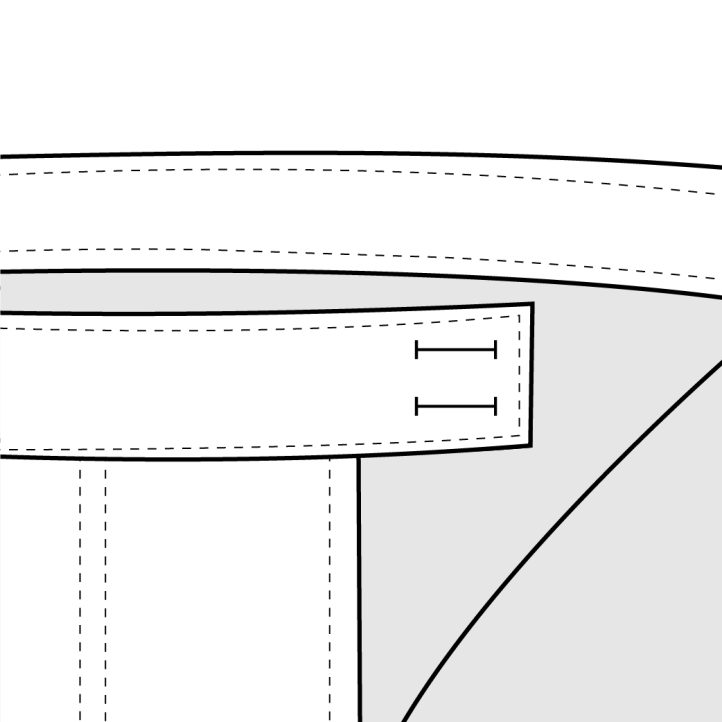
- Zip up the pants and mark on the wrong side of the corresponding waistband where the second part of the hook and eye should go. Sew onto the wrong side of the wearer’s right waistband, making sure to only sew through one layer of the waistband so the stitches don’t show from the front. Sew two horizontal buttonholes on the waistband extension as marked on the pattern piece.
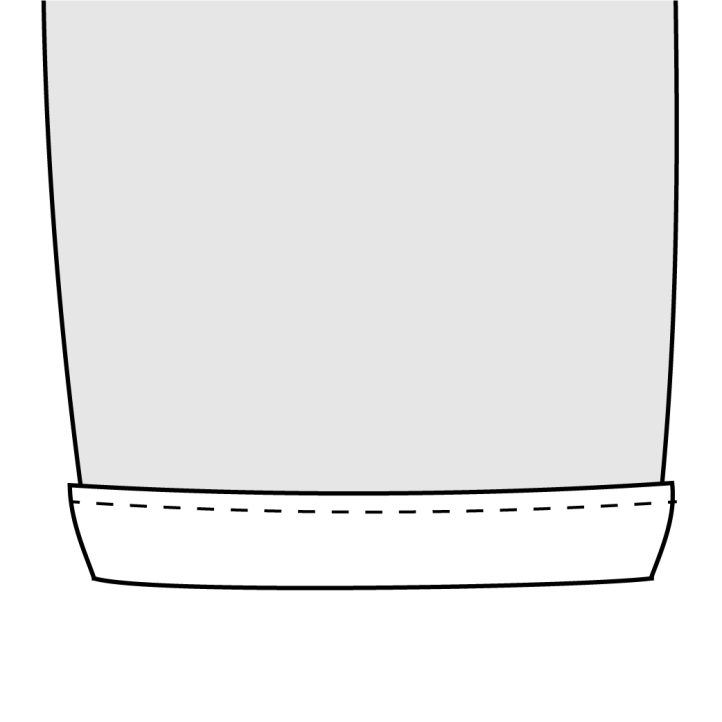
- Zip up the pants and secure the hook and eye, then mark the button placement on the left waistband. Fold the bottom hem of the pants towards the wrong side 1/4” and press well. Fold another 2 inches and press well. Sew the hem of the pants 1/8” from the inside folded edge.


The directions are very well written.
Thanks so much, Marilyn! We’re so glad you enjoyed this pattern 🙂 – Ashley, WeLikeSewing