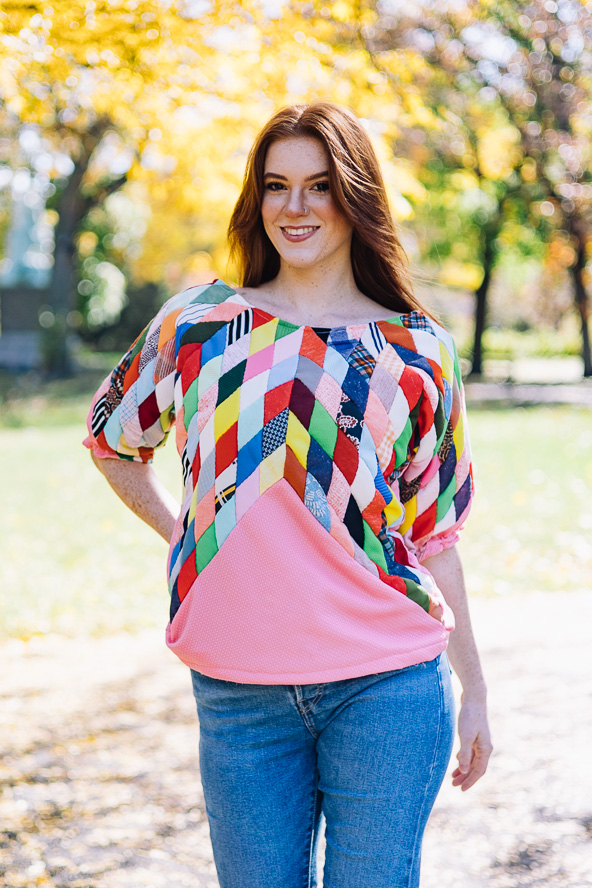
One of the hottest upcycling trends in the sewing and quilting community has been transforming old quilts into stylish, new garments, which is why we’re so excited to share this project from Quayln Stark. This refashioning project walks you through the process of making a thrifted quilt top into a new blouse, from fabric repair to finishing your garment. This sewing project is, as the designer states, a “transgenerational collaboration”, as you preserve the art of the quilter while adding your own work to create a one-of-a-kind garment. The possibilities are truly endless with this fun refashioning project.
From the Designer: “One handmade item I always seem to find at antique stores and estate sales is vintage quilt tops. Large, unfinished, and often hand-pieced panels of fabric that, for one reason or another, never made it to becoming an actual quilt. I find myself being drawn in by these pieces. Convincing myself that maybe I could be the one to finish them. Of course, with all of the projects I have going at all times, there is never enough room in the day, but over the years, I’ve amassed a pile that is waiting for new life to be breathed into them.
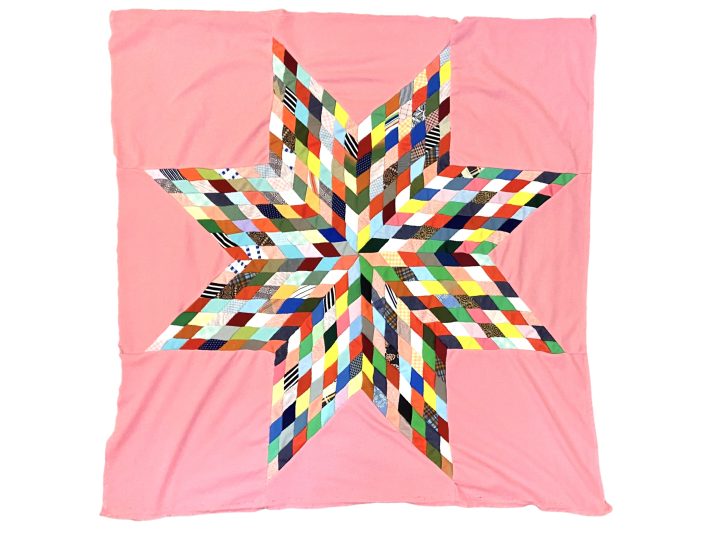
One trend that is forecasted to continue gaining popularity is the “Thrift Flip” of taking old handmade blankets and transforming them into new and trendy pieces. Things like granny square throws and hexi quilts are now being revamped into jackets and shrugs. I love this idea, and there is something to be said sustainability-wise about using already made textiles rather than buying new. I, however, find it hard to take a pair of scissors to a perfectly good quilt (damaged quilts notwithstanding). Quilt tops are a perfect solution to this problem! They are a blank canvas of sorts, created beautifully, but not completed. They are made as the perfect pre-patterned fabric with plenty space to play around with. When you let the quilt top guide your patterning process, you can create magic alongside the previous artisan that stitched the textile in what I consider a transgenerational collaboration!”
Let’s take a look at some of Qualyn’s best tips and tricks for working with these special textiles to turn them into a chic piece with a new life.
Materials:
- Unfinished quilt top
- Basic sewing notions
- Darning tools, if fabric repair is needed
- Gentle detergent and washing basin, if top needs to be hand washed
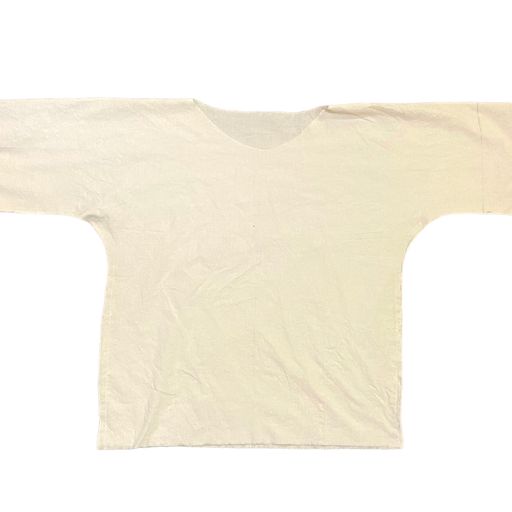
- Cotton lining fabric, if quilt top is unlined
- Muslin if reader desires to create mock-up before sewing
Instructions:
FABRIC REPAIR:
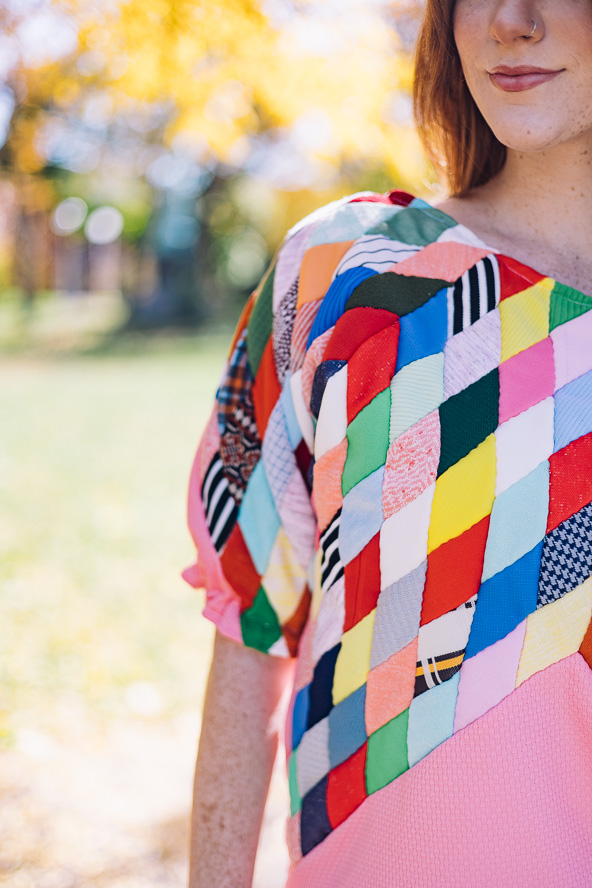
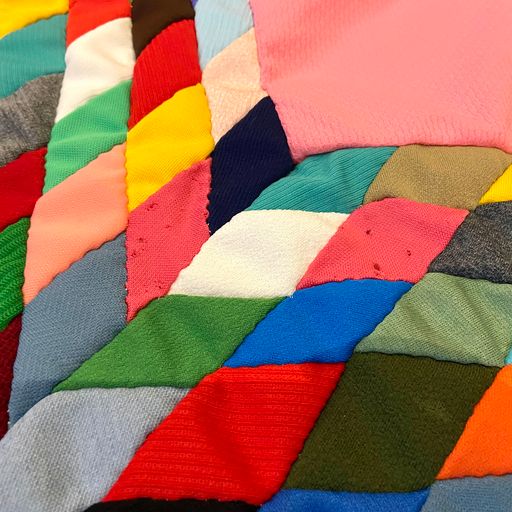
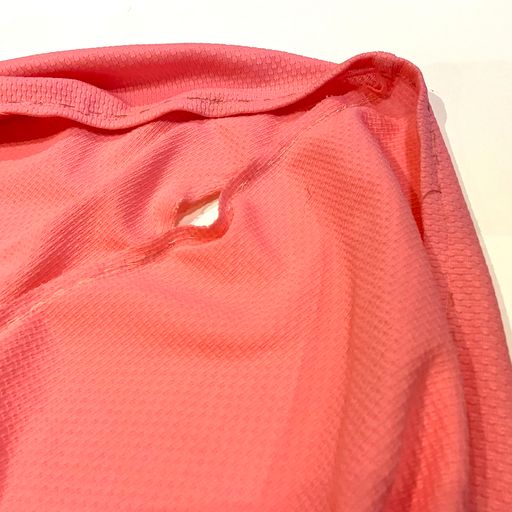
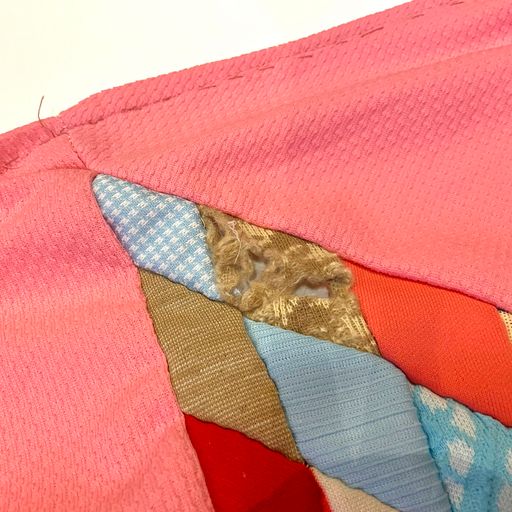
- After a quilt top has been selected, there are a few key factors that go into preparing the fabric for sewing. Firstly, assess the damage to the fabric as a whole. Often times, vintage quilt tops were made of many different fabric brands, styles, and fibers. Each of these fabrics have their own characteristics that could leave them more susceptible to damage over time. Keep an eye out for any holes or tears in the fabric, and any popped seams. If you notice a particular fabric from your quilt top has damage from age degradation, pay careful attention to any other sections of the quilt with the same fabric. Often times, they may show signs of damage as well. The designer recommends carefully hand darning any problem areas before moving on to laundering. Pro Tip: To more easily spot damage, hold the fabric up to a light source like a bright lamp. Damaged areas will be more identifiable as the light will shine through any holes, and any threadbare patches will appear brighter.
LAUNDERING:
- The quilt top you are using is most likely old, and it’s not a stretch to say it could have been decades since its fabrics were last washed. If you can clearly tell the fiber content that makes up most of the fabric, and the seams/joins are strong and stitched by machine, you may feel comfortable enough to throw it into the washer and dryer on the delicate cycle. Afterwards, be sure to reassess the fabric for any new damage that may need to be repaired. If you have no idea what fiber content was used (if it was from the 70’s-80’s, it likely has polyester; other decades use more cottons), or the pieces were hand stitched, your best bet is to launder by hand. This can be as simple as filling a basin with lukewarm water and a gentle detergent, and soaking the fabric for an hour, gently agitating the fabric every so often. After hand washing, hang to dry or throw it in the dryer on its gentlest setting. Pro Tip: Because the quilt top doesn’t have a backing, you will most likely want a cotton lining fabric to keep the raw seams from rubbing you. Select your lining fabric and launder it alongside the quilt top.
PREPARING AND CUTTING:
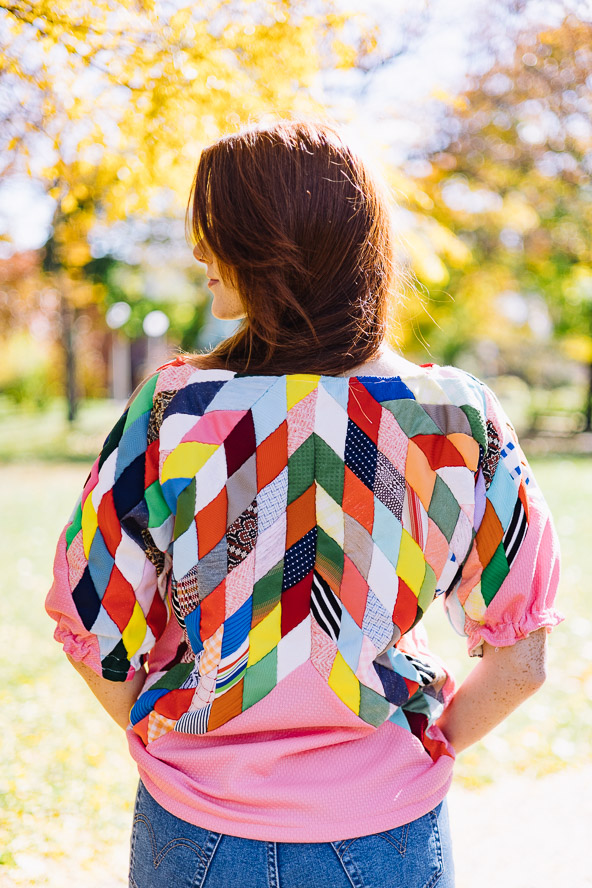
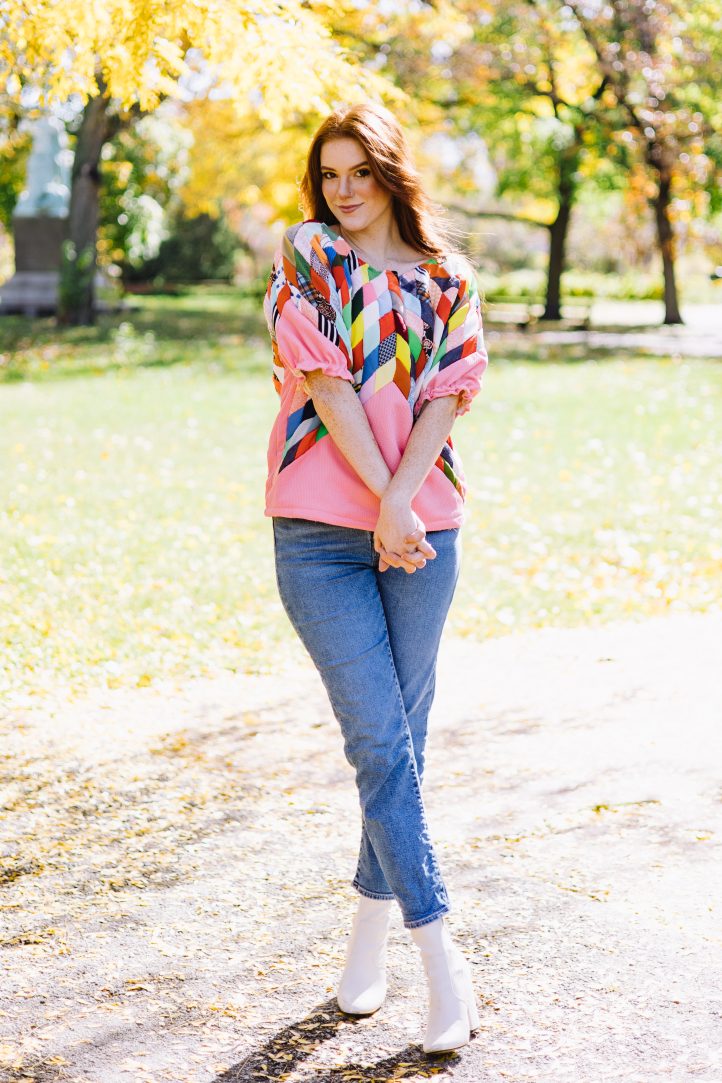
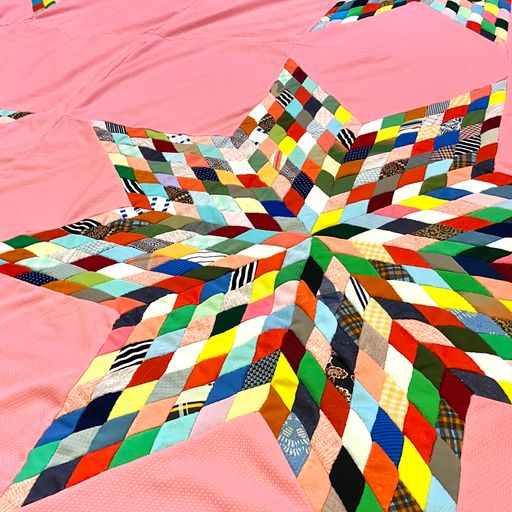
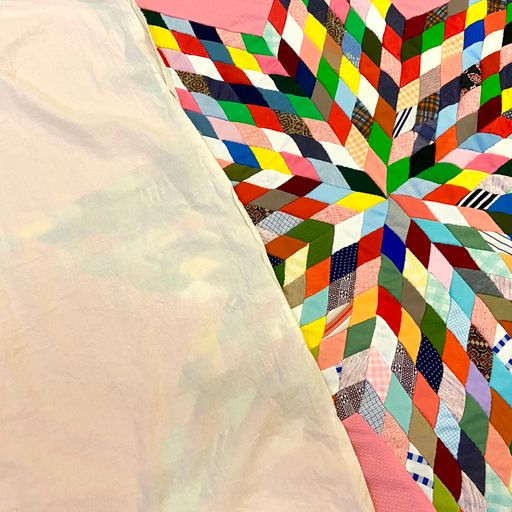
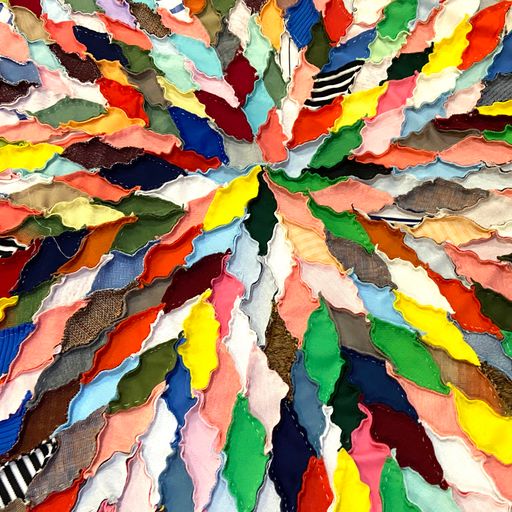
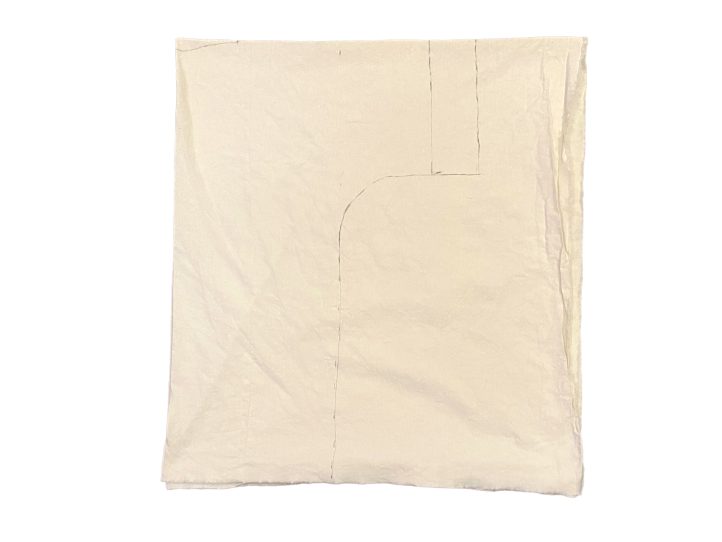
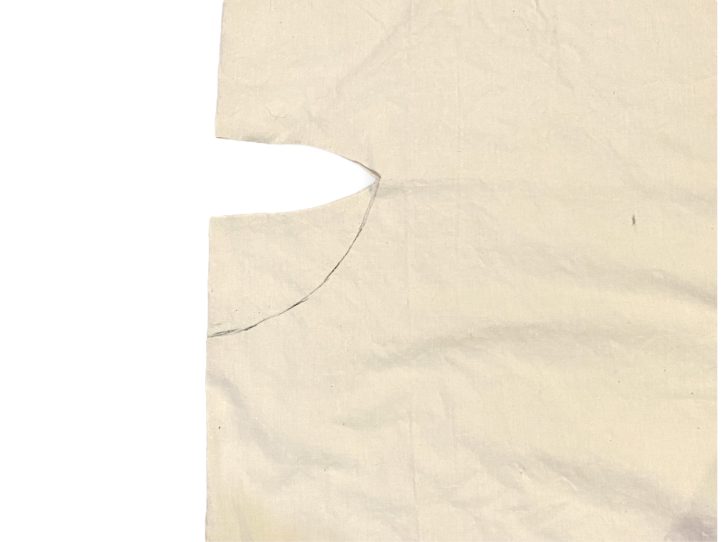
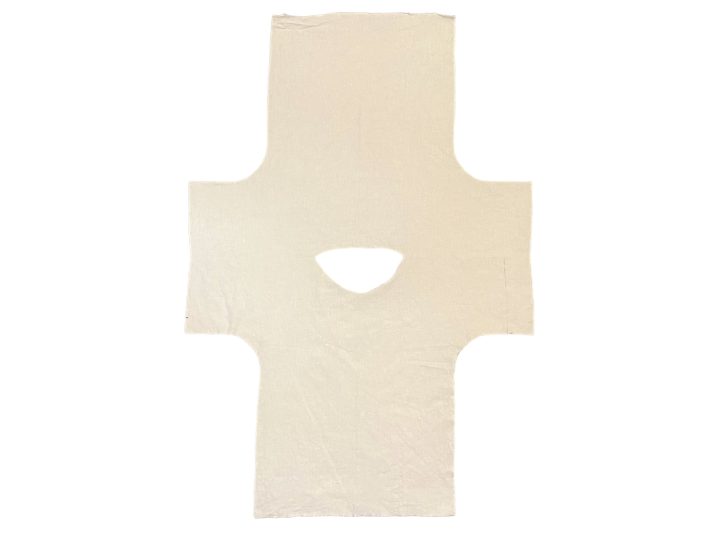
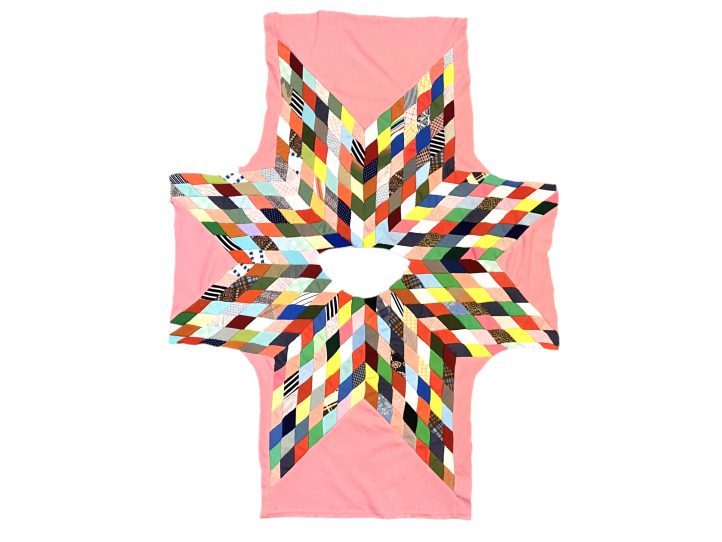
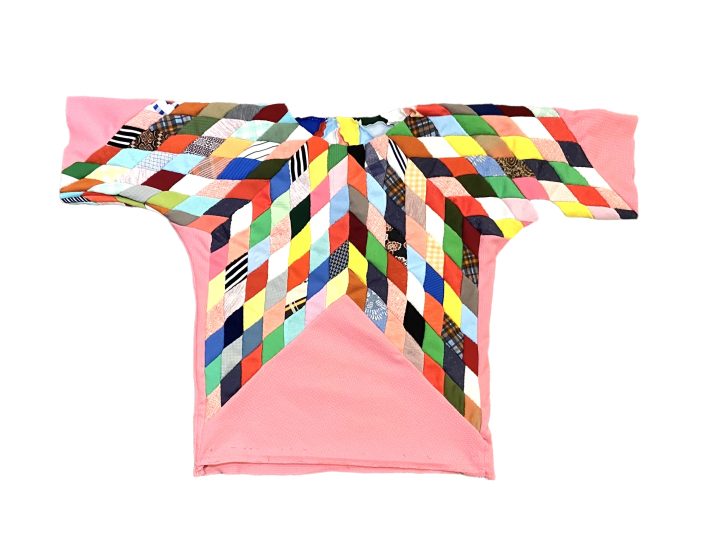
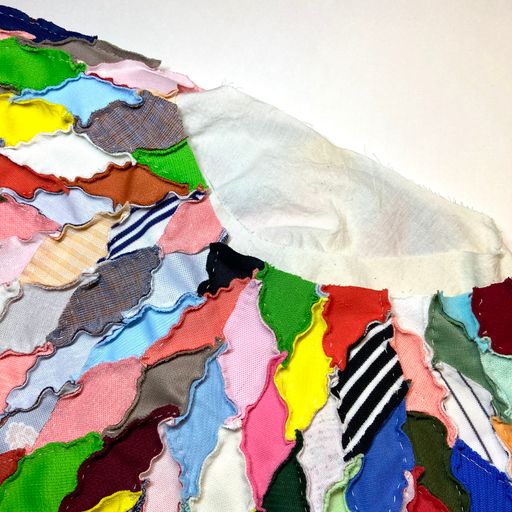
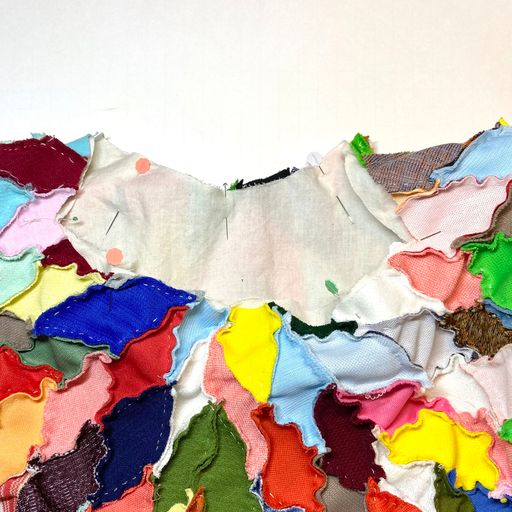
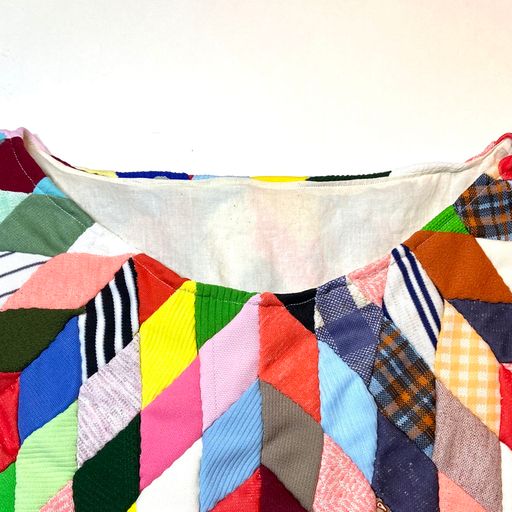
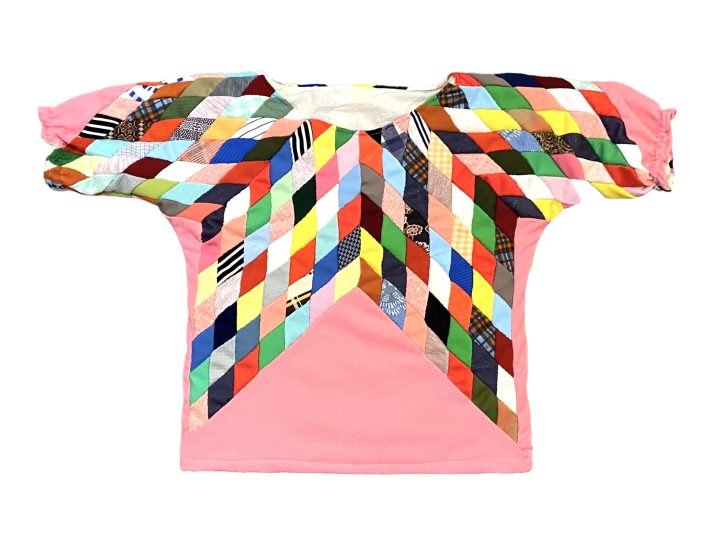
- Before you cut into your fabric, take the time to pay attention to its pattern, and think of how you can best utilize it. If you have a pattern selected beforehand, great! The designer found that the pattern of the quilt top informed the pattern of their garment. For instance, the sample fabric has a beautiful star design that Quayln wanted to keep as much of as possible. They then drafted a top pattern with no shoulder seams to utilize as much of that design as possible. With the shaping the designer used, the most interesting elements within the fabric were kept in the final piece! Once you are satisfied with your pattern, trace it onto your liner and quilt top, then carefully cut it out. Save any excess fabric from both for scrappy projects. Pro Tip: If you are new to drafting patterns, Quayln recommends creating a muslin mockup before cutting the quilt top to ensure proper sizing and fit.

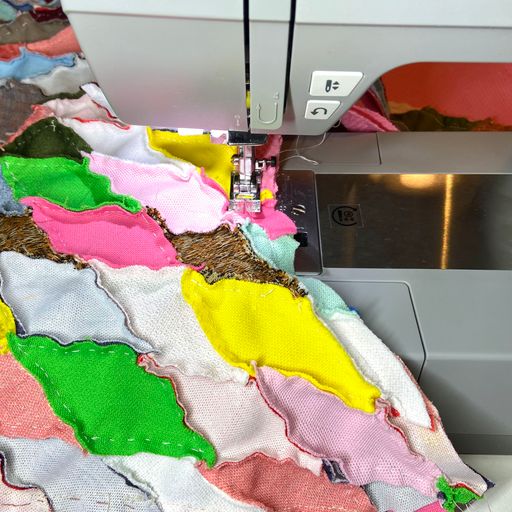
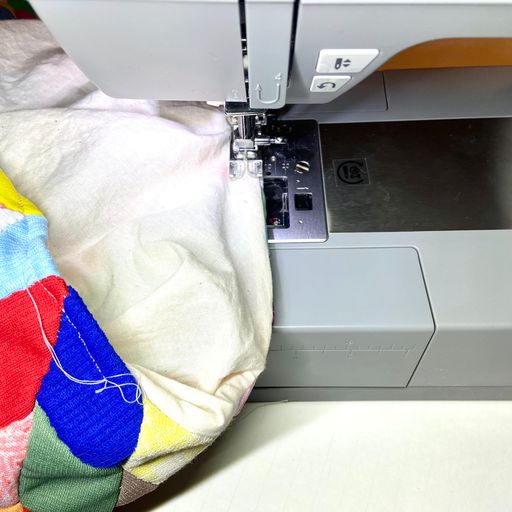
SEWING THE PANELS:
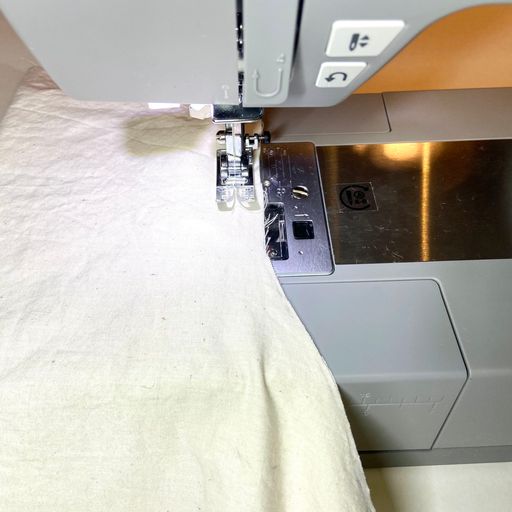
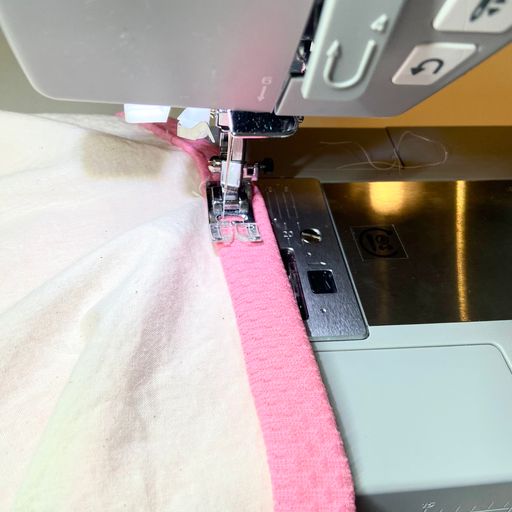
- Sew the quilt top and liner panels according to your pattern. After sewing the panels, flip the outer fabric inside out and insert the liner into the main fabric with right sides facing. Join the liner and quilt top fabrics together. After, flip the garment right side out and stitch around all the seamed edges, such as the neckline and armholes. Pro Tip: Oftentimes, these quilt tops were stitched by hand with less advanced tools than we have now. Because of that, they may not be perfectly symmetrical or even. If you find that the patterning or joins aren’t exact, don’t sweat it! This adds to the charm of their handmade nature.
FINISHING:
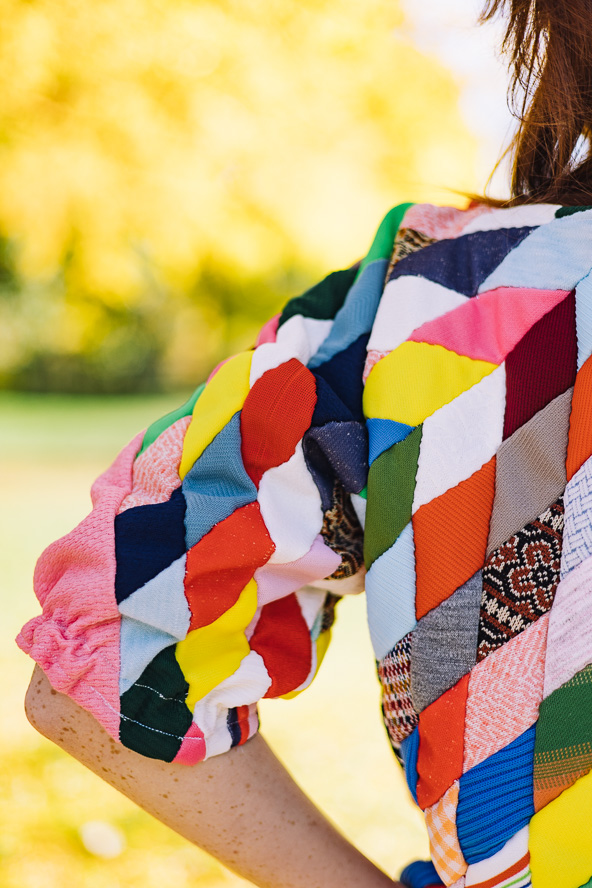
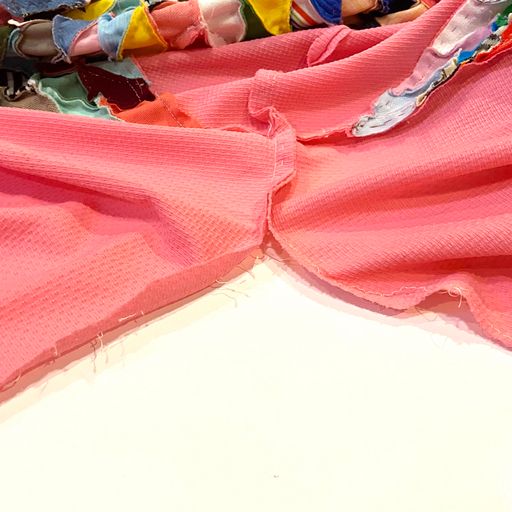
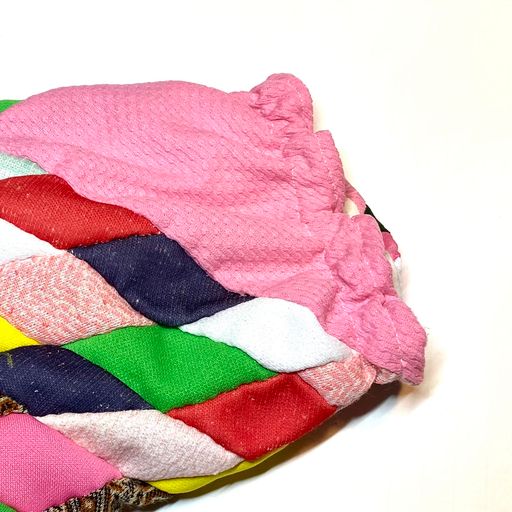
- Finish your piece to your specific requirements. The details are what matter here. Because the sample top was less fitted in the arms, the designer chose to add elastic to give them a slight puff sleeve shape. The designer also finished the bottom of the top with a folded hem. Buttons, ribbons, and other crafty accoutrements only add to the handmade appeal of this style of project, so don’t be afraid to add as much as you desire!
That is all there is to transforming a vintage quilt top into an heirloom garment. Over the course of its new life, you may find it more susceptible to damage due to the age of its fabrics. This gives you a great opportunity to add to its history by patching and darning it when needed. Every stitch has a story, and by repurposing and repairing old quilt tops, you are helping to tell one that may never have had the chance otherwise!