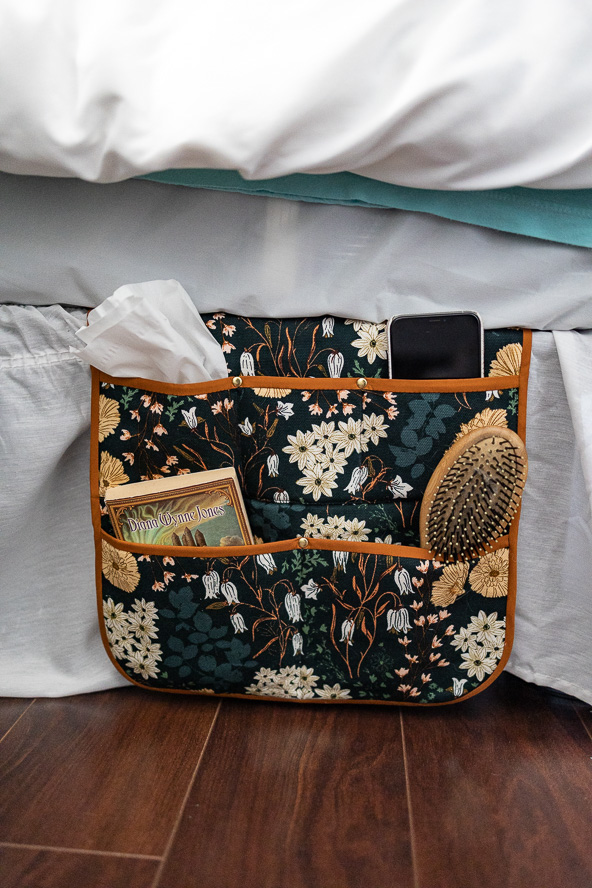
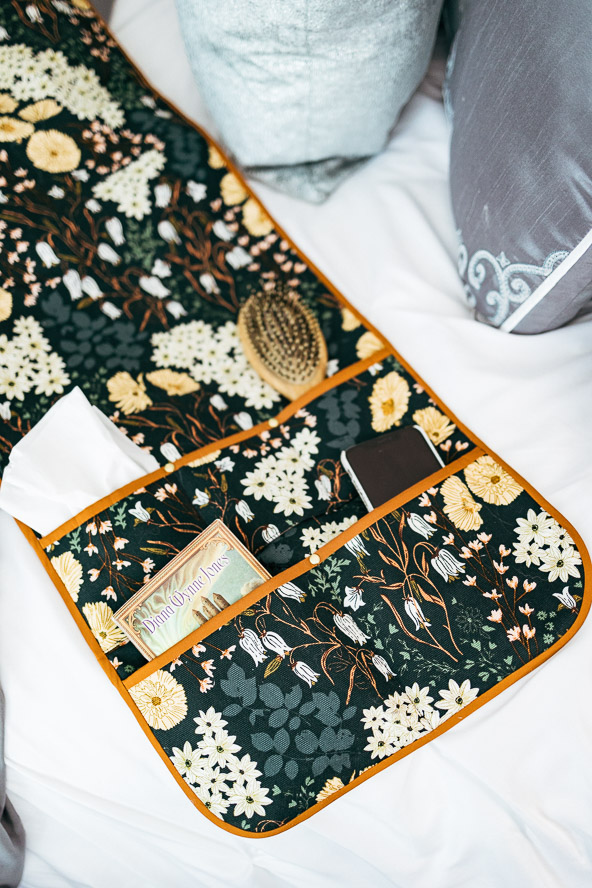
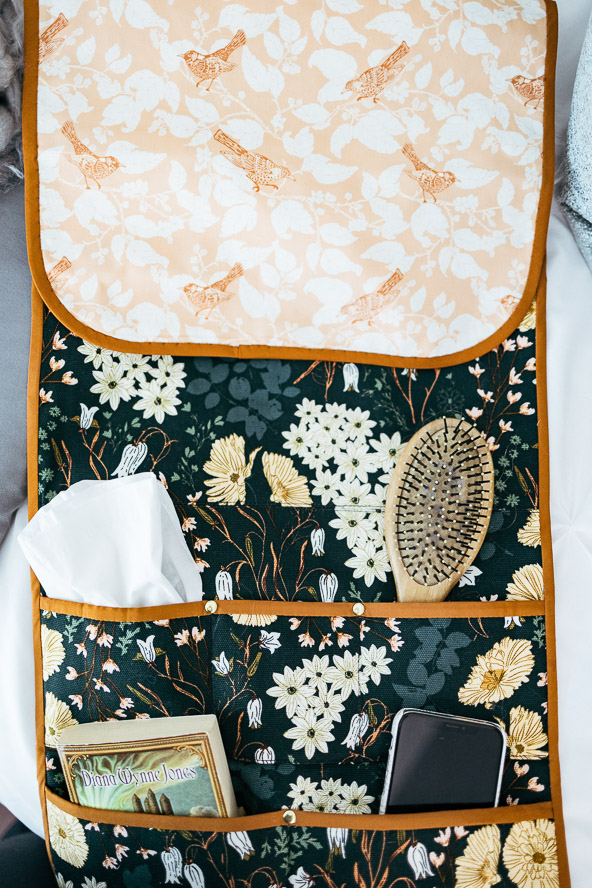
If your bedside table is a disaster zone, declutter your bedroom with this practical and pretty bedside caddy. Make this handy sewing pattern to hold your bedroom necessities like your phone, reading glasses, and favorite book! Complete with multiple pockets, this small space organizer is made with a half yard of canvas and features stylish binding around the pockets and outer edges. This project is ideal for sewists with small bedrooms or those that lack space under the bed, so that you can maximize your space while showing off your sewing skills.
Materials:
- Fabric:
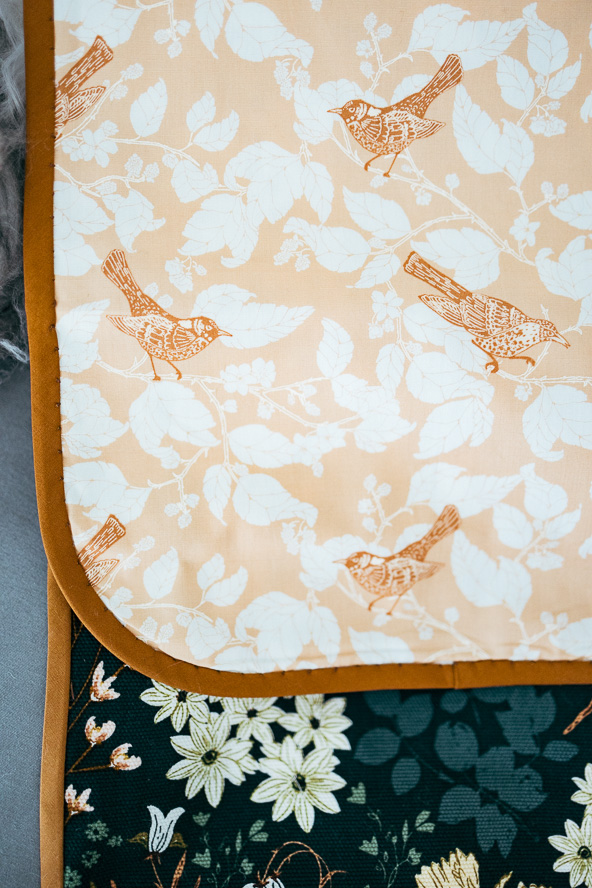
- 1/2 yd. canvas for the outer panels. The designer has chosen Bluebells and Buttercups Lark from the Wild Forgotten collection by Bonnie Christine for Art Gallery Fabrics.
- 1 yd. lining fabric. The designer has chosen Blackberries Thrush from the Wild Forgotten collection by Bonnie Christine for Art Gallery Fabrics.
- 1/2 yd. solid fabric for binding. The designer has chosen Gingerbread from the Pure Elements collection by Art Gallery Fabrics.
- Interfacing:
- 1/2 yd. fusible fleece. The designer has chosen H630 by Vlieseline.
- Coordinating threads for all fabrics and trims
- Note: Always coordinate all of your threads to fabrics. Sometimes this means a different color thread in the top of the machine to the bobbin. It is a bit of extra work but well worth it in terms of style.
- Rivets
- Basic sewing notions, including scissors and fabric marking tools
DESIGNER NOTE: Please read all instructions and assembly requirements before beginning the pattern. Seam allowances are all 1/4” and have already been added.
Cutting Instructions:
- From the canvas:
- 1 piece 14” square for the pocket panel
- 1 piece 14” wide x 4 1/4” tall for the upper pocket
- 1 piece 14” wide x 6 1/4” tall for the lower pocket
- 1 piece 14” wide x 25 1/2” long for the under mattress panel
- From the lining fabric:
- 1 piece 14” wide x 39” long for lining
- 1 piece 14” wide x 4 1/4” tall for the upper pocket lining
- 1 piece 14” wide x 6 1/4” tall for the lower pocket lining
- From the solid fabric:
- 2 pieces straight binding cut 1 1/4” wide x 14” long
- Bias binding cut 1 1/4” wide and joined to make one piece 3 yds. long
- From the H630 fusible fleece:
- 1 piece 14” square for the pocket panel interfacing
- 1 piece 14” wide x 4 1/4” tall for the upper pocket interfacing
- 1 piece 14” wide x 6 1/4” tall for the lower pocket interfacing
Sewing Instructions:
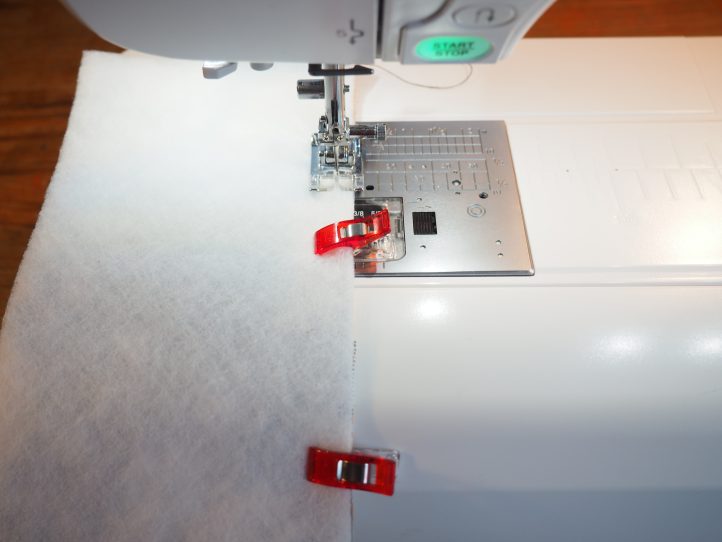
- Fuse H630 fusible fleece to the wrong side of the pockets and the pocket panel. Note: The under mattress portion does not require interfacing.
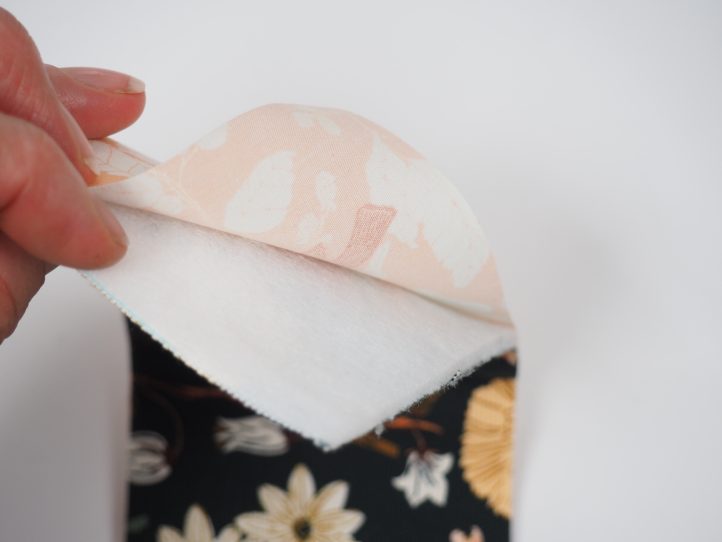
- To make the upper pocket, you need an interfaced front panel and one of lining. Place the outer and lining right sides together and pin or clip. Sew the bottom long seam only.
- Flip the layers over so that the wrong sides of the fabric (and the interfacing) are hidden and on the inside.
- Baste the sides and top edge to keep everything together.
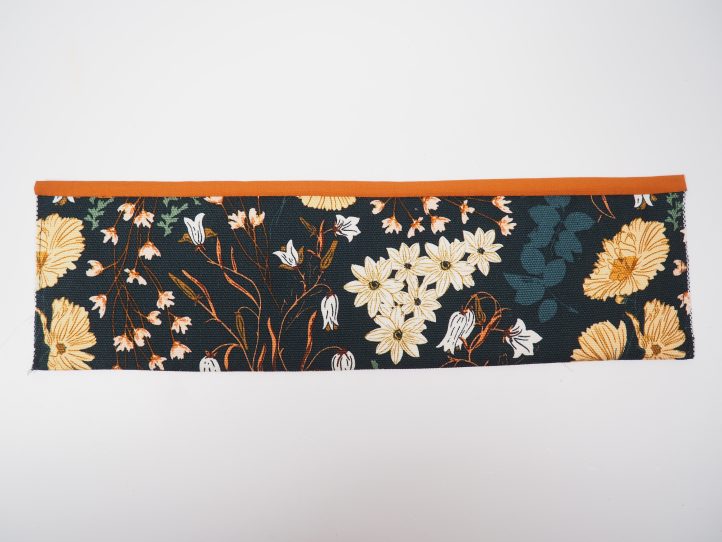
- Bind the top edge with one of the pieces of straight binding. Note: You will have two raw ends on the pocket; just ignore them for the time being. These will be taken care of in the final binding steps.
- The lower pocket is a little different in construction. This time, take the interfaced outer and the un-interfaced lining panel and pin them together wrong sides facing. Baste all around to keep the layers together and then bind the top edge. There will be three raw sides this time.
- Attach the lower pocket to the pocket panel outer, making sure that the bottom and sides of the panel align perfectly with the pocket. Baste the sides and bottom.
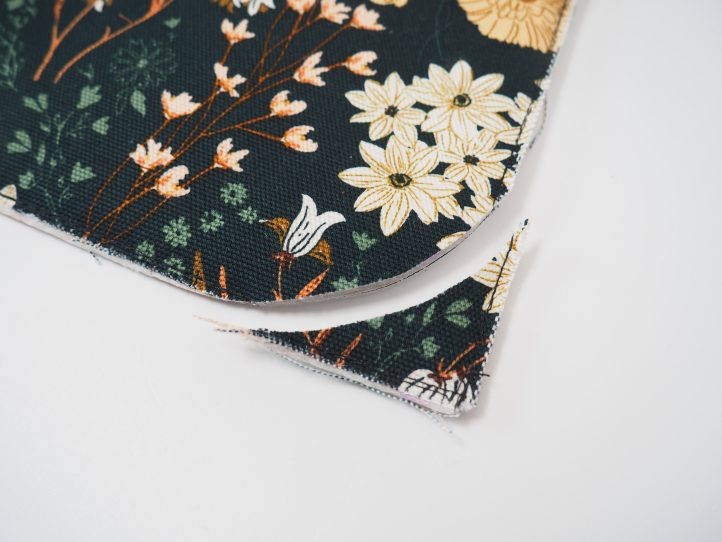
- Round the two bottom corners of the panel (an upturned coffee cup or similar works brilliantly if you do not have a proper ruler) and cut through all layers.
- Re-baste the corners. Note: Rounding the corners means that the main bias binding will be much easier to put on – no mitered corners! You are very welcome!
- Measure up 1” from the top of the lower pocket and pin the upper pocket into place. Baste the sides but this time topstitch the lower seam of the pocket very narrowly (1/8”).
- Bring in the under mattress panel outer and with the right sides together, attach it to the top edge of the panel with the pockets.
- Press everything and iron the seam open on the outer to reduce bulk.
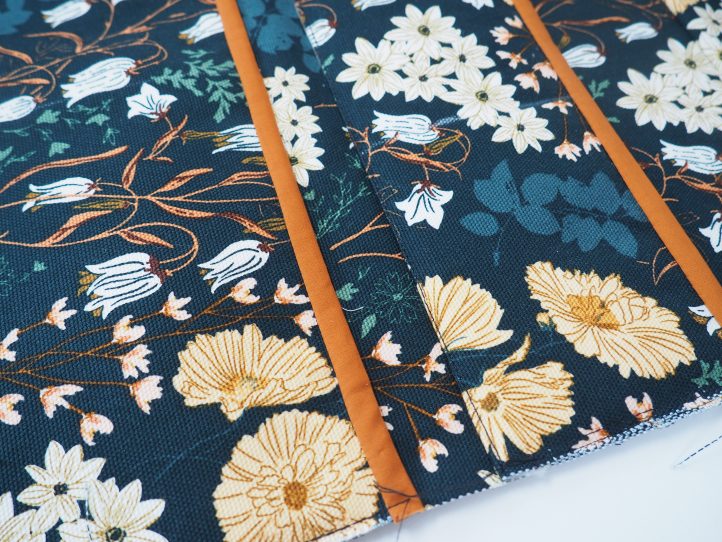
- Place both the lining and the outer wrong sides together and line everything up. Pin or clip and baste right around the edge leaving no gaps. Round the two remaining corners on the under mattress end of the panel and re-baste the corners. Round the corners on the lining too. Note: The designer preferred to topstitch each side of the joining seam in the outer. 1/8” is perfect. This keeps the layers together nicely.
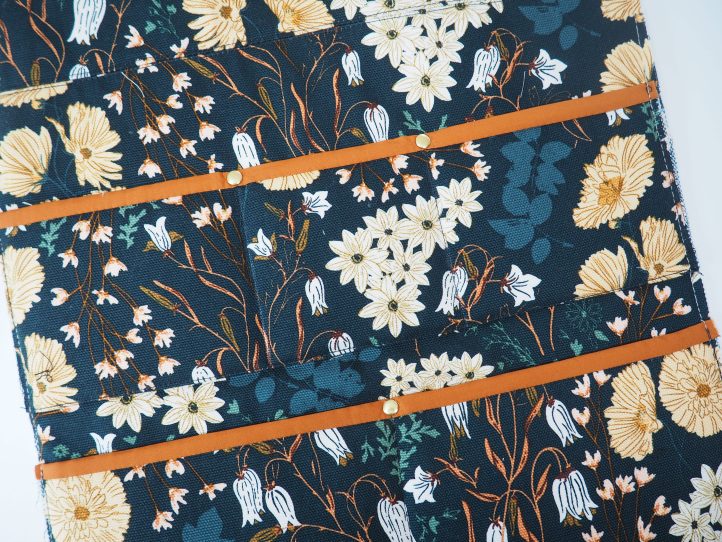
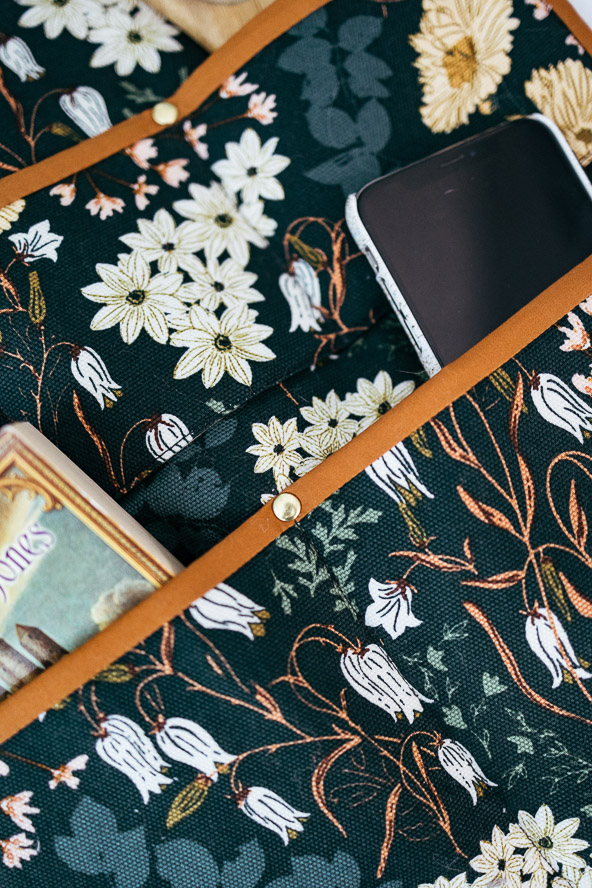
- Before we get to the binding (and this is the bit that will get rid of all of the raw edges on the pockets), we need to take another look at the pockets themselves. These pockets are great but they will sag and things will not fit into them well. The answer is to divide them up with a vertical seam or two. Think about what you will put in them and divide accordingly. The designer has put a vertical seam 5” in from the both sides (top pocket), which is great for phones and glasses and on the bottom pocket, the seam is in the middle, perfect for books. Attach a rivet at the top of each dividing seam.
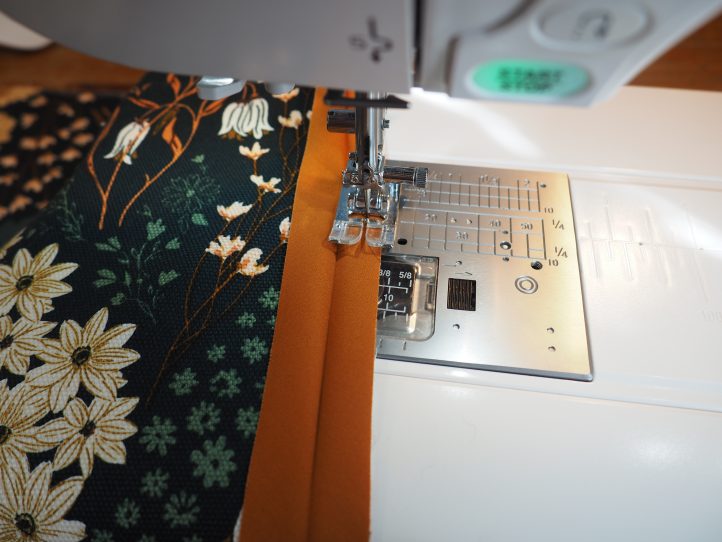
- Bind with the bias binding. Note: The designer preferred to bind the first side by machine and finish off on the back by hand. She found this much neater (not to mention relaxing) but if you have a preferred method, by all means, use that.

How can I obtain hard copy of bedside caddy? Do not have printer. Most interested Please reply Also interested in signing up for future magazines
Hi Carolyn! We are a digital-only magazine, meaning we do not have hard copies available. If you are interested in becoming a premium Gold Club member, you can find more info in the “Clubs” tab on our homepage. Have a great day! – Ashley, We Like Sewing
How can I obtain copy with bedside caddy? Most interested
Just completed this as a sewing table organiser and I love it!
Easy to follow instructions and was so much fun to make. I think I will be making another one ????
Thanks so much for your kind comment! We’re so pleased to hear that you like this pattern. Have a great day 🙂 – Ashley, We Like Sewing
Just finished using this pattern for our teenage daughter’s bed. (Her nightstand was a mess, as well!). She adores it, and decided it will be her friend’s Christmas presents for her to make and give. What a beautiful idea! Thank you.
Thanks so much for your kind comment, Nancy! We’re so glad you enjoyed this pattern 🙂 – Ashley, We Like Sewing
I love this idea. I have made several caddies for other areas of my home, but this is amazing! I am making this right now. All of your patterns are amazing.
Lovely pattern and instructions! I plan to adjust as a pocket on my recliner.
Love that idea, Janet! We’re so glad you enjoyed this project 🙂 – Ashley, WeLikeSewing