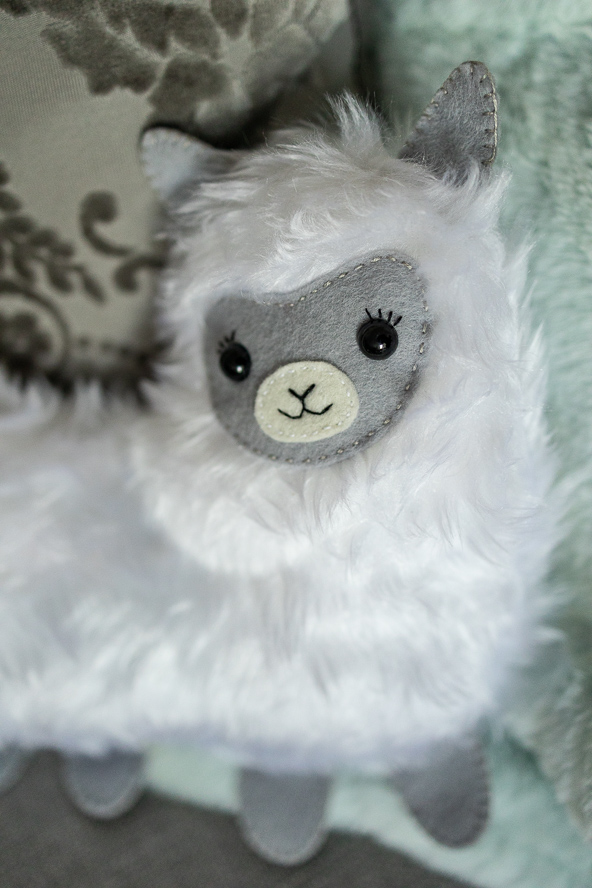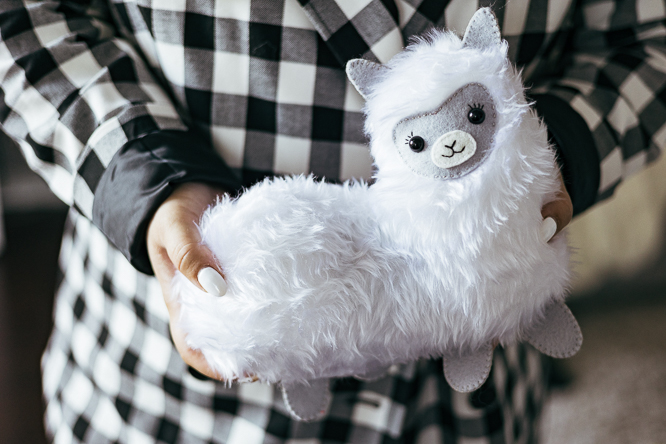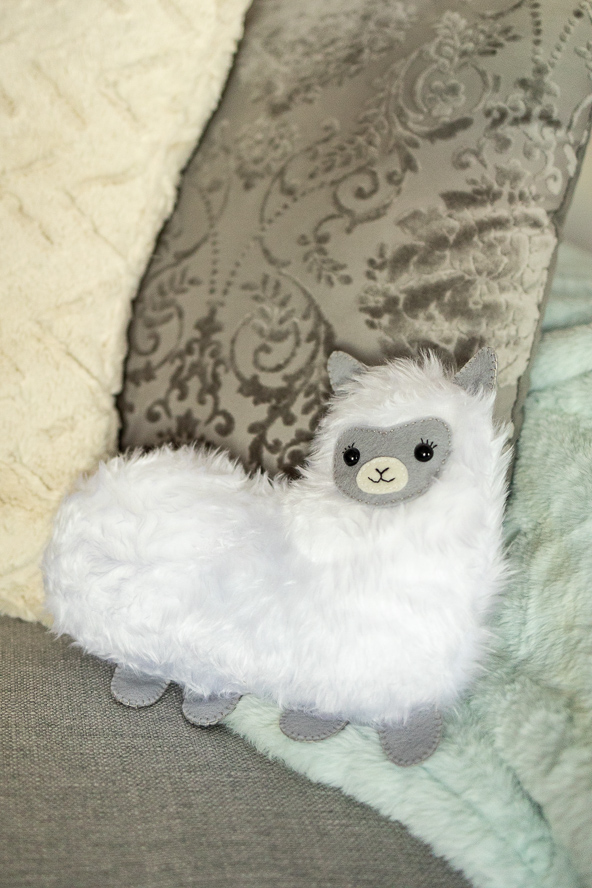
Keep cozy during the long winter months with this delightful heating pad from designer Sophie Tarrant. Made in an adorable llama design, the reusable heating pad is located in the llama’s belly, so simply pop it into the microwave once it starts to go cold. This winter sewing pattern combines a lot of practical and challenging skills for sewists to play with, including sewing faux fur and hand embroidery. Cuddle up with your favorite book, a hot cup of tea, and this super cute sewing project for the ultimate relaxing winter afternoon.
Skill Level: Easy
Finished Size: 9” x 10”
Materials:
- Fabric: short pile faux fur, printed cotton, one fat quarter of each; plus, small pieces of gray and white felt
- Sewing thread: white
- Embroidery floss: gray, black
- Safety toy eyes
- Toy filling (Poly-Fil)
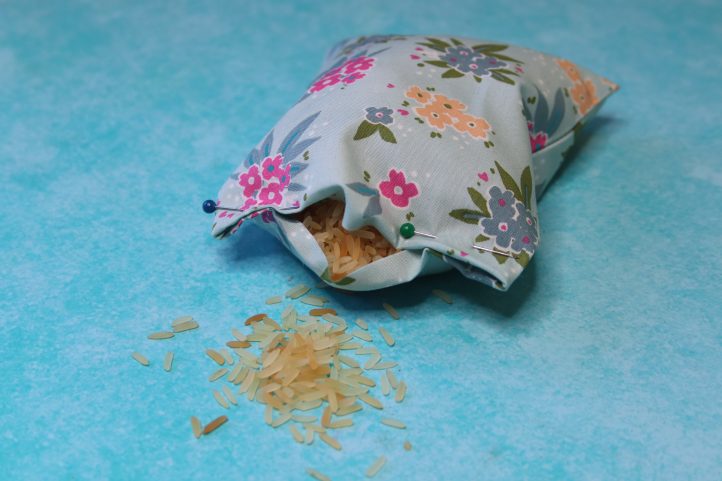
- Rice
- PDF Template – This is located at the bottom of this page. See printing instructions below.
Tools:
- Hand sewing needle
- Pencil
- Scissors
- Sewing machine
- Pins
- Tape measure
PRINTING INSTRUCTIONS:
To download the PDF template, click on the download button at the bottom of the page. We recommend opening your download using Adobe Acrobat.
DESIGNER NOTES:
- If you don’t have any rice on hand or you’d rather not use it, you can also use beans, corn, wheat, barley, or millet to fill your heat pad instead.
- To use, remove your heat pad from your llama and microwave it for a few seconds until warm, then place back inside the llama to keep it cozy. Make sure to never microwave your llama, as his eyes and fur may melt.
Instructions:
- Download and print the llama templates (these are located at the bottom of this page) and use them to cut the various pieces from faux fur and felt, as indicated.

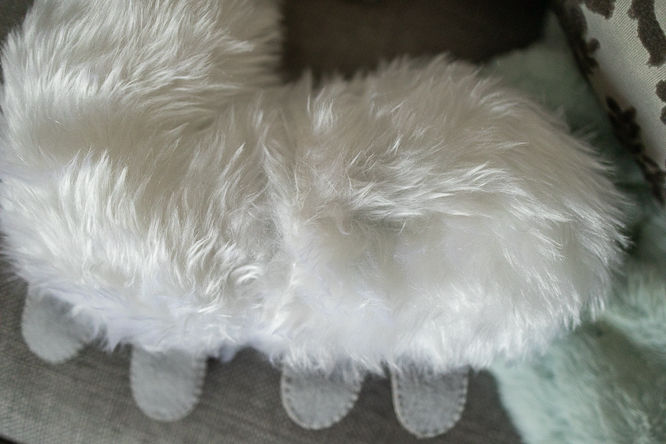
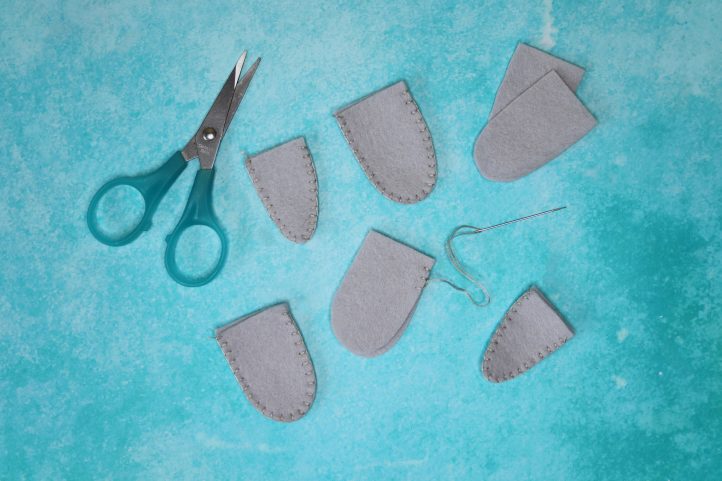
- Place the leg and ear pieces together in pairs, aligning the edges. Thread two strands of gray embroidery floss onto an embroidery needle and work a blanket stitch around the edge of each one, to secure them together and neaten the edges.
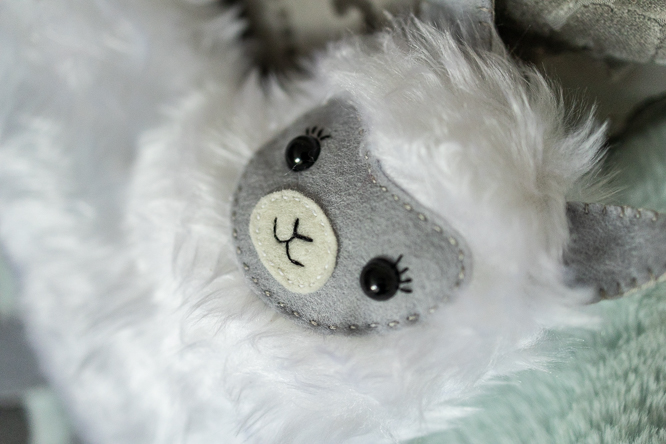
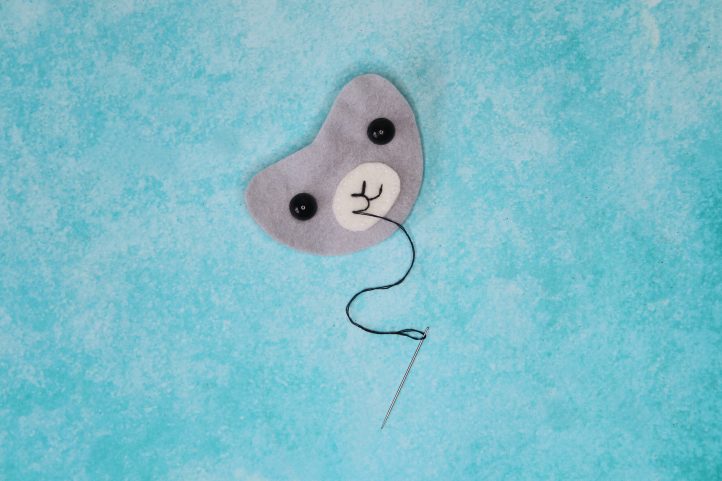
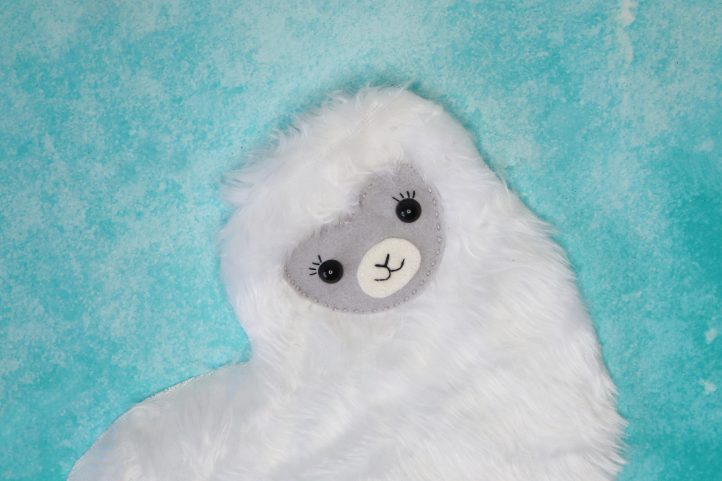
- Place the white snout piece onto the gray face piece and stitch around the edge by hand, using two strands of white embroidery floss. Swap to two strands of black floss, and embroider a mouth and nose onto the snout. Secure two safety toy eyes to the gray felt, then add eyelashes in black floss as shown in Step 4 below.
- Place the gray embellished face onto the faux fur body piece and pin into position. Stitch around the edge of the face piece using two strands of gray floss.
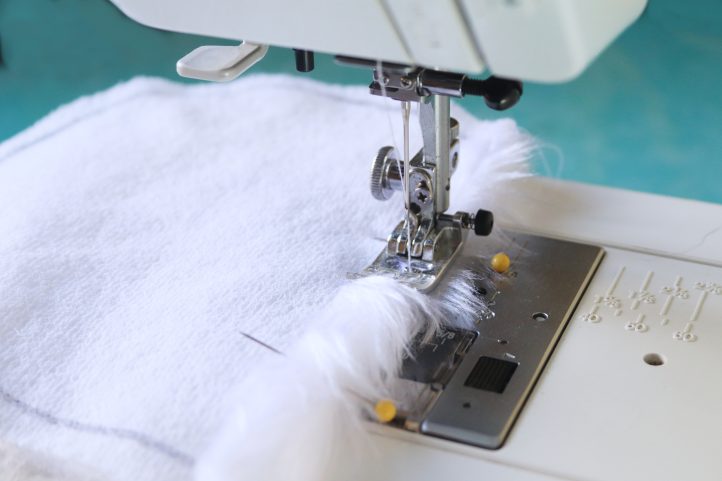
- Fold the straight edge of both faux fur back pieces over to the wrong side by 3/8” and pin, then machine stitch each hem into position.
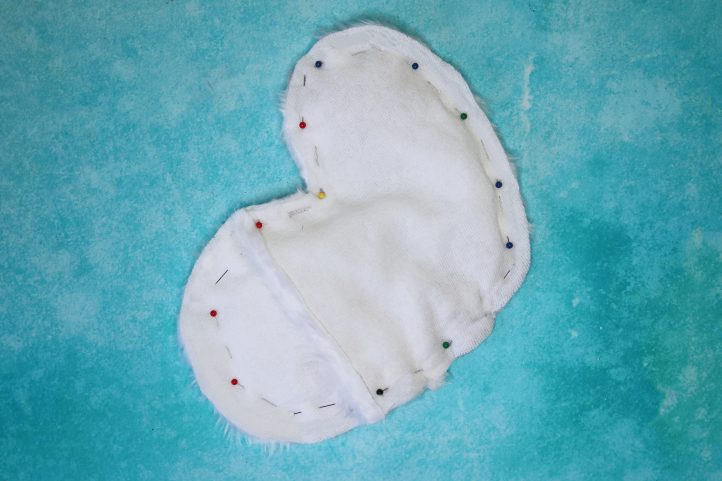
- Make your llama. Lay your main body piece down with right side facing up. Place the four legs along the bottom edge, aligning the straight side of each one with the bottom edge of the llama, and the tip of the feet facing inwards towards the fur. Do the same with the ears, positioning them at the top of the head. Place the two back pieces on top, overlapping the straight hemmed edges. Pin, then stitch all around the outside of the shape, leaving a 3/8” seam allowance. Turn out through the opening in the back, and add a little toy filling to the head and the tail end of the llama to plump him out a little.
- Finally, make your heat pad. Cut a 4” x 8” rectangle of cotton fabric and fold it in half with right sides facing. Pin, then stitch along the two side edges, leaving the top edge open. Turn right sides out and press, then fill with dry rice. Fold the open edge over to the wrong side by 3/8” and pin, then machine stitch across to seal and finish the pouch.