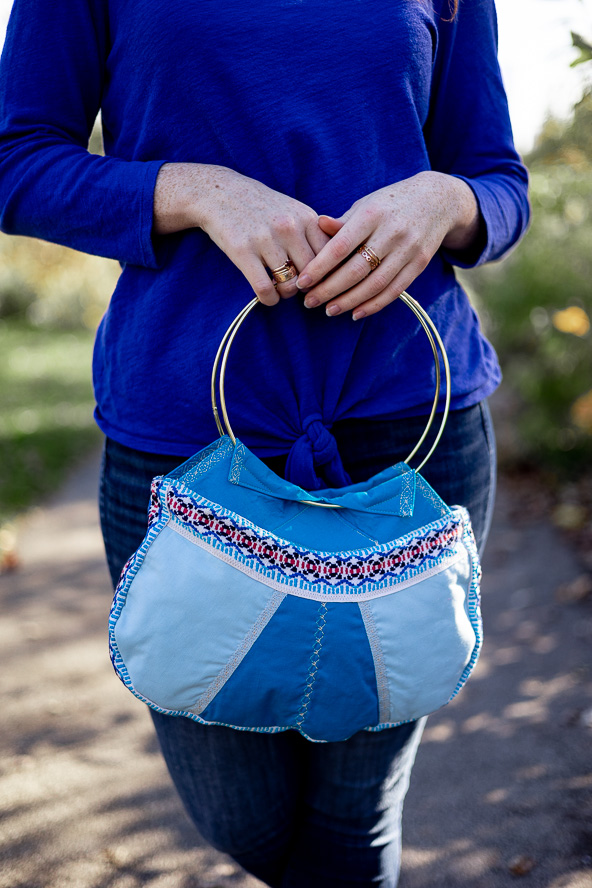
Scandinavian style, here we come! Combine traditional details with sleek, modern style with this quilted bag pattern from Janice Bailor. Made in rich shades of blue, this quilted bag features metal macrame hoops for handles and decorative trim, and you can add hand or machine embroidered details if you like. This charming bag pattern is designed for intermediate sewists and quilters, so that you can use your existing skills while learning new ones. Fat quarter friendly, this purse pattern is excellent for mixing and matching beautiful, vibrant colors.
Skill Level: Intermediate
Finished Dimensions: 10 1/2”h by 14” w, 8” handle drop
Seam Allowances: 1/8” and 1/4”
Materials:
- Fabric:
- Main fabric: one fat quarter or 1/4 yard cut
- Contrasting fabric: one fat quarter or 1/4 yard cut
- Lining fabric: one fat quarter or 1/4 yard cut
- 2″ wide ribbon trim: 2 yards
- Quilt batting or fusible fleece: 2 pieces approx. 12” by 16” or 1/4 yd (45” batting)
- Medium weight fusible interfacing, such as Pellon 880: 4 pieces 9” by 12” or 1/2 yd (45” batting)
- 2” decorative trim
- Two 8” metal macrame hoops
- Sewing clips
- Zipper and decorative stitch foot (optional)
- Hand embroidery floss and needle (optional)
- PDF Templates – These are located at the bottom of this page. See printing instructions below.
PRINTING INSTRUCTIONS:
To download the PDF templates, click on the download button at the bottom of the page. We recommend opening your download using Adobe Acrobat.
Cutting Instructions:
Create the following cuts:
- Main fabric
- Cut 4 – Side Curve Template
- Contrasting fabric
- Cut 2 – Center Wedge Template
- Cut 4 – Fold Over Triangle Handle Template
- Decorative trim
- Cut 2 – 15” by 2” strips
- Cut 1 – 30” by 2” strip
- Lining fabric
- Cut 2 – Interior Lining Template
- Cut 1 – 30” by 2” strip
- Medium weight fusible interfacing
- Cut 2 – 15” by 2” strips
- Cut 4 – Fold Over Triangle Template
- Cut 1 – 30” by 2” strip
CUTTING AND FUSING THE INTERFACING:
- Prepare all cut pieces as instructed above using the measurements and templates provided (These templates are located at the bottom of this page).
- Fuse the medium-weight fusible interfacing (following the manufacturer’s instructions) to the wrong sides of the corresponding decorative trim and Fold Over Triangle template pieces. Set aside.
Sewing Instructions:
PIECING AND QUILTING THE PURSE COMPONENTS – MAIN PANEL ASSEMBLY:
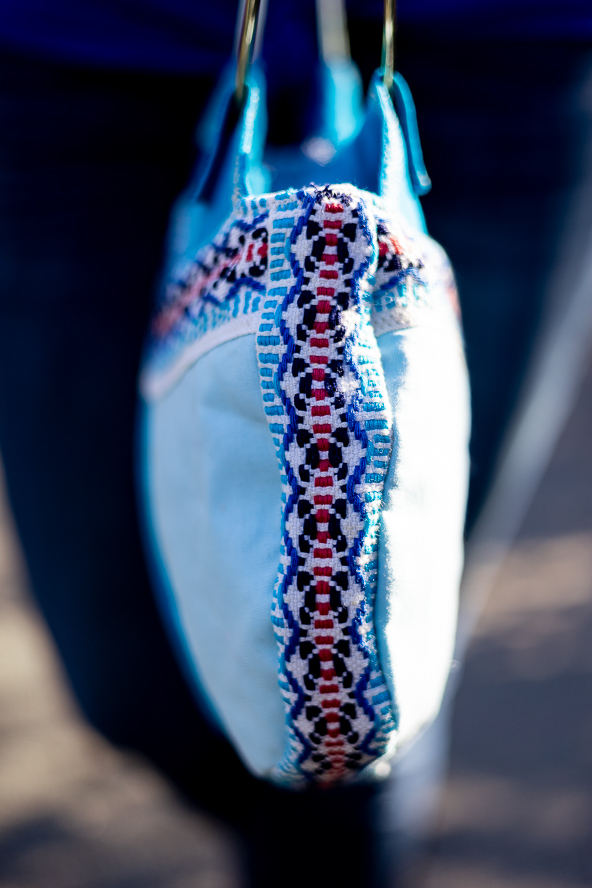
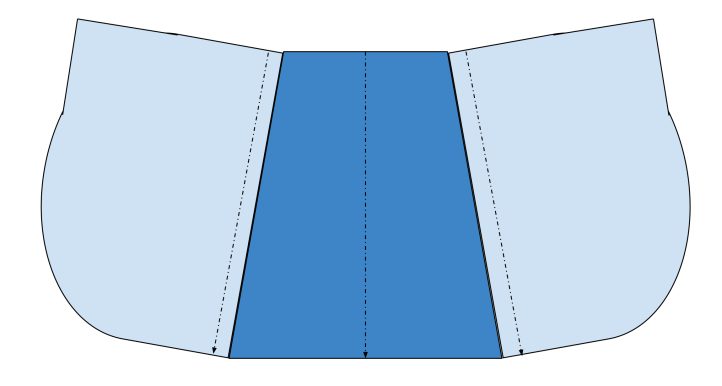
- Placing right sides together (RST), sew together the longest straight sides of both the main fabric Side Curve template to the Center Wedge template. Press Side Curve open away from Center Wedge.
- Sew RST opposite Side Curve to the remaining longest straight side of the Center Wedge to complete one side of the Main Panel. See Figure 1 below.
- Repeat Steps 1-2 to complete the additional side Main Panel. Press both sides of the Main Body well to prepare for quilting.
MAIN PANEL QUILTING:
- Lay out each side of the Main Panel on a piece of quilt batting or fusible fleece and pin in several areas to secure or fuse per the manufacturer’s instructions.
- Stitch around the entire exterior edge of the Main Panel with a 1/8″ basting stitch to secure to the batting. Repeat for the opposite side.
- Use decorative machine quilting or hand stitch up the central line of the Center Wedge. Repeat for the opposite side. See Figure 1 above.
- Use decorative machine quilting or hand stitch down each exterior side seam of the Central Wedge. Repeat for the opposite side.
- Trim away excess batting from around the entire exterior perimeter of the Main Panels to prepare for attaching the trims. Set aside.
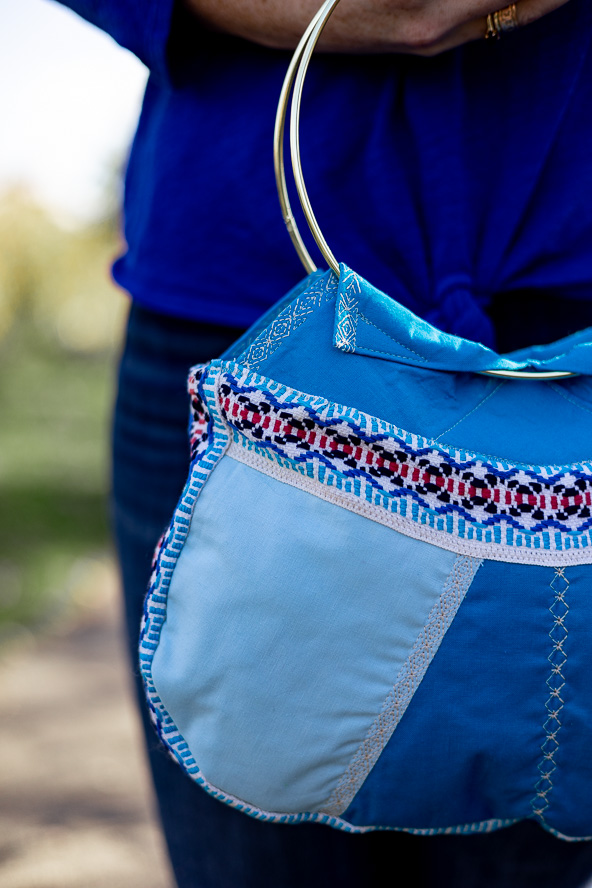
FOLD OVER TRIANGLE HANDLES:
- Fold the Fold Over Triangle Template with interfacing in half, lining up the opposite side bottom base corners. Press a central crease with a hot iron.
- Open the Fold Over Triangle and turn the edge of the triangle base over 1/2″, creating a hem. Press with a hot iron to hold the crease.
- Fold the Fold Over Triangle Template in half again, lining up the hem creased bottom edge and pin or clip to hold in place.
- Top stitch either with decorative machine quilting or hand stitch the hemmed edge.
- Repeat the steps above for the remaining Fold Over Triangle Handles.
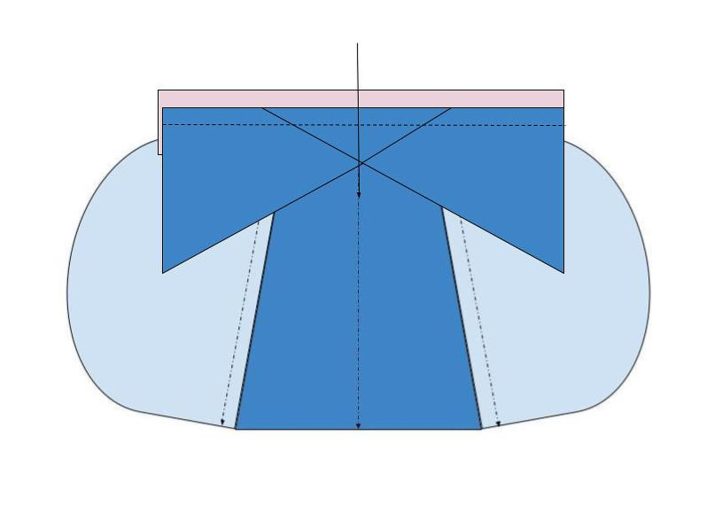
- Using a grid mat or ruler, line up the outer decorative stitched edge of two Fold Over Triangle Handles at the 0” and 11” lines. Triangles will overlap at the tip approximately 4”. Pin or clip in place to hold. See Figure 2 below.

- Top stitch the two overlapping Fold Over Triangle Handles together where they overlap to join as a unit. See Figure 2 above. Set aside.
- Repeat Steps 1-7 to complete both Fold Over Triangle Handle units.
ASSEMBLING THE PURSE – MAIN BODY ASSEMBLY:
- Apply one 15” length of fuse-backed decorative trim to the top of the Main Panel either by top stitching or sewing RST and then pressing open.
- Place the Fold Over Triangle Handle unit RST along the top decorative trim edge of the Main Panel. Line up the point of the handle’s top-stitched central triangle with the center line of decorative stitching on the Main Panel wedge. See Figure 3 below. Pin in place to hold.
- Sew the Fold Over Handle Unit to the Main Panel trim. Repeat for the remaining Main Panel to form both sides of the purse.
- To create the bottom of the Purse body, line up the 30” fuse-backed decorative trim along the entire bottom curve and up the sides of the Main Panel. Work from the center out toward the edges, pinning around the curves to evenly space the trim. See Figure 4 below.

- Sewing RST, again, work from the center of the Main Panel out toward the left top edge, joining the trim pieces along the top of the purse body. Rotate the panel in the machine and sew from the center up the right side to finish attaching the decorative trim to one side of the Main Panels. See Figure 4 above.
- Repeat Steps 3 and 4 above to attach the remaining Main Panel to the 30” bottom trim piece. Set aside.
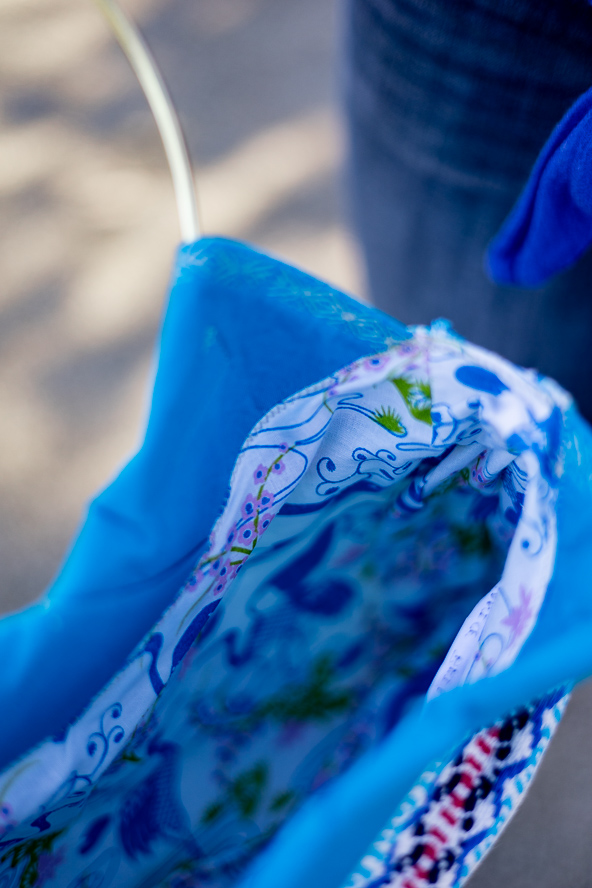
CREATE THE PURSE BODY LINING:
- From the Interior Lining Template, crease both sides of the lining fabric at the center fold.
- Press the 30” by 2” strip of lining fabric in half and press to crease a center line.
- Place the 30” by 2” strip of lining fabric RST with one side of the Interior Lining and pin both together at the center fold marks.
- Working from the center to one edge, sew the Interior Lining Body and Lining Fabric Strip together. Ease the lining strip gently through the curves. Fig. 4 above.
- Rotate the lining pieces and sew the other side from the center out.
- Repeat for the remaining side of the Interior Body Lining.
FINISHING THE PURSE BODY:
- Insert the purse Main Body exterior into the purse interior Lining with RST, making sure to tuck the handle units downward toward the center of the purse body.
- Pin both the interior and exterior top edges together at the side seams and the central marks.
- Leaving a 3” opening at the start and stop, sew along the top edges with a 1/4″ seam to connect the interior and exterior pieces.
- Pull the bag exterior and Fold Over Handles through the 3” opening and turn all pieces right side out. Use a dull turning stick, such as a chopstick, to push out the bottom curves and seams of the bag interior.
- Push the bag interior, now with the right side out, down into the bag exterior. Then align and smooth the sides and seams together.
- Press around the top edge of the bag with a hot iron, making sure to turn the open hole seam under. Topstitch first 1/8″, then 1/4″, around the entire opening of the bag to secure the hole opening and finish the purse body.
ADDING THE RING HANDLES:
- Fold down both the left and right top corners of one side of the Fold Over Handles creating a flat line across the top of the unit. Crease or press to hold in place. See Figure 5 below.

- Position the 8” macrame ring under each corner of the Fold Over Handles, trapping it between the folds. Use clips or pins to hold it as close to the top of the fold as possible. See Figure 5 above.
- Being careful not to sew into the metal ring, securing the fold with hand or machine stitches. TIP: A zipper foot attachment for the sewing machine will allow the needle to get as close as possible to the metal handle while guarding it against hitting the ring.
- Repeat Steps 1-3 for the remaining side to complete the purse.