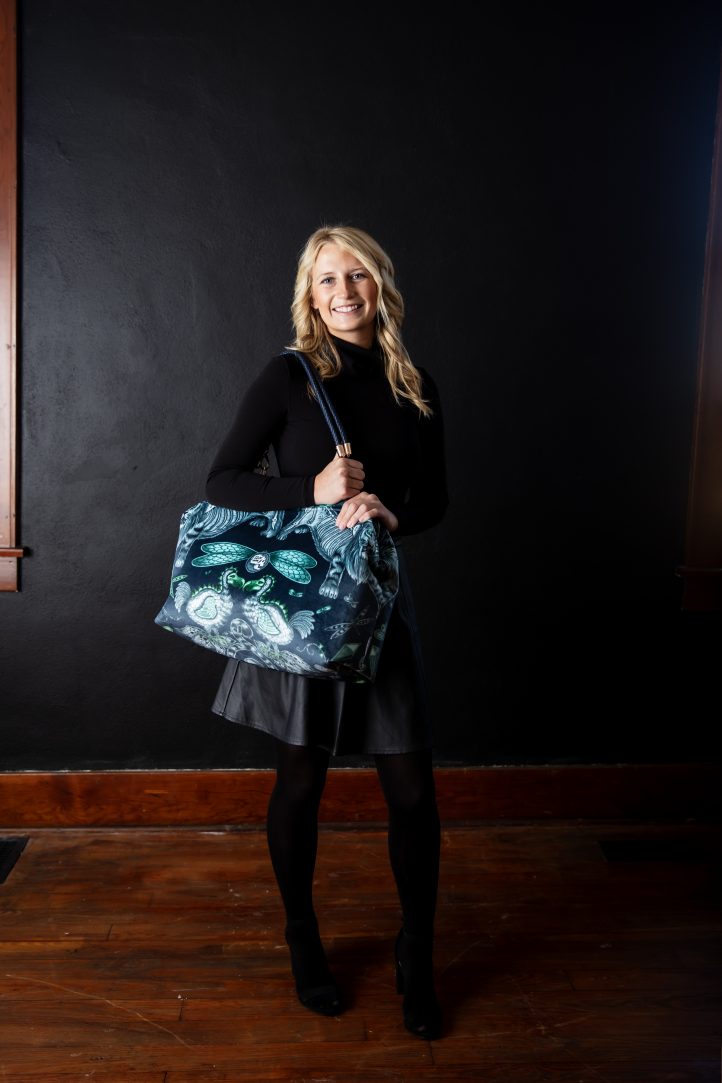
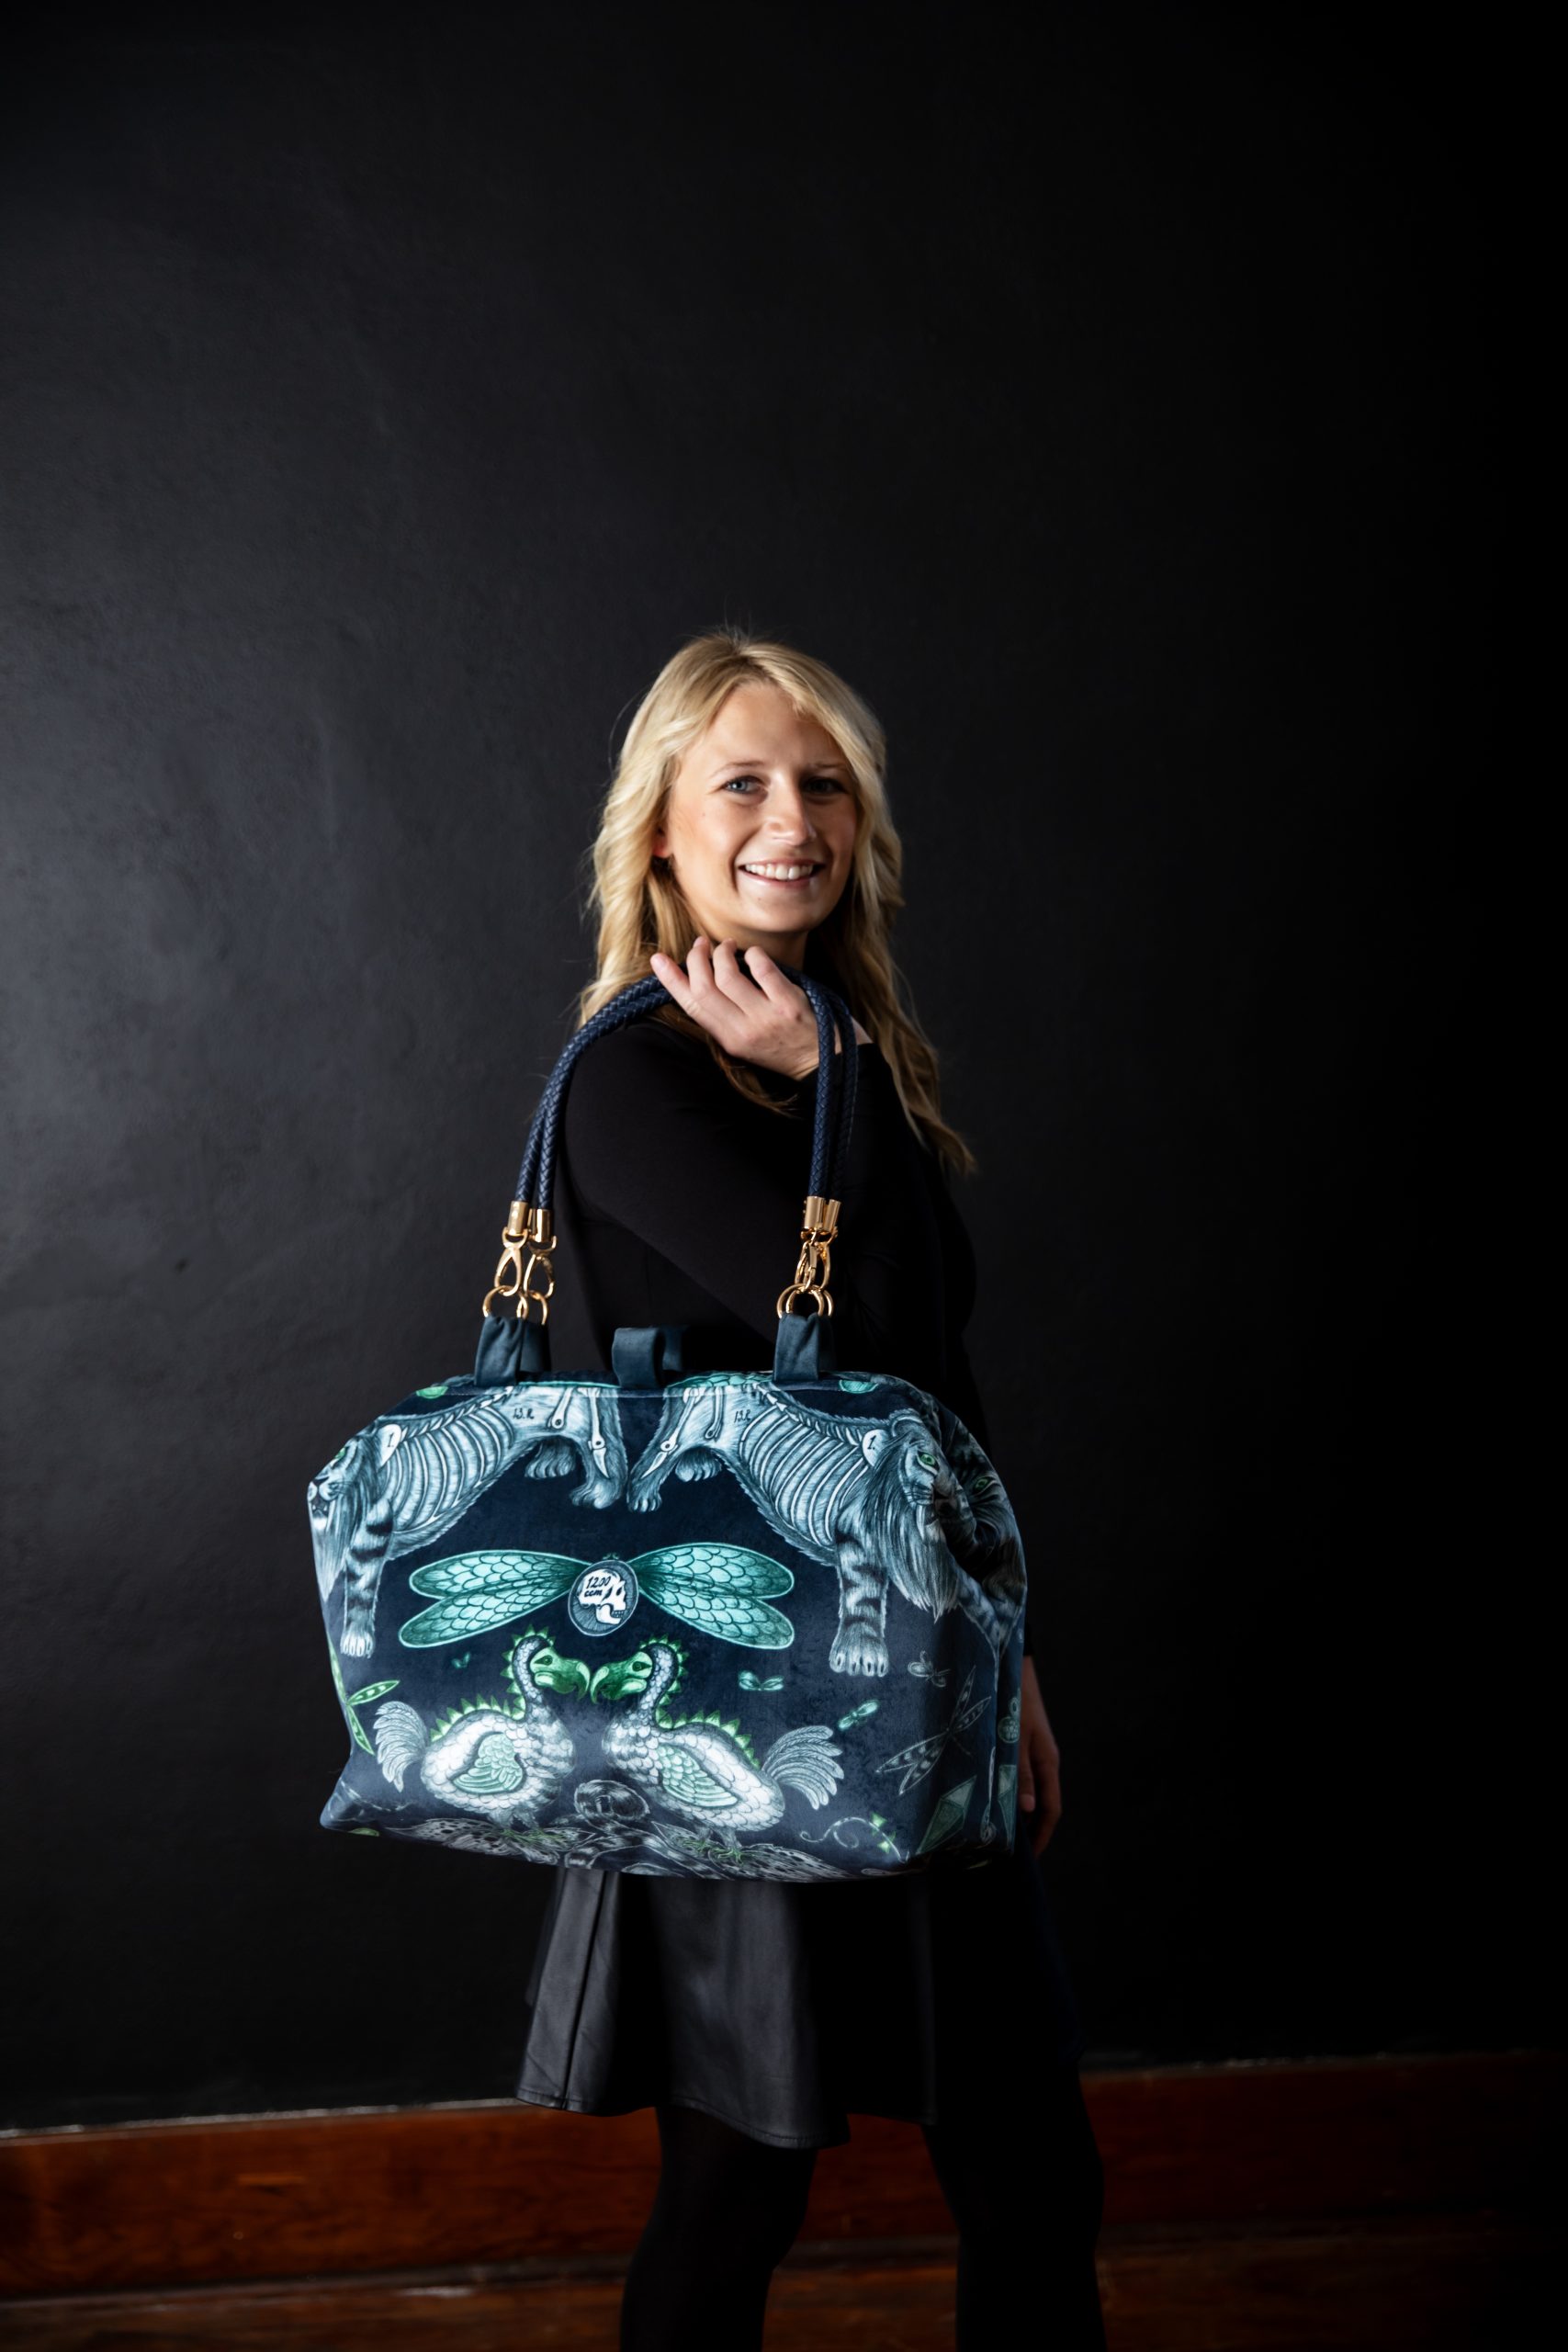
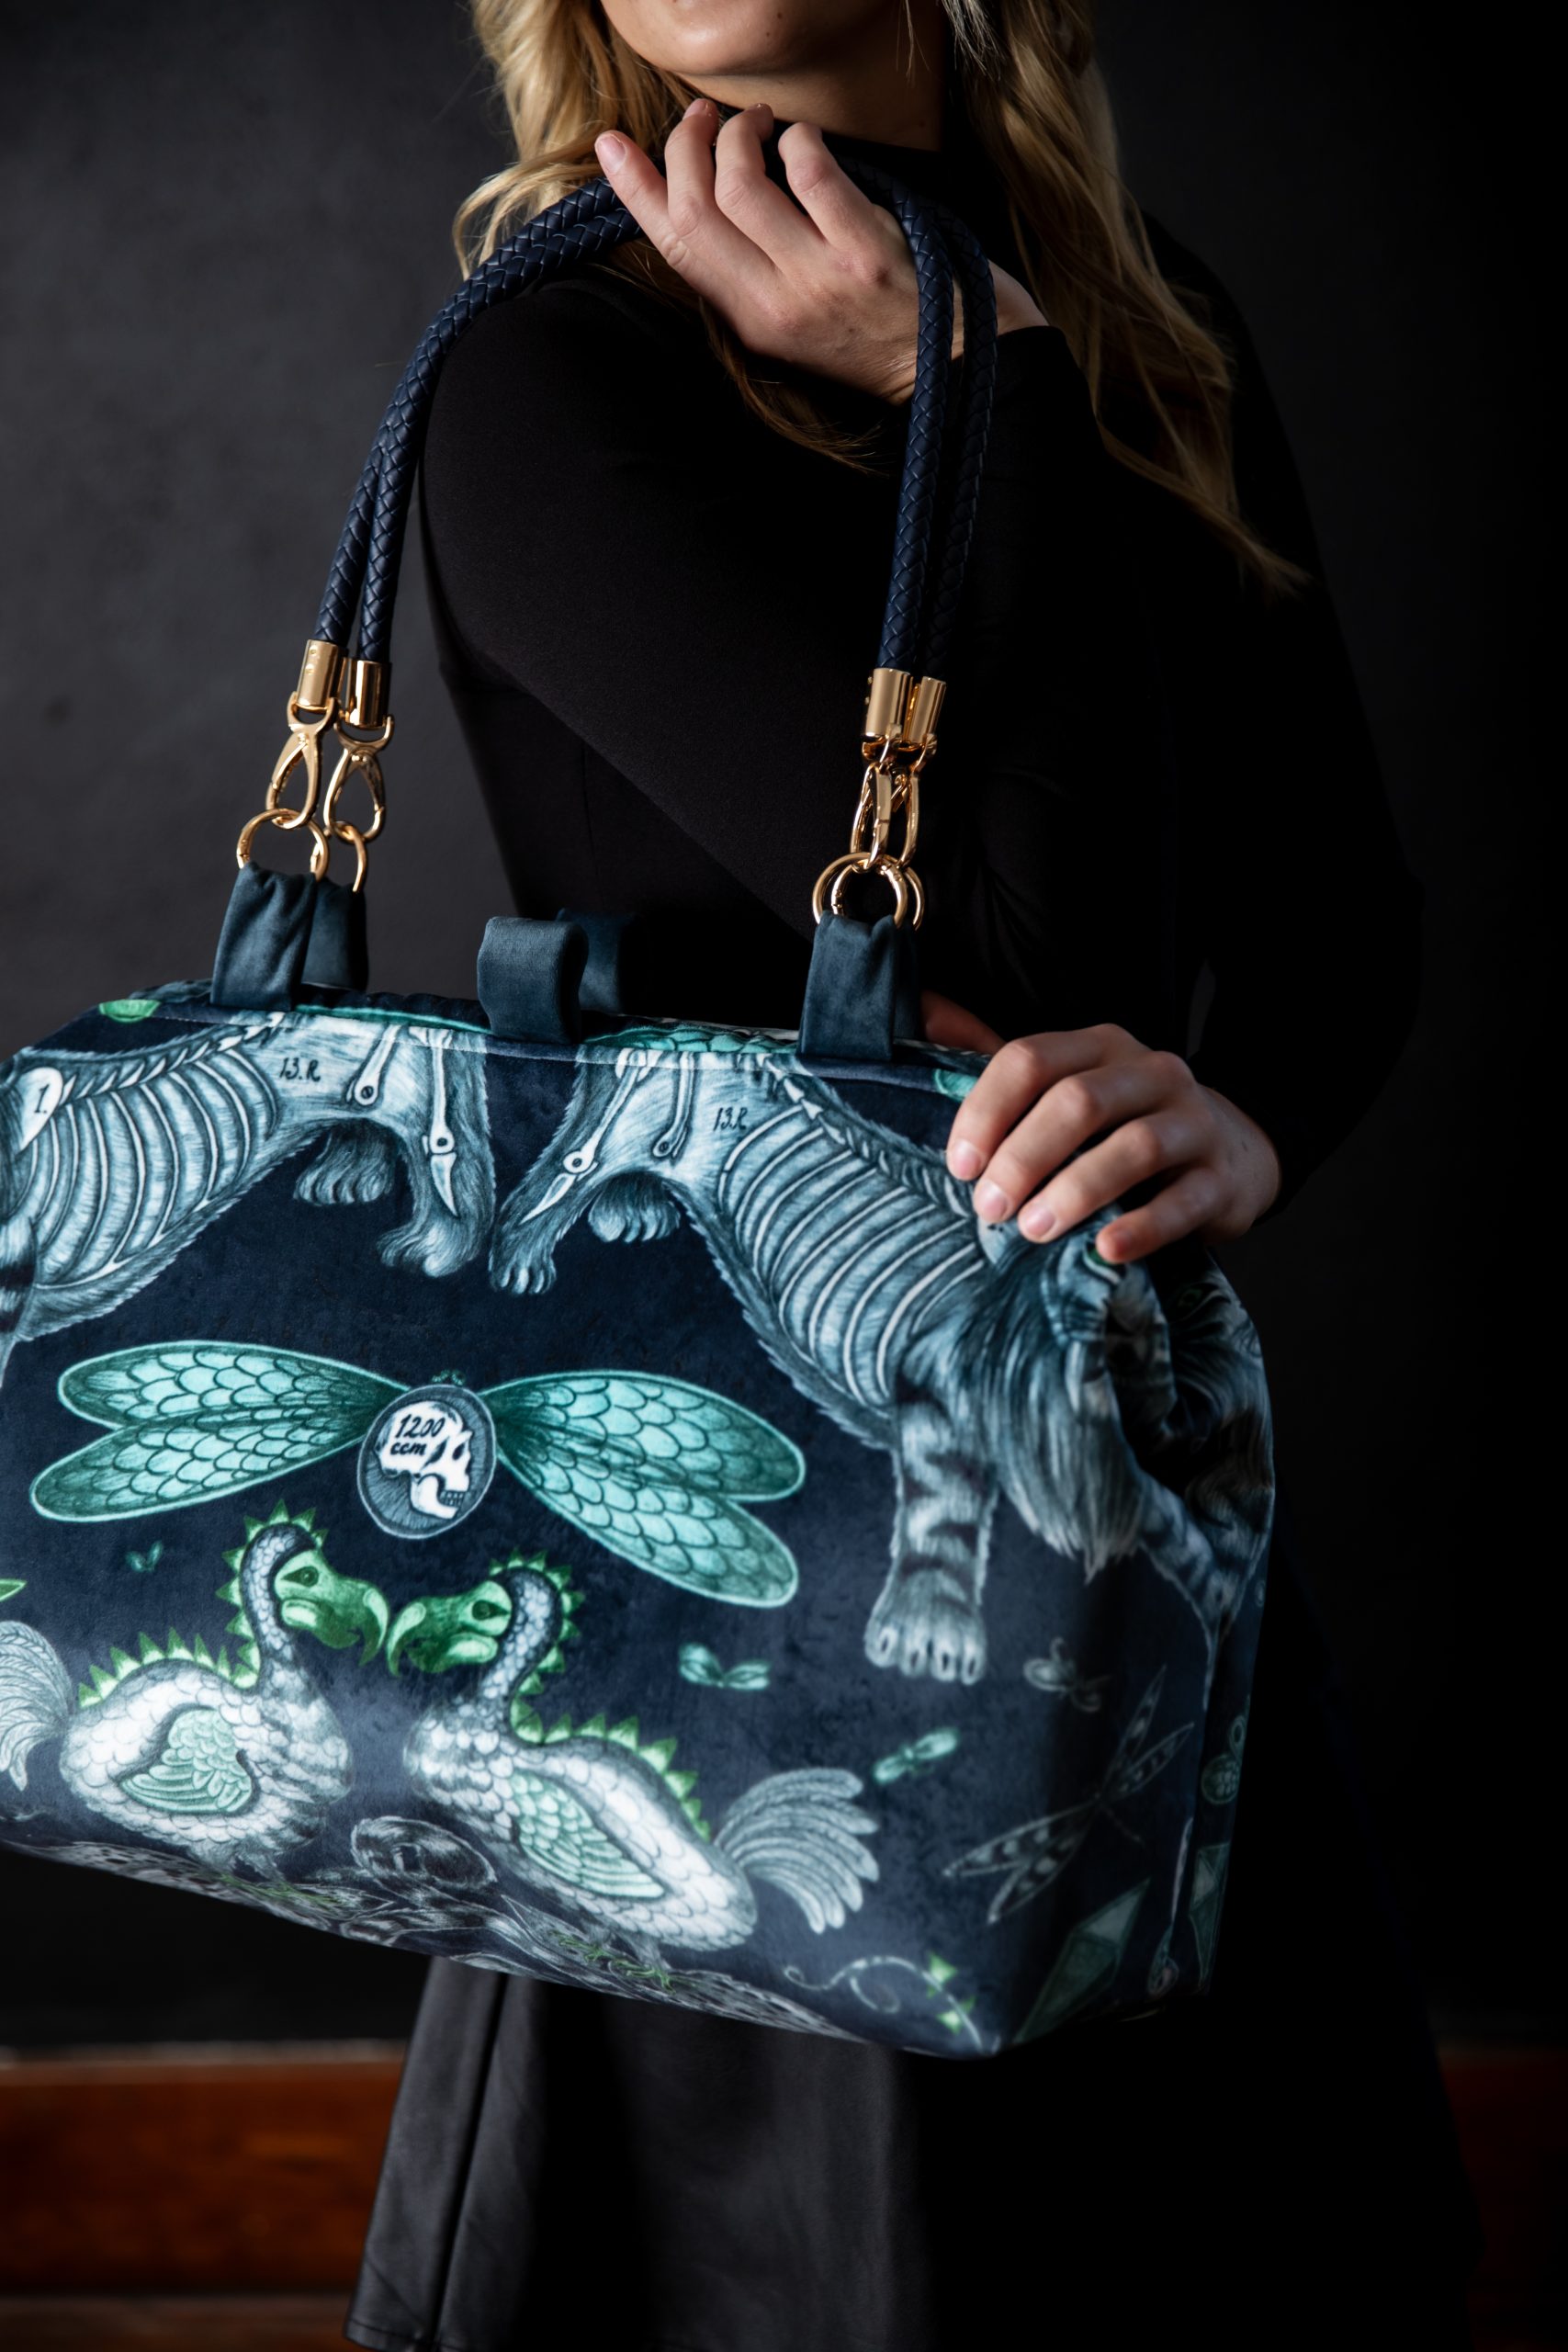
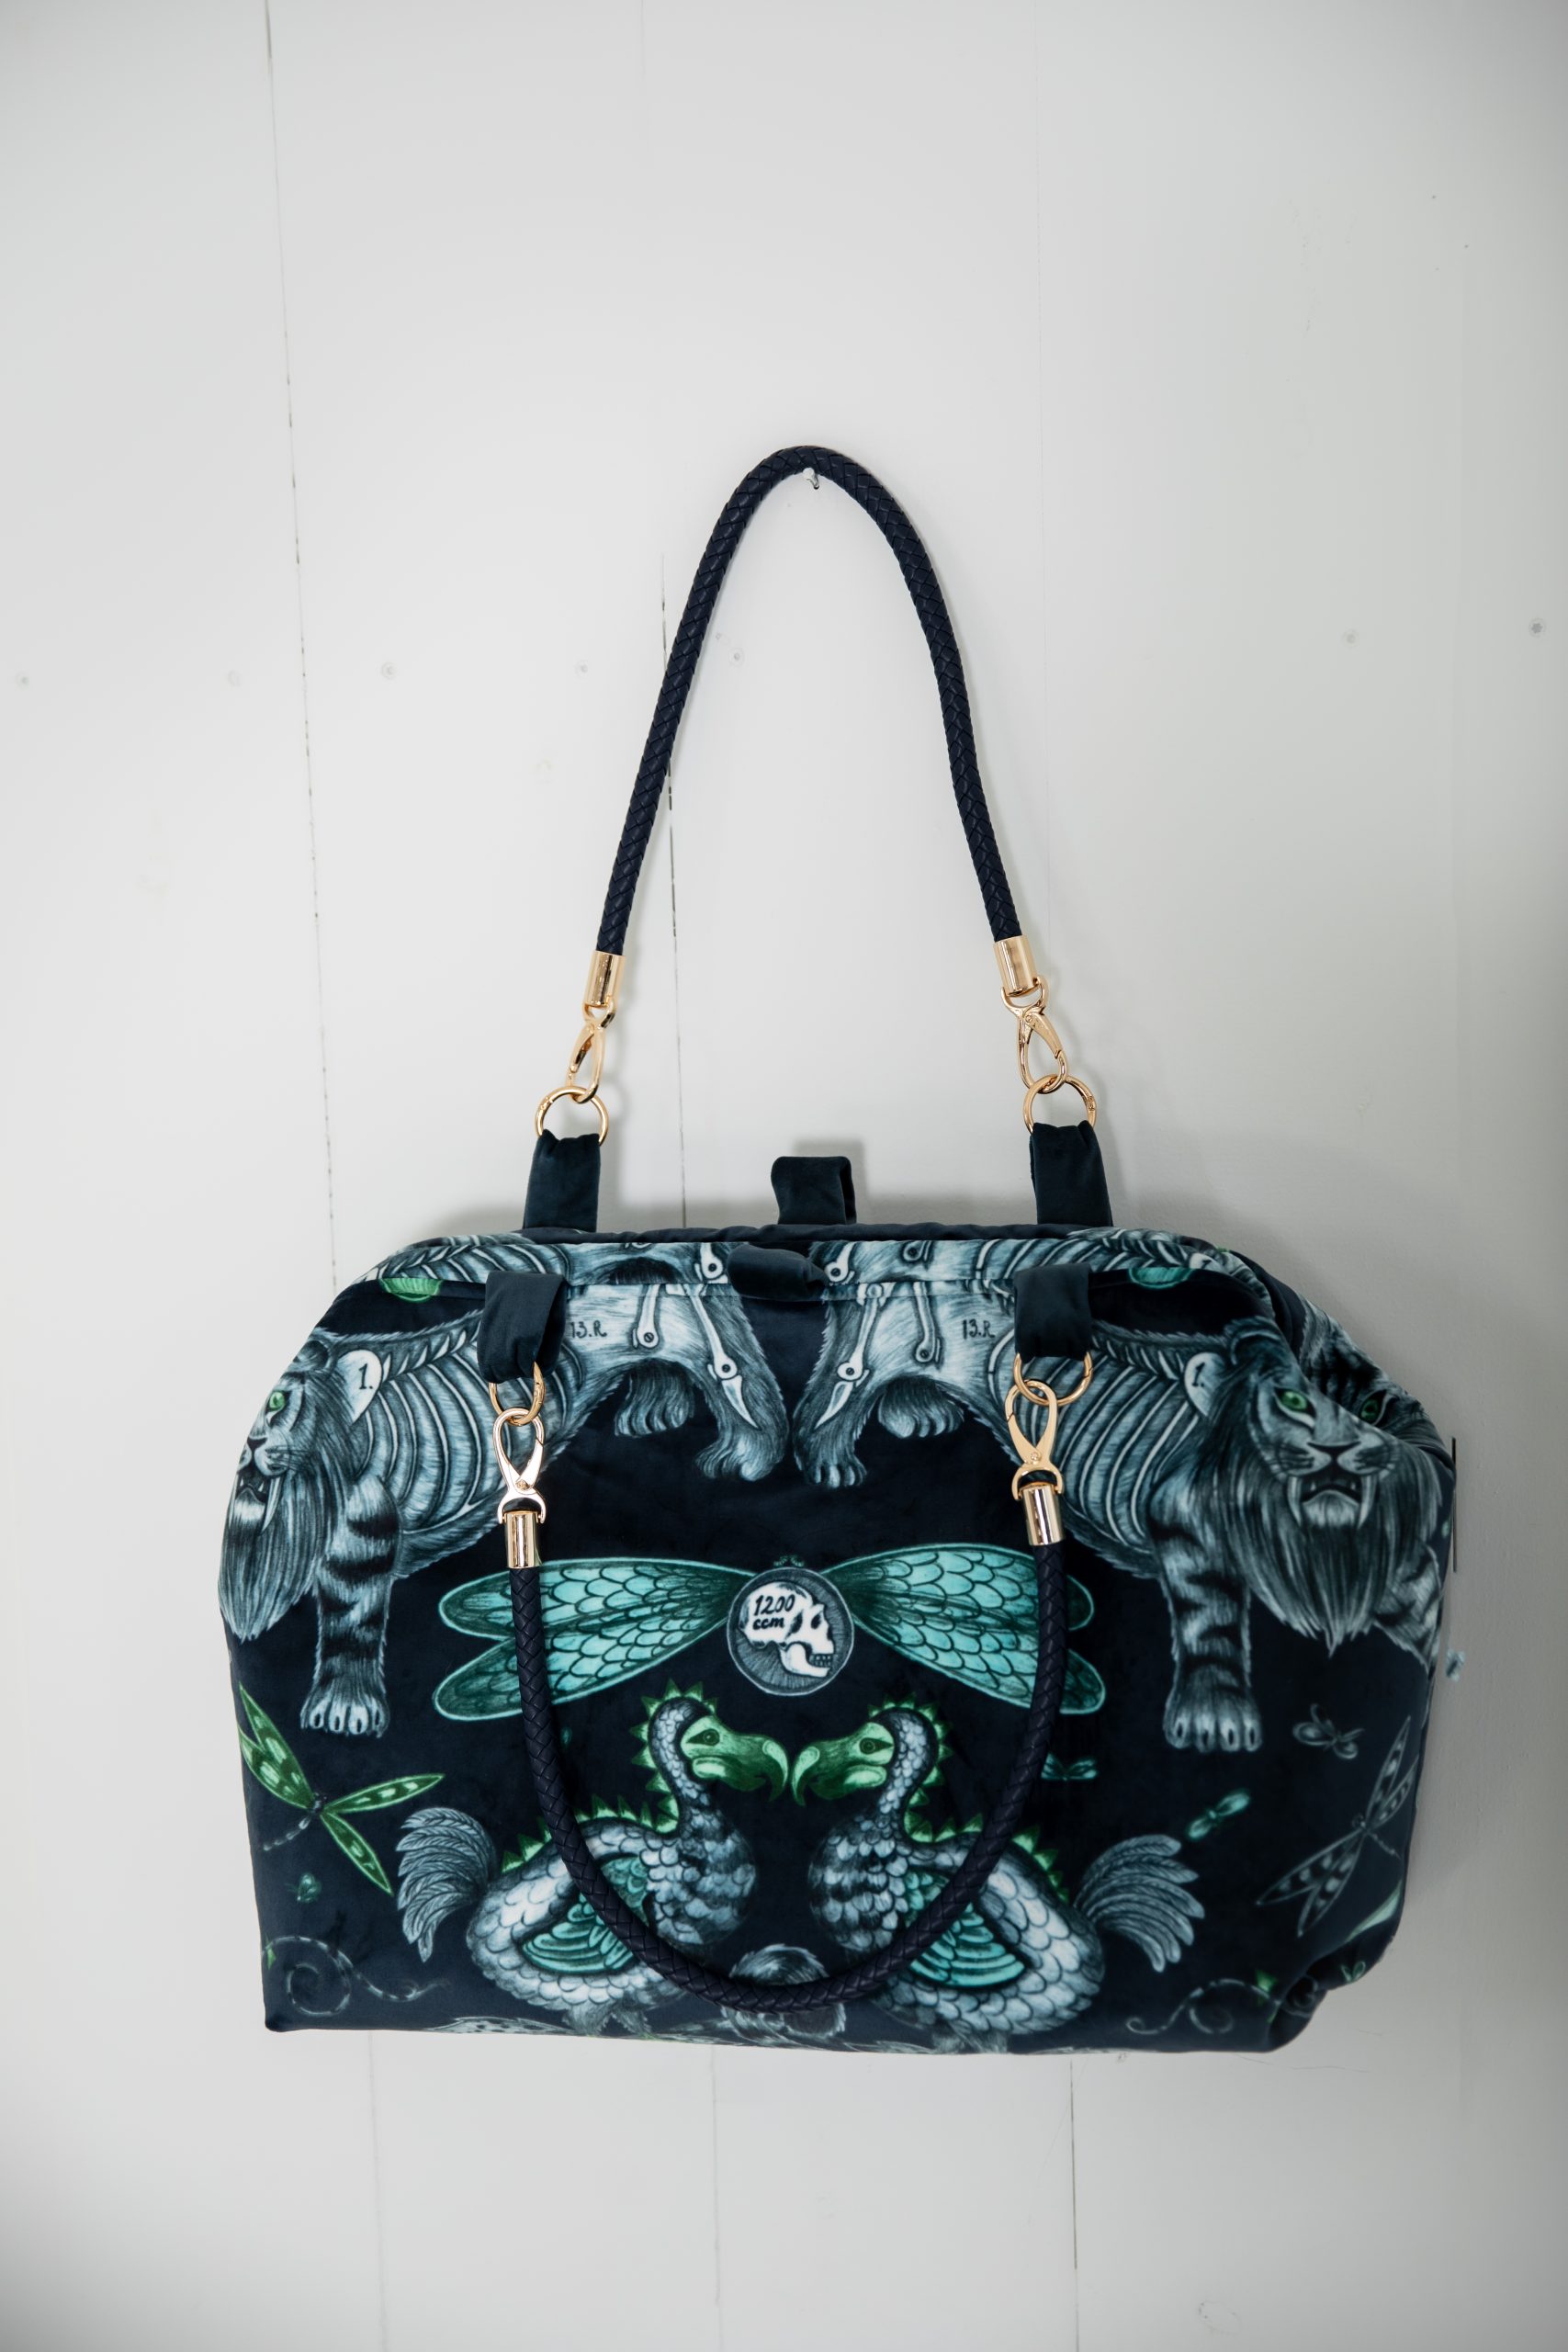
Obsessed doesn’t even begin to cover it! Sew yourself an ultra-chic oversized bag with this pattern from Sophie Tarrant. Made in a luxurious patterned velvet, this doctor’s bag pattern features a 16-inch-wide frame that snaps shut for easy closure and sturdy, braided straps. This doctor’s bag is lightweight but large enough to hold a set of clothes and essentials, making it a great option for a fabulous overnight bag.
Skill Level: Intermediate
Designer Tips:
- We’ve suggested using 1-1/2 yards of velvet fabric for your bag outer, which should be more than enough. However, if you choose a bold, large-scale print (as our designer did), you might need a little extra fabric to match the print repeat perfectly on each side of the bag. This isn’t essential, but it gives your finished bag a truly professional finish and is well worth the extra yardage.
- Hinged bag frames can feel tricky at first, but you’ll pick it up quickly. The hinges on a doctor’s bag frame are held by tension, so gently squeezing the metal lets the central pin slide out. To put it back together again, simply align the holes and squeeze the metal lightly with your pliers, allowing the pin to slide smoothly back into place.
Materials:
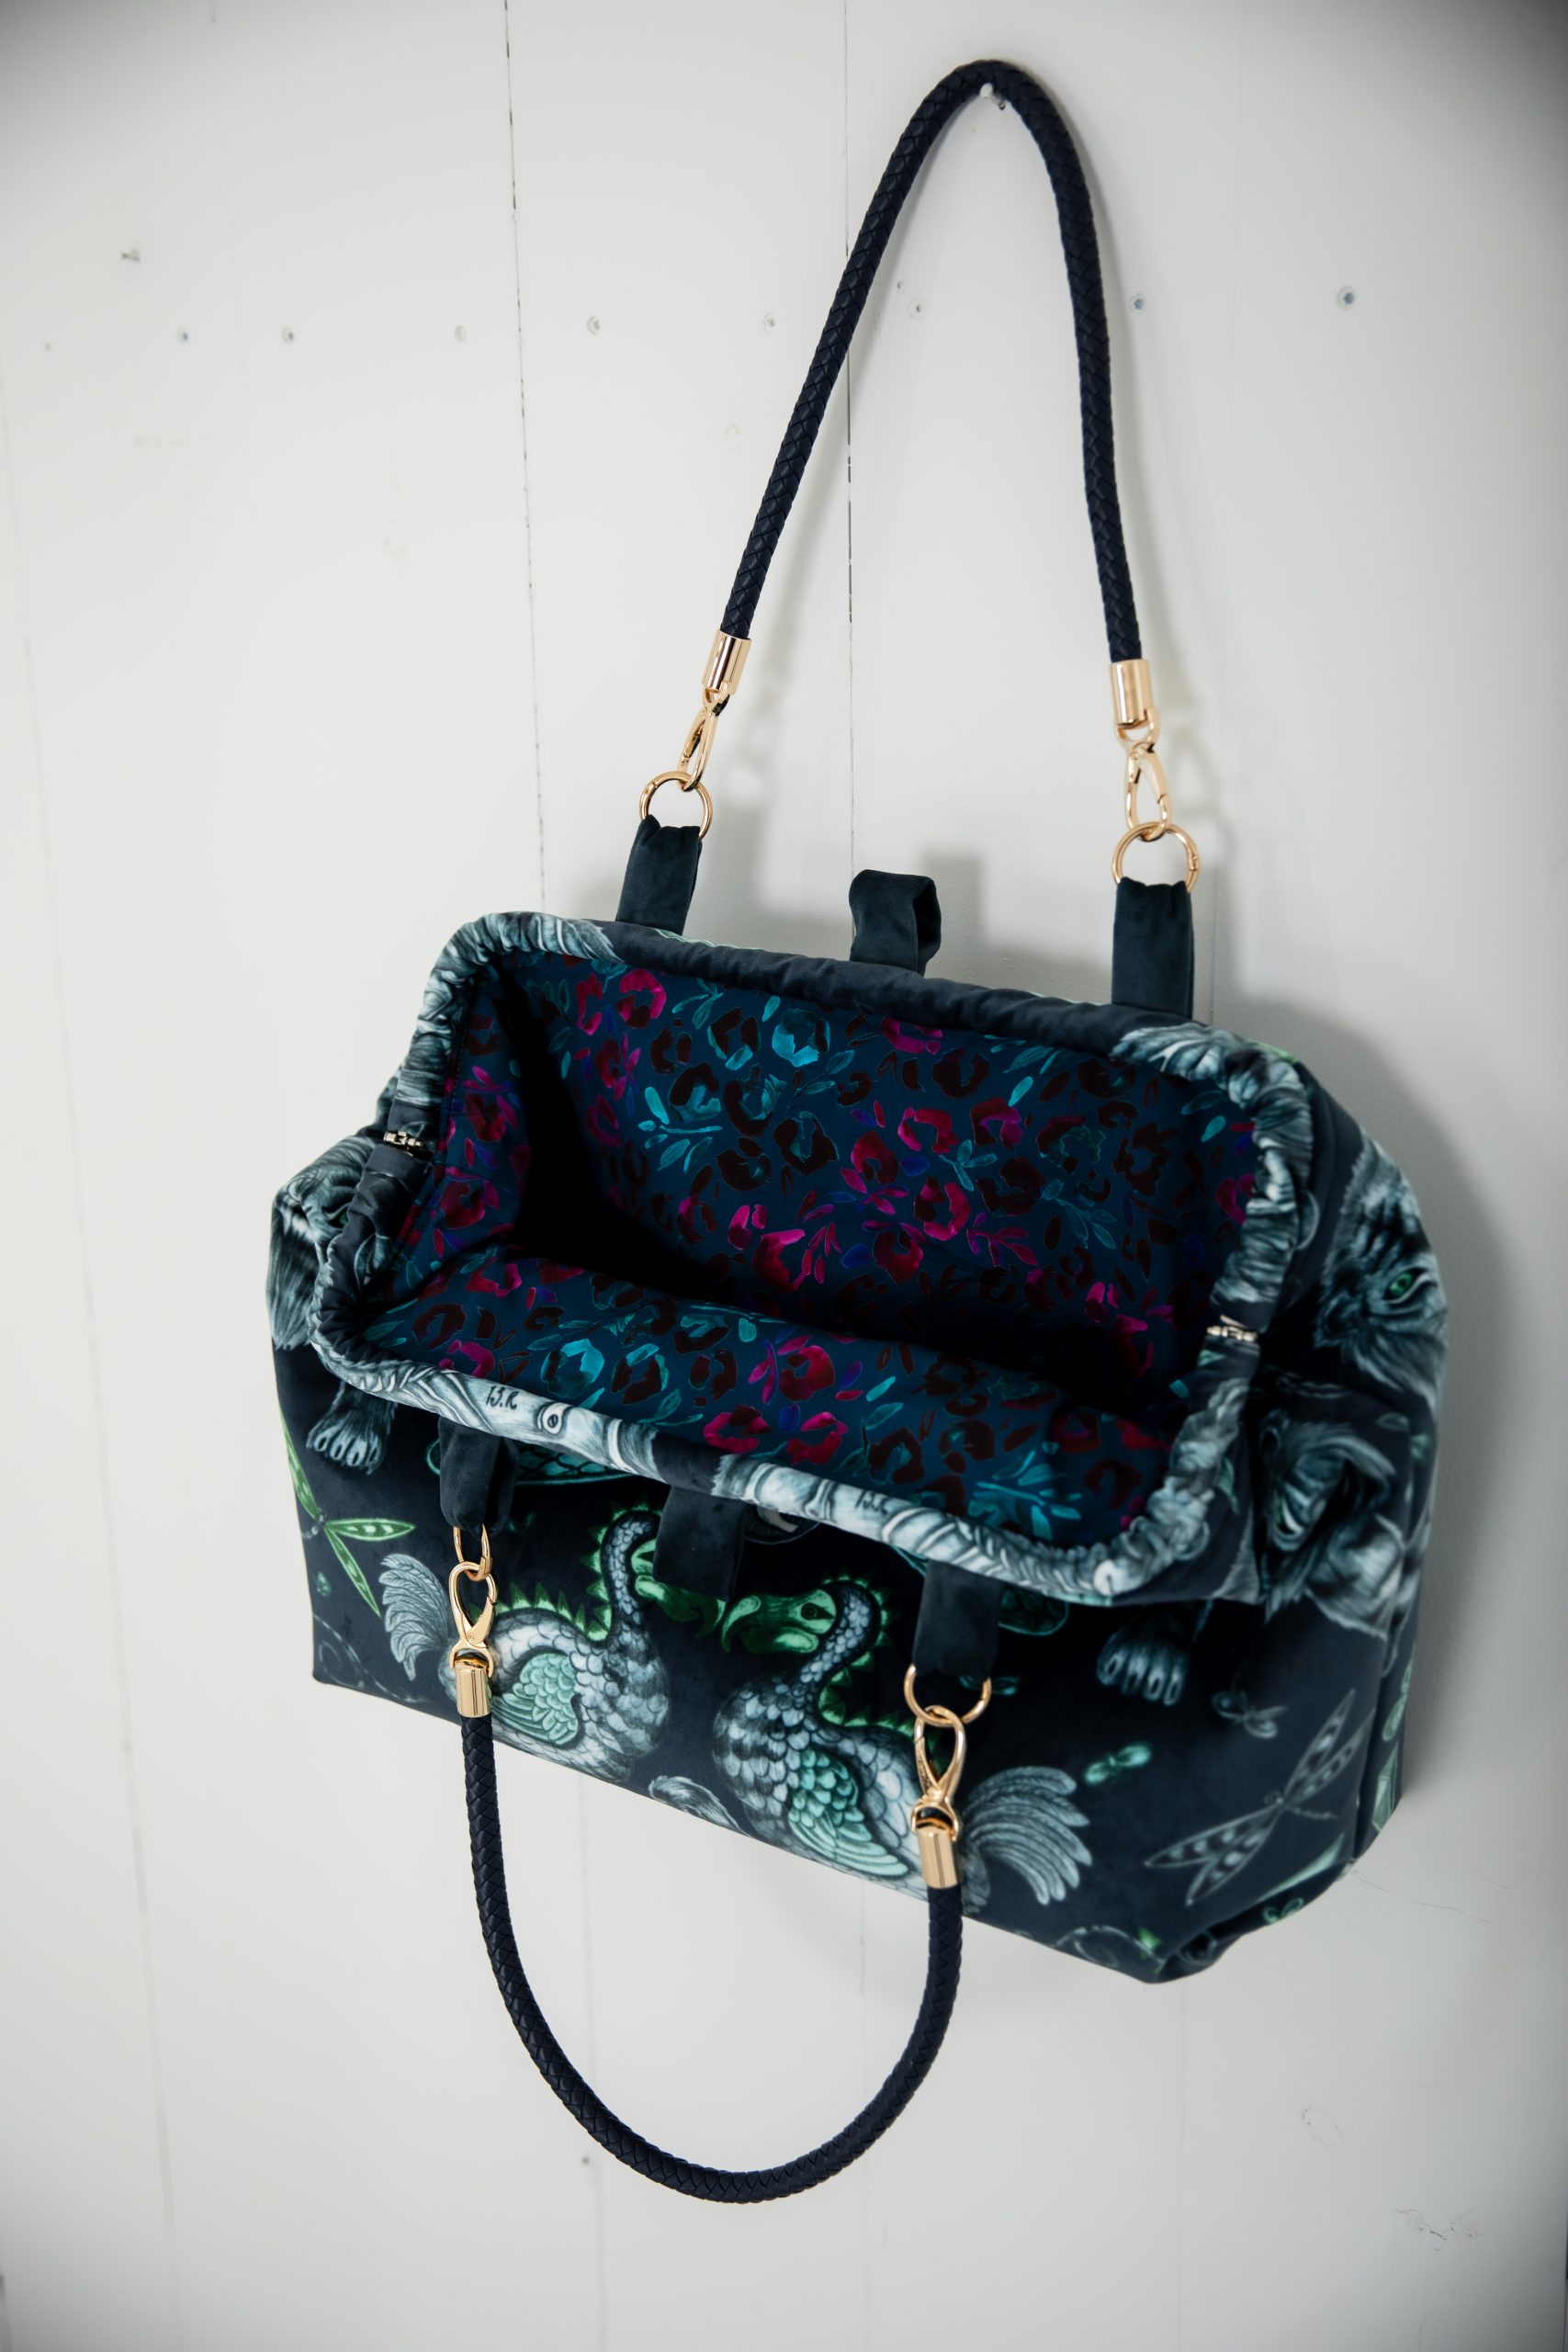
- Fabric: Patterned outer velvet, 1-1/2 yards (you may need more to match the print of the fabric); plain navy velvet, one fat quarter; lining fabric, one yard
- Fusible interfacing: One yard
- Bag stabilizer: One yard
- Thread: Navy, gray
- Doctor’s bag frame: 16-inch wide
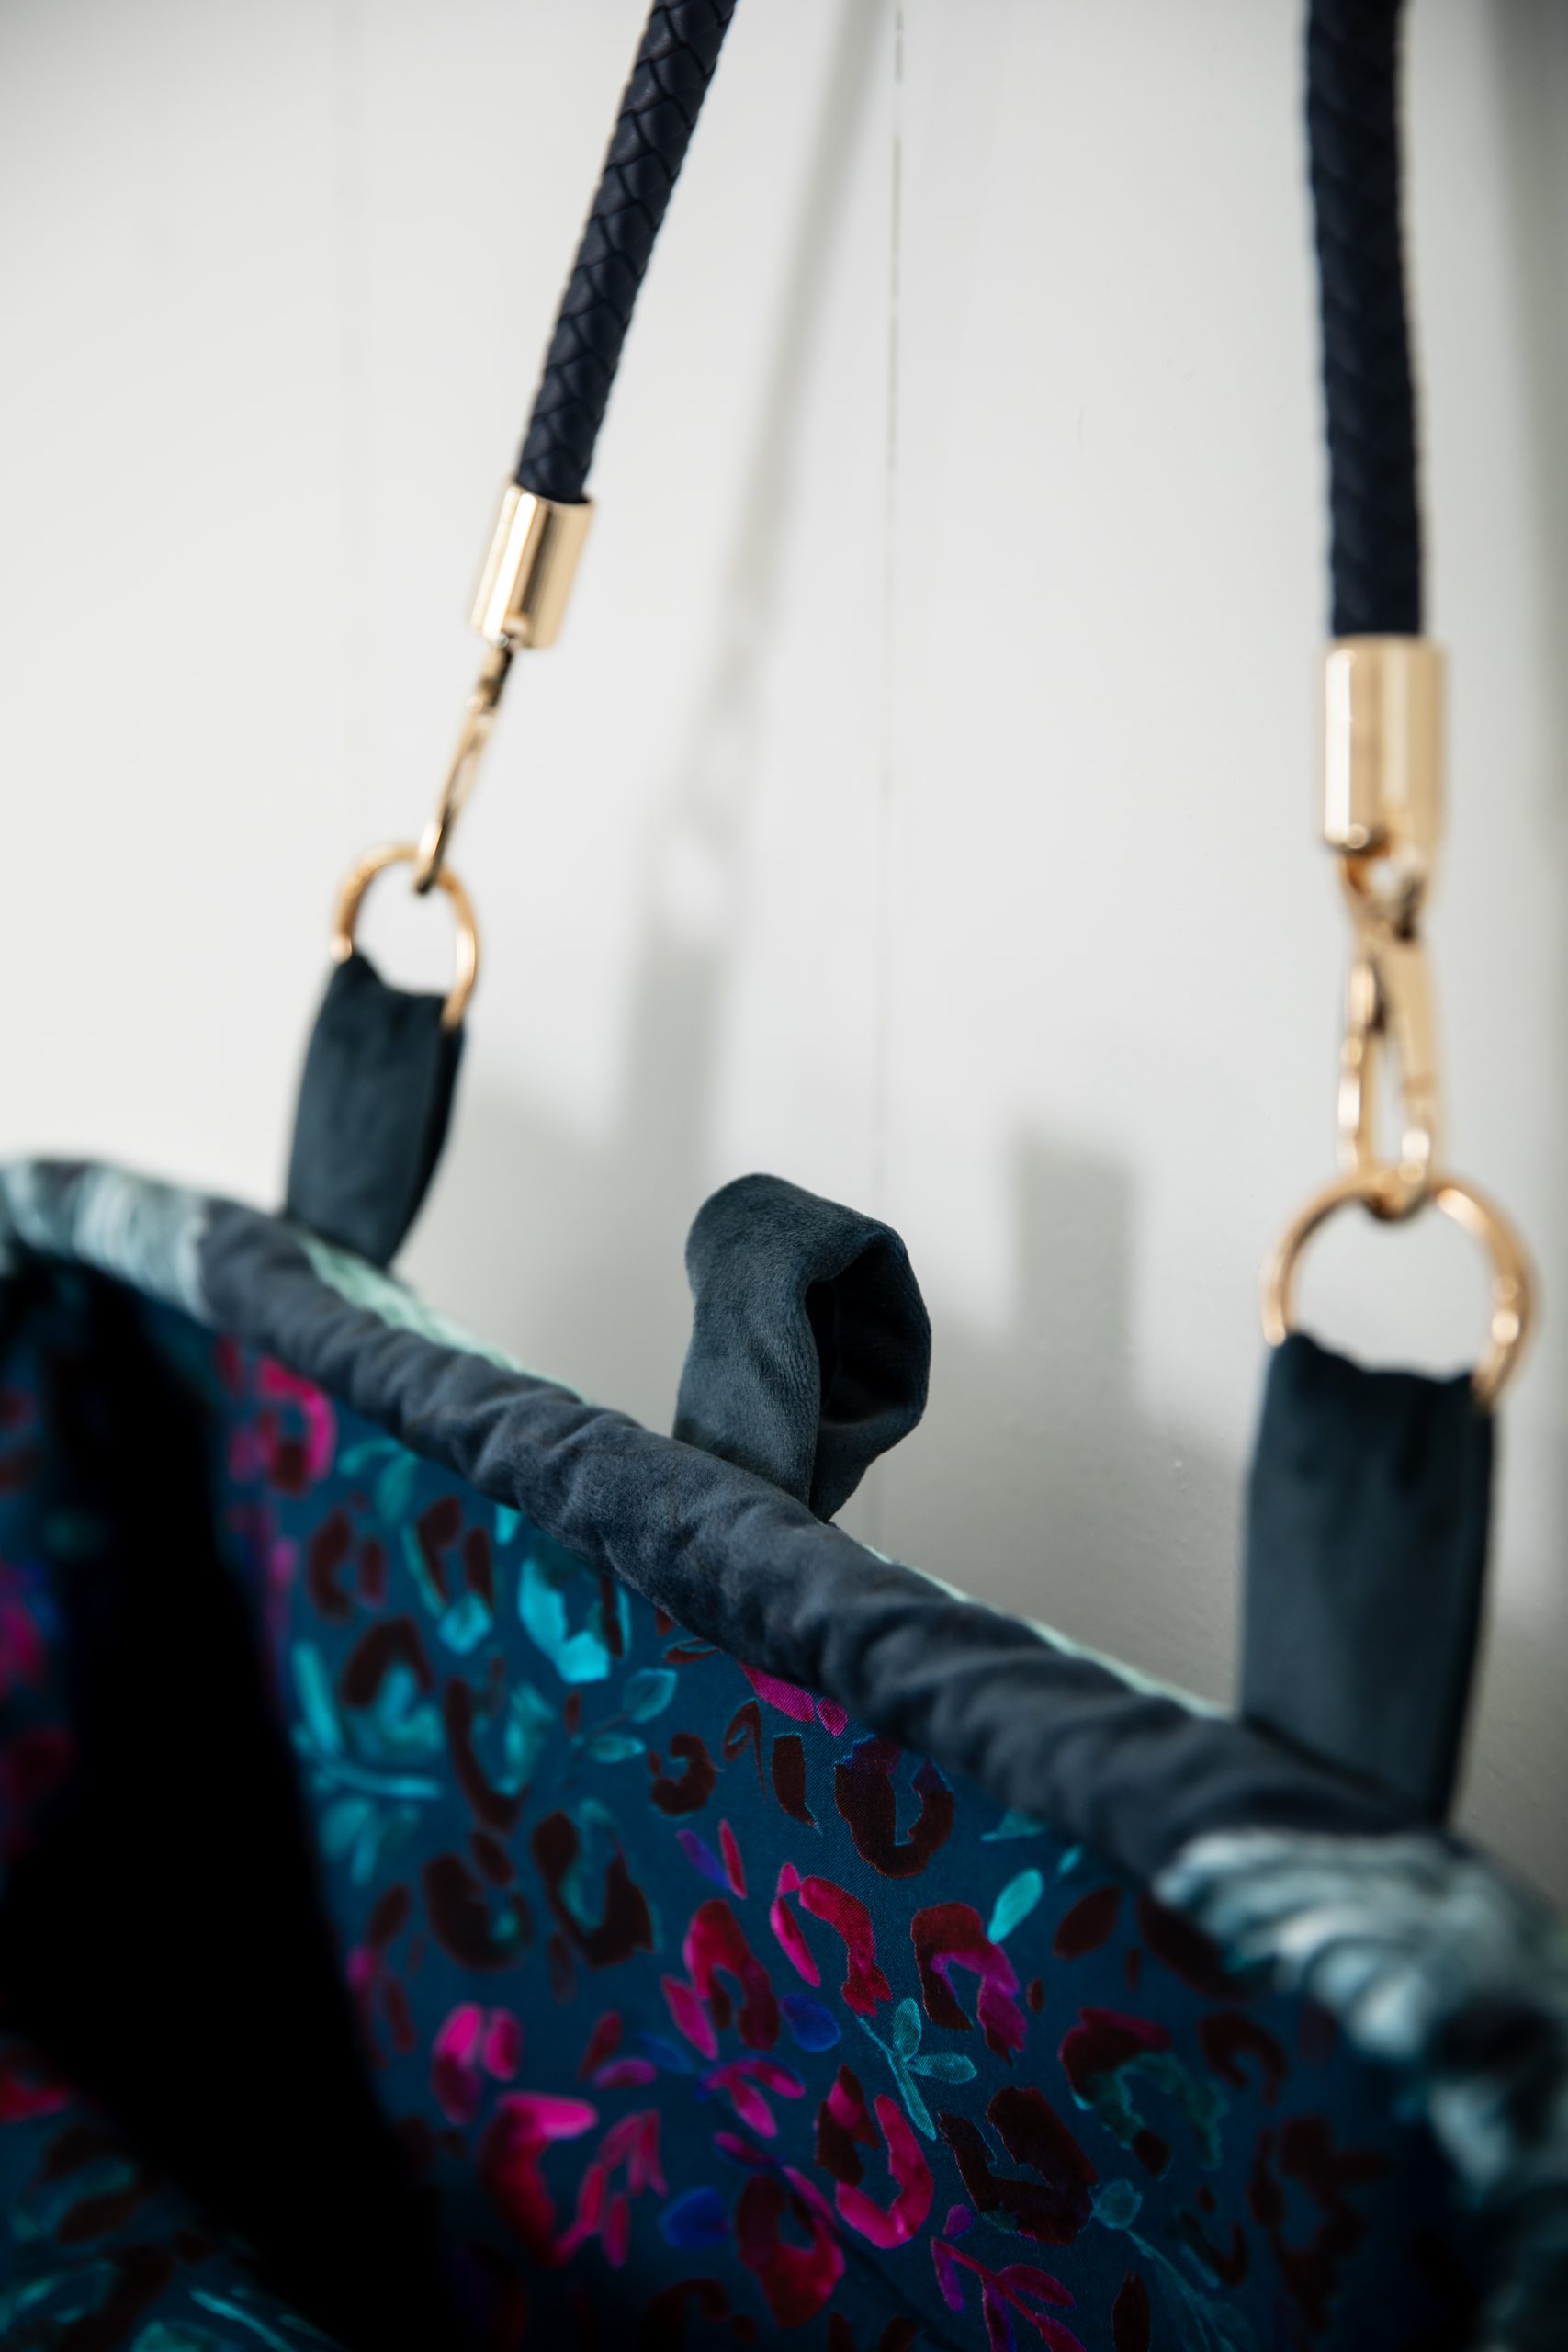
- Braided navy and gold bag straps: One pair
- Gold detachable O-ring fittings: Four
Tools:
- Scissors
- Dressmaker’s chalk
- Sewing clips
- Sewing machine
- Hand sewing needle and thread
- Iron
- Pliers
Sewing Instructions:
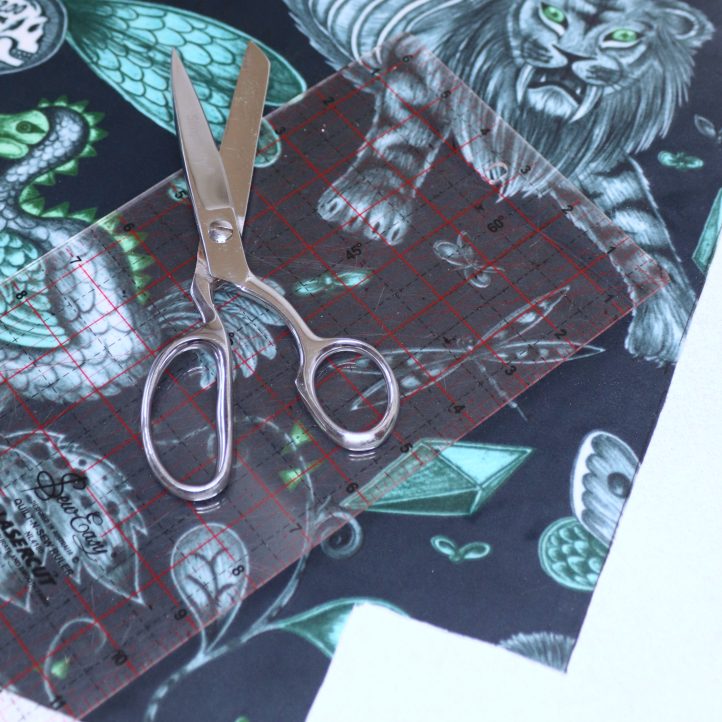
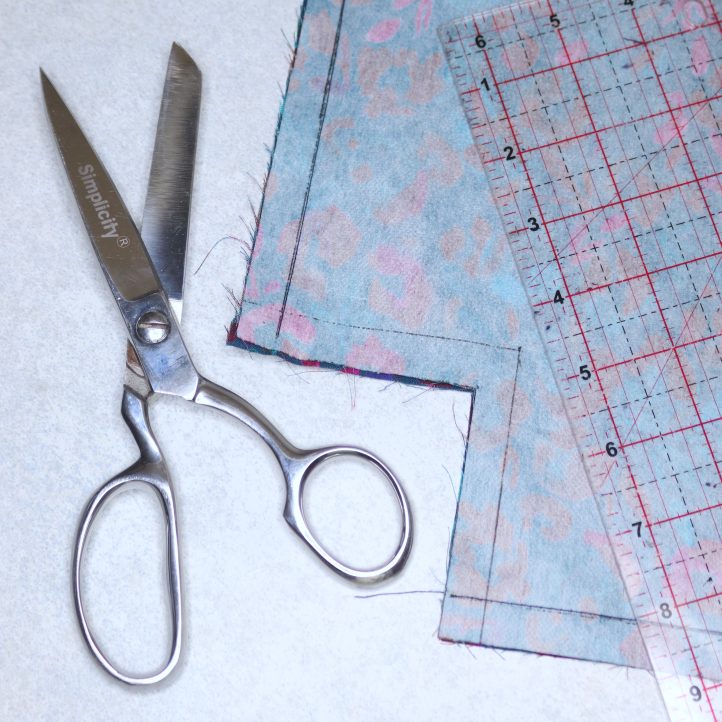
- Begin by cutting your outer bag pieces. Use a ruler and a water-erasable fabric pen to draw two 25 inch wide x 17 inch all rectangles onto your velvet, taking care to position the print neatly and match it up across both pieces so the bag looks the same from each side. Cut out both pieces, then back them with a bag stabilizer. This stiff but flexible layer will give the bag strength and help it keep its shape. Next, cut 3 inch squares from the bottom corners of each piece — these will be used in a later step to create gussets.
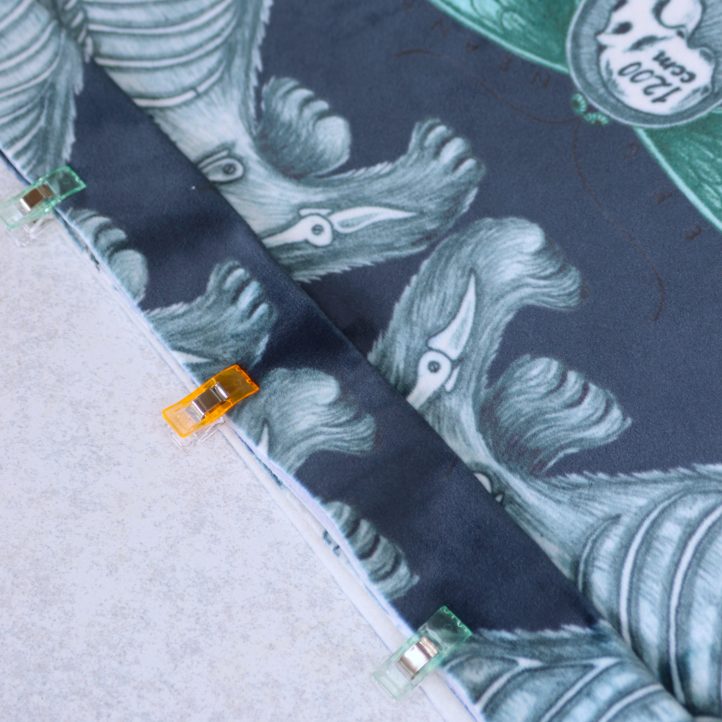
- Place the two outer bag pieces together with right sides facing, making sure the edges line up neatly. Clip the layers together, then sew along the side and bottom edges with a straight machine stitch, leaving a 1/2 inch seam allowance. Leave the corner gusset openings unsewn.
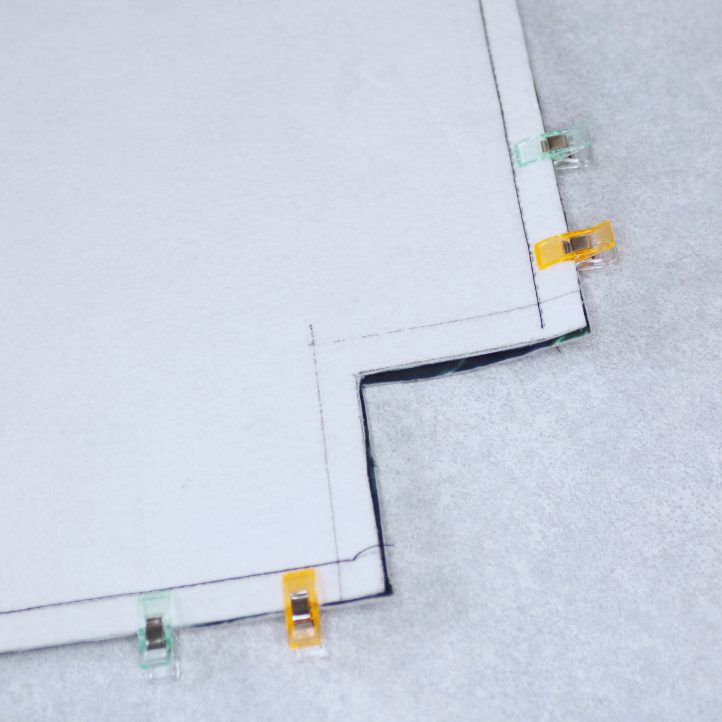
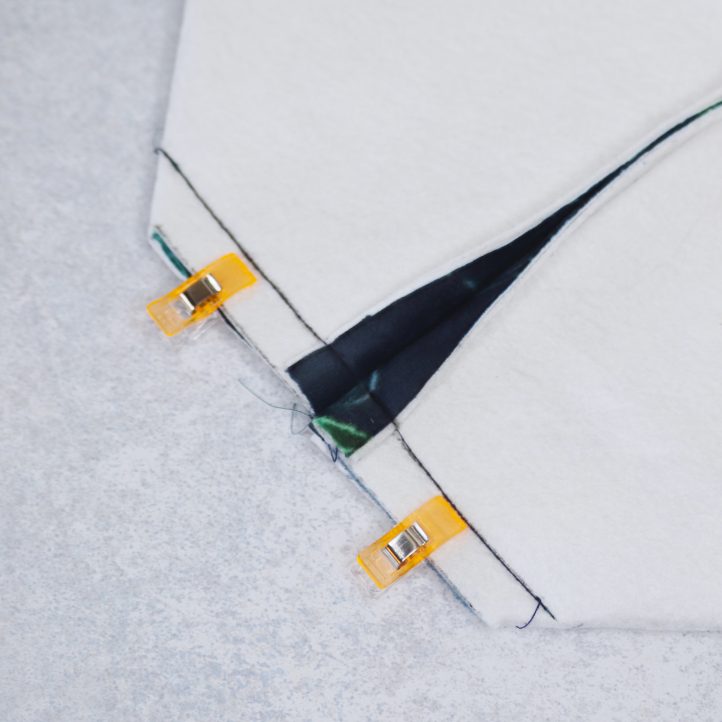
- Now it’s time to sew the gussets. Take one bottom corner and flatten it, so the side and bottom seams run down the center, and the gusset edges meet to form a straight line. Align the seams carefully, then clip into place. Machine stitch across the gusset with a 1/2 inch seam allowance. Repeat to sew the remaining gusset on the other side, then turn the bag right sides out.
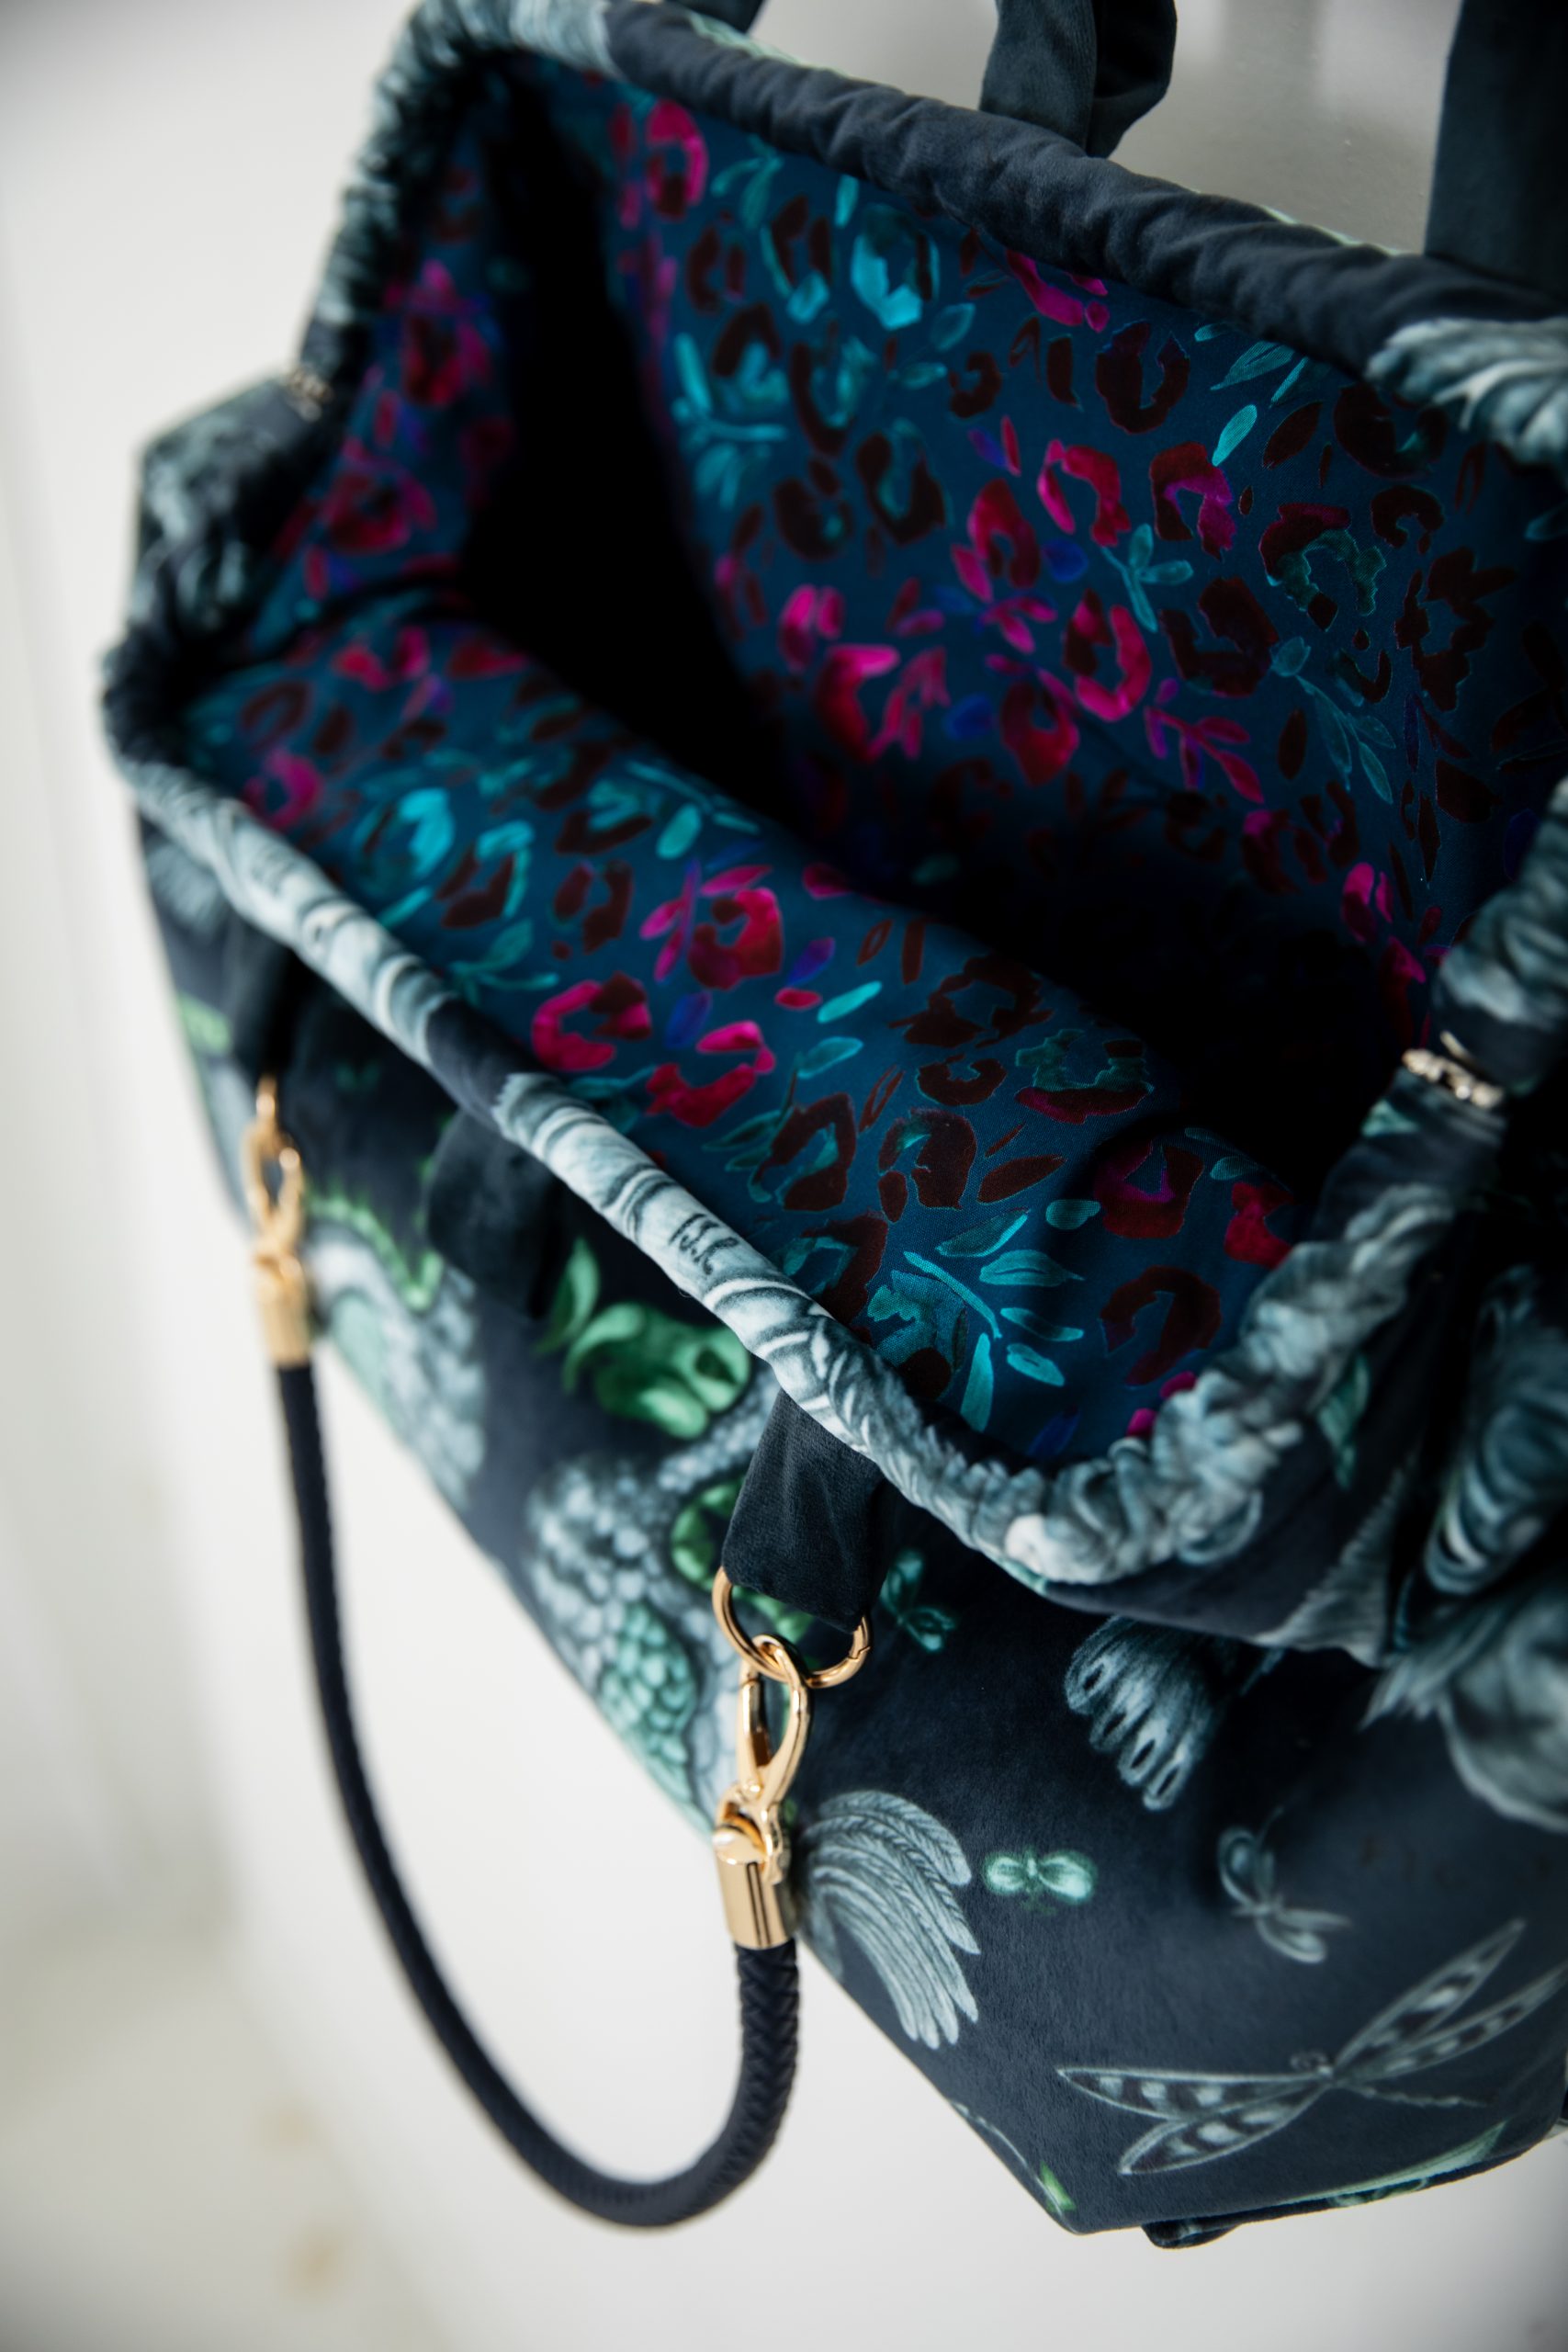
- Next, you’ll make the channels for the metal bag frame. Take a spare piece of your outer fabric and back it with fusible interfacing, then cut two 3 inch x 25 inch rectangles. Fold the short edges of each one over twice by 1/4 inch. Press, then stitch the folded hems in place. Next, fold each piece in half lengthwise with the right sides facing out. Position them along the top edges of the bag, centering each strip along one side and aligning the raw edges. Clip into place.
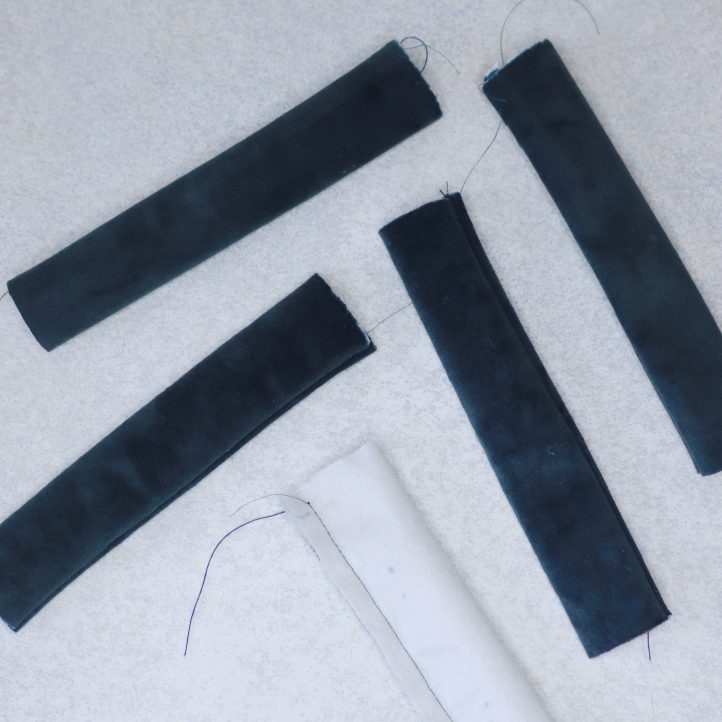
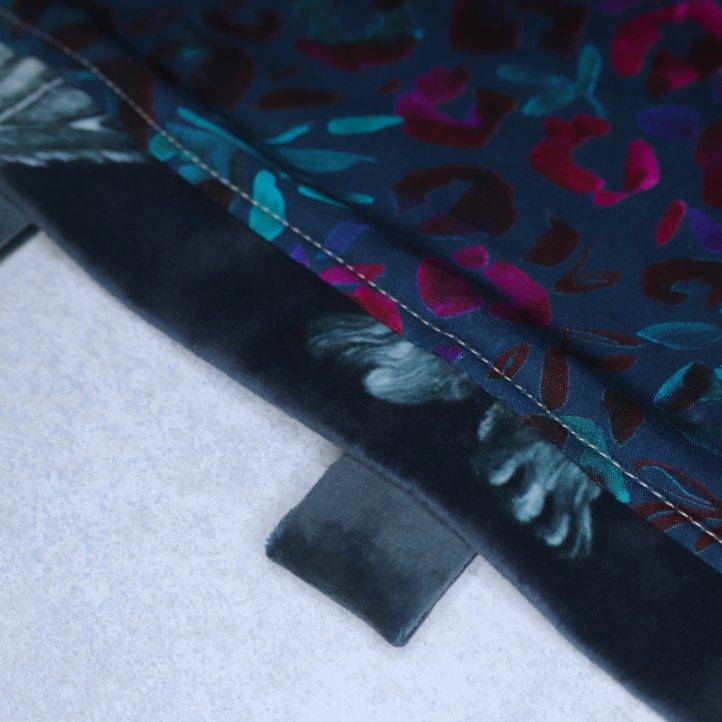
- Before you stitch your channels to your bag, you need to make some tabs. Cut six 3 inch x 6 inch pieces of navy velvet, then fold each one in half lengthwise with the right sides facing. Sew down the long edge of each one, leaving a 1/2 inch seam allowance. Turn each piece right side out and lay them flat, then roll them around slightly so the seam of each tab runs down the center of the strip.
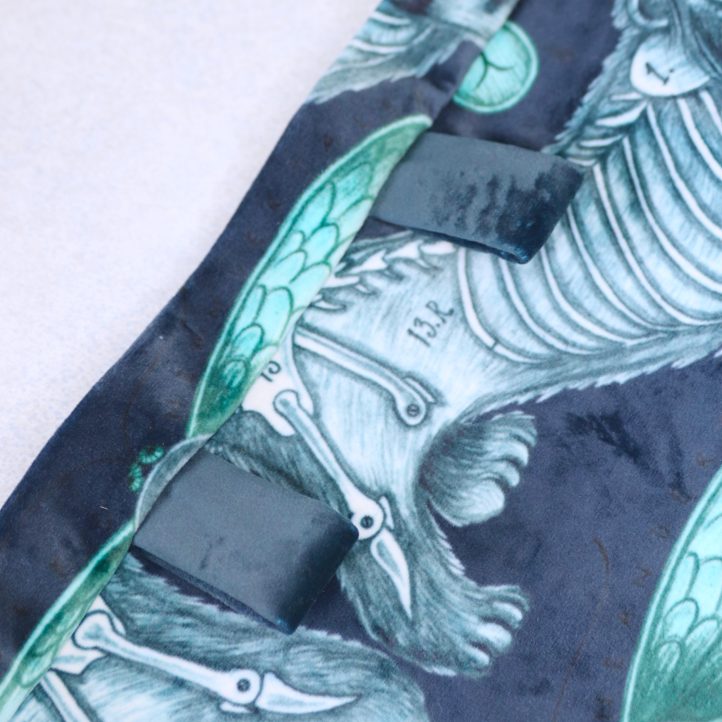
- Fold each tab in half with the seam on the inside, then insert the raw ends of each one between the clipped layers along the top edge of the bag. Position one tab at the center of each side (between the bag and the folded channel fabric), then place another tab to each side. Stitch all the way around the top edge with a 1/4 inch seam allowance to secure both the channel pieces and the tabs in place.
- Make your lining. Begin by backing your lining fabric with fusible interfacing, then cut two 25 inch x 17 inch rectangles. Cut two 3 inch squares from the bottom corners of each one, as before. Place the pieces together with right sides facing and stitch the side edges, then the bottom edge – leaving a 6 inch gap in the bottom seam for turning out. Finally, sew the gussets in the same way you did for the outer bag.
- With the right sides facing, slide the lining bag over the outer bag. Align the side seams, then clip the layers together. Work a straight machine stitch all around the top edge, leaving a 1/2 inch seam allowance. Work slowly and steadily to ensure a neat finish. Turn the bag out through the gap in the lining, then hand sew it closed and push the lining inside the outer bag. Carefully work a machine top stitch all around the edge (just inside the bag), to keep the layers neat.
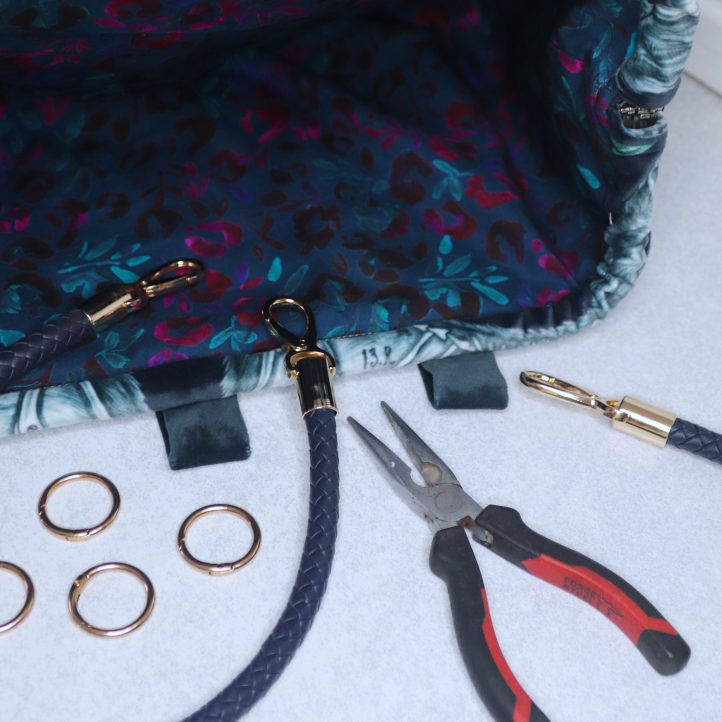
- It’s time to insert the metal bag frame. To take the frame apart, use a pair of pliers to gently squeeze the hinge on one side until the pin slides out. This might take a few tries – it can be tricky! Repeat to remove the pin on the opposite side in the same way. With the two halves separated, take one and thread it through one of the upper channels you made in Step 4, making sure it faces the correct way. Thread the other half of the frame through the second channel. Bring the hinges back together on each side of the bag, then gently squeeze each one with the pliers again to reinsert the pins and secure the frame back together. Ease the fabric into place around the frame until it sits neatly. Finally, thread a detachable gold O-ring onto each of the outer straps, then clip two bag straps onto them to secure them in place.
Absolutely love this and can’t wait to use it as an overnight bag
We’re so glad you enjoyed this pattern, Kelly! Have a great day 🙂 – Ashley, We Like Sewing
Beautiful bag! Where can I get the pattern, the frame the braided straps and the velvet? Would a chenille fabric work? I don’t have access to velvet fabric. I love big bags and this one has great eye appeal .
Hi there! The pattern is available for our Gold Club members. We’ve reached out to the designer with your questions and here is her response. For the bag frame: You can get them on Etsy and eBay, but also from Happy Squirrel Quilts’ online store. For the braided straps: You can find them on Amazon or online from Target. For the printed velvet: This is by a designer called Emma J Shipley. Would chenille fabric work: Yes, I think so! Any heavyweight/mid-weight fabric with a good structure would work well for this project. Lightweight fabrics such as cotton or linen wouldn’t work well as they lack the structure needed, but chenille should be sturdy enough to hold the shape of the bag nicely. Please let us know if you have any other questions! – Ashley, We Like Sewing